7. Computer controlled machining
GROUP ASSIGNMENT
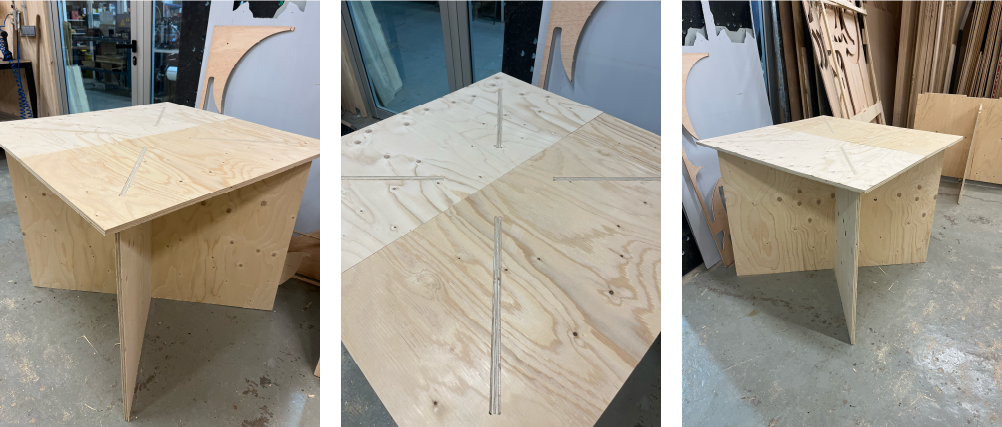
For this week I built the pedestals that will carry the tanks for my interactive installation project. I wanted to build them flat-pack for easy transfer to different locations. They are to be 1000x1000 and 800mm in height. We had 15mm plywood available in the lab and I decided to use that as they will be quite secure and sturdy in their build.
I designed them on Rhino to have a top and two intersecting legs. The top is divided into two so I can cut as many pieces out of a board as possible. Everything will fit into one another and they should be easily assembled and disassembled. For that reason I need to be careful with the tolerances as they cannot be too tight or too loose.
CNC
CNC Milling is a 3-axis subtractive manufacturing process which uses a cutting drill it mounted on a rotating spindle and gantry. The gantry moves in x and y and the spindle controls the rotation in order to cut through different materials. Some materials include wood, foam, acrylics, and more.
3D Modeling on Rhino
The tolerances in the design are around 0.4-0.8mm added to the material thickness. I measured the sheet I used with a caliper (15.1mm) and in Rhino made the gaps 15.6-15.8mm. The longer intersecting line is 15.8 to make it easier to assemble and disassemble on my own.
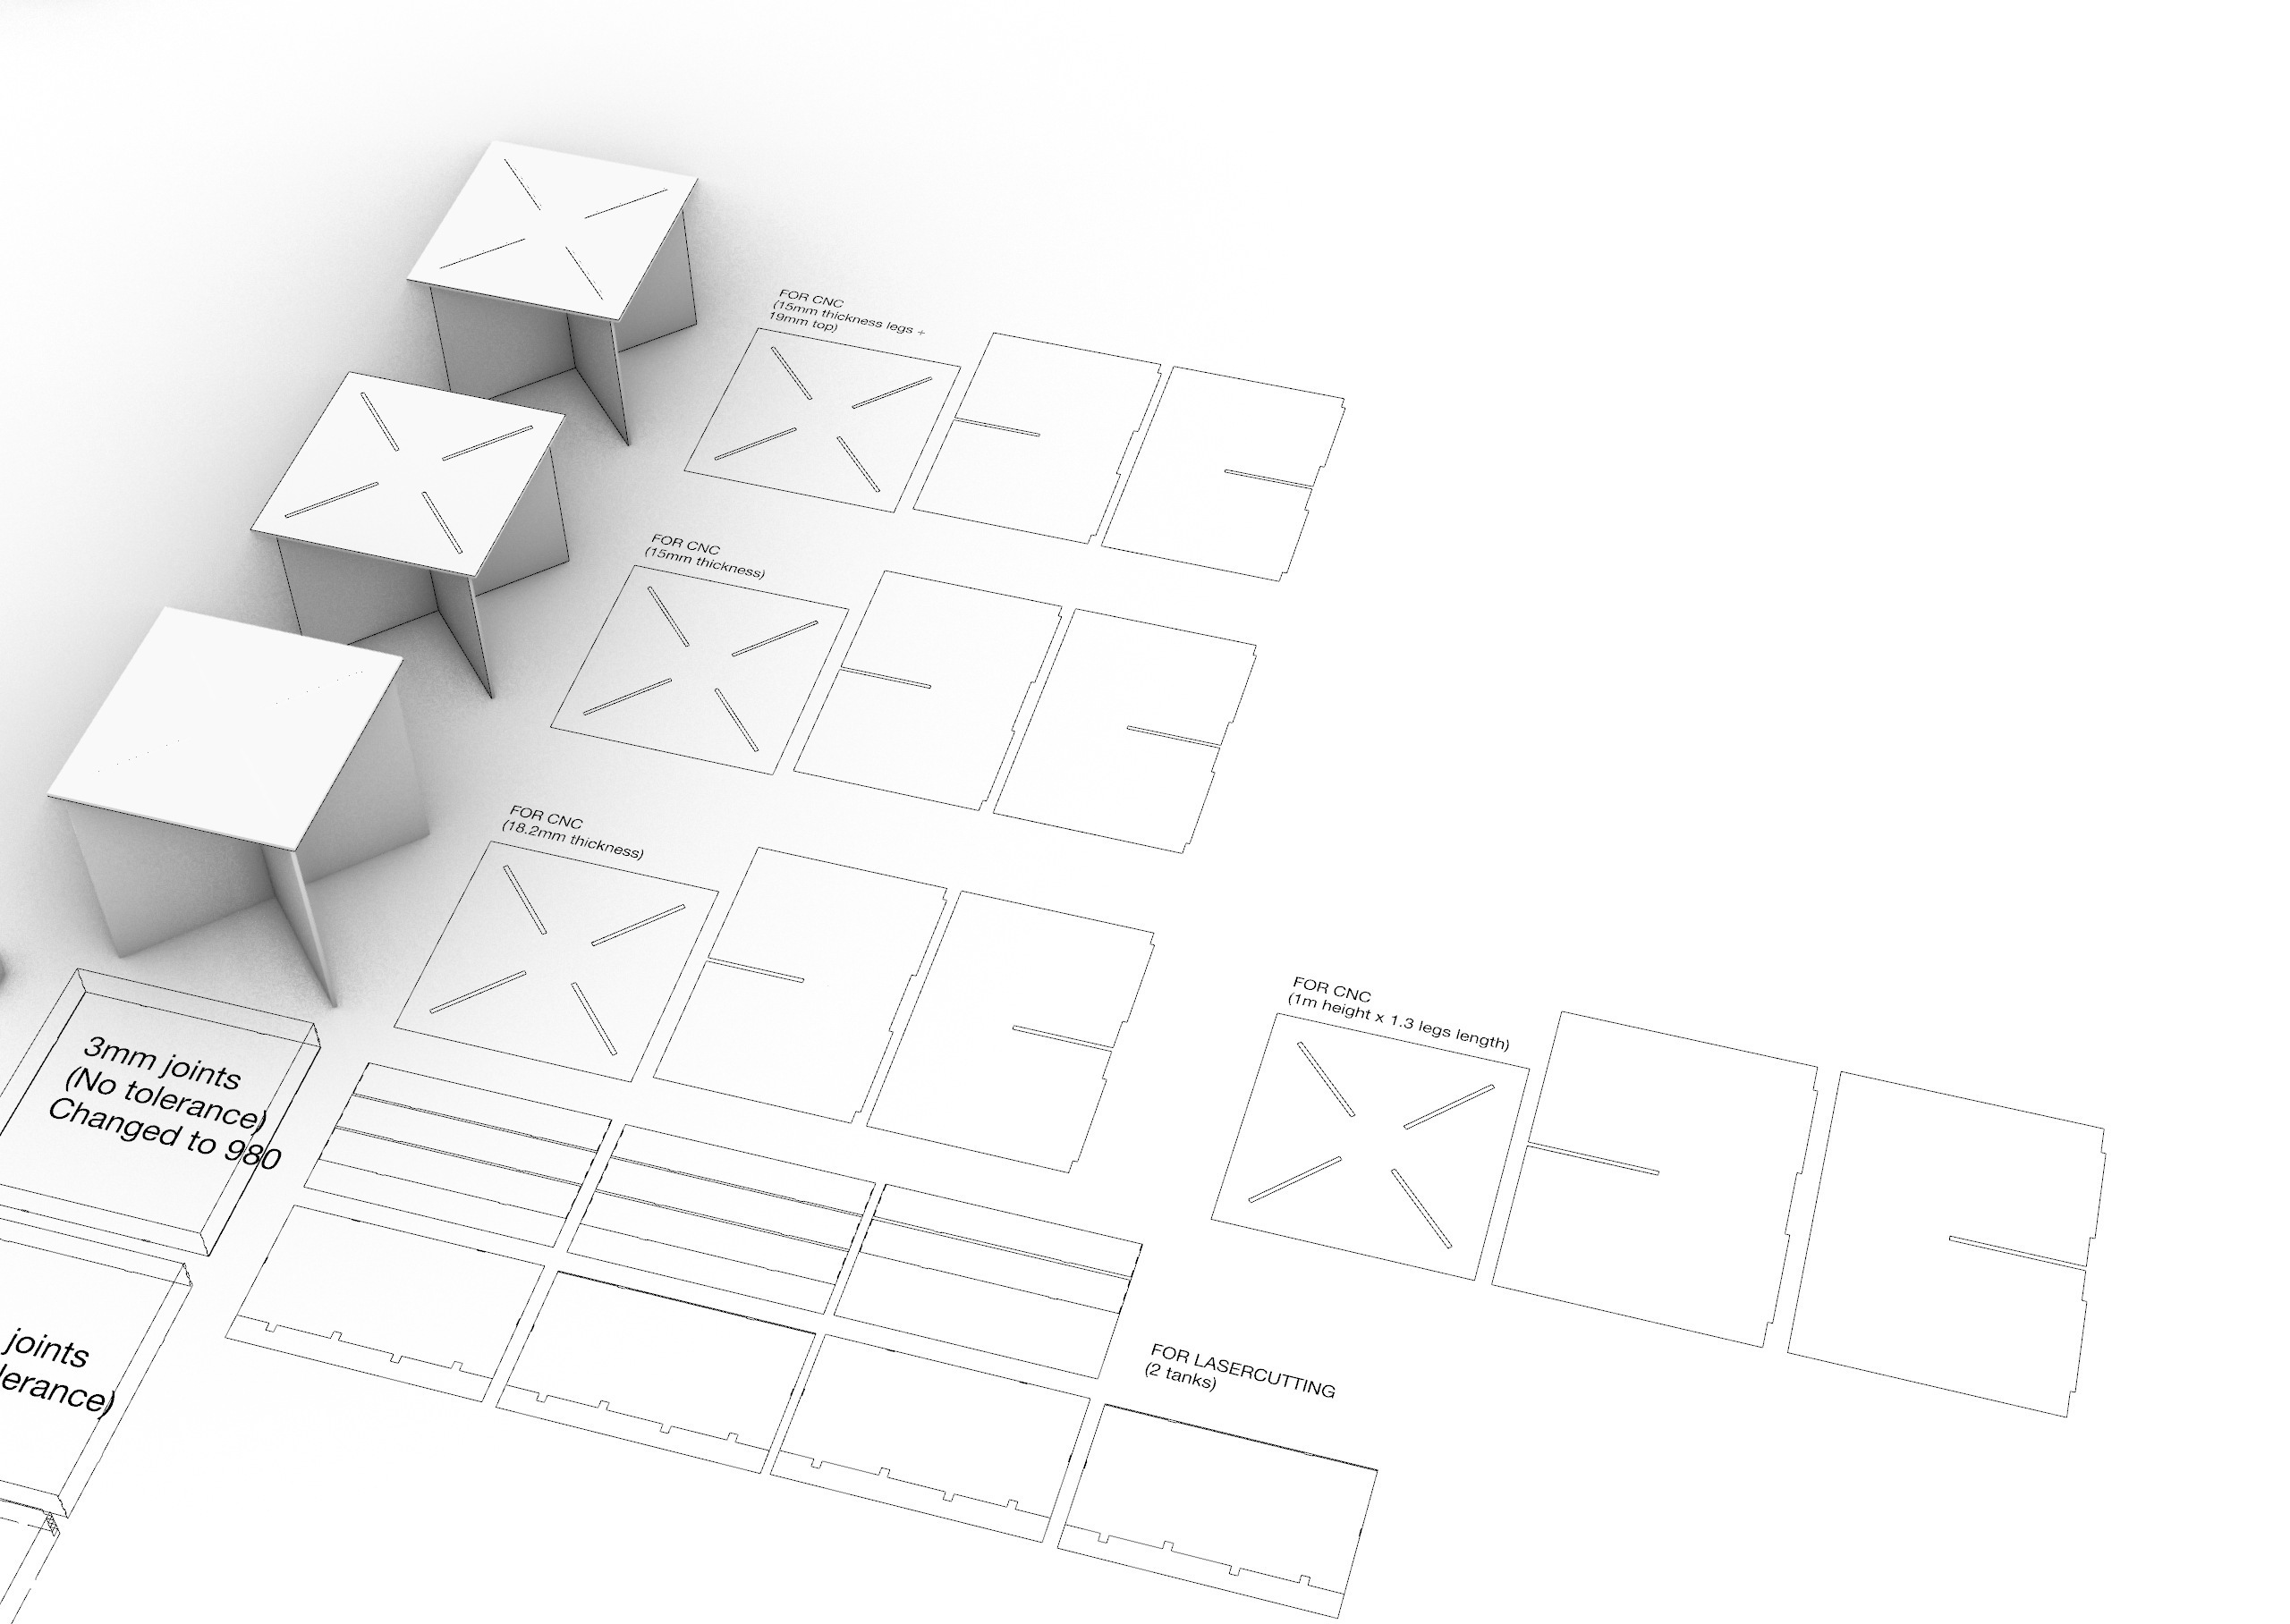
In the photo above, I designed the pieces for different thicknesses of materials depending on which wood sheets I would be able to use. I added a tolerance of 0.8mm because the wood seemed a bit warped and I wanted to make sure that I can assemble and disassemble easily.
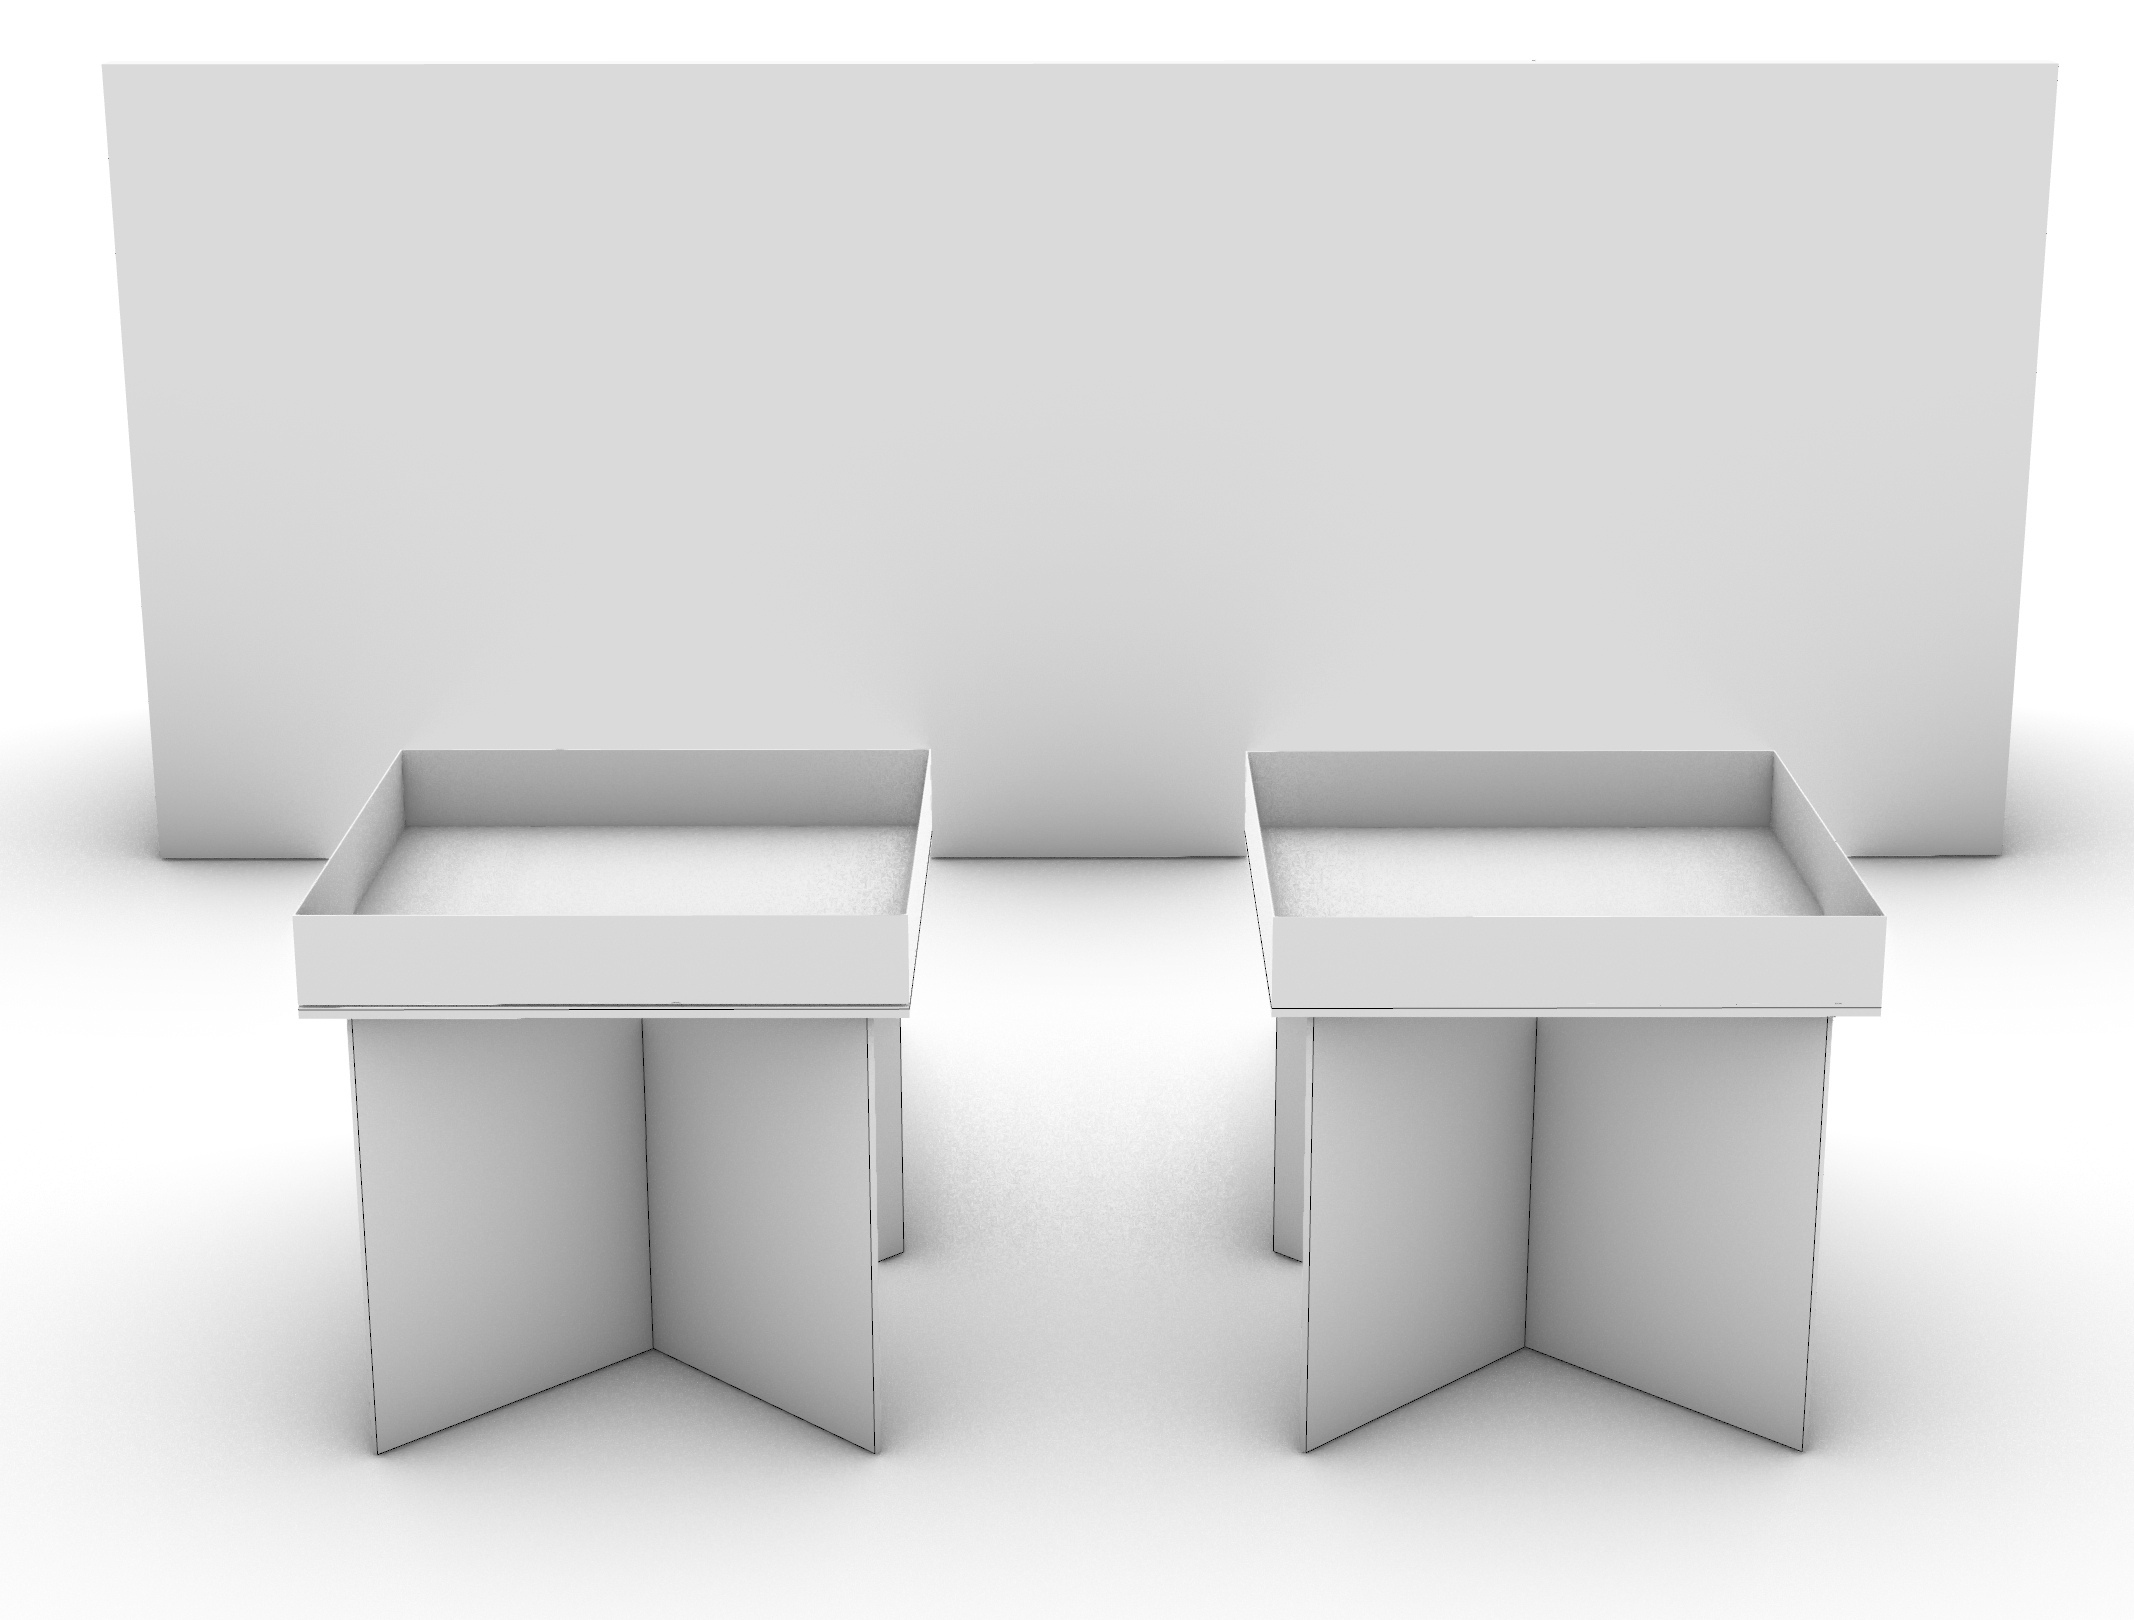
how they are designed to look in place
In designing for CNC milling, there is an important point to keep in mind. Inner corners will never be sharp corners as the tool is rounder. It will leave a rounded edge. To eliminate that, dogbones are used.

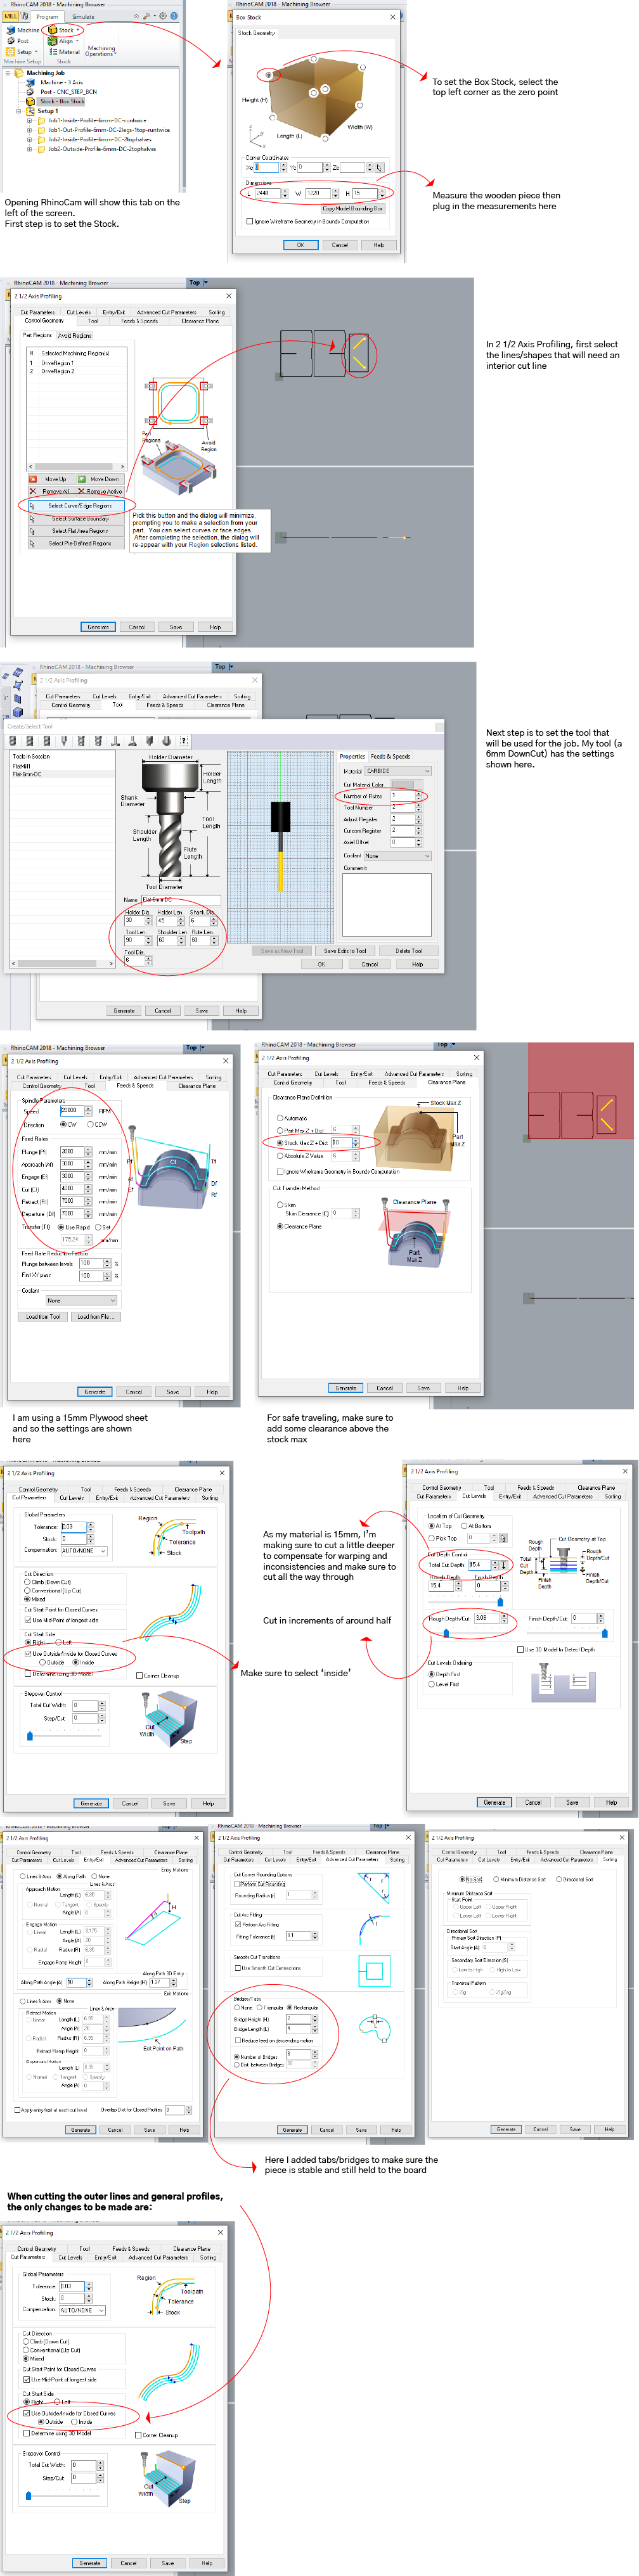
RhinoCAM
In our Lab, we use RhinoCam to set up the jobs for milling. The machine is a Raptor X-SL I used a 6mm Flat End Mill, a downcut with one flute. My job had a mixture of inside and outside profile cuts.
As a first step, I added very shallow drill holes to know where my screws will go in without affecting my pieces. Once the screw locations were engraved, I screwed in the sheet and then set the zeros for x, y, and z before sending in my jobs.
Order of Jobs:
- Inside cut
- Outside cut
Make sure to add dog bones for the interior corner cuts so they can fit together perfectly. I placed the dog bones (as seen in the last photos) very close to the edge for aesthetic purposes.
CNC Milling
As prepared on the RhinoCAM, the machine will first cut any internal cuts and then profile the overall shapes.
I used a 6mm flat end downcut.
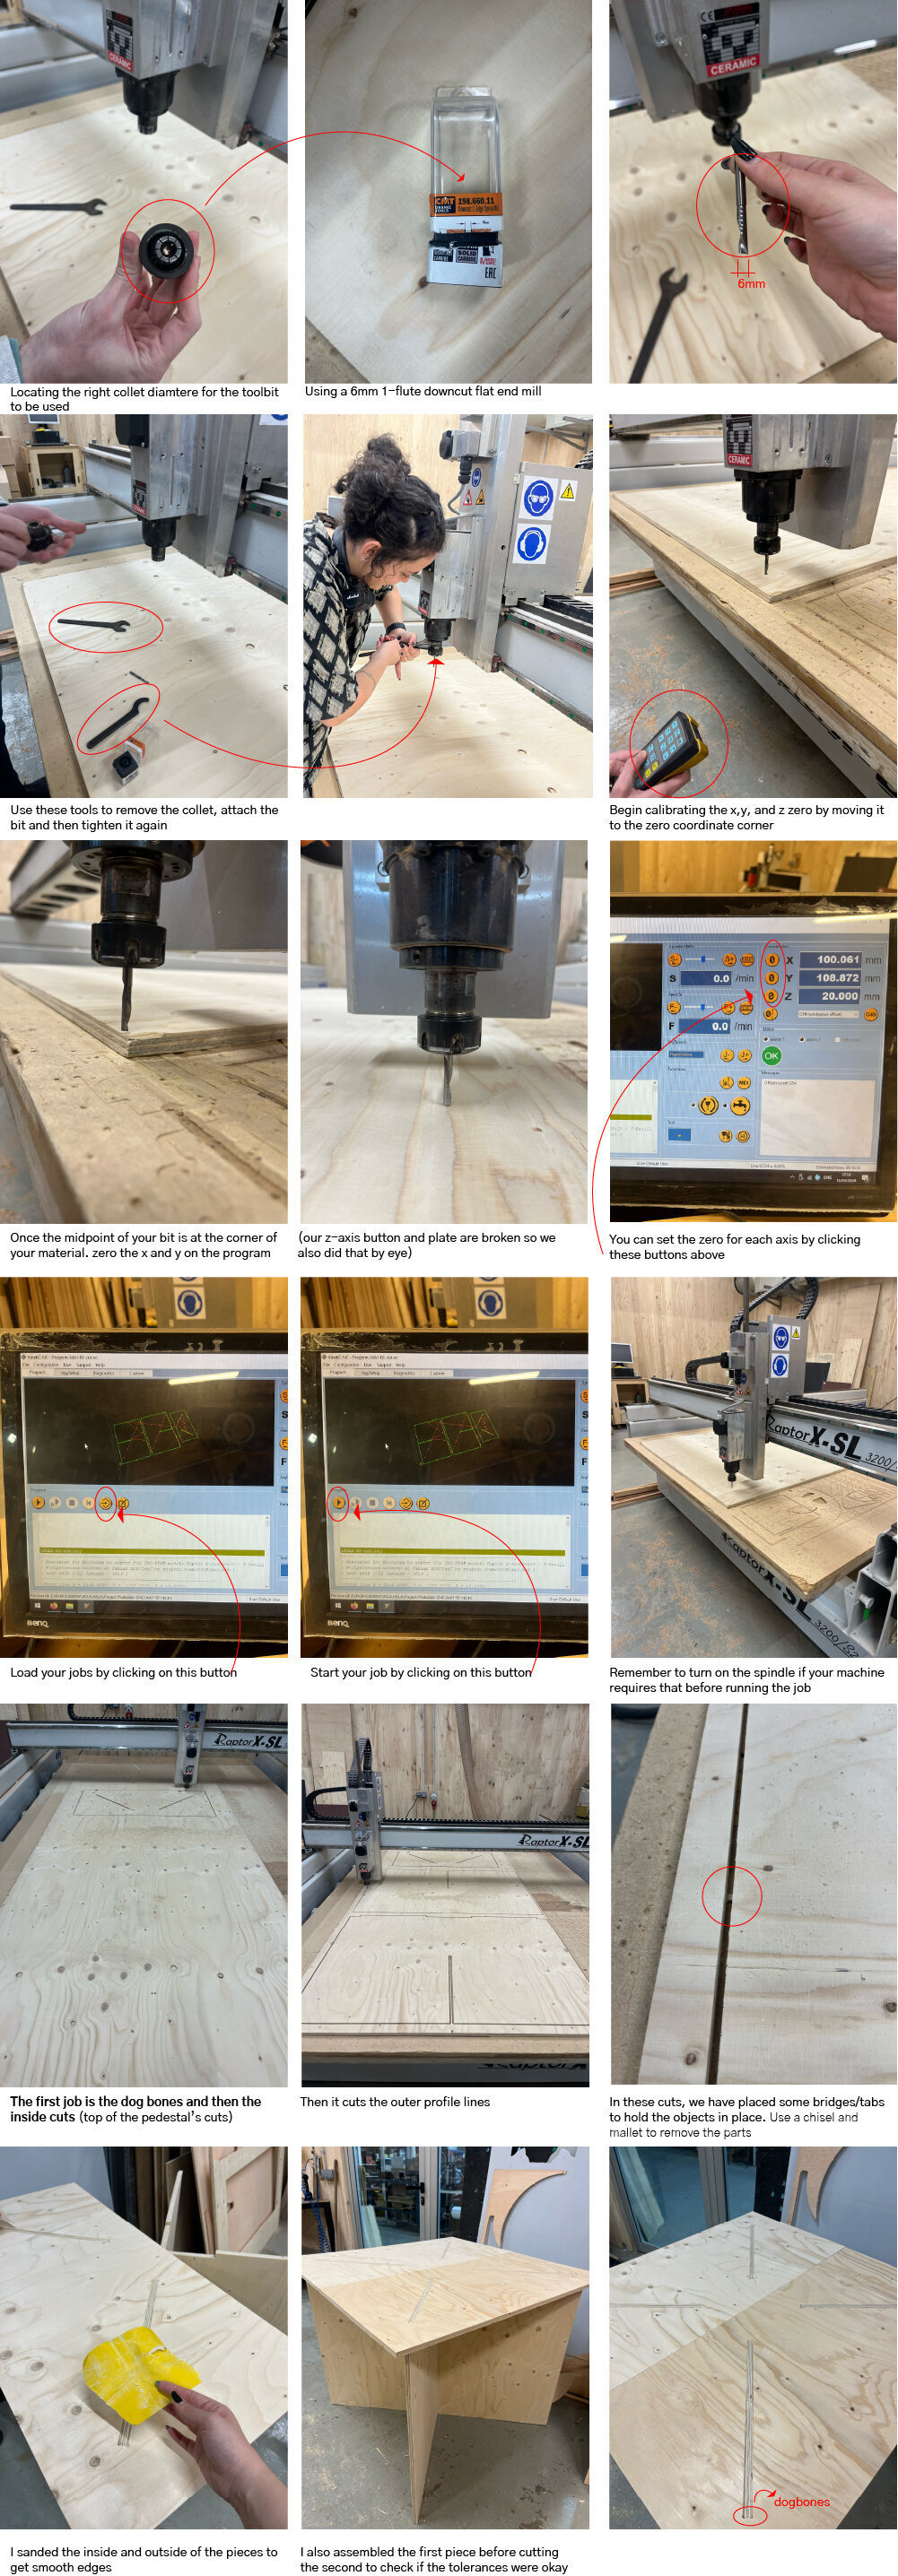
Assembly
As the material had some inconsistencies and was a little warped, the second time I cut the legs, it was very difficult to assemble and disassemble. The material warped and needed to be aligned perfectly every time to fit in.
Safety Measures
When using the CNC there are a few safety measures in place:
- Wear safety glasses at all times
- Preferably, wear ear protection
- Do not reach your hand into the cutting area
- Make sure the spindle is on
Files
-
File:Rhino Files and Gcodes ↩