17. Machine design
| This weeks design | |
|---|---|
| marblerun design | F3d |
| trap v4 | F3d |
| Stairs | svg |
| Sticker | svg |
For the machine design week we have a group documentation where all the different parts and tasked are explained. You can find it on GROUPASSIGMENTS In my part i focus on the thing i have done for this machine week.
Fixing some error of my stairs
In mechanical design week we started building our machine. I was responsible for the stairs to bring the marble to the top of the machine. The stairs were unfortunately not reliable yet. The marbles sometimes were stuck at one point of the stairs. Since this is the key part of the machine we had to inprove the design. My first afford was trying to fix the stair by using clay to guide the marbles to the next stair. Beside it does not look so neat, it was still not reliable.
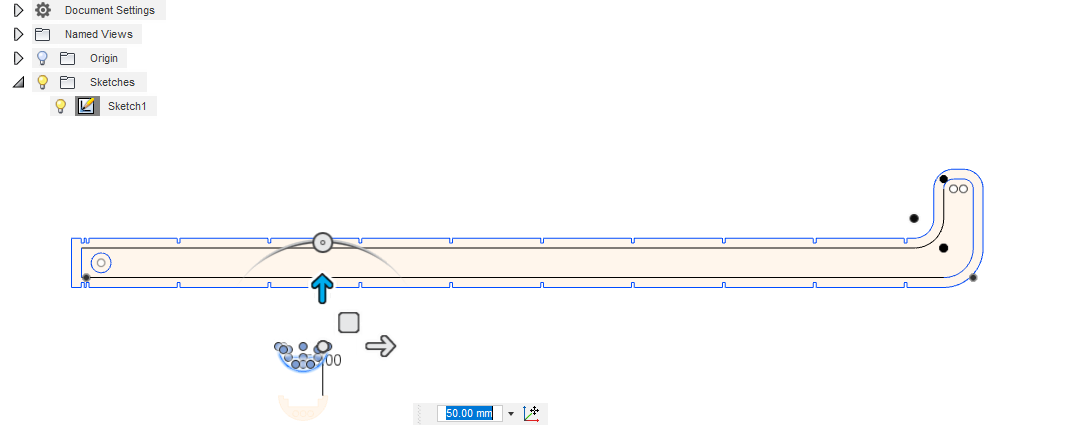
Soo.. Back to the drawing board. After many tests with small variations i finally came up with a design that worked. First thing i changed was the angle. I changed the angle from 2 degree to 5 degree to ensure that the marble run. The cutout where the marbles have to go out to the next stairs i made deeper. The center point of the marble have to be forced out. This i established by using a guide rail underneath. To ensure that the marble won’t be stuck at the end i made a piece to force the marble to one direction.
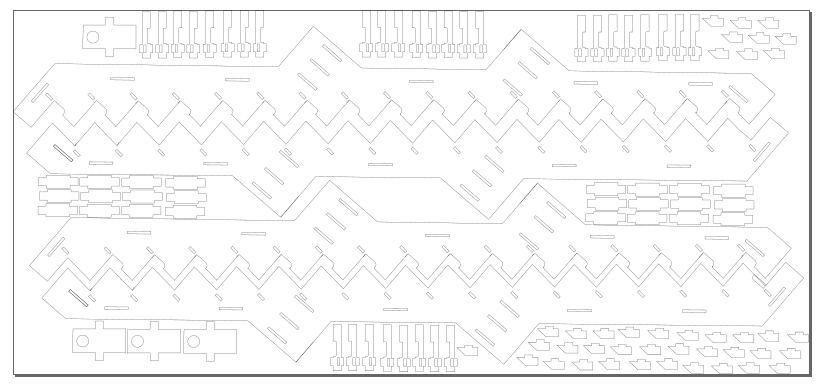 In inkscape i prepared the design to be lasercutted
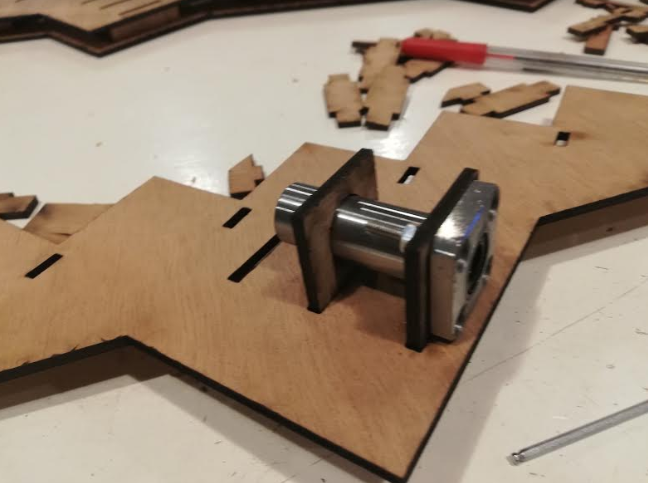
My initial plan was to move the stair with the help of the wheel rotating and two guide rails to make one movement up and down. Our test on the stairway did not had the desired result. It did move up and down but there was friction to both sides of the rail causing stress on the structure. Anne came up with a nice alternative with a rod connected to stepper motor. When we placed this in the middle it resulted in a smooth up down movement without any friction.
The test i did two weeks ago with the press and fit really came in handy when redesigning the stairs. I simply used the same ofset to get the correct result. For the cutting i used speed 30 and power 100. The laser went through all the pieces perfect
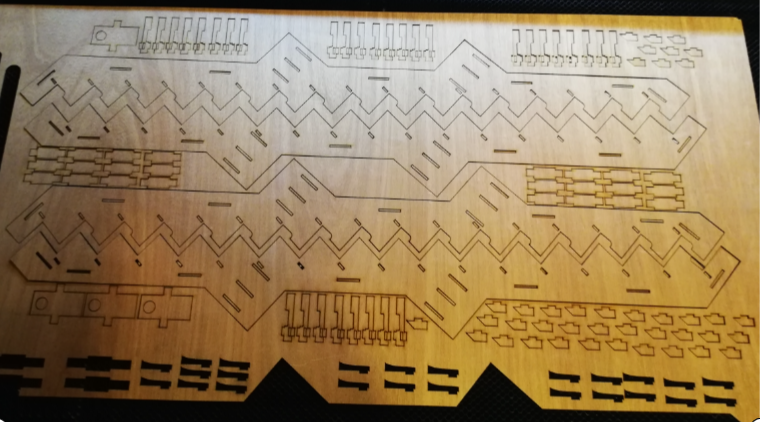 Almost feel a shame to take the pieces out. Looks like a Maia art piece
The pressfit worked out nice and i had to assemble the different parts. I was slightly worried that the assembly would be difficult because of the many parts. But i went smooth. First i had to connect the sliders. In my design i had to do this on forehand. Later would be rather difficult.
 Placing the sliders
After this i could connect both staircases.
 Assembling the stairs
Marbles run
Now the stair has finished the marble need to be guided trough the track. I really enjoyed brainstorming about how to do it. Making marble run is more complicated then expected on forehand. Anyhow. This is a nice puzzzle to solve. My first focus was to collect the marbles from the booking indicator. I can imagine the marbles getting thrown out by the servo so i decided to make this rail slightly bigger then the marble itself. Finishing with a hole big enough to fit the marble in. I used multiplex wood for this purpose.
 Designing a rail to collect the marbles
The rail get support from the press fit parts underneath. i made holes in the support of 6 mm to be able to connect the glide to it in a later stadium. Also i can use the holes to give the structure more support. I made the rail approximately the same length as the servo rail on the top. This way i was able to connect the rail to the sides of the machine my teammate Mick made.

 The rail undeneath the marbles collector
A next challenge was to create a slide to get the marbles at the beginning of the stairs. I wanted to be sure that the marble were going like intended so i decide to create a rail that covers the marble on all sides. The marbles are approximately 16 mm width. I created a small offset to ensure the marbles will roll and not get stuck in the “pipe. ” The issue when designing a rail on all sides is the limitation of the lasercutter. You can create a halve circle with the machine but this will only cover two sides. To cover all four sides you need to use the top surface for two sides and the side surface for the other two sides. With side surface i mean the part that is cutted by the laser. The material i use has a thickness of 3.2 mm. The challenge was to create a path that has the dimension of the thicknes of 3.2 mm and that the with correspond with the depth. That all sides are the same dimension. When cutting with the lasercutter you have to set a ofset. The laser burn material away so the side i had to make slightly bigger to make the dimension similar to the depth of the material. 3.3 mm seemed to do the trick.
 Making curves so the marble can roll
When the individual rails were set it was time to create shapes for the glide. I made calculations to decide how far the rails should be set apart to perfect guide the marble down. The marble will be in the middle and stopped by the outside rails. 7.35 +1.65(halve of width rail) = 9. 9*2= 18 mm (space for marble to smooth go down) The middle rail will be cutted twice (top and down) and the inner and outer rail once. Now is set the design rules i could start making shapes for the marble to roll.
 example of the shape
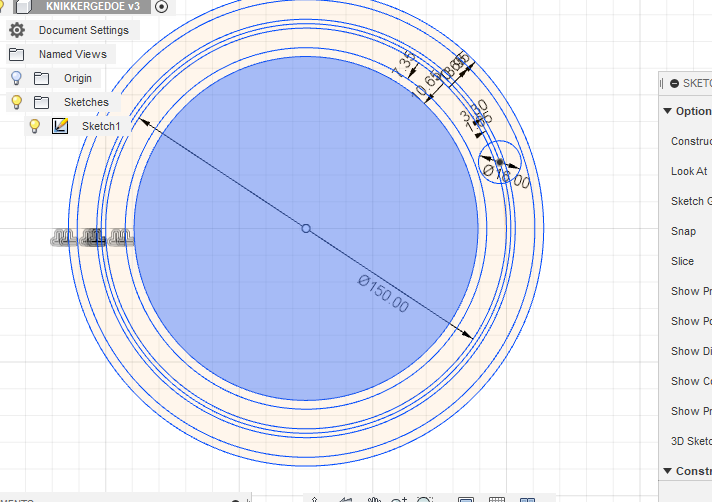
I used a diameter of 15 cm as a guideline for the different shapes. I wanted to be sure the marble would run smoothly and don’t slow down. No science behind this decision just some logic design thinking.
The rails need to have support and i designed circles with four point to connect the rails to. I made inner support and support on the end of each rail shape. The idea here is that you can mount another shape to it by the use of bolts and nuts. i made 8 holes so you can mount the next shape to it in a small angle. I next designs i would even make more holes around it to give more freedom in choosing the right angle.
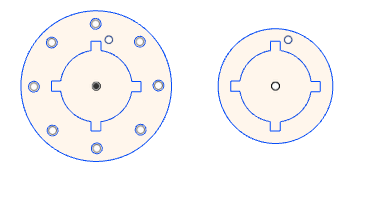
Connecting parts
After creating some different shapes i safed my sketch in fusion 360 as dxf and imported it in inscape. I like to use inscape to create a template for the lasercutter. I find it more easy to move and copy sketches in inkscape to prepare the sketch for the lasercutter.
 Assembly of different parts
The best result in cutting this material was with speed 35 and power 100. With this settings the side and the top of the rails came out the same size.
 best setting for my 3.2 mm multiplex board
Then all was set to be cutted. I placed some heavy metal objectr on the side of my multiplex board to prevent it from bending. When doing this make sure the objects are not placed in the workfield of the laser job. I first did a test run so that the laser moved around the workingfield. When this was set i knew where i could place the metal object to prvent bending wood.
 cutting the pieces
When all the pieces came oput it was time to assemble them. With the used of a pincer i pressed the rails in the connecting parts. This way i could put pressure on the excact spot. My first try was by hand but that resulted in breaking the rail. With a pincer i could opnly put pressure on the connecting parts.
 press fit connection
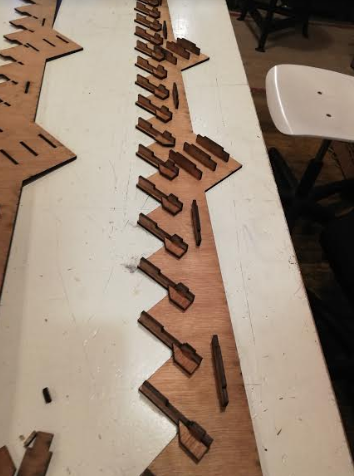
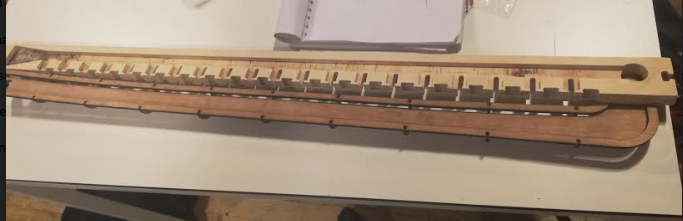
I had approximately the dimensions of the machine and the distance the marble had to move from the rail to the beginning of the stairs but we still had to do some testing and moving. I made sure i made enough parts to bring the marble back. In the picture below you see all the different shapes of rail i made for our machine.
 Made pieces to assemble
The pieces i connected with bolts and nuts. I used metal wire to connect the rails to the marble run hanging above. This way i got support and i was able to adjust the rails when the marble would not go smooth. Turned out a good solution.
 connecting the rails
 Assembled all the pieces
Time indicator
My teammate Joey designed the rail where the servo will be attched on to indicate the available hours on the machines. Now we had the issue in how to attach the servos and indicate the different time. Together with Anne we designed the time indicator. We designed it in a way the servo would fit well in position underneath. We made the design out of acrylic with a small slot for the servo to connected to. When preparing it for the lasercutter i shared the complete file with Anne how made a nice cutout of letters with vinylcutter. Since she had the correct dimensions of the design it was easy to place the vinyl later. Meanwhile i concentrated on cutting out the pieces. I removed the letters in the design to have just the cutout of the pieces.

The cutout fell perfect in place. Also the vinyl number Anne made on the vinylcutter looked nice. The we placed all the pieces in the design.
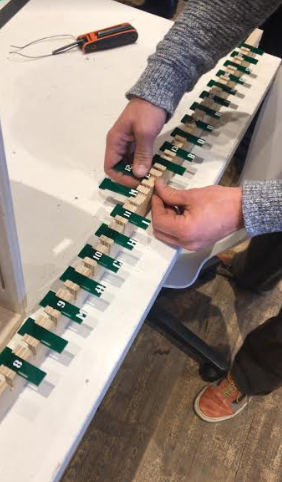 placing the time indicators
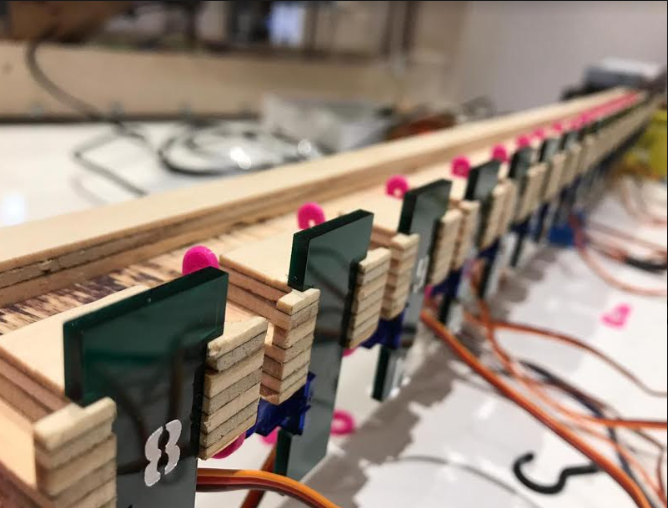 everything in place including the servo’s underneath
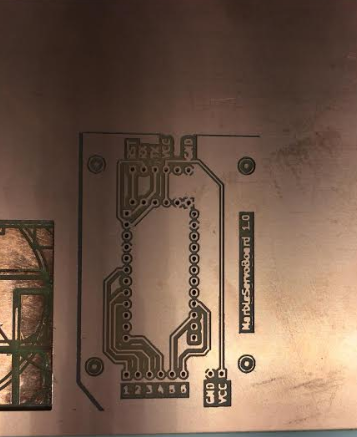
Pcb for electronics
Joey took the responsibility to design electronic circuits to control the 20 servo we used for the machine. He send me the design and with the help of the Roland MDX 20 i produced the boards. I made in total for of these boards
Making the name of the machine
Last minute we want to finish of the machine by making vinyl letter naming our machine. I quickly designed the name in inkscape and used the vinylcutter to do the job. After this was done i placed the sticker on a transparent acrylic plate made by Anne.
 designing the name of the machine
 Name placed on the machine
The Machine is ready!
After two intensive weeks working hard on all the different components of the machine it was rewarding to see the machine all assembled and working. I was stressfull to make in such a short time a working machine and to do it as a team. But i im proud of the end result.
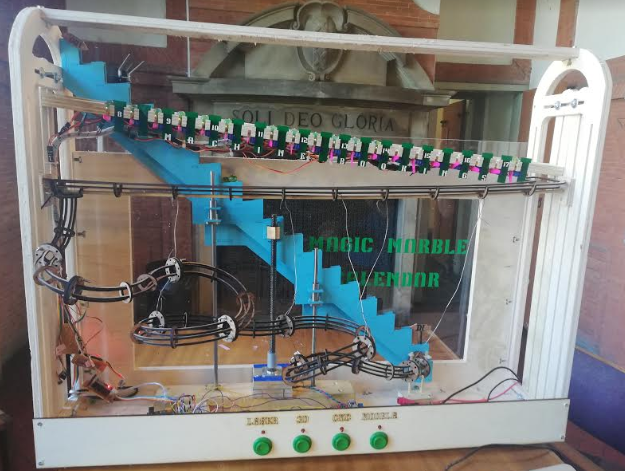 The final result
What i learned and what went wrong.
It were two intensive interesting weeks of creating a machine together with my fellow students. I was fun to work together and i could not have picked better people to do so. There were hardly any conflicts and we divided the work as good as we could. Electronics is not my strong suit and therefore i more focused on assisting the others with producing the parts and making sure the marble will continued moving through the machine. Learned a great deal about planning and dividing work between the teammembers. I am very proud of what we were able to make in such a small timespan. And in the way i fell in love with marble tracks. More to come.