Embedded Programming
- Salem AlMarri
- Super FabLab UAE
- Last Reviewed on 18/3/2019
- Last Modified by Salem AlMarri
Introduction
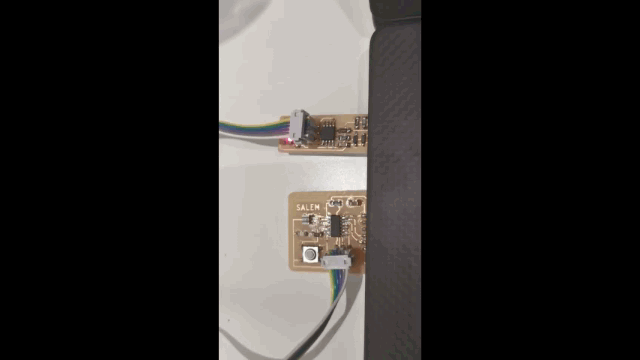
This week's focus is on programming embedded systems such as the echo-hello board we produced in week 7, it will be programmed using USBtinyISP which we also produced in week 5. Embedded programming is the programming of an embedded system such as a microcontroller. In such programming, microcontroller's structure and limitation must be accounted for.
ATtiny44 - Datasheet
As an electronics engineer, the first step in designing or programming any embedded system was to look for component's data sheet. In this case, the core component and most important when it comes to programming is the microcontroller.
For low-level programming, it is very important to take not that an 8-bit microcontroller has an 8-bit wide register. It is also important to take note of instruction execution timing to create delays after each instruction, data memory map as to were the program can be written, and how to handle reset and interrupts. These information are only important when it comes to low-level programming such as ASSEMBLY. (I have taken a whole course on ASSEMBLY as an undergraduate)
For high-level programming, it is important to take not of pin description such as VCC, GND, Port A, Port B, and etc.

Arduino Programming Language
Although not a programming language on its own but is a simplified C/C++ language. Functions used may be simple when compared to the functions used to initialize and write to certain pins on C program, this is because Arduino language has a library of functions which are based on C/C++ used to simplify the programming process (especially to hardware) for new beginner users. Moreover, in Arduino's reference website, it is mentioned that Arduino's structure is C++, such as loop(), setup(), arithmetic operators, comparison operators are all in C++.
Arduino Code
In this code which was uploaded to our echo-hello board using "Upload using programmer" through USBtinyISP. The code is based on Arduino's langauge (C/C++). The code initializes pin 8 as input_pullup.
The notable issue I ran across here is I used the correct ATtiny44 pin 8 which is connected to the button component on the board, however since this pin was initialized as input without "pullup" the button did not work.
Program in Arduino Language - ATtiny44
In this code, LED blinking speed varies depending on input from the button
            const int buttonPin = 8;  //declaring pin 8 as button pin
            int buttonState = 1;  //declaring button state value of 1

            void setup() {
                pinMode(buttonPin,INPUT_PULLUP);  //configure pin as input
                pinMode(7, OUTPUT); //configure pin 7 as ouput
            }

            void loop() {
                buttonState = digitalRead(buttonPin); //read pin value
                if(buttonState == HIGH){ //if statement
                digitalWrite(7, HIGH);  //turn LED ON
                delay(750); // 750 milliseconds
                digitalWrite(7, LOW); //turn LED OFF
                delay(750);
              }
              else{
                digitalWrite(7, LOW);
                delay(250);
                digitalWrite(7, HIGH);
                delay(250);
              }
            }
Program in C Language - ATtiny44
In this code, LED turns on/off depending on input from button. (if there is no input the LED turns on/off)
The code is influenced by the work found in this link.
        #include <avr/io.h> //include AVR IO header file
        #include <inttypes.h> //include inttypes header file
        #define F_CPU 20000000UL //equivalent to 20Mhz

        int main(void) {
        DDRB = 0b00000000;       //Initialize pin 2 of Port B as input
        PORTB = 0b00000100;      //Initialize pullup resistor for input pin 2 of port B
        DDRA = 0b10000000;       //Initialize pin 7 of port A as output

        while(1) {  // condition true, infinite for loop
          if (PINB == 0b00000100){ //if statement for input pin 2
          PORTA = 0b10000000;//Output HIGH, LED ON
          }
          else{
          PORTA = 0b00000000;//Output LOW, LED OFF
          }
        }
       }

What I learned from writing this code is that DDRB which is button's pin must be initialized as 0 to make it input. When it was not initialized and it was left blank, the button was not working. In addition, when writing to PORTB to activate a pull-up resistor for a specific pin, in this case button's pin, the pin must first be initialized as input and then the pull-up resistor can be activated.
Assignment Files:
Arduino codes above can be copied directly and pasted into arduino IDE.