10. Molding and casting
Assignment
-
Group assignment
Review the safety data sheets for each of your molding and casting materials Make and compare test casts with each of them Individual assignment -
Individual assignment
Design a 3D mold around the stock and tooling that you’ll be using, machine it, and use it to cast parts.
Group Assignment
3D design
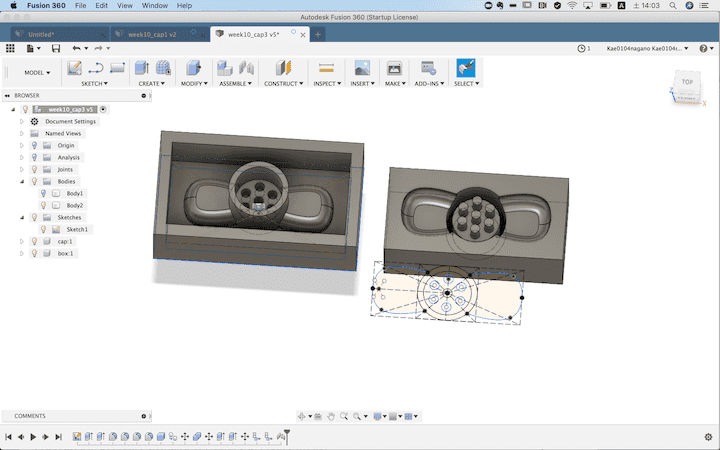
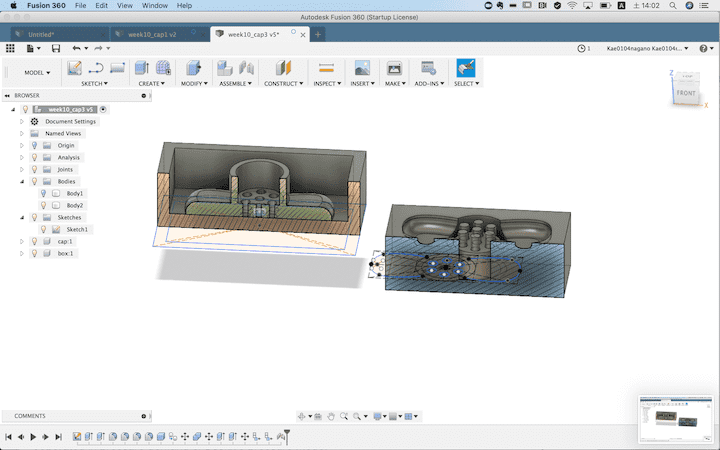
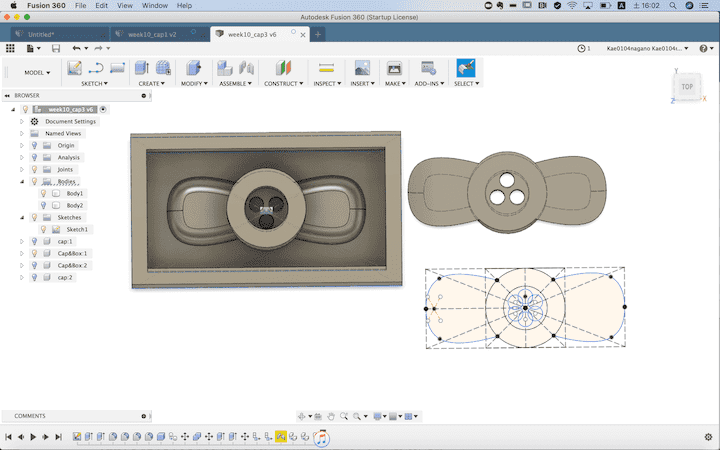
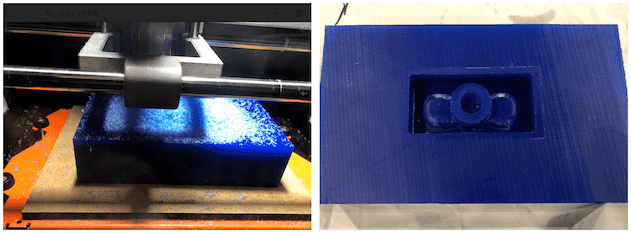
I designed a small parts for my final project using Fusion360. It will be placed at the top of mist tube.
The left one below is the designed mold and the right one is the mold image made by casting.
I exported it as stl format.
Tool Path
To make the 3D tool path, I used Rorand’s software “MODELA Player 4”.
Import the stl file I designed, then choose material from pull down menu. I used modeling wax.

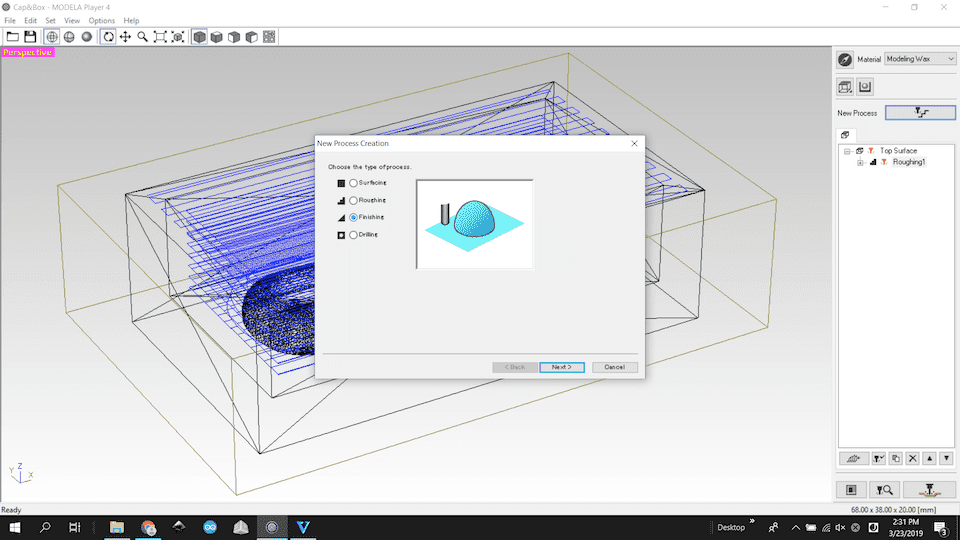
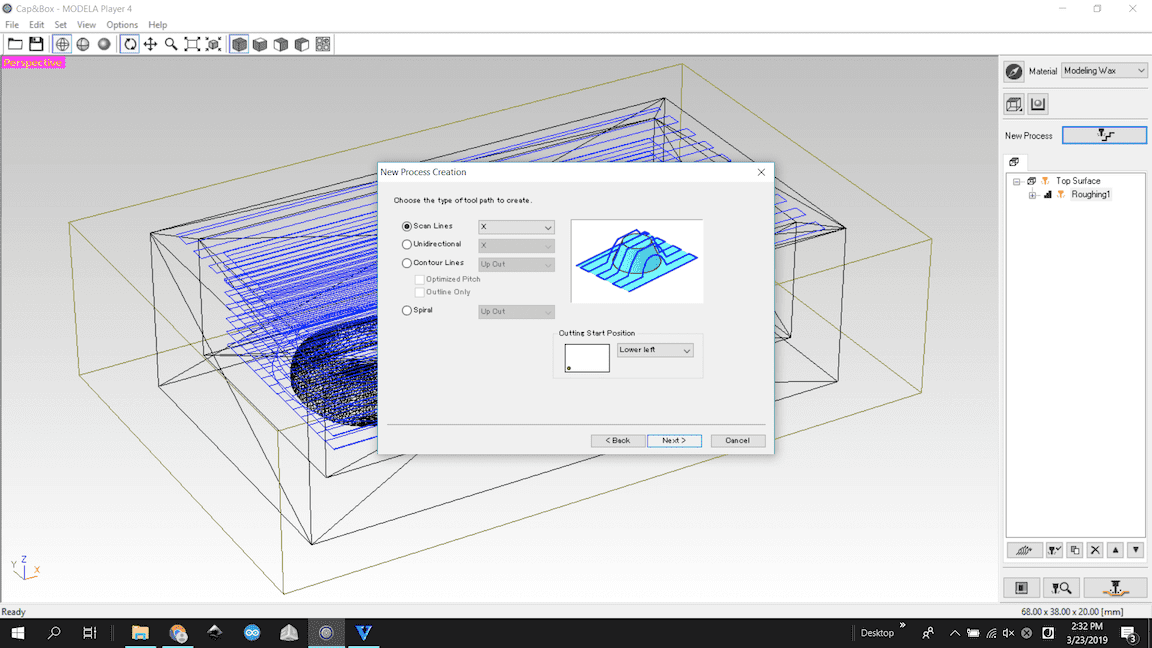
Select “New Process” then Choose the type “Roughing”, then press next.
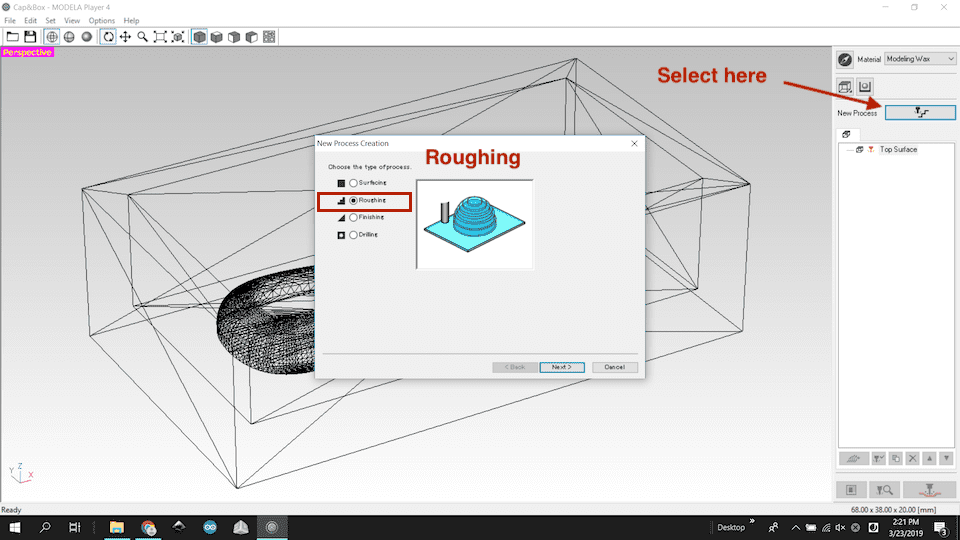
Select the cutting surface “Top”, then press next.
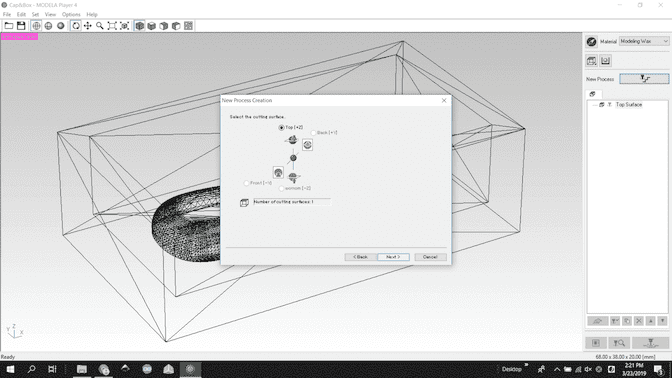
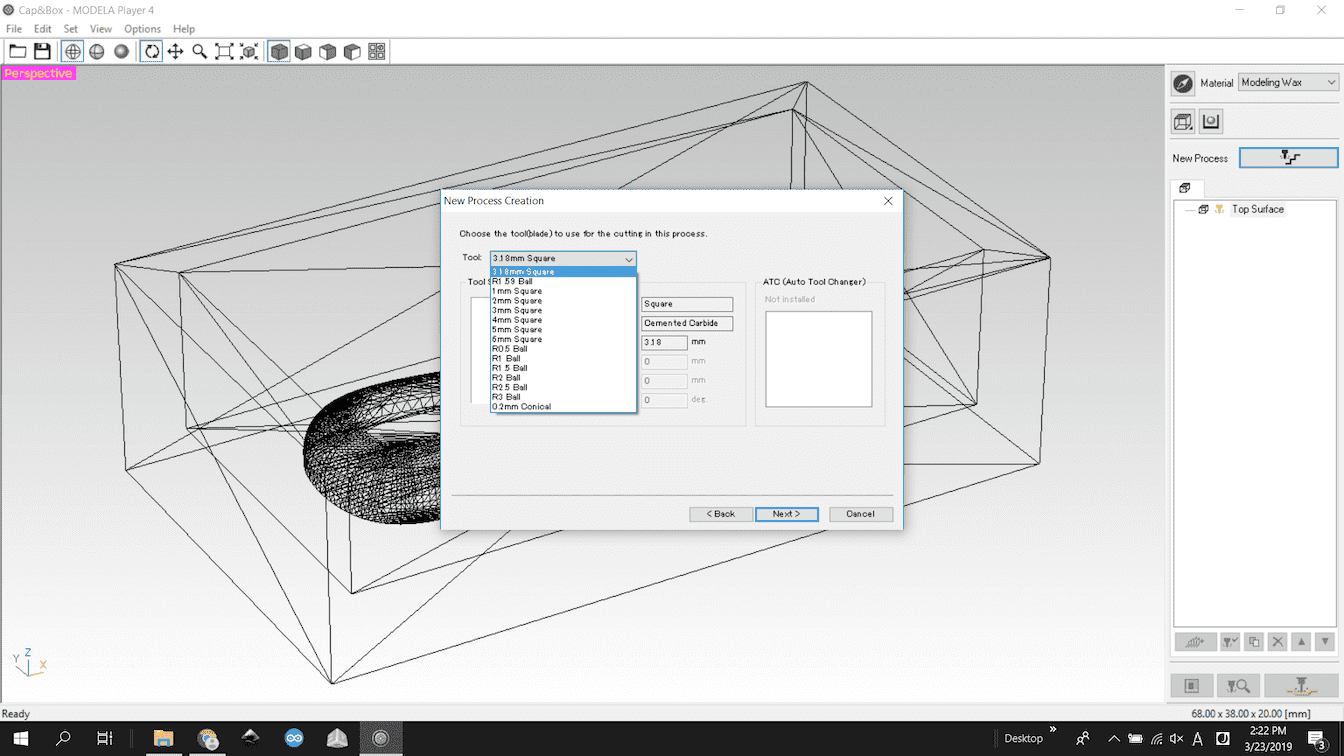
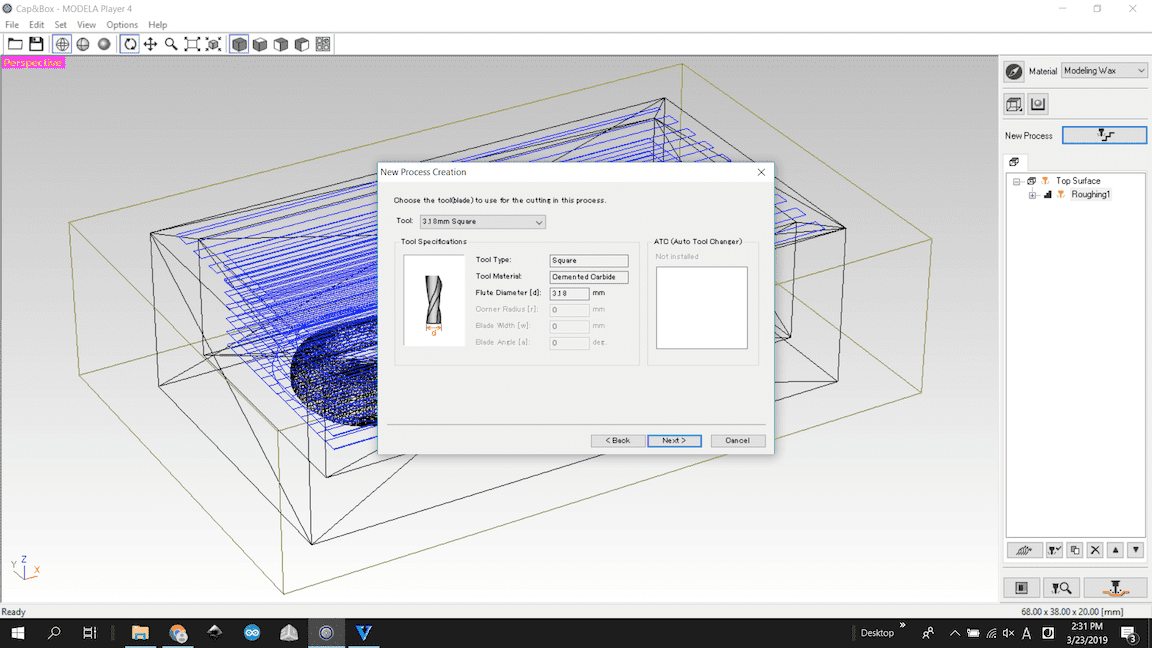
Choose the tool from pull down menu. I used 3.18mm Square for Roughing.
Then press next.
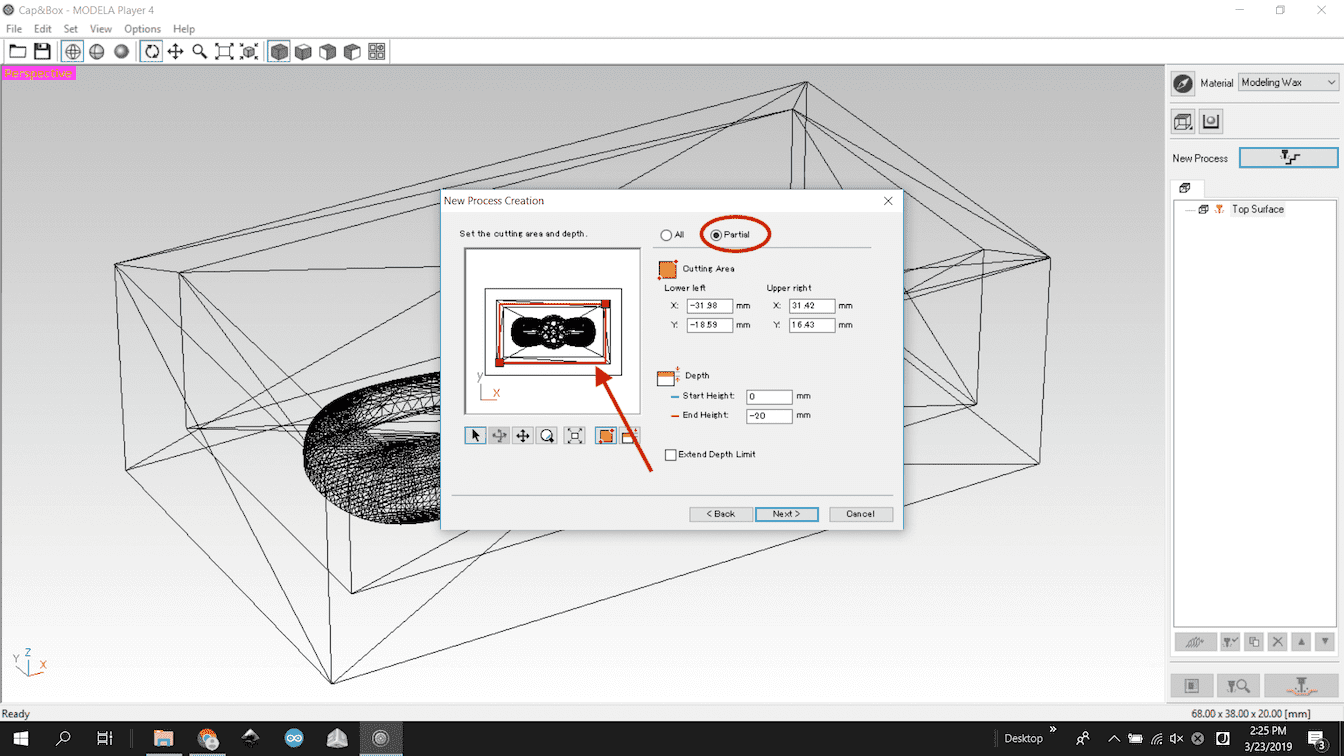
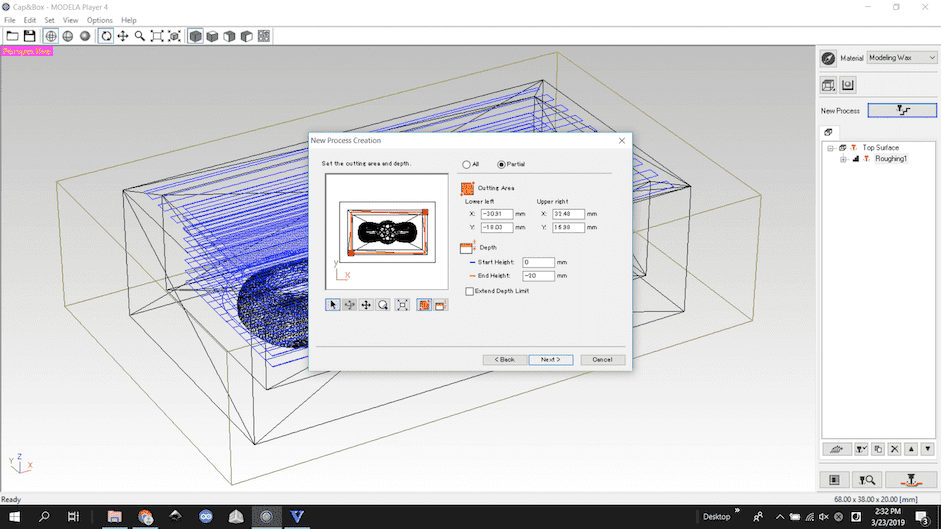
Select “Partial”, then fit the cutting area manually.
Choose type of tool path “Contour Lines”

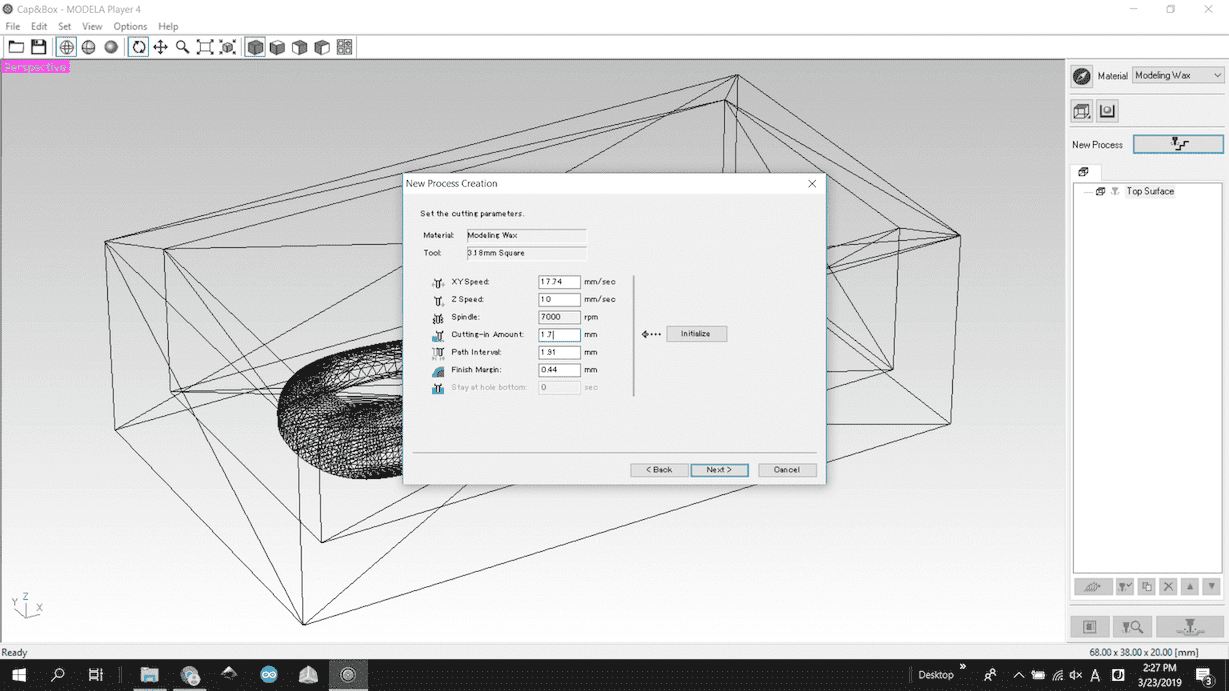
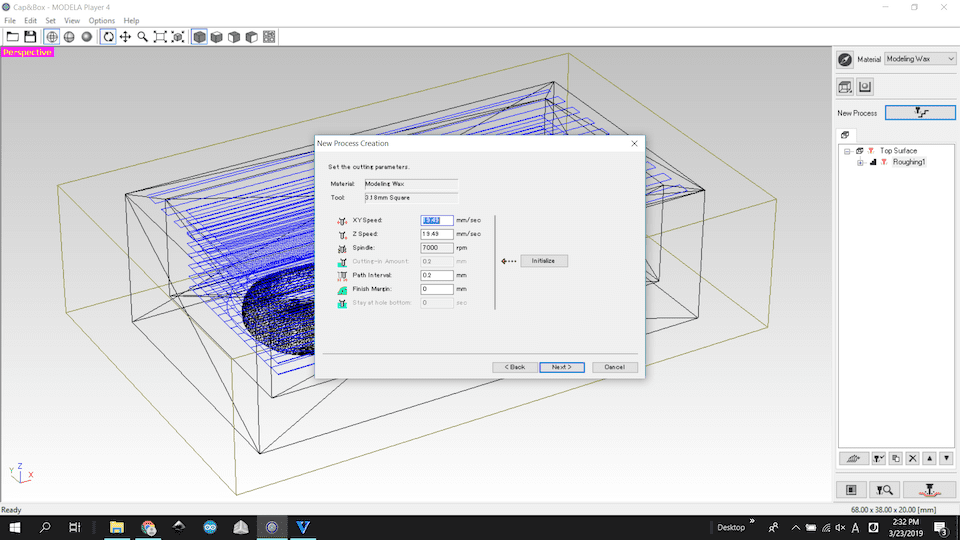
Set the cutting parameters.
Name the process,

Preview the path
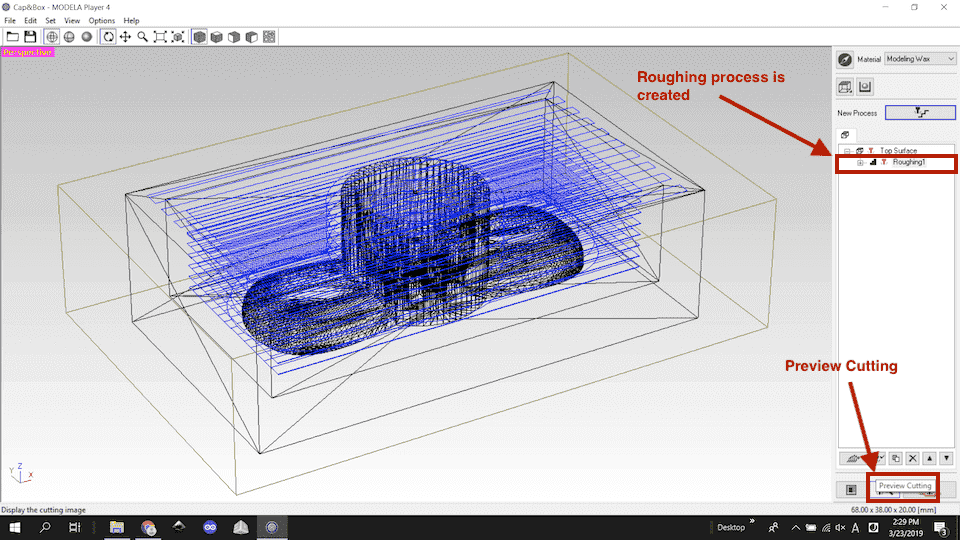
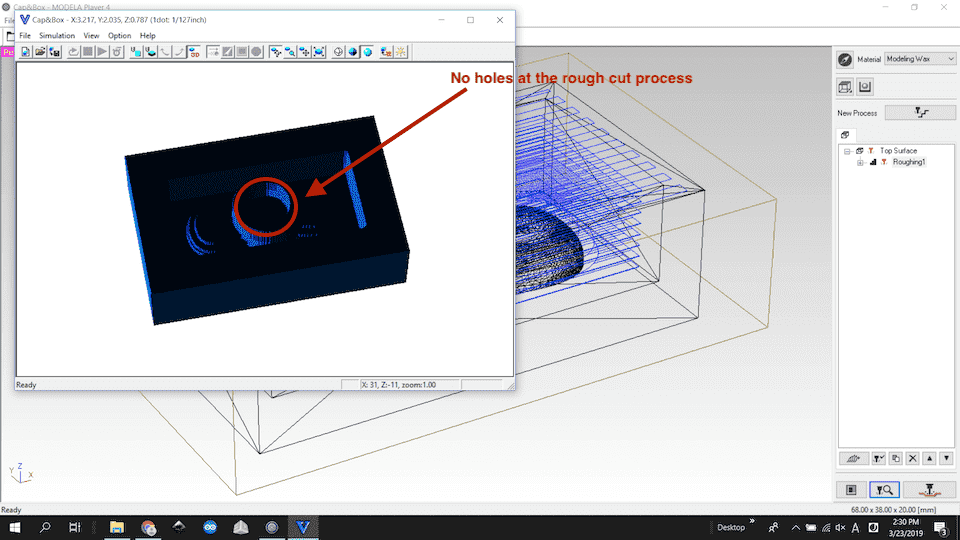
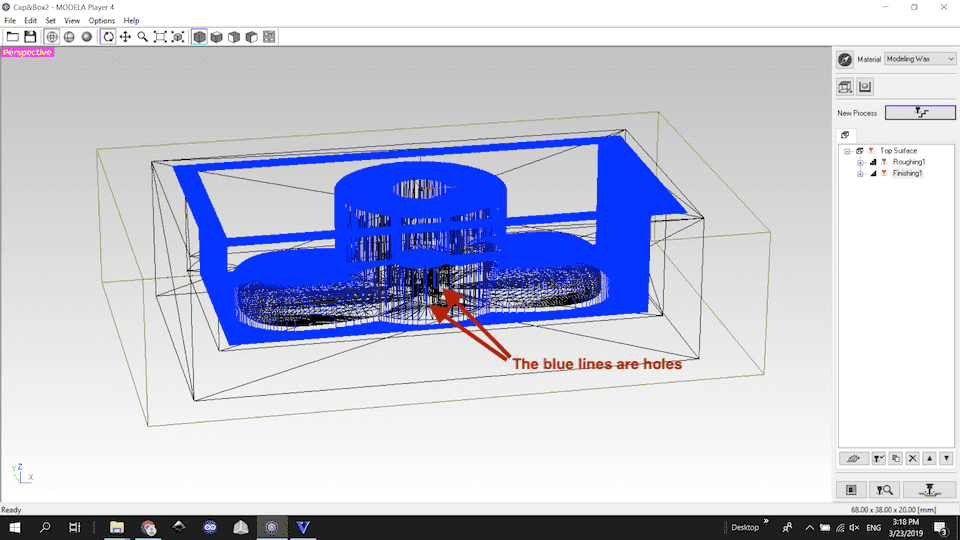
Preview screen. I found that the small holes were not included in the Roughing process. My instructor advised me that it might be cut at finish process. So I went to the next step.
Choose “Finishing” process,
Choose the bit for finishing. I chose the same one as Roughing process.
Minimized the cutting area manually.
Choose the type of tool path.
Set the cutting parameters.
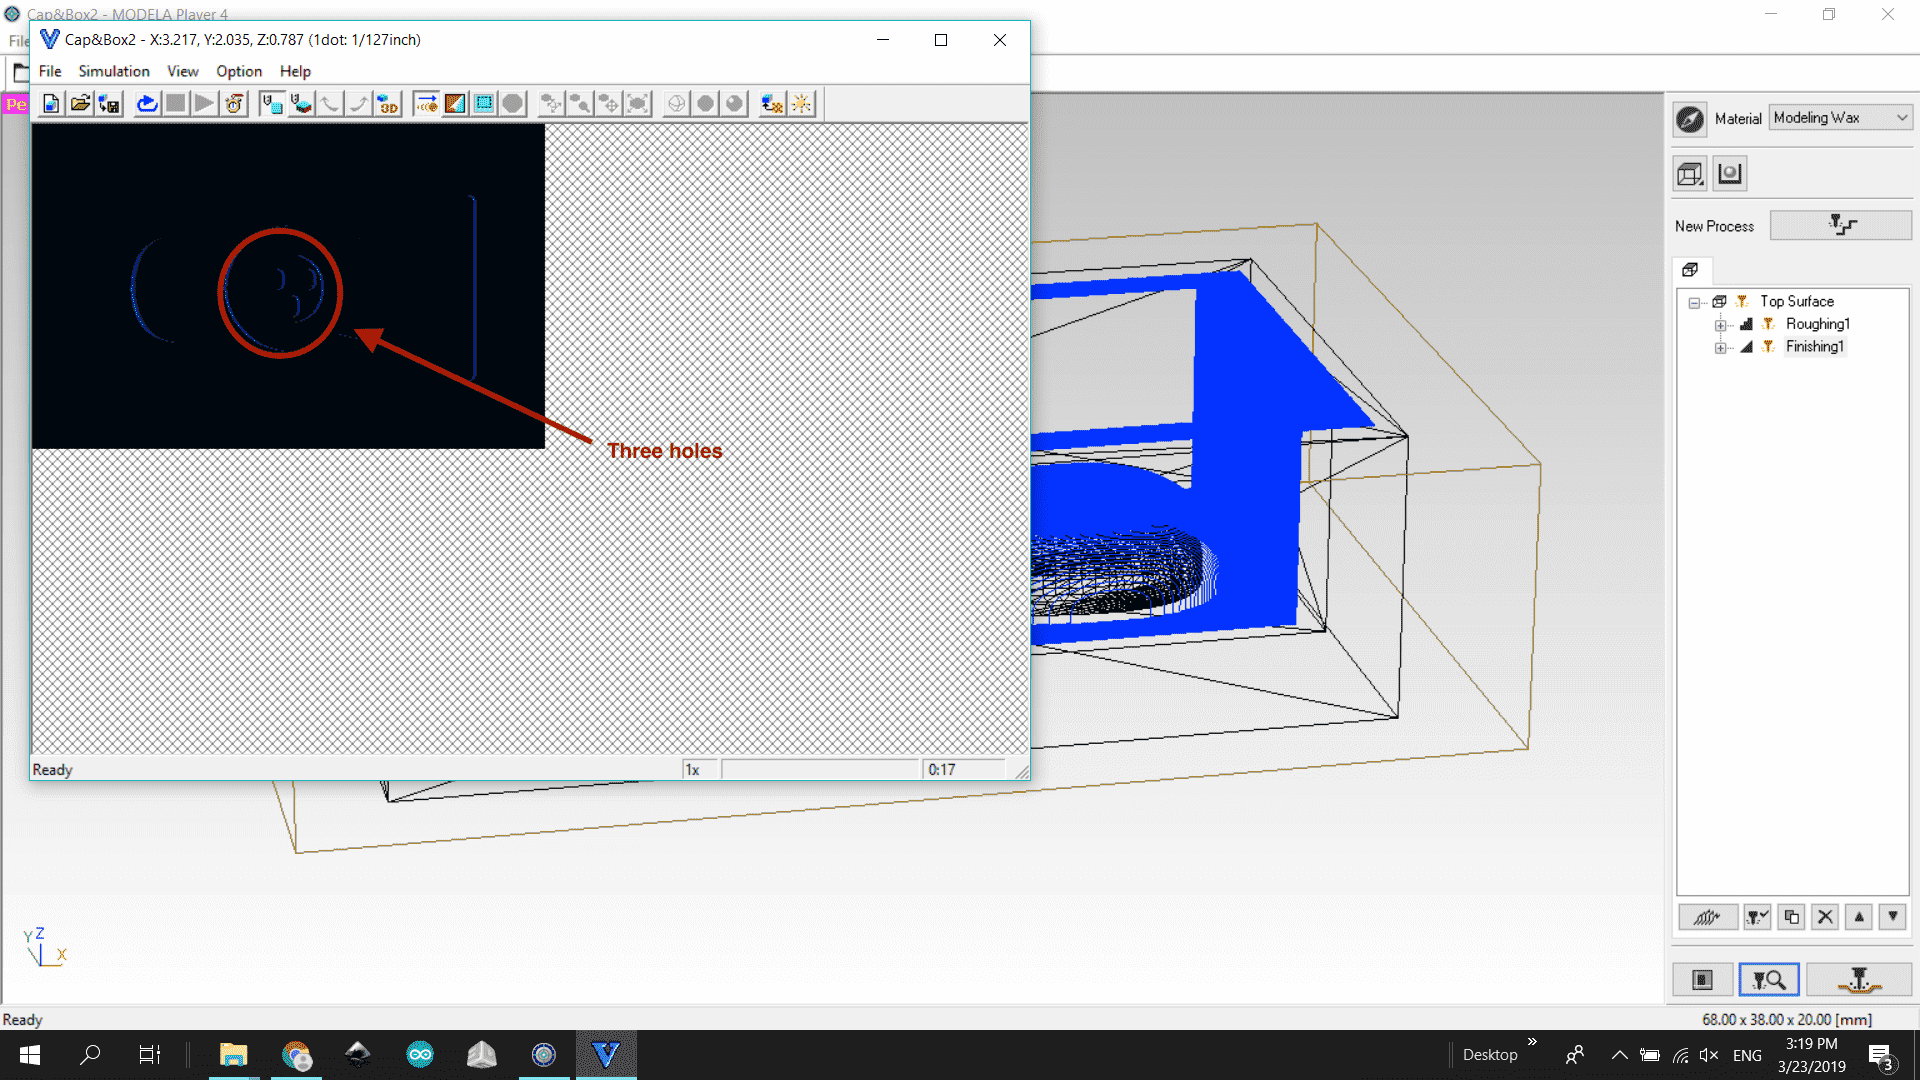
After that I encountered a problem. The path below looks fine, but the path of center holes were not created.
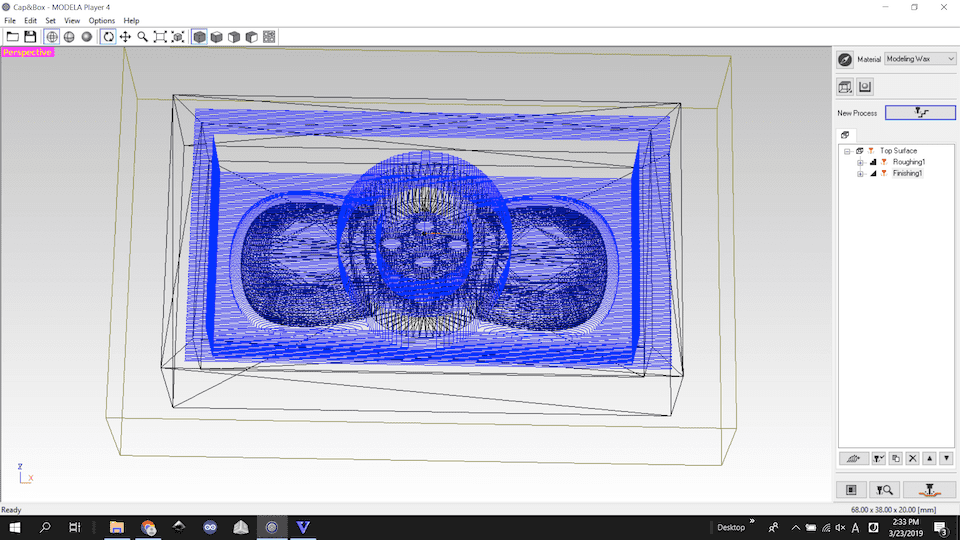
The diameter of hole that I designed was 3.2mm, almost same as the diameter of the end bit. So I changed the diameter of tool from 3.18mm to 3mm on the software. Then the hole path was created properly. It seemed that 3.2mm diameter was too small for the 3.18mm end bit. So I changed the diameter to 3.7mm and reduced the number of holes to three.
Three holes were created at the finish process.
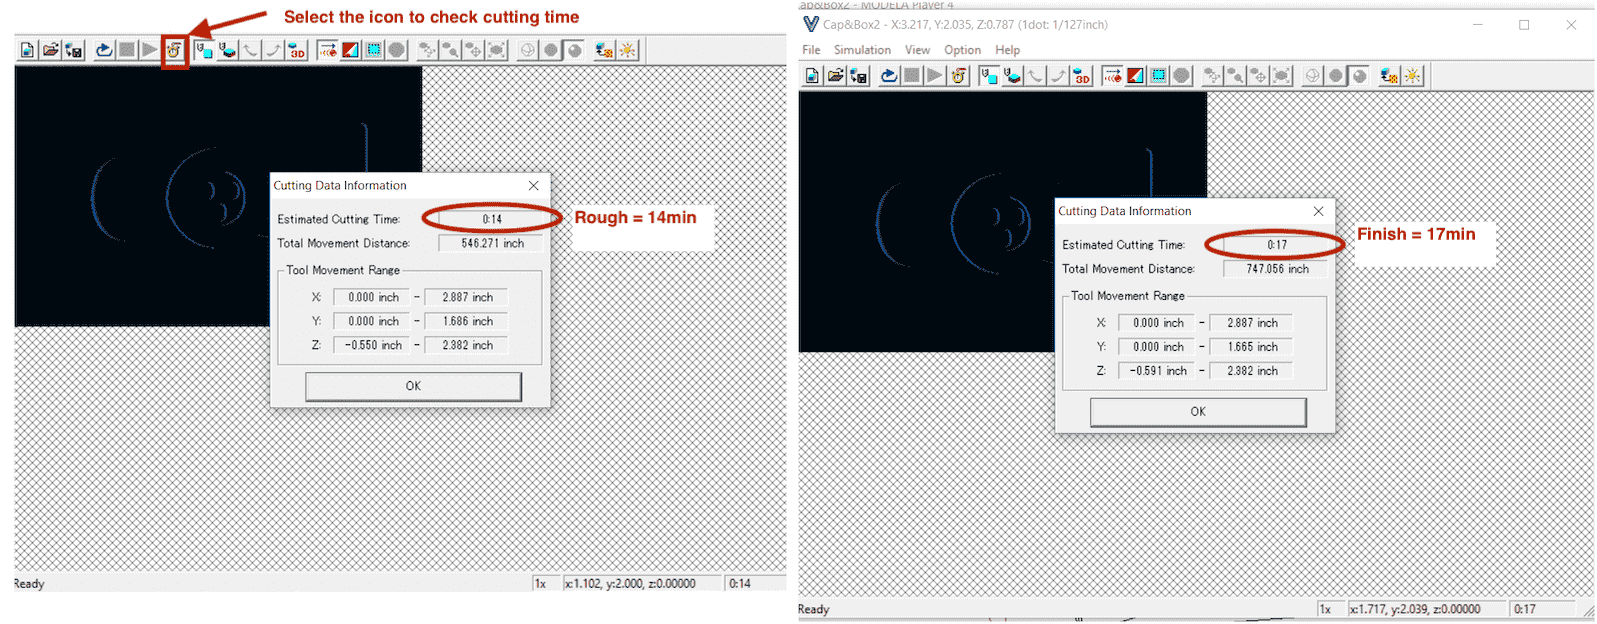
Preview the path.
The total milling time is 31min.
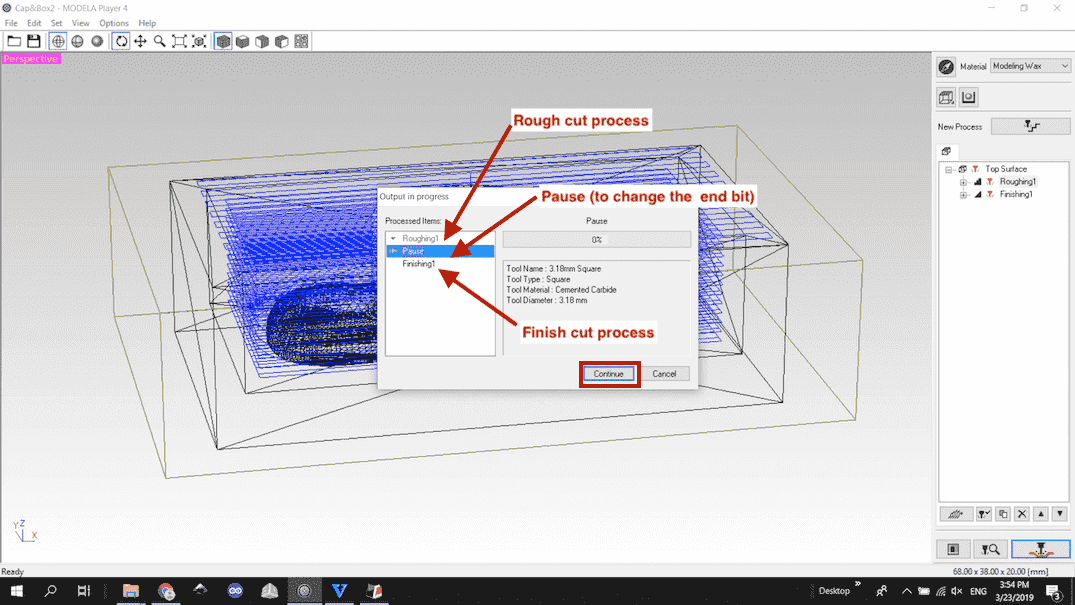
Start the milling from the MODELA Player screen. The machine paused automatically when the first roughing process finished. As I didn’t change the end bit, pressed continue button for final process.
Milling
I milled the following wax with SRM-20. Set zero of X/Y/Z axis with SRM-20 software, then start milling from MODELA Player 4.
The feeds and speeds are as follows.
- XY speed: 1774 mm/sec
- Z Speed: 10mm/sec
- Spindle: 7000 rpm
Casting
- MOLD STAR 16 FAST
1st Mold
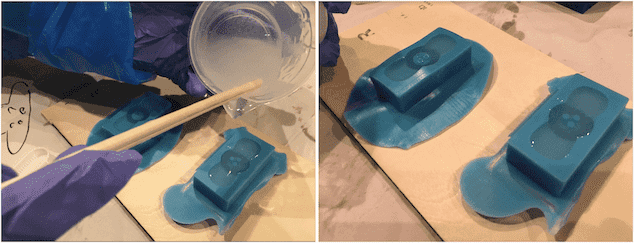
I measured same amount of A and B, then poured in anotger container and stirred.
Casted the material into the mold. To remove air bubbles in the material, I tried vibration of the sander as Kamakura method.
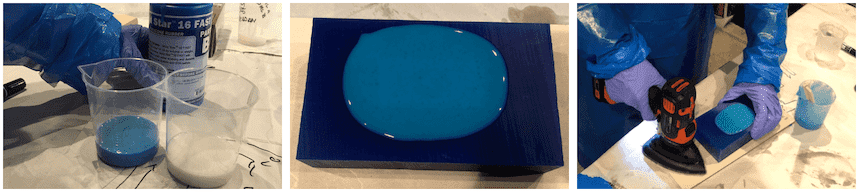
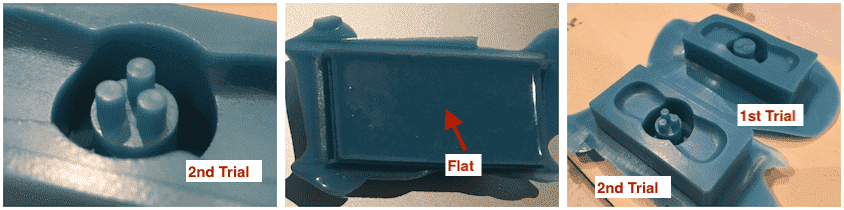
30 minutes passed. Removed the material from the mold.
The bottom of the center was too thin and distorted (right image). So the hole in the center were lifted up.

2nd Mold
Since the 1st mold was distorted, I did 2nd trial.
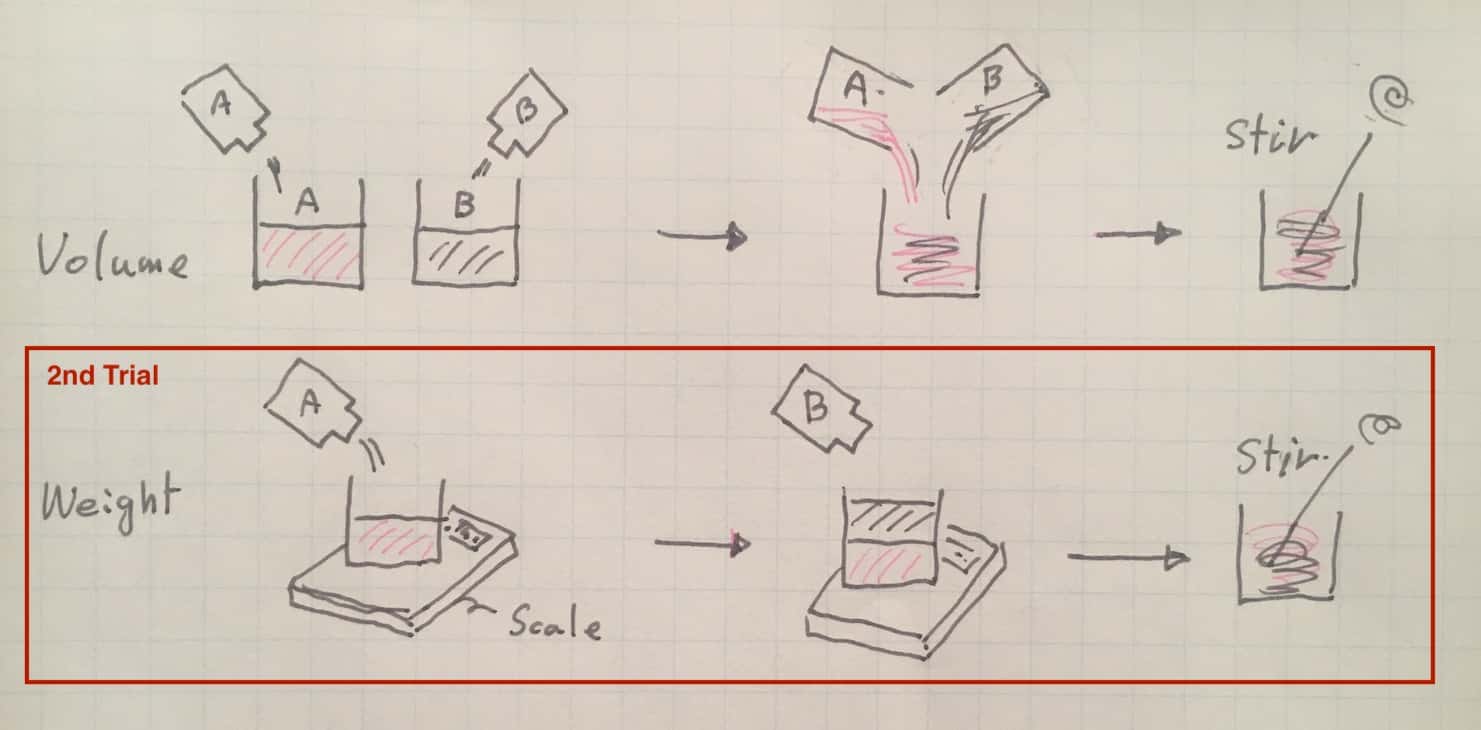
- Improve mixing
At the 1st trial, I measured each amount, then poured in another container. ( the upper example of diagram below)
However I realized that the way is difficult to mix in the correct proportion if the material is high in viscosity. So I changed to measure the weight instead of volume.
- Improve Pouring and Mold
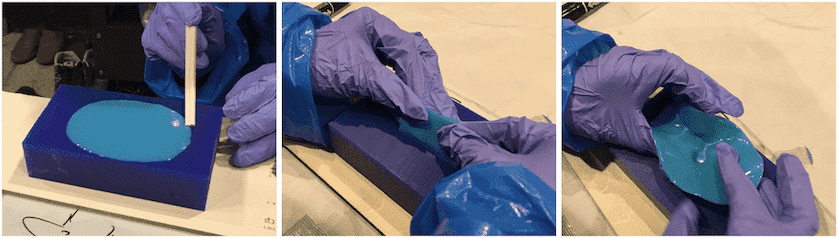
The center holes are so small that I tried to use a stick like toothpick. Applied the material to the stick and paint it into the hole little by little.
And also the bottom of the mold was thickened by surrounding it with Waribashi chopsticks.
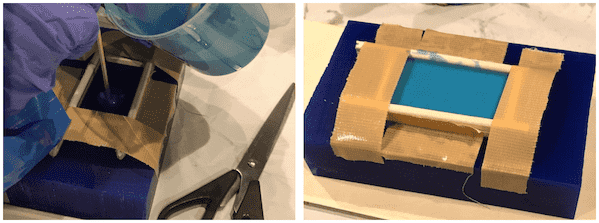
The 2nd trial was perfect as follows.
Casting for object
I used flexible material that we tested at the group assignment.
- Ecoflex 00-50
As the cure time of the material is 3 hours, I left it overnight.
I could take out the 1st trial, but I could not remove the 2nd one from the mold.
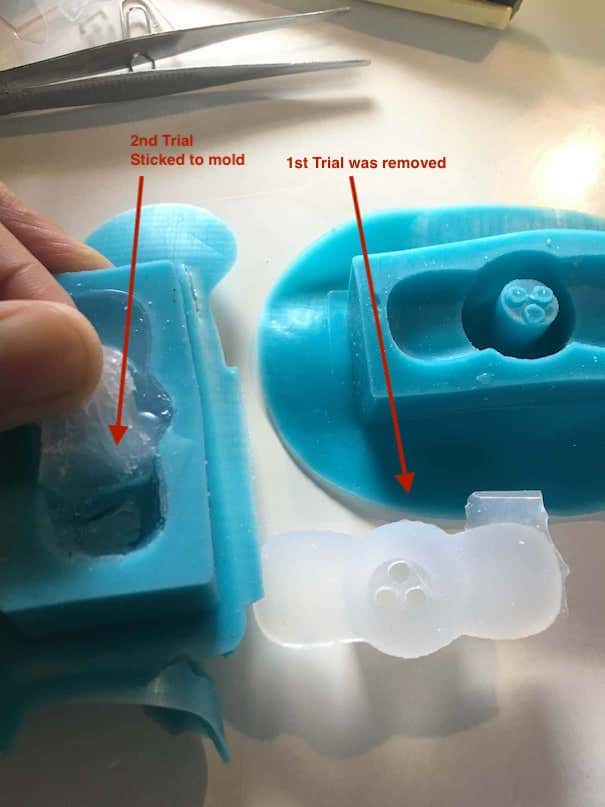
According to the tips: How do I release silicone from silicone?, silicone from silicone seems difficult combination. I tried alcohol and soap, but did not improve.
It is interesting that the 1st mold that the mixed portion was not properly made was able to take out from silicone mold. It did not stick to silicone mold because of its imperfect chemistry.
The molding and casting is really sensitive work flow.
Finally I attached the casted parts to top of mist tube and projected.