Week 6: 3D Scanning and printing
Individual Assignment: Design and 3D print an object (small, few cm3, limited by printer time) that could not be made subtractively.
I chose to 3D print a small box with a built-in hinge that I could store my FabISP in. The part of this design that is only achievable via 3D printing is the printing of the pin inside of the hinge while the hinge housing is being printed, simultaneously. While the pin ended up being so small that its edges were attached to the hinge’s inner walls and broke when I opened it, I learned quite a bit in the designing and printing processes. I feel confident that I would be able to produce a fully-functional, single-assembly, hinged box should I try going forward.
Research: Creating an Object that can only be made via additive manufacture
I initially considered creating a small object with complex internal gears. However, I settled on creating a box that could house and protect my FabISP (last week’s assignment) on a long-term basis, as a reference for future students at our Fab Lab. I favor using Autodesk’s Fusion 360 for my CAD/CAM work, so I watched a few online tutorials on the design and construction of hinges for 3d printing.
Video Links:
3D Printing a hinge in Fusion 360
How to 3D model a hinged box for 3D printing: Part 1
How to 3D model a hinged box for 3D printing: Part 2
That was extremely helpful, and provided me with new tools and techniques to create nested geometries. With that, I set out designing the box.
CAD Design
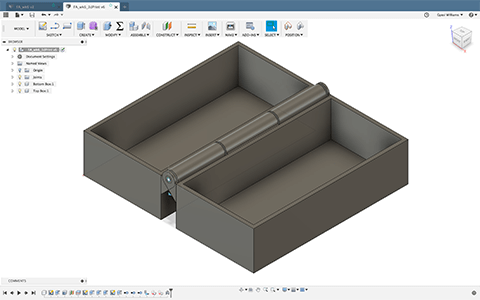
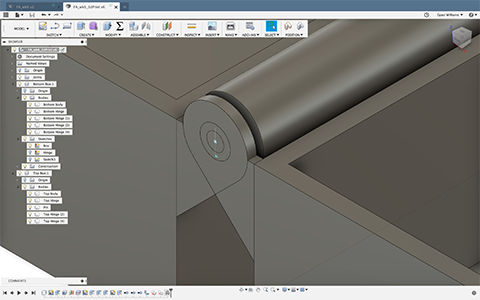
The main tutorial that informed my 3d printed box is this tutorial. I made adjustments to the box’s dimension to accommodate the rough dimensions of my FabISP: 49mm x 20mm x 17mm. The exterior dimensions of the box are 60mm x 30mm x 30mm (not including the hinge, itself). With a wall thickness of 1.3mm, these dimensions still provide sufficient interior space for my purpose. Creating a 3d box with a hollow interior in Fusion 360 was something I could already do. The challenge for me was how to design a working hinge that could be 3d printed, but not possible via subtractive manufacture. Kevin Kennedy’s design (from “Product Design Online” - see the link above), from which I borrowed, makes use of a length-wise pin that connects each hinge through its center running the length of the long side of the box. Using sketches, construction lines, extrusions, tangent lines, mirroring, construction planes, assemblies and as-built joints I was able to design the box, and save it as an stl file.
3d Printing
Our lab has the latest Sindoh 3DWox 3d printers, the DP201. Converting the stl file created in Fusion 360 to a usable G-Code was straightforward. Print time was approximately 2 hours.
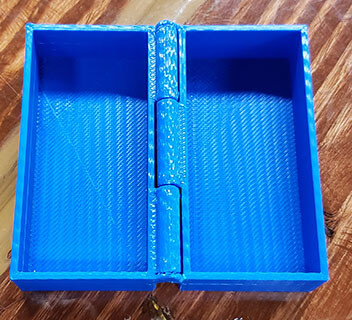
My print ultimately failed, I believe, because the pin connecting the hinge parts was too small and brittle at this size to withstand the torque opening the box for the first time.
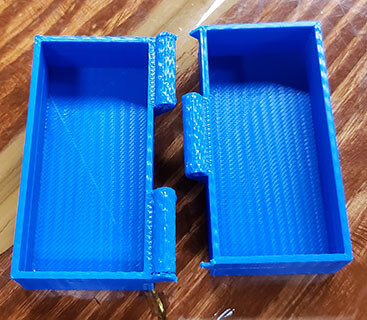
At this scale, the small hinge mechanisms at the edges of the box fused.
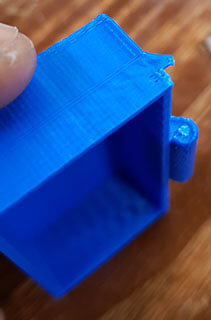
Looking at my CAD image in Fusion 360 at the moment of writing this, I realize that I didn’t separate these thin hinges.
I will adjust my CAD design and reprint. Additionally, I noticed that the interior of the pin print fused with hollow cylinder that it was housed in, despite what I thought were sufficient tolerances to prevent that from happening (the existing “gap” is 0.5mm). Once done, I will update my documentation here.