9. Embedded programming
This week I worked on 3 task(s) on Embedded programming in order to familiarize with both ATtiny 44 microcontroller and programming languages. These were the assignments:
-
Group assignment:
Compare the performance and development workflows for other architectures
(Follow this link to see the group assignment) -
Individual assignment:
1. Read a microcontroller data sheet.
2. Program your board to do something, with as many different programming languages and programming environments as possible.
SUMMARY
-
Have you?
1. Documented what you learned from reading a microcontroller datasheet > DONE
2. What questions do you have? What would you like to learn more about? > DONE
3. Programmed your board > DONE
4. Described the programming process/es you used > DONE
5. Included your code > DONE
ASSIGNMENT
Individual - Program board to do something
Devices description
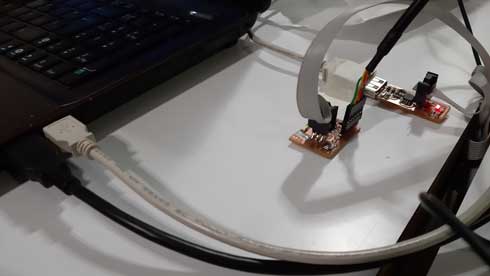
For this assignment I used both fabISP and ATtiny44-SSU LED-button boards produced by myself.
Software description
I used installed software from week05 > electronics production (check it to see my past procedure). As a summary, I can list the software used:
- AVR toolchain
- AVRdude
- Atmel Studio
- GNU make
- notepad++
- Git
- Arduino
- zadig driver
- PATH from MS Windows
Note: Arduino needs to be setup with devices configurations in order to do the programming process. These are the final settings:
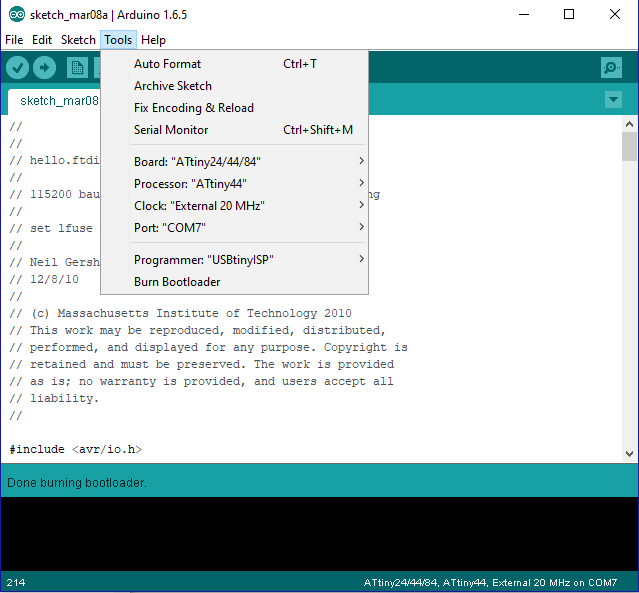
If Arduino does not have the ATtiny44 library, do this to obtain and install it to be able to select the described settings. (Source > high-low tech)
ATtiny44 datasheet
I did a general reading on the device datasheet, and also I founded some general explanations ot the device, like this one:
The ATTiny44 is high Performance, low Power 8-bit Microcontroller with advanced RISC architecture. These are its general features:
- 4K Bytes of Flash Program Memory
- 256 Bytes of Programmable EEPROM
- 256 bytes SRAM
- 12 general purpose I/O lines
- 32 general purpose working registers and 8-channel 10-bit ADC.
- Internal calibrated oscillator
- Operating voltage supply between 1.8 ~ 5.5V.There are two kinds of ports:
- Port A pins are 8-bit bi-directional I/O port with internal pull-up resistors (pin names are from PA0 to PA7)
- Port B pins are 4-bit bi-directional I/O port with internal pull-up resistors (pin names are from PB0 to PB3).
(Source > Javier Alboguijarro)
Also, I recommend to read the official summarized data sheet to have a general idea on a first reading.
The main and most important ideas that I extract from the datasheet is that it is neccesary to consider the inner resources of the microcontroller to understand the whole workflow to be able to program in any language. For example: there are different kinds and uses of memories that must be writen/read (consider adresses and registers), there are different settings in managing the pins and ports (according to the digital/analog processes) and there are timing limitations (cicles, interruptions and clocks). These informations are presented after testings in reliable data tables useful for the different commands and settings of the programming code.
hello-world
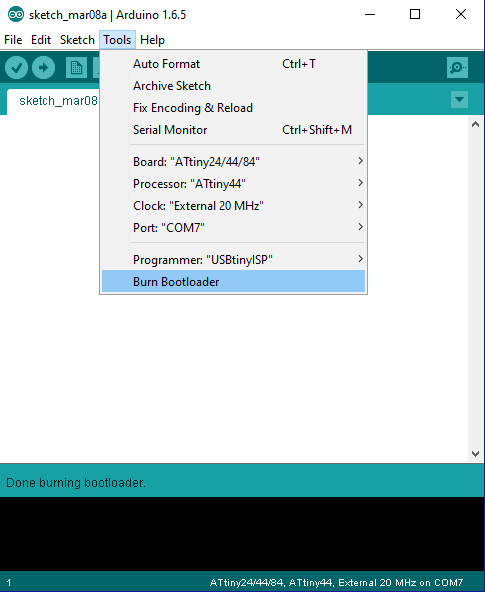
With both boards connected, both between them and to 2 different USB ports, I used Arduino to burn the bootloader in order to allow the board to be programmed. As read on many sources, this is equivalent to the make fuses code.
Then, I copied and pasted the hello-world code into Arduino and uploaded it to the ATtiny44 board using the FabTinyISP programmer (settings showed before).
NOTE > It is not usual to have problems in using the programmer to do this, but, in that case, it is possible to to ensure the use of the programmer in Arduino by pressing the SHIFT key while clicking on the Upload button.
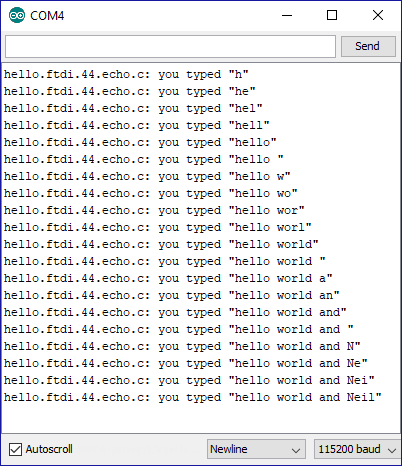
Then, I checked the result by clicking in the Monitor icon and interacting with the code/board by typing a letters, one by one:
terminal + C
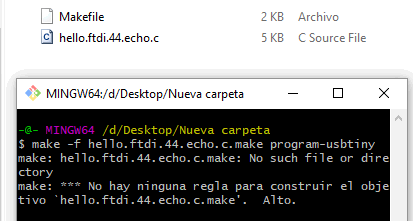
I tried to make the similar process through terminal (GitBash), but I had problems in generating the .hex file. I followed these Fab Academy official Tutorials steps.
NOTE: In this tutorial, the neccesary command to type is not present/explained. I had to go to the source tutorial to copy the command.
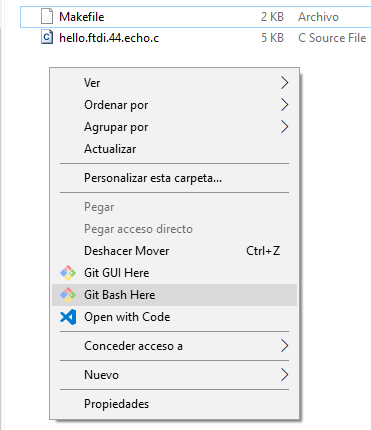
Download the program code (.c) and the .hex generation instructions (.make) and run Git Bash in that folder
NOTE: Consider that renaming the files implies to use that new names as this:
- .make filename must be used in the .hex generation command in terminal:
make -f FILENAME program-usbtiny (MS Windows)- .make file has an instruction at the beginning (first line) pointing to the .c file name. Change this name if you change the .c default filename:
PROJECT=FILENAME
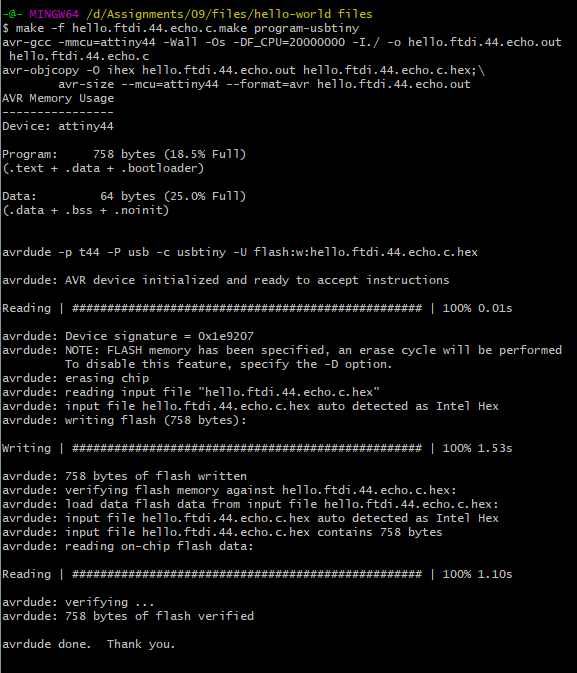
UPDATE:
After reviewing the process and requierements to succed with this exercise, I realised that there was a problem with AVR toolchain installation and configuration: AVR was extracted into %PROGRAMFILES% and not into %PROGRAMFILES(x86)% folder. Also, this route had to be changed in the MS Windows PATH variables list, erasing the another (wrong) one.
Finally, with the two boards plugged as explained before, I typed again the command and IT WORKED!

Atmel
I tried also the Atmel Studio 7 interface to work program the ATtiny44 but I have only could read the device info. Things I found in this process are:
I found that this software presents much interesting graphical information about the device:
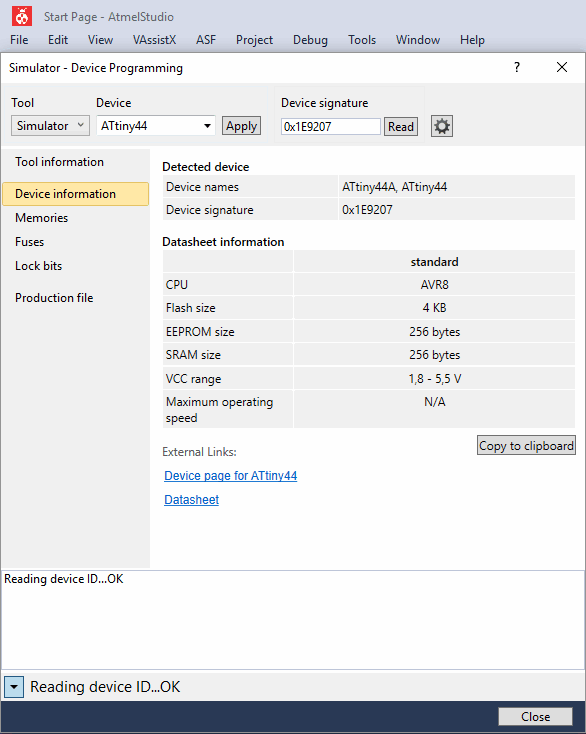
It also sended me to other web info about the device (this is, updated datasheet and summarized datasheet)
* I could not be able to communicate via serial COM (USB-FTDI) port to upload the .hex file
Arduino
I started trying some Arduino codeexamples, and then mixing them to familiarize with coding and programming. I made these exercises: (downloadable at the end of the page)
-
Neil’s hello-world:
This code allows me to receive an acummulative character by character message typed with the keyboard.
-
Blink100-100:
This code sets up the LED to light for 100ms and wait 100ms to start again. It uses delay commmand, that is not recommmended because it holds the whole program and not only the LED actions.
-
Fade10-10:
This code sets up the LED to fadein/fadeout in a loops with 10ms period and on 10 bright value.
-
ButtonLEDon:
This code turns on the LED while pushing the button and holding it pushed.
-
ButtonLEDblink100-100:
This code mixes the Blink100-100 with the ButtonLEDon functions.
-
SerialLOOP:
This code was a simple test to communicate with computer via FTDI serial pins (RX, TX). -
Light-Darkness w/serial:
This code combines the ButtonLEDon code with the SerialLOOP one, returning messages when button is mantained pressed (turning on the LED) and when releasing it.
-
Light-Darkness w/serial - stay: This is the final Frankodestain process in where the code works as Light-Darkness w/serial one, but pressing the button once to turn the LED on, and pressing it again to turn it off, and also with the correspondant messages:
Questions/Purposes
What I inmediately want to learn to do is to control the behaviour of the light by another methods, like sensors that could bring more values to translate them to the light state.
Conclusions
Using fabISP programmer and Arduino/Atmel/terminal reports these main pros/cons conclusions on programming ATtiny44-SSU microcontroller:
• PROS
- devices low cost
- easy to load light programs
- C programming from terminal allows to make some actions at once
• CONS
- low speed at upload step
Original files
- hello-world code files > (compressed pack)
- Arduino exercises > (compressed pack)
WorldWideWeb
Links
Demonstration code for several things at the same time
Programming an ATtiny w/ Arduino 1.6 (or 1.0)
Turn ON an LED with a Button and Arduino