8. Computer controlled machining
CAD Design
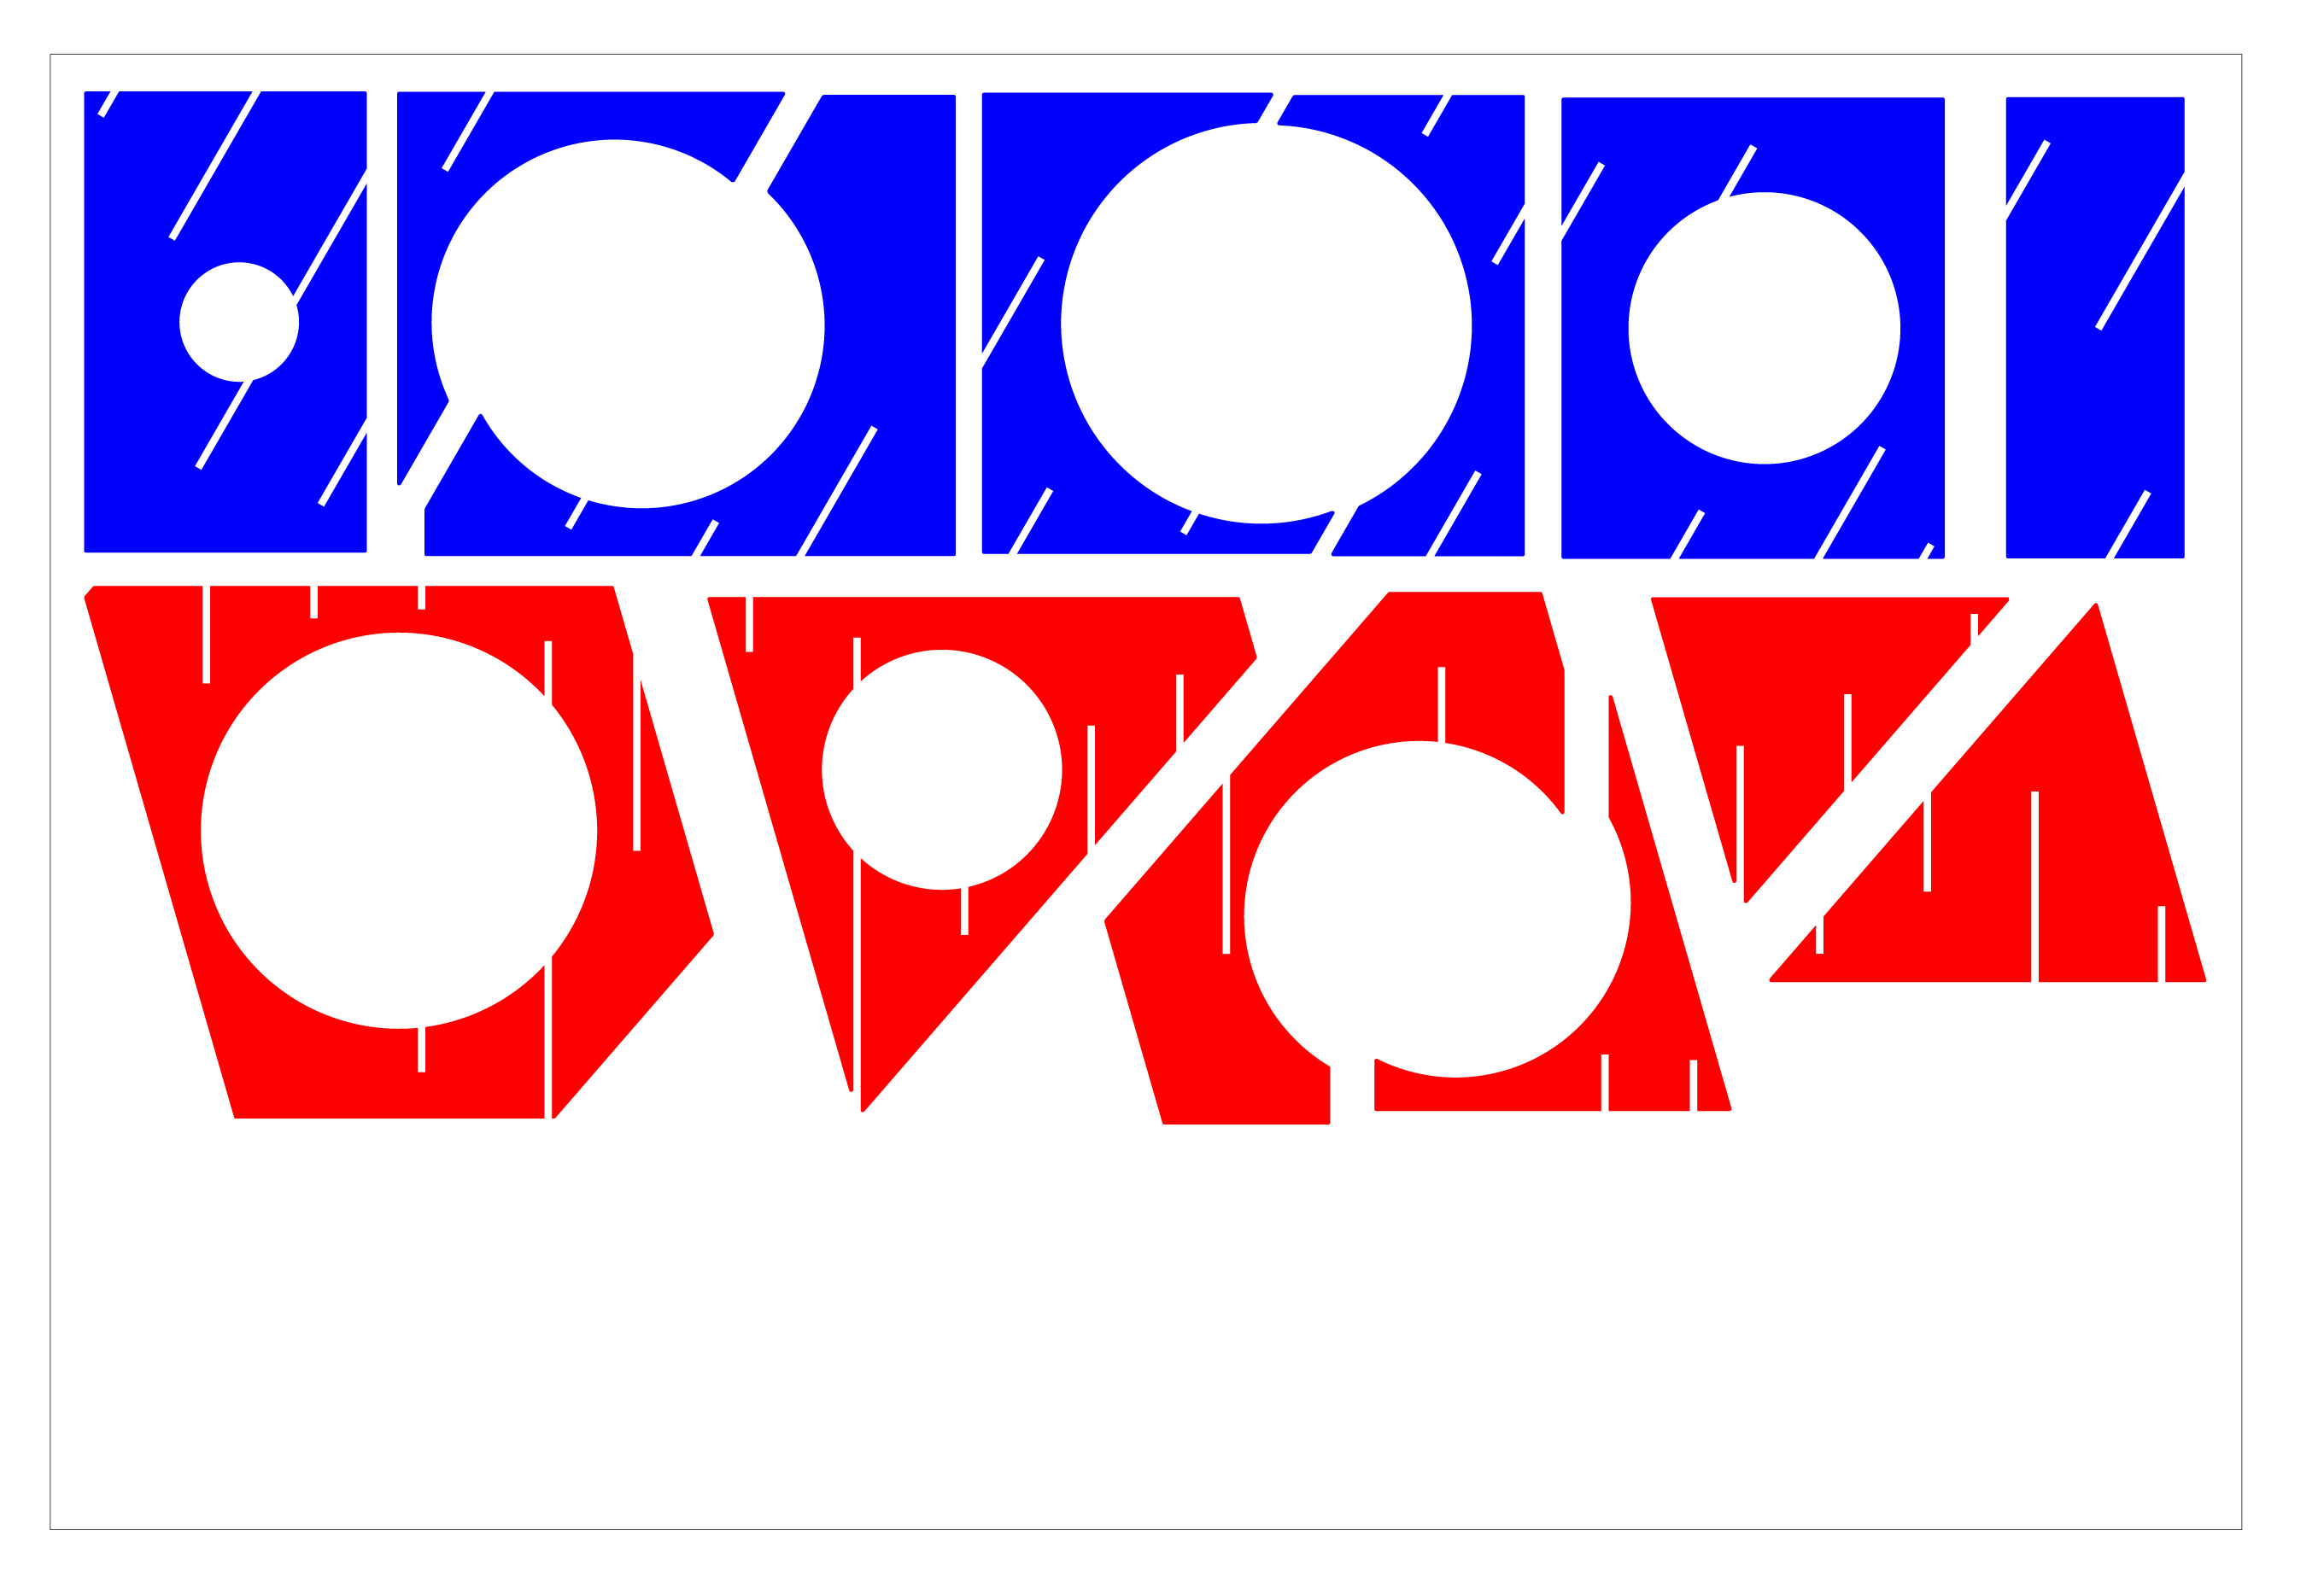
Parts layout
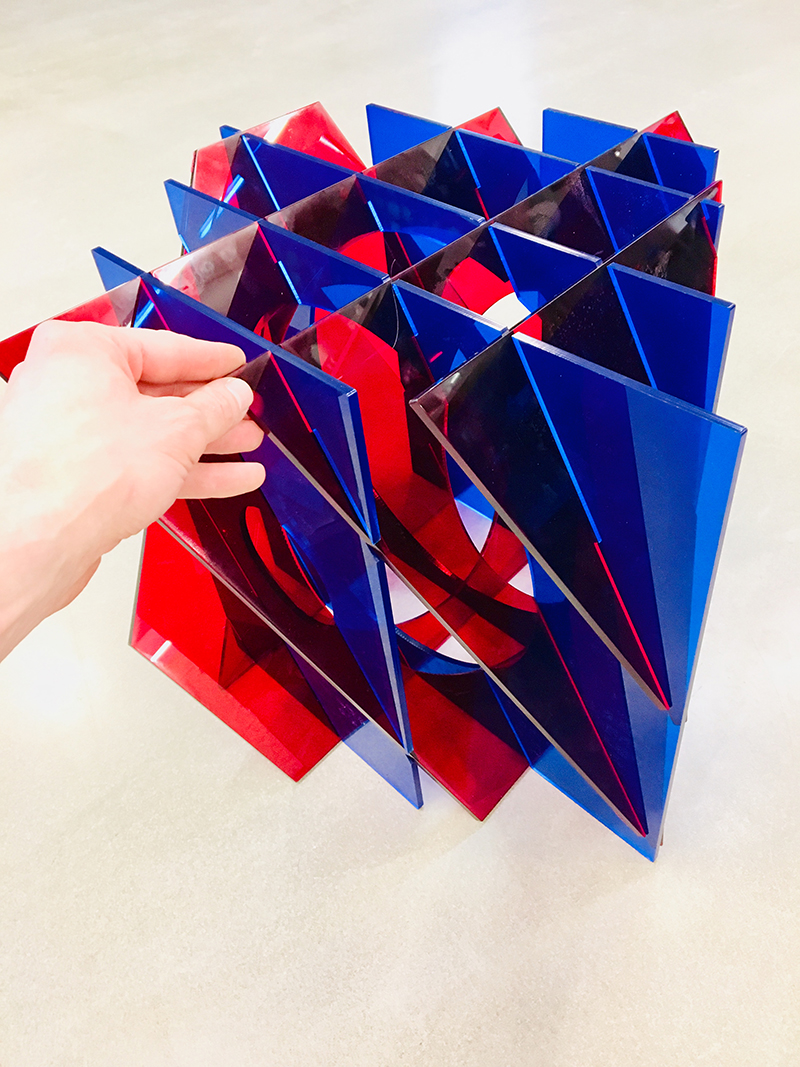
 I first wanted to make a smaller scale prototype on the laser cutter to test for fit and assembly.
Laser Cut Prototype

 Now…to scale it up!
Shopbot CNC Toolpathing - downloadable files
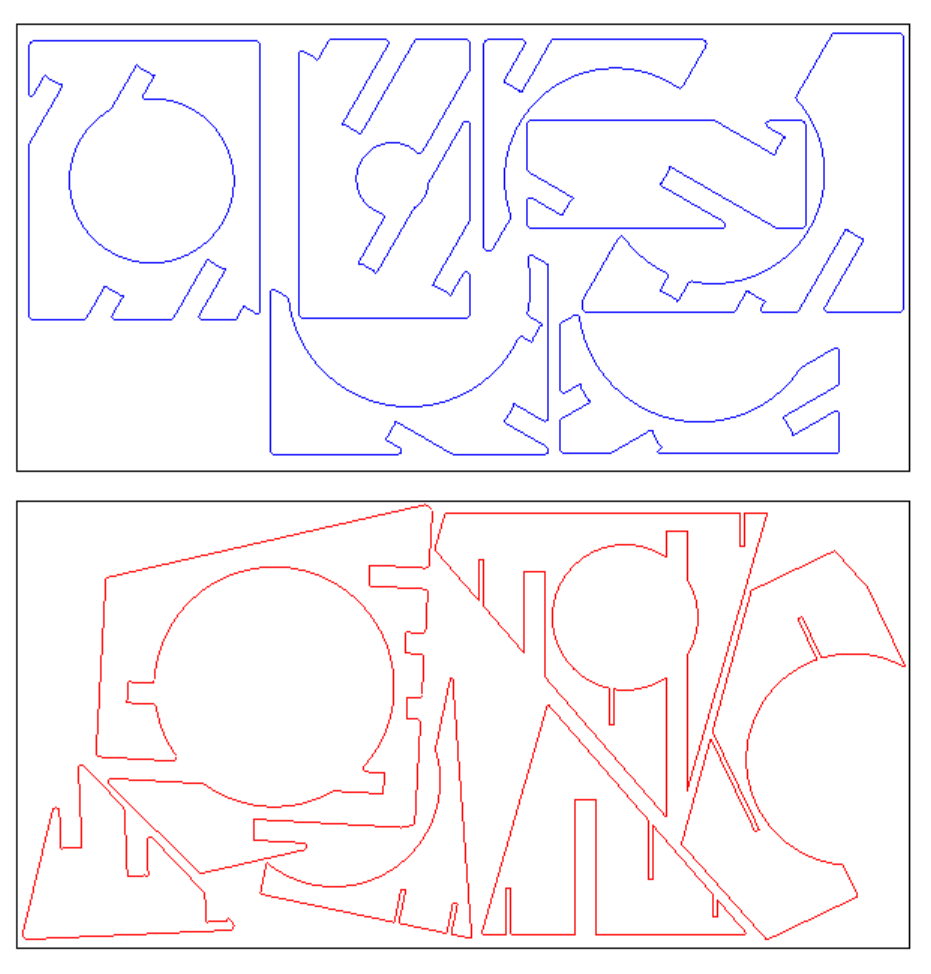
First I remade the parts layout to reflect needed changes for the larger scale cnc cut puzzle.
I used ShopBot’s VCarve program to define the tool paths - all path were set to the Contour method.
Includes: I scaled overall 2x the original size. I added dog bone corners, and I made the parts 8X thicker so that they’d be more chunky at larger scale as opposed to planar.
Rhino parts layout download files
2D Workflow
Here’s a Rhino screenshot to illustrate a 2d workflow for modifying the red geometry to be ready for milling, the black geometry.
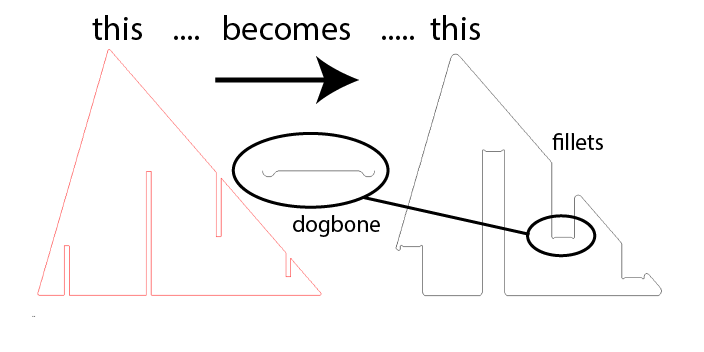
The main 2D drafting operations I used were fillet, offset, move, rotate, and join. By using thicker material I need to offset the lines to make the gap wider. I also need to account interior corners when using press fit/slotted geometry, hence the dogbone geometry. This particular dogbone geometry uses a double fillet so to prevent any sharp corners. When modifying this particular piece I had to remove a significant chunk of material from the bottom left corner By widening the slot, it left a really small pinch point in the material which would have likely broken off after cutting. So I made the decision to remove the geometry to the left of the slot, however I left some small nub to help hold the parts together.
VCarve
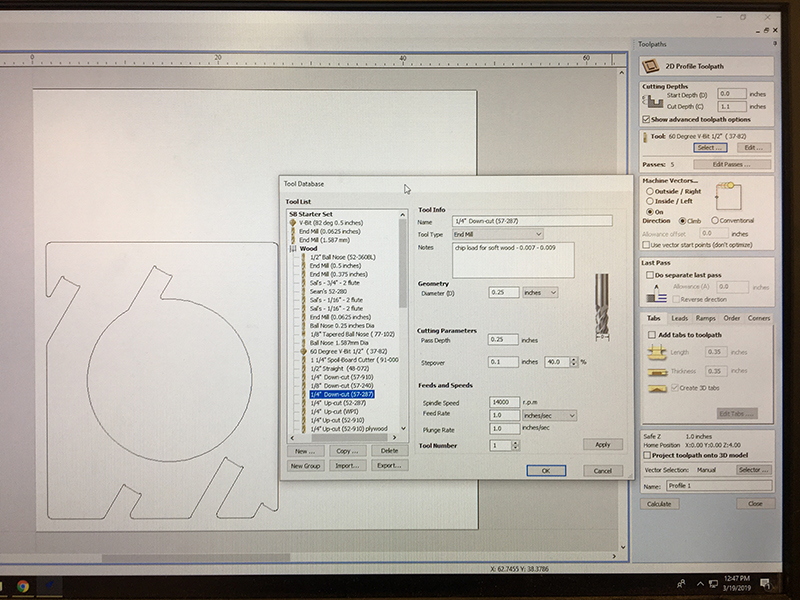 I used Vcarve to generate the gcode for the piece. In this photo I’m selecting the 1/4” downcut tool, and making sure the feed and speed and rpm are appropriate for the material. I also can set the pass depth and stepover here. Since this is just a profile cut, I don’t need to worry about step over dimensions. However, in the Casting and Molding Week, I did adjust these settings to get the precision of the slope.
CNC Cutting
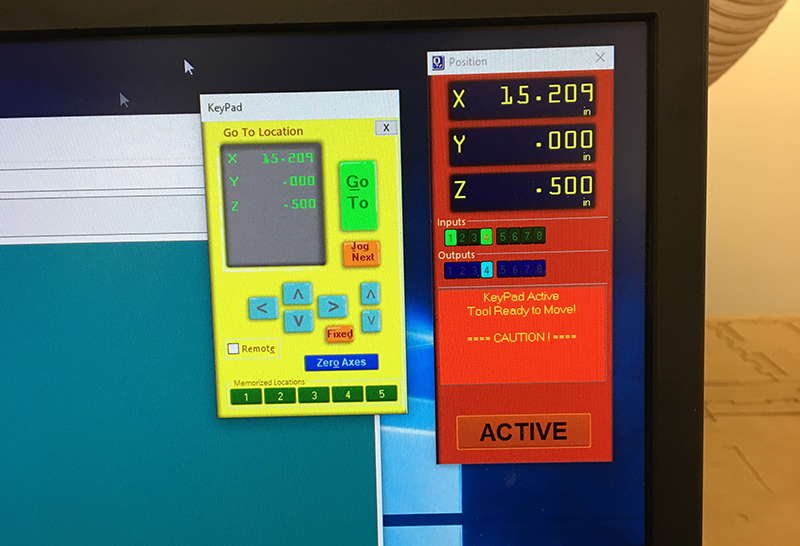 Here is the Shopbot control interface. First, you need to manually jog the tool over to your 0,0. You do this with the blue Keypad arrows.
 Our sacrificial layer has been sacrificed!
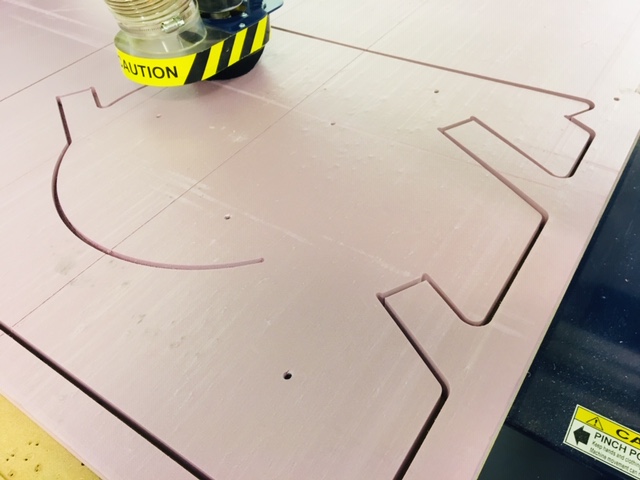 The 1” foam cut quite well. I could probably speed up the feed rate.
I secured the parts to the table using wood screws.
Final Piece
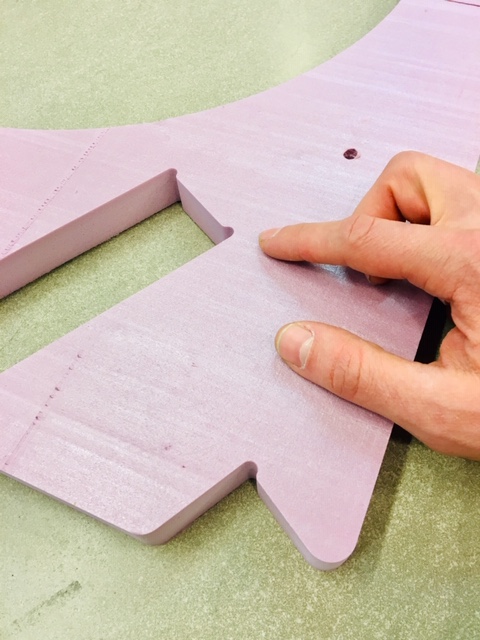 Here’s a detail of the dog bone design - a modified ‘H’ section. I’ve also added fillets to the all exterior corners to mimimize breakage.
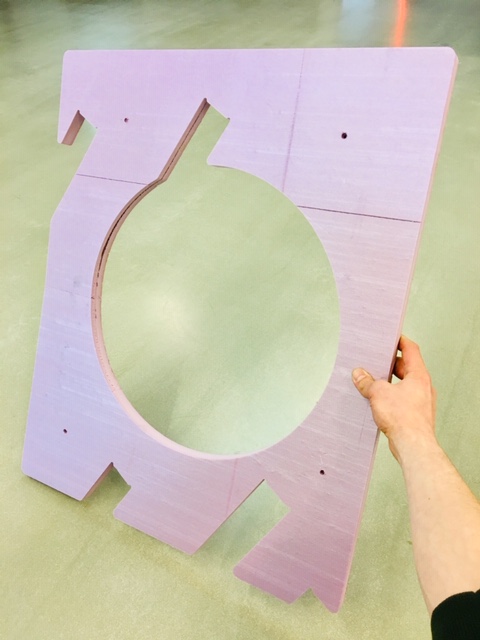 Here’s the full piece! It’s about 30” tall, 1” thick.