Computer-Controlled Machining
The assigment page
The goal of this week was to model and cut with a big CNC milling machine something big!.
⇝ 3D modelling in Fusion ⇝ CAM ⇝ Milling
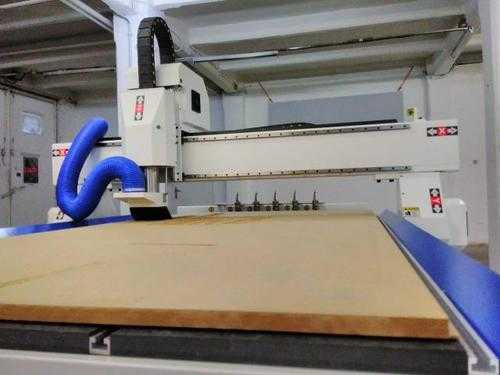
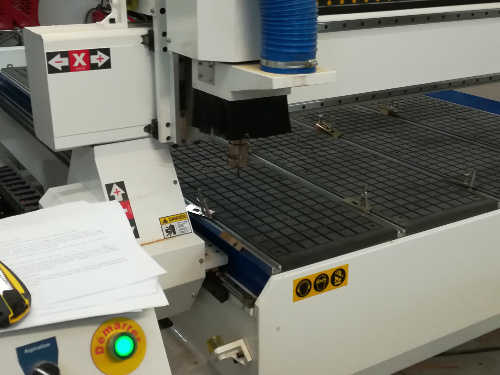
The Imal's CNC machine
Imal has 2 CNC, a little (I will talk about it in few weeks) and a big one. It's a ML2512:
You can check wikImak for more info.
Some specs:
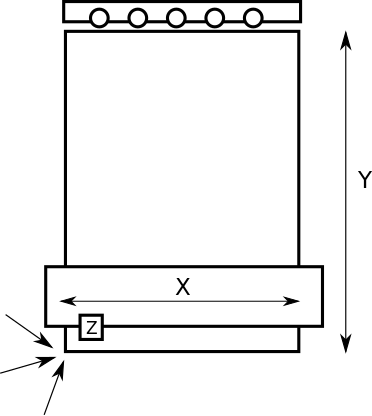
(Y)2500mm*(X)1500mm*(Z)150mm
Rooter 3kW
Automatic tool changer (and height compensation)
Vacuum table
It has a vaccum table and an aspiration system.
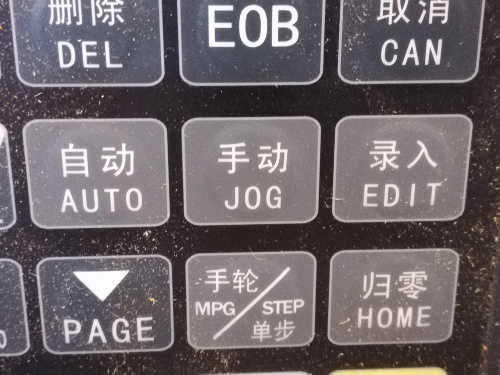
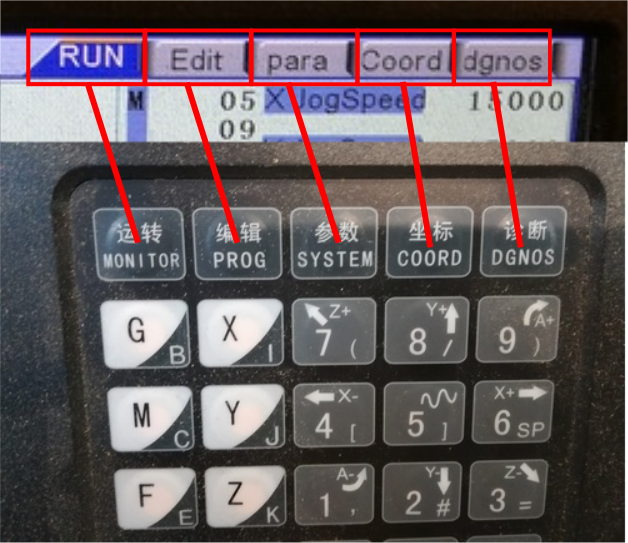
Here's ML2512's controller, an ADTech ADT-DK400A:
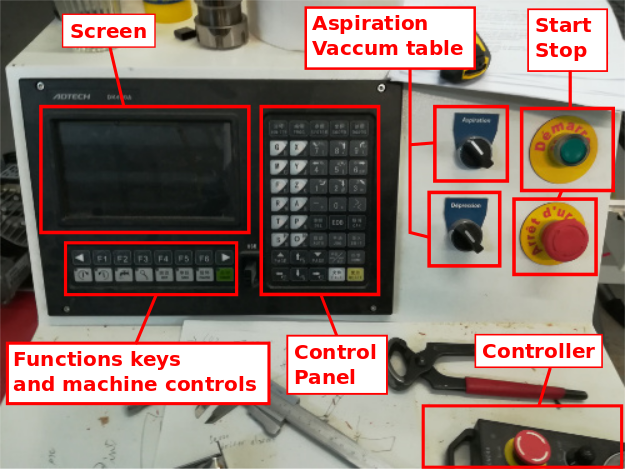
Screen: Display the interface.
Functions keys: Each function key is related to an option displayed above it.
Machine controls: Using to start or stop the spindle, pause the machine or start a job.
Control panel: A lot of keys for a lot of options, most of those are explained below.
Controller: an hand-controller for move the axis or start/stop the machine.
Start/Démarrer: To boot the machine, push this button for few seconds.
Stop/ Arrêt d'urgence: To shutdown the machine or, in case of emergency, stop the machine.
Aspiration: A switch for start or stop the aspiration.
Dépression/Vaccum table: A switch for start or stop the vaccum table.
How to mill with the ML2512
1. Boot the controller (and the machine) by pushing the green button on it.
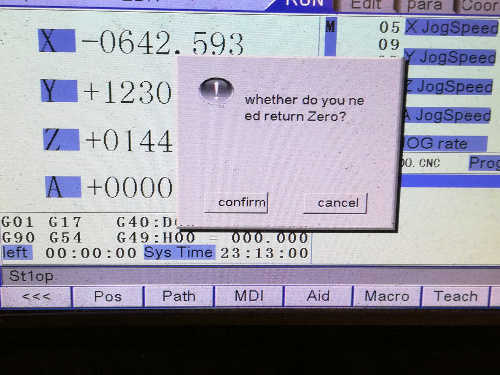
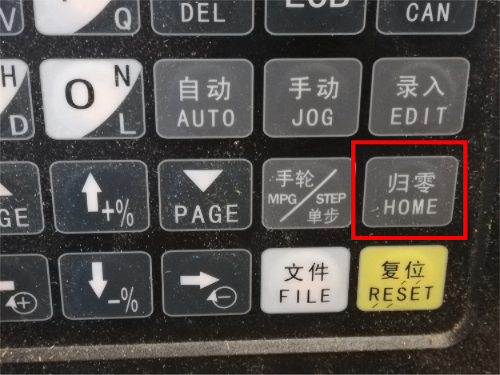
2. This screen will appear. It's asking for automatic homing:
For choosing one or another you need to find those buttons:
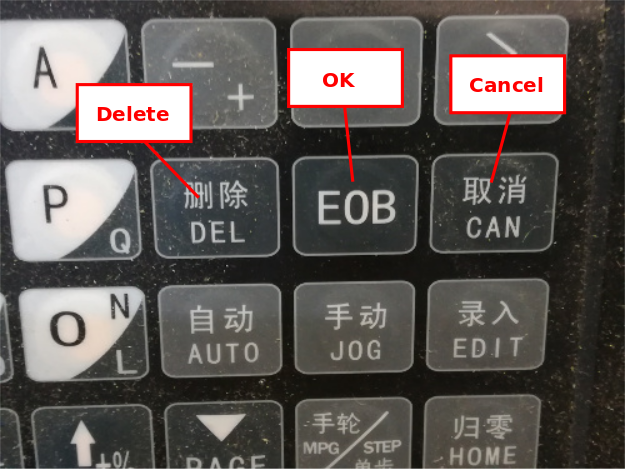
DEL -> Delete.
EOB -> Confirm, Ok.
CAN -> Cancel.
If you click OEB, Confirm, so it will do an automatic homing.
But it's very slow.
So you can click CAN and move the axis manually.
Click on "JOG" on the control panel:
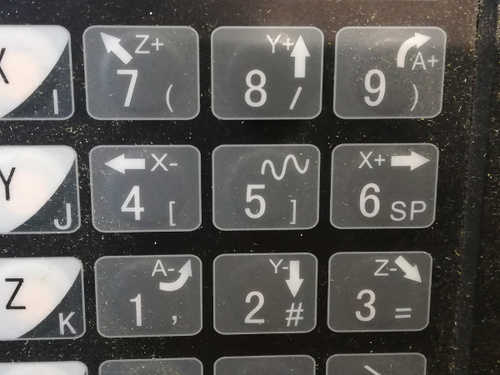
Now you can use these keys to move the axis. Z+ and Z- for Z axis, X+ and X- for X axis and Y+ and Y- for Y axis:
Move the head in the bottom left angle of the machine. Don't touch to Z axis:
When it's done, click on Home, then Start to automatically homing the machine:
The machine will move a bit and stop. It's done!
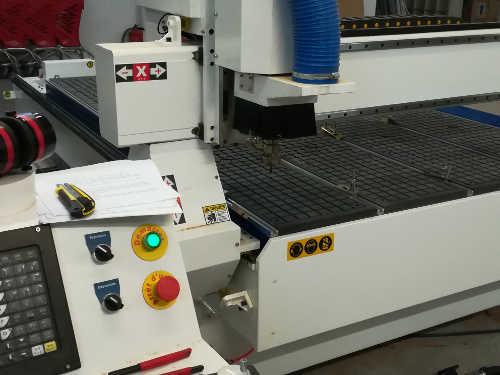
Now can put your material on the table. If there's no sacrificial layer, put an 6mm (not 3, not 9, 6.) MDF sheet. Push the "Depression" button to start the vaccum table and flat your sheet.
If you don't want to use the depression (or if it doesn't work) you can use clamps that you put into the slides:

When I used the machine for this assigment depression didn't work (the seller forgot to obstruct the pipes resulting an important air leak).
I clamped the sheet.
3. Set the 0 for your cut:
/!\ The machine have an automatic tool changer. Set the origin ALWAYS with tool 1 even if you'll use another tool. /!\
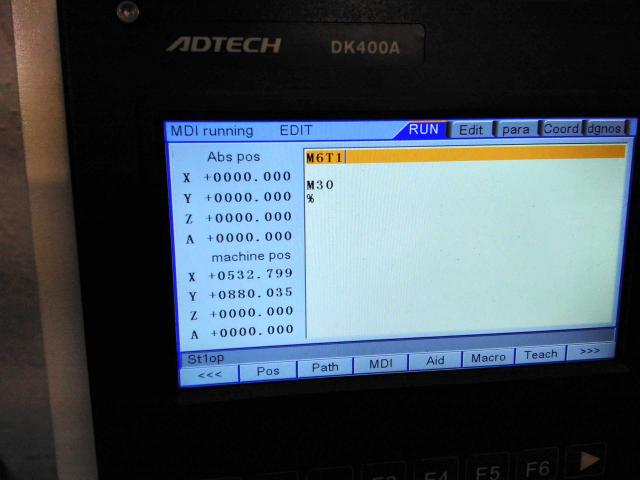
To change tools, you have to enter this G-code in the console (in RUN menu, push F3 button under MDI option):
M6T1 for tool 1,
M6T2 for tool 2, etc.
Use JOG to move the head above your material. For more precision, use the hand controller.
Click on the "MPG/STEP" button to be allowed to use the controller:
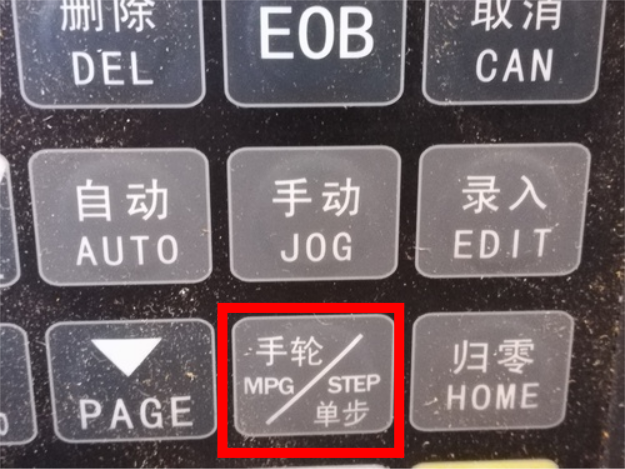
Now the button on the controller can be use:
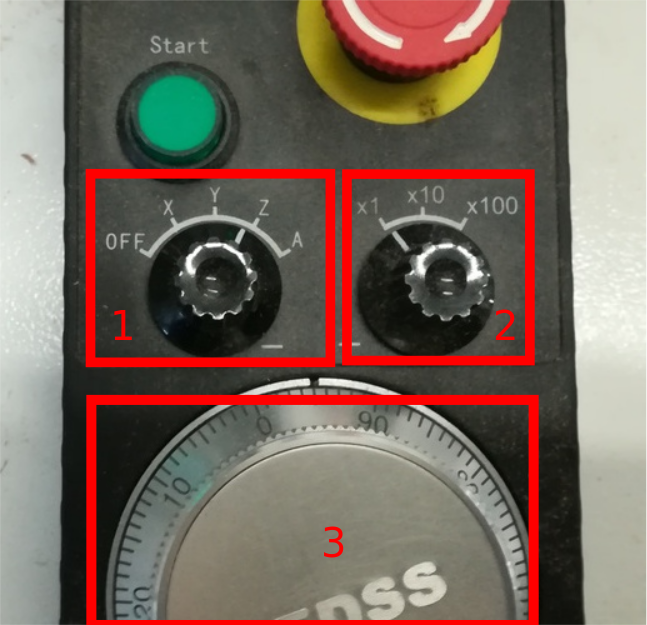
1. Choose which axis you will move.
2. Choose at which steps you'll move the axing.
3. Use this knob to actually move the axis.
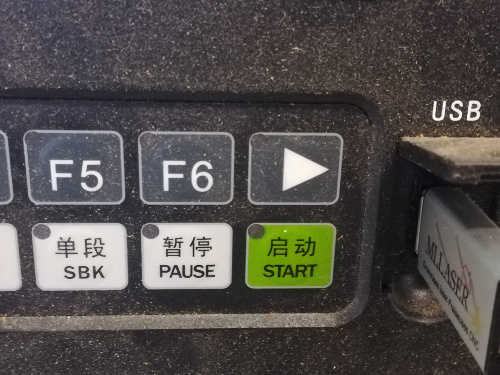
Start button is use for starting the job and the stop one for stopping it. If the milling machine refuse to move and makes some "blips" perhaps this button is still pressed.
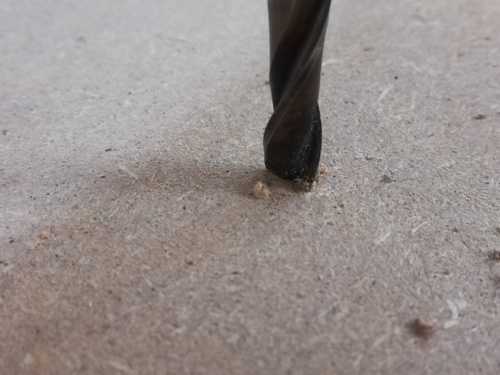
Use the hand controller to move precisely the axis for your origin. X and Y are pretty easy. For Z axis, move it near your material or the sacrificial layer (depending which Box Point you've set).
When you're touching the material roll the head with you're hand:
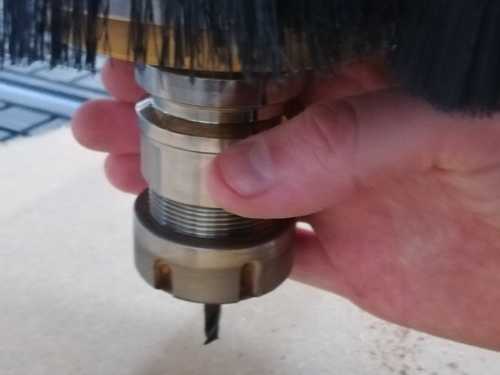
When you're starting to mill a bit the material stop it.
Now turn the hand controller off and push on "COORD" on the controller. Each of these buttons are related to one of these tab:
When you're in the COORD menu, just press EOB, a message will appear and push EOB once again.
The origin for your job is set, use the JOG command to move the end mill away (if you reboot the CNC, these values are saved).
4. Loading your file and starting your job:
To load your file, push EDIT button.
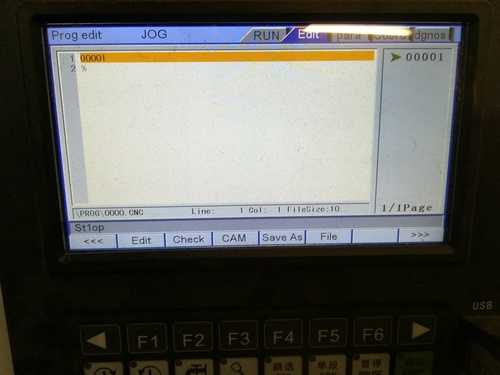
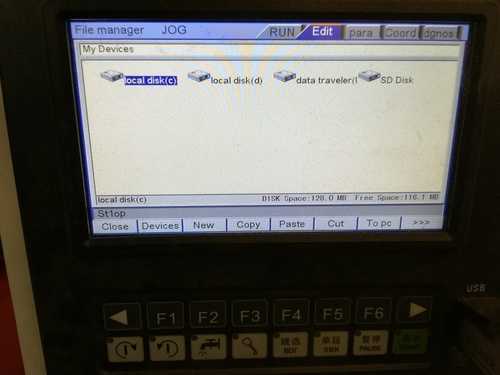
With the "F" keys, select "File". You're using an USB key so move the cursor with arrows keys and select "Data traveller".
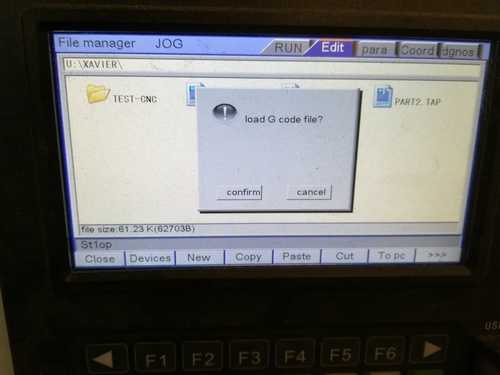
Select your file, confirm with EOB, push Auto key and START!
My furniture was easy to assemble, here's the result:
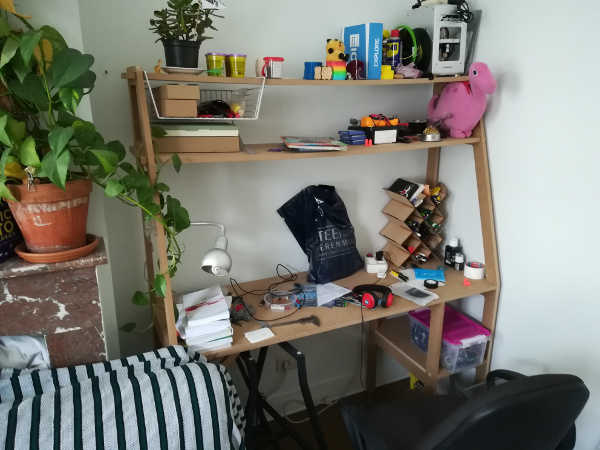
As you can see, the desk is quite strong but shelves are too wide and sagging.
EDIT: I use it everyday since that week and I'm very satisfied!