composites
.
lecture / slide: Fabacademy 2015 04.22D Lesson12: Composites MIT CBA Composites.
topics: materials, vendors, design, processes, molds, safety.
assignment: design and make a 3D mold and produce a fiber composite part in it!.
experimentation: Working for my final project I am in need of a container that can hold my soil-clay-seed mixture. The requirements are waterproofness, stability and if possible having the possibility to open it (for cleaning purpose). I imagined a cylindrical piece that can hold a stepper engine on top (having a rchimedes screw attached, inside the volume) that will extrude the paste from the container through a pipe. Both the screw and a final piece to connect the container to a tube will be 3d printed and detachable. Both sides of the container are connected with screws or clamps along their edge and can be detached in a very fast time. I will also have to consider a fast way to refill the container once the substrate is all gone.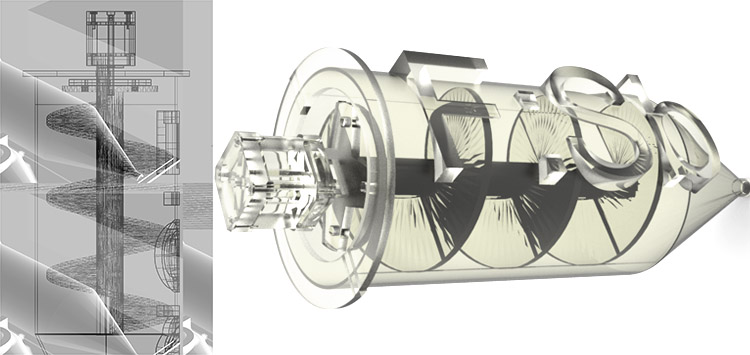 Once I completed the geometry, having production-based constraints in mind I found some XPS foam, measured it and imported it as my stock. The process is running two processes, one horizontal roughing that takes out a lot of material in the first place and not being precise plus a parallel finishing operation that is detailing the surface. The tools used were 12mm ball mill for the roughing and 6mm ballmill for finishing. I also changed to a speed of 1000 mm/min and spindle speed of ? (DOCUMENT THIS BETTER TO BE REPRODUCABLE). all settings. .. Since my stock was 90mm high I used the Precix Mach3 Milling machine (the ShopBot wouldnt allow to use that high pieces):
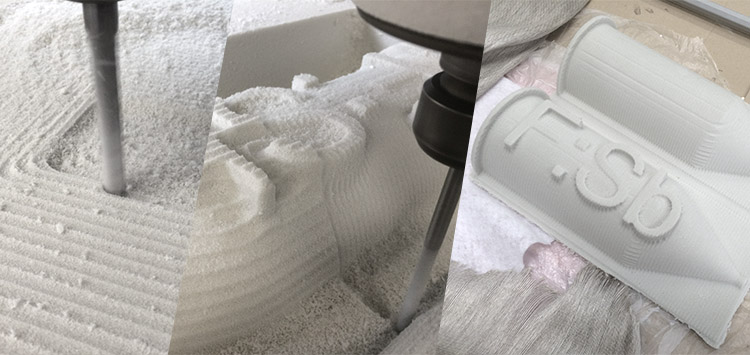
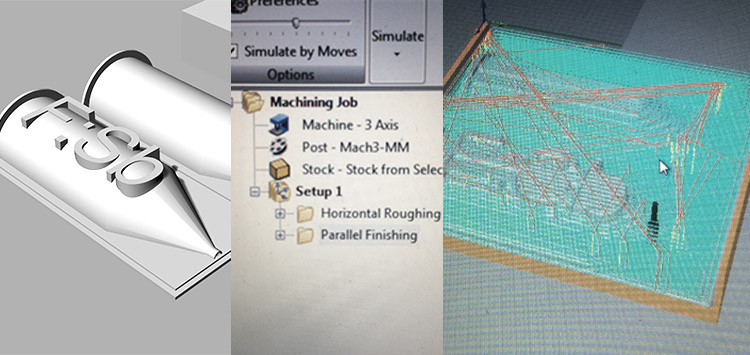 First again, the horizontal roughing. I ran this process with reduced speed and eventually changed my stock piece since the file strangely enough wouldnt fit anymore (about 10mm). Better measure your stock correctly and save yourself from a lot of trouble! Also make sure to fix the stock to the board, which can be tricky with foam but double sided tape and some wood helps. If you use wood or other foreign objects to the foam make sure they dont touch the machine or even the millbit, this can be dangerous. The second iteration was the detailing, I just changed the toolbit in the middle and reset the z Axis on the full height of the foam (Stock was placed below zero in my 3D model and CAM file). After roughly two hours for both sessions of roughing and detailing I took the piece out and as you can see I already prepared the materials that I will use for the composite assignment:
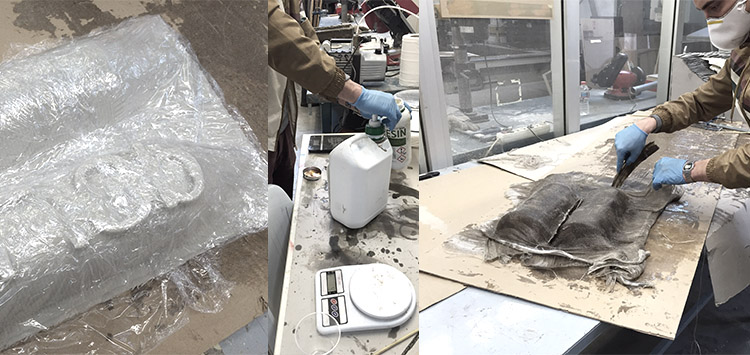
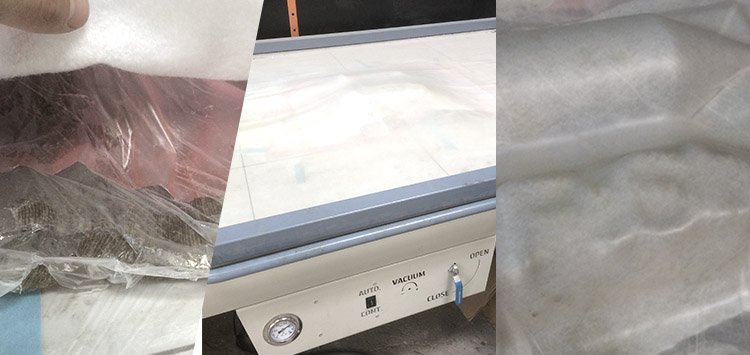
 The piece itself was covered with plastic foil that we have in every kitchen. This will ensure that the resin does not go underneath the surface and even dissolves the foam. Get some gloves, a mask and actually even glasses in case you have. The resin is epoxy resin plus hardener that is mixed in a ratio of 100:47. Take a plastic cup, measure it on the scale (minus the weight of the cup of course) and mix it well, keep in mind that pot life is only 25 minutes! I prepared the clean workspace before and saved the table with some cardboard, otherwise the resin will leave some nasty marks. I layed a layer of burlap (also precut in order to get the right size and not waisting pot life time of the resin) and applied a good amount of resin on top. The burlap textile is laying on the cardboard, you just cant see it because I could take proper selfies when doing this step! The textile will appear wet and should be completely covered by the resin, use a piece of wood or a a brush to apply the resin. Now take the textile on two corners, lift it up without having it glue together and apply it on your surface. Push the material gently down and make sure its all well covered by resin and repeat but apply the next layer in a different orientation because the textile as a fibre direction and a cross-layered composite will give you more strength:
 The machine we were using was a air-vacuum press that can achieve a pressure up to ten tons. On top you will find a sort of doorframe on which a flexible rubber plane is connected. Make sure to not put plastic above or very close to the pins of the vacuum machine where the air will be sucked out and double check again if your covering technique makes sense, the resin should not leak out since it will glue the machine together and you will be in medium sized trouble. Turn the machine on, close the gap and the security handles and watch the magic taking place. Dont turn it on too strong though if you use foam because the rubber surface will try to press your material together (just think of it as a pressure tool). This will take the shape of your piece and make sure to press the burlap layers nicely together. Even for some hours (I left mine in for 6 hours):
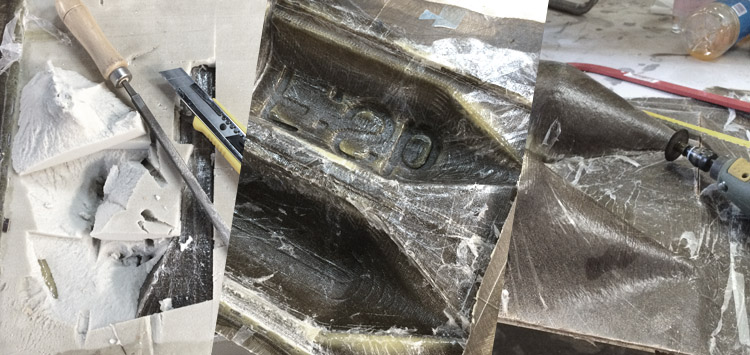
 Getting the mold out was quite some manual labor and I wish I could have saved it to reproduce it but a jizzle and a cutter knife helped to get the styrofoam out that was still glued on some spots and hard to grab/break. After this process I tried to cut off the spare parts of the composites, both with a hand saw and a Proxxon tool. RIP Proxxon. Make sure to wear goggles and a mask, this is still nasty epoxy resin!
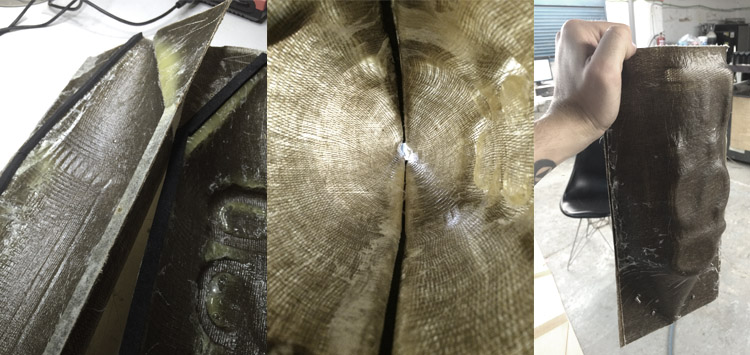
 Once the parts were cut apart and cleaned I added some foamtape to make the construction more or less tight when I pour in the material. I am not sure if I can keep the idea of using it for my final project but nevertheless this assignment was great fun and opened up a new understanding of composite processing. I drilled some holes to attach both halfs together and be able to open it as well to clean it or when material will be stuck. The idea is to connect a tube that goes to an extruder and not as I initially intended to extrude straight out of the container. Check the finished piece here:
.
files: Files wlzr Fab Academy '15 // w13.
bookmarks / links: Wikipedia - Composite material.
global review: Fabacademy 2015 04.29B Review12: Composites-

Any content on these pages by Alexander Nikolas Walzeris licensed under a Creative Commons
Attribution-NonCommercial-ShareAlike 4.0 International License