"Design a 3D mold, machine it, and cast parts from it"
Well ok then! Steps 1 and 2 were done with Tinkercad and the 2Bot respectively. I cover Tinkercad during week 5 and 3D printing here. The 2Bot is a neat milling machine for Expanded Polystyrene (EPS), higher density foams, machinst wax and I am doing research with mushroom foam.
Tinkercad and the 3D mold
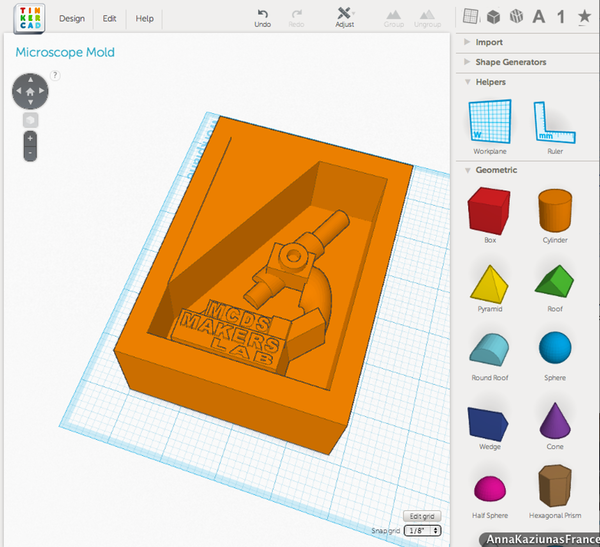
The 2Bot uses a tray that suspends the material in two tension clamps held right and left. It defines the Z top by calculating the middle of the clamps less one half of the height of the material. Not an ideal situation as no "bit drop" z calibration is available. I am sure this is to keep things simple, but results in errors. It does allow you to flip the material for two sided cutting as well as scaling the model to any size you want by calculating the material needed. This is all done in software. All path calcs are also done in software.
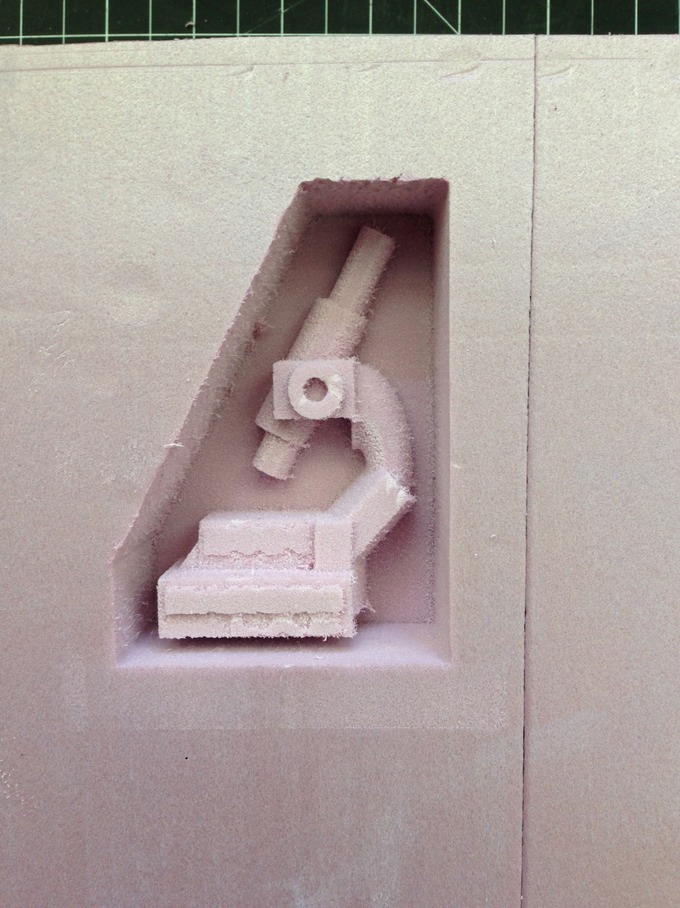
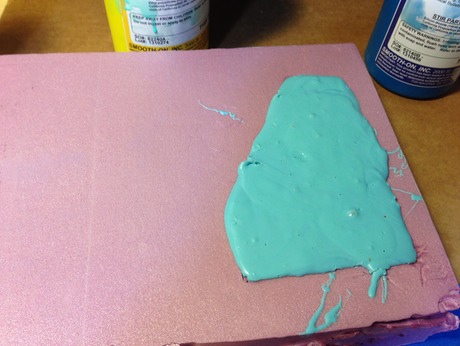
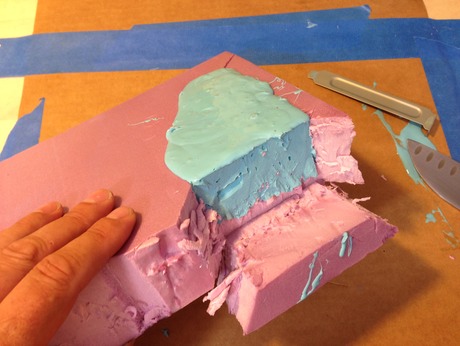
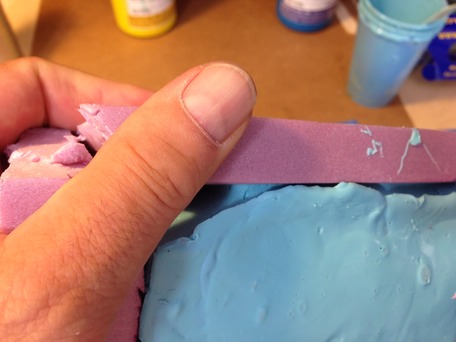
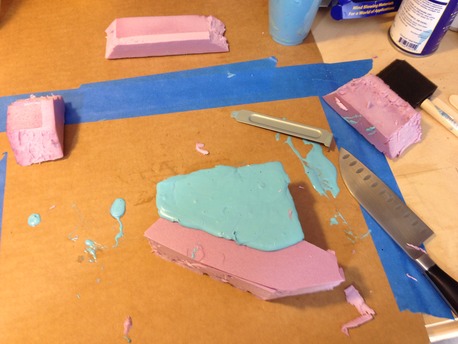
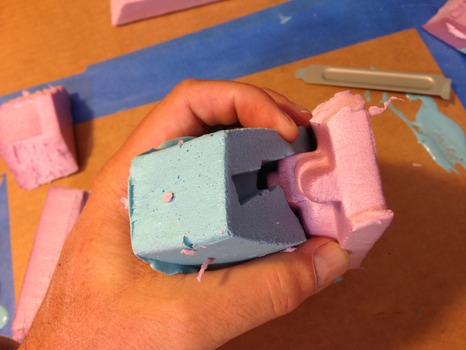
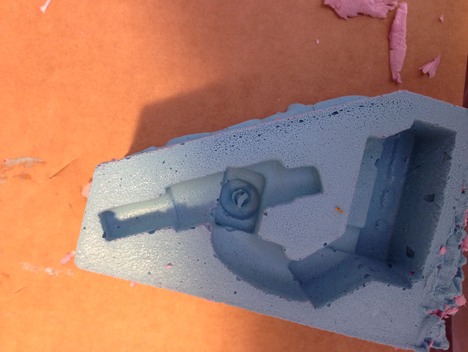
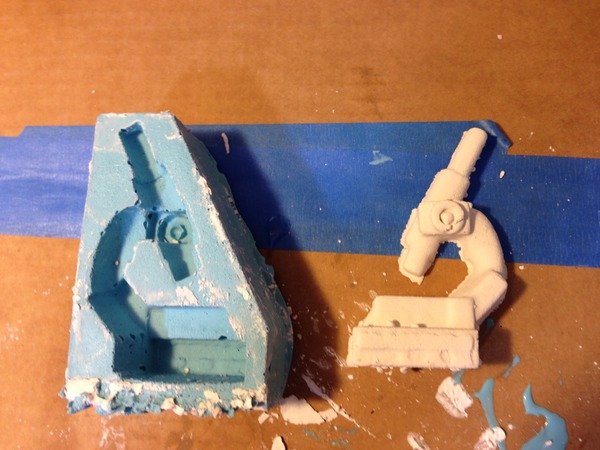
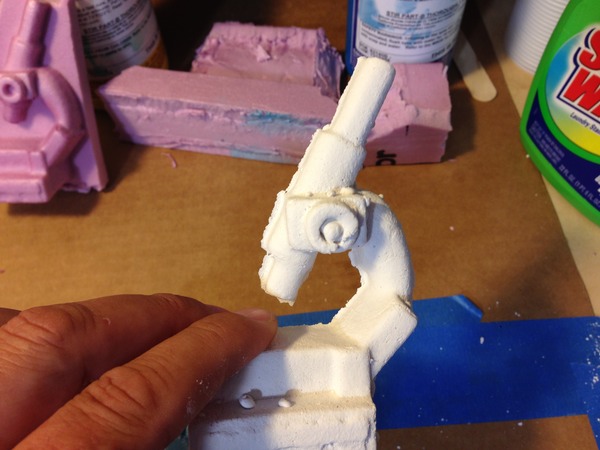
The model machined really well, but I left it a bit tight on the bottom. You can also notice all the little "hairs" hanging off of everything. This was done at a resolution of 0.01" with a 1/8" bit. I am uncertain how the 2Bot will handle a different bit as it is a unique design.
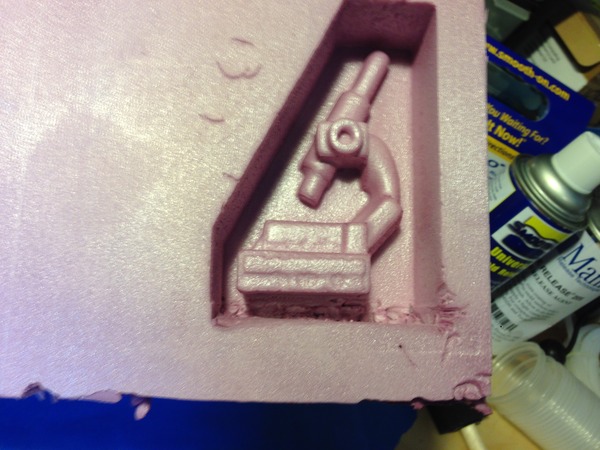
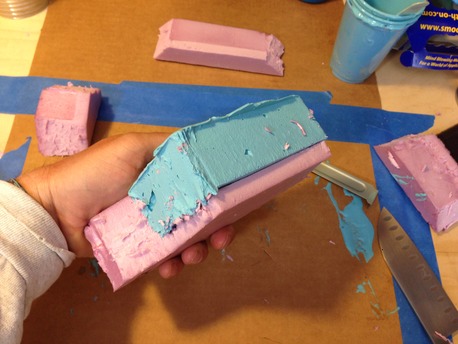
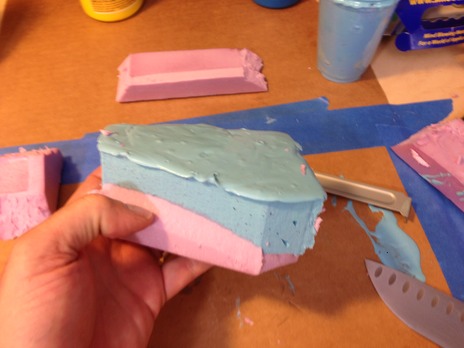
As you can see in the below picture, after applying a little heat with a heat gun the "hairs" melted and the surface became more sealed. You can also see where i manually expanded the bottom of the mold. I learned that if you do a two-sided cut (a small checkbox in the 2Bot software) it will ask you to flip the model to do the opposite side. I did not need the other side cut and did not want it to cut out the mold (see model above in TinkerCad). If you select two sided and never flip it will not cut it out.
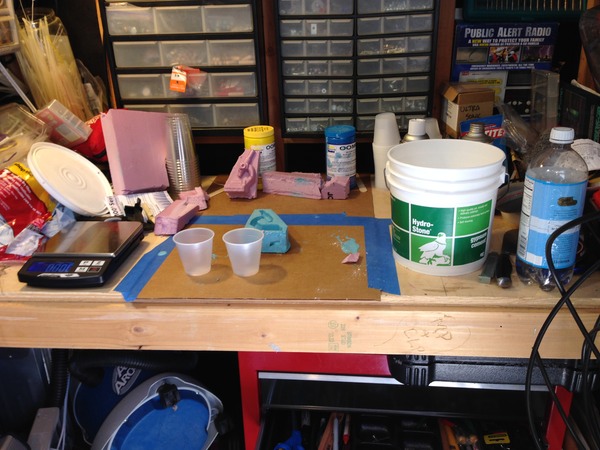
Getting the work area ready...
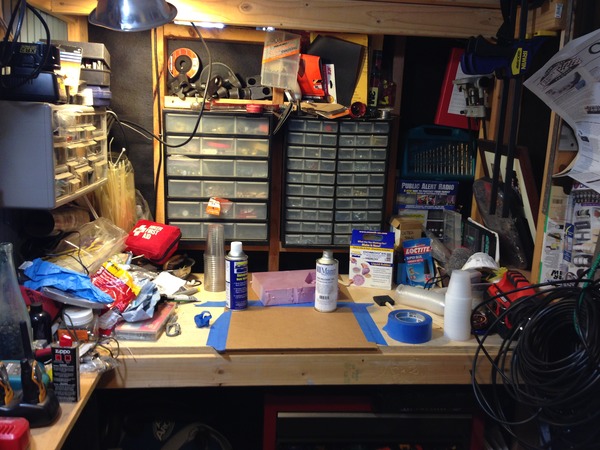
- Prep area on table:
- Oomoo 25
- Mixing cups
- Gloves
- Protect work surface
- Face mask
- Demolding release agent
- Mold (EPS microscope)
- Mixing sticks
- Since I am working outside and there is a breeze, move mold inside on cardboard after pour (pour inside?)
- I may move the whole operation inside as the wind is annoying and may impact the pour.
- Mix the Oomoo part A and part B by hand in containers with a "square" edged device per tech video
- Measure out into cups in equal parts and mix a bit more
- Combine cups into one or the other and mix some more
- Pour mixed oomoo into another clean cup
- Pour into mold in very fine stream very slow and let it level itself out (this is where the wind will mess stuff up).
- Oomoo 25 sets in 75 minutes and Oomoo 30 sets in 6 hours. I will use Oomoo 25 first to see how it goes.
- Demold after 75 minutes
- All of this is at ~73 degrees Farenheit
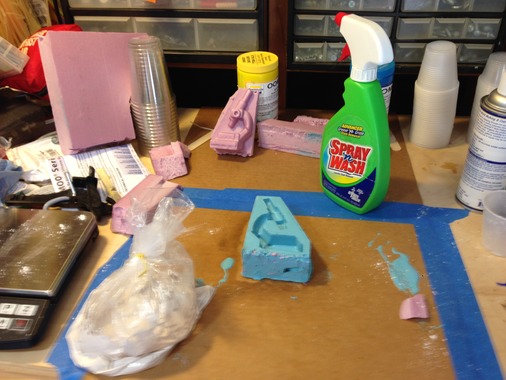
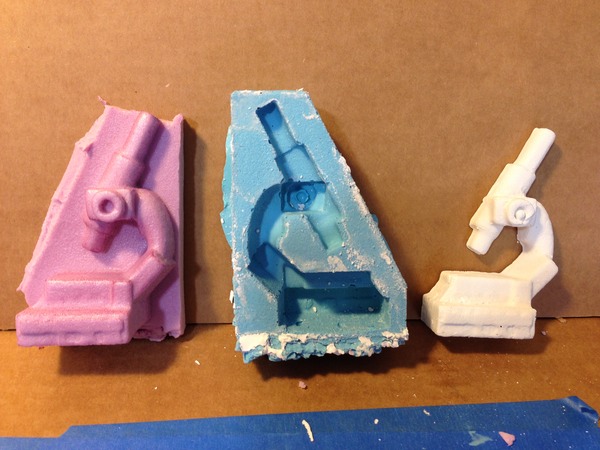
For Oomoo 25 I will not use the vacuum chamber. Hopefully I can recast the positive if there are lots of bubbles. I spoke to Smooth On Tech services and they said it should be fine except that the Oomoo 25 will creep into the little holes in the EPS. I have applied heat to the surface which has melted and sealed the positive, but it is still rough. I also did not make the mold big enough along the bottom of the microscope and carved it out by hand resulting in a rough top. Hopefully this will not impact the actual negative. I will also use mold release agent per technician's recommendation…here we go!
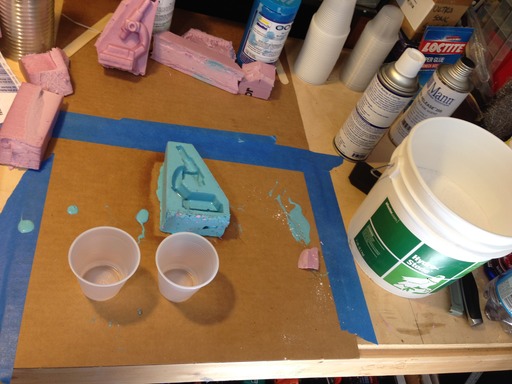
So, all setup and ready to go in my small workshop. I decided to clear it out and get a windless area to pour. Good idea as the wind picked up! I did not have the recommended square steel stirrers as in the Smooth on videos and used wooden tongue depressors that the lab had. While cleanup will be a pain with the metal stirrers I can see whay they recommend them. The viscosity was very stiff at first and required quite a bit of careful stiring. I was right at the edge of the temperature guidelines and maybe a bit under. As I poured the Oomoo it became clear I was fighting a 15 minute window, again perhaps due to the temperature. It came out in ribbons. I was concerned I would not have enough, but it turned out to be the perfect amount. Once I was done pouring I tapped the sides and bottom to release bubbles. I didn't think any would come out in the thick liquid, but sure enough they started rising to the surface. Now the 75 minute clock is ticking which I will probaby extend to 90 minutes. Since I am doing this at home, and do not have easy access to the lab and milling machines I hope this works out. While I wait I am starting a composite bowl in week 11.
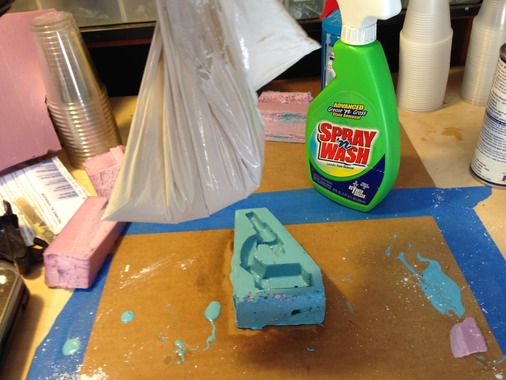
Releasing the Oomoo from the mold…
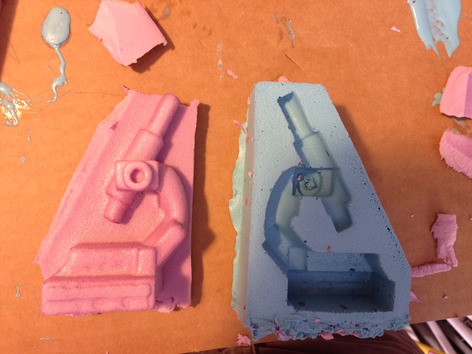
It was rather difficult to get the Oomoo out. I ended up carefully cutting the sides of the mold. The Oomoo was very sticky even though it cured for 90 minutes. In the end, I was able to carefully release the mold and retain the positive, albeit without the walls. There are many bubbles and next time I will use steel stirers as well as a shallow mixing container. I used plastic cups the Lab had and it was challenging.
And on to Hydrostone…
I read up on this plaster/cement stuff and found a great video on technique. I decided to try out using soapy water in the mold to release and reduce air bubbles in the hydrostone. I did also pre spray the Smooth On mold release. I also decided to mix in the plastic bag as in the video. I carefully weighed 100 parts Hydrostone to 32 parts water and ended up mixing 300 grams of the Hydrostone. It seemed to come out a little thick but filled in the mold nicely. I then scraped off the surface to get it flush with the top. I think in a future casting I will build a border so it can be hung on the wall. I am waiting for the Hydrostone to set to see the results.
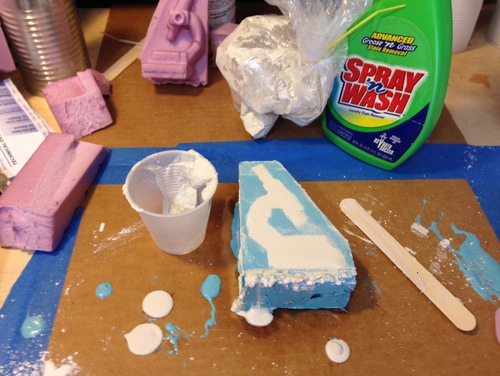
Note that the Spray n' Wash is not that, I am using that bottle to hold soapy water made with a generous helping of dish soap.
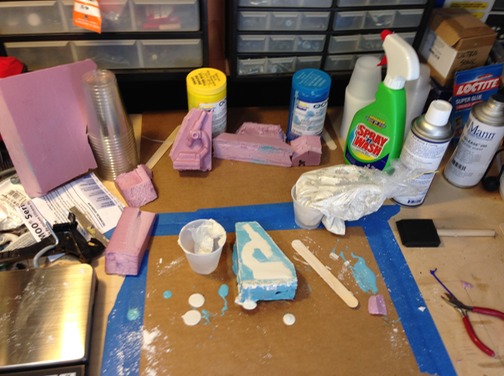
Wow! Demolding a success!
I had no idea things went so quick with the Hydrostone. I remember Neil saying it is quick, you don't have to wait over night etc. etc. Upon digging and some research I learned it sets enough to demold in just 30 minutes! This entire process went slowly for me, on purpose, so that I didn't miss a step.


I scraped the edges of the final casting with some aluminum scrap and am quite impressed. No bubbles evident I guess as a result to the soapy water.
Some things I would do differently next time:
- The EPS seemed to work fine and is very quick to mill. I will give more clearance to the edges and possibly apply Styrospray 1000 to the EPS before making the silicone mold. This will give it a very smooth finish, but adds a step.
- I would like to mill something with the wax.
- The Oomoo needs a better stirer than a tongue depressed and a shallow bowl. This will help with the bubbles.
- I would change nothing with the Hydrostone…the soapy water and the bag mixing is the way to go!