Moulding and Casting
Assignment
Here shot of the week
Individual assigment
In this week I use this materials
-
Nitrile gloves for process and safety
-
Safety glasses while handling silicon and gypsum
-
masks,Disposable cups and sticks for clean and safe mixing
-
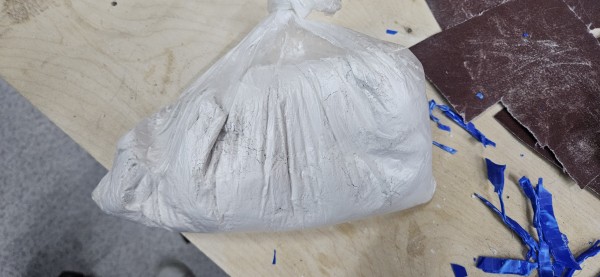
Silicon, gypsum, cement
Mold box
I have figure and i make cad for mold box
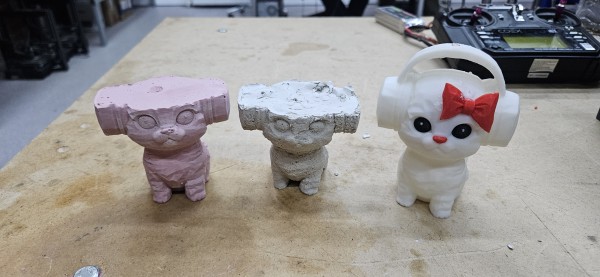
I 3D printed a circular 120mm diameter model, only 3mm thick, to test the fit. This helped me visualize exactly how the figure sits inside the mold box, ensuring perfect alignment and spacing before starting the final casting process today.
After making precise measurements, I designed and printed the custom mold box. Within the design, I added those large geometric squares inside to occupy extra volume. This is specifically to help save on silicone usage during the molding process.
Molding process
After printing I start work with silicon
And I have Silicon A and B and we must mix model a and b equal 50% each other for mold

Silicone Preparation Instructions
-
Ratio: Mix Part A and Part B in an exact 1:1 ratio (50% of each component).
-
Mixing: Stir the mixture thoroughly and consistently for 5 minutes to ensure a full chemical bond.
-
Heat Curing: Place the mold in an environment set to 50°C for 1 hour to accelerate the curing process.
-
Cooling: After heating, place the mold into a refrigerator to stabilize the material and complete the setting phase.
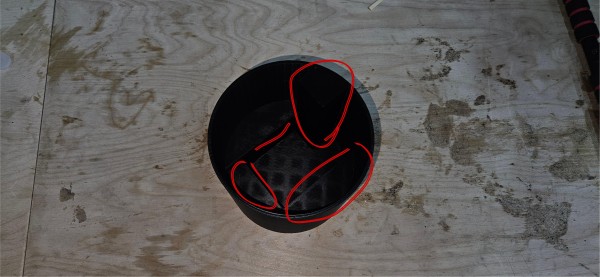
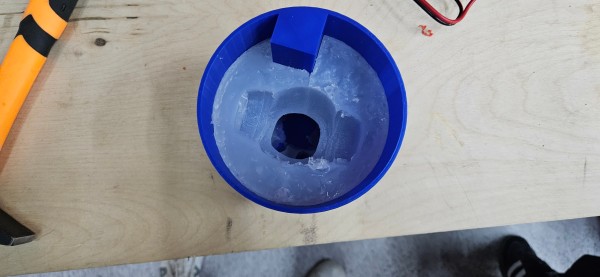
After mixing the silicone, I poured it into the mold box containing the figure. Unfortunately, I was slightly short on silicone and didn't have quite enough to reach the top, but I proceeded with the curing process to see the results.
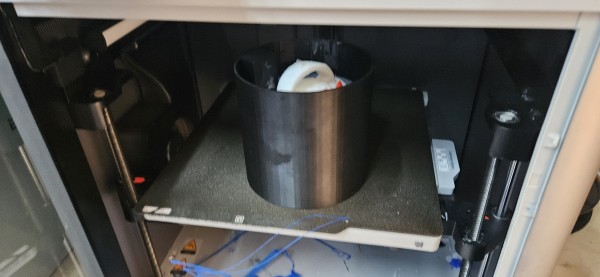
After pouring, I placed the mold box inside my 3D printer. Since it is a fully enclosed unit, it worked perfectly as a curing chamber, allowing me to set the heated bed to a stable 50°C for the duration of the process.
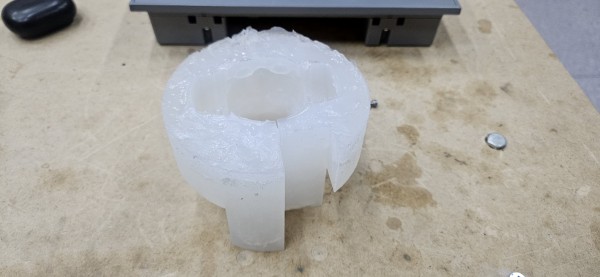
After the curing and cooling phases were complete, I began the process of removing the mold. I carefully pulled the silicone out of the 3D-printed mold box. It came out as one single, solid piece, fully intact and flexible.
Even though I had a slight shortage of material during the pour, the extraction was successful. The single-piece mold perfectly preserved the internal geometry of the figure, proving that the 3D-printed enclosure and the volume-saving squares worked exactly as intended.

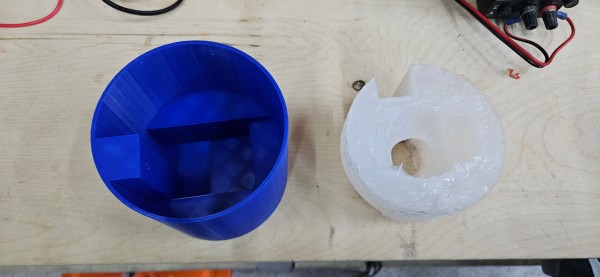
After extracting the silicone block, I carefully cut it down one side only, leaving the other side completely intact. This created a single, flexible piece that I could peel back to pop the figure out. By not cutting it all the way through, the mold remains a single unit, which helps keep everything perfectly aligned for the final pour.
To finish the process, I 3D printed the exact same mold box again. I then placed the single-piece silicone mold back inside the new box. Using the rigid 3D-printed walls as a support frame ensures that the silicone stays perfectly compressed and aligned, preventing any leaks or deformation during the final casting.
Casting with cement
Finally, it was time for the casting phase. I prepared the cement by mixing it with water, stirring thoroughly until the consistency was smooth and free of lumps. Once the mixture was ready, I poured it into the silicone mold, which was already secured inside the 3D-printed mold box. I made sure the cement filled every detail of the cavity to ensure a high-quality final result.
To ensure a perfect finish, I used a hammer to gently tap on the mold box's outer casing. This vibration technique forced the trapped air bubbles to rise to the surface and escape. By consistently tapping the sides, I made sure the cement settled into every detail, resulting in an ideal, bubble-free model.
I placed the mold filled with cement back into the 3D printer. By utilizing the heated bed to keep the environment warm, I was able to accelerate the drying process, allowing the cement to set much faster and reach its final strength more quickly.
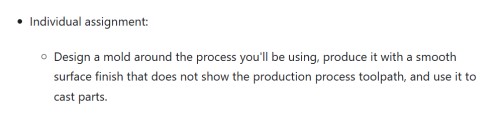
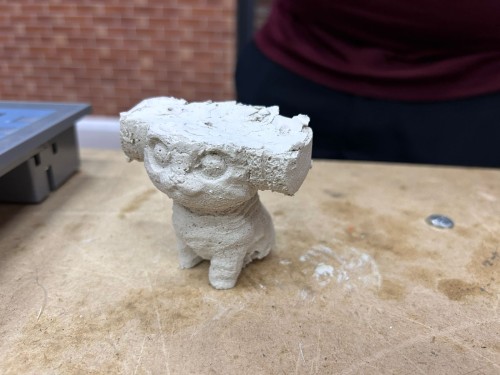
After the cement had fully hardened, I removed the final model from the mold, successfully completing the cement casting stage of the project. The result was a solid, detailed replica, marking the successful conclusion of the entire fabrication process.
casting with gypsum
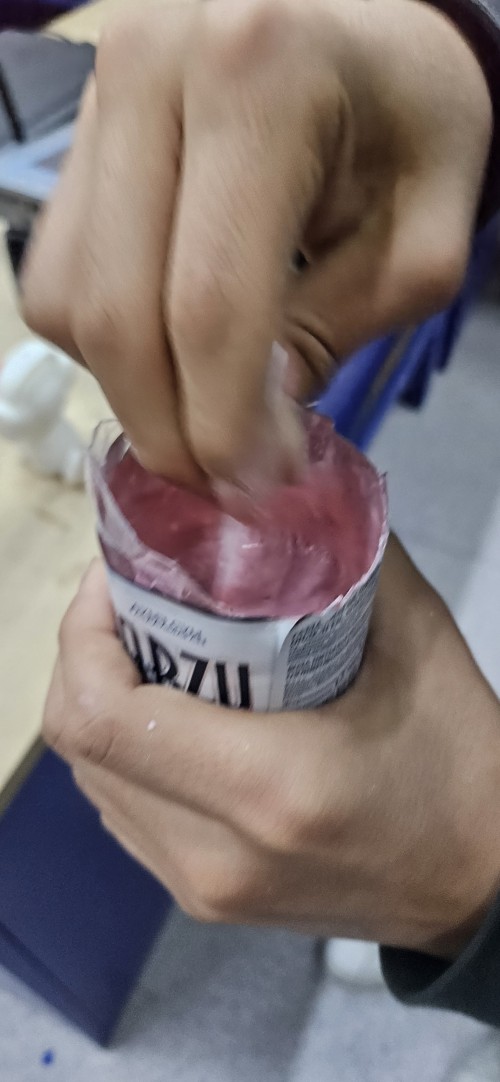
For this stage, I prepared the plaster (gypsum) by mixing it with water and adding red pigment. I stirred the mixture thoroughly until it reached a thick, uniform consistency. By adding the dye at this stage, I ensured the material was vibrantly colored all the way through, resulting in a solid, red base for the model.
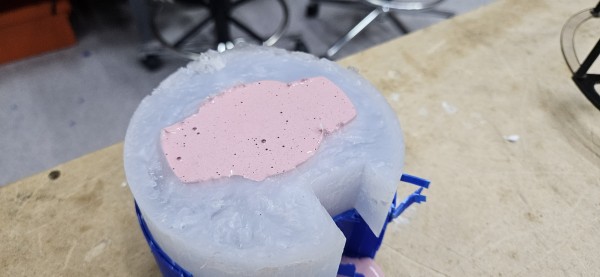
Once the material had fully set, I carefully extracted the model from the mold. By handling it gently, I ensured that all the fine details remained intact and the edges stayed sharp, successfully bringing the project to its final form.
Problems
Despite the successful final result, this project presented several significant challenges that required careful problem-solving:
-
Silicone Management: I encountered a shortage of silicone, which meant the material didn't fully cover the model as intended. Additionally, my initial curing process was incorrect; I left the silicone at room temperature for 3 hours and then placed it in the freezer for 15 hours. Because of this, the silicone failed to cure properly and remained sticky. I eventually fixed this by using the 3D printer's heated bed at 50°C to ensure a proper chemical reaction.
-
CAD and Mold Box Design: The original CAD design for the mold box was not optimized for extraction. Every time I wanted to remove the silicone, I was forced to break the 3D-printed box and print a new one. This taught me the importance of designing "draft angles" or multi-part enclosures for easier disassembly.
-
Dimensional Accuracy: I realized that for the final casting, the diameter of the outer housing needed to be slightly larger. A wider diameter would have provided better structural support for the silicone and made the pouring of cement and plaster much more efficient.
conclusion
This project was a valuable learning experience that combined 3D printing, CAD design, and material science. While I faced several technical hurdles—ranging from curing issues to design flaws in the mold box—each problem provided a clear lesson in fabrication.
Key Takeaways Thermal Control: I learned that silicone curing is highly temperature-dependent. Moving from the freezer (which inhibited the reaction) to a stable 50°C environment inside the 3D printer was the turning point for a successful set.
Design for Disassembly: The need to break the mold box highlighted a crucial CAD lesson: future designs must include larger diameters and better clearance to allow for non-destructive extraction.
Material Efficiency: Using geometric inserts to save silicone was a successful strategy, though I learned the importance of precisely calculating the required volume to avoid material shortages.
Ultimately, by combining vibration techniques to remove air bubbles and heat-assisted hardening, I achieved a high-quality, detailed result in both cement and gypsum.