18. Applications and Implications, Project Development
- Applications and Implications
Plan a final project masterpiece that integrates the range of units covered.
Your project should incorporate:
- 2D and 3D design
- Additive and subtractive fabrication processes
- Electronics design and production
- Embedded microcontroller interfacing and programming
- System integration and packaging.
Where possible, you should make rather than buy the parts of your project. Projects can be separate or joint, but need to show individual mastery of the skills, and be independently operable.
- Project Development
Prepare drafts of your final project summary slide (presentation.png, 1920x1080) and video clip (presentation.mp4, 1080p HTML5, < ~minute, < ~25 MB), put them in your root directory, and check that they are linked in the final presentation schedule
Individual Assignment
Applications and Implications
What Will It Do?
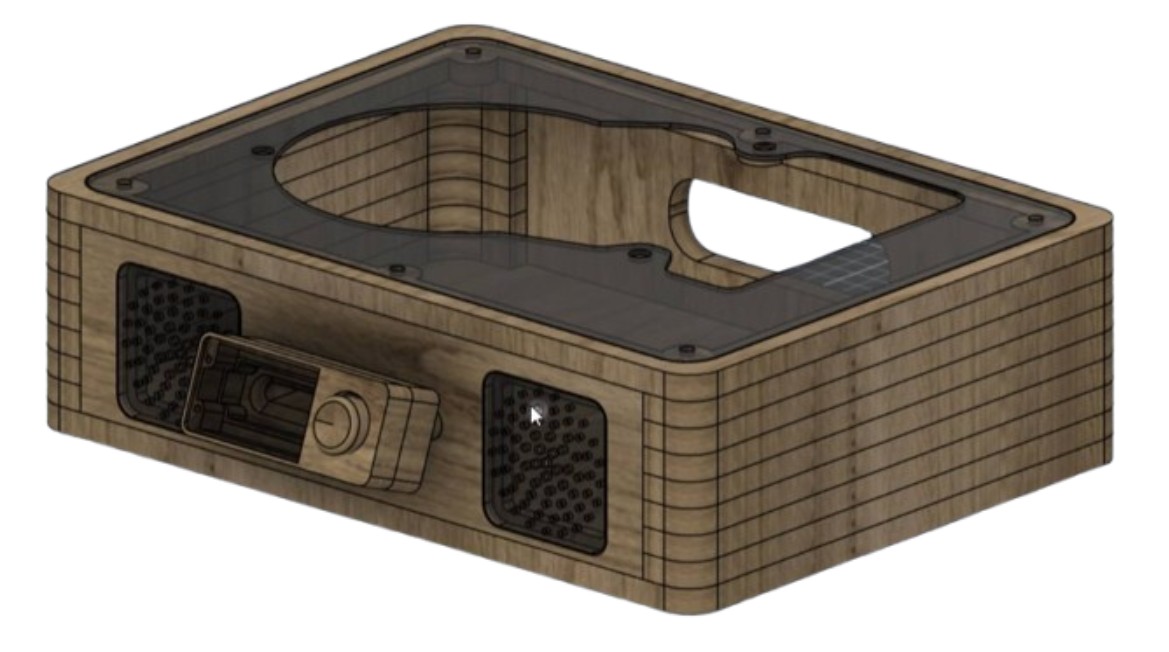
My final project is called Sweep. The project adds a modern navigation system to a traditional vinyl record player, allowing the user to choose individual tracks on a vinyl record without manually placing the needle. Instead of listening from the beginning of the record, the user can select a desired track through a simple interface, and the mechanism automatically moves the tonearm to the correct position.
The system combines the tactile experience and high-fidelity analog sound of vinyl records with the convenience expected from modern digital music players. A web application detects the locations of tracks on the vinyl record using computer vision, and those track positions are then sent to the player where the servo mechanism moves the tonearm to the selected location.
Who’s done what beforehand?
Although track selection is uncommon on modern turntables, several companies experimented with similar ideas during the late 1970s and 1980s. These systems attempted to automatically detect the spaces between songs and allow users to jump directly to individual tracks.
Optonica RP-7705
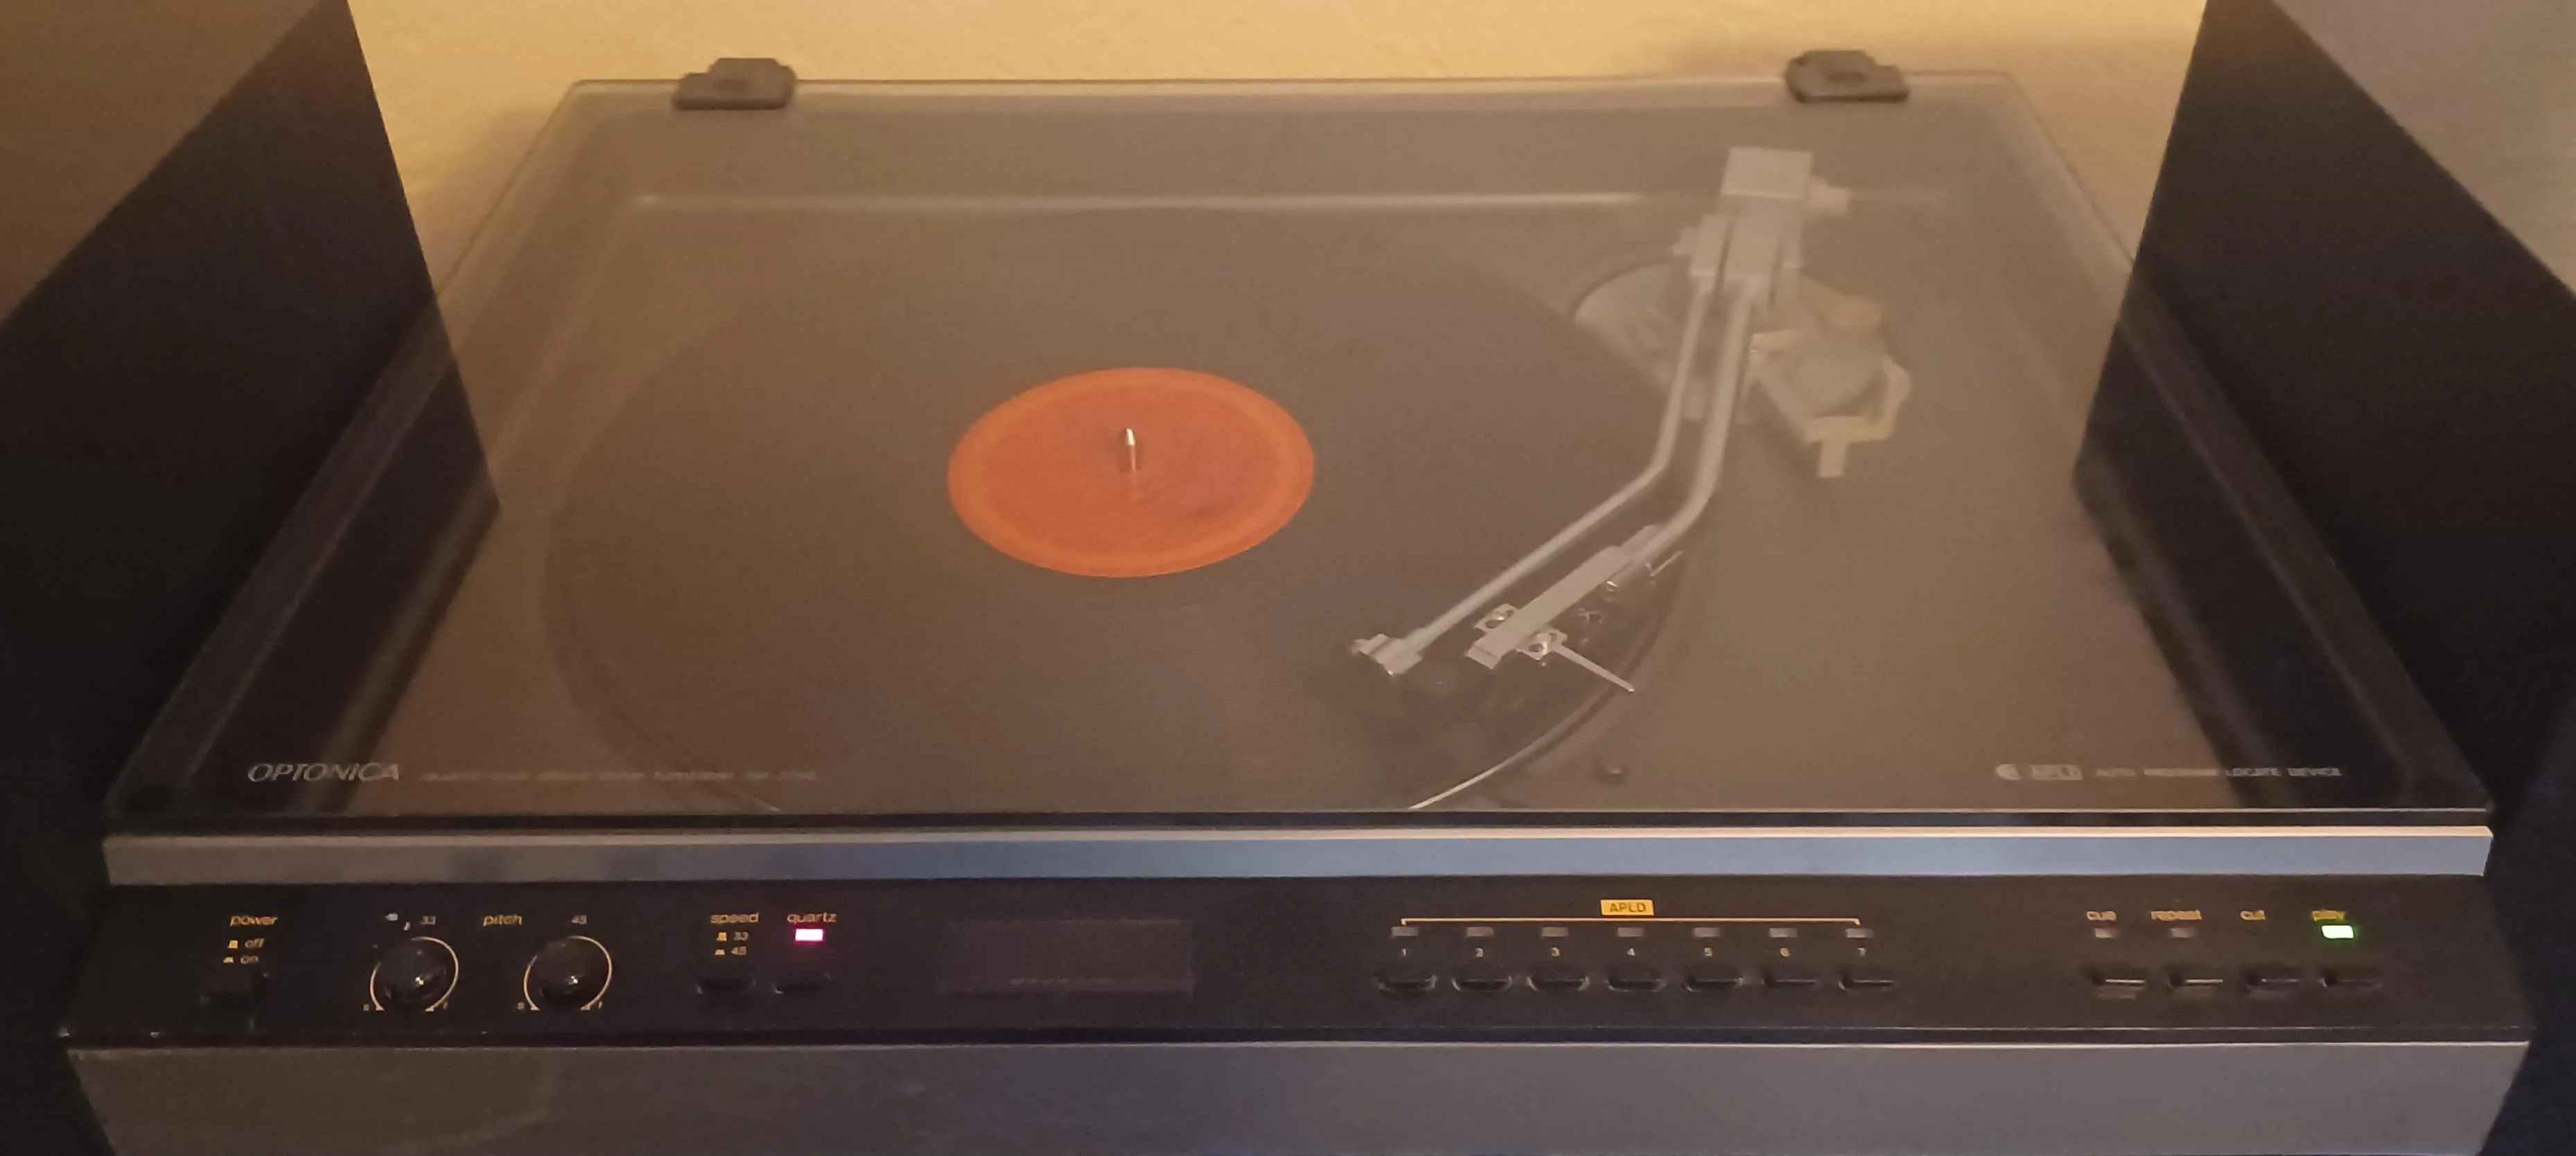
Image Credits: Original Source
One of the earliest examples was the Optonica RP-7705, produced by Sharp under the Optonica brand. The player featured an automatic music search system capable of detecting the silent gaps between tracks. Instead of relying on mechanical sensing, the system used an optical approach that analysed the surface of the vinyl record to estimate track positions.
Although innovative for its time, the technology was limited by the available electronics and processing power. Variations in vinyl colour, surface wear, dust, scratches, and lighting conditions often reduced detection accuracy.
Useful references:
Pioneer PL-88FS
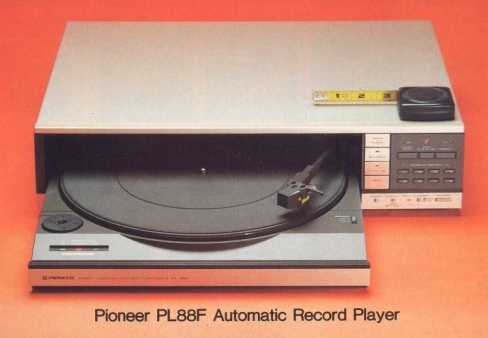
Image Credits: Original Source
Another interesting implementation was the Pioneer PL-88FS, which also attempted automatic music searching. Pioneer used an optical sensing system that projected infrared light onto the record surface. By measuring the reflection and scattering of the light, the player estimated the blank spaces between songs and positioned the tonearm automatically.
These systems demonstrated that automatic track selection on vinyl was possible decades ago. However, they relied entirely on dedicated hardware, making them expensive and difficult to manufacture. My project instead uses computer vision running on inexpensive embedded hardware, making the approach far more accessible while keeping the mechanical operation relatively simple.
Useful references:
What sources will you use?
For the overall appearance I wanted something that looked clean, modern and minimal while still respecting the classic appearance of a record player. The enclosure was heavily inspired by the industrial design language of the Bambu Lab P1 Series 3D printer. Its combination of matte panels, transparent surfaces and simple geometry matched the aesthetic I wanted for the project.
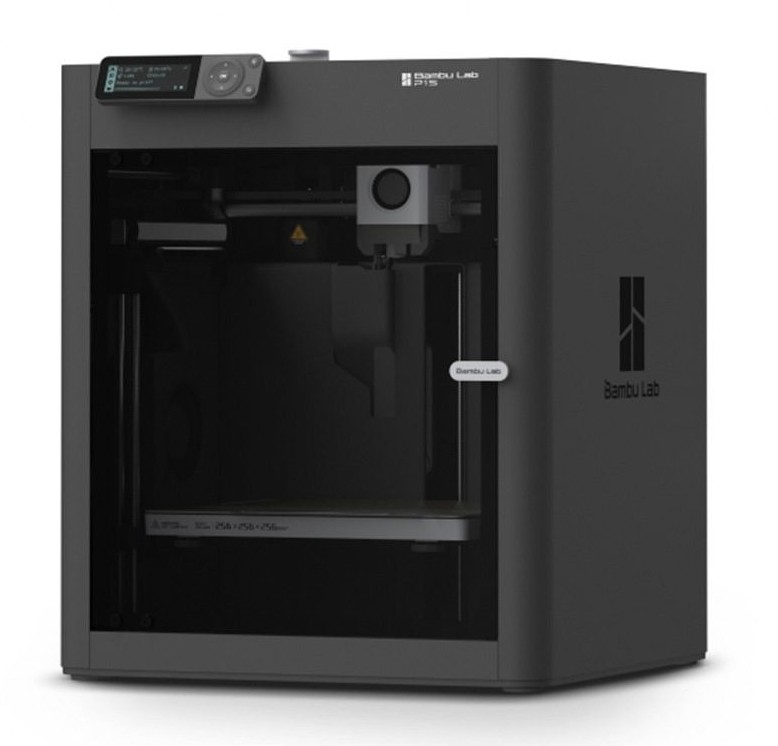
Image Credits: Original Source
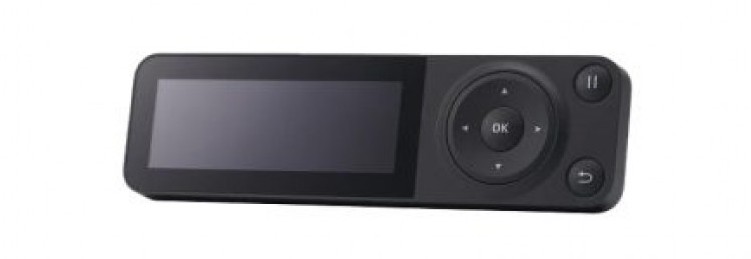
Image Credits: Original Source
Although the project serves a completely different purpose, I tried to adopt similar design principles.
Research Sources
Throughout the development of the project I relied on a combination of official documentation, community forums and previous weekly assignments. Each weekly assignment acted as a prototype for one subsystem that would later be integrated into the final project.
Official Documentation
-
Seeed Studio Wiki
Used extensively for understanding the capabilities of the XIAO development boards, hardware pin mappings, wireless communication features and example programs. -
Arduino Documentation
Reference for Arduino libraries, communication protocols and hardware APIs. -
Espressif Documentation
Used for understanding the ESP32-C6 wireless capabilities and Wi-Fi features. -
Fusion 360 Documentation
Reference material for CAD modelling, CAM operations and rendering workflows.
Community Resources
-
Reddit
Helpful for troubleshooting hardware issues, reading discussions about similar projects and comparing different implementation approaches. -
Arduino Forum
Provided tested solutions for electronics problems, communication libraries, timing issues and servo control. -
KiCad Forum
Used during PCB layout and routing to understand good PCB design practices.
In addition to online resources, valuable feedback was continuously provided throughout the Fab Academy by instructors at Super Fablab Kerala and the global Fab Academy review sessions. Many improvements to the project were made after discussions during weekly reviews.
Design Software
Fusion 360
Autodesk Fusion 360 was used to design the entire mechanical assembly including the enclosure, internal mounting features, acrylic top panel, servo mechanism, display mount and all rendered product images.
KiCad
KiCad was used to design all custom PCBs including schematic capture, PCB layout, routing and manufacturing files.
What Will Be Designed?
Mechanical Enclosure
The enclosure was designed entirely in Fusion 360. It consists of multiple layers of CNC-machined plywood which are laminated together to create the main body of the player. A laser-cut transparent acrylic sheet forms the top cover, allowing the record to remain visible while protecting the internal mechanism.
The enclosure also contains mounting locations for the servo mechanism, electronics, OLED display and rotary encoder while maintaining sufficient clearance for the tonearm movement.
PCB Design
Two custom PCBs were designed using KiCad.
- Master Board – controls the servo motor, power distribution, display communication and wireless communication using the XIAO ESP32-C6.
- Node Board – contains the OLED display, rotary encoder and user interface components. The node board communicates with the master board using an 8-pin JST connection carrying power, I²C communication and encoder signals.
Web Application
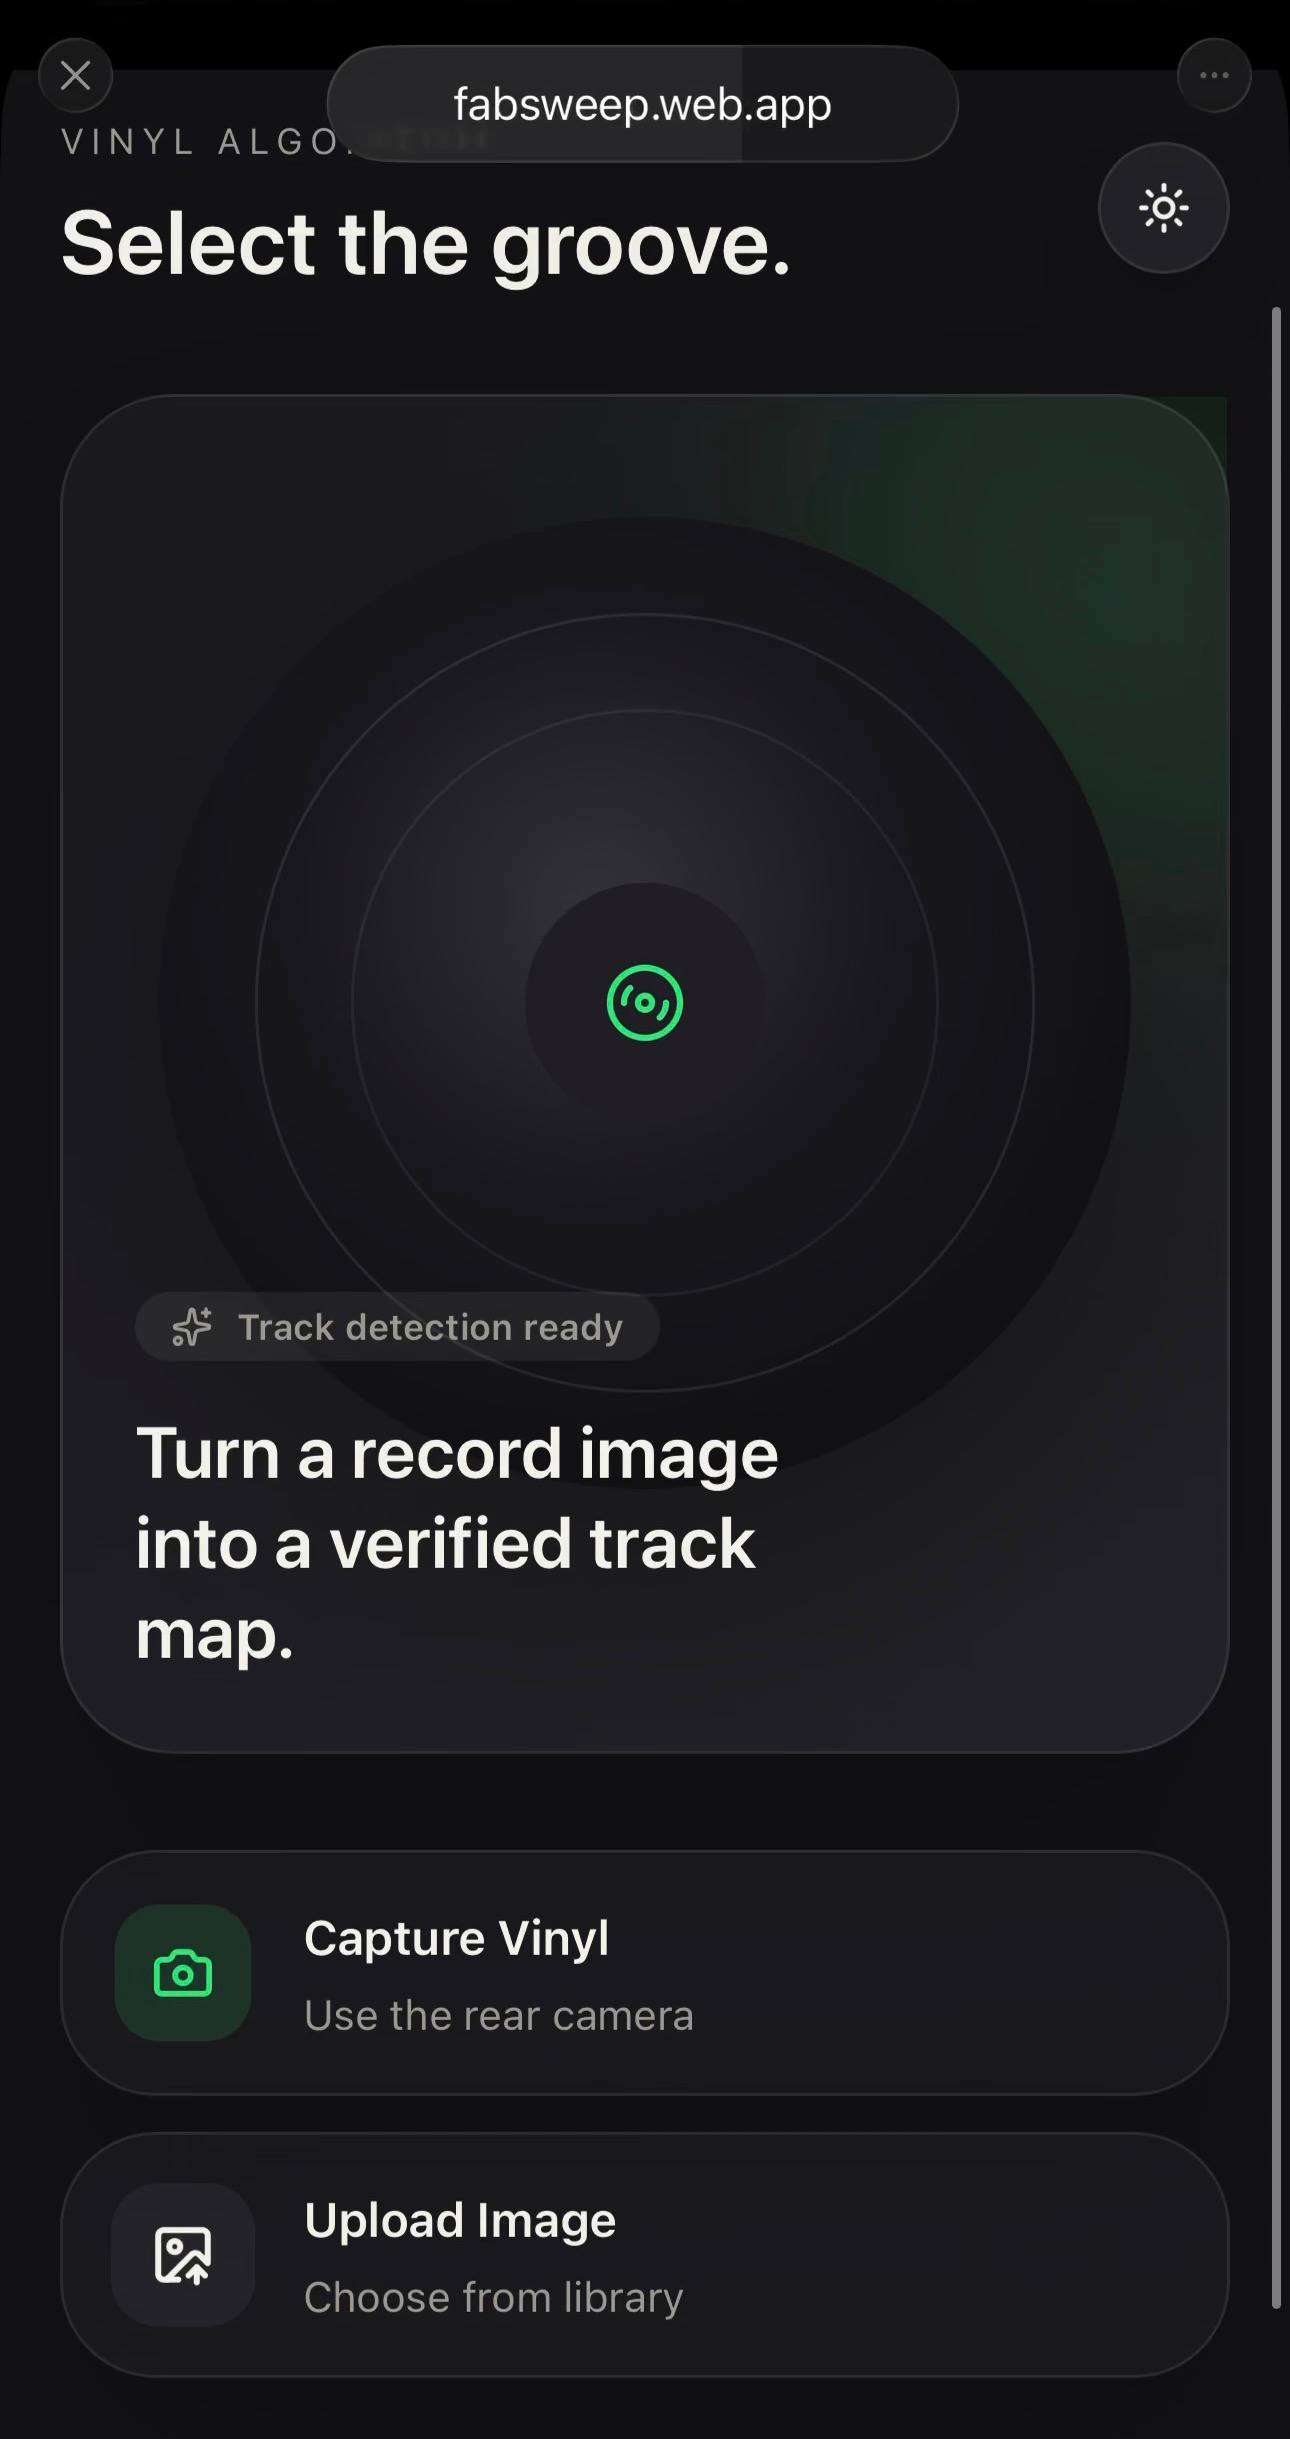
A browser-based interface was also developed using HTML, CSS and JavaScript. The application is responsible for displaying the detected tracks on a vinyl record and allowing the user to select which song to play. The groove detection algorithm developed during Wildcard Week forms the basis for this system and will eventually automate the complete track detection process.
What Materials and Components Will Be Used? Where Will They Come From? How Much Will They Cost?
The majority of the electronic components were sourced from the Kochi Super Fablab inventory, while structural materials such as plywood, acrylic and PLA filament were taken from Fab Lab stock. Standard passive components including resistors and capacitors were also available from the lab inventory, so they do not contribute significantly to the overall project cost.
| Component | Supplier | Qty | Unit Cost (₹) | Total (₹) |
|---|---|---|---|---|
| Seeed Studio XIAO ESP32-C6 | Fab Lab Stock | 1 | 555.00 | 555.00 |
| MP1584 Buck Converter Module | Fab Lab Stock | 1 | 41.00 | 41.00 |
| 100µF Electrolytic Capacitor (SMD) | Fab Lab Stock | 1 | 0.00 | 0.00 |
| MOSFET N-Channel (AO3400A Equivalent) | Fab Lab Stock | 1 | 32.00 | 32.00 |
| SS34 Schottky Diode | Fab Lab Stock | 1 | 2.00 | 2.00 |
| JST-XH 2 Pin Female Connector | Fab Lab Stock | 2 | 0.00 | 0.00 |
| JST-XH 2 Pin Male Connector | Fab Lab Stock | 2 | 0.00 | 0.00 |
| 1kΩ Resistor | Fab Lab Stock | 1 | 0.00 | 0.00 |
| 10kΩ 1206 Resistor | Fab Lab Stock | 3 | 0.50 | 1.50 |
| 100nF Ceramic Capacitor | Fab Lab Stock | 2 | 0.00 | 0.00 |
| 2×1 Male Pin Header | Fab Lab Stock | Several | 0.00 | 0.00 |
| Plywood Sheet | Fab Lab Stock | 1 | 0.00 | 0.00 |
| Transparent Acrylic Sheet | Fab Lab Stock | 1 | 0.00 | 0.00 |
| PLA Filament | Fab Lab Stock | Approx. 120 g | 0.00 | 0.00 |
Total Project Cost
| Total Estimated Cost | ₹631.50 |
|---|
Mechanical Materials
-
Plywood
Used to construct the layered enclosure. Each layer is CNC machined using the ShopBot and laminated together to form the complete body. -
Transparent Acrylic
Laser cut to form the top cover. The transparent surface allows the user to see the record while protecting the internal mechanism. -
PLA Filament
Used to 3D print the OLED display housing, rotary encoder knob and custom mechanical parts used by the sweeping mechanism.
What Parts and Systems Will Be Made?
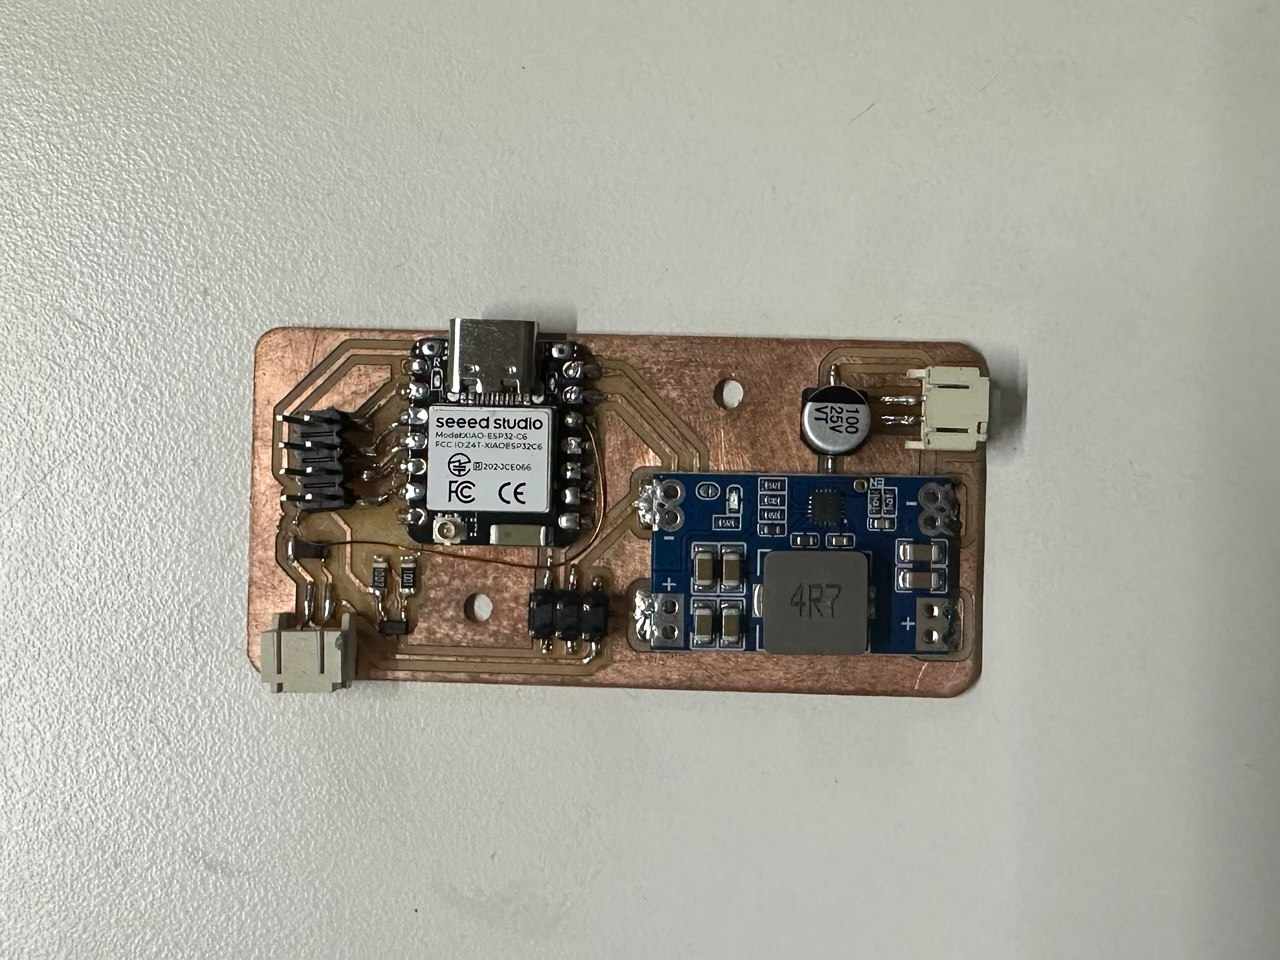
Master Control Board
The master board is the primary PCB responsible for controlling the complete system. It contains the XIAO ESP32-C6 microcontroller together with the power management circuitry and interfaces to the remaining hardware.
Node Board
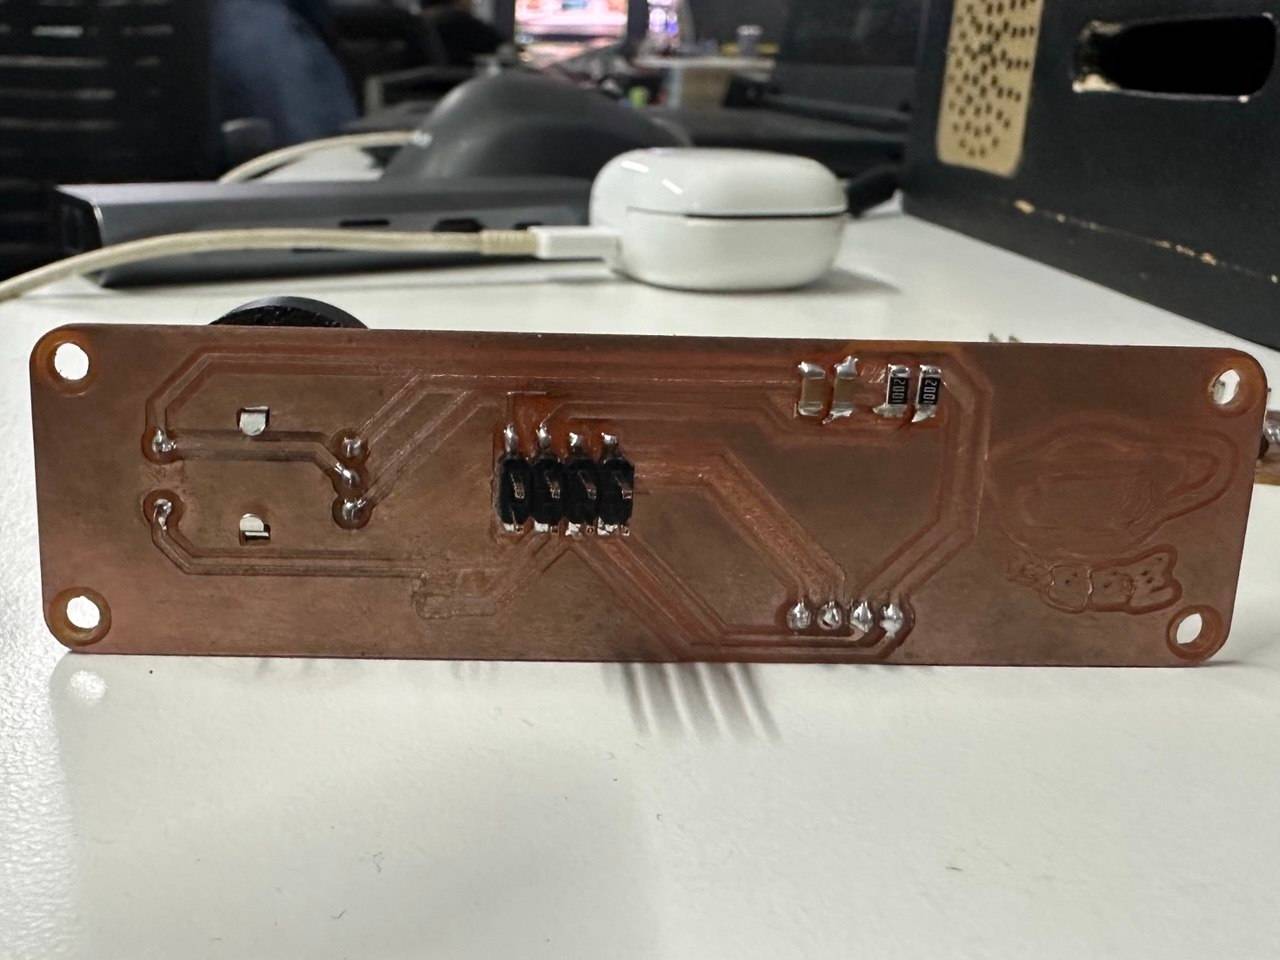
The node board provides the physical user interface for the player. Rather than placing all components on a single PCB, the controls are separated into their own compact board which connects back to the master board using an 8-pin JST connector.
The node board includes:
- OLED display.
- Rotary encoder.
- Push button integrated into the rotary encoder.
- I²C communication.
- Power distribution from the master board.
Separating the interface board from the control electronics allows the front panel to remain compact while simplifying cable routing inside the enclosure.
Mechanical Enclosure
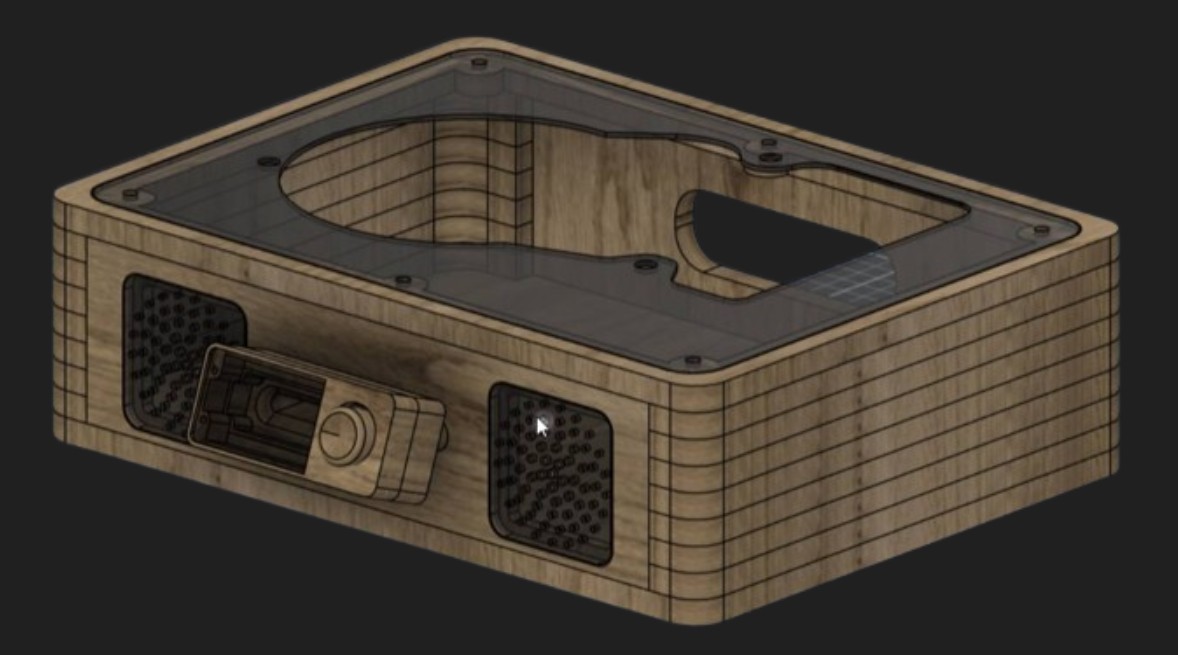
The enclosure consists of multiple CNC-machined plywood layers that are glued together to create the final housing. Internal pockets provide mounting points for the electronics while maintaining enough clearance for the servo sweep and tonearm movement.
A laser-cut acrylic panel forms the upper surface of the enclosure, allowing the vinyl record and moving mechanism to remain visible while protecting the electronics underneath.
Several custom 3D printed components are integrated into the enclosure, including the display housing, rotary encoder knob and servo linkage.
Software System
The software component consists of two connected systems.
The first is firmware running on the XIAO ESP32-C6, responsible for controlling the hardware, driving the servo mechanism and communicating with the display.
The second is a browser-based web application written using HTML, CSS and JavaScript. This application provides the user interface and displays the available tracks detected from the vinyl record.
What Processes Will Be Used?
Laser Cutting
The acrylic top panel and display window were manufactured using laser cutting. The design was prepared as a 2D vector drawing and cut from acrylic with high precision. This process and the machine workflow were explored in Week 3 – Computer-Controlled Cutting.
PCB Milling
The project's two custom printed circuit boards were fabricated using PCB milling. The traces and board outlines were milled directly from copper-clad FR-1 boards before the electronic components were soldered. The PCB production workflow was learned during Week 8 – Electronics Production.
3D Printing
Several custom components, including the display enclosure, rotary encoder knob, servo mechanism, and sweep mechanism, were designed and manufactured using 3D printing. This enabled rapid prototyping and the creation of parts that could not be easily produced using subtractive manufacturing. The process was introduced in Week 5 – 3D Scanning and Printing.
ShopBot CNC Machining
The main wooden enclosure was manufactured using a ShopBot CNC router. The enclosure parts were designed in CAD software and machined from sheet material before assembly. This workflow was developed during Week 7 – Computer-Controlled Machining.
Soldering
After the PCBs were milled, all electronic components were assembled using through-hole and surface-mount soldering techniques. This completed the custom hardware required for the final project.
Web Application
A web-based interface was developed to present the project documentation and downloadable resources. The fundamentals of building web interfaces using HTML, CSS, and JavaScript were explored during Week 1 – Project Management .
What Questions Need to Be Answered?
Can the servo mechanism accurately position the tonearm over the correct track? Will the enclosure provide good sound quality? Should the computer vision algorithm run on a Raspberry Pi, in the browser using JavaScript, or on a separate computer, and which option provides the best performance?
How Will It Be Evaluated?
The project will be evaluated by whether the tracks are detected correctly, the servo mechanism reliably moves to the selected track, and all mechanical, electronic, and software components fit together and operate successfully inside the enclosure.
Project Development
As the project reached completion, the remaining tasks focused on preparing the final presentation material required for Fab Academy. This included creating a presentation slide, recording and editing a short demonstration video, compressing the media files, and uploading everything to the project repository following the required naming conventions.
Presentation Slide
The presentation slide was designed using Canva. I first created a blank presentation with a resolution of 1920 × 1080 pixels, matching the requirements for the final presentation.
The slide was designed to resemble a commercial product advertisement rather than a technical poster. The rendered product image generated in Fusion 360 was used as the primary visual element.
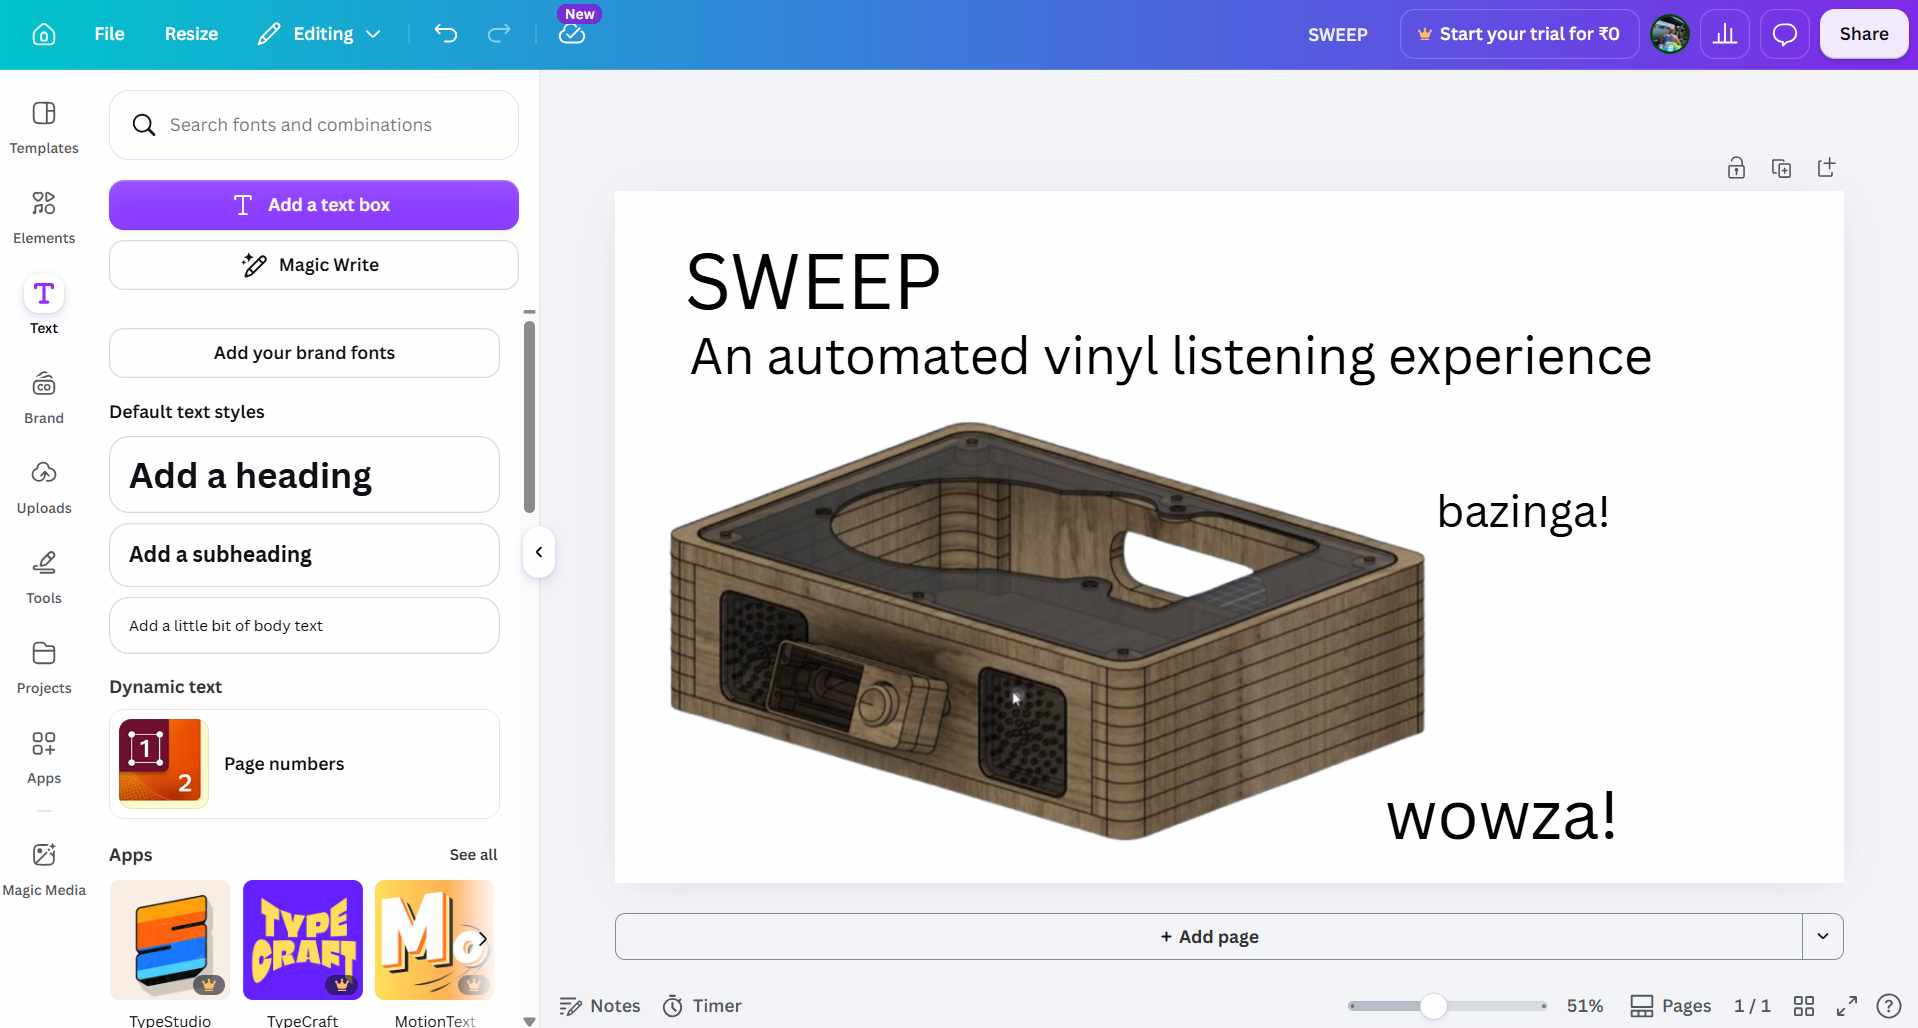
The rendered images used on the slide were exported directly from Autodesk Fusion 360, allowing the final presentation to closely resemble a commercial product launch.
Video Preparation
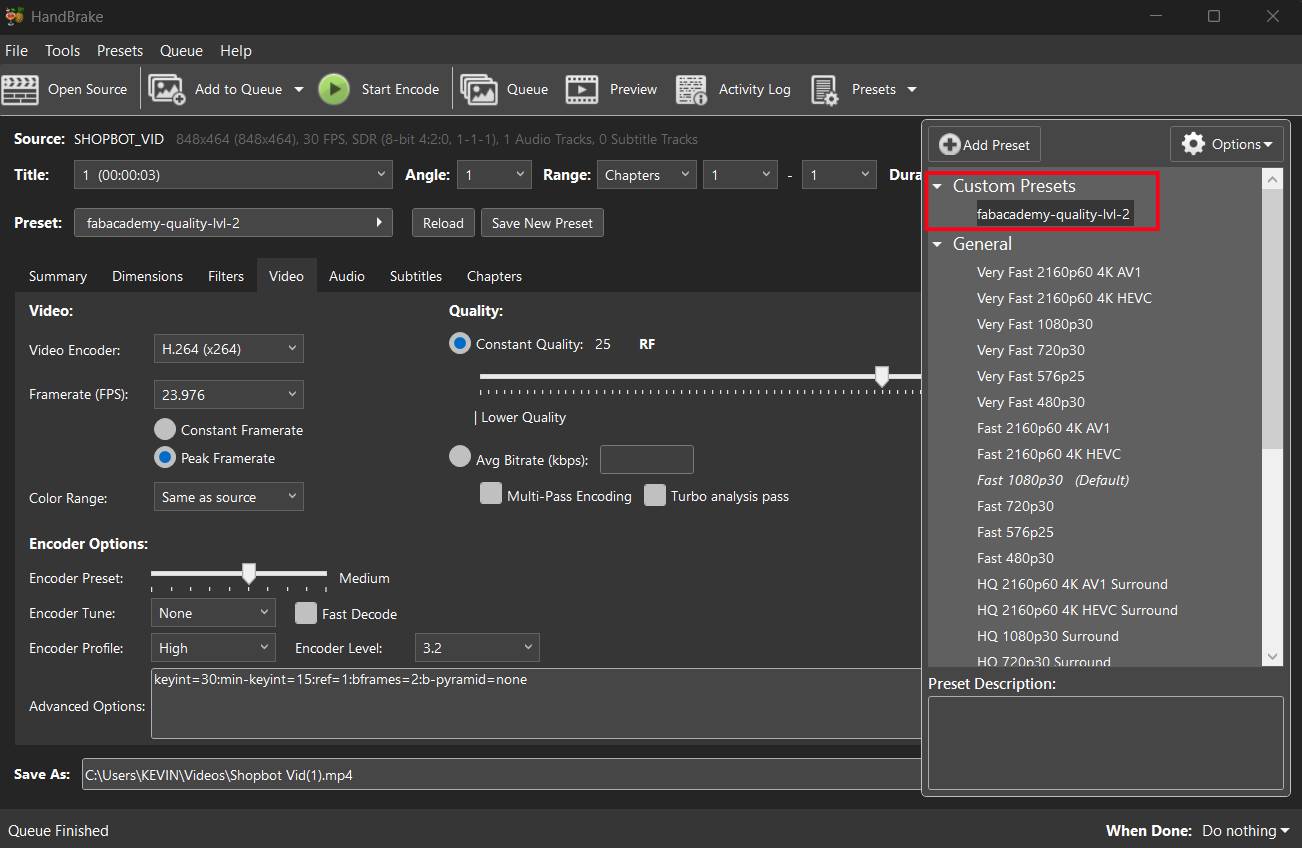
To create the final presentation video, I used InShot for editing. The video serves as a concise overview of the complete project and demonstrates both the design process and the final working prototype.
Video Compression
Since Fab Academy specifies a maximum file size for presentation videos, the exported video was compressed before being uploaded.
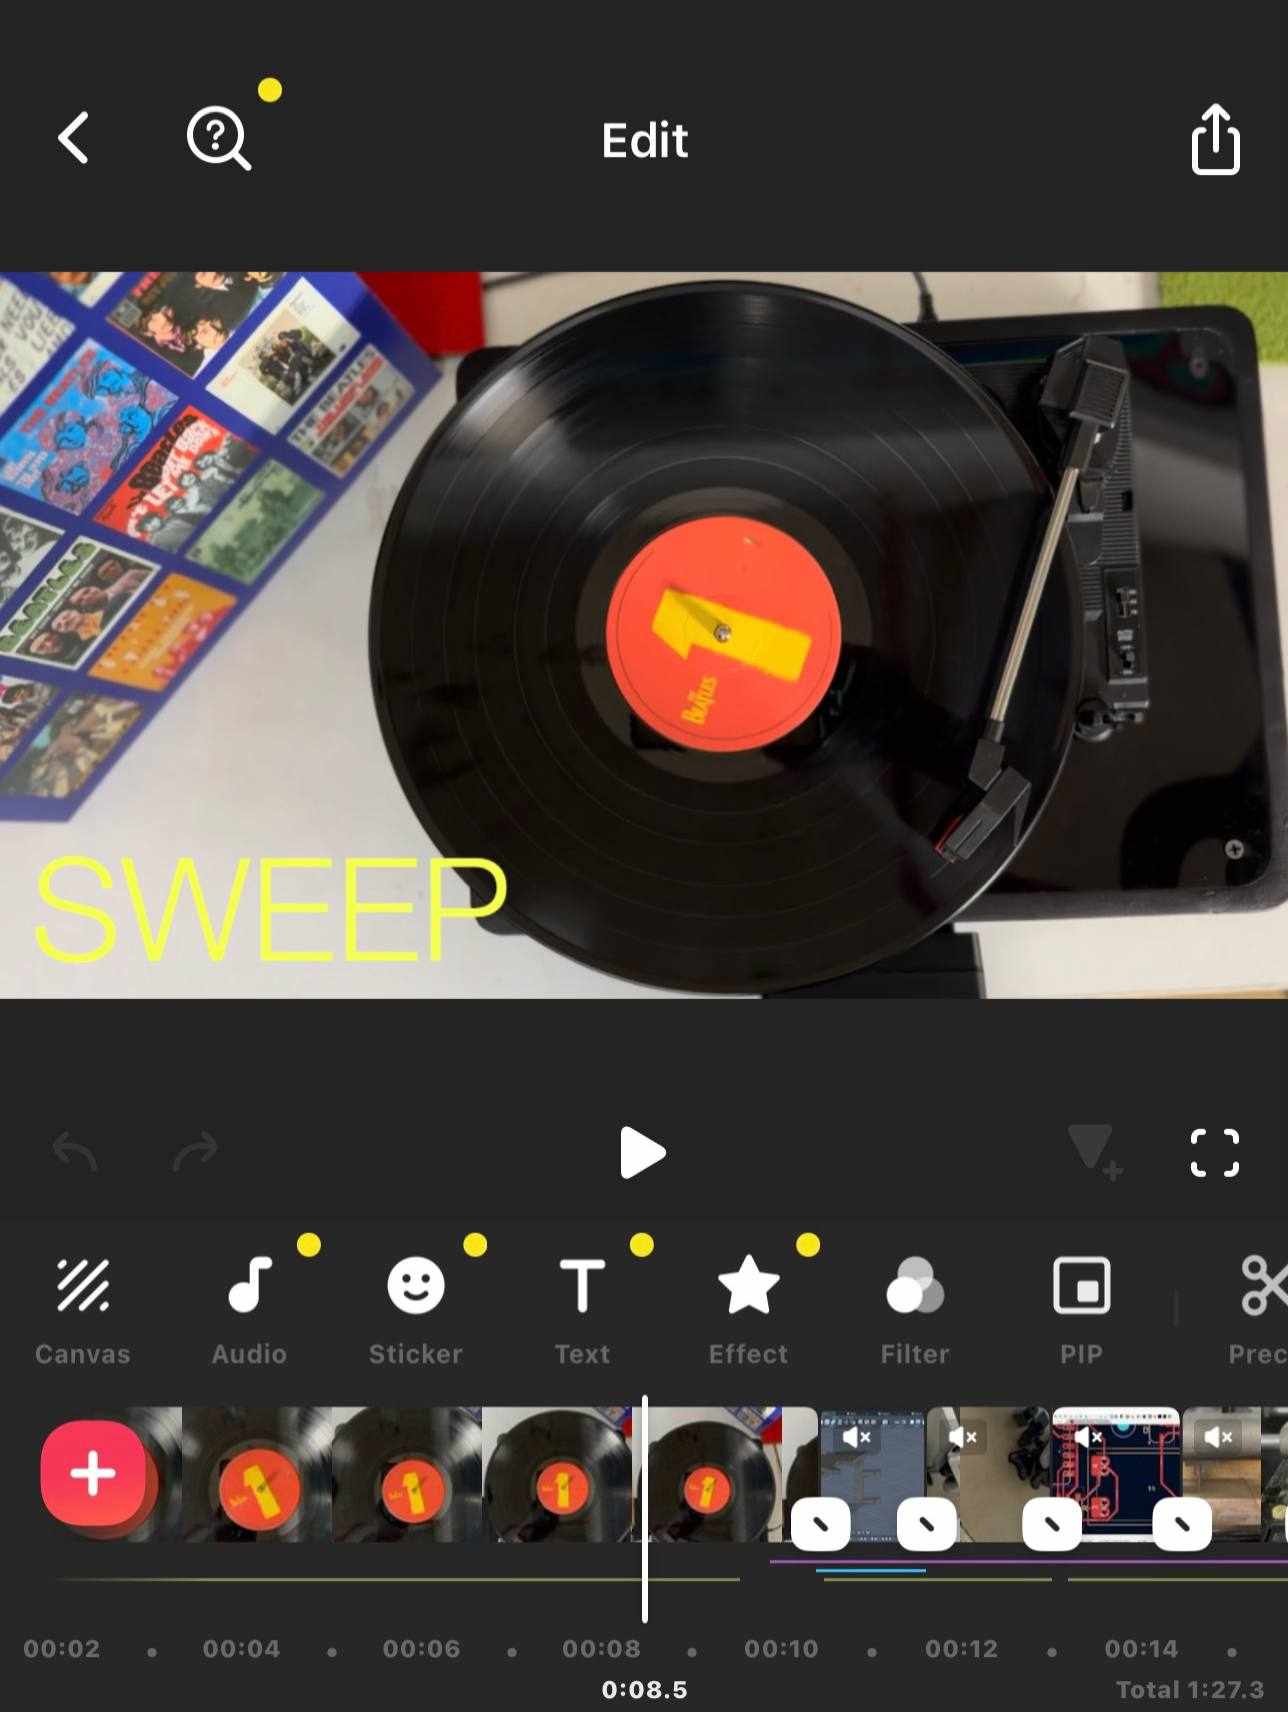
I primarily used HandBrake, an open-source video transcoder, to reduce the file size while maintaining acceptable visual quality.
The following FFmpeg command was used:
ffmpeg -i input.mov \
-ss 0.0 -to 10.0 \
-vf "scale=1920:1080" -r 25 \
-c:v libx264 -profile:v high -level 4.1 -pix_fmt yuv420p \
-preset medium -crf 26 \
-movflags +faststart \
-c:a aac -b:a 192k \
presentation.mp4
HandBrake Encoding
After exporting the edited video, I imported it into HandBrake and applied a custom encoding preset.
Uploading to the Repository
After generating the presentation slide and compressed video, both files were added to the project's public repository.
According to the Fab Academy documentation, the files must use the following exact filenames:
- presentation.png
- presentation.mp4
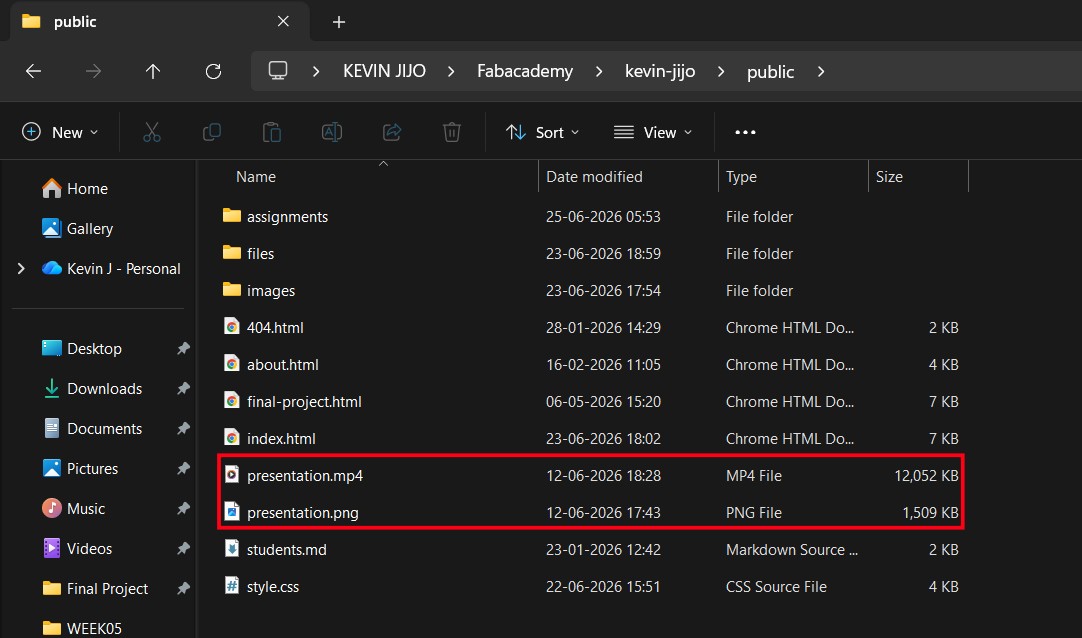
Using the required filenames ensures that the automated presentation schedule can correctly locate and display the project media.
Both files were placed in the repository root directory before pushing the changes to GitHub.

To know more about the project, please refer to the Project Development documentation in the repository.