Demonstrating and Comparing Toolchains and Development Workflows for Embedded Architectures
Beijing Space
Introduction
In embedded programming, the architecture of a microcontroller affects not only the hardware performance of a board, but also the entire development experience. Different embedded architectures use different compilers, libraries, upload tools, debugging methods, and programming workflows. For this reason, comparing embedded platforms is not only a comparison of chips or boards, but also a comparison of the complete software and hardware ecosystem behind them.
In this document, I compare available embedded architectures from three perspectives: architecture family, toolchain, and development workflow. This makes it possible to understand both the technical differences between platforms and the practical differences in how they are programmed, tested, and debugged. Instead of only listing board names, I use a common comparison framework to evaluate how each platform supports embedded development in the context of rapid prototyping and digital fabrication.
1. Architecture Families
The available embedded platforms can first be grouped by architecture family. This is a useful starting point because each architecture has different computing capabilities, memory constraints, peripherals, and typical applications.
AVR microcontrollers
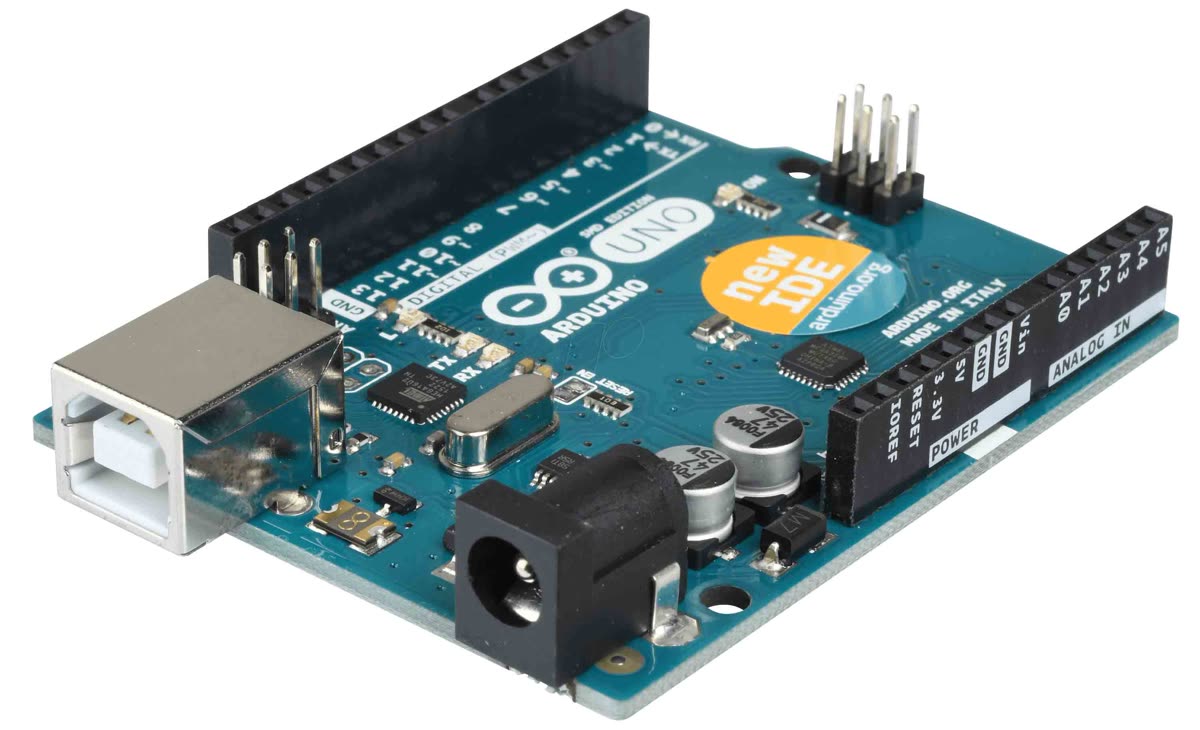
AVR is a classic 8-bit microcontroller architecture that is widely used in beginner-friendly embedded boards such as the ATtiny and ATmega series. A common example is the Arduino Uno. AVR-based boards are simple, lightweight, and well suited for basic input and output tasks such as blinking LEDs, reading buttons, or controlling simple sensors. Because the architecture is relatively small and straightforward, the development workflow is usually simple and easy to understand. However, AVR microcontrollers have limited RAM, limited flash memory, and lower processing power compared with newer 32-bit systems.
ARM Cortex-M microcontrollers
ARM Cortex-M is a 32-bit microcontroller family used in many modern embedded boards such as SAMD21, STM32, and RP2040-based boards. Compared with AVR, ARM Cortex-M platforms provide more memory, faster performance, and more peripherals. These boards are better suited for larger and more complex projects, especially when multiple sensors, communication protocols, or real-time interactions are involved. Because of their flexibility, ARM-based boards often support several development environments and a wider variety of flashing and debugging methods. At the same time, their setup and configuration can be more complex than AVR.
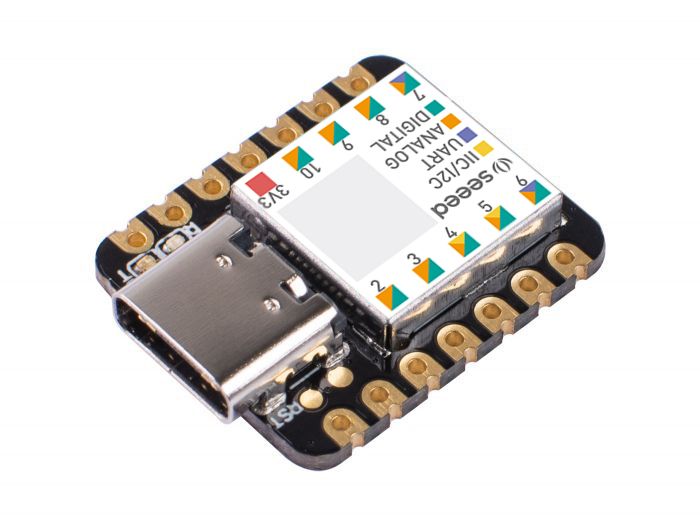
Getting Started with Seeed Studio XIAO SAMD21
ESP32 and wireless microcontrollers
ESP32 belongs to a more advanced category of embedded platforms because it combines a powerful microcontroller with built-in wireless communication such as Wi-Fi and Bluetooth. This makes it especially suitable for Internet of Things projects, remote control systems, web dashboards, and connected devices. In terms of processing power and features, ESP32 is more capable than many entry-level AVR boards. However, the development process can also be more complex because it often involves serial configuration, wireless testing, board drivers, and boot mode management during flashing.
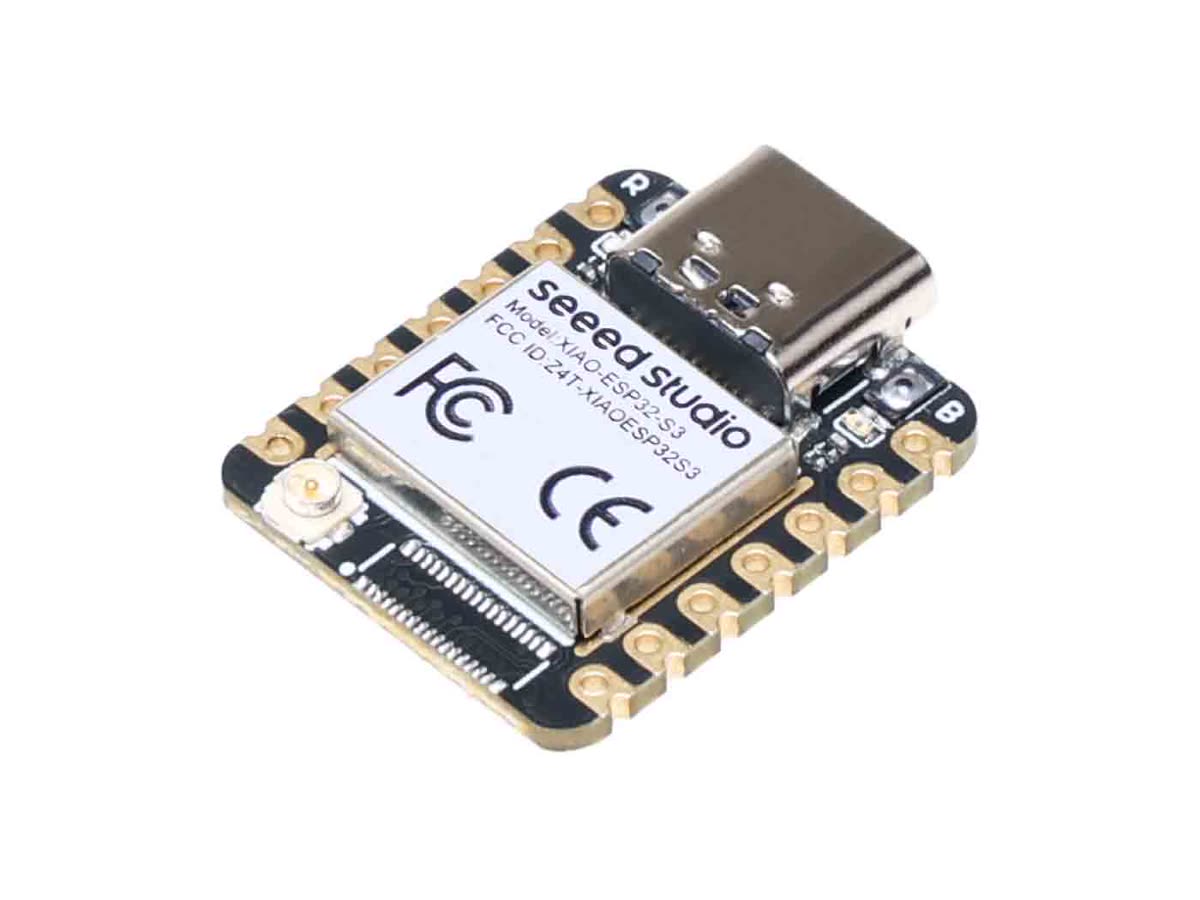
Getting Started with Seeed Studio XIAO ESP32-S3 Series
Raspberry Pi (Linux single-board computer)
Raspberry Pi is not the same class of device as AVR, ARM Cortex-M, or ESP32 in the usual "MCU firmware" sense. It runs a full Linux operating system on an application-class ARM processor. Development looks like Linux application development (Python, Node, C/C++, services, apt, SSH) rather than flashing a single firmware image for a bare-metal loop. GPIO is accessed through the kernel and libraries such as gpiozero or libgpiod, not only through a single Arduino-style abstraction. It is included here because it is a common choice in digital fabrication and IoT gateways, but its toolchain and workflow are fundamentally different from microcontroller platforms.
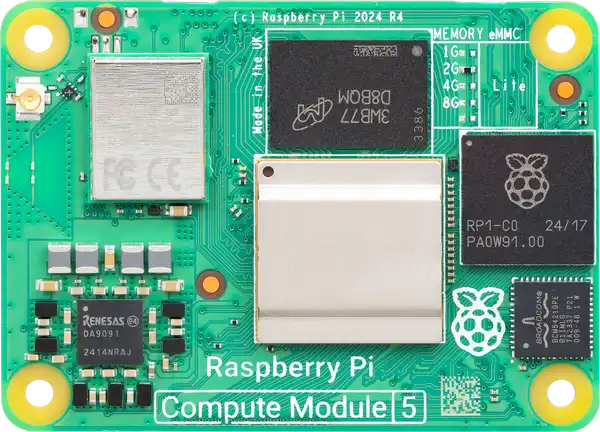
Getting Started with Raspberry Pi
2. What a Toolchain Includes
A toolchain is the complete set of software tools used to develop for an embedded platform. In embedded systems, a toolchain usually includes the code editor or IDE, the compiler, the upload or flashing tool, the board support package, the libraries or SDK, and the debugging tools.
Although these steps are often hidden behind a user-friendly interface such as the Arduino IDE, they are still happening in the background. Comparing toolchains helps reveal how much work is abstracted away and how much direct control the developer has over the system.
A typical MCU embedded toolchain includes:
- a code editor or IDE to write the source code
- a compiler to translate the source code into machine code for a specific processor
- a linker and build system to generate the final executable file
- a flashing tool to upload the program to the board
- a debugging method such as serial output or hardware debugging
- libraries or frameworks that simplify access to hardware features
For Raspberry Pi, the "toolchain" is usually the Linux distribution (compilers, interpreters, package manager, optional cross-compilation on a PC) rather than a single board-specific flash tool for each program run.
3. Toolchain Comparison
The main difference between embedded architectures is not only the processor itself, but also the toolchain required to program it. The following table summarizes typical toolchains used by several common platforms.
| Architecture | Example boards | Typical IDE / environment | Compiler | Upload / flash tool | Debugging | Typical complexity |
|---|---|---|---|---|---|---|
| AVR | ATtiny, ATmega, Arduino Uno | Arduino IDE, PlatformIO | avr-gcc | avrdude | Serial monitor | Low |
| ARM Cortex-M | SAMD21, STM32, RP2040 | Arduino IDE, PlatformIO, STM32CubeIDE, Pico SDK | arm-none-eabi-gcc | bossac, OpenOCD, UF2, SWD | Serial, SWD | Medium |
| ESP32 | ESP32 DevKit, XIAO ESP32 | Arduino IDE, PlatformIO, ESP-IDF | Xtensa or RISC-V GCC (chip-dependent) | esptool.py | Serial, optional JTAG | Medium to high |
| Raspberry Pi | Pi 4, Pi 5, Pi Zero 2W | VS Code, SSH, Thonny, terminal | gcc / g++, interpreters | SD image / apt / scp (not MCU-style flash per app) | gdb, logs, systemd | Low to medium (Linux), different problem set |
AVR toolchain
AVR-based development is usually the most accessible for beginners. The Arduino IDE provides a simple programming interface, and the platform support package installs the necessary compiler and upload utilities automatically. The compiler is typically avr-gcc, and uploading is usually done with avrdude through USB or serial communication. Debugging is often limited to serial printing, but this is usually enough for simple embedded tasks. The main strength of the AVR toolchain is simplicity. The main limitation is that it offers less performance and fewer advanced debugging features.
ARM Cortex-M toolchain
ARM Cortex-M platforms support a broader range of development options. In a beginner-friendly environment, they can often be programmed using the Arduino IDE or PlatformIO. In a more advanced workflow, developers may use STM32CubeIDE, the Pico SDK, or other vendor-specific environments. The compiler is usually arm-none-eabi-gcc. Flashing methods vary depending on the board: some use USB serial upload, some use drag-and-drop UF2 bootloaders, and others use hardware interfaces such as SWD or tools such as OpenOCD. As a result, ARM workflows are more flexible and powerful, but also less uniform than AVR workflows.
ESP32 toolchain
ESP32 can also be programmed through the Arduino IDE, but it supports more advanced frameworks such as ESP-IDF. Depending on the specific ESP32 family, the compiler may target Xtensa or RISC-V. Uploading is typically handled by esptool.py, usually through USB-to-serial communication. The ESP32 toolchain is attractive because it combines embedded programming with wireless communication features, but this also means the developer often needs to manage additional setup steps such as driver installation, board package configuration, serial port issues, boot mode behavior, and wireless testing. The ESP32 workflow is therefore powerful, but more demanding.
Raspberry Pi toolchain (contrast)
On Raspberry Pi, you typically install or flash Raspberry Pi OS, then develop on the device or cross-compile from another machine. There is no universal requirement to merge bootloader and application into one MCU image for every change (unless you customize the OS or firmware at a low level). Networking, databases, and multi-process applications are natural here; real-time GPIO timing is less deterministic than on a small MCU unless you use specialized techniques.
4. Development Workflow Comparison
In addition to the software tools, it is important to compare the actual development workflow of each architecture. Even when the overall pattern is similar, the practical experience can differ significantly from one platform to another.
A typical MCU embedded development workflow includes:
- Setting up the environment
- Writing code
- Compiling the program
- Uploading or flashing the program
- Testing hardware behavior
- Debugging and improving the code
On Raspberry Pi, steps 4–6 resemble deploying and restarting a Linux application or service rather than reflashing chip firmware on every iteration.
4.1 Environment setup
The first step is preparing the development environment. For AVR boards, this step is usually straightforward. Installing the Arduino IDE and selecting the board is often enough to begin. For ARM boards, the process depends on the board family. Some boards are as easy as Arduino-compatible platforms, while others require board packages, additional drivers, SDK installation, or debugging tools. For ESP32, setup often includes installing a board package, configuring serial drivers, and checking whether the correct COM port is recognized.
This means that AVR generally offers the easiest entry point, ARM platforms vary from simple to moderately complex, and ESP32 may require more troubleshooting before the first successful upload. For Raspberry Pi, setup means imaging the SD card, first boot, network/SSH, and installing language runtimes or libraries with apt or similar.
4.2 Writing code
The second step is writing the program. Many boards today support the Arduino programming model, which uses setup() and loop() and provides beginner-friendly functions such as digitalWrite(), pinMode(), and analogRead(). In this mode, programming across AVR, ARM, and ESP32 can feel very similar.
However, when using native SDKs such as ESP-IDF or STM32 HAL, the workflow becomes more detailed and closer to the hardware. The developer may need to define peripheral settings, configure communication buses, manage system clocks, or work with more structured project files. This gives more control, but also requires a deeper understanding of embedded systems.
On Raspberry Pi, code is often a Python script, a C/C++ binary, or a web service, with GPIO handled through Linux-facing APIs rather than only the Arduino core.
4.3 Compilation
After writing the code, the project must be compiled into a binary file that the microcontroller can run. This is where architecture-specific differences become very clear. AVR code must be compiled for the AVR instruction set, ARM code for the ARM Cortex-M architecture, and ESP32 code for the appropriate Xtensa or RISC-V core.
In beginner tools such as the Arduino IDE, most of this complexity is hidden. The user clicks Verify or Upload, and the build process happens automatically. In more advanced development environments, the build process is more visible, and the programmer may interact with Makefiles, CMake, project configuration files, or dependency managers. As a result, advanced workflows trade convenience for transparency and control: you see more steps, but you can tune memory layouts, optimization flags, and component boundaries more precisely.
4.4 Upload and flashing
Uploading connects the build output to the physical board. AVR workflows typically use the bootloader and avrdude. ARM workflows may use UF2 drag-and-drop, USB CDC, or an external programmer with SWD. ESP32 workflows rely on esptool.py and correct boot mode (often automatic via USB-UART chips; sometimes manual for recovery).
Failure modes differ: wrong baud rate or port, missing drivers, or holding the board in download mode. Raspberry Pi "deployment" is usually copying files, git pull, or package install, then running or restarting a process—not reprogramming flash for each small code change.
4.5 Testing and debugging
Testing combines expected behavior (LEDs, sensors, serial logs) with edge cases (power, timing, wiring). On MCUs, debugging is often serial logging, assertions, and LED patterns; ARM and ESP32 (especially with ESP-IDF) can add GDB with OpenOCD or JTAG for breakpoints and register inspection.
ESP32 adds wireless testing: Wi-Fi credentials, router behavior, and concurrent tasks (e.g. FreeRTOS) can affect reproducibility. On Raspberry Pi, debugging aligns with Linux: log files, gdb, remote SSH sessions, and system services.
5. Concrete board usage: Arduino and ESP32
This section spells out what you actually do on the desk with common Arduino-family boards and ESP32 boards. Steps refer to Arduino IDE 2.x; PlatformIO uses the same compilers and esptool under different UI commands.
5.1 Arduino boards (typical: Uno, Nano, Mega — AVR or official ARM "Arduino" boards)
Hardware
- Connect the board with a USB data cable (charge-only cables will not show a serial port).
- Power LED on; some boards need a separate power choice (USB vs barrel jack) documented on the silkscreen.
One-time software setup
-
Install Arduino IDE 2 from arduino.cc (or use Arduino CLI for the same toolchain).
-
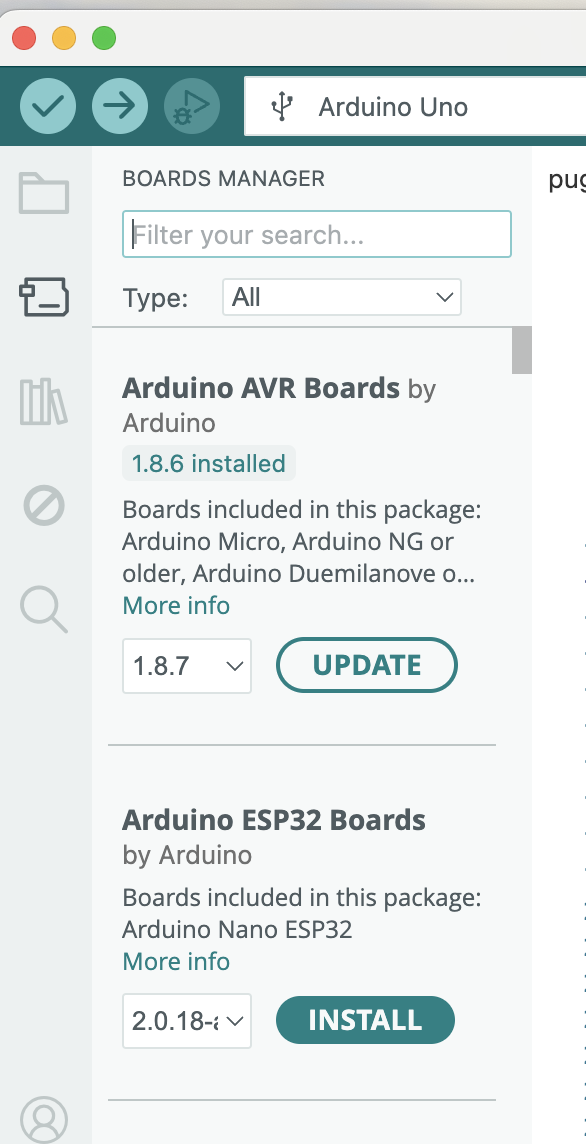
Open Board Manager (left sidebar → Boards icon, or Tools → Board → Boards Manager).
-
Install the core for your board, for example:
- Arduino AVR Boards — Uno, Nano (ATmega328), Mega.
- Arduino SAMD Boards — Nano 33 IoT, MKR family (ARM Cortex-M0+).
-
macOS/Linux usually need no extra driver; Windows may need a board-specific USB driver (e.g. CH340/CP2102) if the port does not appear.
Every project
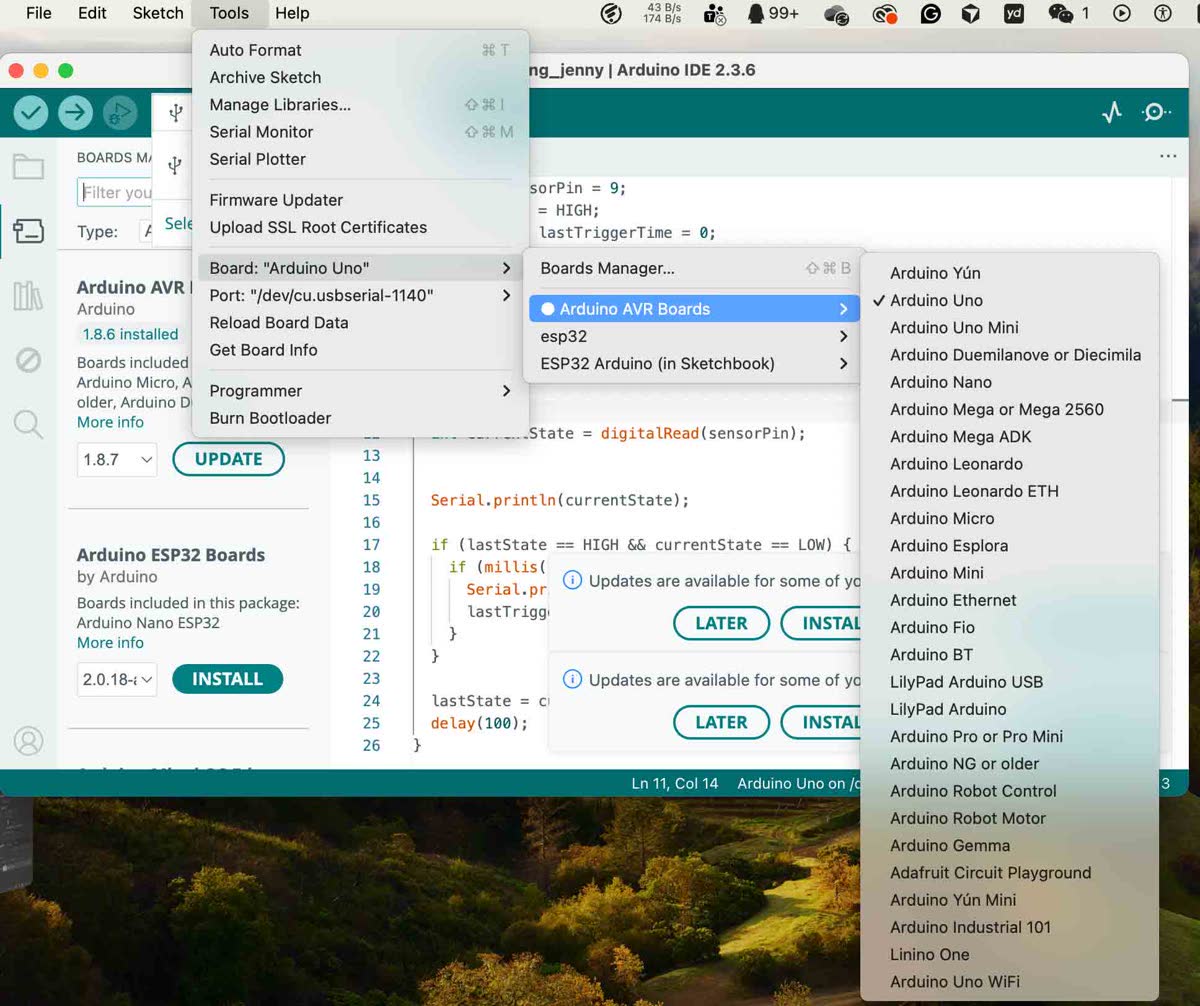
- Tools → Board — pick the exact model (e.g. Arduino Uno).
- Tools → Port — pick the port that appears when the cable is plugged in (e.g.
/dev/cu.usbserial-*on macOS,COM3on Windows). - Create a sketch:
setup()runs once,loop()repeats. UseSerial.begin(9600)(or another baud) andSerial.println()for logs. - Verify (compile) — checks syntax and produces the firmware.
- Upload — compiles if needed, then sends the binary through the bootloader (
avrdudeon AVR). - Serial Monitor (Tools → Serial Monitor) — set the same baud rate as
Serial.begin(...).
Libraries
- Sketch → Include Library → Manage Libraries… — search and install (e.g. Servo, Adafruit sensors).
#includethe header at the top of the.inofile.
Typical failure checks
- Wrong board or port selected.
- Another program (another Serial Monitor, PlatformIO monitor) holding the port — close it and retry upload.
- On some clones, manual reset timing; press reset once if upload stalls.
5.2 ESP32 boards (Arduino core — DevKit, ESP32-S3, XIAO ESP32, etc.)
Why it feels different from AVR
- Flash is larger; firmware is split into bootloader + partitions (app, NVS, optional OTA).
- Upload uses
esptool.pyover USB serial (or USB-JTAG on some boards). - Default console baud is often 115200, not 9600.
One-time: add the ESP32 core in Arduino IDE
-
File → Preferences → Additional boards manager URLs — add (official Espressif index):
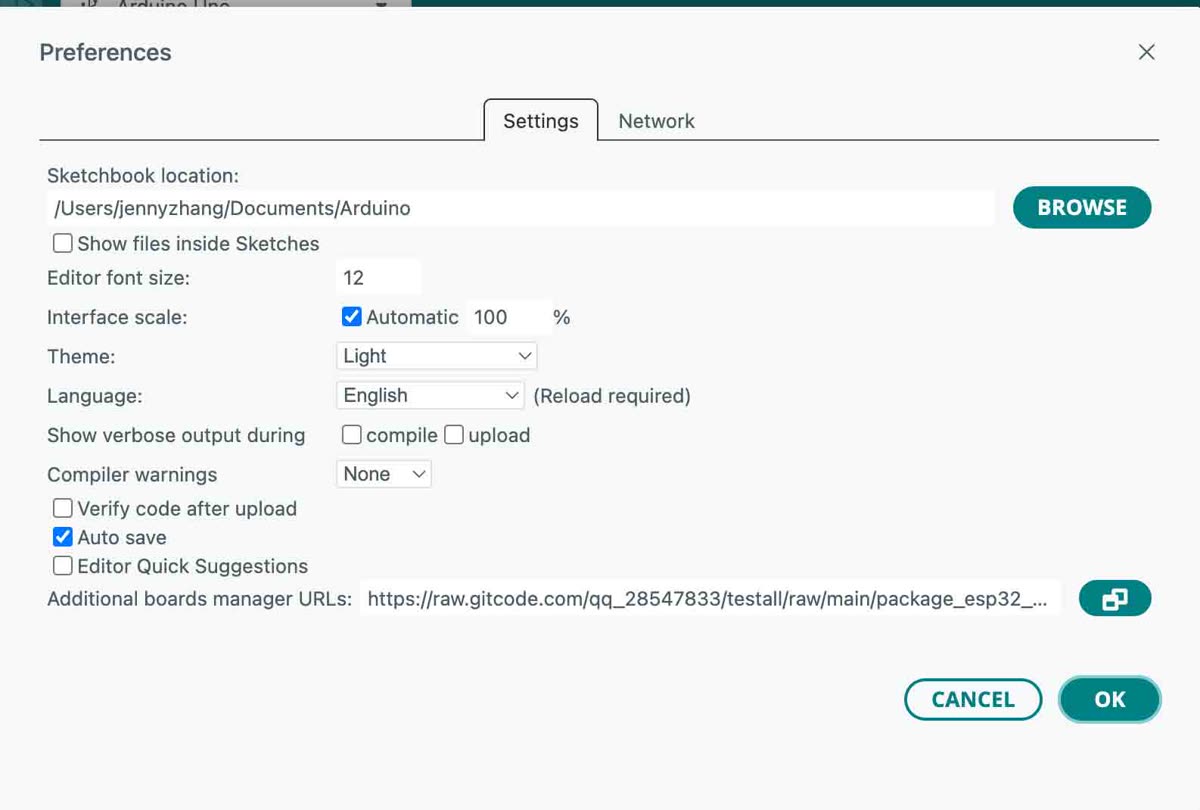
https://espressif.github.io/arduino-esp32/package_esp32_index.json -
Open Boards Manager, search esp32, install esp32 by Espressif Systems (pick a recent version).
-
On Windows, install USB-UART driver for your chip (CP2102, CH340, or native USB boards per datasheet).
Every project: board options that matter
- Tools → Board — choose a line that matches your module, e.g. ESP32 Dev Module, ESP32S3 Dev Module, XIAO_ESP32S3.
- Tools → Port — the serial port for that USB connection.
- Adjust when uploads fail or the app is huge:
- Flash size — must match the module (e.g. 4 MB, 8 MB).
- Partition scheme — default "huge app" vs "default" vs OTA layouts; wrong scheme can cause upload OK but boot loop.
- Upload speed — lower (e.g. 115200) if you see timeout / corrupt errors on long cables or noisy USB hubs.
- PSRAM / USB CDC on boot — enable only if your board and sketch need them (S3 / USB-serial-as-console cases).
Typical workflow
- Write sketch with
setup()/loop()(same Arduino model). UseSerial.begin(115200)and a shortdelay()before first print so the USB console can attach after reset. - Verify, then Upload.
- If upload fails with "waiting for packet" / timeout: try lower upload speed, another USB port/cable, or hold BOOT (GPIO0) while pressing EN/RST to force download mode (exact pins vary by board — check the vendor diagram).
- Open Serial Monitor at 115200 and the correct line ending if your code expects it.
Wi-Fi / Bluetooth in practice
- Add
#include <WiFi.h>(or BLE headers). Store SSID/password in code for class demos; use WiFiManager or preferences/NVS for anything you ship. - After changing Wi-Fi code, open Serial Monitor to see connection errors (wrong password, 2.4 GHz vs 5 GHz, etc.).
Example: Seeed Studio XIAO ESP32-S3
The XIAO ESP32-S3 is a compact ESP32-S3 board (USB-C, battery charging, castellated pads). Treat it like any ESP32-S3 in software, but several hardware and menu details are specific to Seeed's design.
Variants (pick the one that matches your hardware)
| Variant | Typical flash / PSRAM | Notable hardware |
|---|---|---|
| XIAO ESP32-S3 | 8 MB Flash, 8 MB PSRAM (on-chip) | UART, I²C, SPI, 11× GPIO, U.FL antenna socket |
| XIAO ESP32-S3 Sense | Same memory class; Sense adds camera/mic/SD via expansion | OV3660 camera, digital mic, SD slot (install expansion per wiki); higher peak current when camera runs |
| XIAO ESP32-S3 Plus | 16 MB Flash, 8 MB PSRAM | More GPIO / second SPI, B2B connector for radios (e.g. LoRa) — check Plus pinout before wiring |
Hardware before first upload
- Solder pin headers if you need breadboard wiring (board ships without headers by default).
- Attach the U.FL antenna from the kit for usable Wi-Fi / Bluetooth range (Seeed documents a "slide one side in first" technique to avoid damaging the connector).
- Sense only: align and press the camera expansion until it clicks; consider a heat sink for sustained camera workloads.
Arduino IDE setup (Seeed + Espressif)
- Install the arduino-esp32 core (version 2.0.8 or newer is required for this board family, per Seeed's wiki). Use Additional boards manager URLs (same Espressif index as in §5.2) and install esp32 by Espressif Systems.
- In the board list, search
xiaoand selectXIAO_ESP32S3. If your IDE shows a separate entry for Plus, use that for XIAO ESP32-S3 Plus. - Tools → Flash size — 8 MB for standard / Sense; 16 MB for Plus (must match the SKU).
- If
Serialover USB does not appear or upload behaves oddly, try USB CDC On Boot: Enabled (ESP32-S3 often uses native USB for the Type-C console). - PSRAM: The
XIAO_ESP32S3board preset usually matches the on-chip 8 MB OPI PSRAM; if you override chip options manually, a wrong PSRAM setting can cause boot loops — restore the board default when in doubt. - Tools → Port — choose the port that appears when the cable is connected (Windows often
COM3+; macOScu.usbmodem*or similar).
Bootloader mode (when the port is missing or upload fails)
Seeed's recovery flow:
- Hold
BOOT(maps to GPIO0 / boot strap). - While holding
BOOT, plug in the USB data cable to the PC, then releaseBOOT. - Upload a known-good sketch (e.g. File → Examples → 01.Basics → Blink).
Alternatively: hold BOOT, tap Reset once, then release BOOT after entering download mode. After a bad firmware, this fixes many "no port" / failed upload cases.
Pins and LED behavior
- Silkscreen D0–D12 correspond to specific GPIO numbers; use Seeed's pinout sheet for UART (D6/D7 = TX/RX), I²C (D4/D5), SPI, and ADC (note: A11/A12 do not support ADC on ESP32-S3 — Seeed warns about this).
- User LED is on GPIO21 and is active-low: in many sketches
LOWturns the LED on andHIGHturns it off (the stock Blink example behavior matches this).
PlatformIO (optional)
In platformio.ini, a common board id is:
board = seeed_xiao_esp32s3
framework = arduino
platform = espressif32
Adjust board if PlatformIO lists a separate target for your Plus revision.
5.3 ESP32 with ESP-IDF (optional "product" path, not Arduino sketch)
Use this when you need full control (menuconfig, components, OTA, low-level Wi-Fi).
- Install ESP-IDF via the official installer for your OS (bundles Python, cross-GCC, CMake).
- In a terminal, run the export script the installer prints (sets
IDF_PATHandPATH). - In a project folder:
idf.py set-target esp32(oresp32s3,esp32c3, …)idf.py buildidf.py -p /dev/cu.usbserial-XXXX flash monitor
- Logs and stack traces appear in the same monitor; debugging can use OpenOCD + GDB as described in Espressif docs.
This path does not use .ino files; source is C/C++ with CMake CMakeLists.txt and main/.
6. Summary and how to choose
| Goal | Sensible direction |
|---|---|
| Simple sensors, LEDs, learning bare MCU basics | AVR / basic Arduino boards |
| More peripherals, speed, varied upload methods | ARM Cortex-M (Arduino, PlatformIO, or vendor IDE) |
| Wi-Fi, Bluetooth, IoT, OTA-oriented products | ESP32 (Arduino-ESP32 for speed; ESP-IDF for products) |
| Linux apps, networking stacks, databases, multi-process systems | Raspberry Pi |
Architectures differ not only in raw performance but in how you build, ship, and debug software. MCU platforms emphasize firmware, flashing, and close-to-metal timing; Raspberry Pi emphasizes operating-system-level development and software richness at the cost of predictable hard real-time behavior for naive GPIO code.
Together, this comparison shows that choosing a board is really choosing a whole workflow: compiler, flasher, libraries, and day-to-day habits on the bench.