Week 10
Output Devices
Summary
This week I successfully controlled a LED matrix and a MG90S servo motor using the ANDRU board. I measured their power consumption, adapted appropriate libraries for the ESP32-C3 architecture, and improved my understanding of output device integration and system power management.
Group Assignment
As part of the group assignment, we documented:
- Measure the power consumption of an output device.
- Document your work on the group work page and reflect on your individual page what you learned
As part of the group assignment, we measured the power consumption of different output devices using a multimeter. Each member worked with a specific component to analyze its voltage, current, and estimated power usage under operating conditions..
What I Learned
- I understood how to measure the power consumption of output devices using both voltage and current readings.
- I gained insight into how different output devices (such as LED matrices or servo motors) behave in terms of energy use under load.
- I realized the importance of selecting an appropriate power source based on the actual consumption of each component.
- This activity helped me connect theoretical knowledge with practical measurement techniques, reinforcing the relevance of power analysis in embedded systems.
Individual Assignment
Hardware Identification
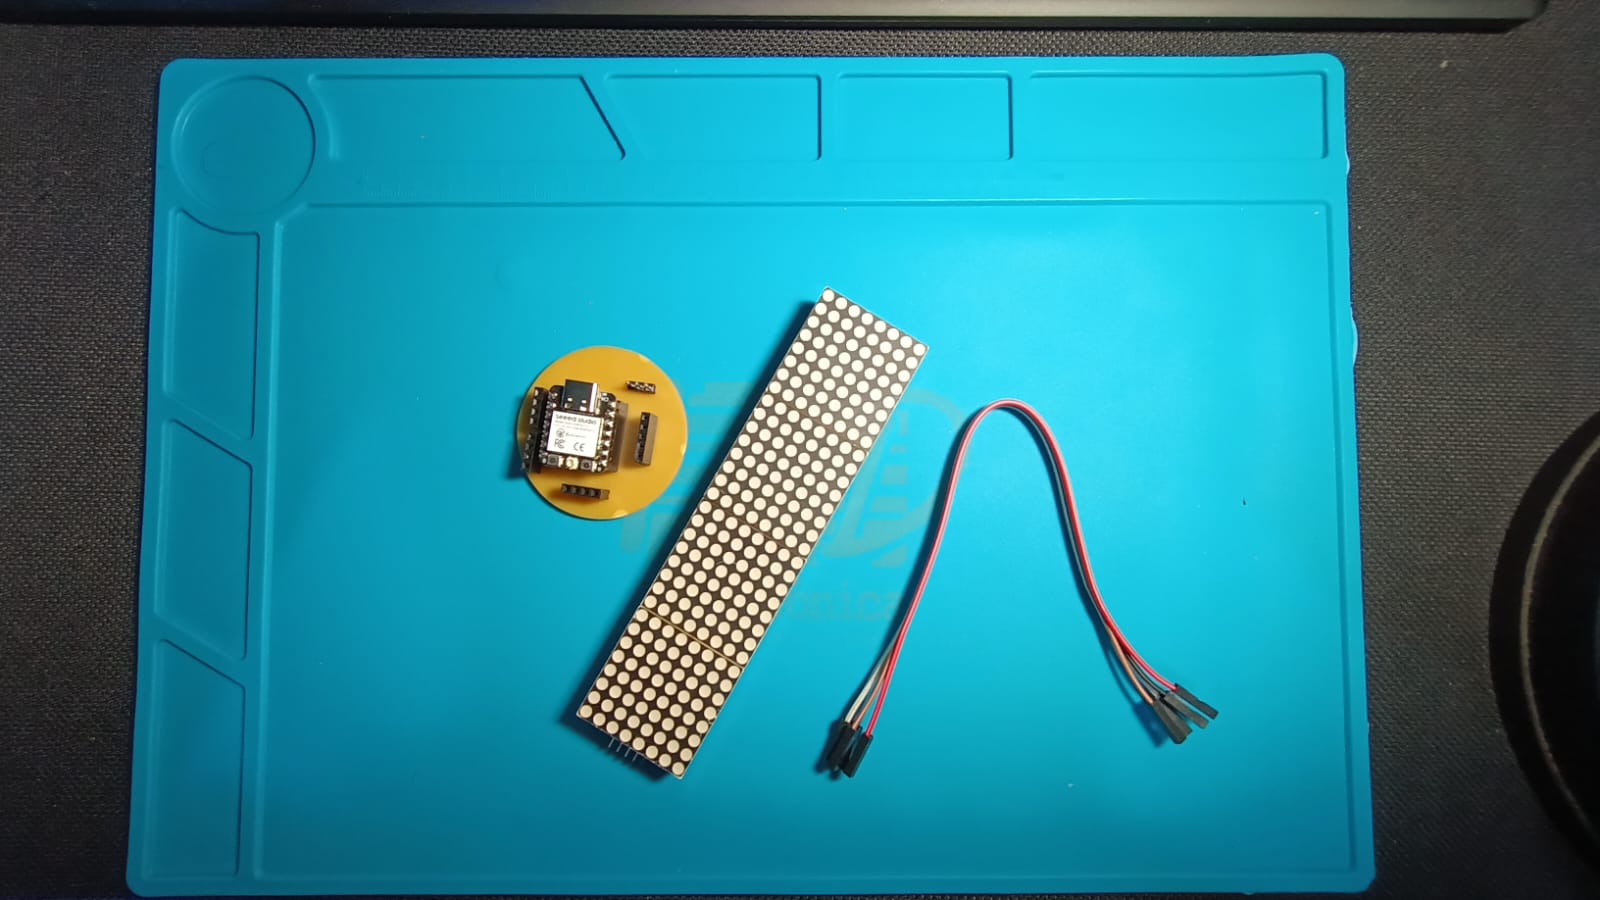
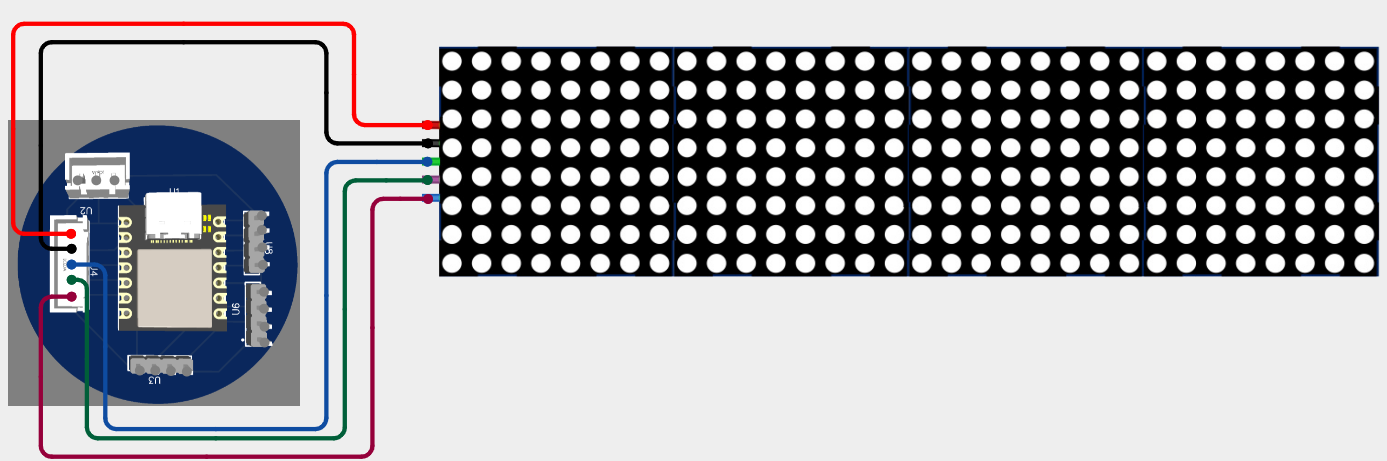
I used a LED matrix composed of 4 screens of 8x8 LEDs. The connection pins are: VCC, GND, DIN, CS, CLK. The microcontroller is a XIAO ESP32-C3 based custom board (ANDRU).
Choosing the Library
For better compatibility and functionality, I chose the MD_MAX72XX library to control the matrix.
Installing the MD_MAX72XX Library
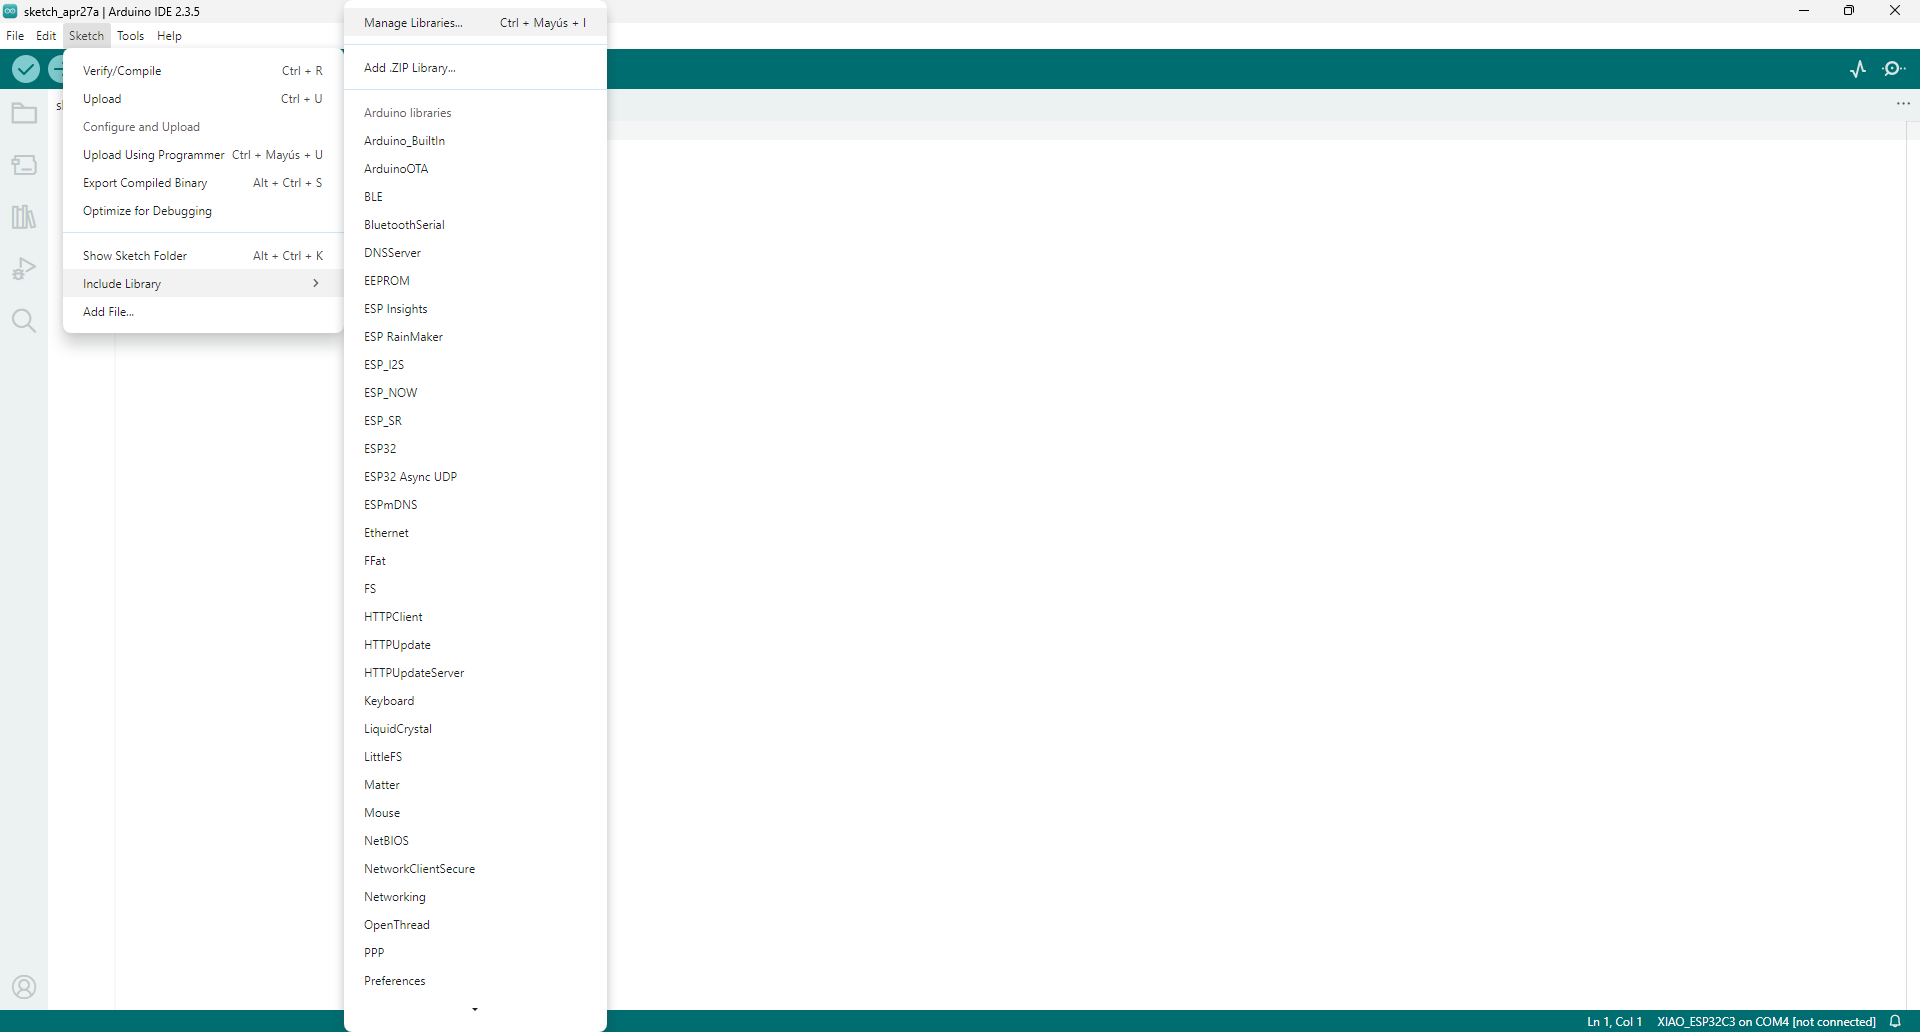
- Open Arduino IDE.
- Go to Sketch → Include Library → Manage Libraries....
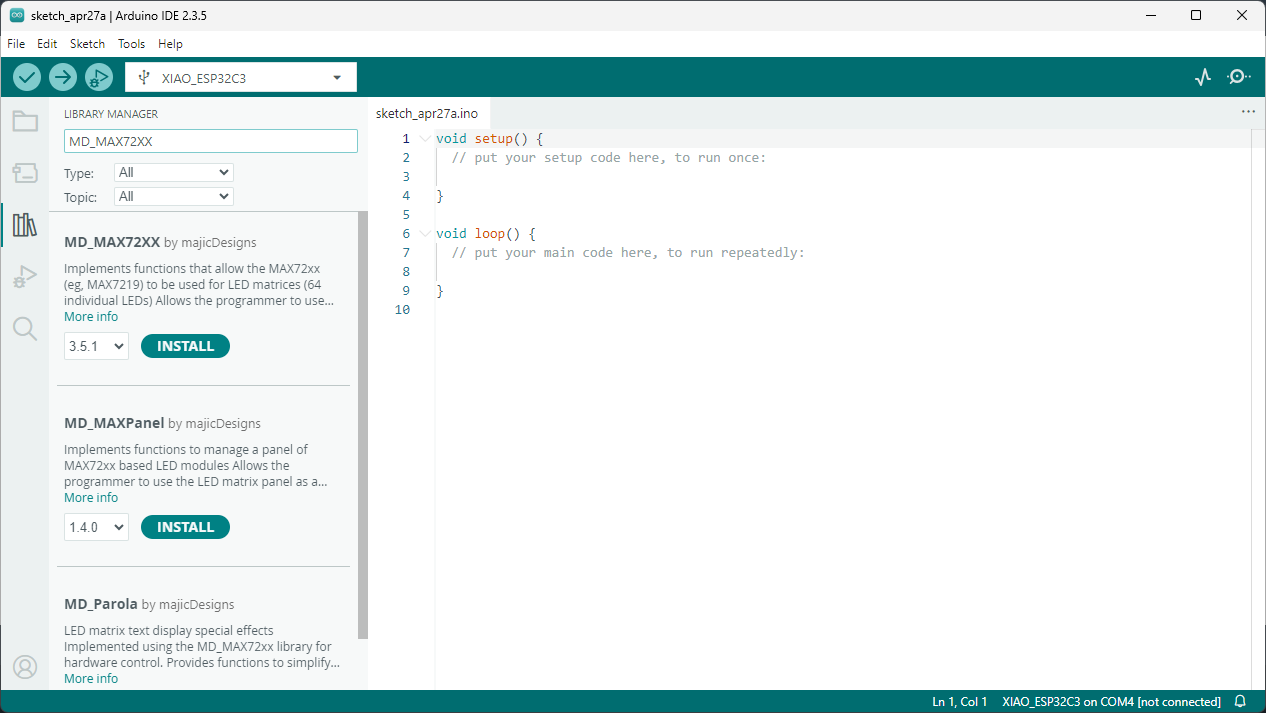
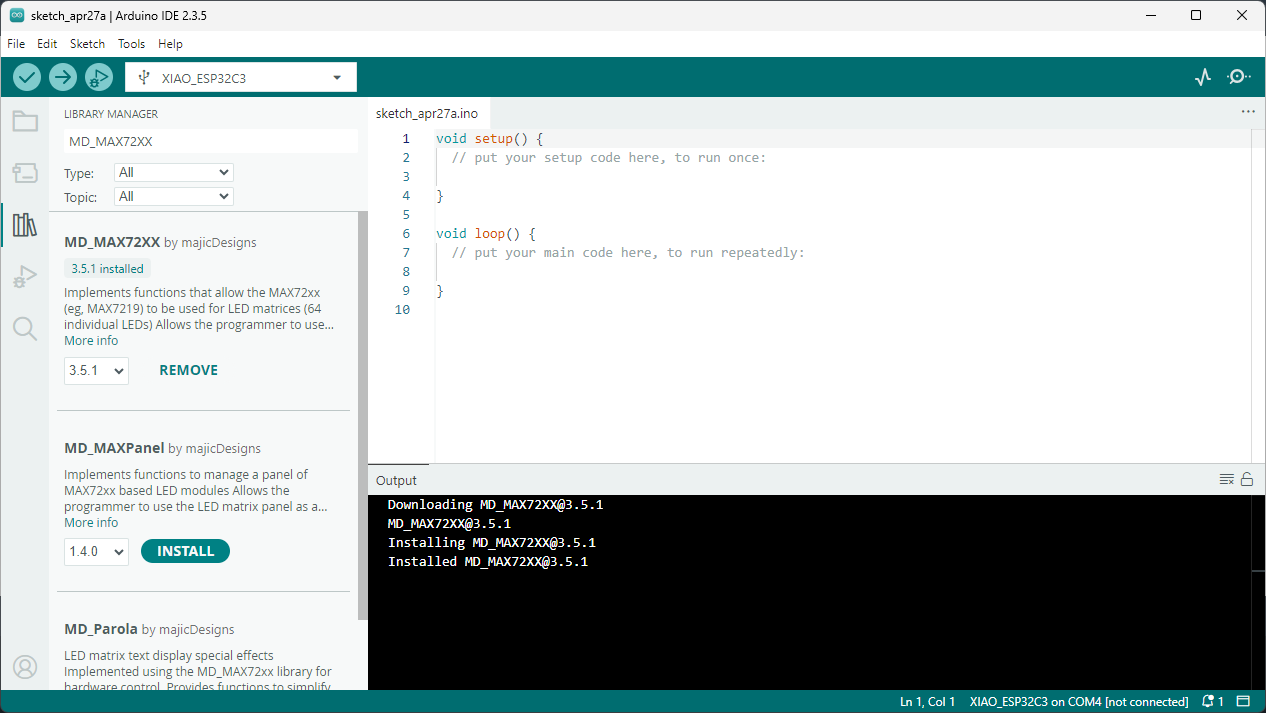
- Search for MD_MAX72XX.
- Install MD_MAX72XX by MajicDesigns.
- Install MD_Parola for advanced scrolling text.
Wiring the Circuit
Connections between the LED matrix and the ANDRU board:
| LED Matrix Pin | ANDRU Pin |
|---|---|
| VCC | 5V |
| GND | GND |
| DIN | GPIO10 |
| CS | GPIO9 |
| CLK | GPIO8 |
5. Arduino Code
                        #include
                        #include
                        #include

                        // Define hardware type and number of devices
                        #define HARDWARE_TYPE MD_MAX72XX::FC16_HW
                        #define MAX_DEVICES 4

                        // Define pin connections
                        #define DATA_PIN 10
                        #define CS_PIN   9
                        #define CLK_PIN  8

                        // Create a Parola object
                        MD_Parola display = MD_Parola(HARDWARE_TYPE, DATA_PIN, CLK_PIN, CS_PIN, MAX_DEVICES);

                        void setup() {
                            display.begin();
                            display.setIntensity(5);   // Set brightness (0 to 15)
                            display.displayClear();
                            display.displayScroll("Andres", PA_LEFT, PA_SCROLL_LEFT, 100); // Text, entry side, scroll effect, speed
                        }

                        void loop() {
                            if (display.displayAnimate()) {
                            display.displayReset(); // Reset the animation when finished
                            }
                        }
Mounting and Test
Physical Assembly
The LED matrix was connected to the ANDRU board (XIAO ESP32-C3 based) following the defined wiring. Below is an image showing the final physical setup:
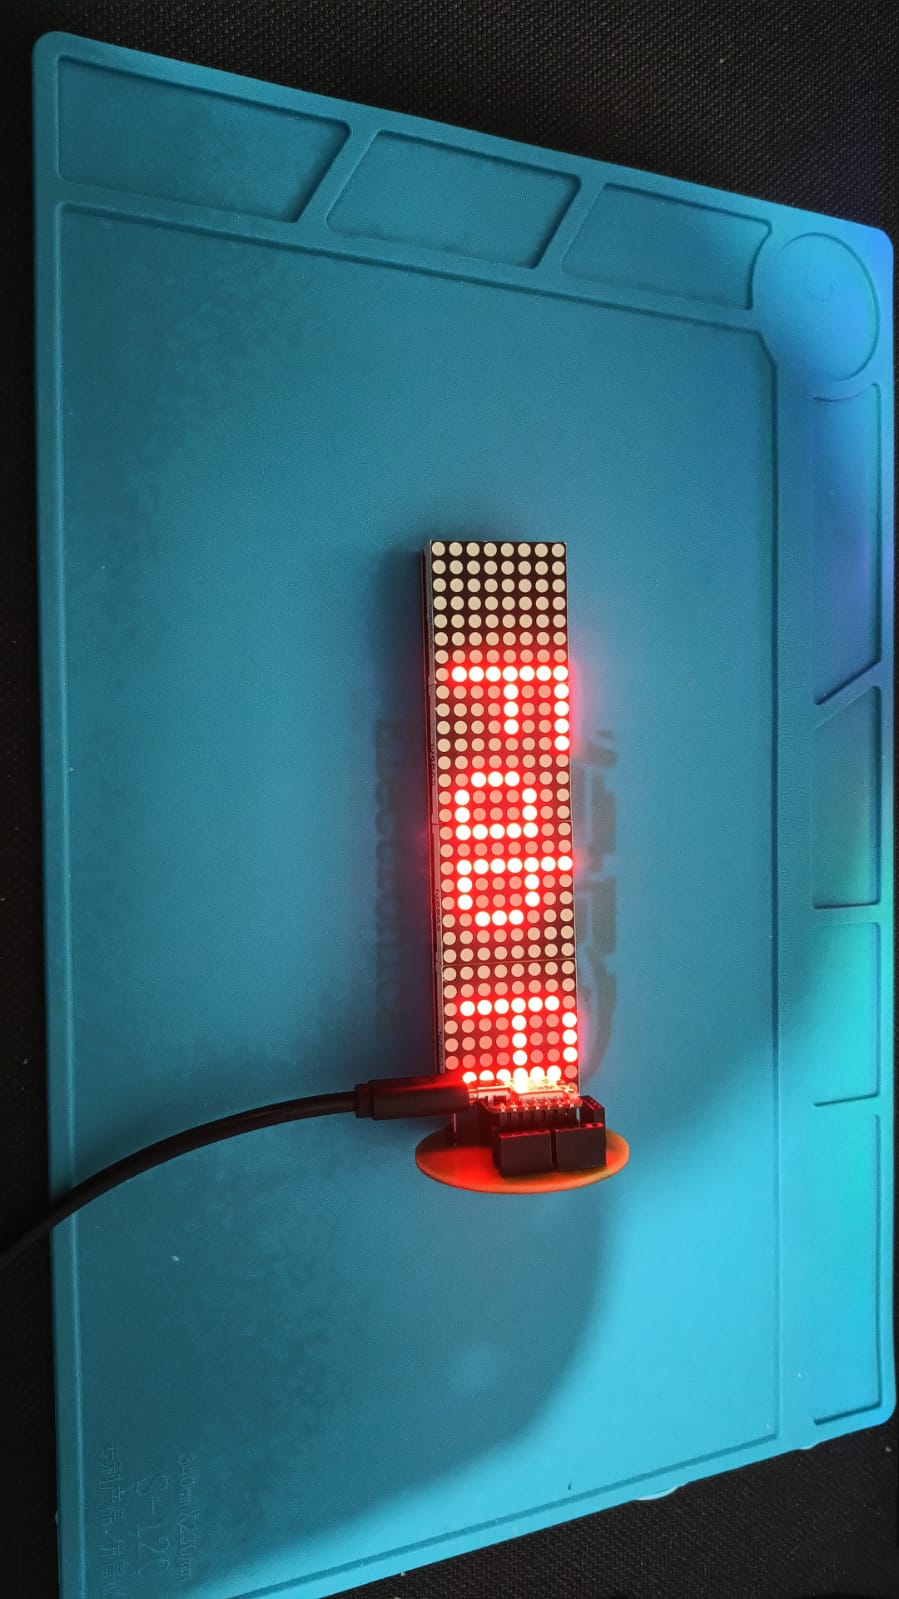
Scrolling Text
The final text selected to be displayed on the matrix was:
\"Fab Academy EAN Colombia\"
The text scrolls smoothly from right to left across the four 8x8 modules, making the message fully visible during the animation.
Video Evidence
The following video shows the full operation of the scrolling text on the LED matrix:
Controlling a Servo Motor (MG90S)
Device Description
The MG90S is a small but powerful servo motor with metal gears, offering higher torque and durability compared to basic models like the SG90. It operates using a PWM signal and requires a supply voltage between 4.8V and 6V.
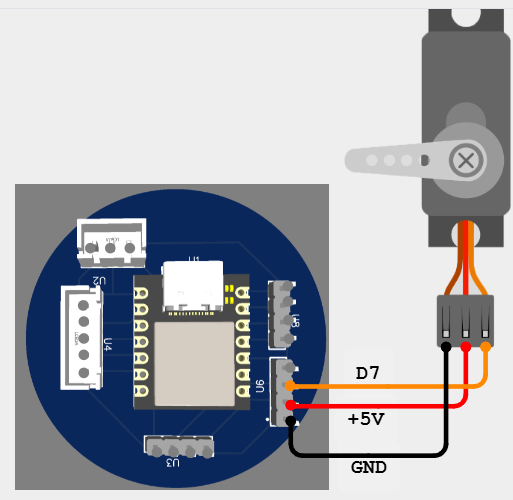
Connections
| Servo Wire | Function | ANDRU Connection |
|---|---|---|
| Brown | GND | GND |
| Red | VCC (5V) | 5V |
| Orange | PWM Signal | GPIO7 |
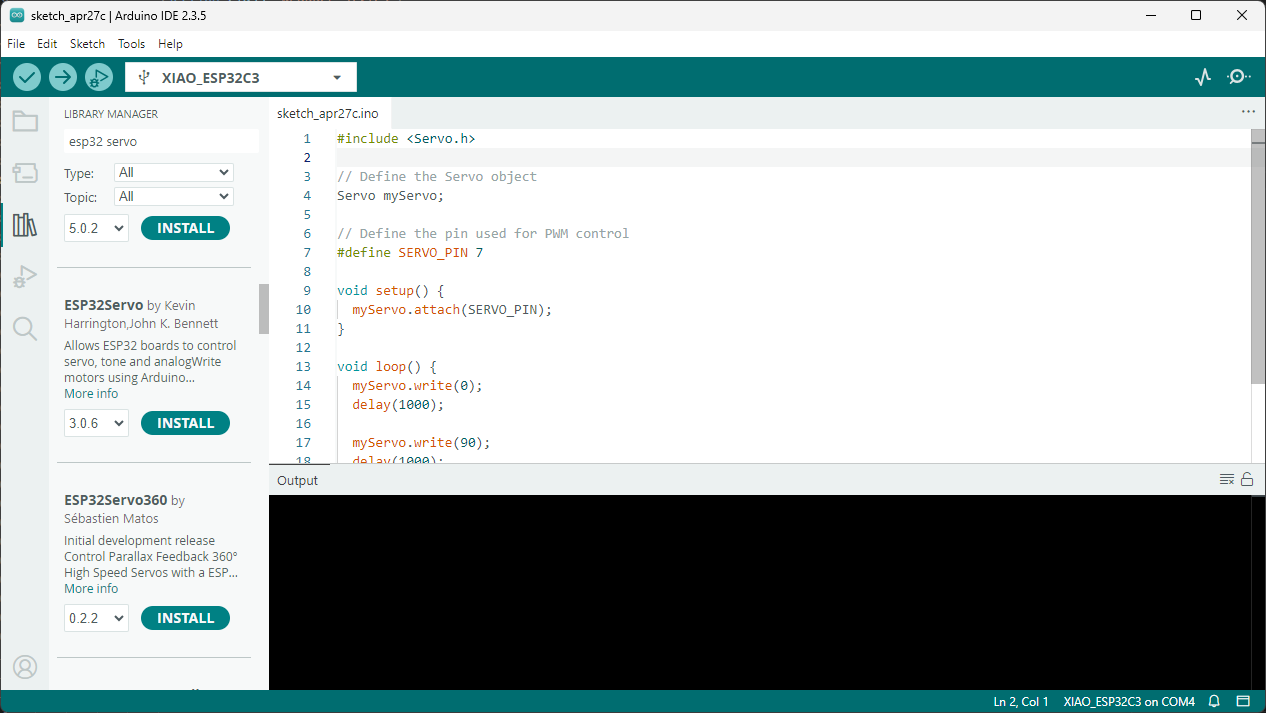
Library Installation for Servo Motor Control
Since the standard Servo.h library is not compatible with the ESP32-C3 architecture, it is necessary to install a specific library that supports PWM control on ESP32 boards. The required library is ESP32Servo.
Follow these steps to install it:
- Open Arduino IDE.
- Go to Sketch → Include Library → Manage Libraries....
- In the search bar, type ESP32Servo.
- Locate and install the library named ESP32Servo by Kevin Harrington and John K. Bennett.
Below is an image showing the installation screen:
ESP32-C3 Code
                        #include

                        // Define the Servo object
                        Servo myServo;

                        // Define the pin used for PWM control
                        #define SERVO_PIN 7

                        void setup() {
                            myServo.setPeriodHertz(50);    // Standard 50Hz servo
                            myServo.attach(SERVO_PIN, 500, 2400); // Attach pin, min and max pulse widths in microseconds
                        }

                        void loop() {
                            myServo.write(0);
                            delay(1000);

                            myServo.write(90);
                            delay(1000);

                            myServo.write(180);
                            delay(1000);
                        }
Mounting and Test
The servo motor was connected to the ANDRU board following the wiring table. Below is a picture showing the final setup:
Video Evidence
The following video shows the servo moving between 0°, 90°, and 180°:
Conclusions and Reflections
This week provided valuable experience in working with output devices and understanding their electrical requirements and behaviors. I successfully controlled a LED matrix and a MG90S servo motor using my custom board ANDRU based on XIAO ESP32-C3.
Key learnings included:
- Understanding the voltage, current, and power consumption characteristics of different output devices.
- Integrating and programming a LED matrix with the MD_MAX72XX and MD_Parola libraries to display scrolling text.
- Learning about the compatibility issues of libraries, specifically adapting from
Servo.htoESP32Servofor the ESP32-C3 platform. - Measuring and analyzing the energy consumption of devices under real operating conditions.
- Developing reliable wiring, coding, and documentation practices to ensure functional and reproducible work.
Overall, this week reinforced the importance of carefully choosing components and libraries depending on the hardware architecture. Additionally, it demonstrated the necessity of verifying real-world power consumption in order to design efficient and robust embedded systems.
Downloads
You can download the sketches developed during this week: