Computer controlled cutting
Tasks
- Group assignment:
- ✔ Do your lab's safety training
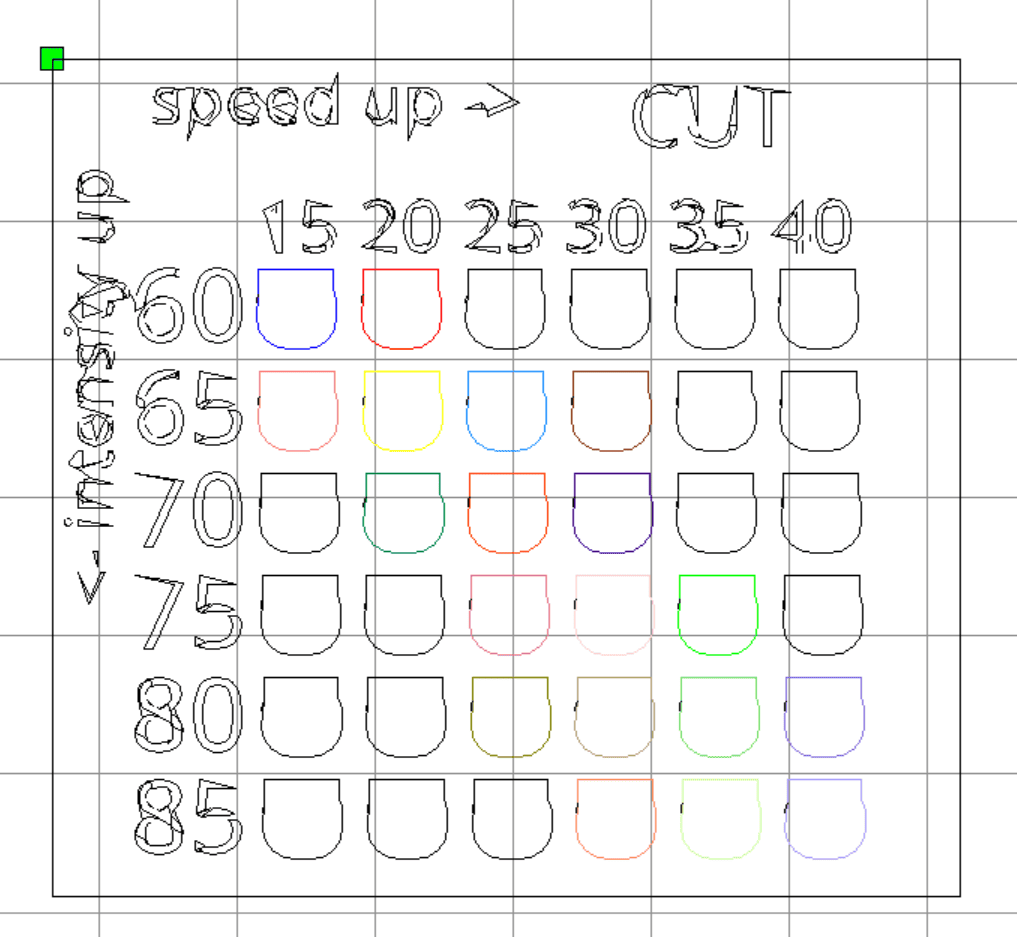
- ✔ Characterize your lasercutter's focus, power, speed, rate, kerf, joint clearance and types
- Individual assignment:
- X Cut something on the vinylcutter -> the cutter is not ready yet
- ✔ Design, lasercut, and document a parametric construction kit, accounting for the lasercutter kerf, which can be assembled in multiple ways
- X Extra credit: include elements that aren't flat
All download files can be found here. Some of them are quite heavy.
Issue: Lasercutter
WHile working with the lasercutter I encountered the following issues:
- The software RD Works V8 on UNIKAT computer did not accept my prepared lasercut files.
It also did not accept .svg data.
Solution: Reexport files as .dxf from Cuttle (free plan only allows for 10 exports per month, that I have now almost used up). When importing said .dxf files the text did not import properly. - After lasercutting the first test round, I noticed, that the laser would not lasercut my new files.
Instead, it kept wanting to laser the same testfile with the same parameters as the first time.
Solution: the laser can only save 99 files. Every time a file is uploaded, a slot is reserved for that file. As such, the solution was to constantly overwrite the same file. To do this, one has to save the file under the same name as the one one wants to overwrite. - The parameters I have been cutting and scanning with for over 2 years now don not work properly anymore. What's more: even within the same file, when a color other than black is applied it does not seem to cut properly. Even if whatever color is applied has the exact same parameters as the black color.
- There is a lot of smoke forming with parameters that barely produced any smoke last time.
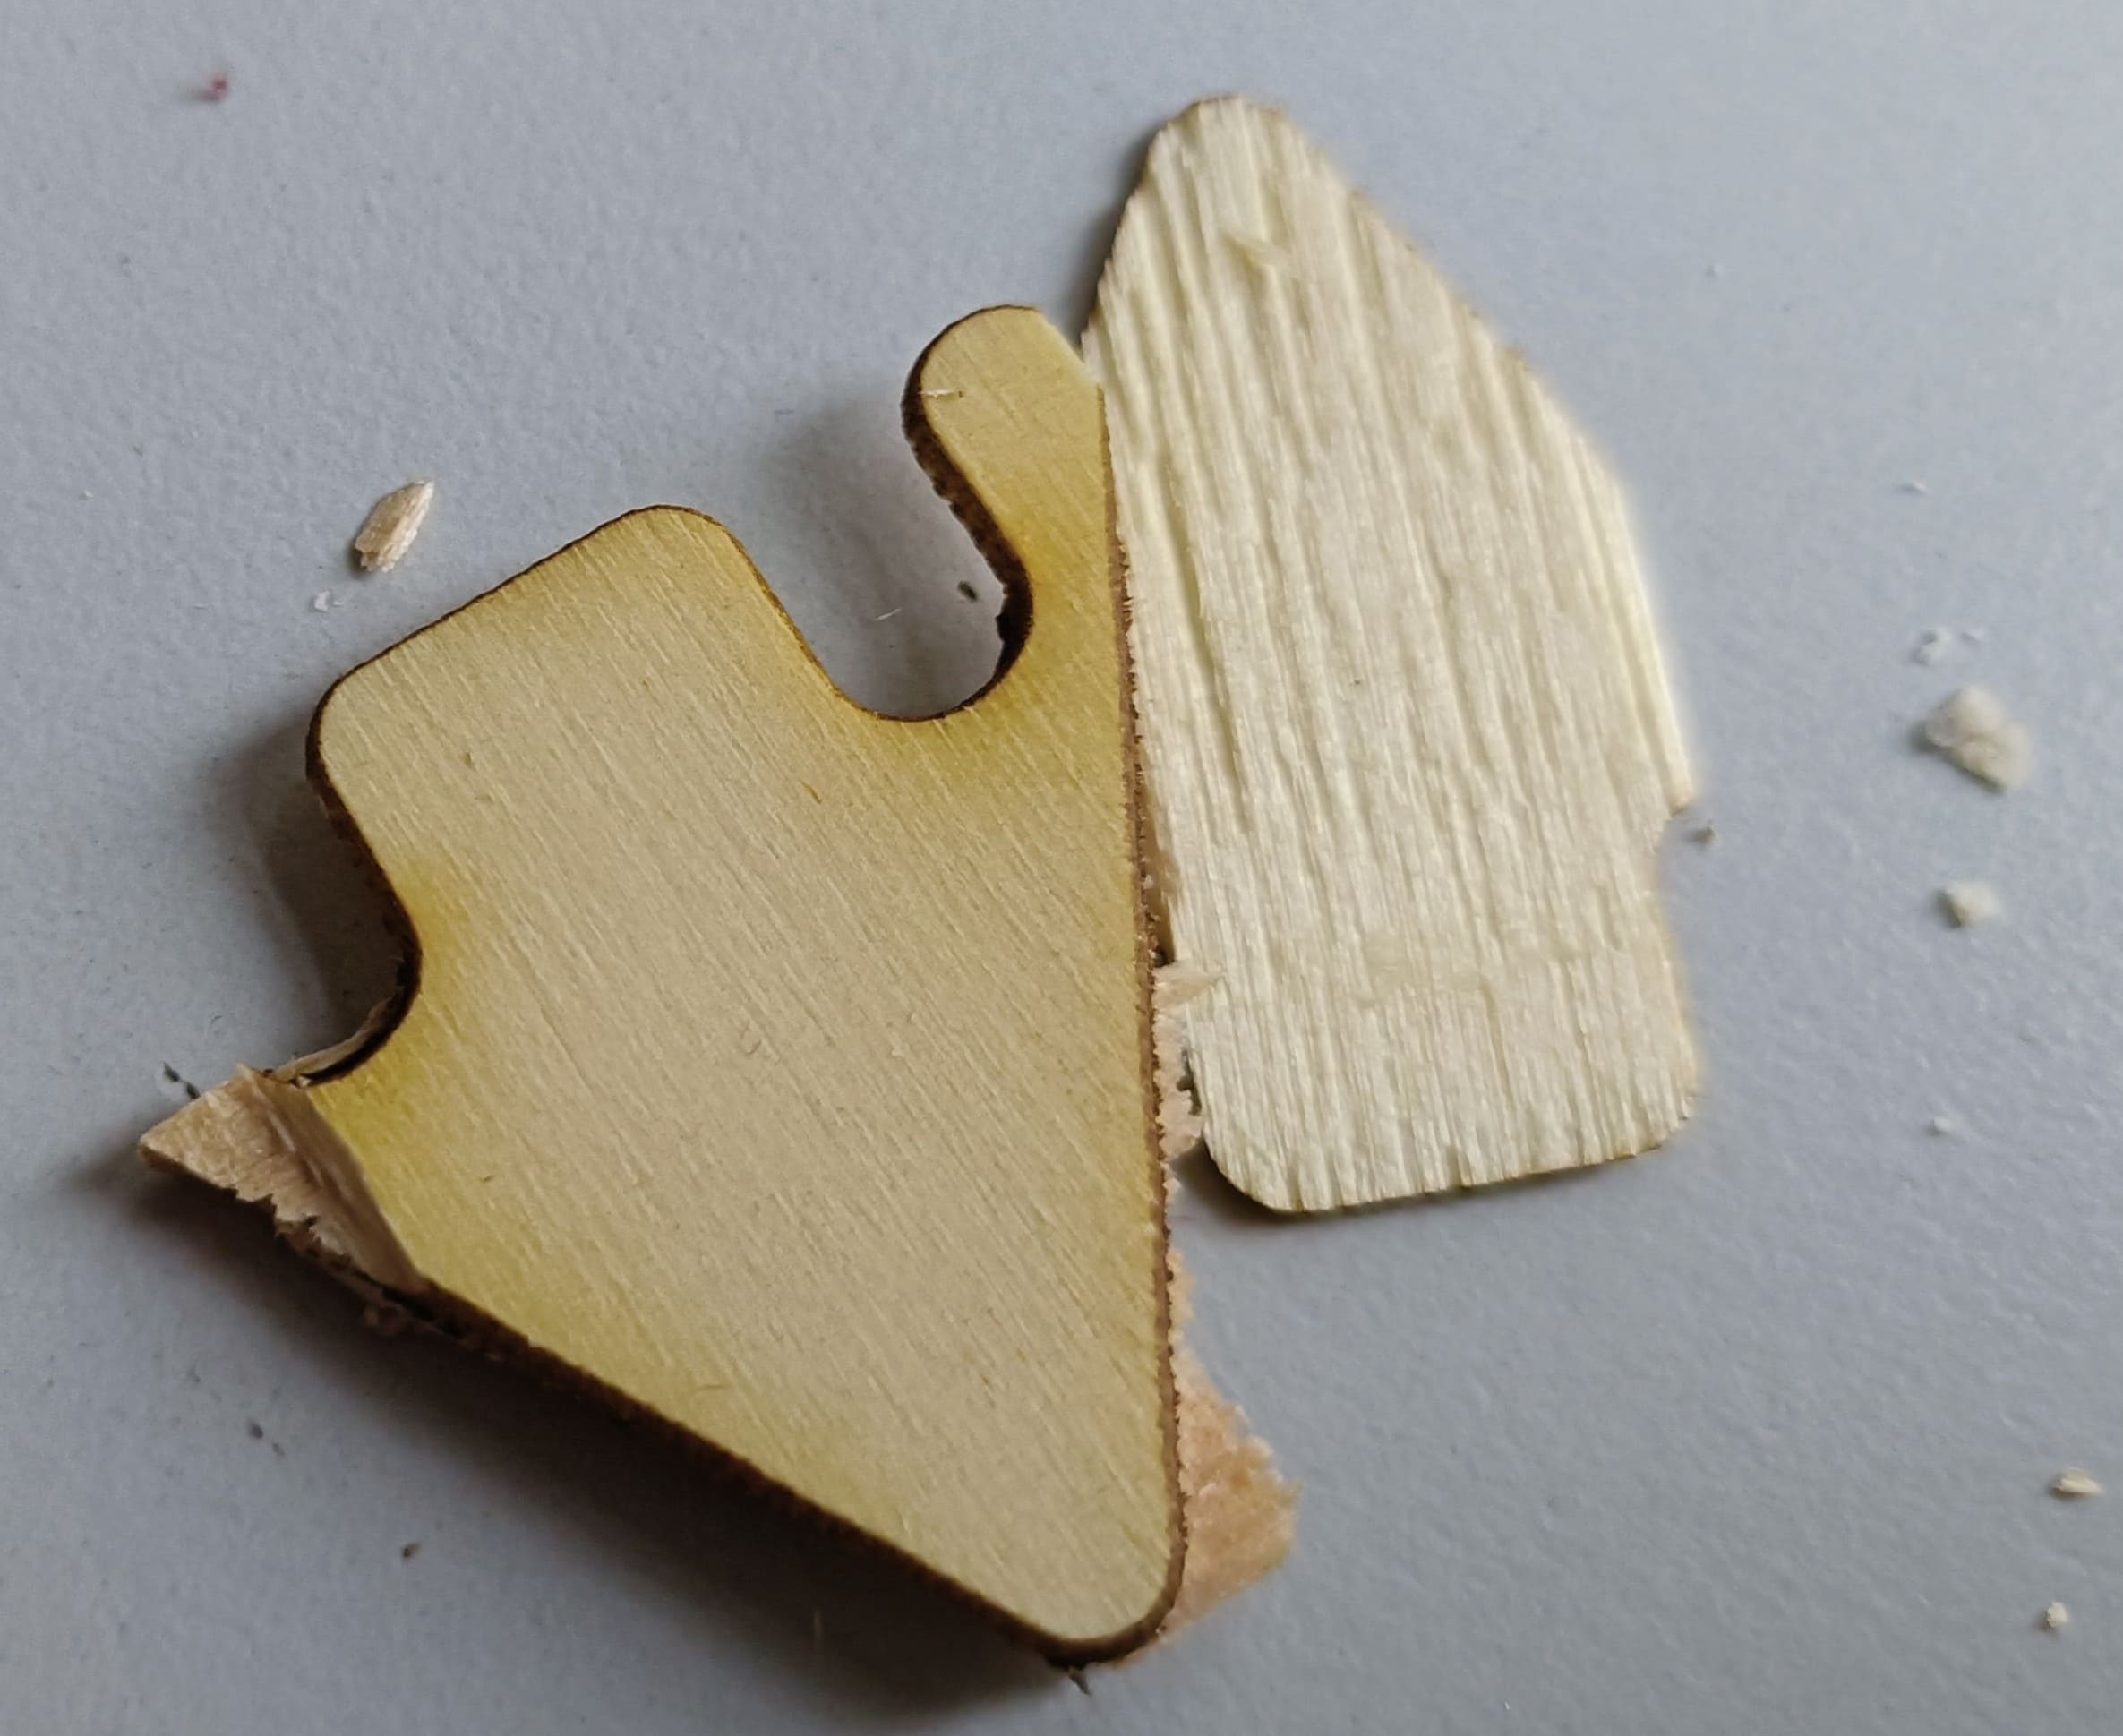
- After cutting, the wood was brittle and would easily split. When I was cleaning I noticed that before lasercutting it was already unstable when force is applied. This is another mystery, as the other pieces I cut from that same piece of wood are stable.
Additionally, I noticed the lasercutter bed is new. It is finally even, that's great! Last time I lasercutted was on the 07.02, back then it worked like it always did. Coincidentally, I noticed that only other participants from the FAB Academy have used the lasercutter (and wrote it down in the documentation booklet), so i'm guessing sth was changed that I missed while sick at home.
I made sure to test the same parameters with the same piece of wood that I used last time - it did not cut through anymore and the wood fell apart when trying to remove the pieces by force.
I also tried different files just to be save.
Solution: Ask the other participants. Sit down one day with more time and test new parameters for cutting. Test with different materials.
Update: During the group assignment the focal point was changed. That's why the parameters I've always been using do not work anymore
The issue with the bad transmission between the computer and laser can apparently be solved by reuploading the file to RD WorksV8
Working with Cuttle, RDworks V8, and Krita
For more information of the software go to my software comparison page.
I have been using Cuttle for a while now. For evaluation of this program please go to my software comparison page. I strongly recommend this tutorial for beginners.
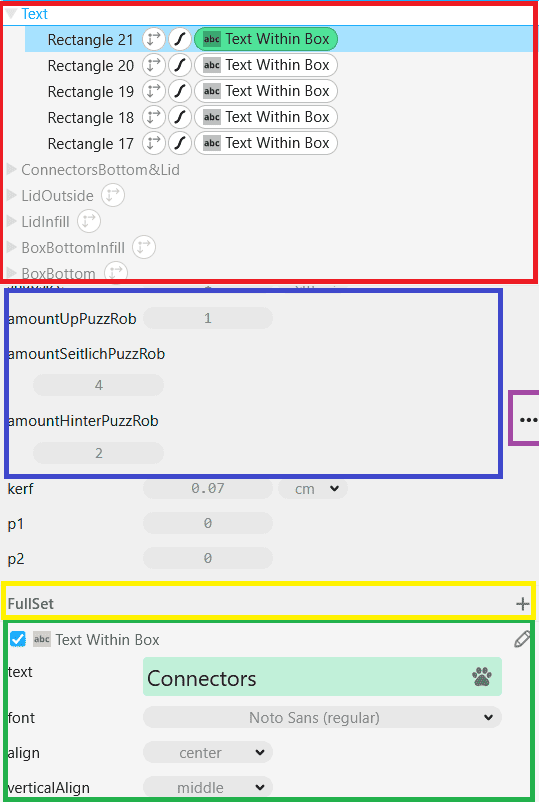
At the link you'll find a great guide to getting started with parametric design in Cuttle. Basically, all the magic happens on the left side menu. On the top part (list menu, red) all the shapes are listed, with the ones with the uppermost layer being at the top. If there is a modifier applied to them, it will appear right next to the name of the specific shape (green highlight). To change sth about it, double click on the name and apply the changes on the lowermost part of the left side (property menu, green). Keep in mind that if you want to change the properties of the modifier, you'll specifically have to click on the modifier next to the name. Personally, I really like grouping the shapes into groups stay on top of all the shapes.
Specifically for parametric design, right in between the list of objects and their properties on the left side, there is a menu (blue) that allows you to create global variables. You can reference the variables at any time by typing that name of the variable in any field. Local variables (the ones that are only valid for this specific component) can be defined right underneath (yellow).
To create equations or change the type of input click on the 3 dots (purple) and select "Edit Expression". To add a modifier select the shape(s) and press on "Modify" on the top menu.
That's it for Cuttle! Happy creating!
Unfortunately, I do not know of any good tutorials for RDWorks8. Krita has a lot of tutorials online. You will find whatever you want to do.
With that said, I am not going to explain how to do anything here. Instead, my main focus will be on the projects themselves.
Reference sheet for Math functions in Cuttle
Group assignment
I wasn't able to join the group lasercutting session last Thursday due to an urgent appointment. As such, I redid the testing on my own. I realize this is less than ideal and I will try to move the ultra high priority regular appointment to another day after next week.
Link to our lab's group assignment

The results are less than ideal. For more information please see the Issue-card farther up on the page. Nevertheless, Scan is working fine. I will use 400 speed.
Box for safe transport and storing of the puzzling Robots
More information can be found on the final project page.
! The exact size of the puzzling robots is not decided yet as the Electronic components still need to be chosen. This is but a parametric design to input the sizes required later.
Download links to files:
- Download: Puzzling robot storage and travel box SVG
- Download: Placeholder values Box Puzzling Robots
Newer updated will be posted on the final project page.
Outside box
Requirements:
- Stable enough to carry a bit of weight
- Allows to comfortably carry the box
- Have a lid to insert and remove puzz robots with ease
- Does not need to be changes in size -> no need for removable connection
- Super nice to have: water protecting attribute
Inside box
Requirements:
- Comfortably fit 10 puzz robots
- Protect robots from damages due to impact
- Super nice to have: charge batteries when robots are stored
Super weird cool amazing game night stand table
Needed a new table. Me and my friends wanted to try out some new games with super expensive boards. I had to think of a press fit connection project. I really love lizard scales. The box for the puzzling robots is not ready to be cut just yet. That is how this happened.
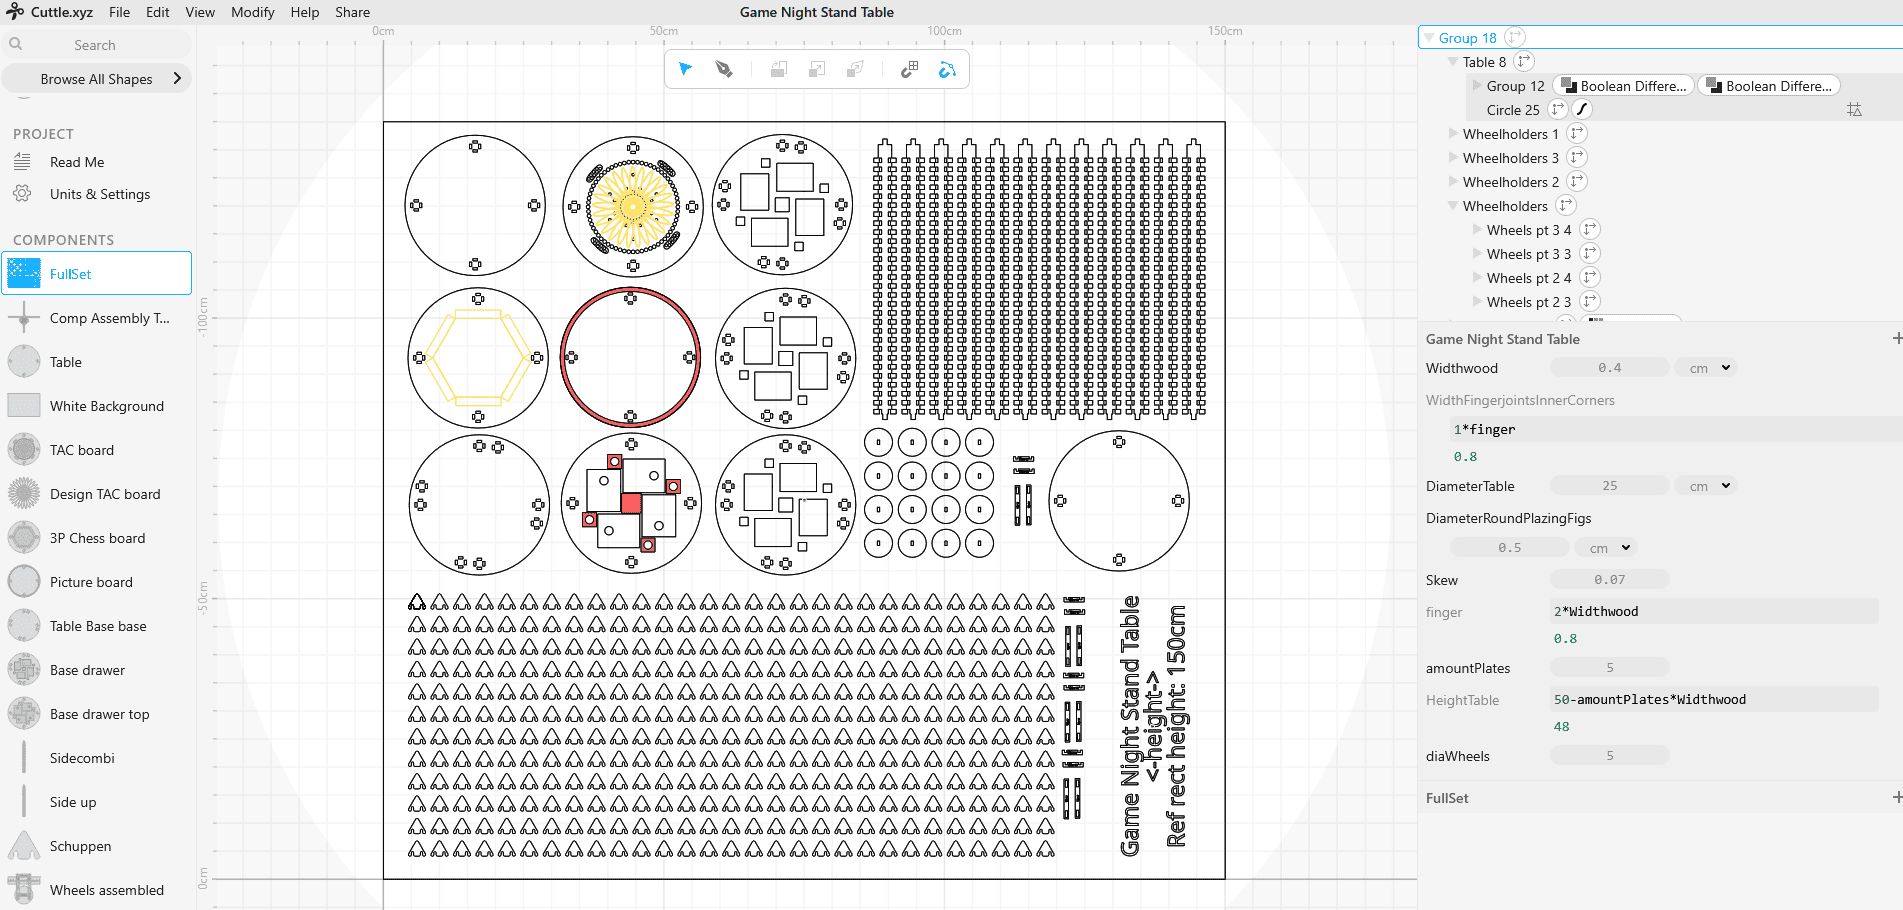
Download links:
- Download: GameNightStandTable SVG
- Download: TestComponentsSideGameNightStandTable DXF
- Chess pieces by ohammersmith -> Link to Thingyverse
Though the lasercutting session today was really bad, it allowed me to to basic testing. It seems to be working fine with a few little changes.
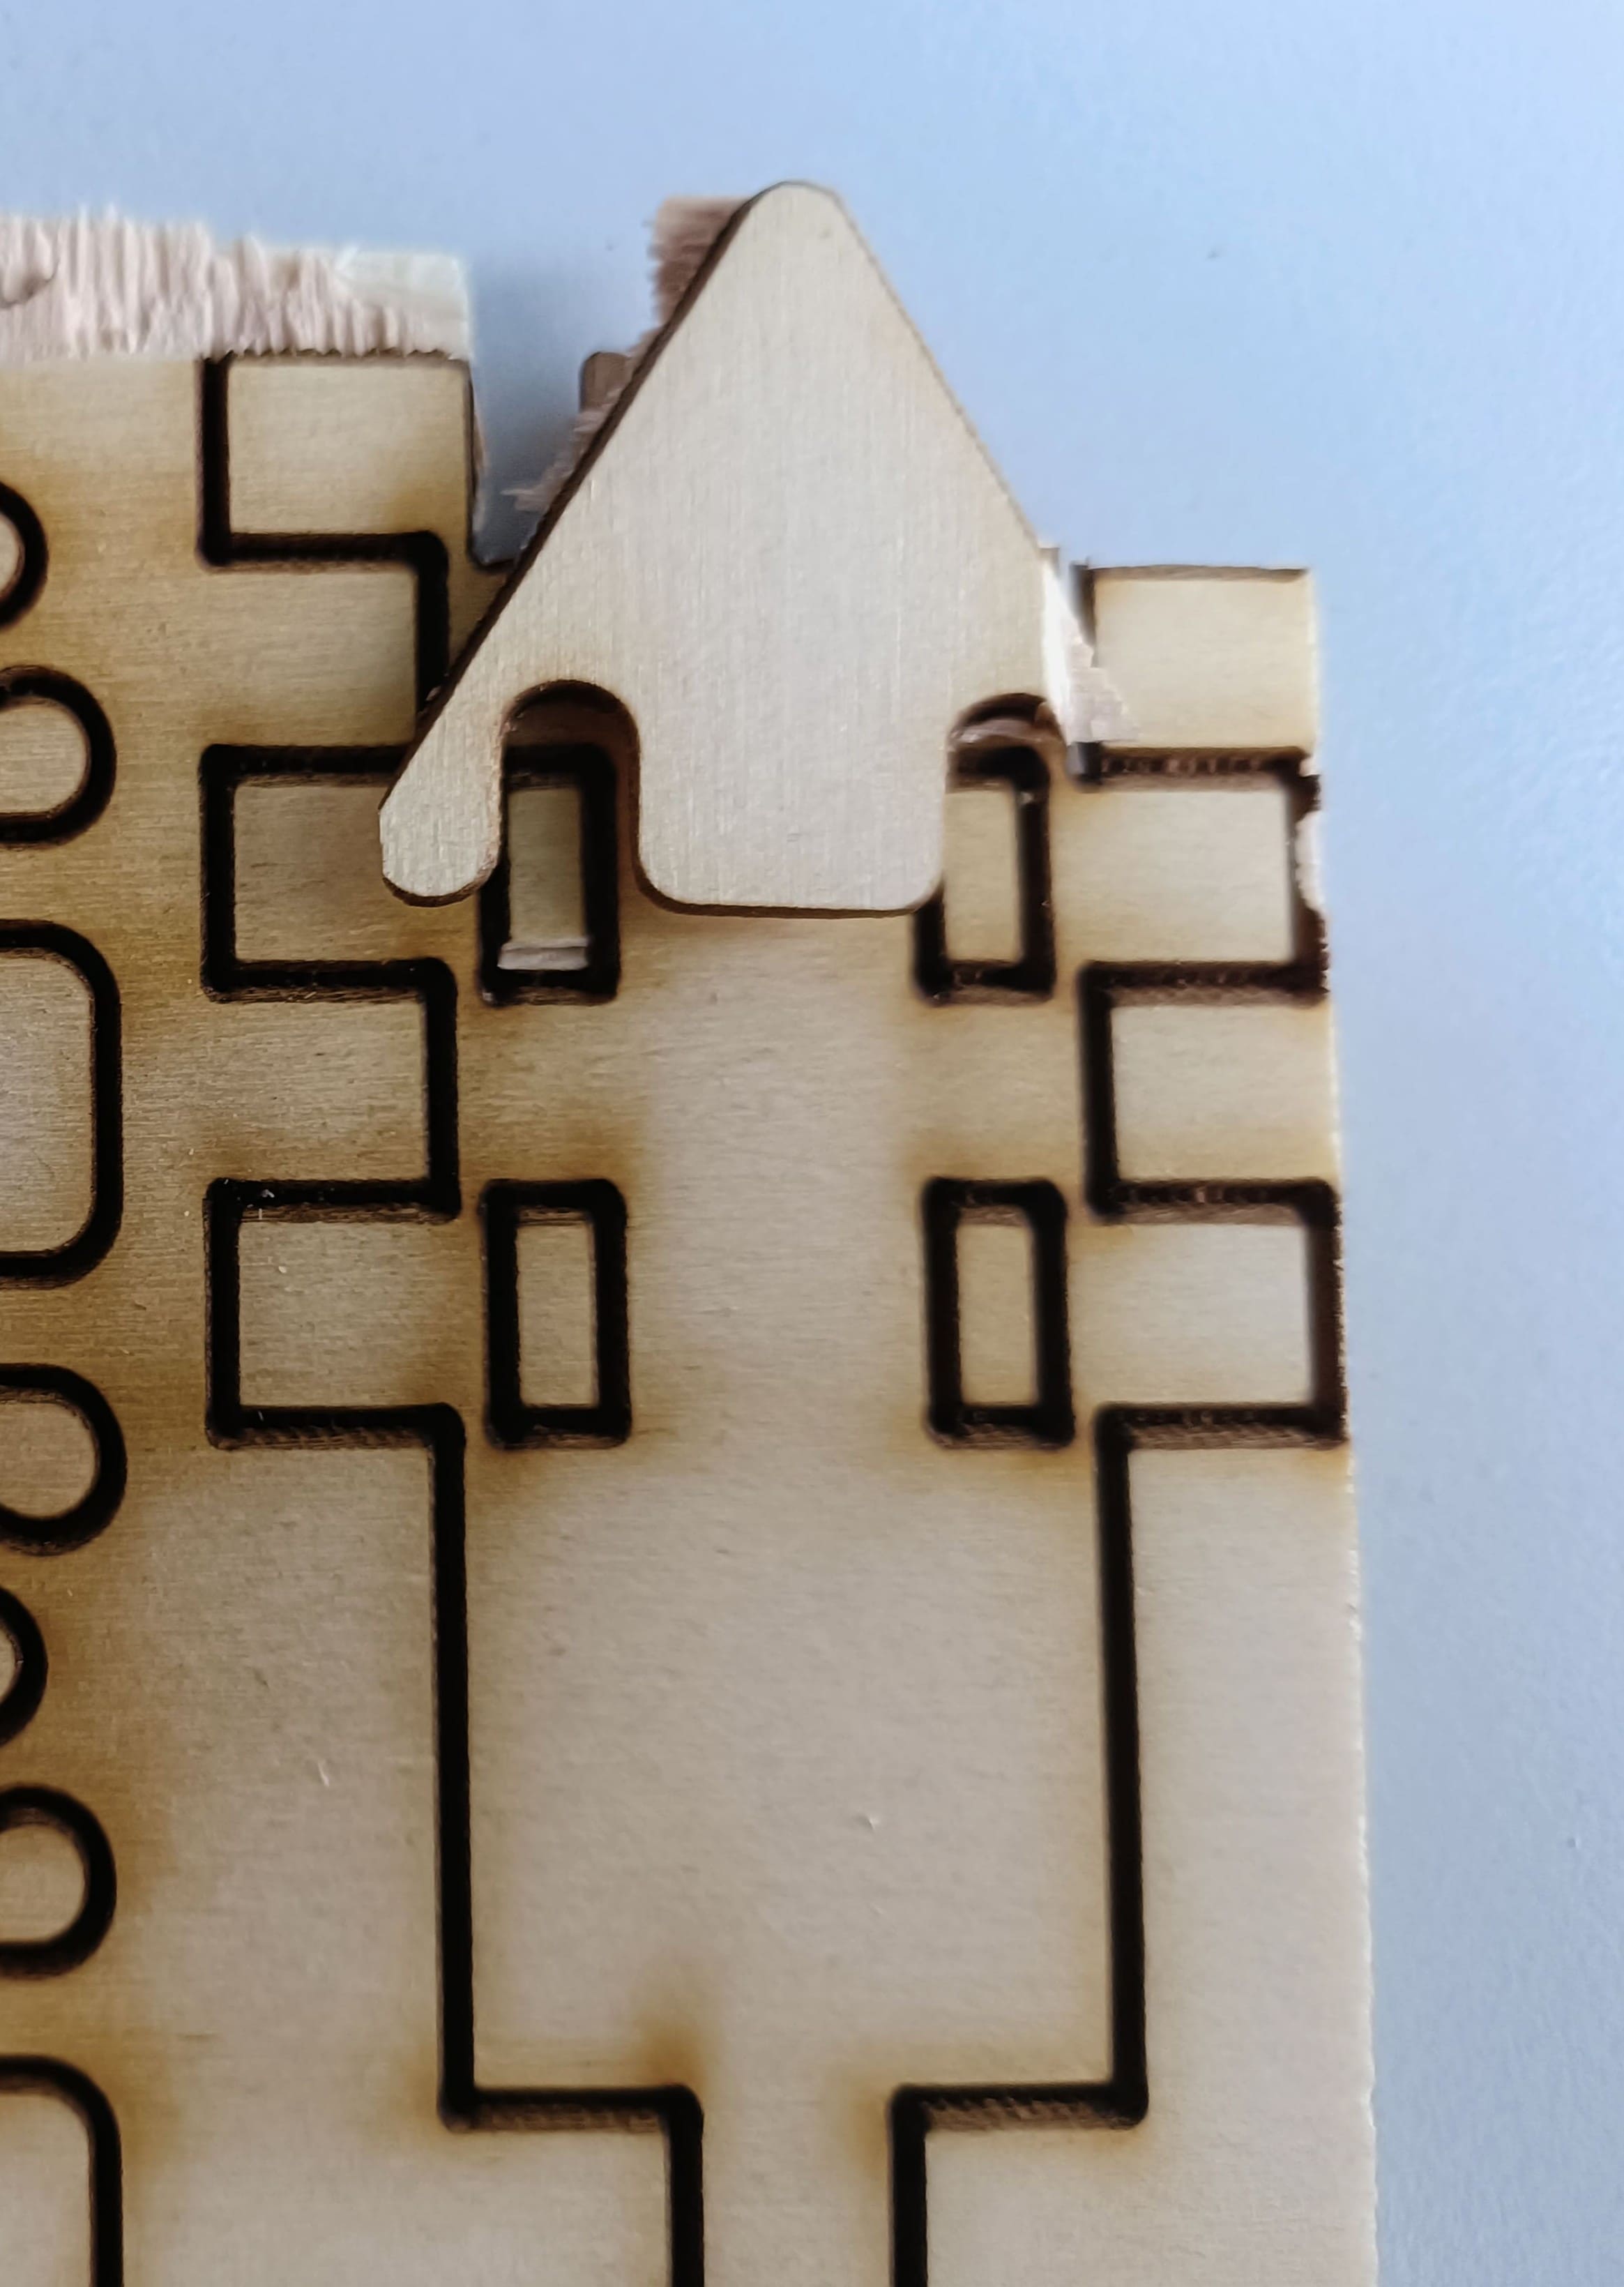
Version2 update
- In scales: remove rounded corners from finger inserts
- Increase
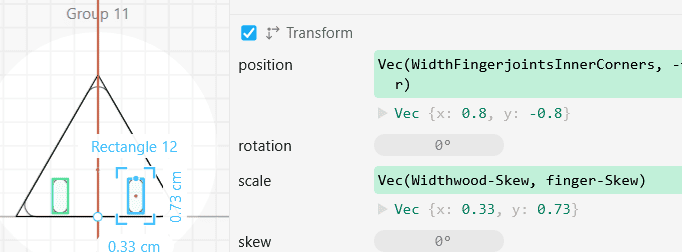
How I made this press-fit connection: using parametric design, experience, and brainpower I created formulas that change automatically. Until now, the kerf was 0.07 cm, so I included it into the formula as if it was a scale factor. At times it took some trial and error or reworking the formulas. Thanks to Cuttel's instant modification that was no trouble.
This project does not in any way have something to do with my final project. I will save it under "Side projects". For the sake of time I will not officially further pursue this project.
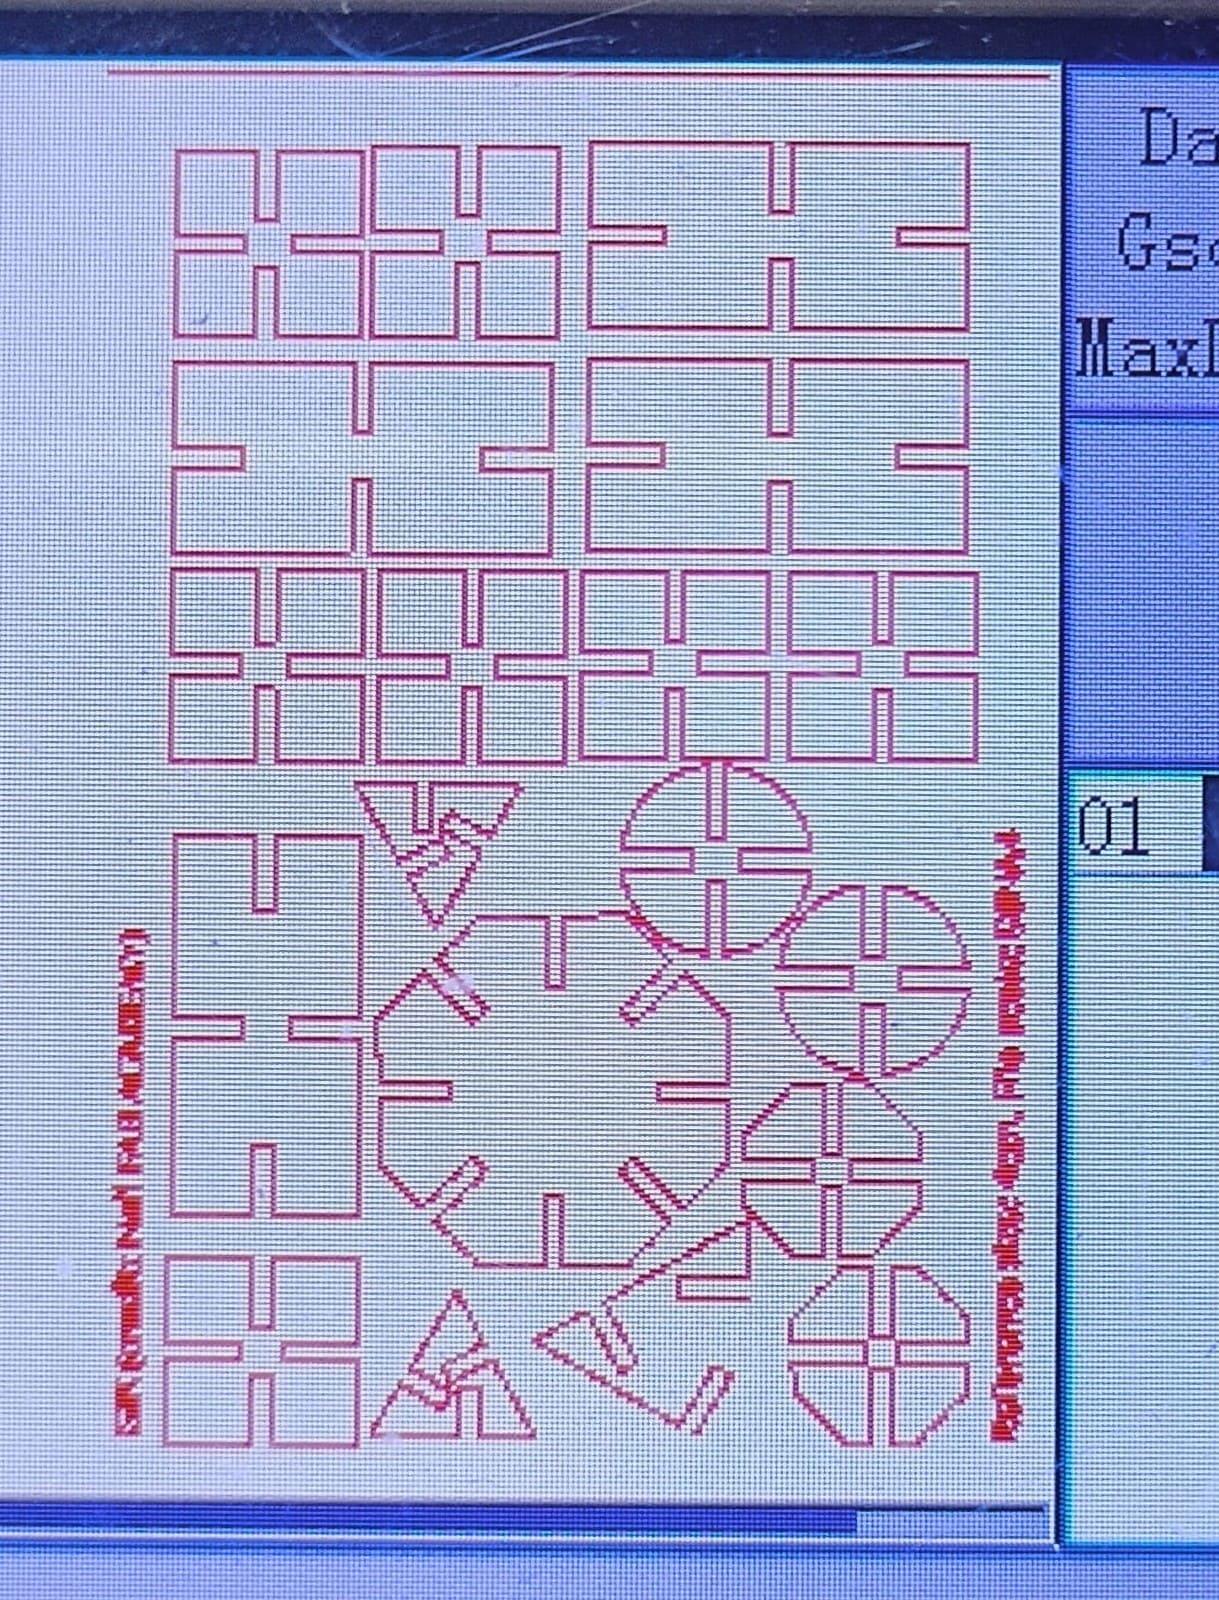
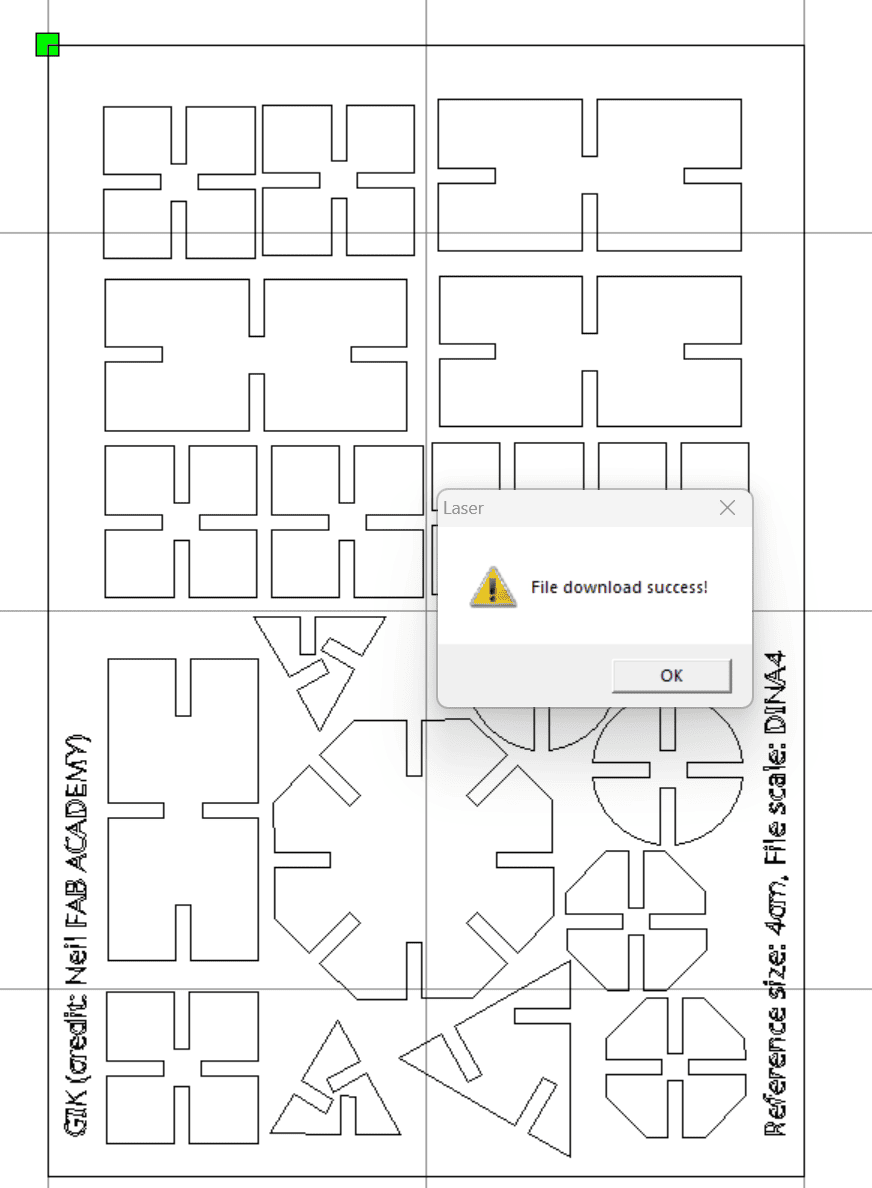
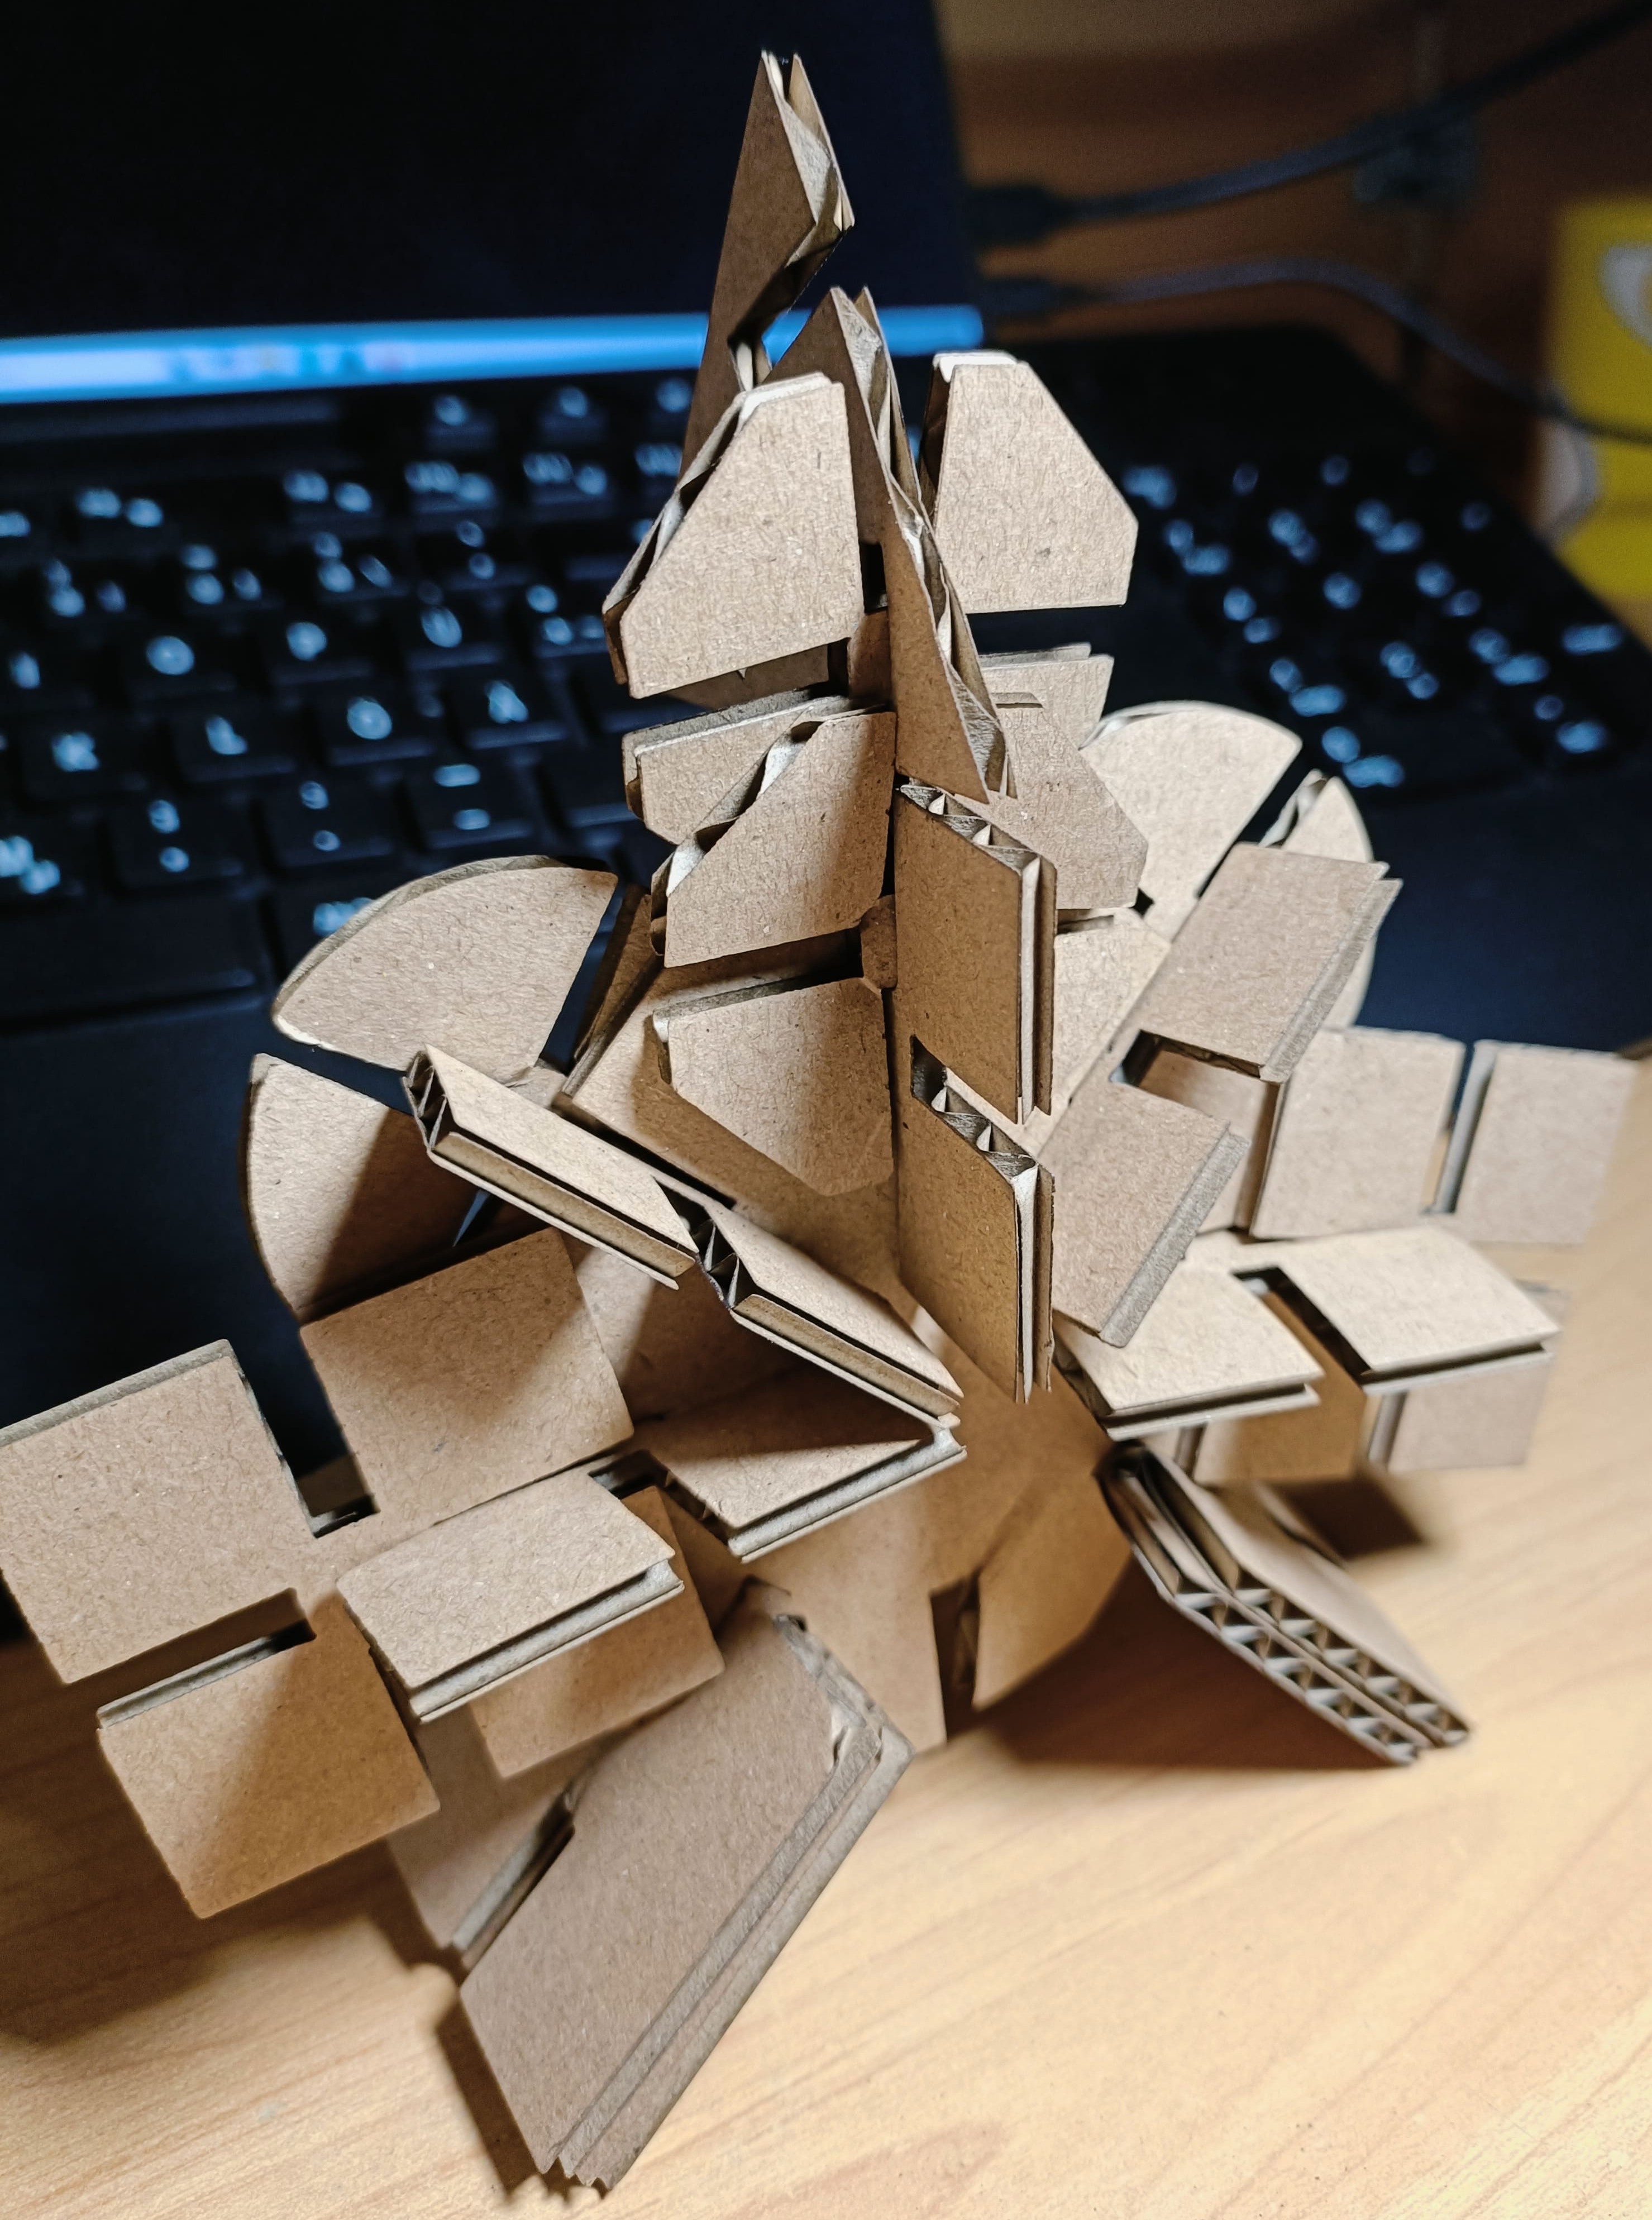
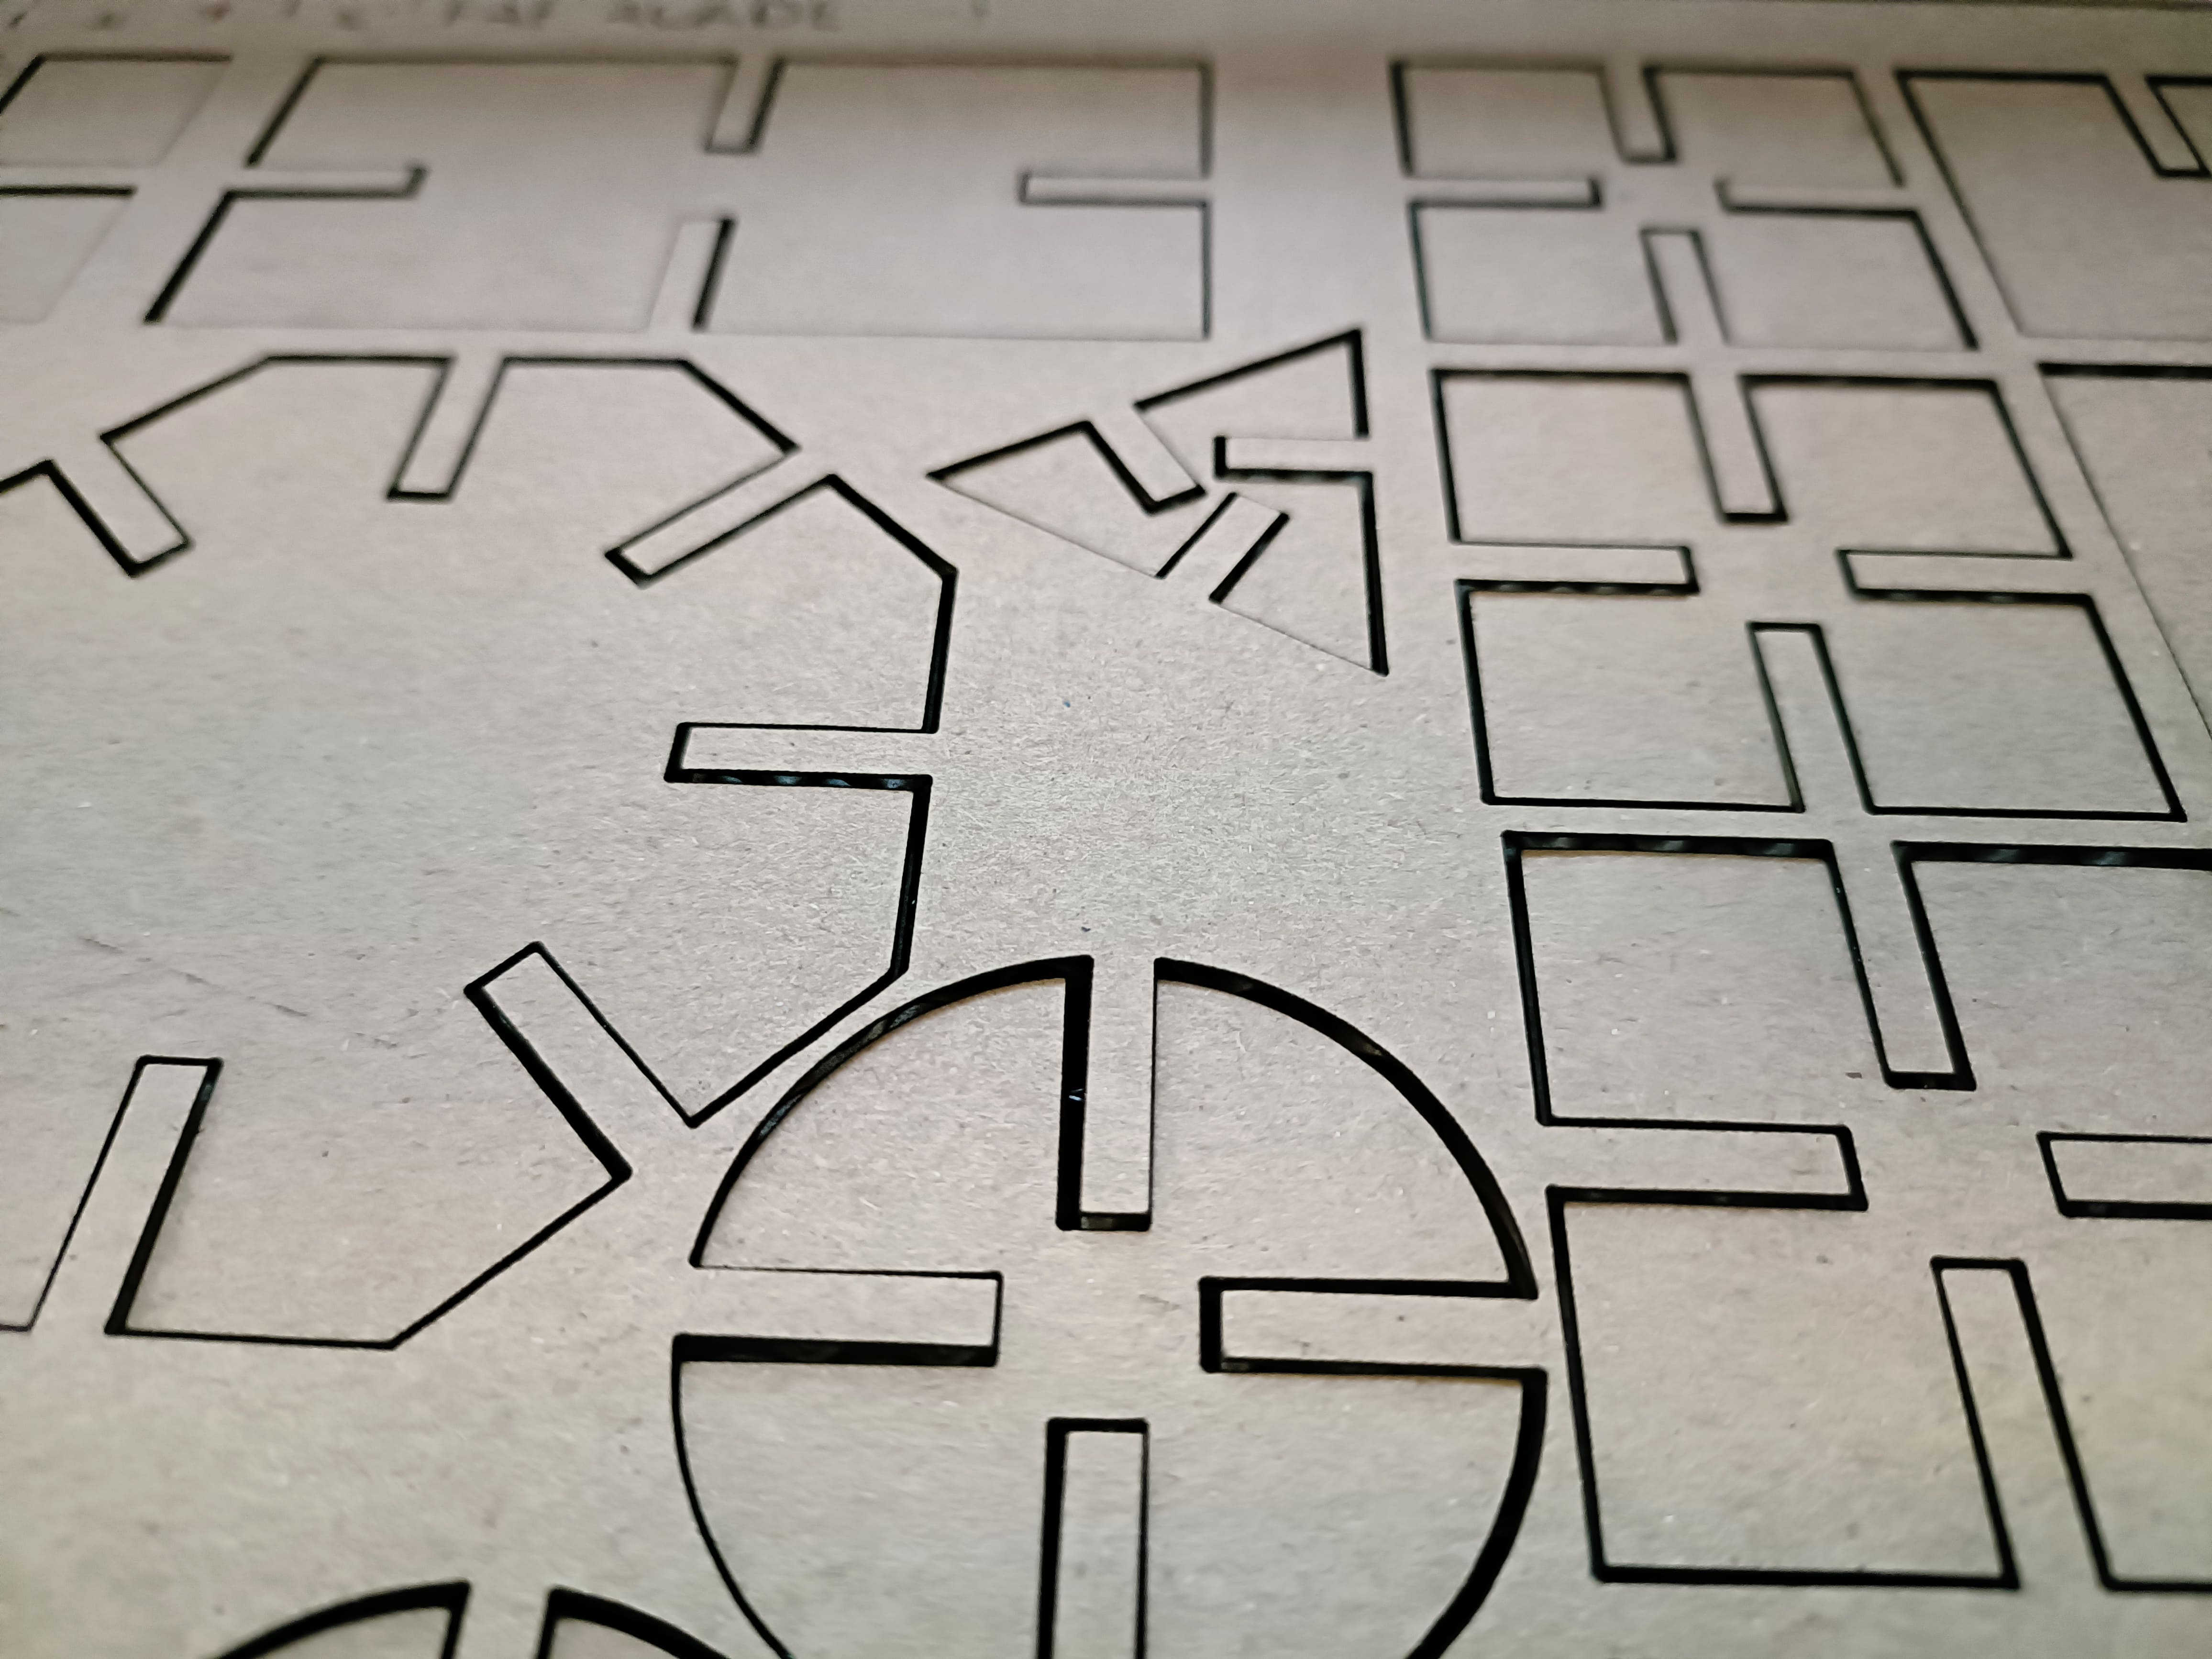
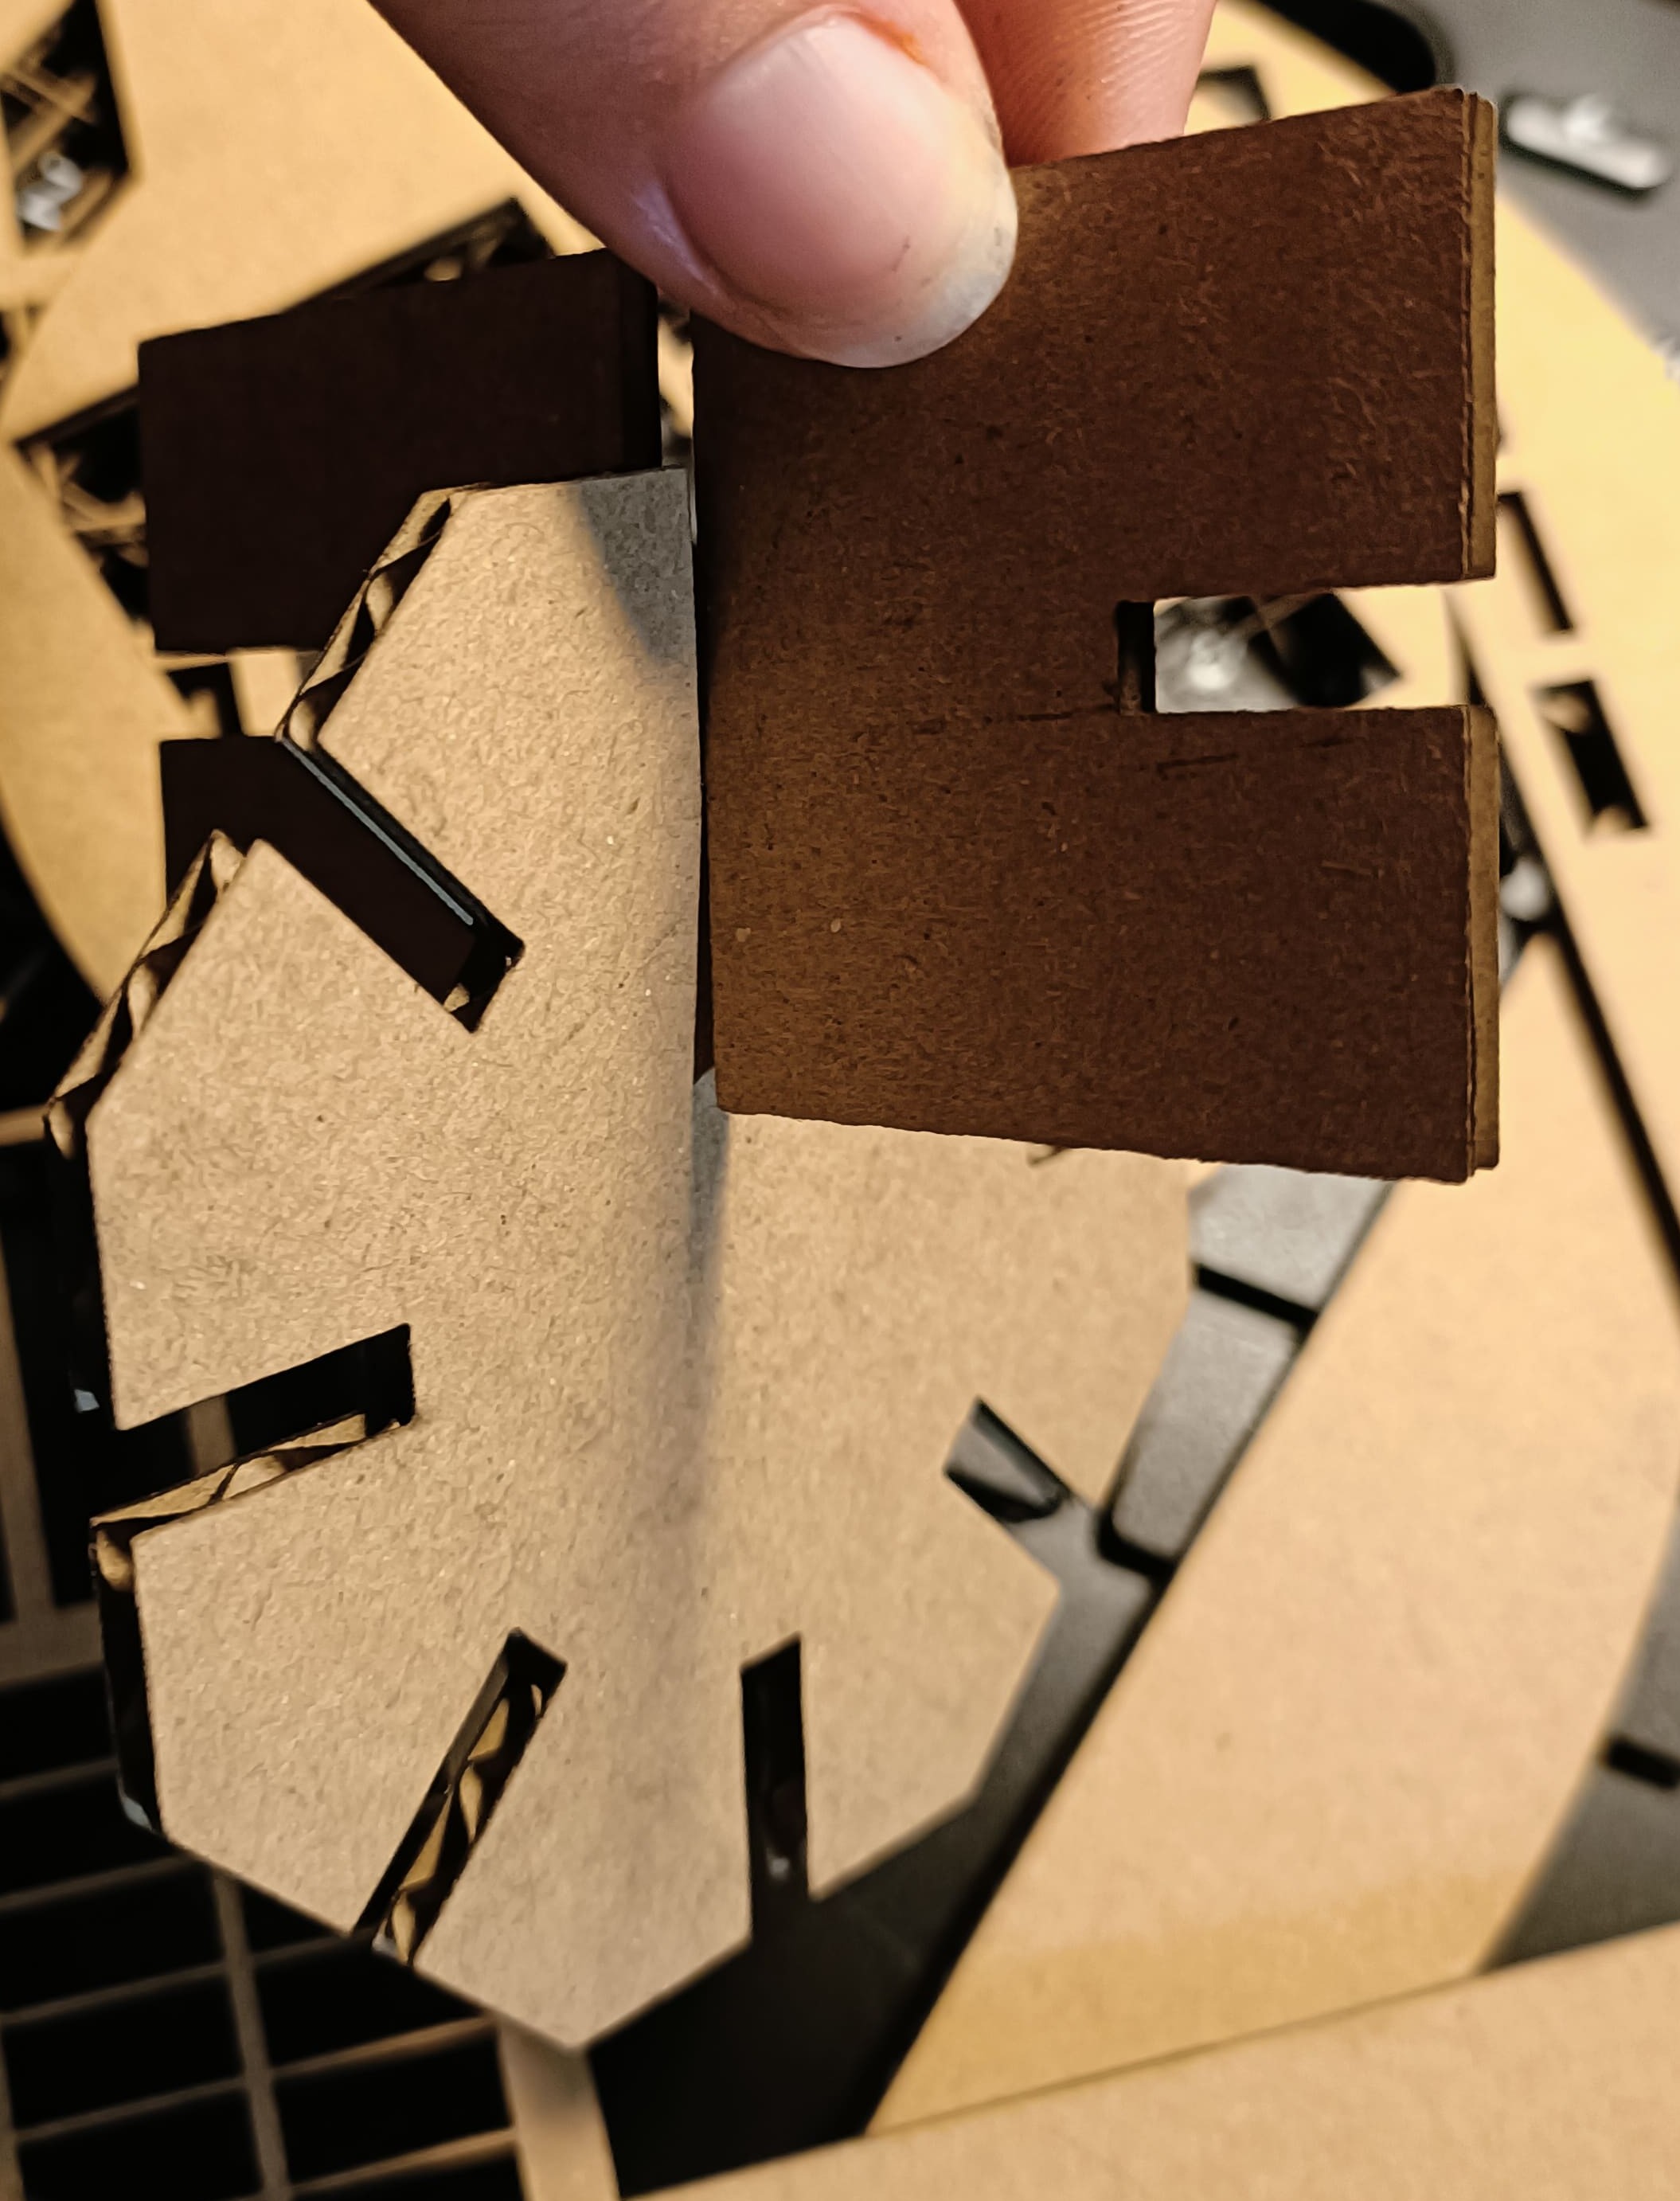
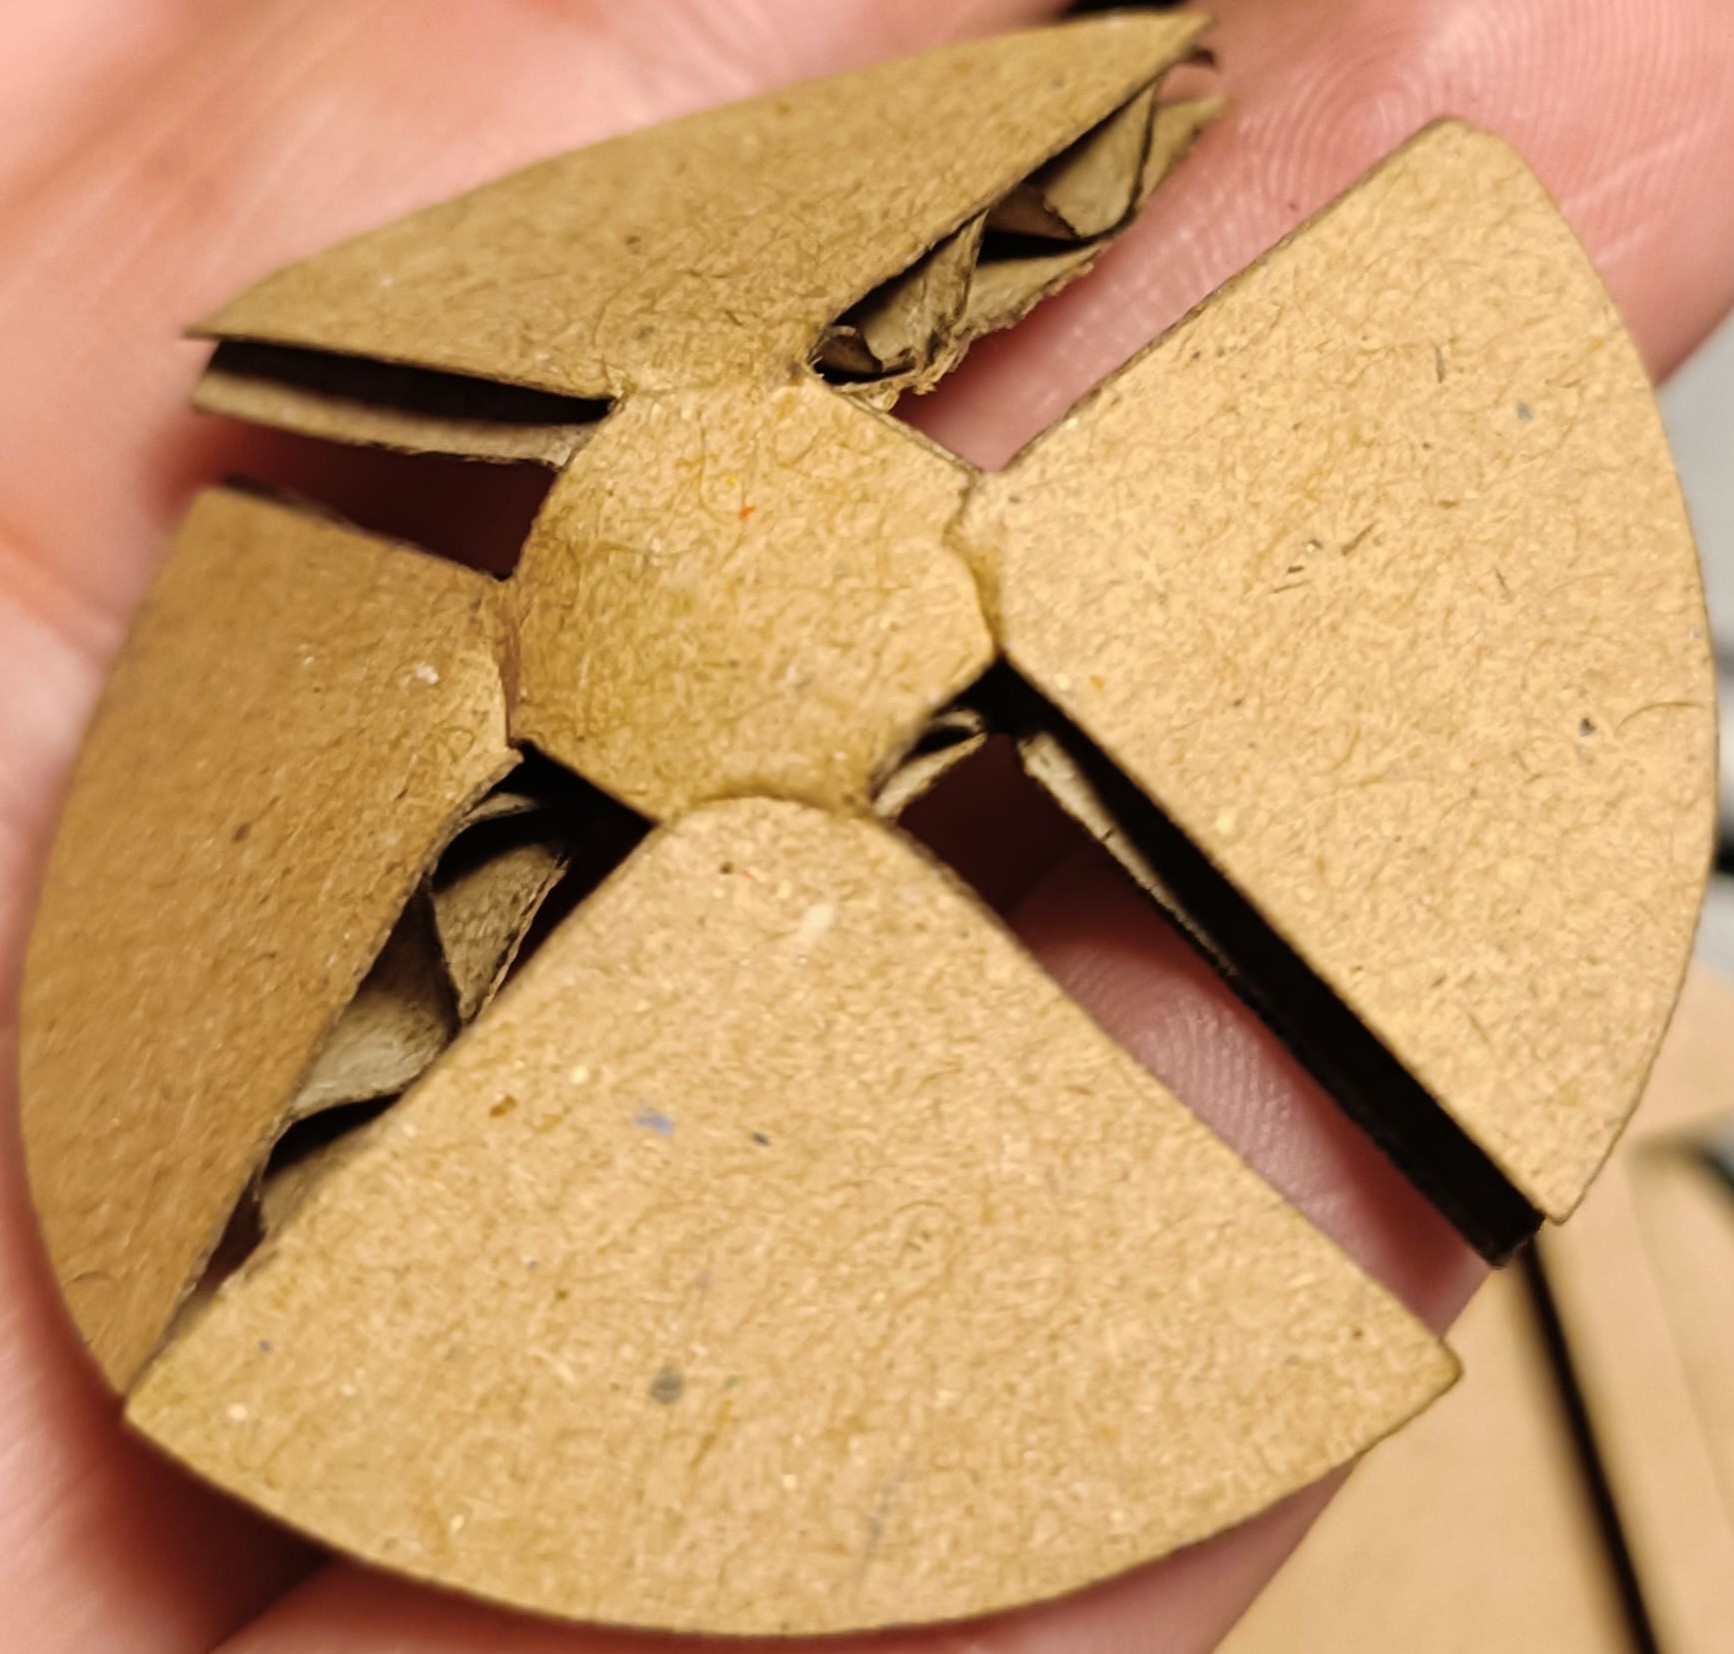
GIK redesign
When Neil showed it during the class it seemed like a lot of fun! I wanted to experiment with it and test how it it to use cardboard on the lasercutter. So, I redesigned GIK for my personal (and my guest's) amusement.
Download links:
All credits to Neil!
This project does not in any way have something to do with my final project. I will save it under "Side projects" once I properly lasercut it. For the sake of time I will not officially further pursue this project.
Hero Shot:
Lasercut with 60% 29mm/s and scanned with 18% 300mm/s
Banksy™ Clock
"Banksy™ Clock is an “upcycled” office clock featuring a rat, which plays an essential role in Banksy’s oeuvre.
Running up one side of the clock's face as if stuck in a wheel, the rodent represents the endless rat race we find ourselves in."
(from the Bansky explained website)
Since I saw that clock in a gallery I could not get it out of my head. I have been playing around with ideas on how to adapt the clock to be more suitable to me. The rat has to stay, and to edit it more easily an svg format would be perfect.
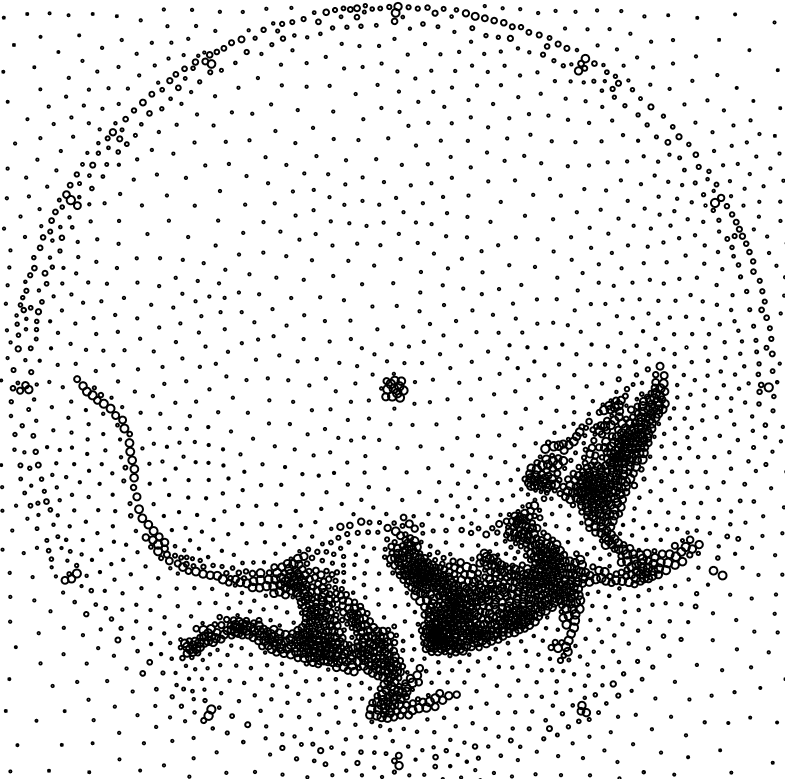
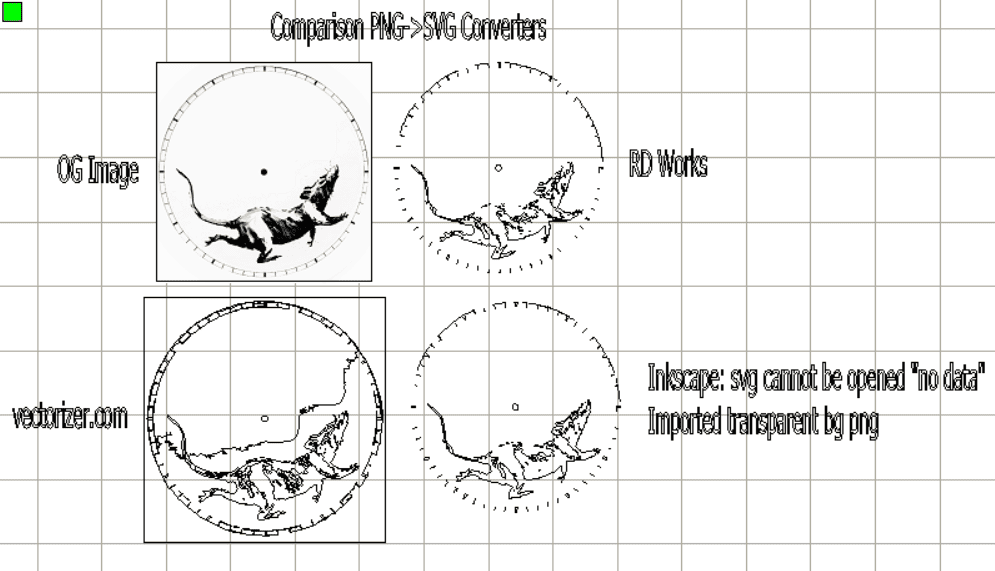
The quality of the svgs was bugging me though, so here is a basic comparison of some of the most common pdf to svg converters. Both RDWorks V8 and Inscape do a good job in representing the image 1:1. The online converter "Vectorize" made it more interesting. Other online converters or suggested pages like Photopea or GIMP only add noise, which is not optimal for a lasercutter file. The app StippleGen2 converted the image in a dotted representation.
Svg and lasercutter files to Download
- Download: SVG result from Inscape
- Download: SVG from online website Vectorize
- Download: Dotted SVG file made with StippleGen2
This project does not in any way have something to do with my final project. I will save it under "Side projects". For the sake of time I will not officially further pursue this project.
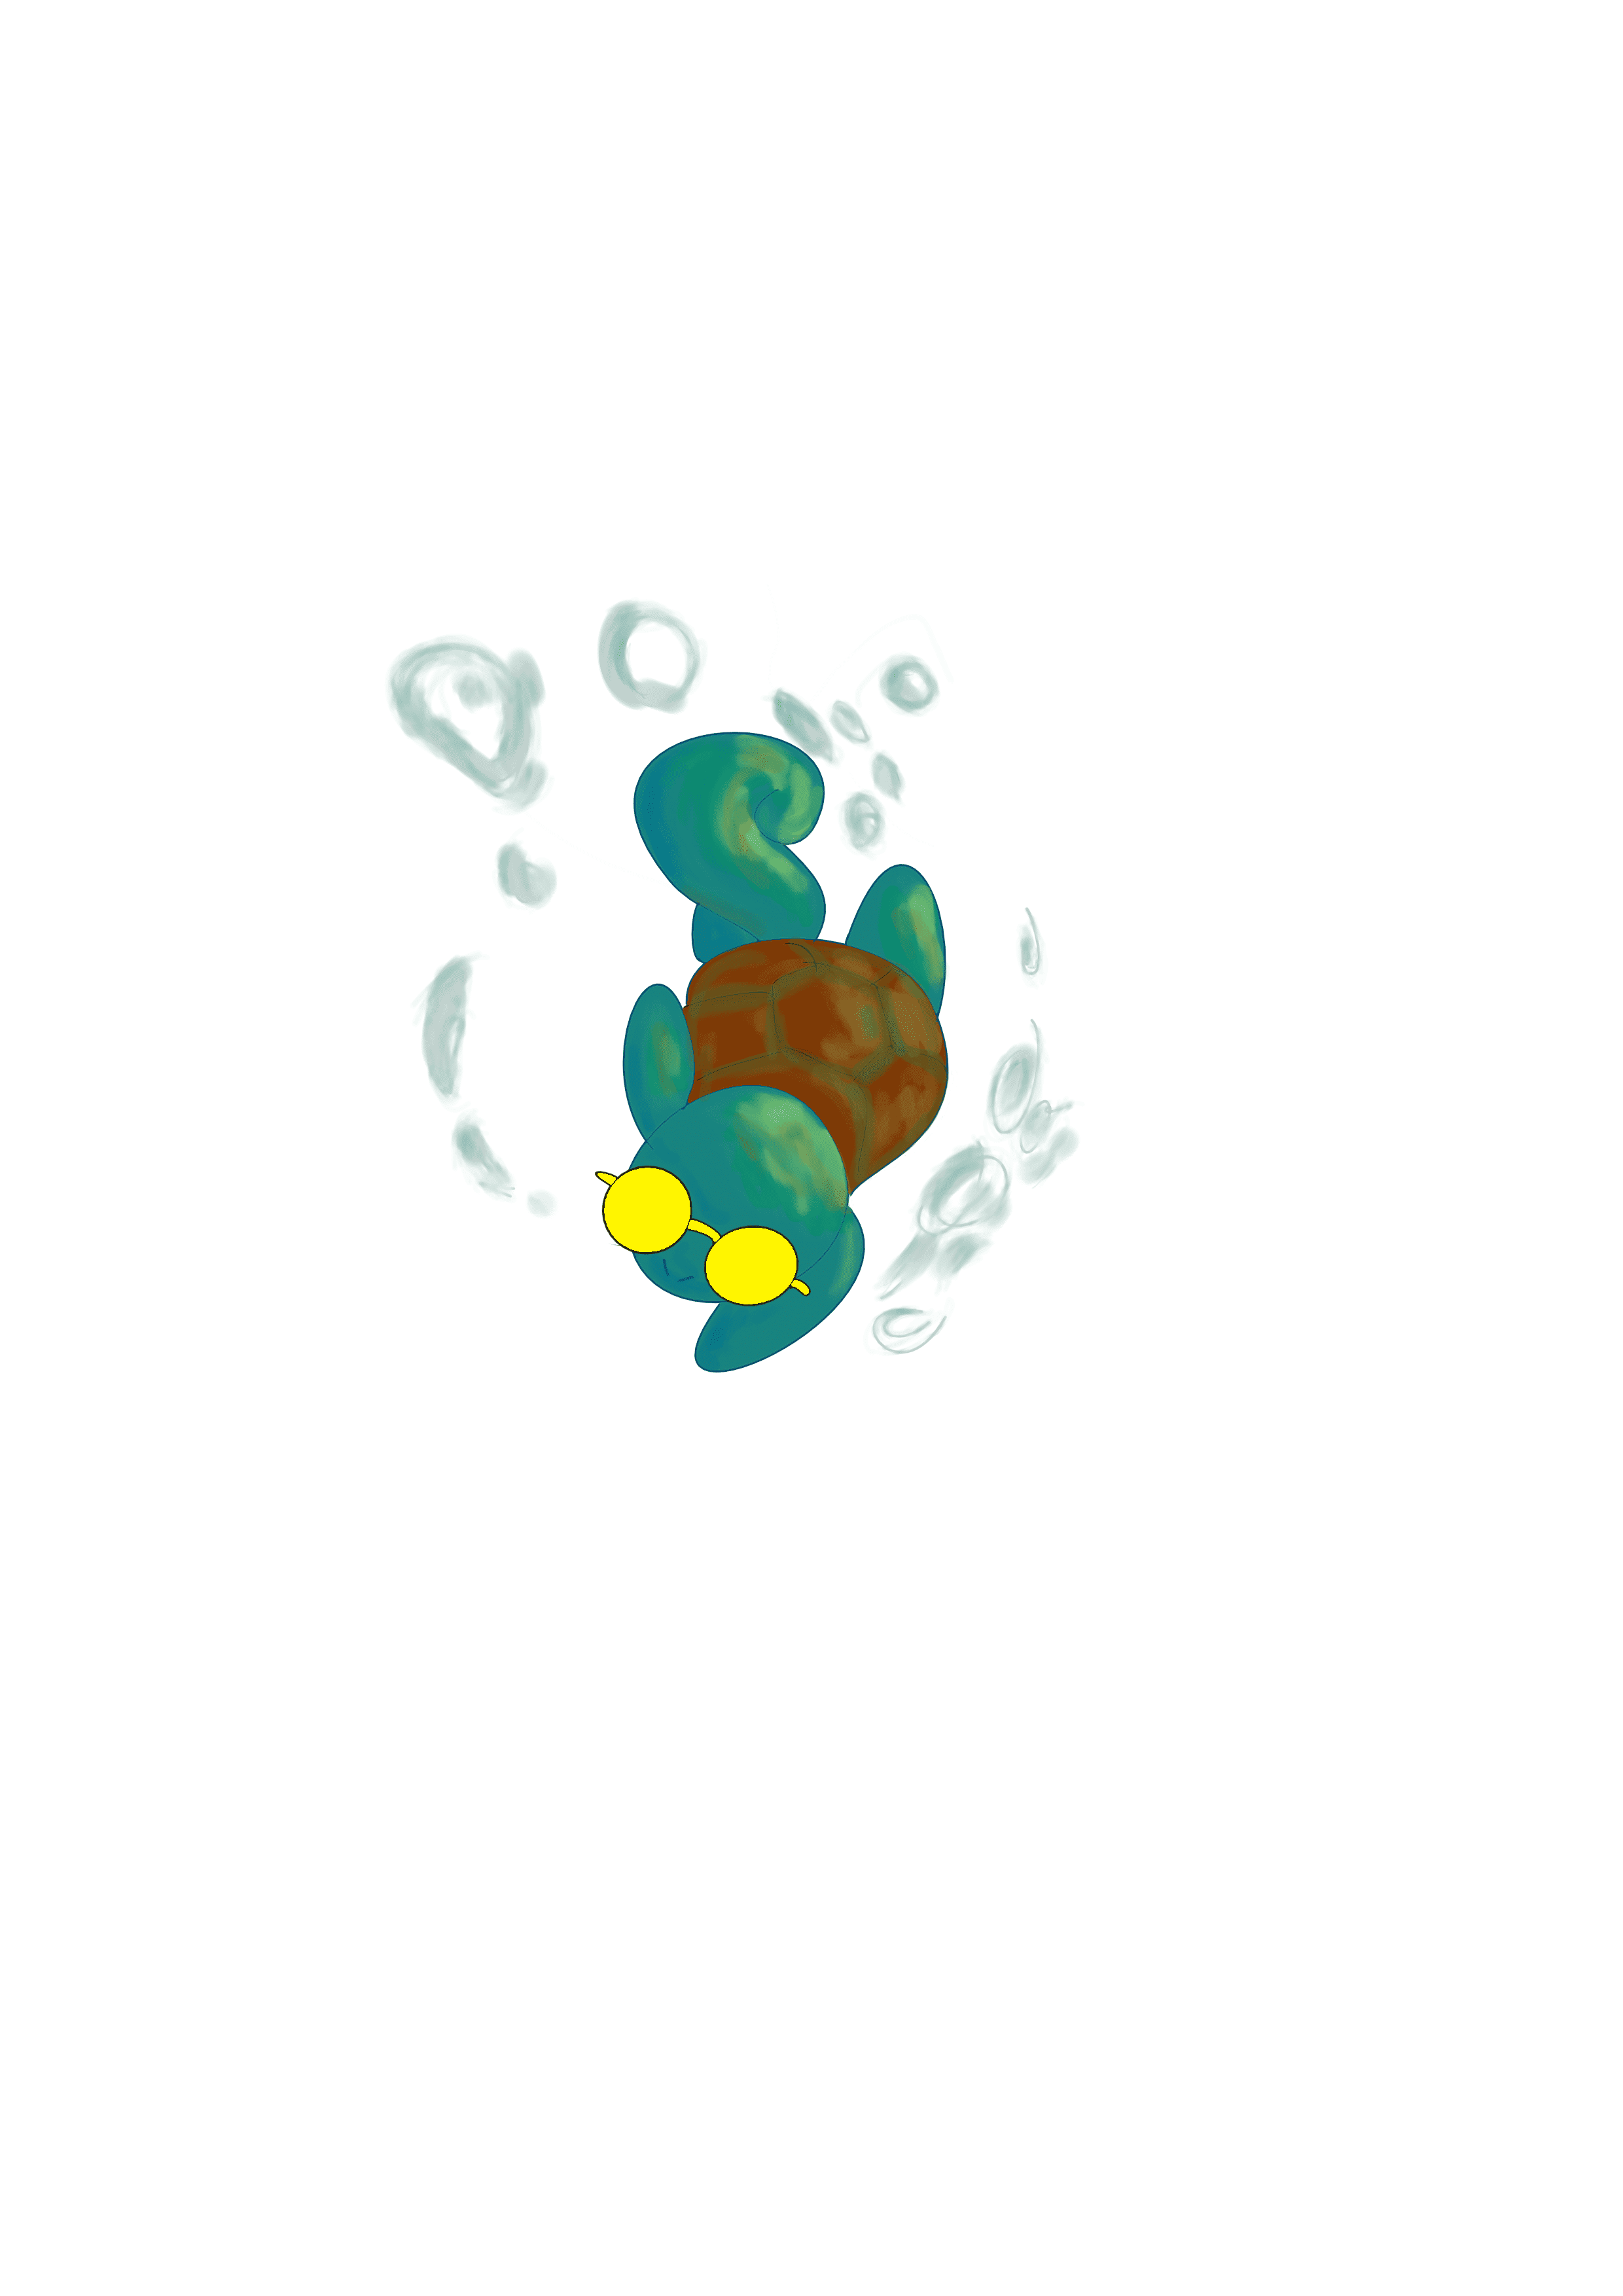
Squirtle Hoodie
Download files:
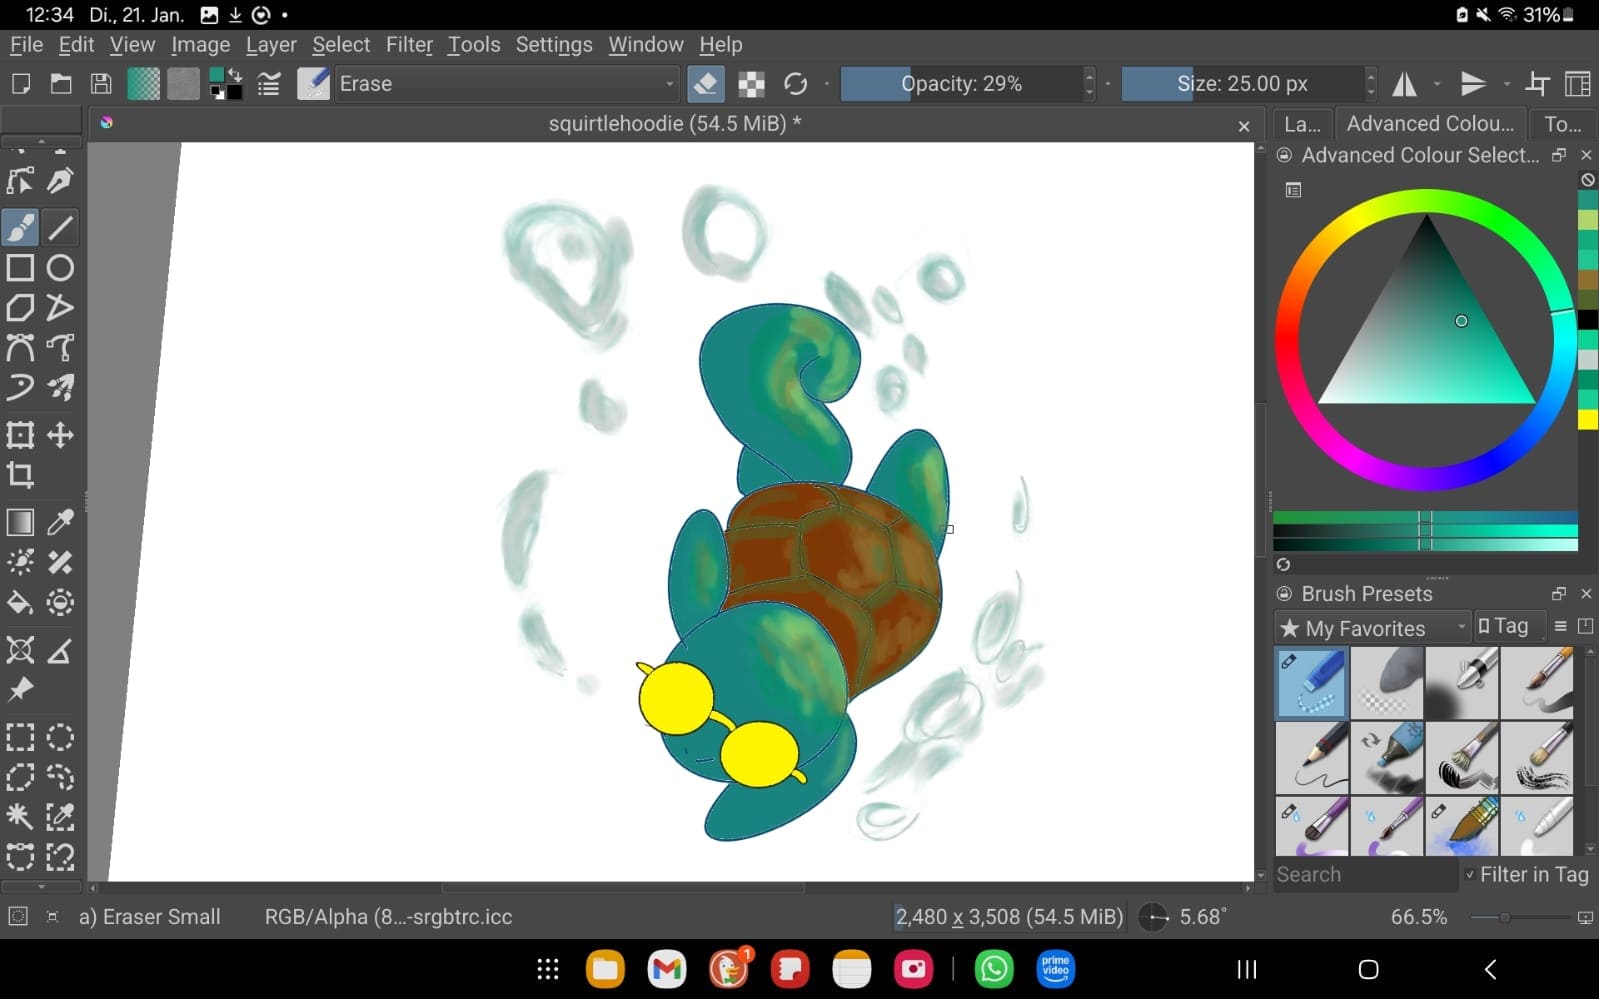
I saw an advertisement on Instagram: a beautiful Squirtle hoodie! Problem: the website that sells it is not trustable. Besides, I can make it myself! So, I opened Krita and painted Squirtle. I got myself some cheap Acryl colors for permanently painting a hoodie that I still have to buy (or sew, haven't decided yet).
This was my first time using the vinylcutter, so I'm going to document it a bit more thoroughly.
firstly, I was under the impression it worked like a printer and lasercutter - painting on the surface and then cutting out. As such, Squirtle has many blurred outlines and colors. As it turns out, our main vinylcutter can only cut. This means, that the sticker or whatever is being processed will only have the color of the material it is being cut from.
Alright, change of plans. With my instructor, we opened Inkscape and applied filters and pathed the outline. We then exported it in an svg format.
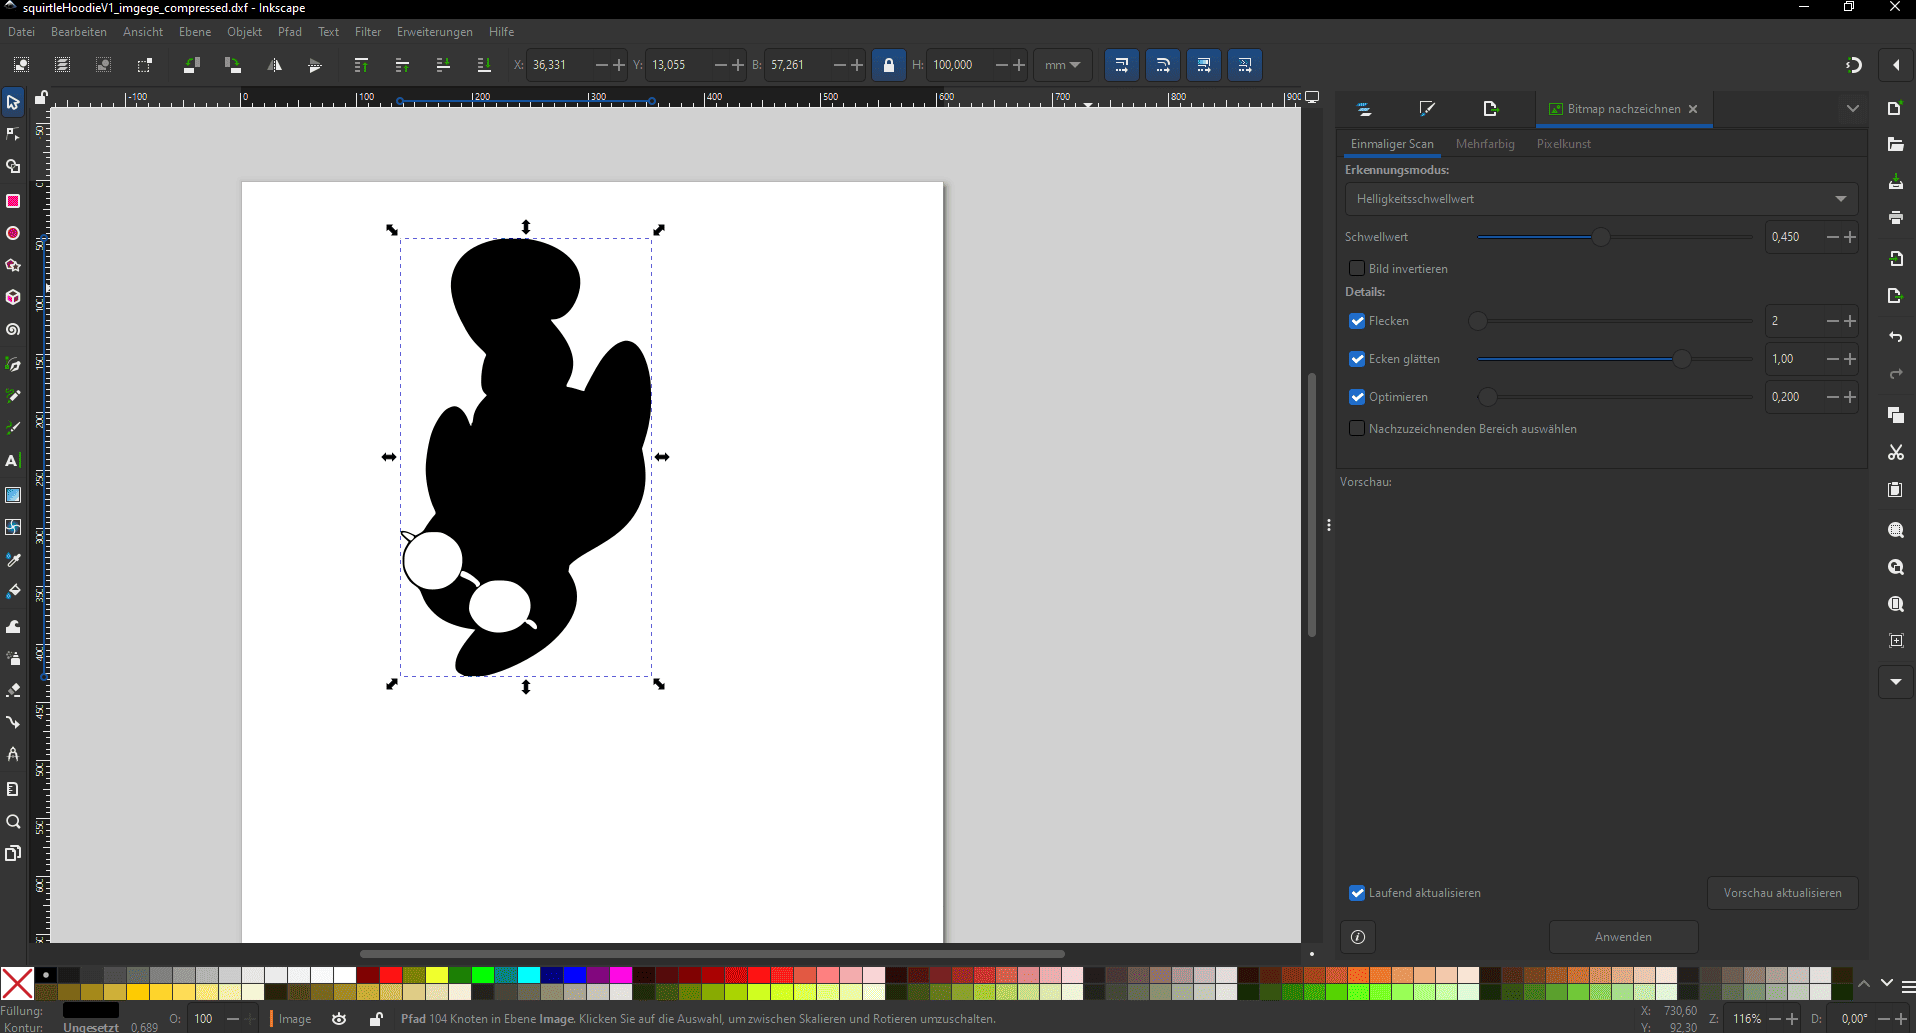
Open Silhuette Studio App->Import->Choose svg file. The size always gets increased to the maximum size, so it had to be resized using the parameters on the uppermost left corner of the screen. Luckily. The vinylcutter was already connected through Bluetooth, so we proceeded to set up the tip to our needs.
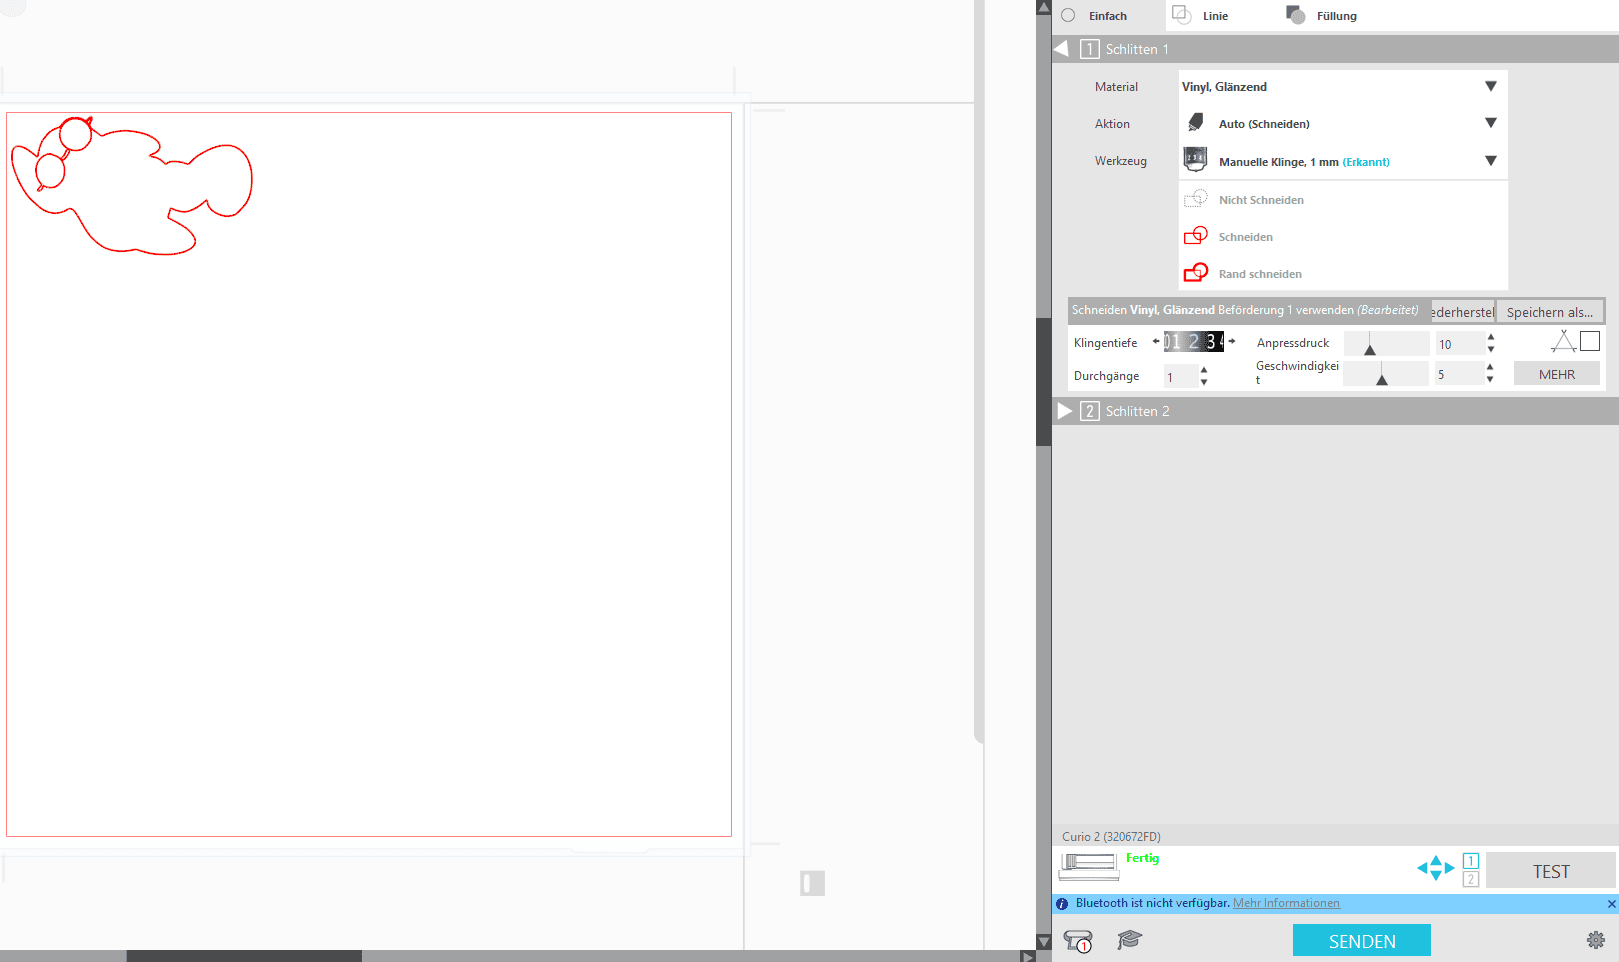
We tested the depth of the blade so that it only cuts through the uppermost layer of the acryl surface to not damage the machine. Squirtle was originally meant to be a design for a Hoodie, but seeing as all it's nice qualities got removed, we decided to make it a sticker instead. We decided the blade depth of 2 and set the parameter on the right middle side of the screen. Finally, we sent it to the cutter.
Apparently, we did not position the vinyl correctly on the adhesive plate: a part of Squirtle's arm did not fit on it. Apart from that, the process was very quick.
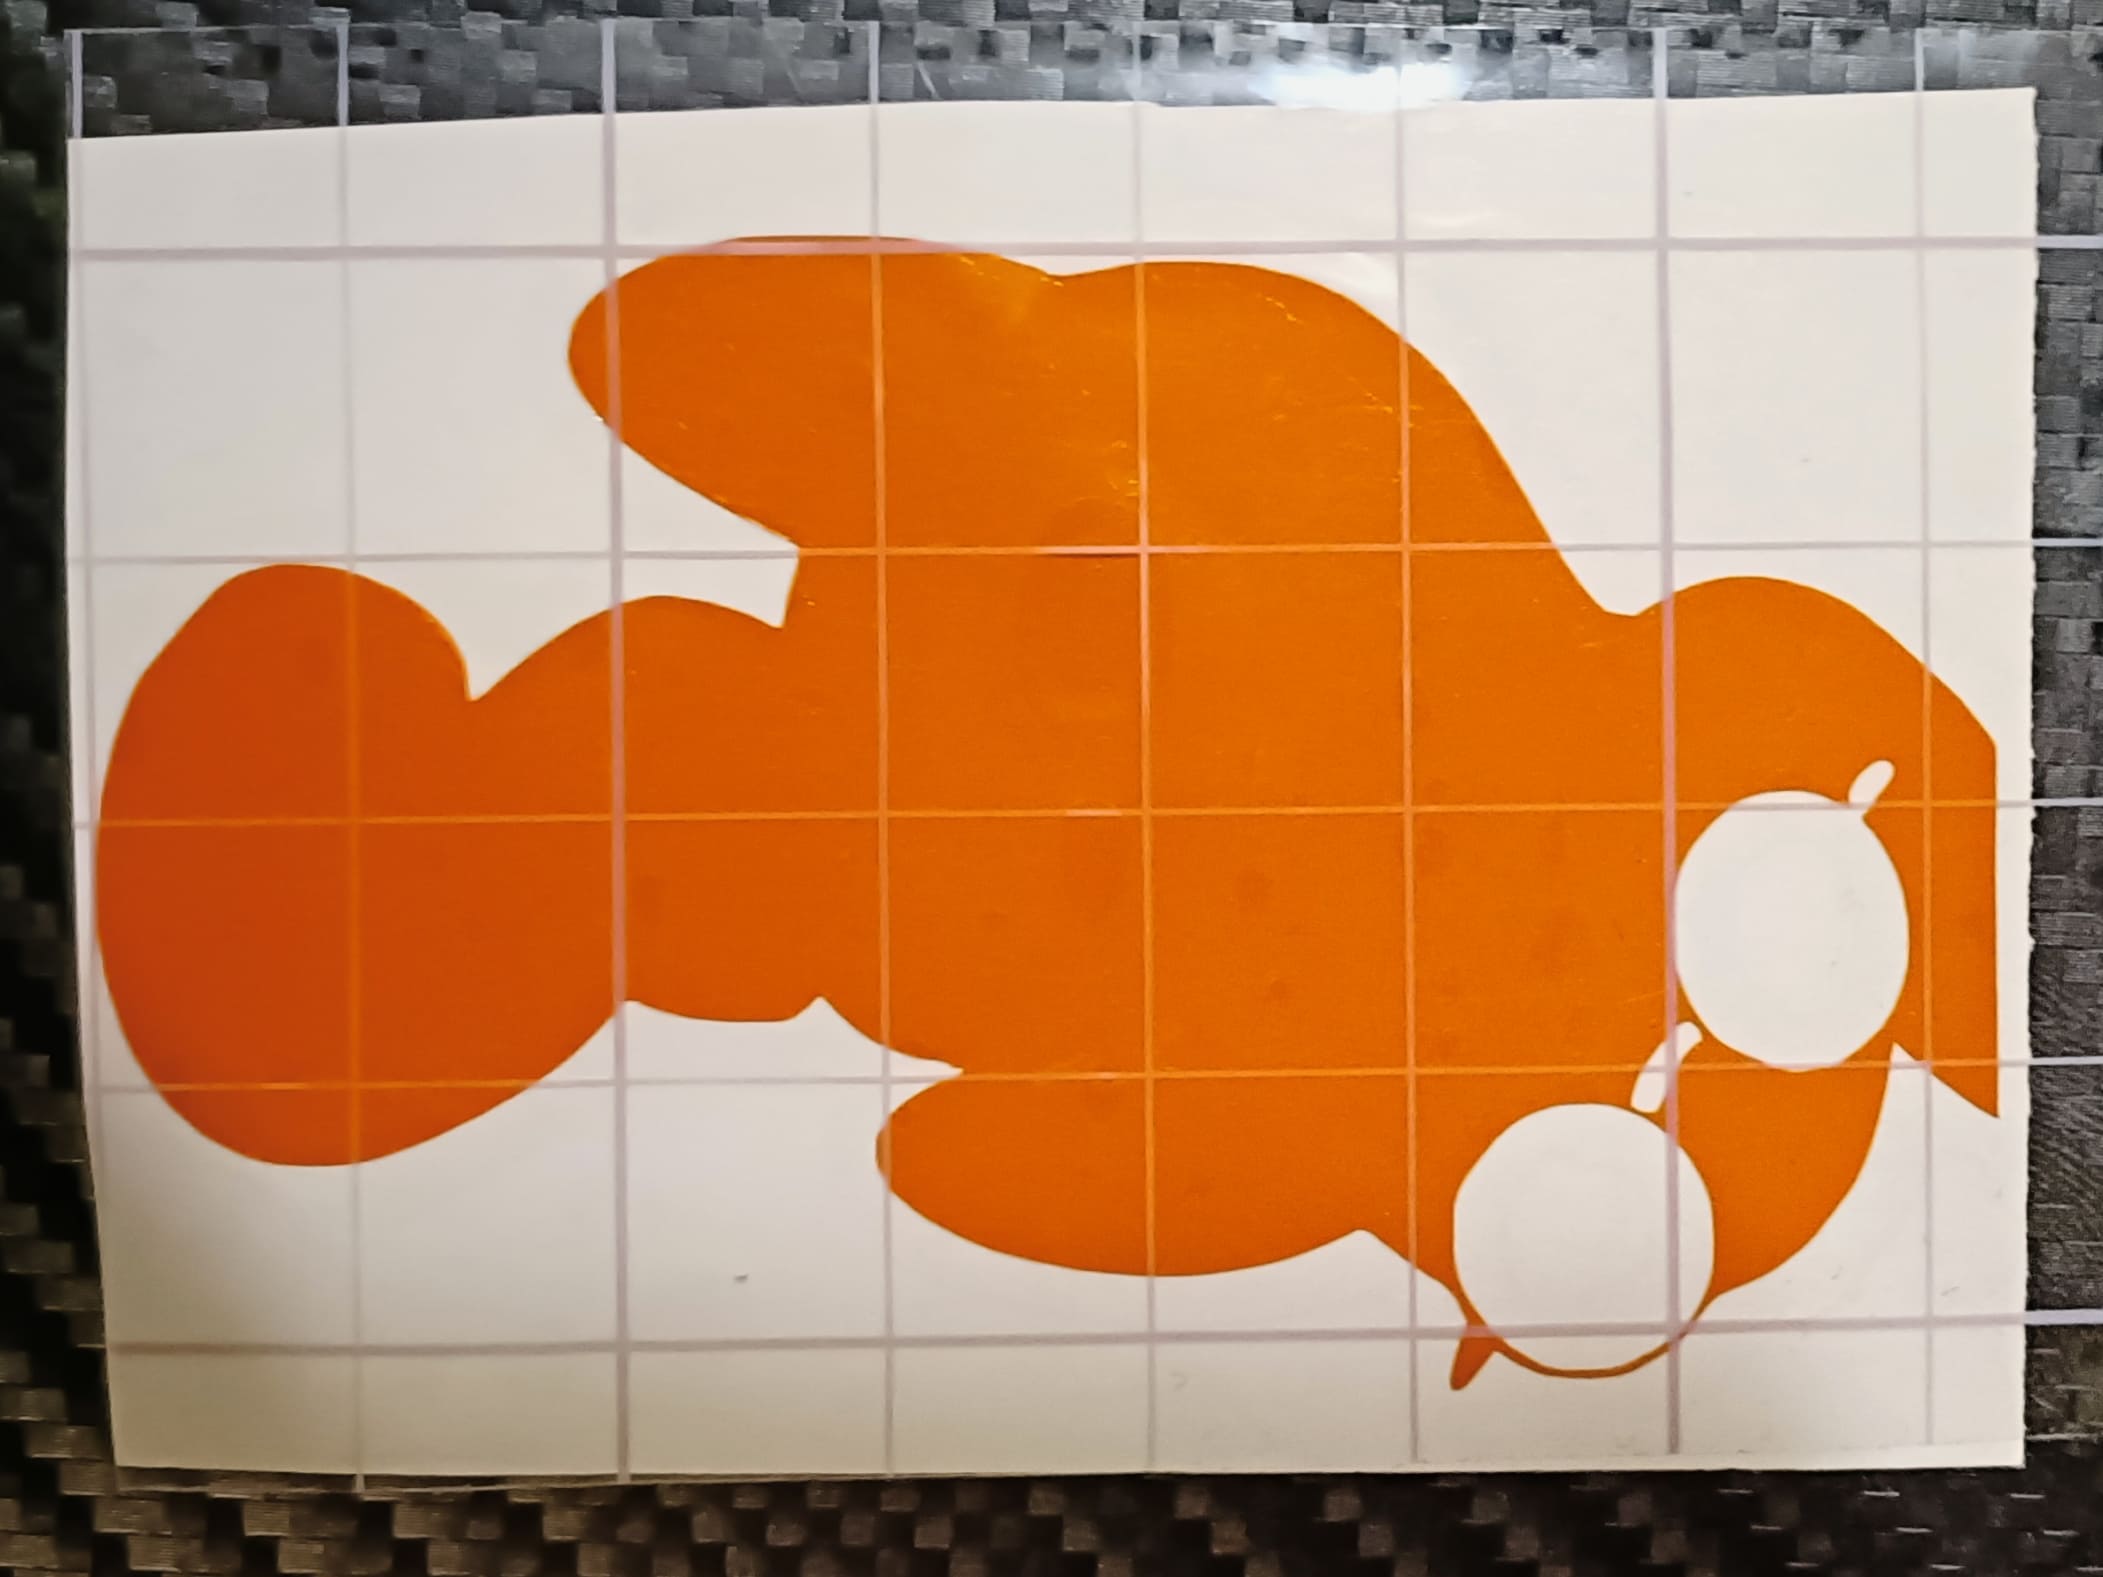
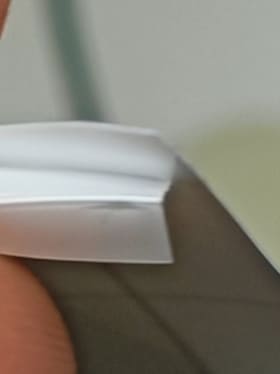
As there was only 1 solid component of my sticker, we were actually done here, but my instructor insisted on doing it thoroughly. So, we 'hashed' (or rather removed the negative shape of the sticker) it and covered it with the removal tape. Now we were done.
I can definitely see myself doing PCBs with this machine: a copper/ or other flat conductive piece with a a layer of acryl/ sth thin that is not conductive and were done way faster than with the CNC-mashine! I am looking forward a lot to trying this out in the upcoming weeks!
What I want to improve on next week
- Nice to have: integrate puzz Robots animation on the sides of the website
- Study waaaay more for the upcoming exam
- Did you not want to focus on main task??????