Molding and casting
Let's go!

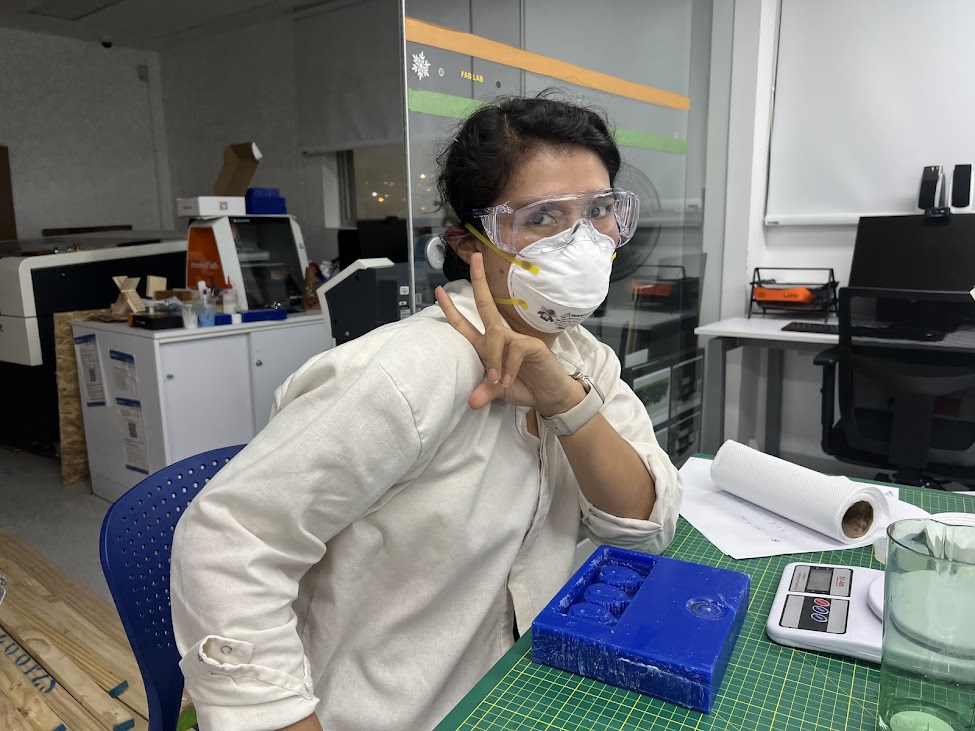
This week I am very excited, it is something I have wanted to do for a long time, to be able to create my own molds.
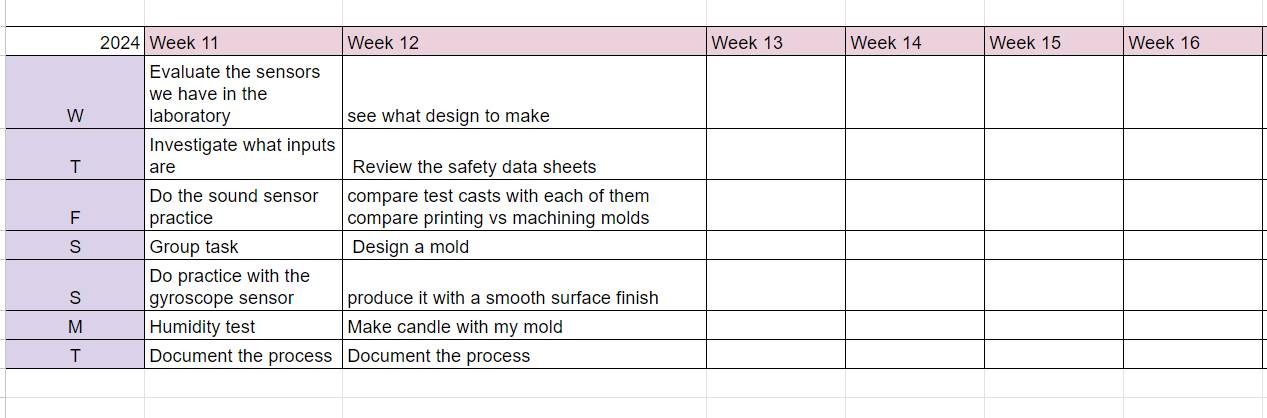
WEEK GROUP
Design Board Safety data sheets for each of your molding and casting materials Designed and created your 3D mold Safely made your mold and cast the parts Final files:
Conclusions
Assignments
-
Group assignment:
- Review the safety data sheets for each of your molding and casting materials, then make and compare test casts with each of them compare printing vs machining molds Individual assignment:
- - Design a mold around the process you'll be using, produce it with a smooth surface finish, and use it to cast parts
Group assignment
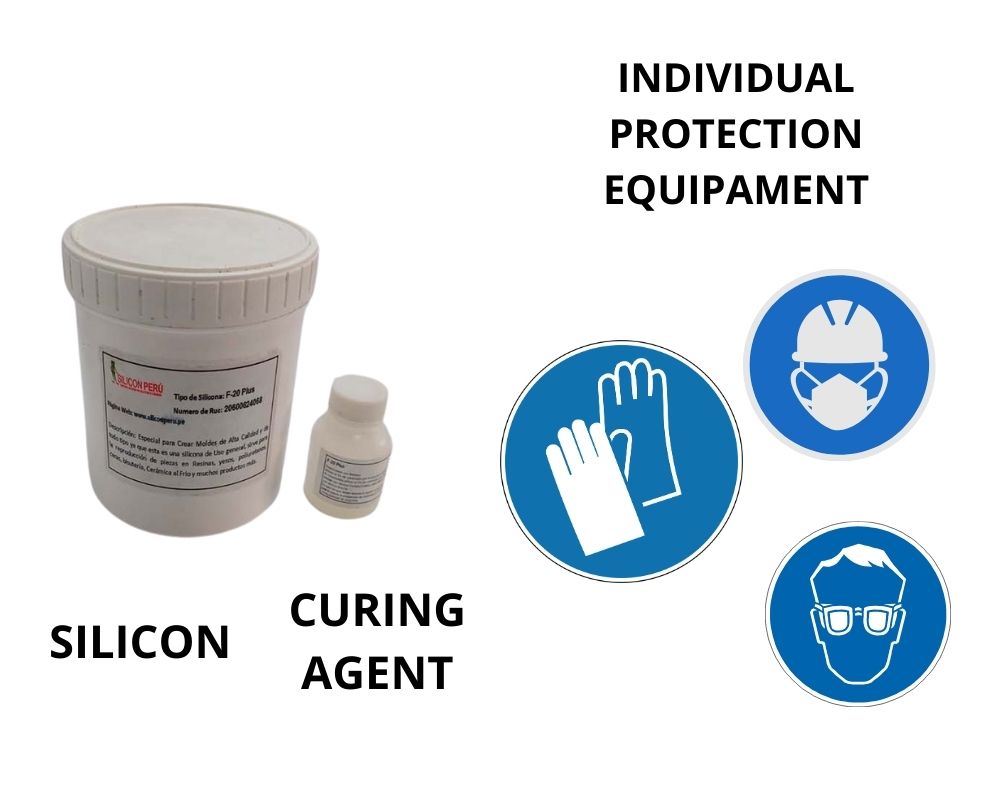
In the group assignment we explored various types of materials, some of the silicones we used did not have a data sheep as such, but the supplier gave us a summary of the instructions, other suppliers did have one, and they sent them to you by WhatsApp clearly indicating what you did. the purchase and send the purchase receipt. There are several companies where you can buy, for example, this silka and silcon peruREVIEW THE SAFETY DATA SHEETS FOR MATERIALS
First, my classmates and I reviewed everything we had at home and in the laboratory, I brought a silicone that I had a while ago when I took a digital experimentation course where we did sofrobotic, so I took it to test.
Now I show you everything we found
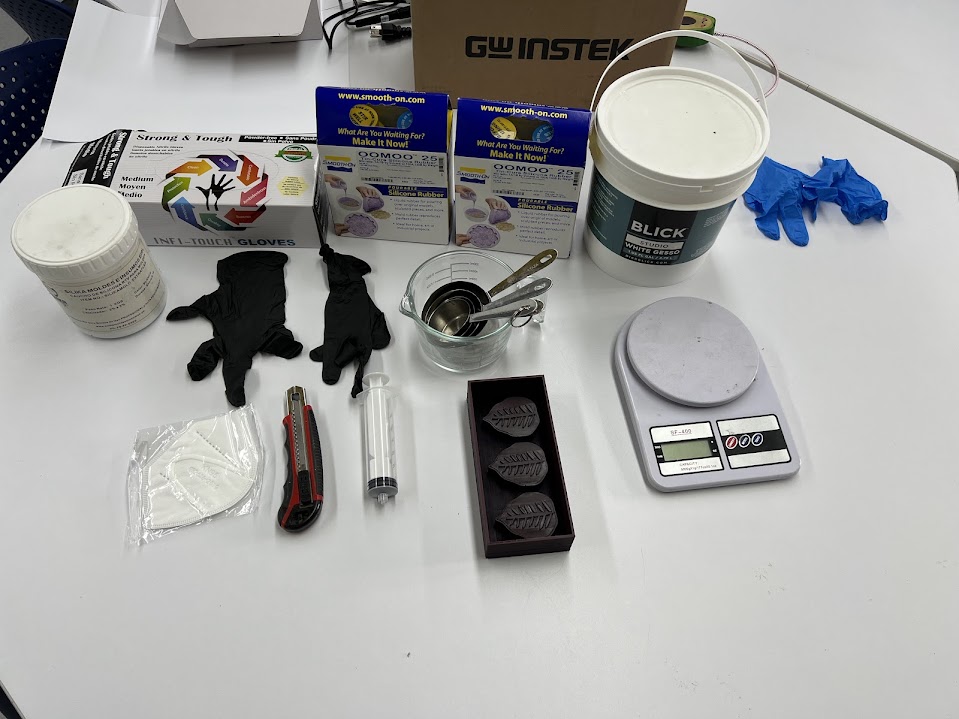
- Balance
- Syringe
- Containers with measurer
- Gloves
- silicones as many as you can try
- Face mask
- Cuter
- Mold made by you
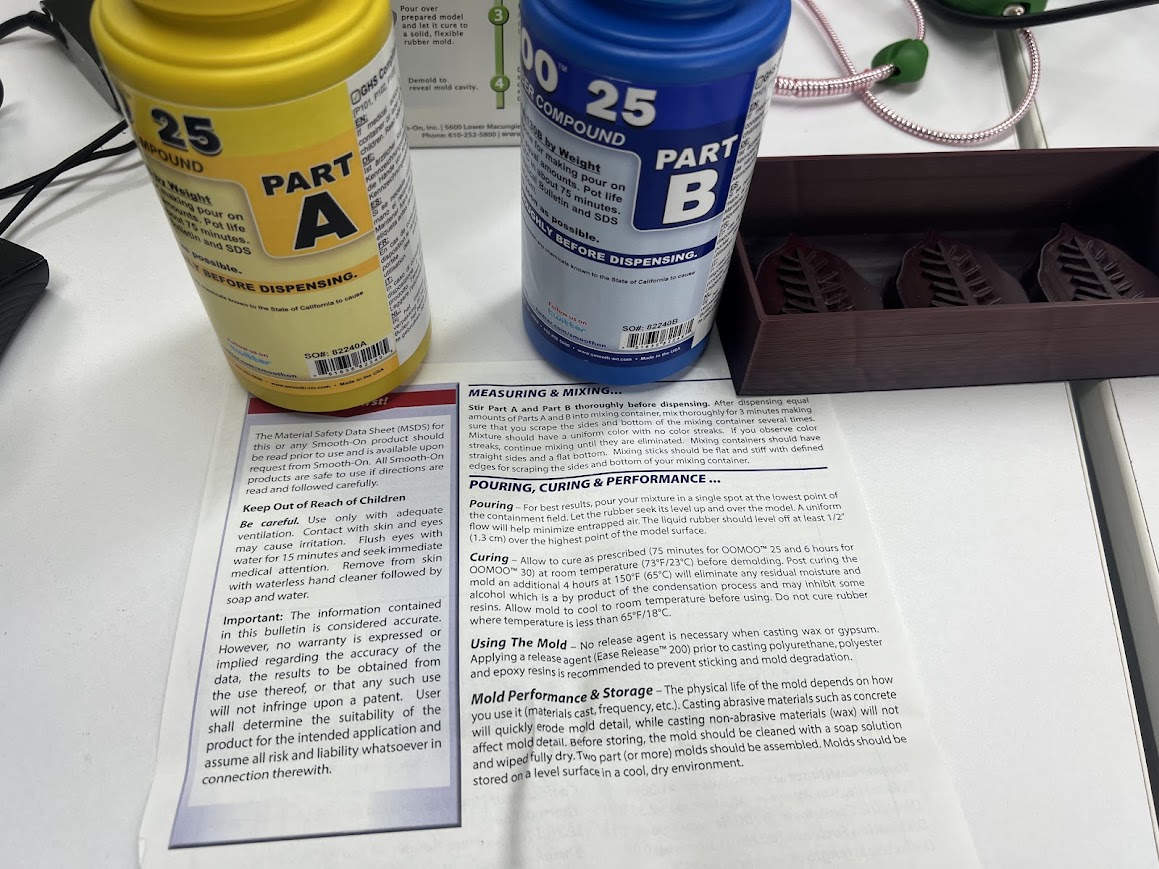
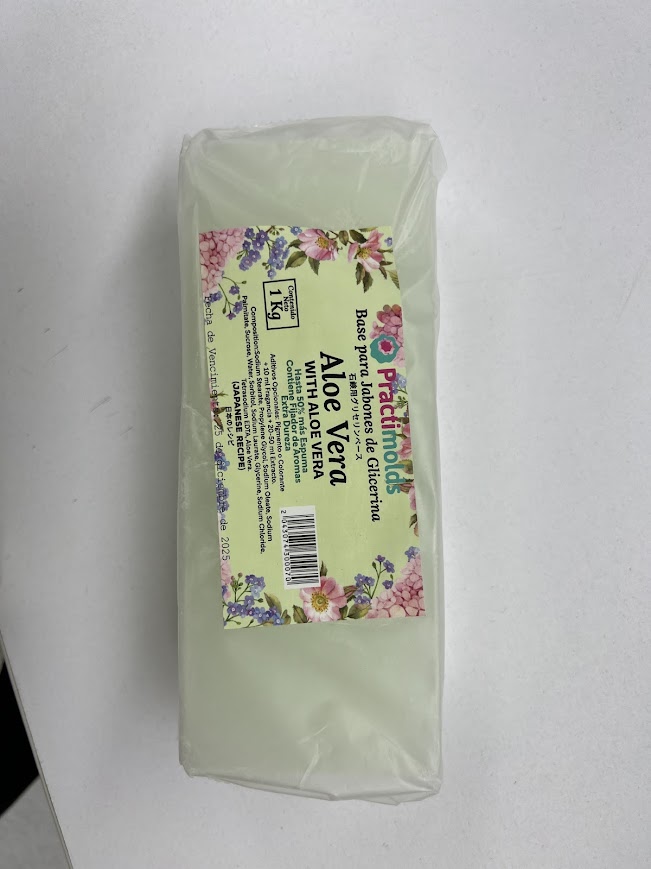
SILICON OMMO 25 - SMOOTH ON
DATA SHEET
PDFThe first thing we did with my group was to look for the materials in the USCUR laboratory, something very sad was finding the silicone, to be exact OMMO 25 from SMOOTH - ON, the one with the yellow knob was hard, there was no way to use it and there were several failed batches, We were very sad, but it didn't stop us from continuing with the other materials we brought.
SILICON RTV F20 PLUS
DATA SHEET
PDFSPECIFICATIONS
- Cure at room temperature within 4-8 hours, but all perfomance will act perfectly when it cure within 2-hours.
- Good fluidity and ecellent operation
- Good resistance to weather, temperature, aging, acid.
- Excellent tear strength, comfortable duplication times
- Firstly, after your previous work of dealing with the original model, take some liquid silicone rubber, add 2%~3% cuing agent of the amount of silicon and mix them evenly.
- Then after vacuum-pumping the mixture, you can pour it into the mold frame.
- . The silicone mold will cured in 2~3 hours
- Base and Curing Agent Mixture (100:3 by weight) in 25 °C (77F) testin
- MIX RATIO INSPECTION METHOD A:B VALUE 100:3
- POT LIFE INSPECTION METHOD : 25°C VALUE: 40-50 mins
- Demold time INSPECTION METHOD : 25° C VALUE:8-12h
- Shelf life 12 months with original unopened package
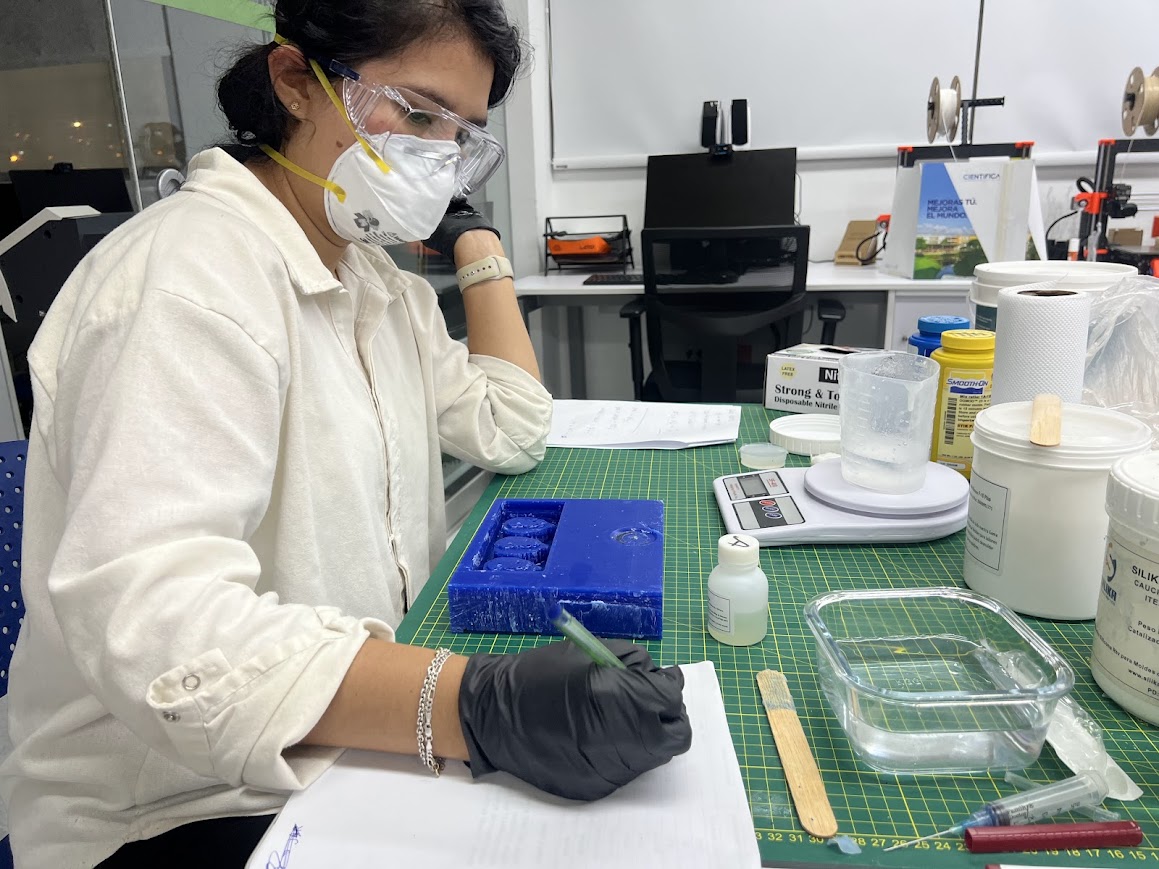
The following silicone consists of 2 parts A Silicon and B Curing agent, a white liquid which is the silicone and the curing agent. Curing time is 4 to 8 hours. It has good tear resistance and excellent temperature resistance. Here is a summary table of the data sheets provided by the seller and the PDF to download.
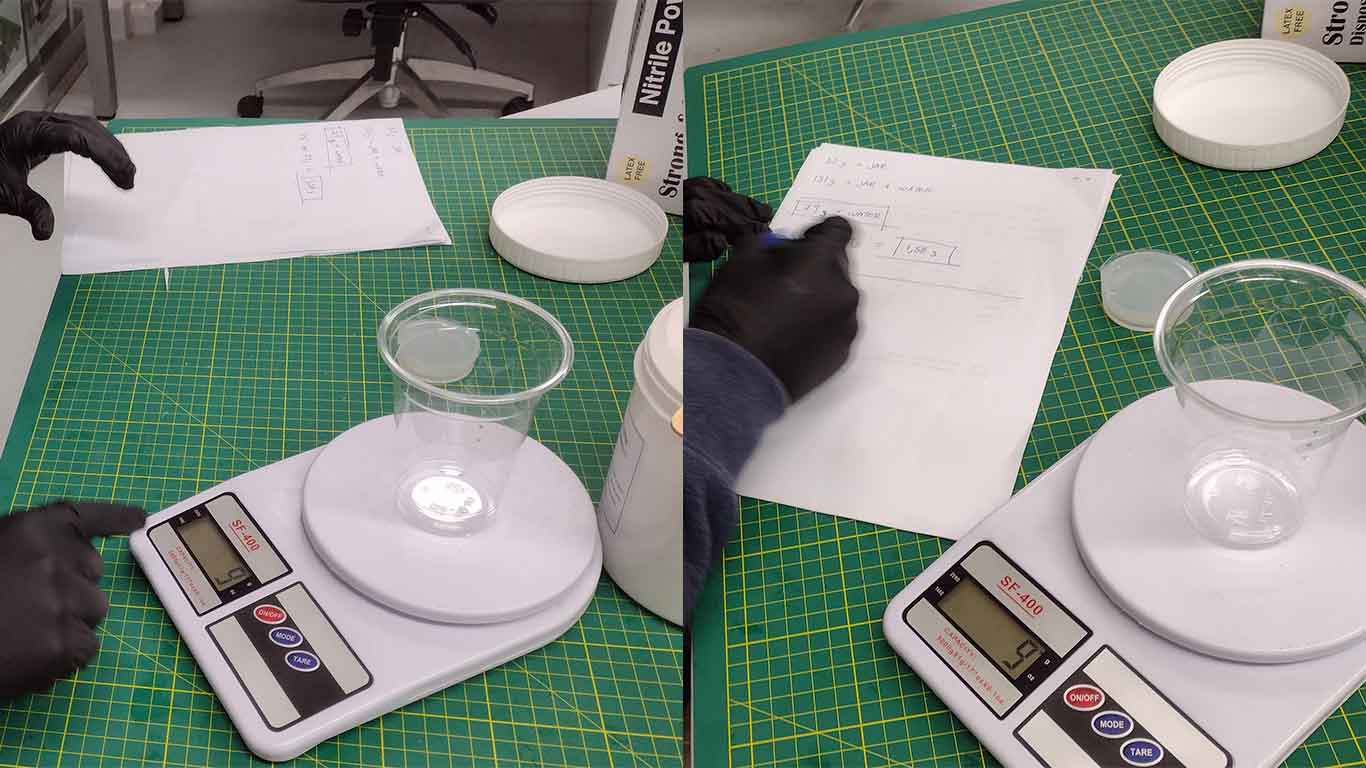
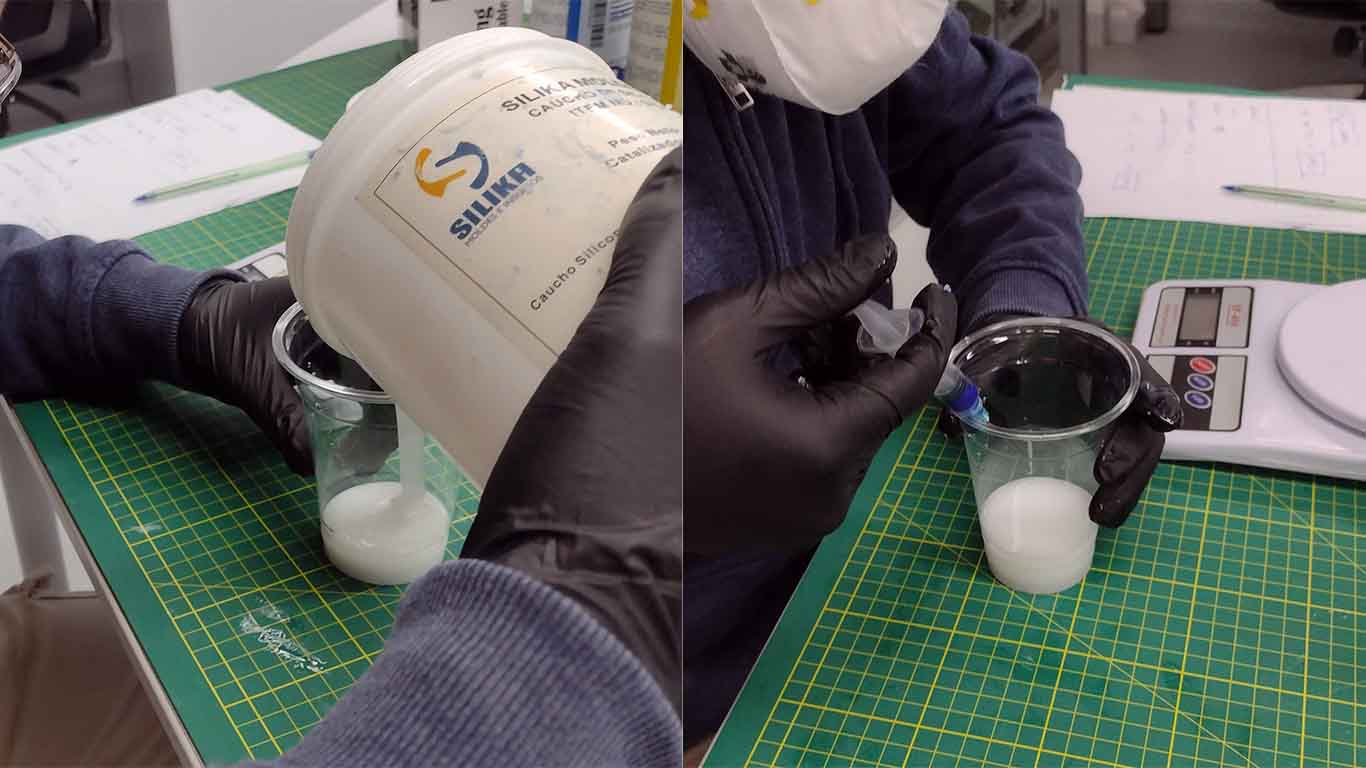
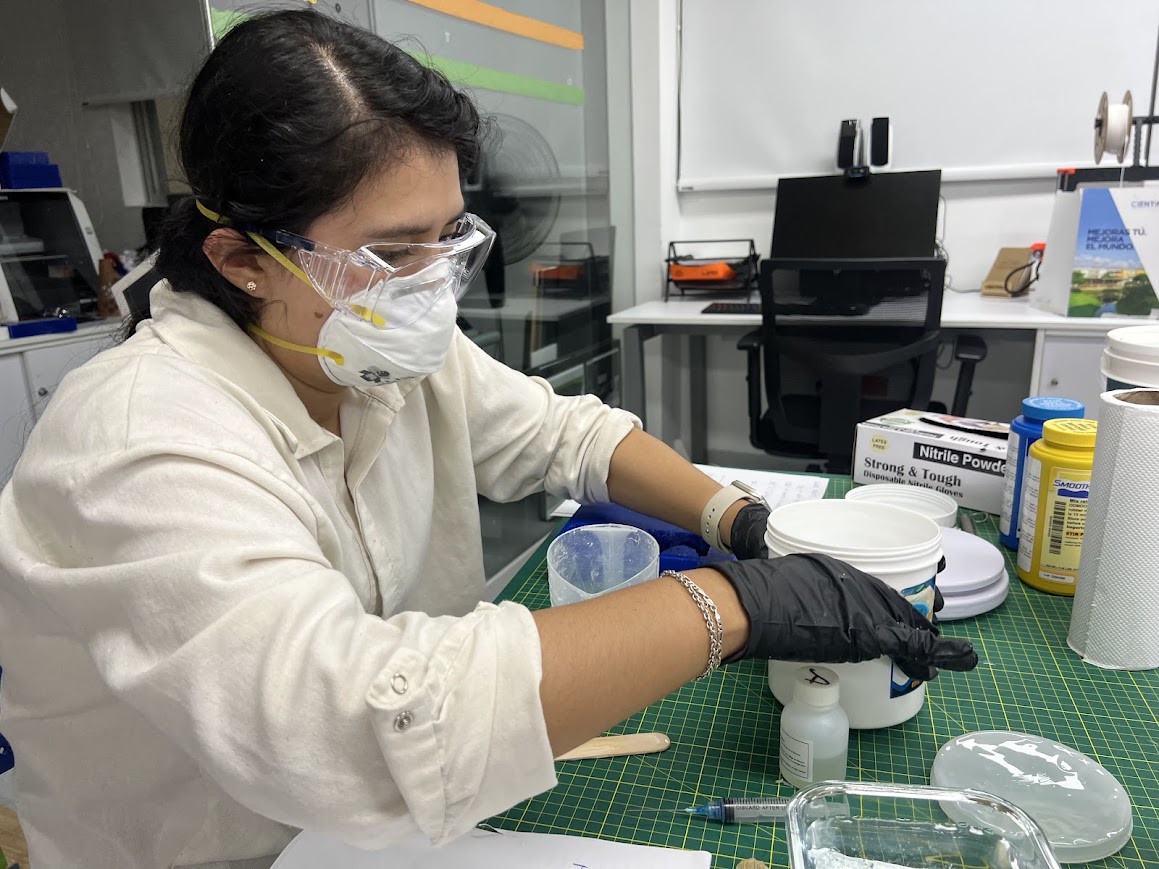
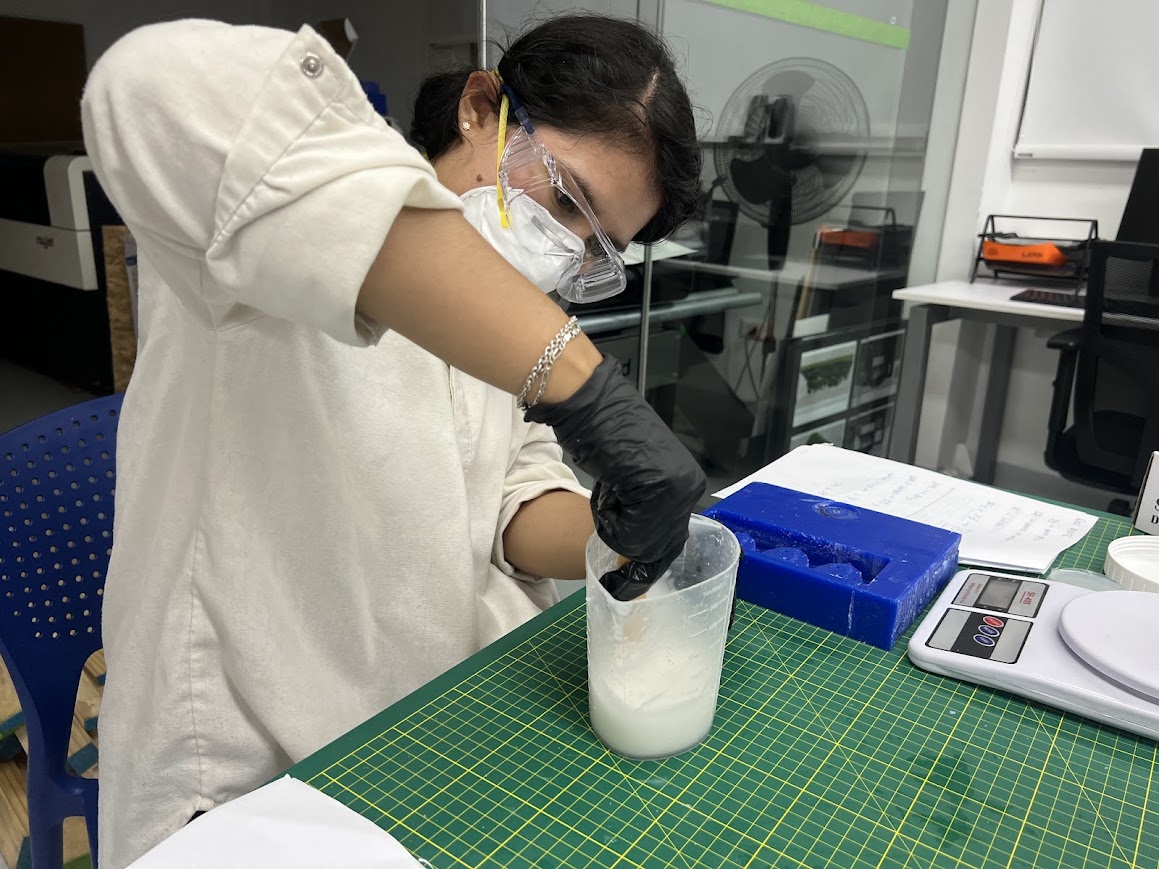
We started weighing to achieve the proper ratio between silicone and curing liquid according to the data sheets.
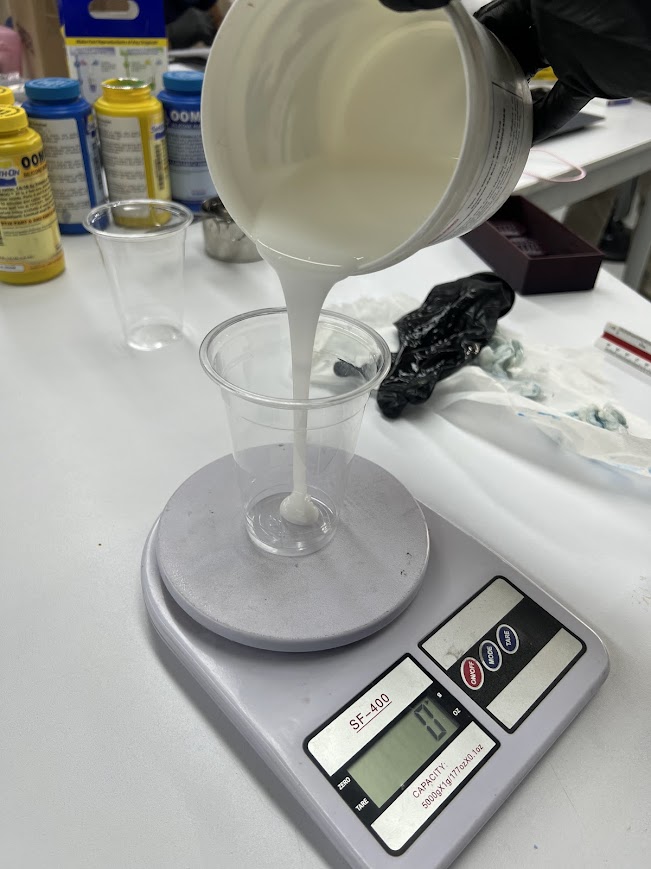
We weighed the silicone to ensure precise measurements, allowing us to calculate the exact amount of catalyst needed for mixing.
We measured and mixed the materials according to the proportions outlined in the technical datasheet.
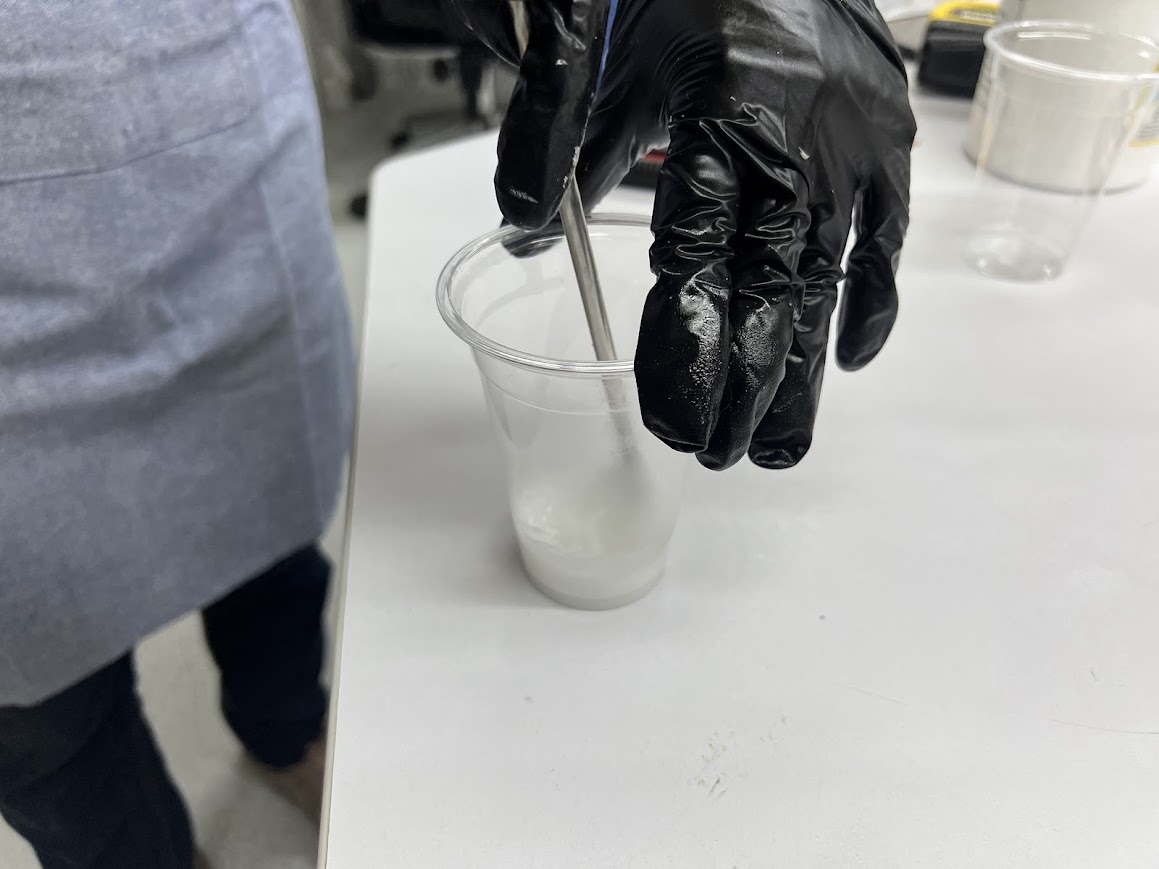
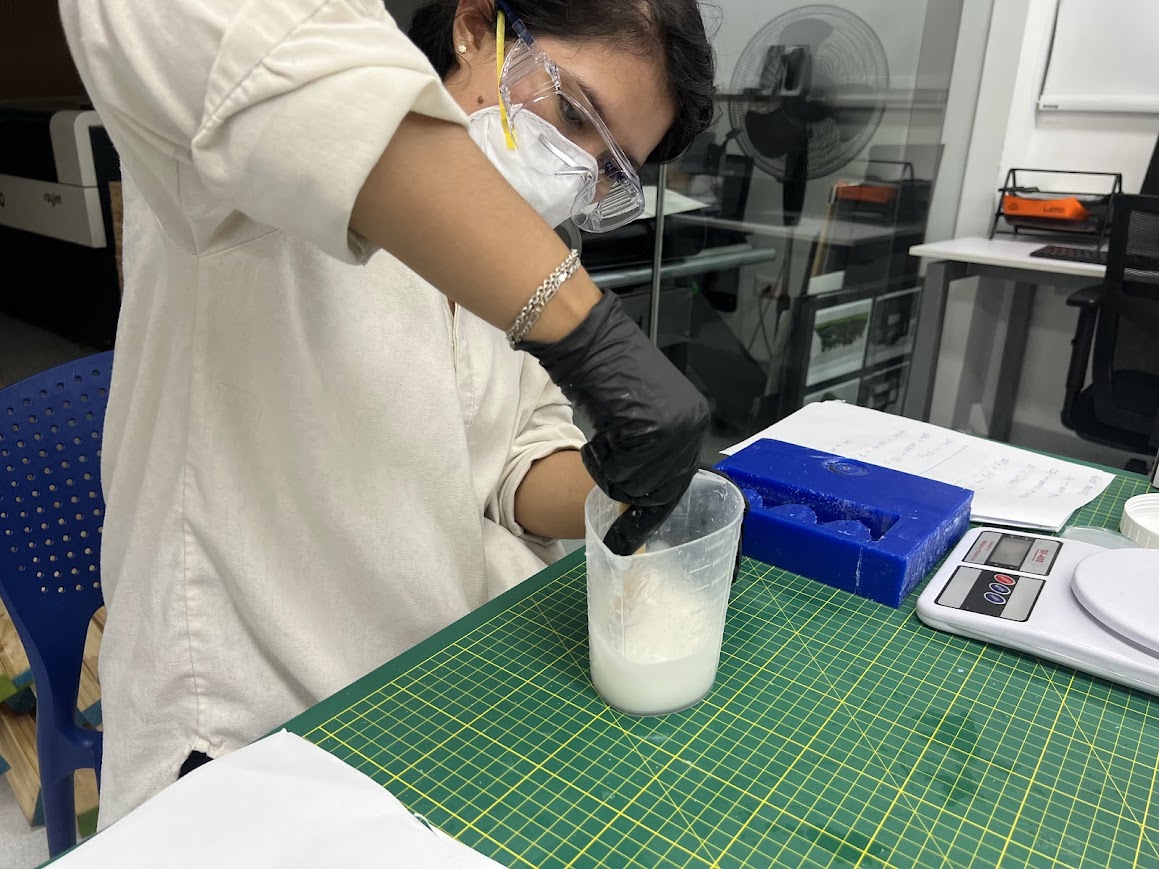
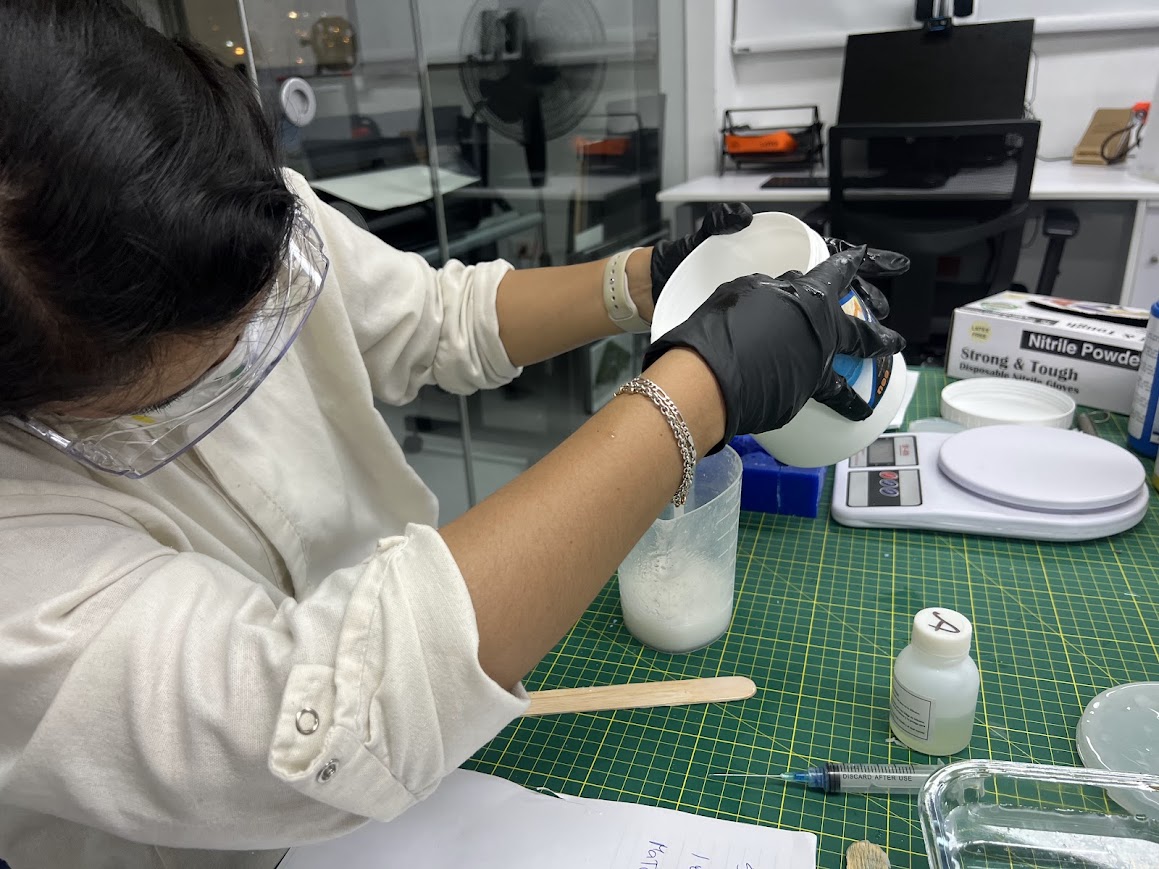
We moved the two materials slowly to prevent the formation of too many bubbles.
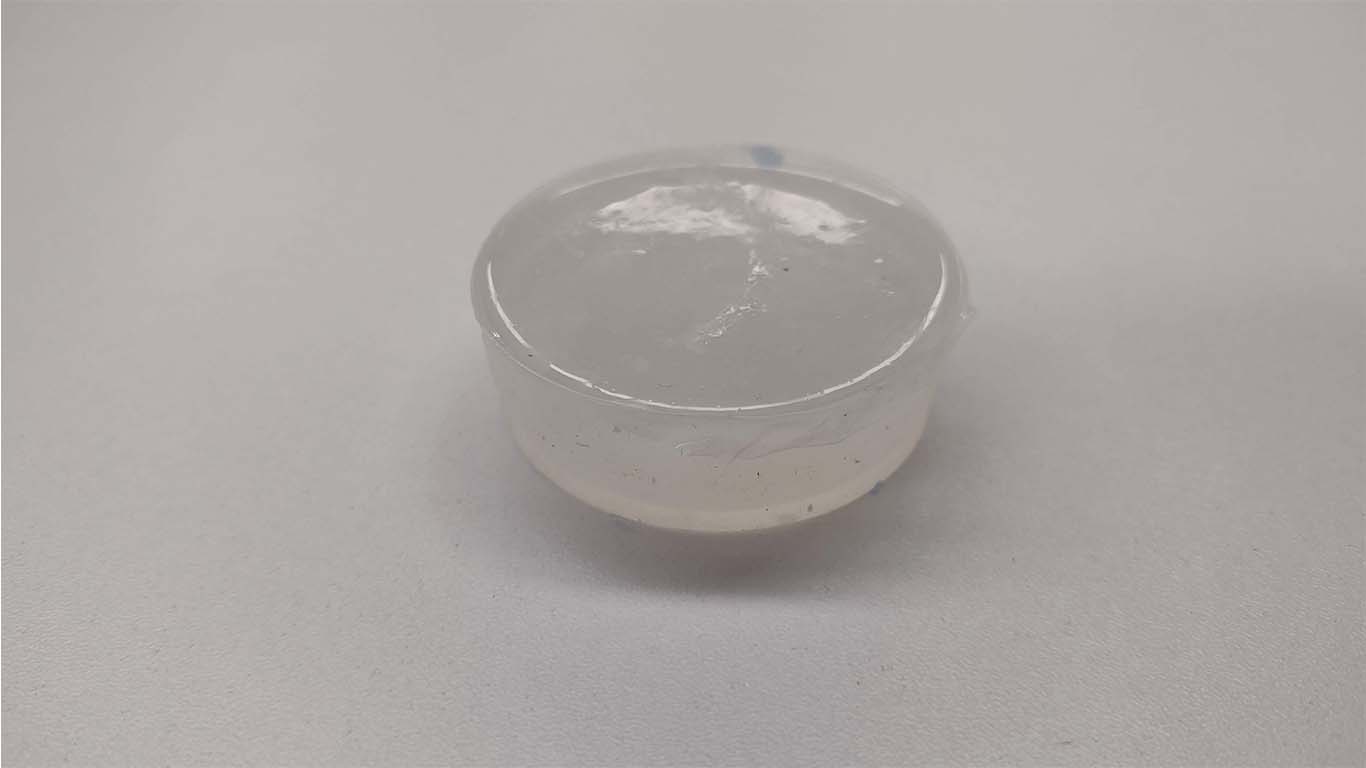
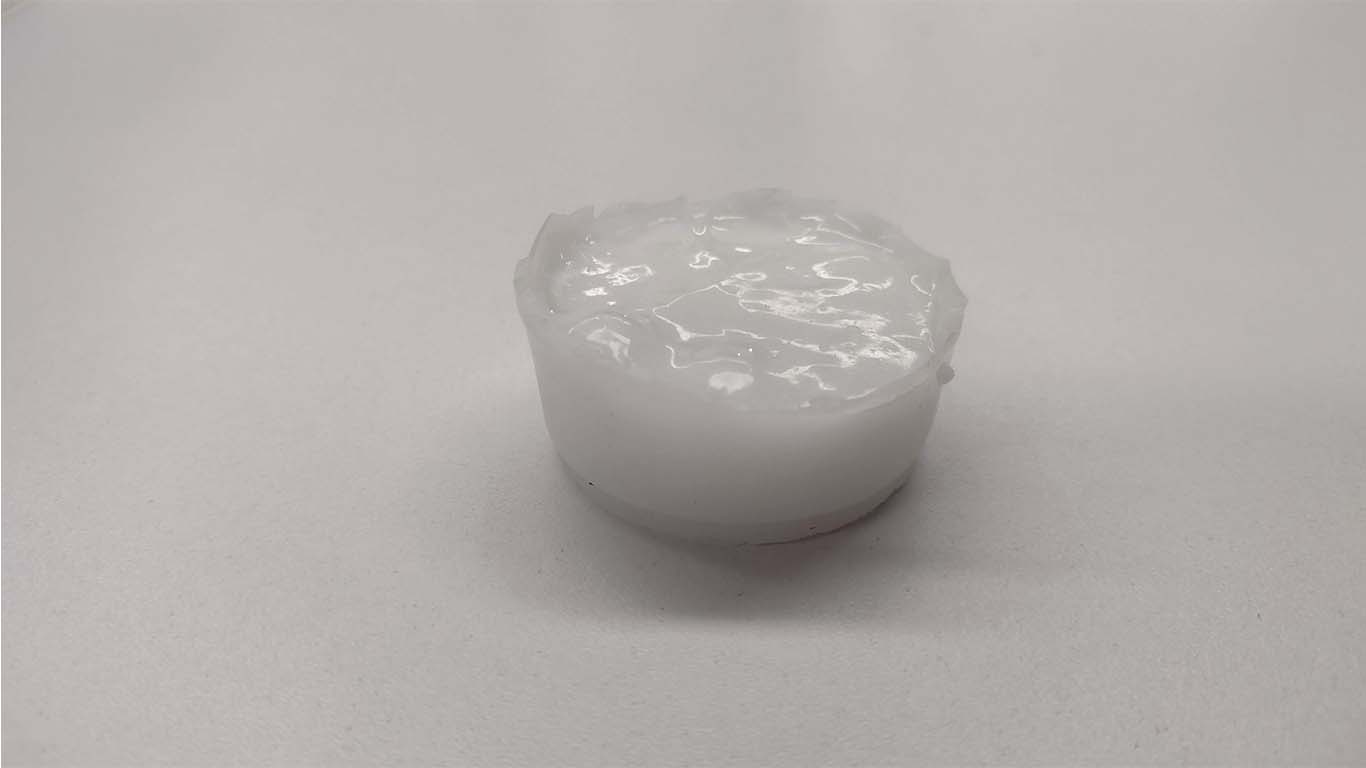
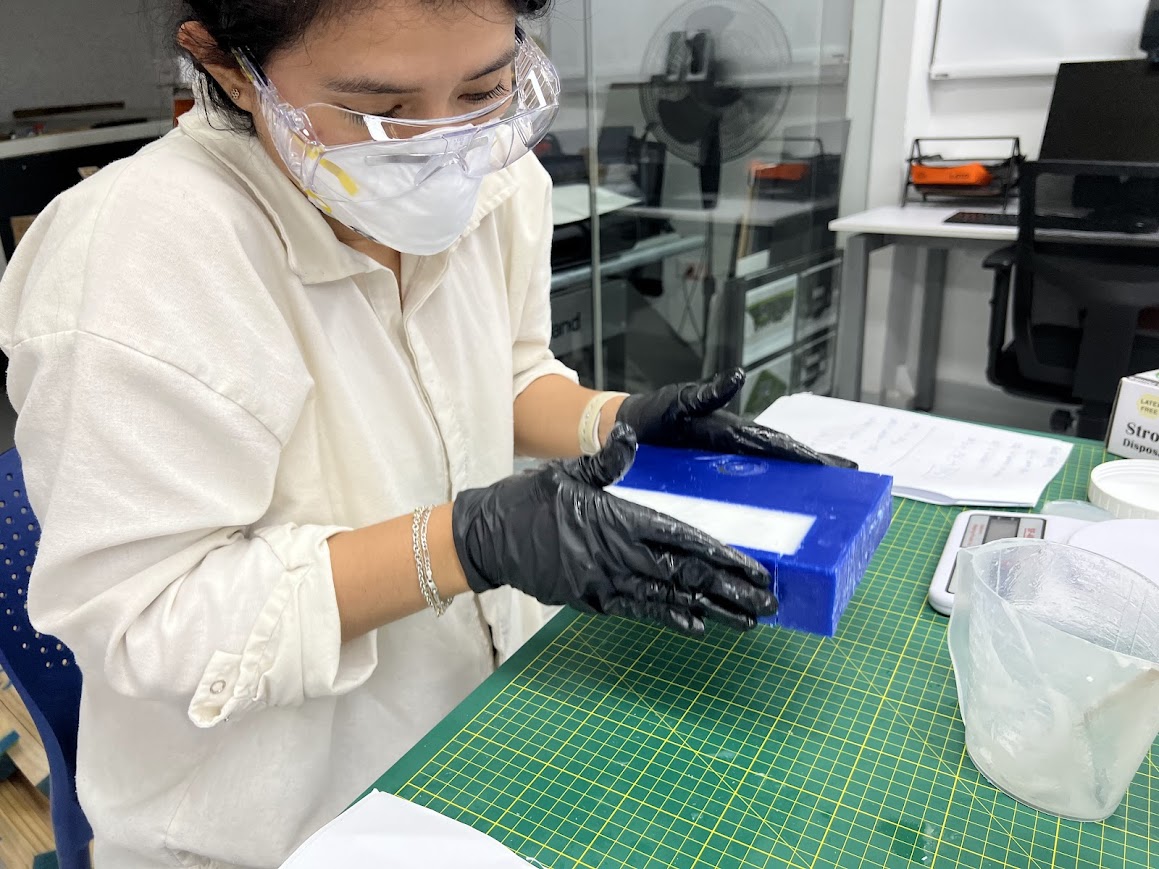
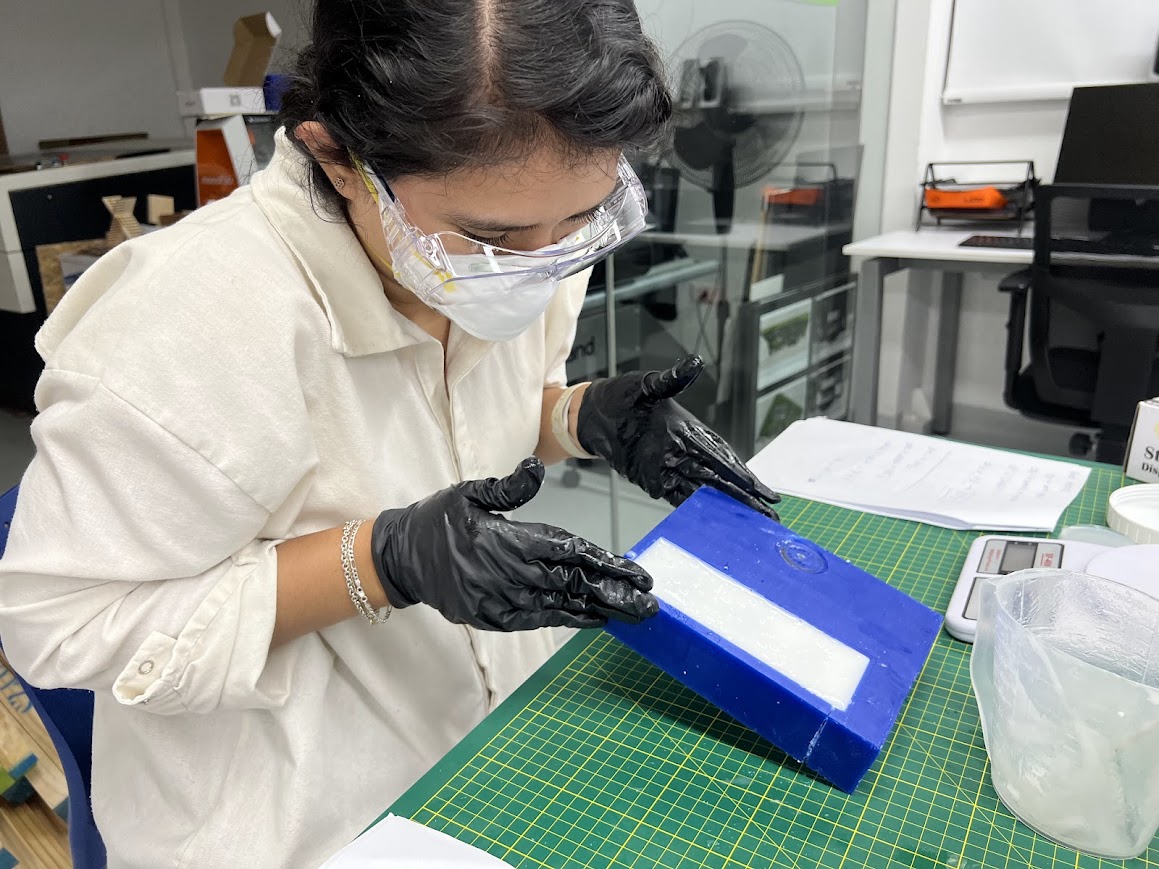
We can observe the result of the first test, which yielded a silicone mold that is more robust, with some excess material around the edges due to leftovers in the container. However, we were able to remove these excess parts to assess its consistency and strength.
PLATINUM RTV SILICONE HARDNESS 30-1 FOOD
DATA SHEET
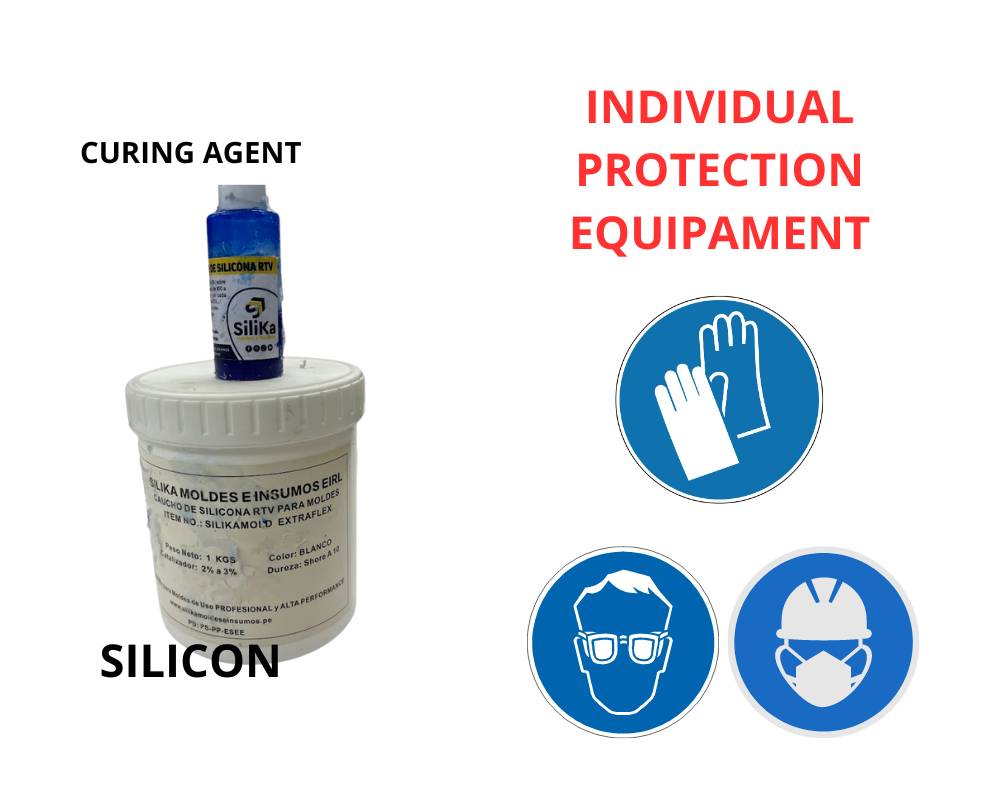
PDFGiven that we're using PLATINUM RTV SILICONE HARDNESS 30-1 FOOD, safety is still a priority. While this type of silicone is not as toxic, we'll still adhere to safety protocols by wearing gloves, a mask, and safety glasses. This precaution ensures that we're protected from any potential hazards during the work process.

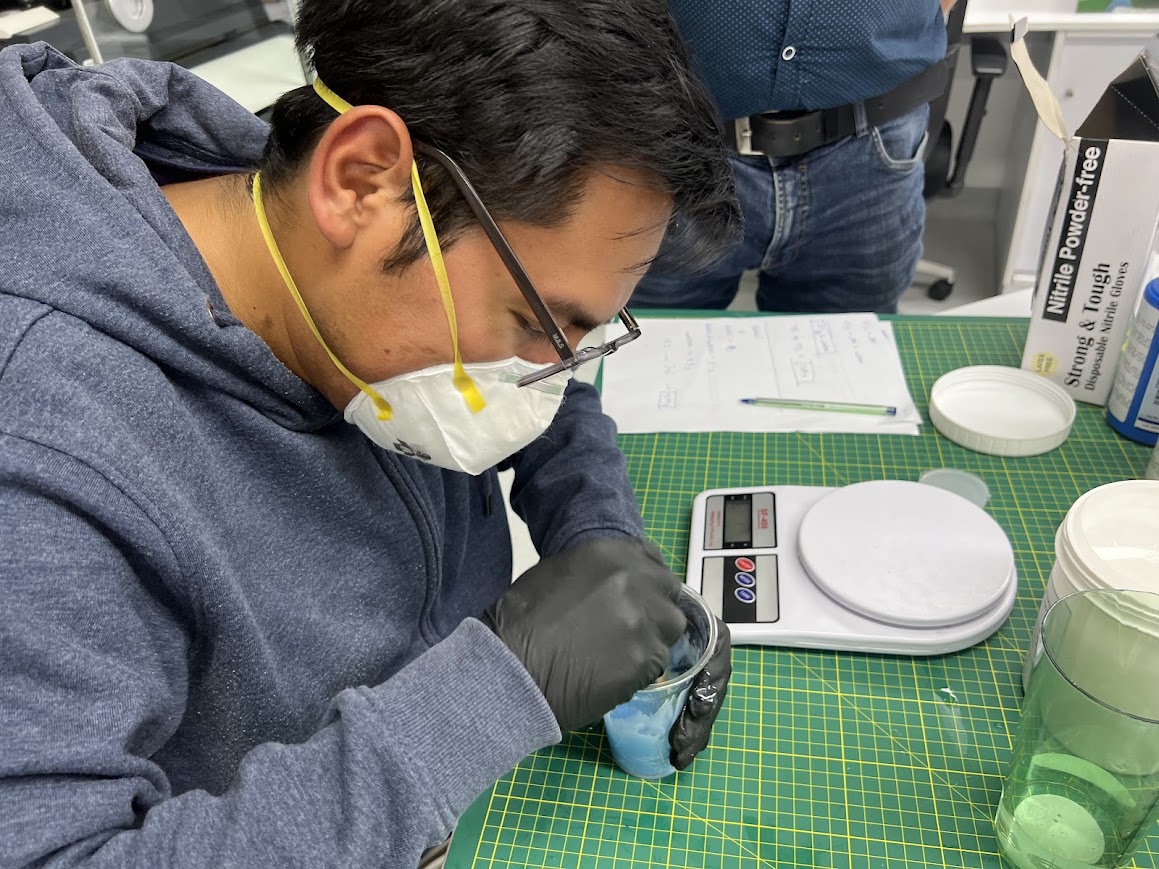
In this case, we mix equal parts of the silicone with the catalyst to ensure proper reaction and optimal curing of the material. It's important to follow the specific instructions from the technical datasheet to achieve the best possible results in terms of mold strength and durability.

We first weigh out 15 grams.
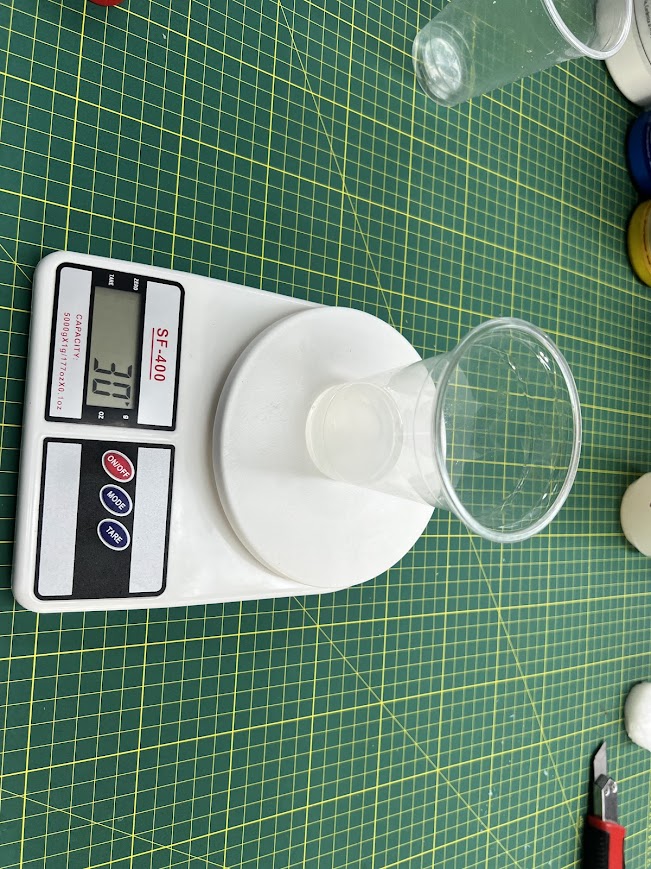
Then we weigh out another 15 grams, totaling 30 grams altogether.
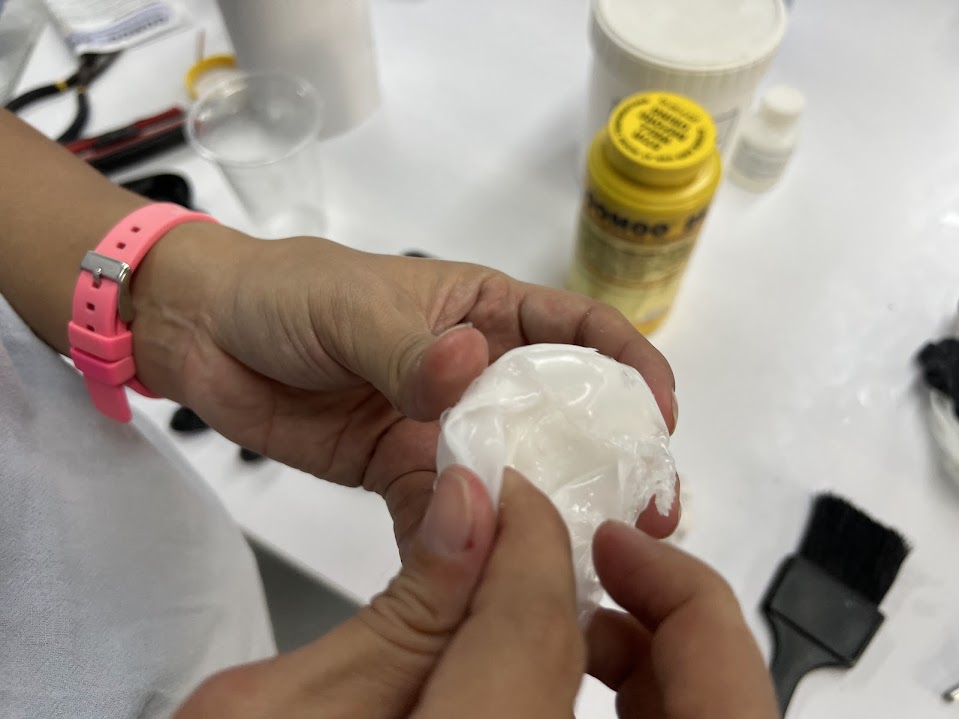
We mix the two components gently until thoroughly combined.
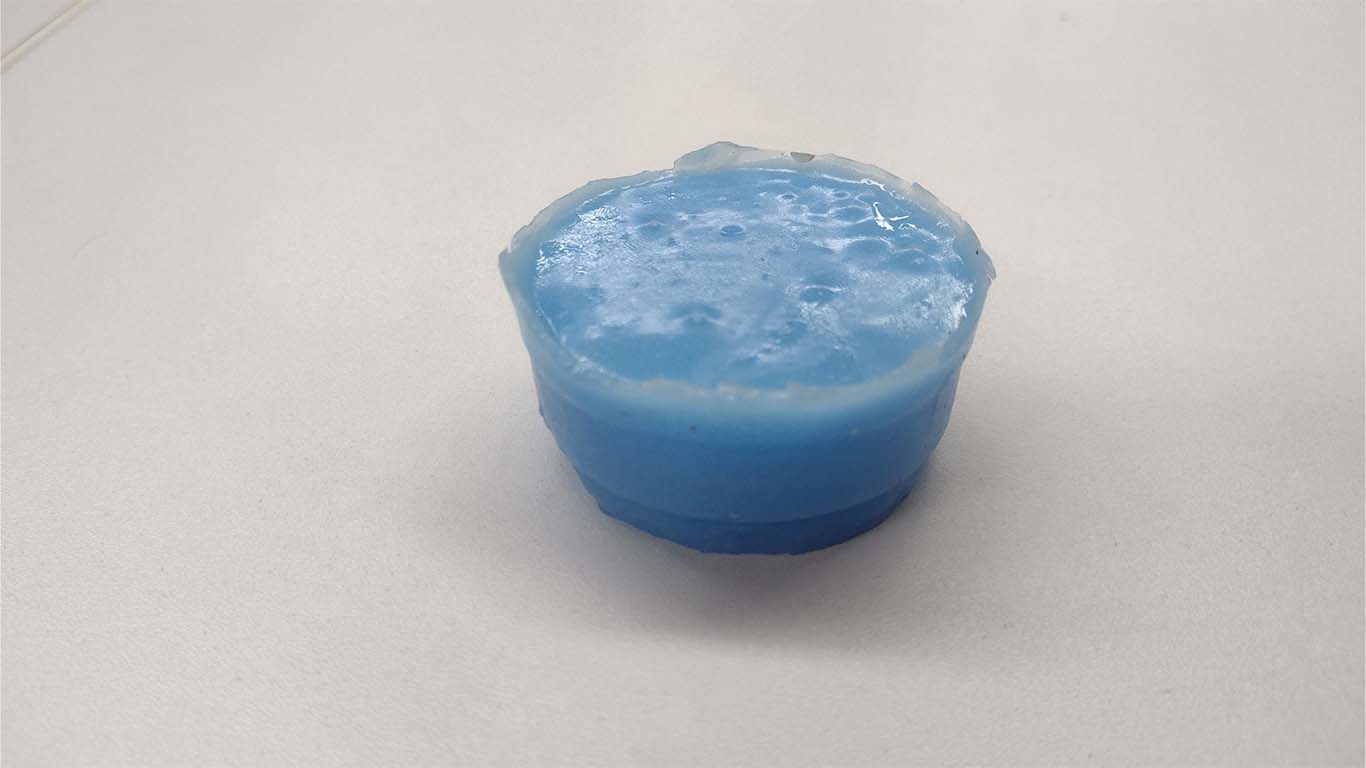
The result turned out really nice! This silicone mold is perfect for making food items. I was thinking of creating something with chocolate, but I might not be able to taste it if I manage to get the ingredient.
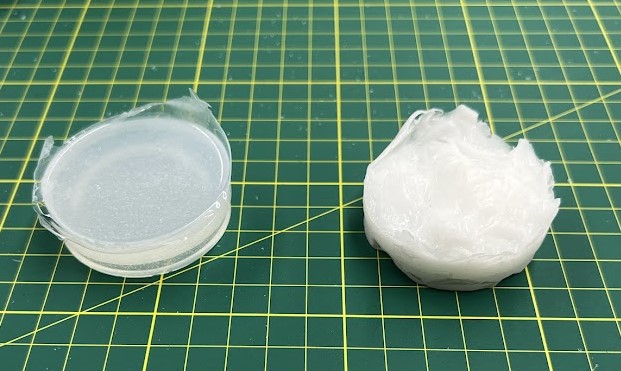
Here we can see the comparison of the results.
RTV EXTRAFLEX SILICONE RUBBER
DATA SHEET
PDFWith RTV EXTRAFLEX SILICONE RUBBER, full protection is required, including safety glasses, a respirator mask, and gloves.
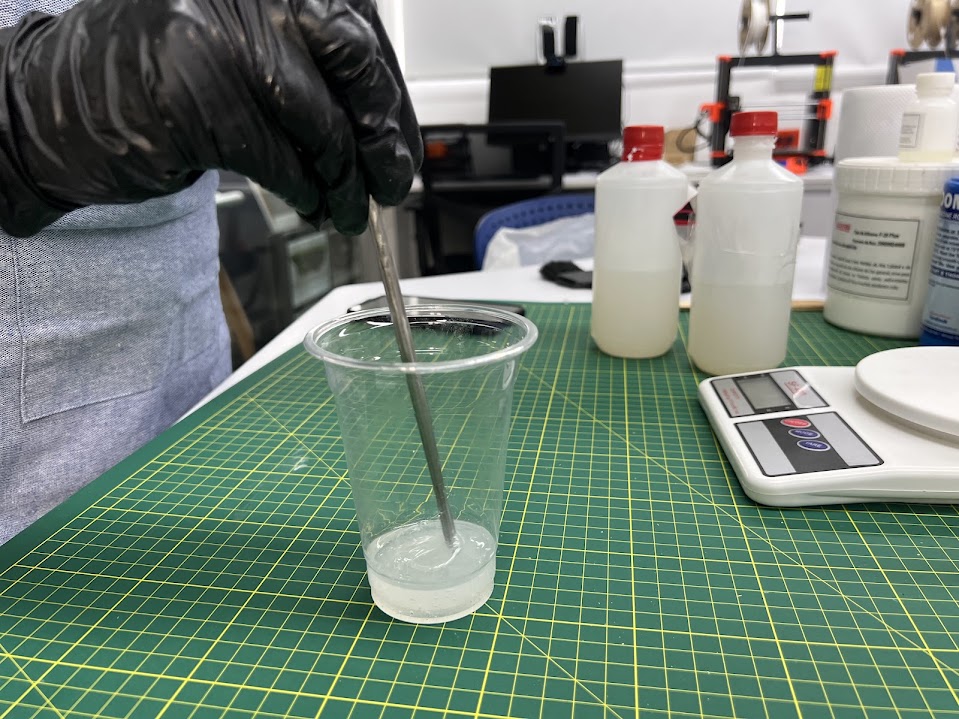
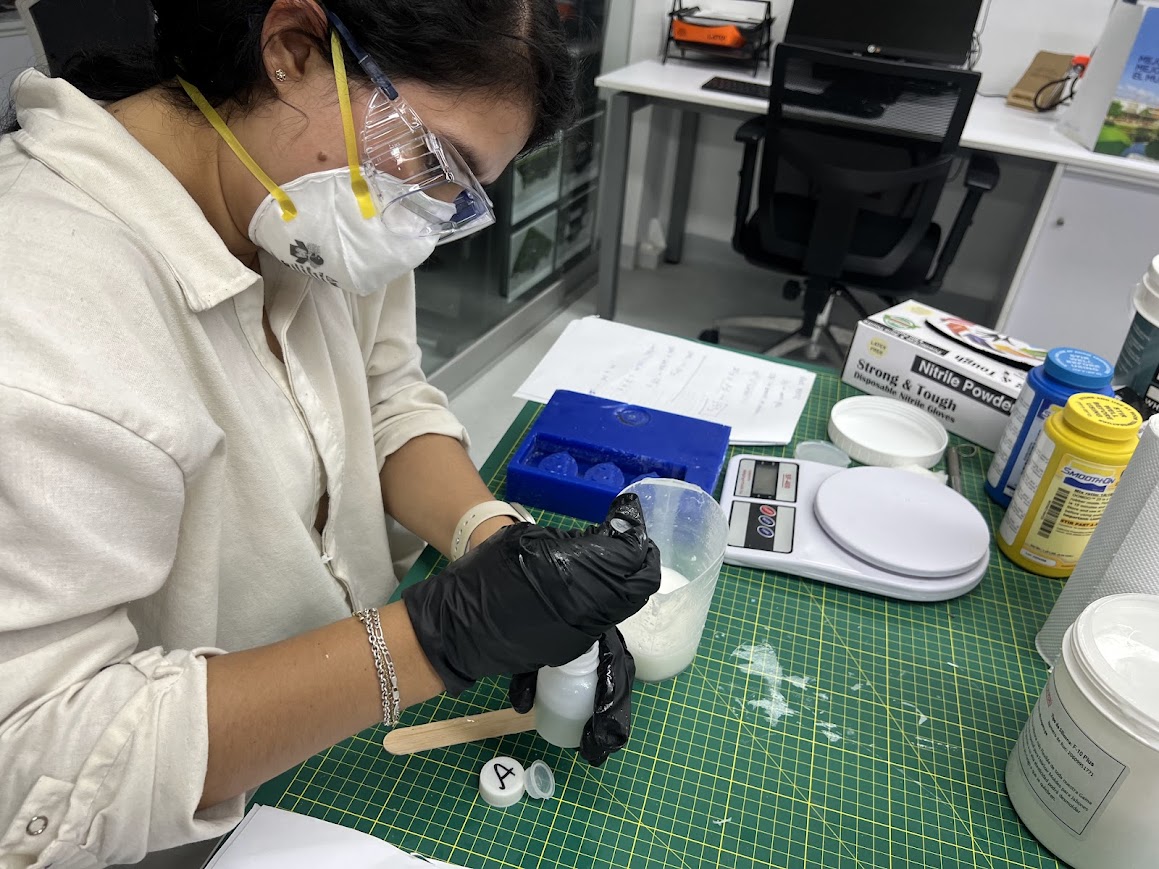
The first thing we did with Hans was to measure out the portions we were going to use for the tests.
We measured out the silicone to the same quantity as the other molds, and then added 1% of catalyst to ensure it would dry within 6 to 8 hours..
Here, instructing Hans to mix slowly to avoid creating bubbles.
The result of the test is a very flexible silicone.
SILICON F10 PLUS
DATA SHEET
PDFWith SILICON F10 PLUS, it's crucial to wear protection such as a mask, gloves, and goggles, as the odor could potentially affect you.
Here, we start by mixing the components for the tests of this silicone.
Adding only 2 ml of catalyst, as this silicone has a quick drying time.
It's important to consider the measurement of the catalyst because if you add too much, it's likely to harden in less than three minutes, leaving you with insufficient time to achieve a homogeneous mixture.

Also, consider continuous, slow, and homogeneous mixing for less than 2 minutes.
Mix thoroughly but at a slow pace to ensure everything is well blended before pouring into the container.
Individual assignment
DESIGN MY MOLD
"Design My Mold" began with my initial design, which evolved and changed over time. You'll see many versions of my molds as they progressed.
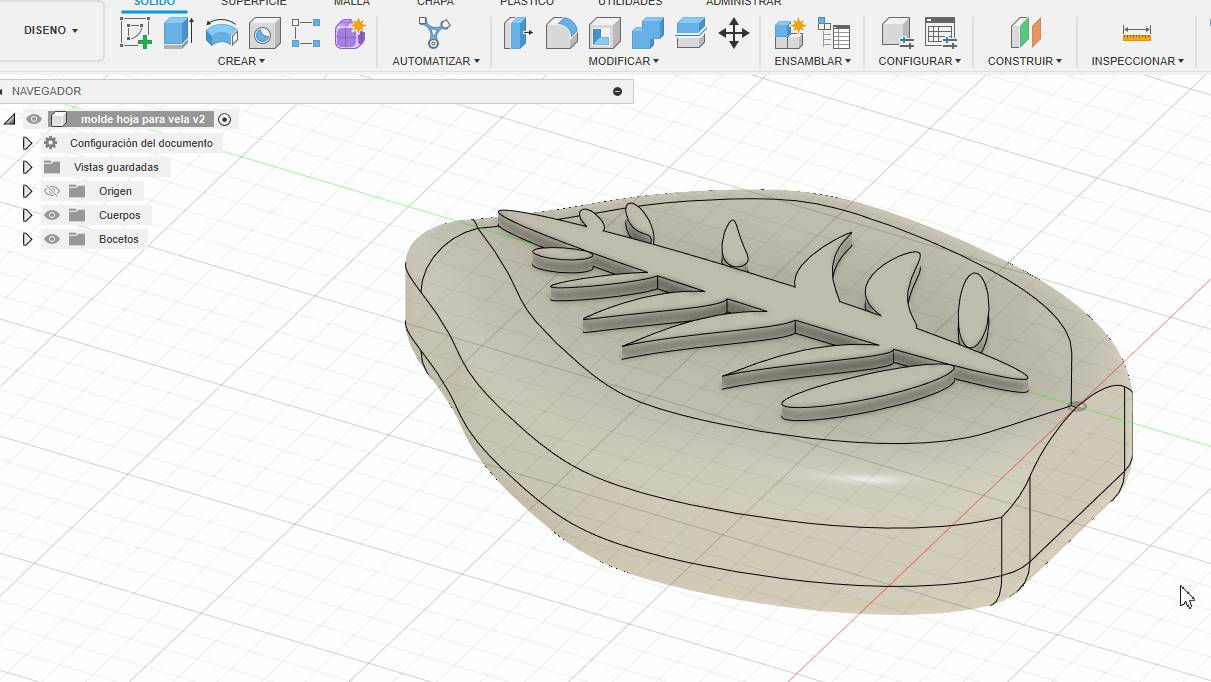
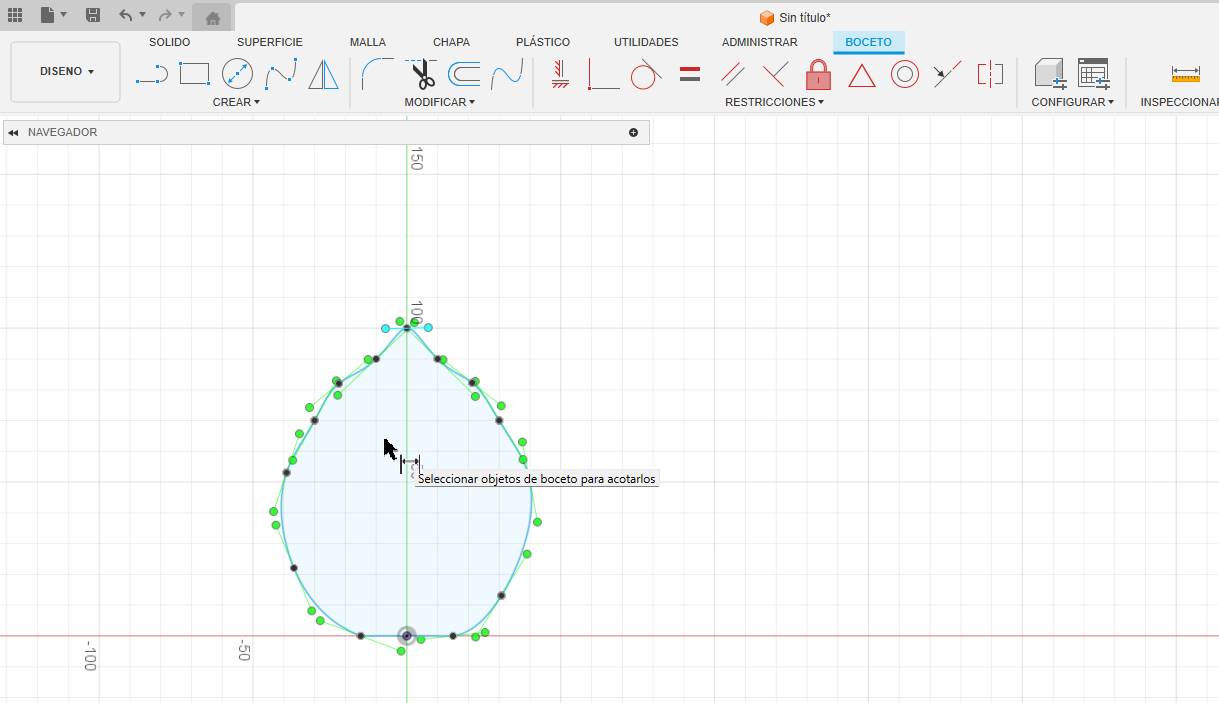
I'll start my design with my leaf, as it's so representative of my final project.
Now, I'm setting the thickness of my leaf to 2 cm to ensure my mold is quite thick.

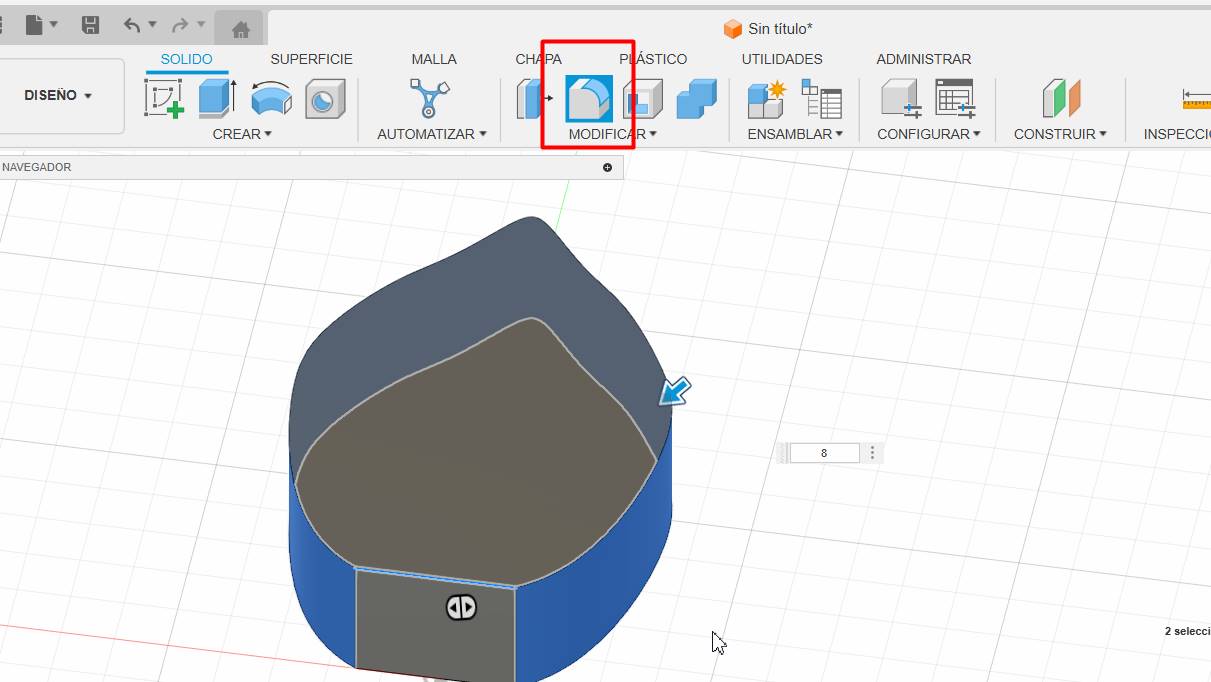
Here, I wanted to add a border to give my design a curved edge.
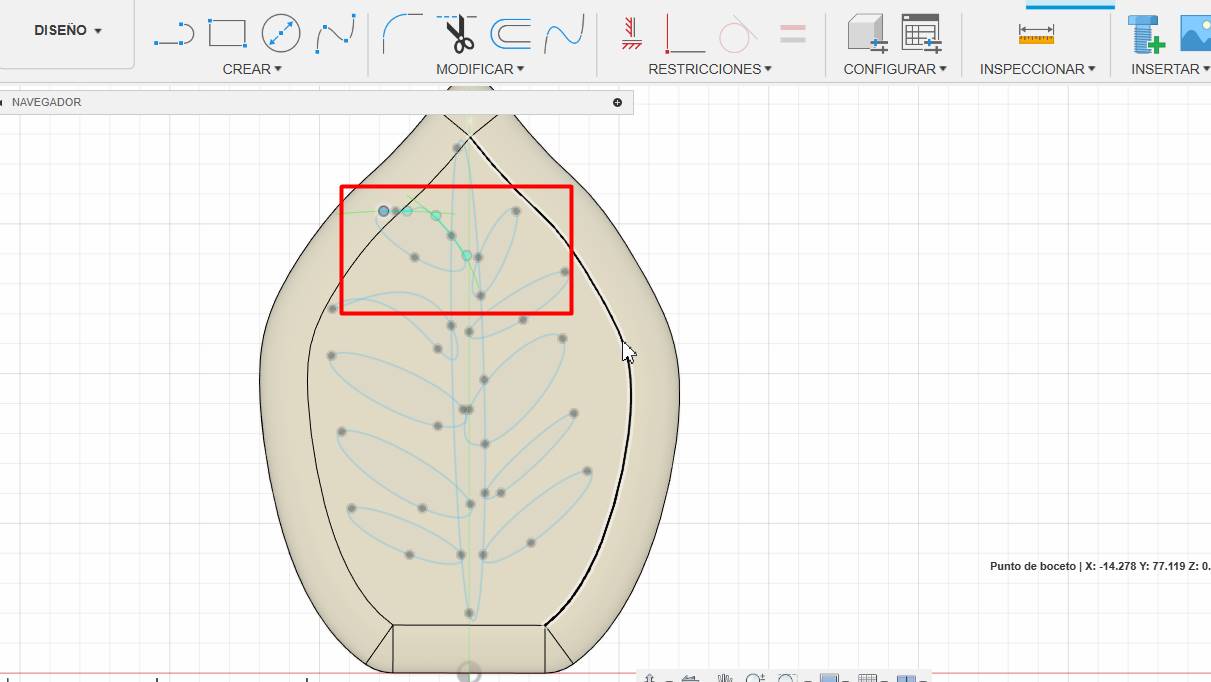
Then, I began creating designs for my leaf to give it texture.
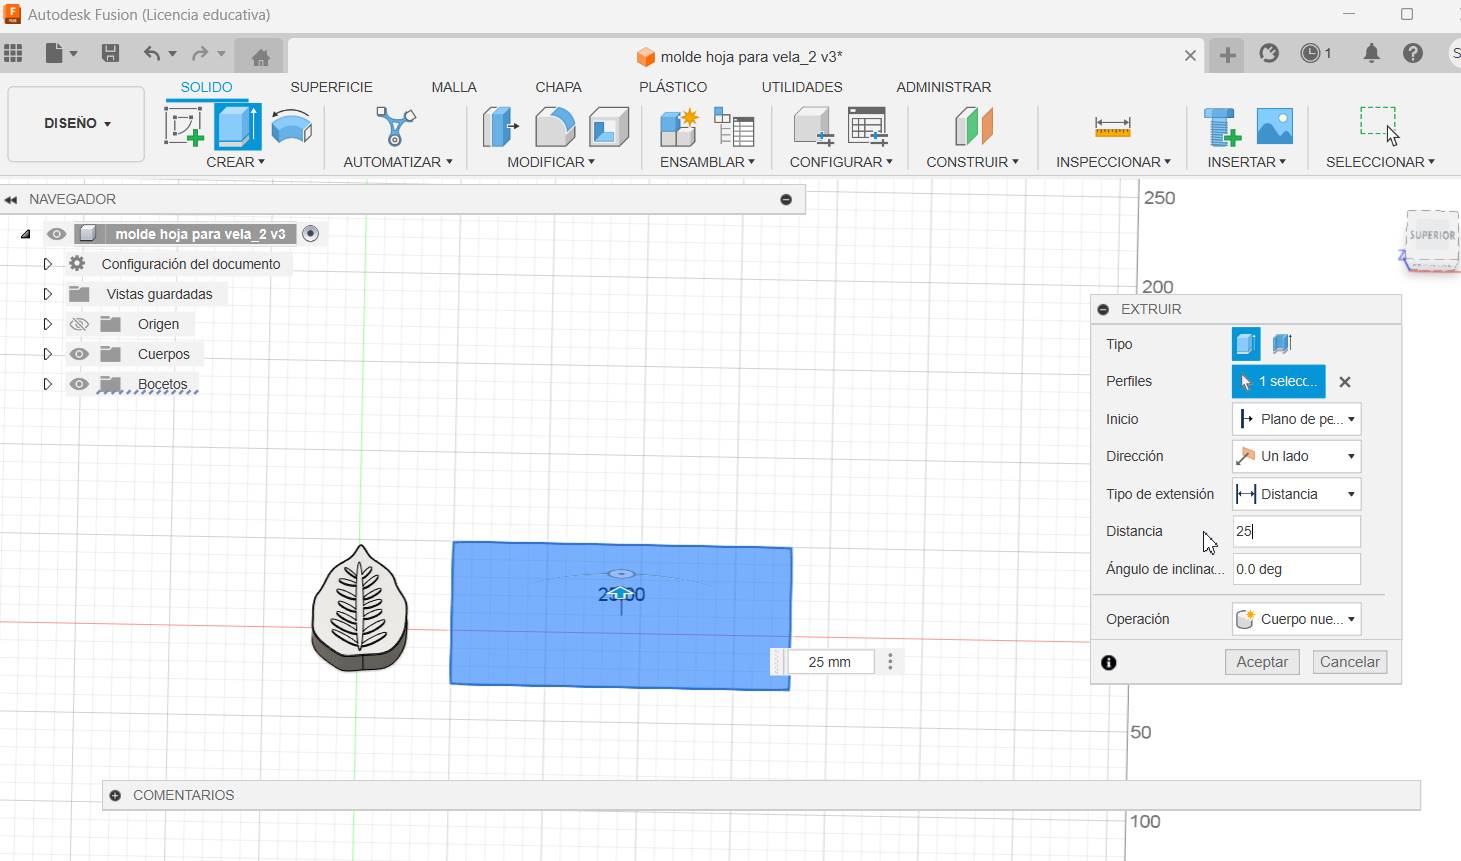
Now, I'm creating the box, which will have an approximate size of 17 by 7 cm, or perhaps slightly smaller. In the case of this one, as I'll be printing it, it will be 18 by 8 cm, slightly larger than what I'll be making in the CNC milling.
I made the respective connections with the xiao for correct operation
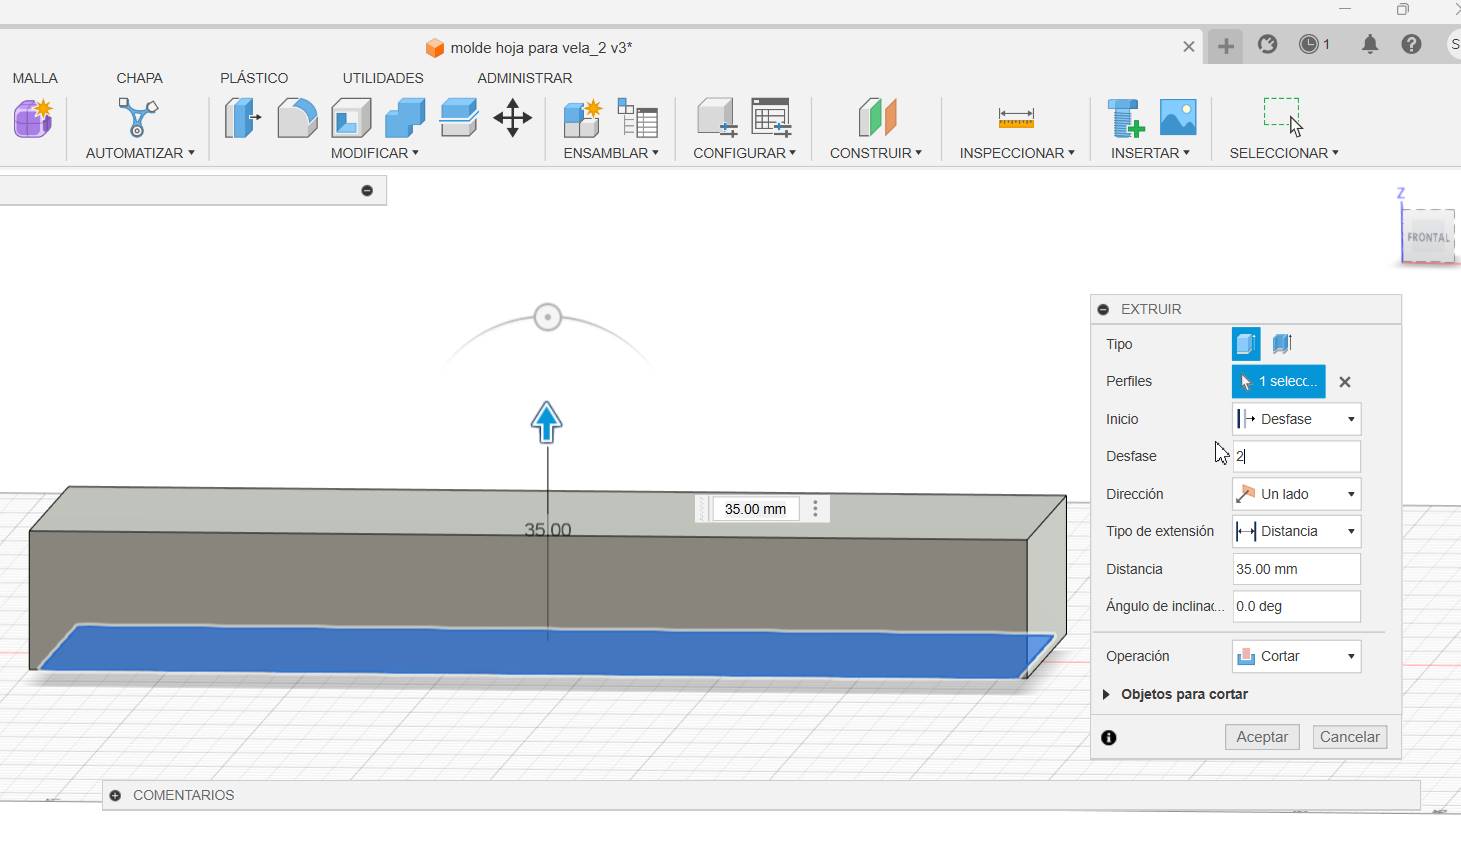
I created a cavity with walls of 2 mm thickness and placed my design inside the box.
I began arranging it slowly, piece by piece
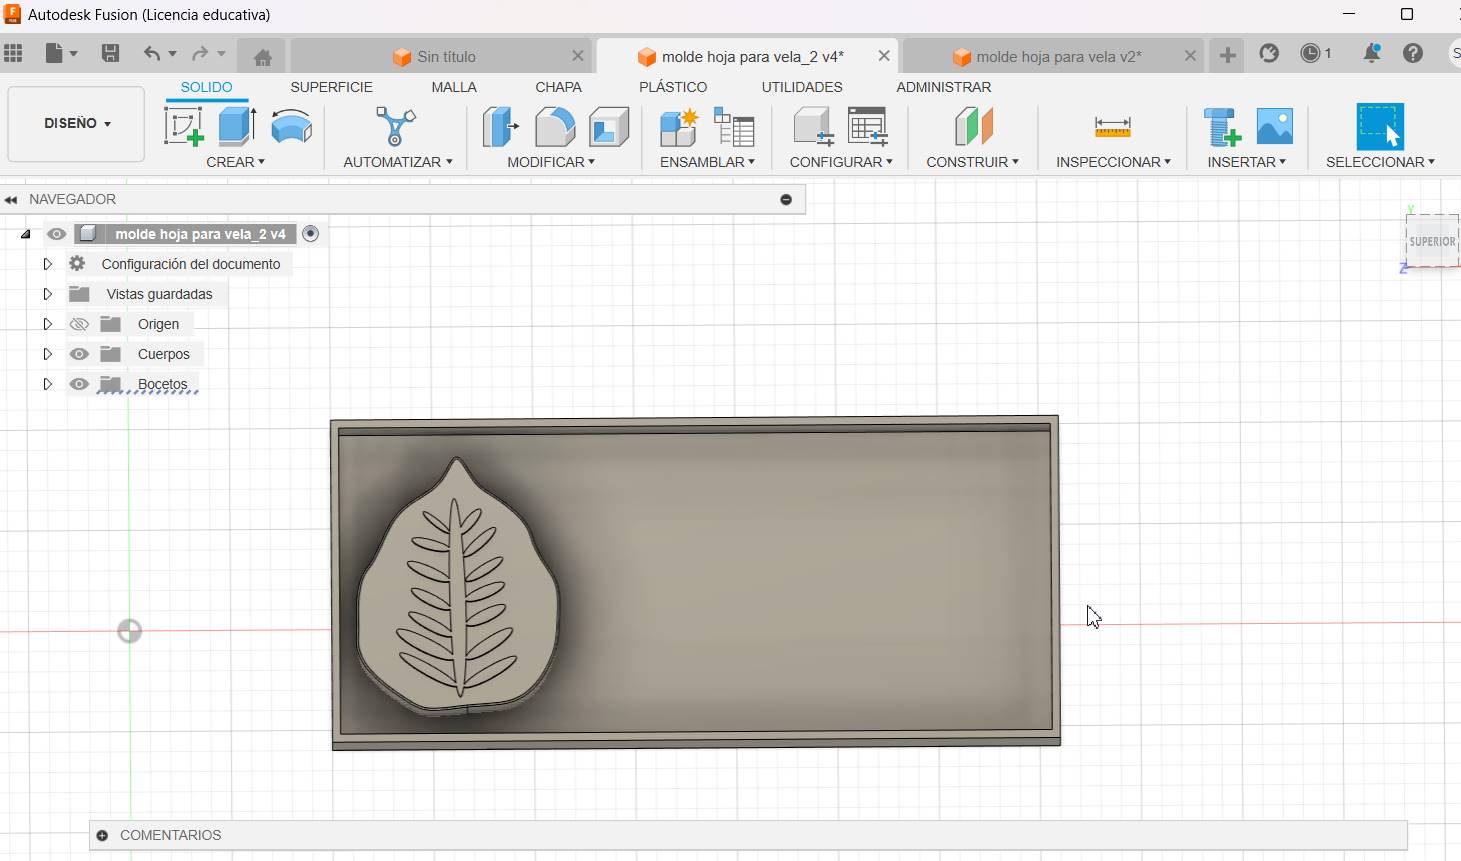
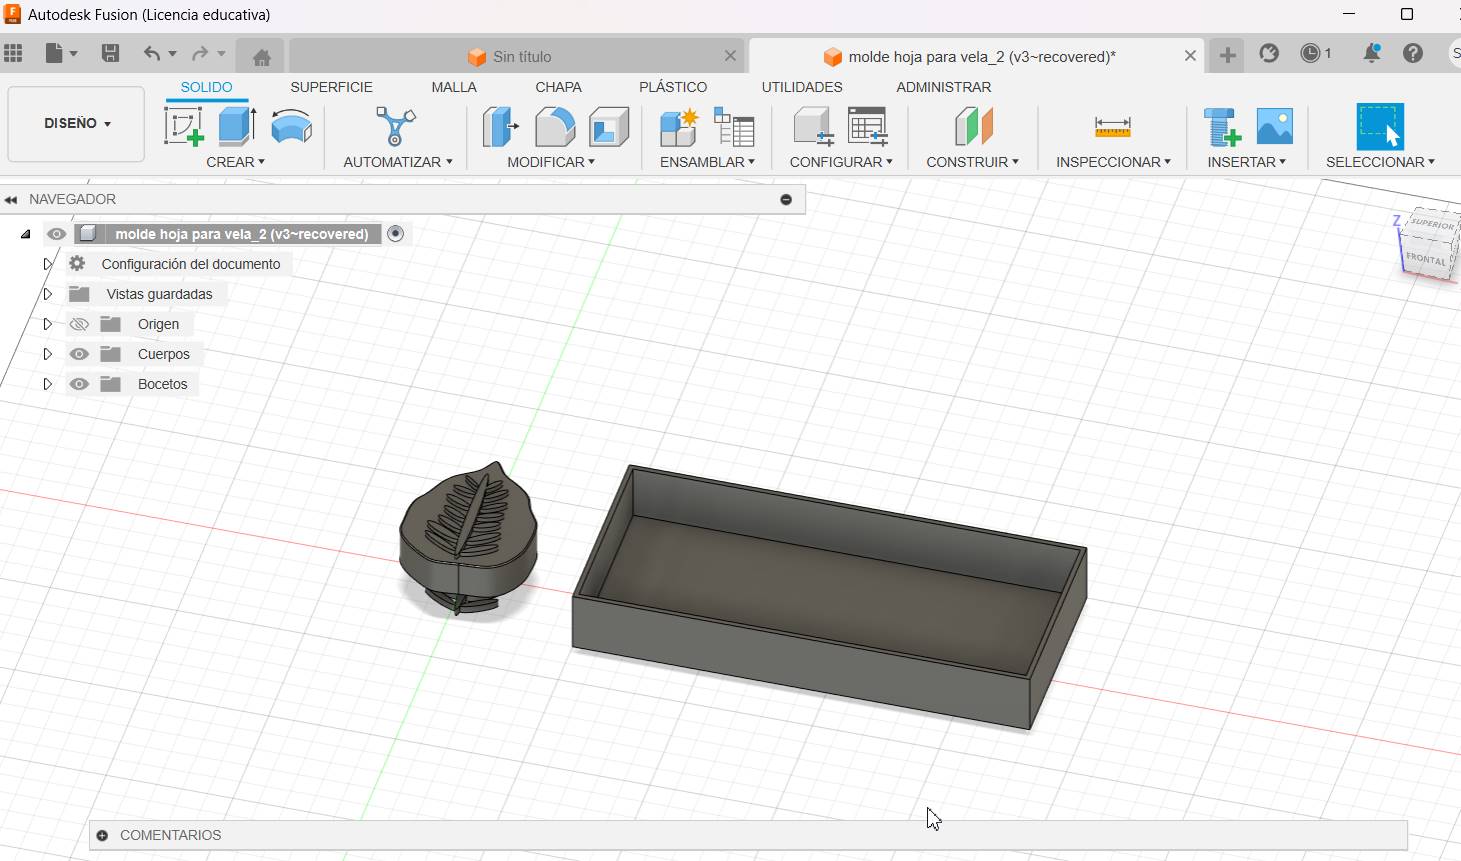
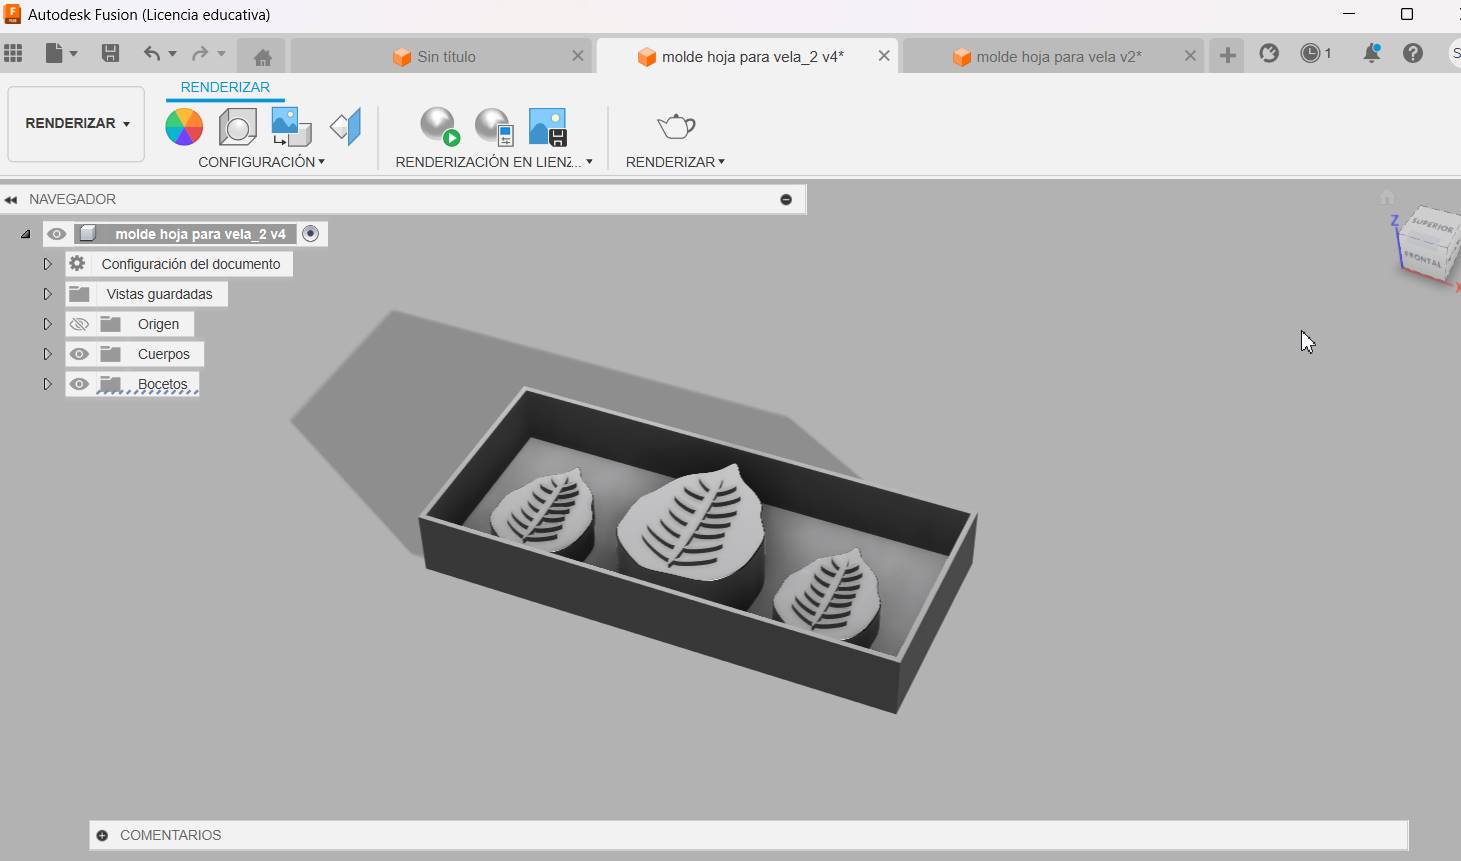
Here, I'm placing the leaf designs in the center.
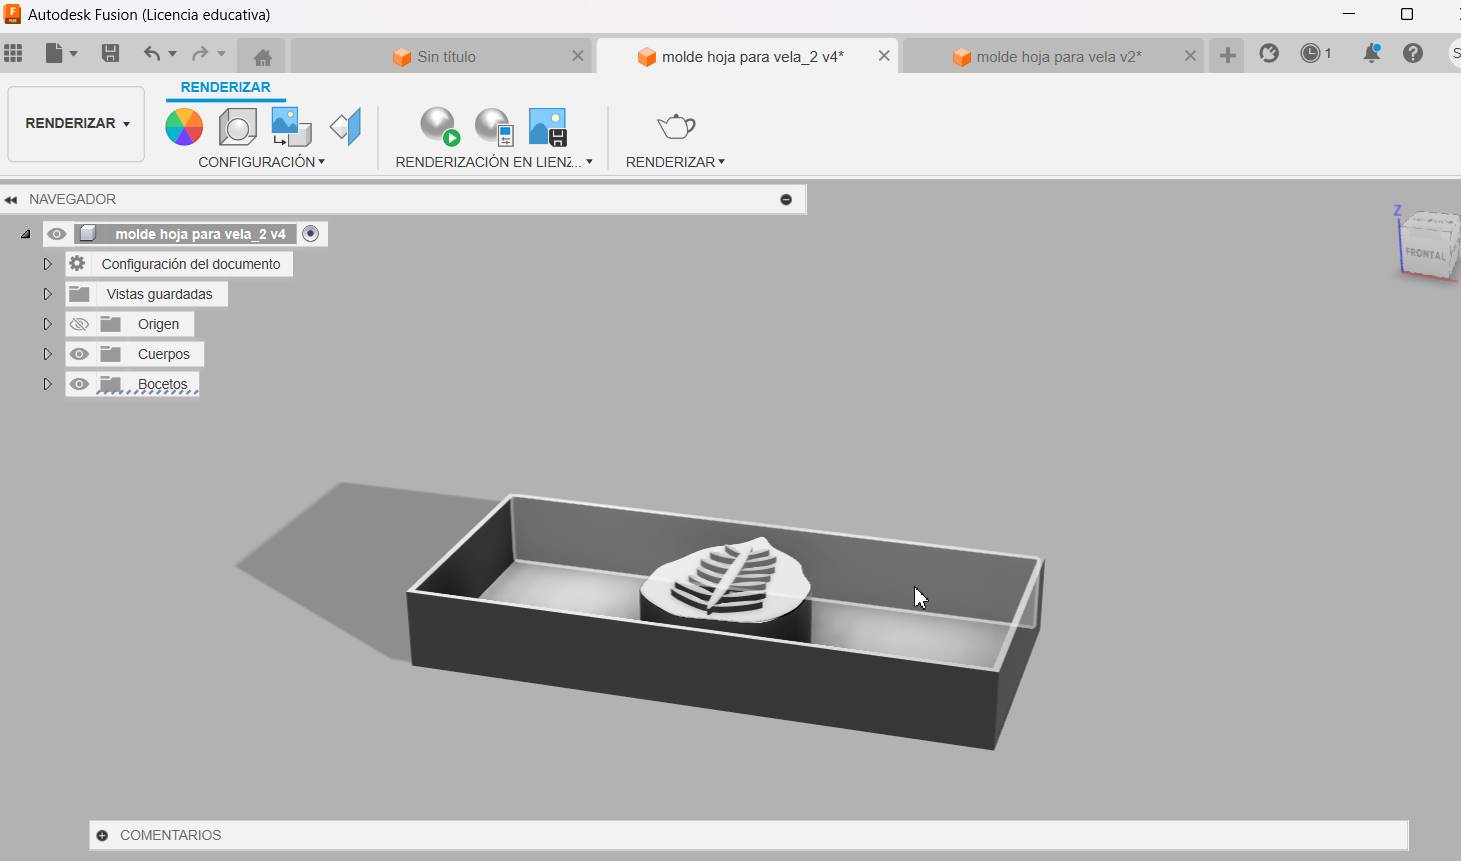
Then I multiplied it so that there are three molds for casting.
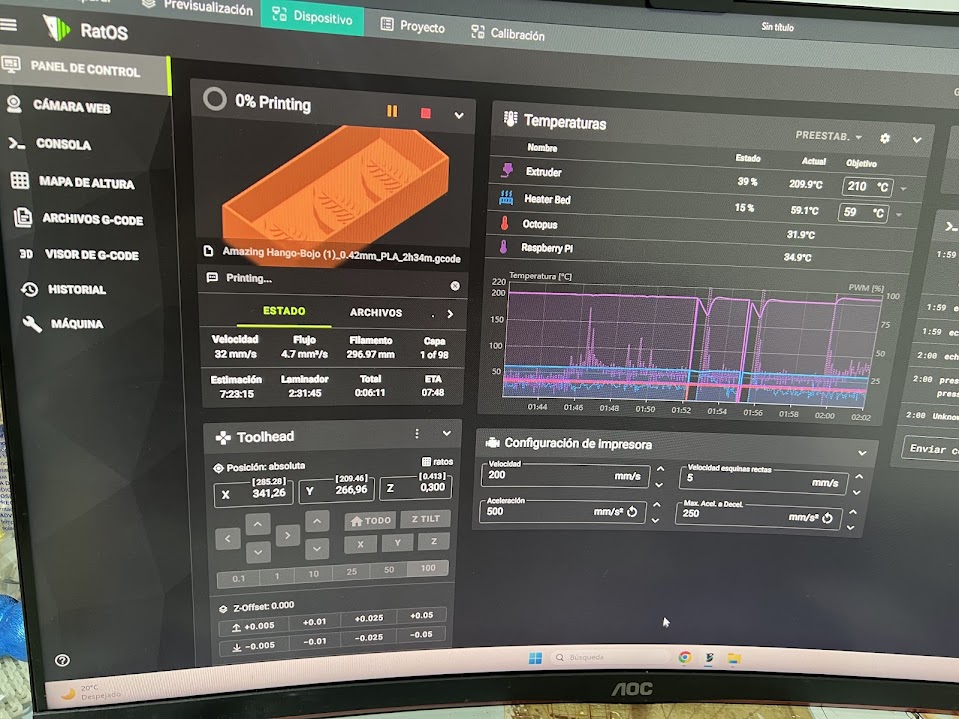
Here, we need to slice it in Orca. We can observe that the printing time is 7 hours and 23 minutes, with a material consumption of 296.97mm.
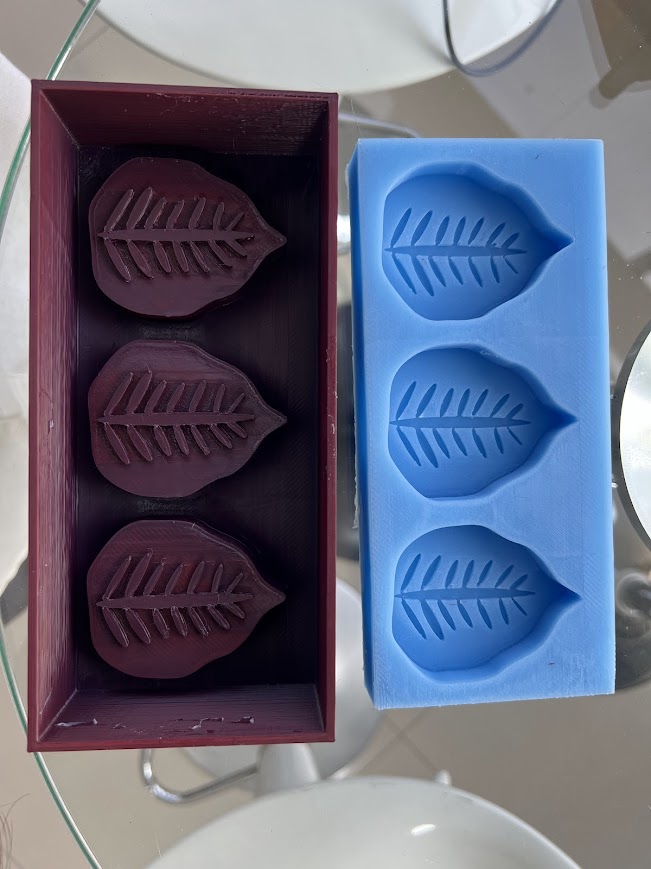
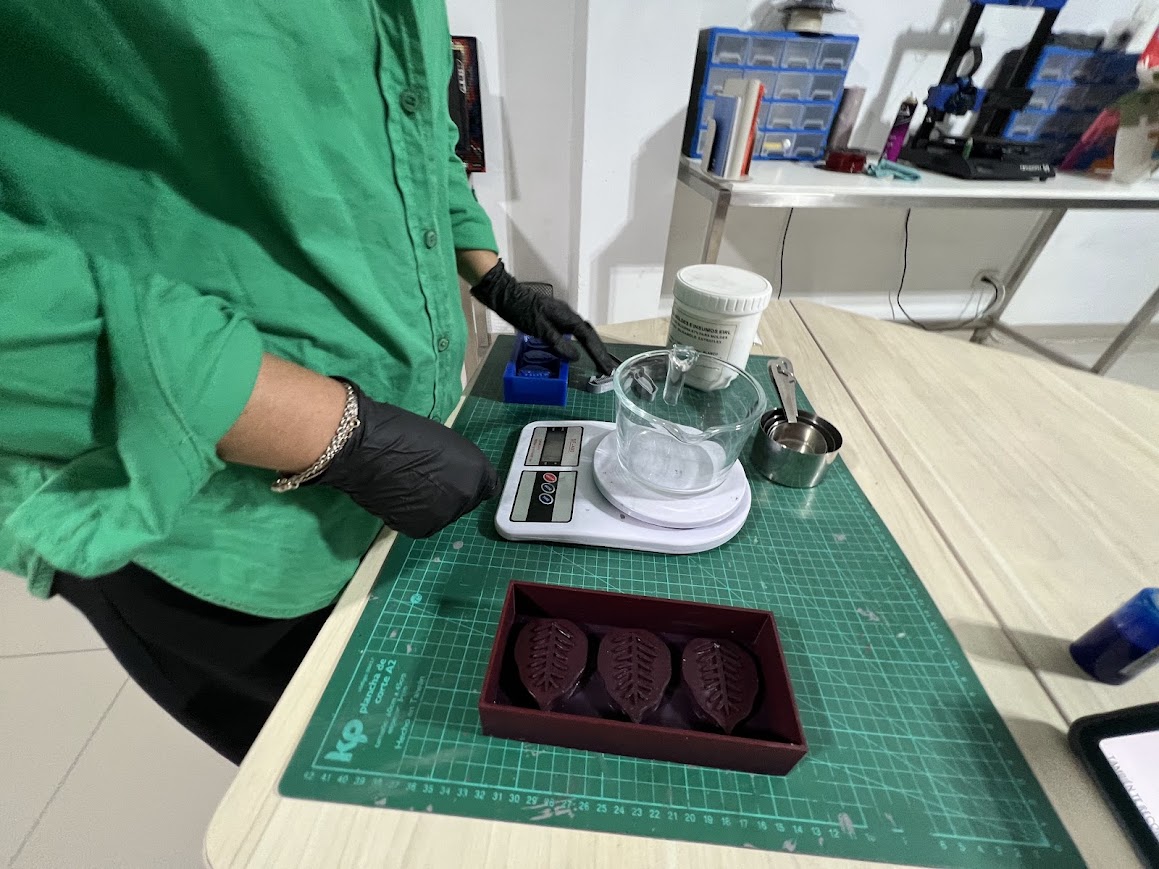
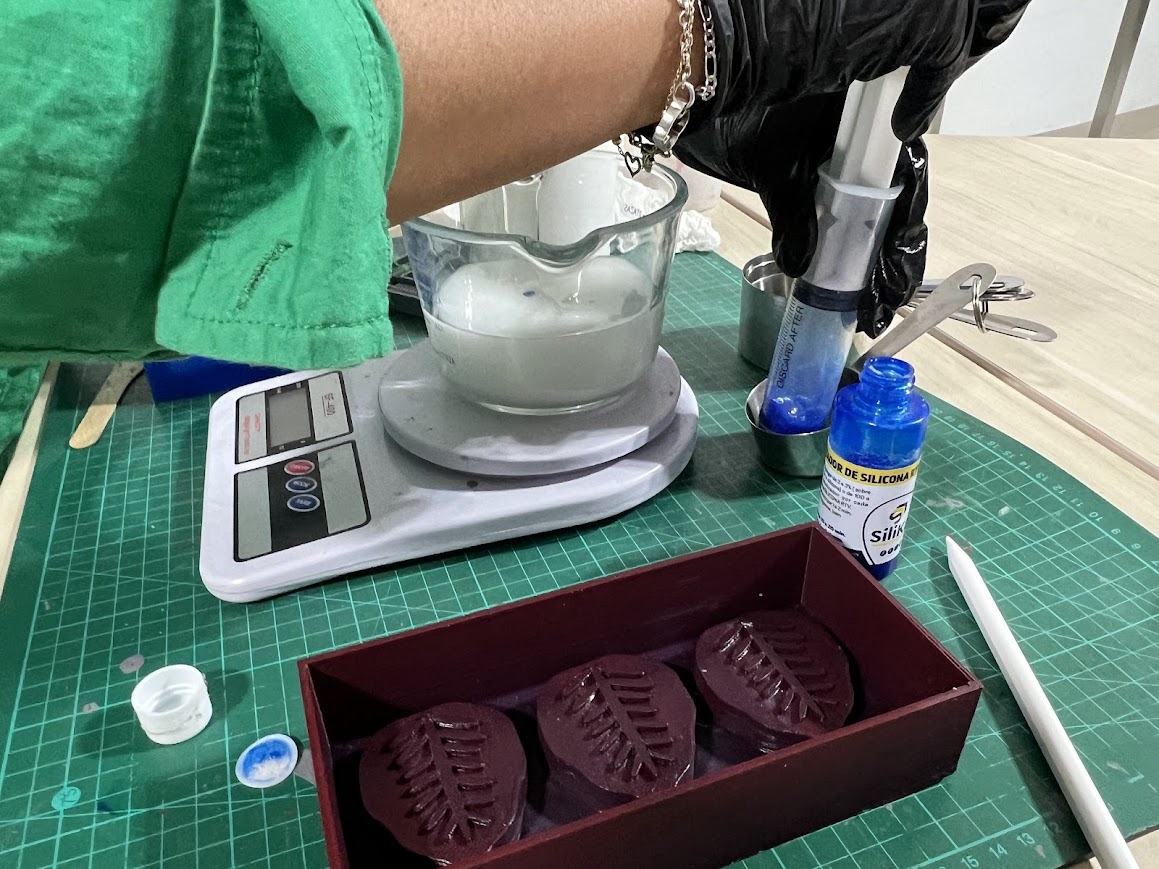
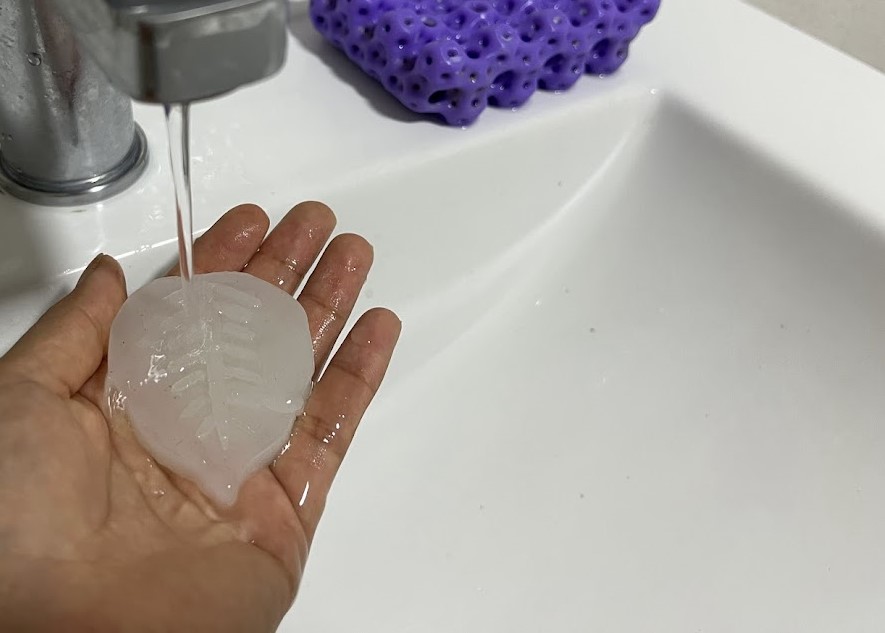
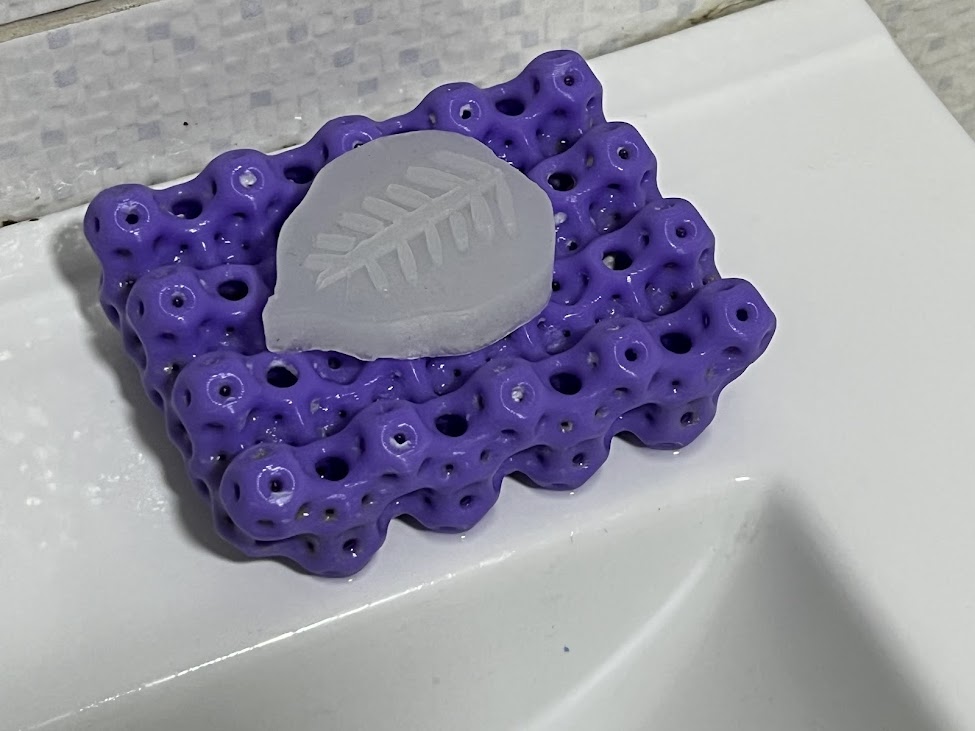
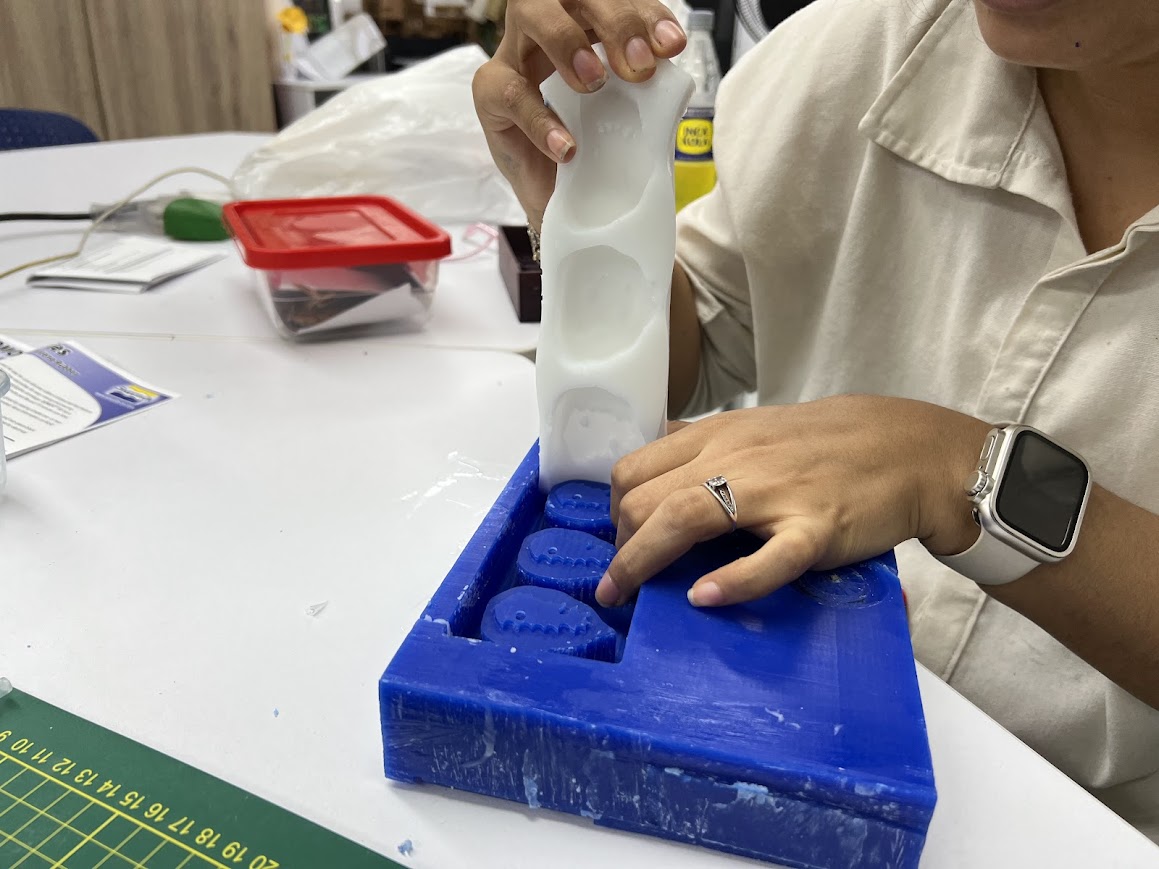
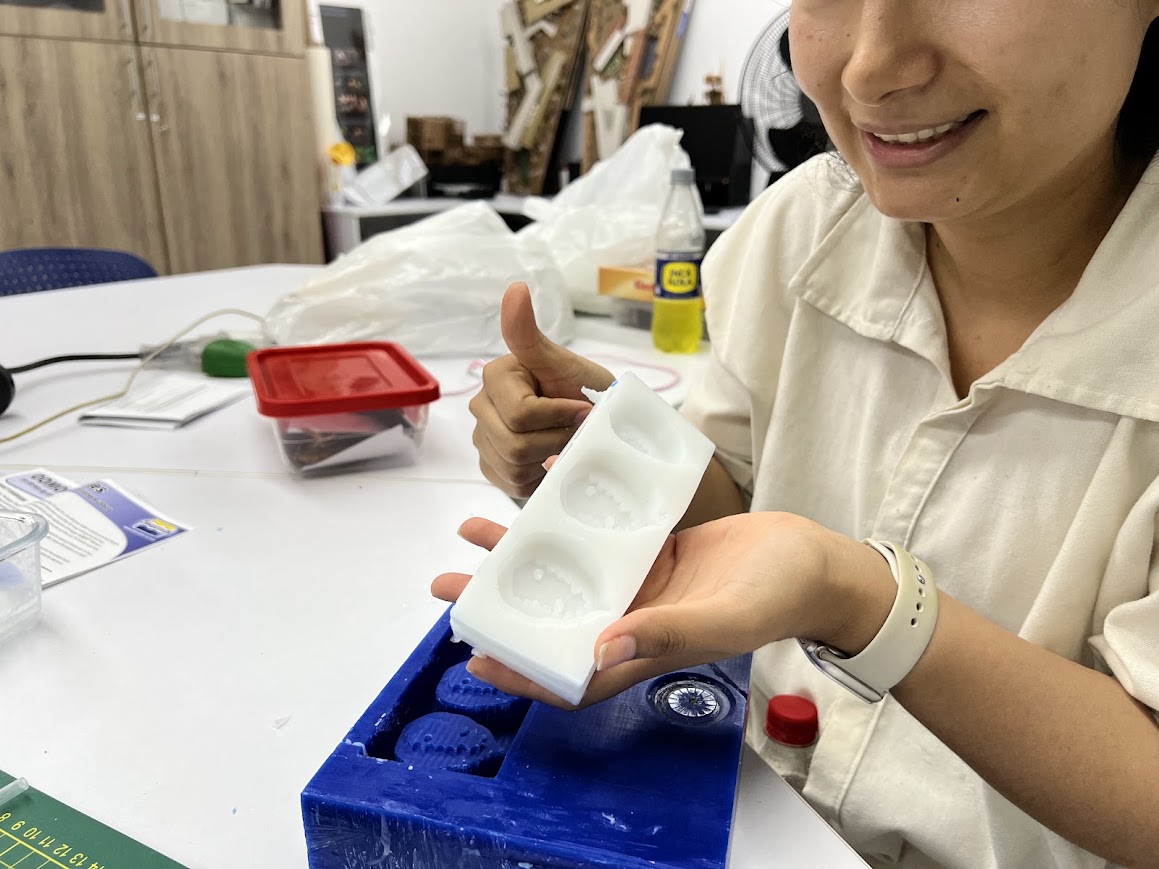
SILICONE MOLD
I'm glad you loved the outcome of the silicone mold. It's fantastic to see how the detail and smooth finish will allow you to replicate your soaps and candles accurately. Sounds like a total success!
When sending it to print, it's crucial to ensure that the first layer comes out perfectly to avoid issues. Since it would take 7 hours, I left it overnight, but still made sure that the initial layers were correct.
I used an Artillery Genius. The first thing I did was calibrate it, then I heated the nozzle to 200 degrees and the heated bed to 50 degrees. I loaded the filament of one of my favorite colors.

Here's the result after 7 hours. I love it!

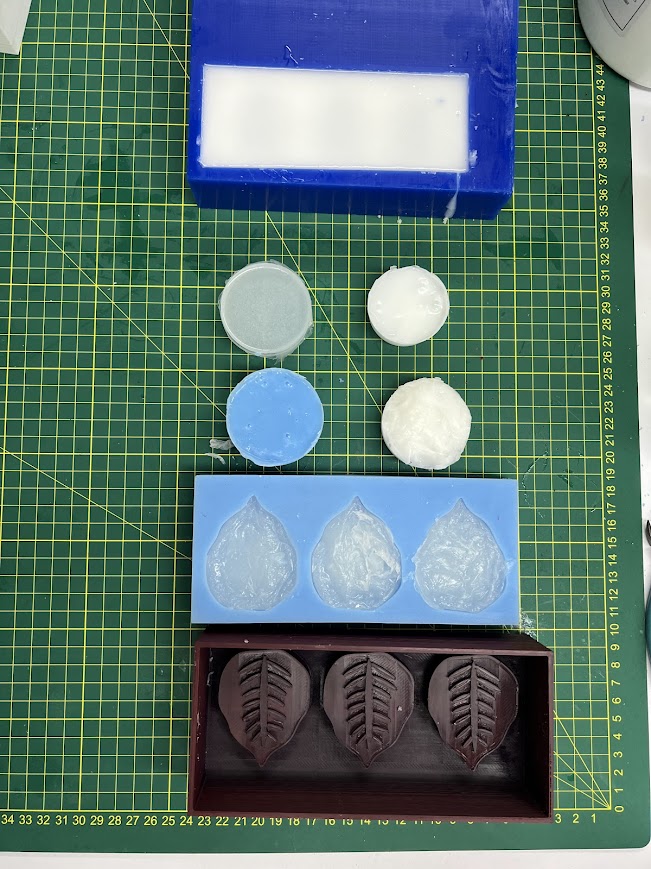
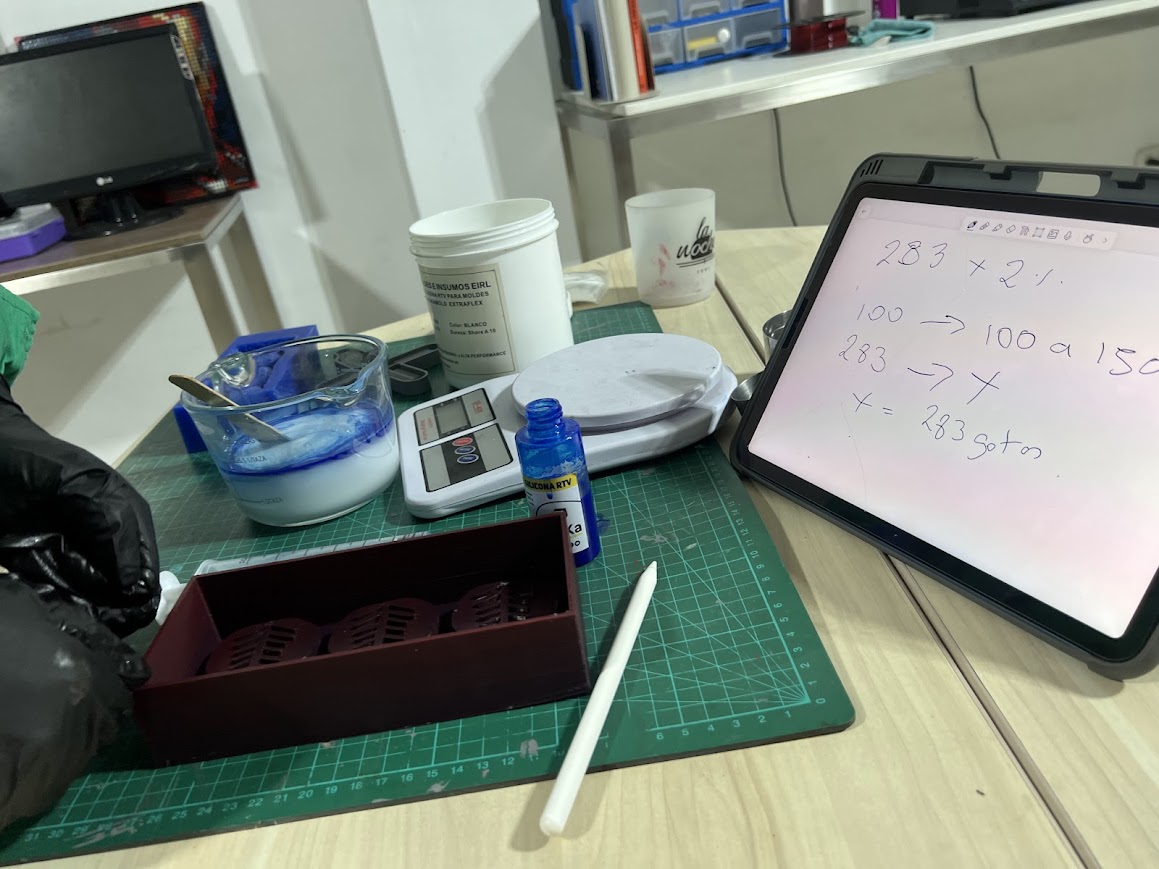
Gathering everything I need to start making my silicone mold.
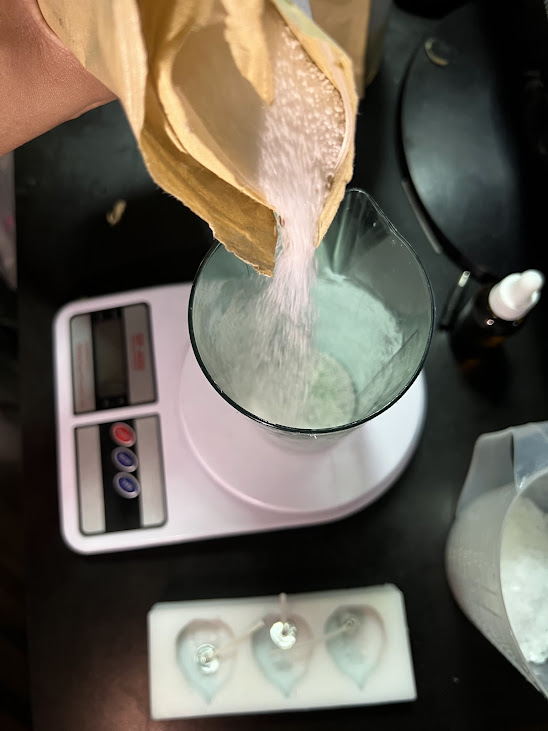
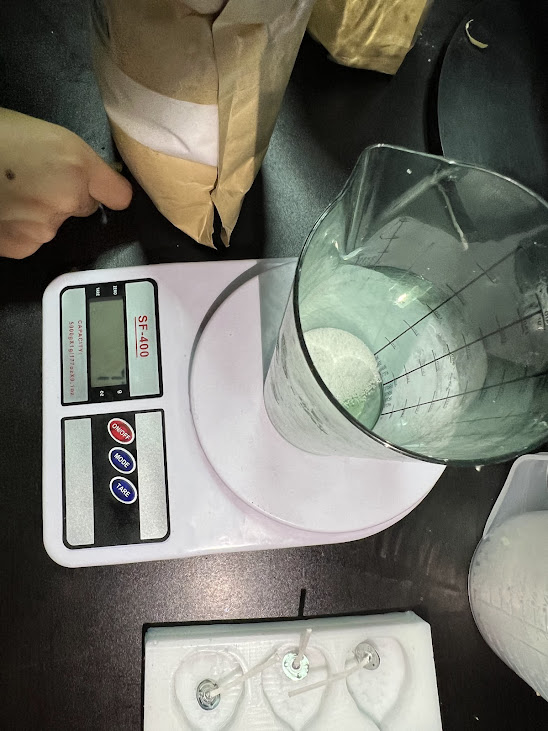
I began by weighing my container and setting it to zero using the "tare" function, then I added the silicone.
Here, pouring the silicone, it reaches 283 grams because my mold is large.
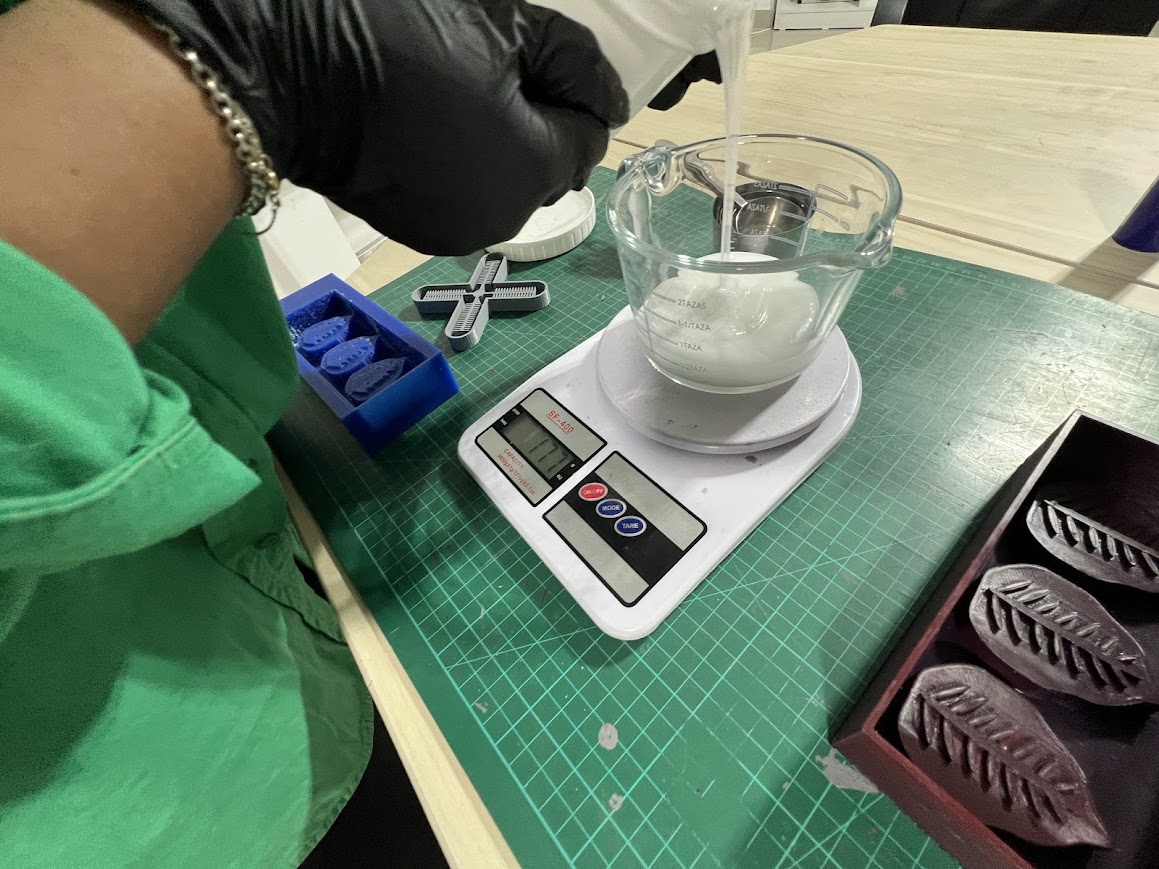
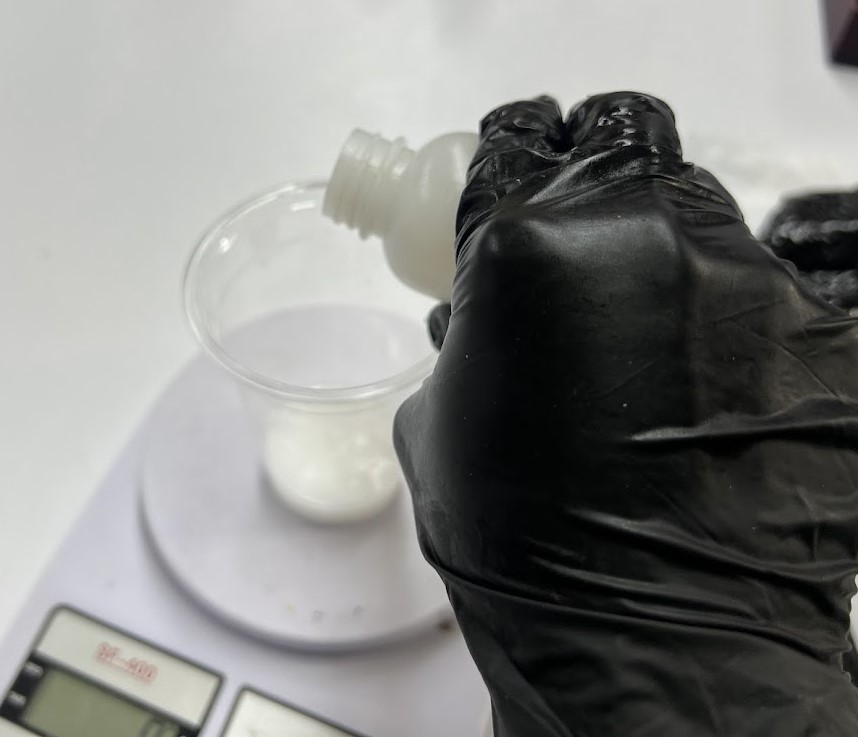
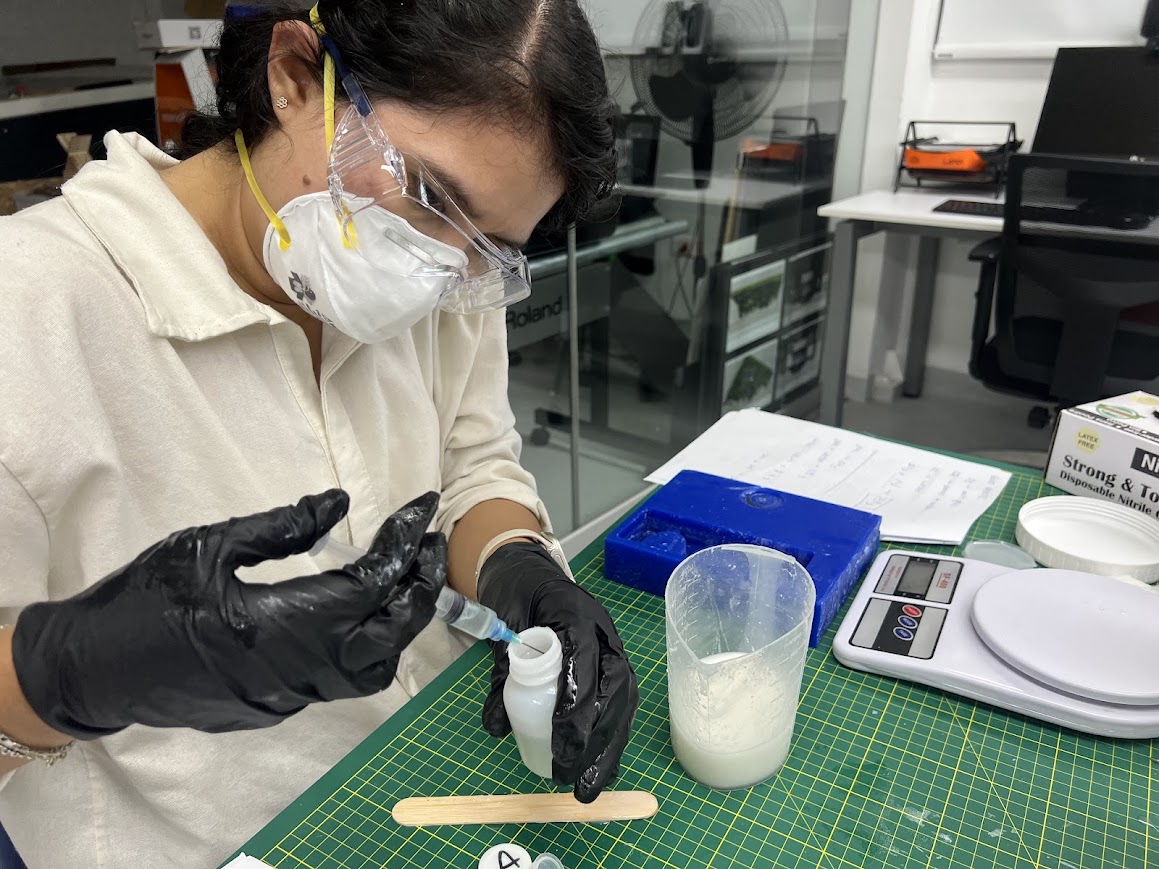
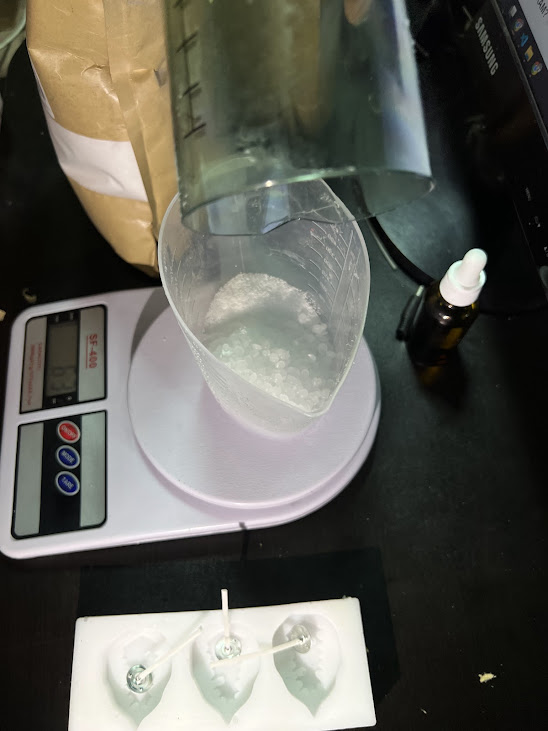
Here, adding the catalyst, which needs to be 1%, so I add 2.8 ml from the syringe.
Here, we can see the calculations I made to ensure everything is properly measured.
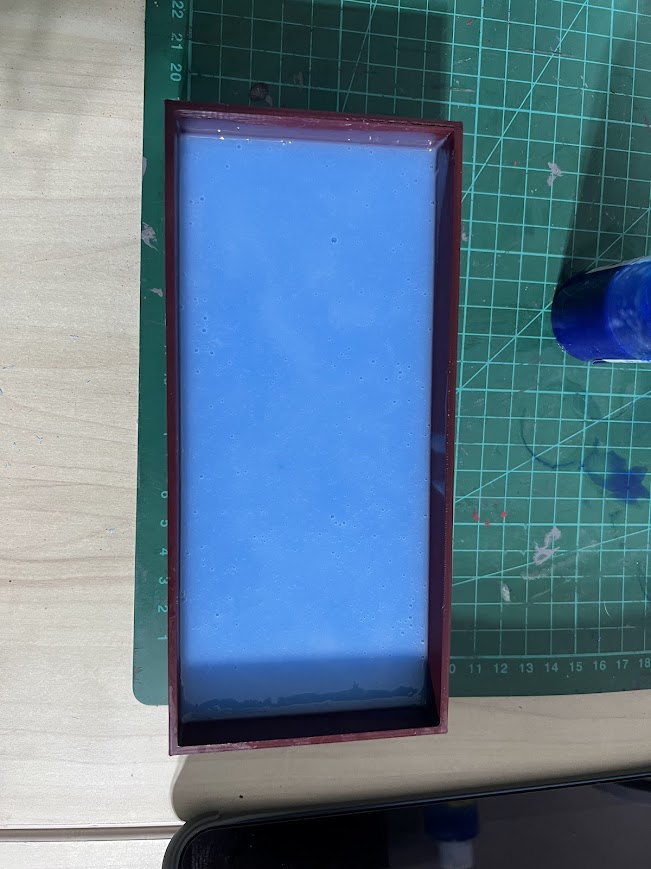
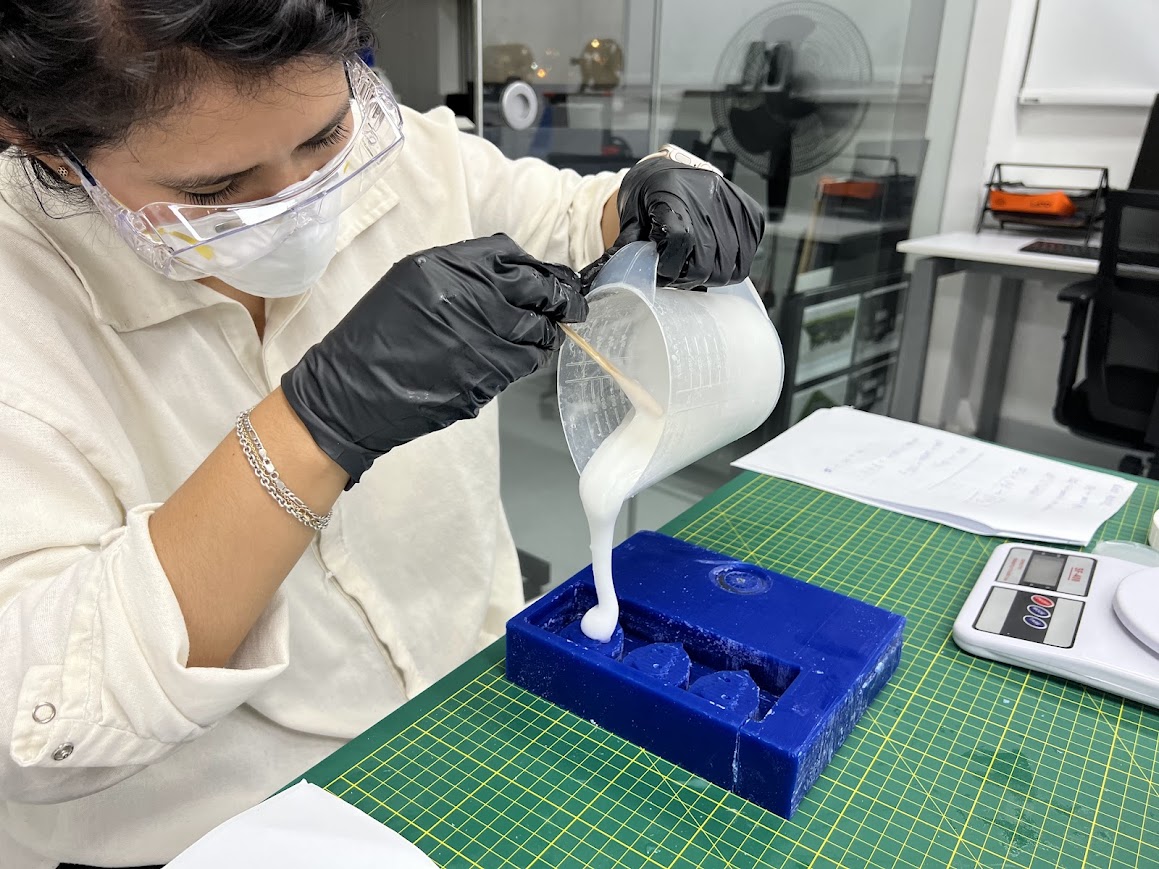
I moved everything slowly, but within less than 3 minutes, then poured it into my 3D-printed mold, and it was precise.
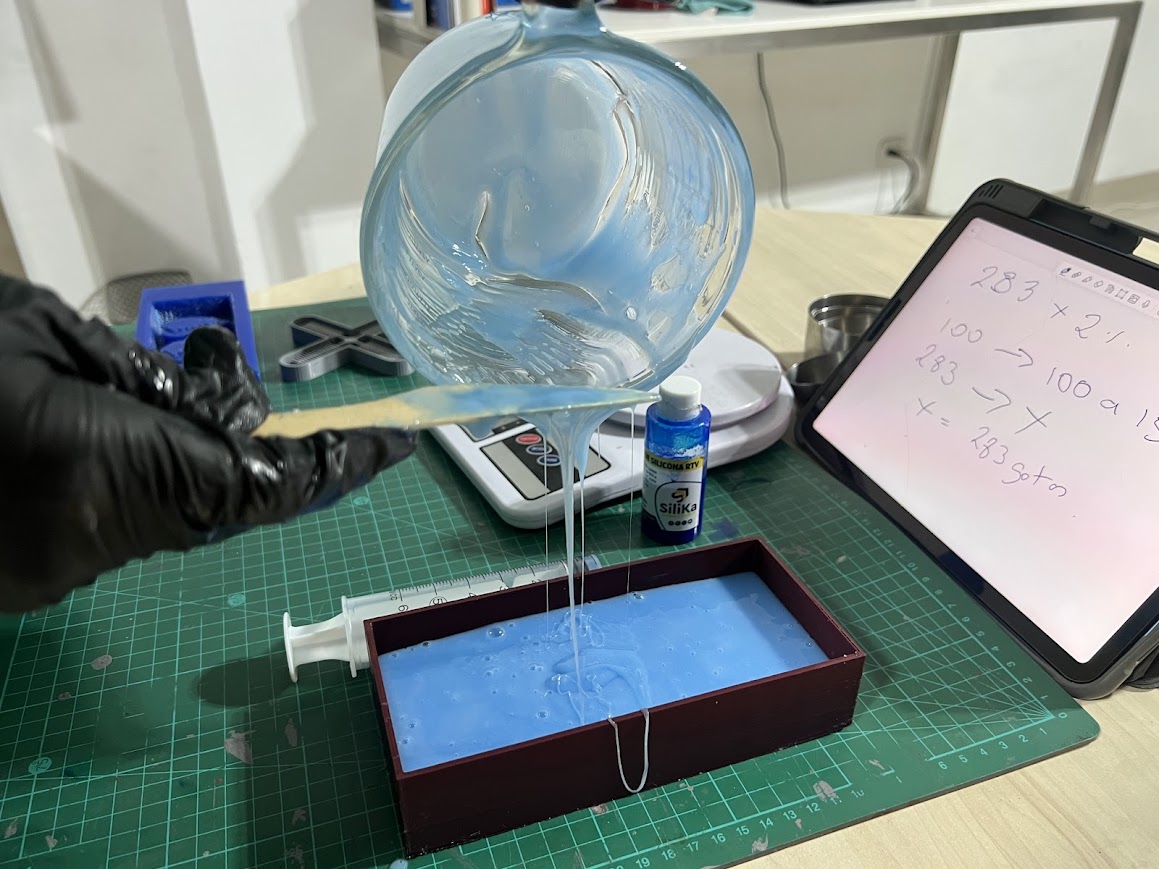
Here, there was a trick of tapping many times to remove the air trapped in the silicone and prevent bubbling. Jesus helped me with his strength to ensure it was free of any bubbles.
CASTINGS
Now, for casting, one crucial aspect is the products you can create from your molds.
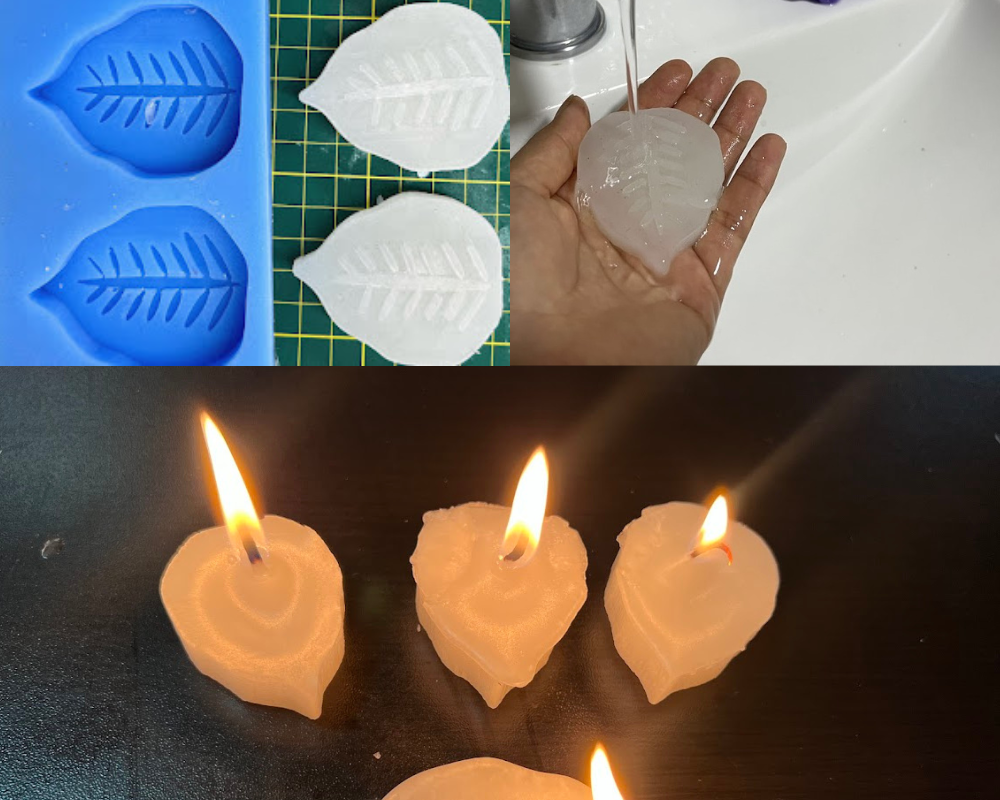
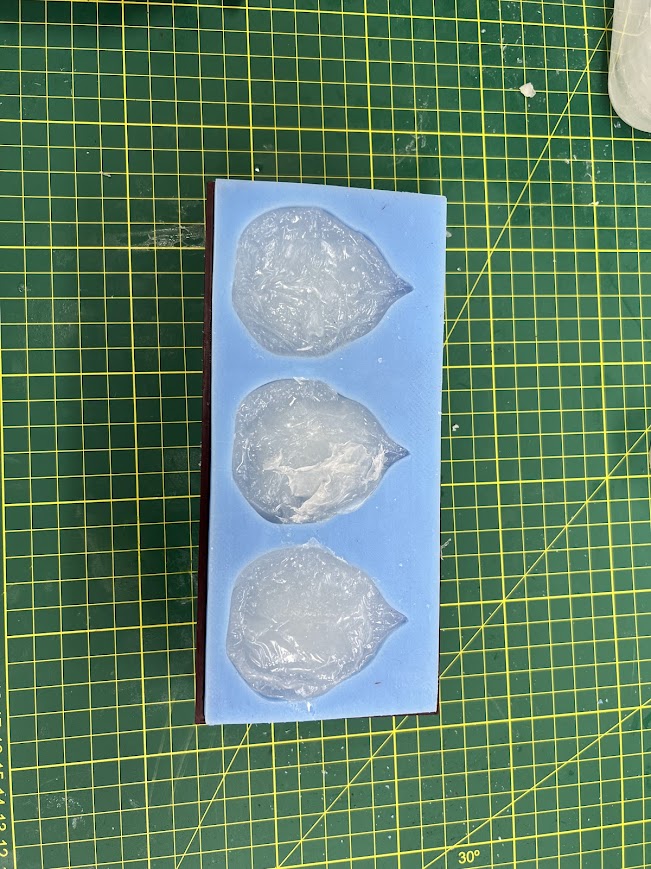
I filled my soap mold, but it turned out a bit odd on the top because I accidentally touched it and moved it.
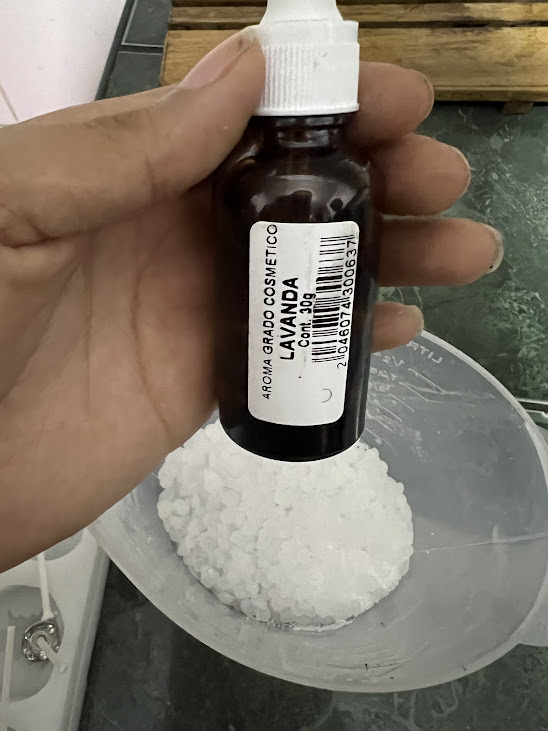
Here's the amount of soap that Hans, Jose, Alberto, and I will use for our lavender-scented soap test.
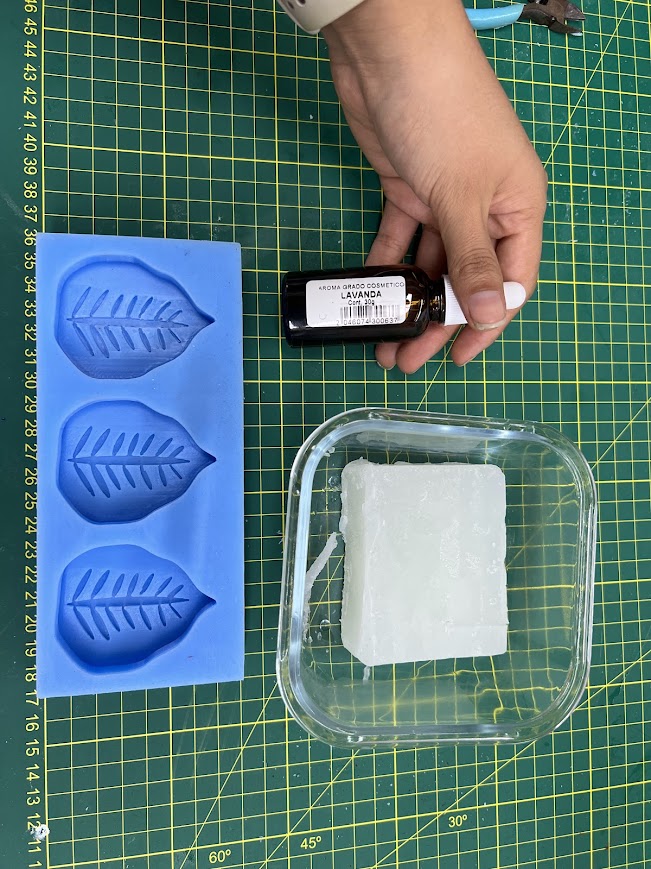
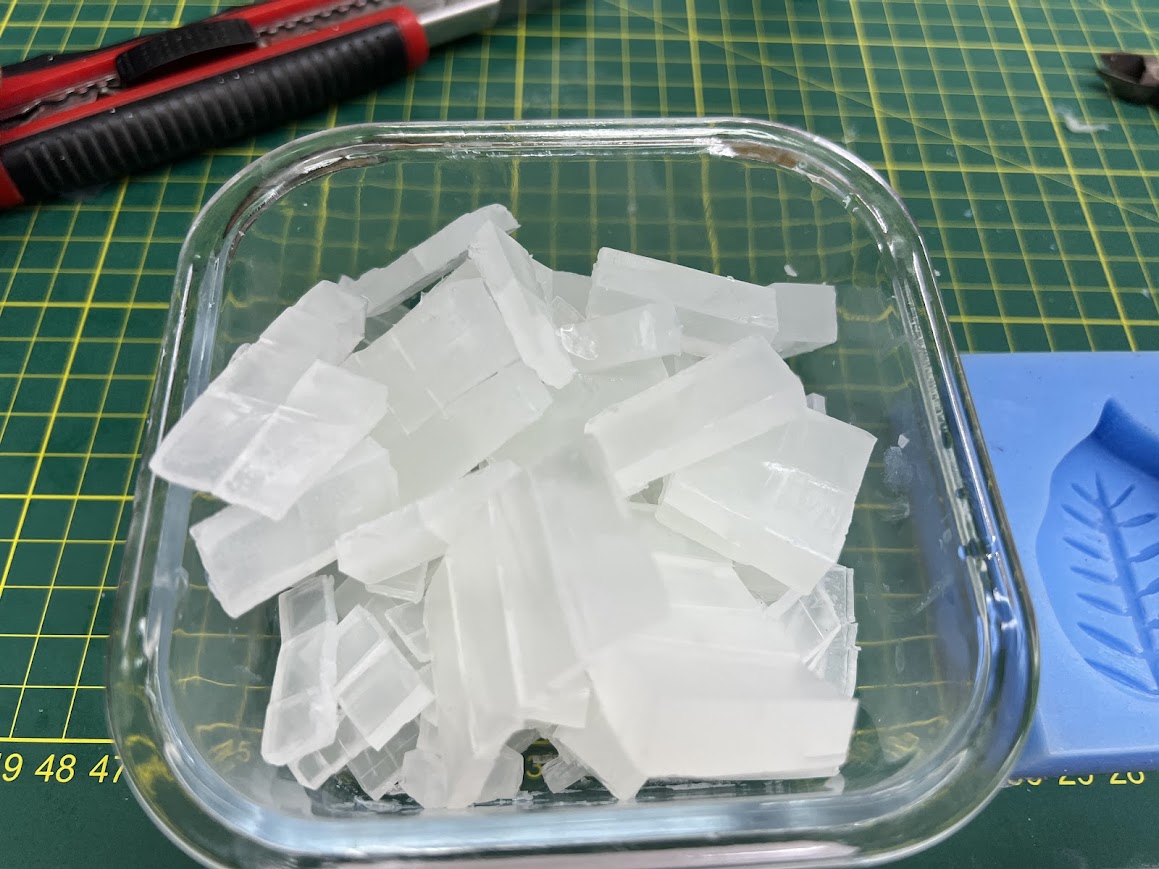
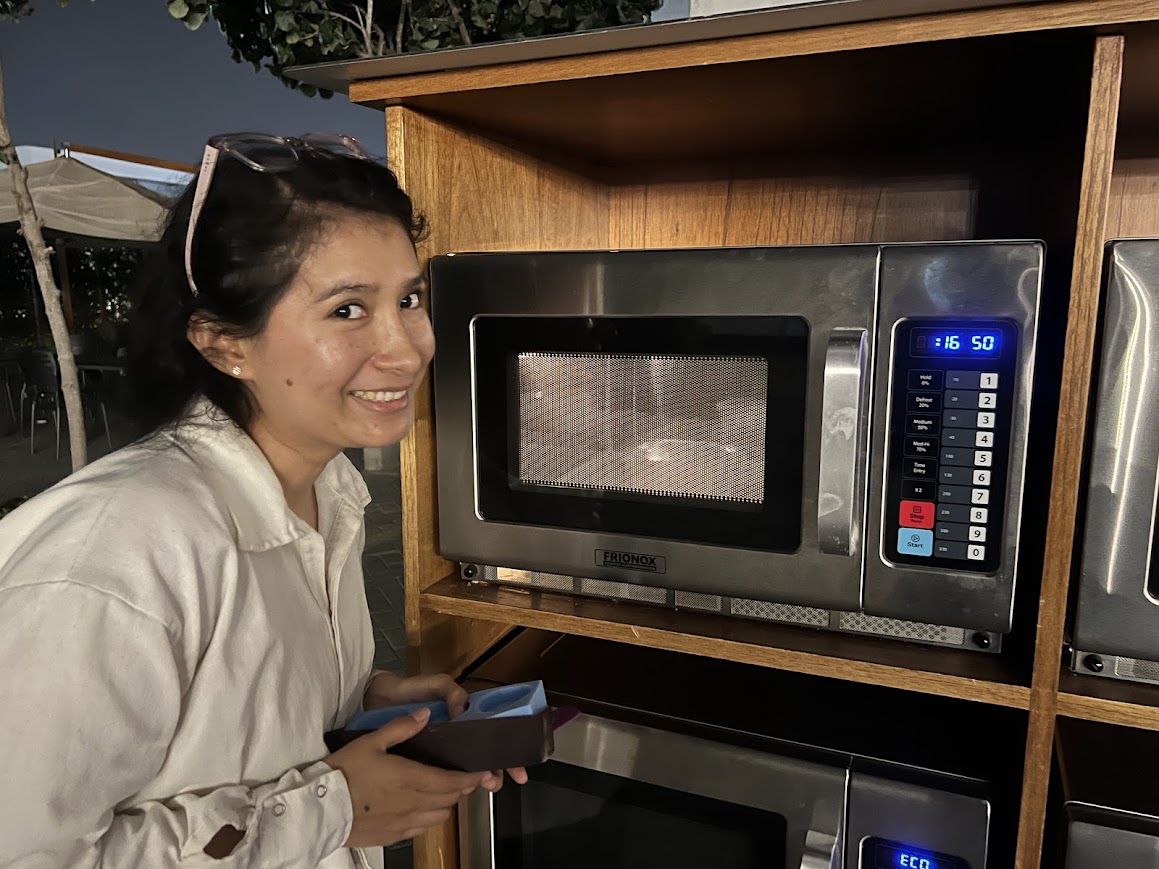
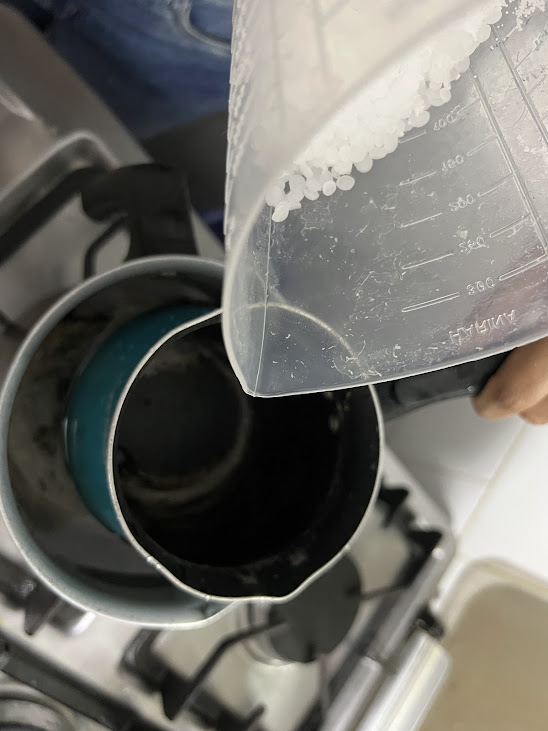
Here, we're chopping the soap into small pieces to melt it faster in the microwave.
We went to the USCUR microwave. According to what I had researched, we needed to start with 30 seconds and check if it was melting.
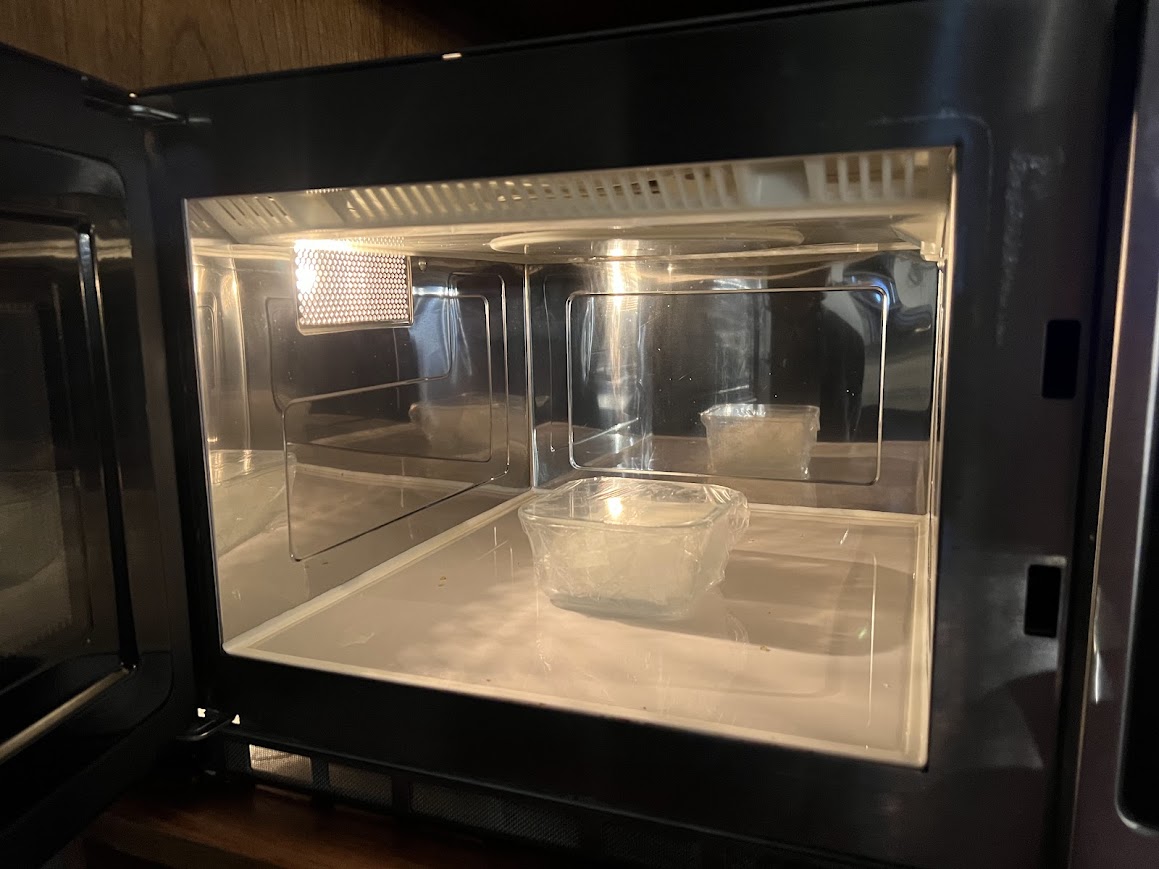
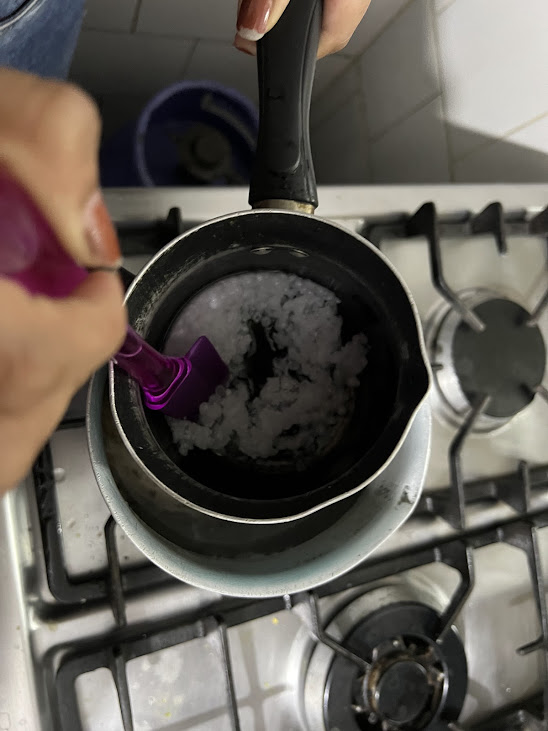
Here, waiting for it to melt, we added another 30 seconds, but we realized it was already very hot, and it probably would have been better to do 20 seconds.
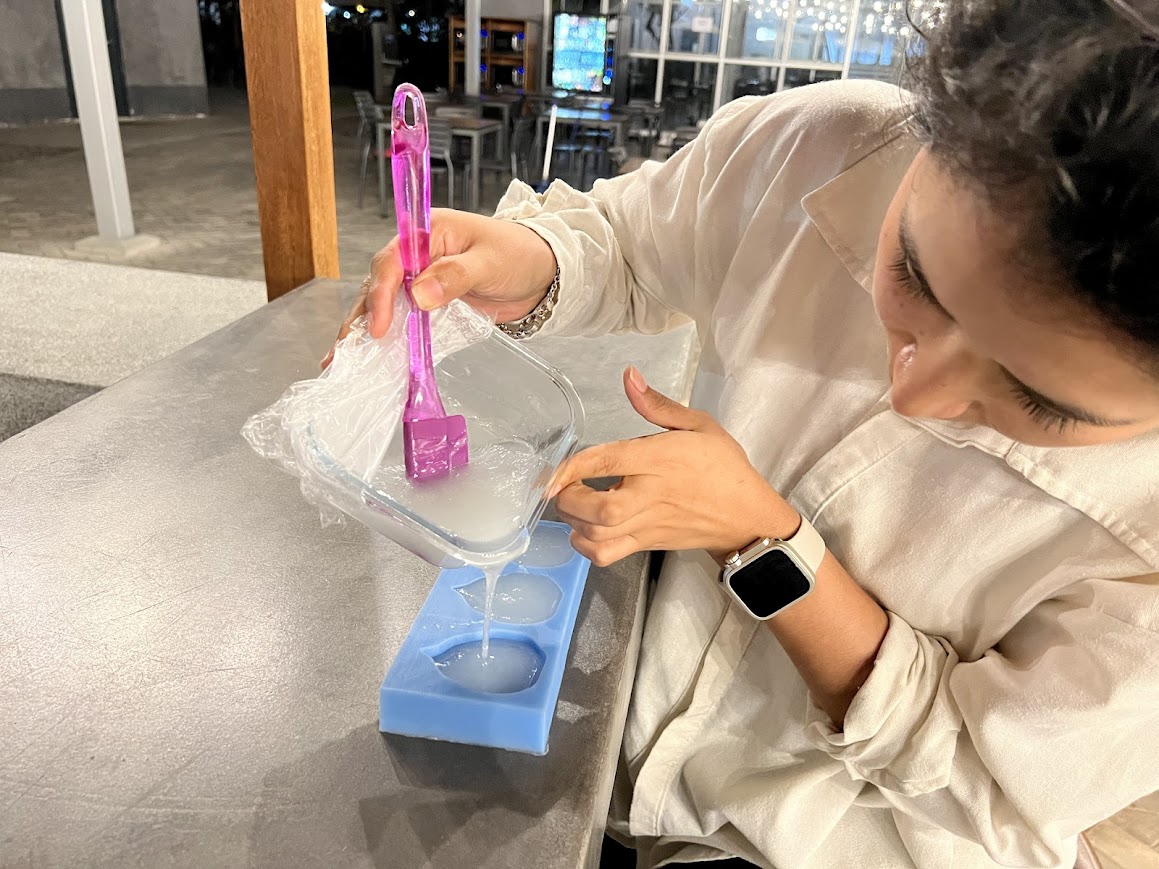
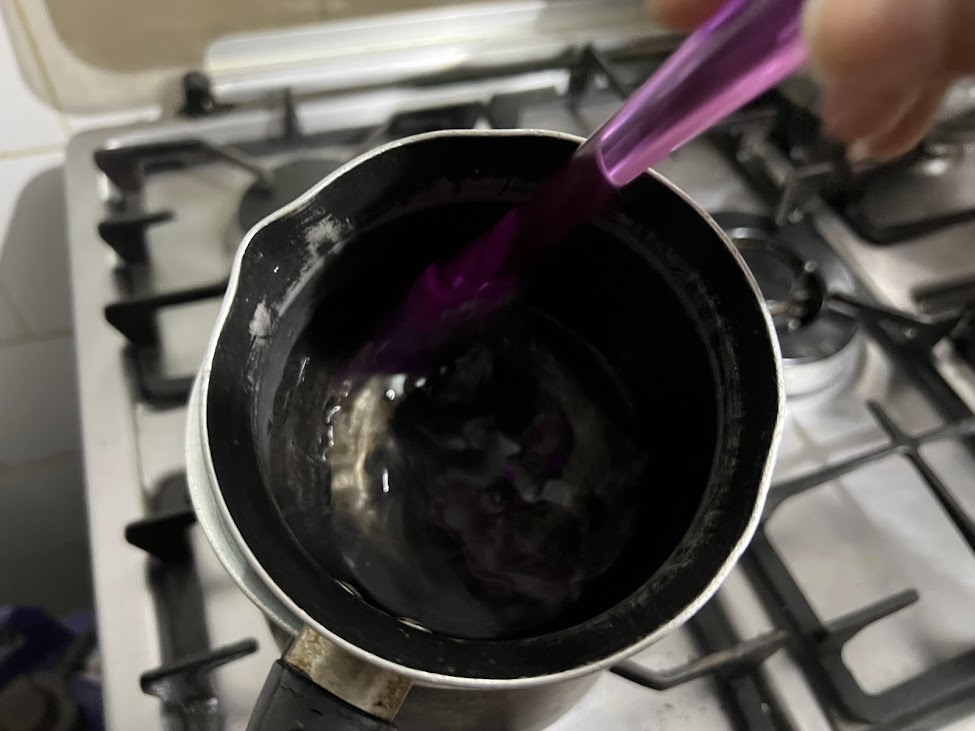
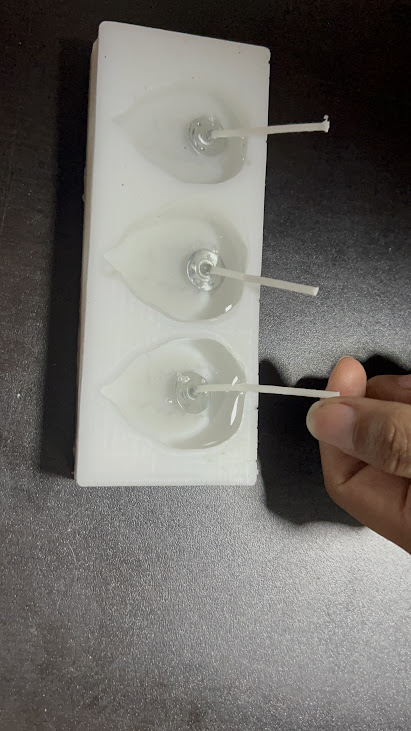
I quickly started to pour it into the mold.

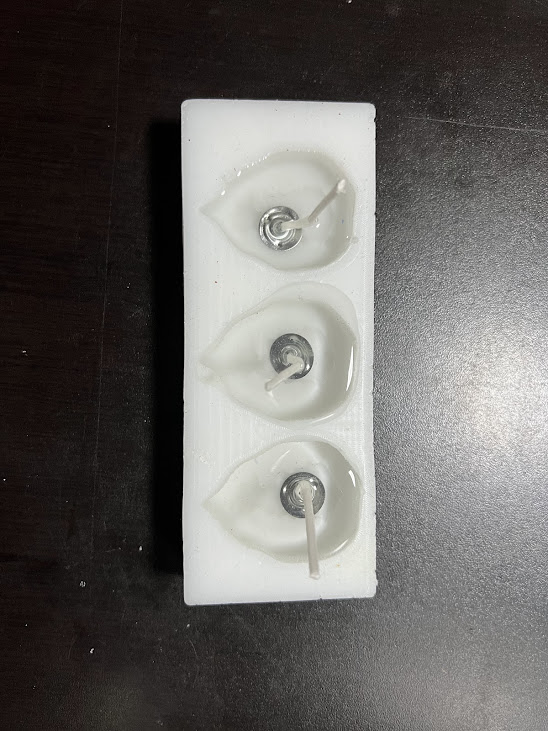
I began to fill each leaf slowly to fill them completely.
Here, Hans rushed to the lab to fill his mold with the melted soap. It was fun, but he managed to fill it, and it turned out lovely!

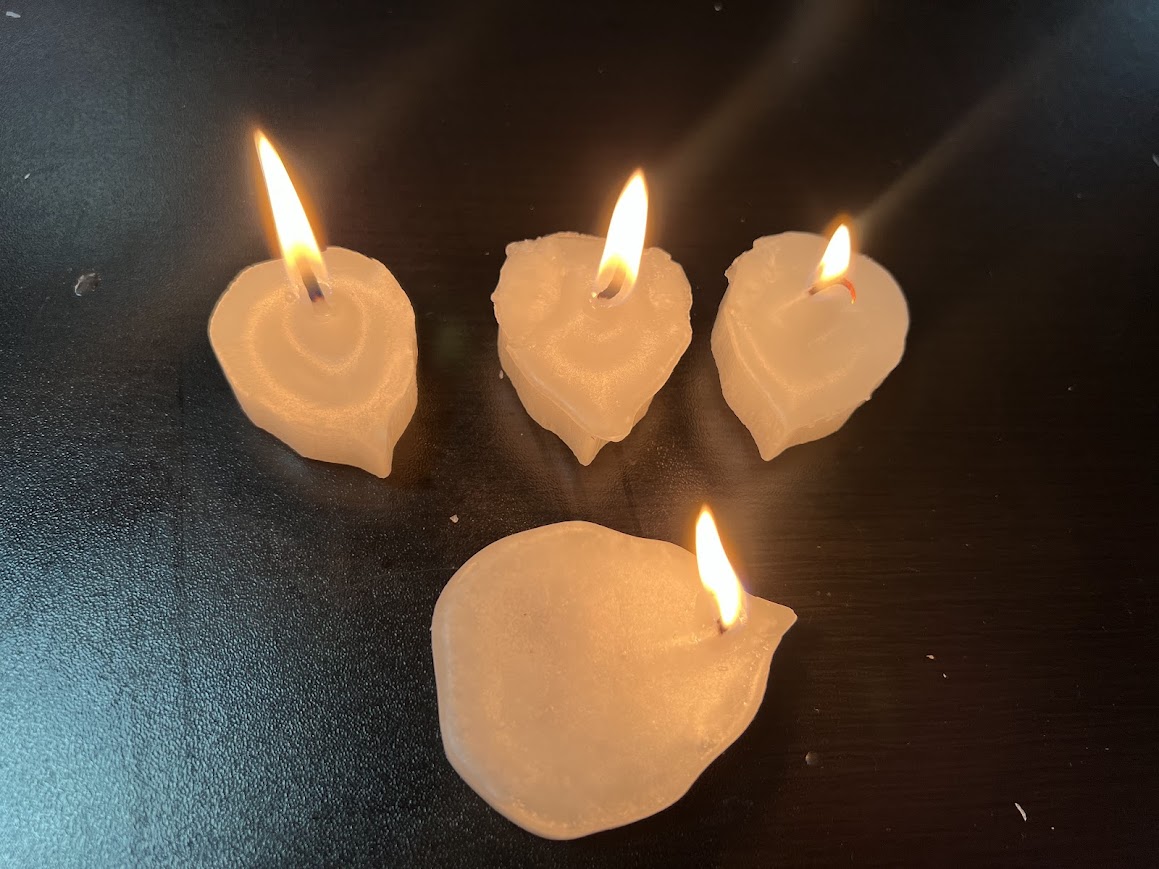
It works really well, my family loved the result, and they're using it.
I'm thrilled you loved the soap's outcome! It turned out with all the details, and it looks gorgeous. Total success!
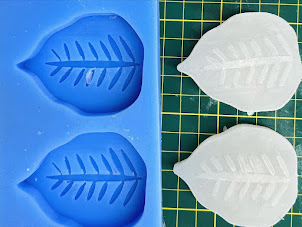
I replaced the soap in my house, which had run out, with this beautiful leaf-shaped design.
It works really well, my family loved the result, and they're using it.
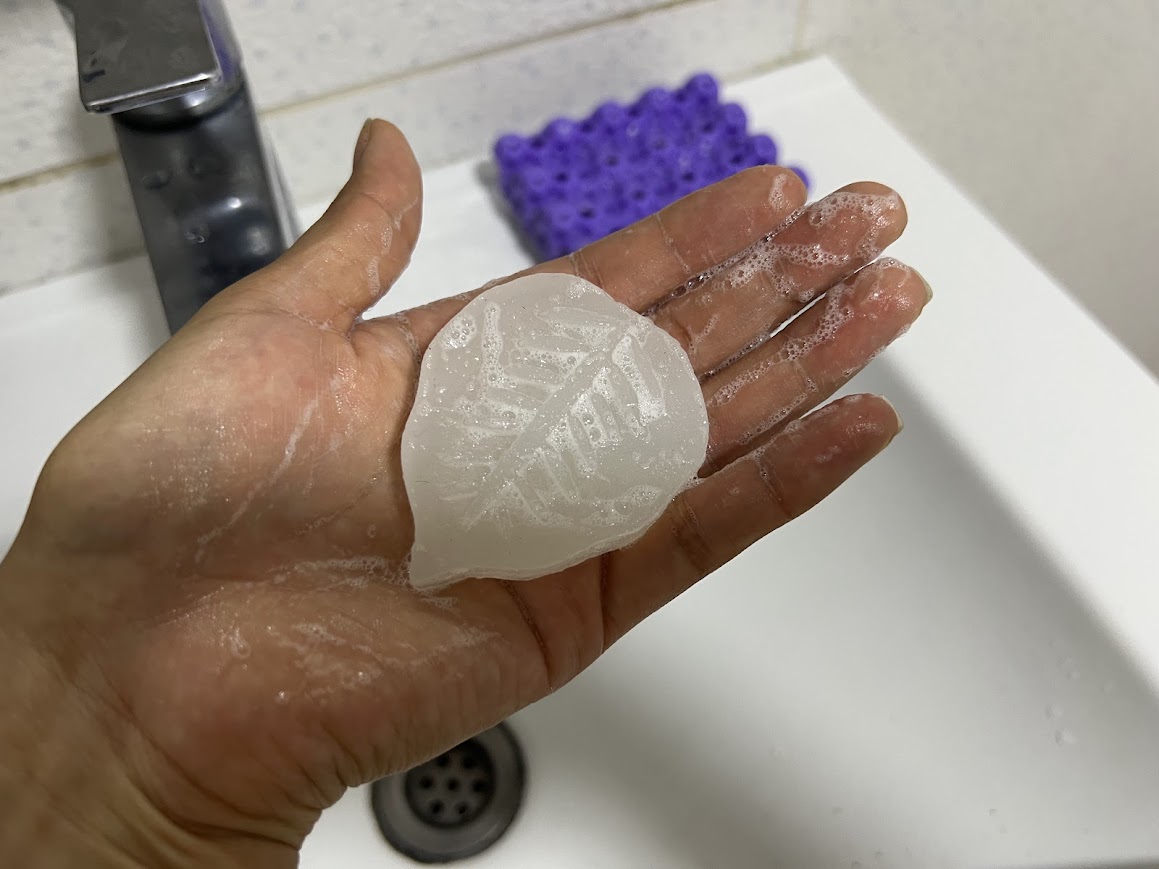
The soap lathers up really well, now everyone's using it!
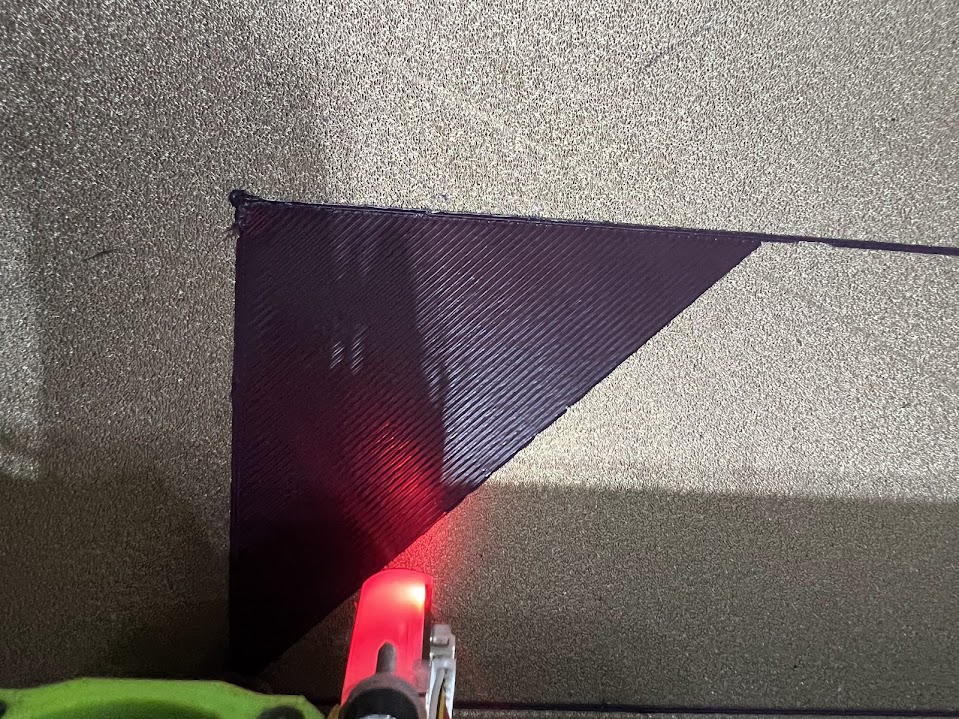
MILLING MY MOLD
In this part my colleague Hans made an inventory of all the things that were going to be needed to make the mold, and saw that the best thing would be to work with the SHOPBOT.
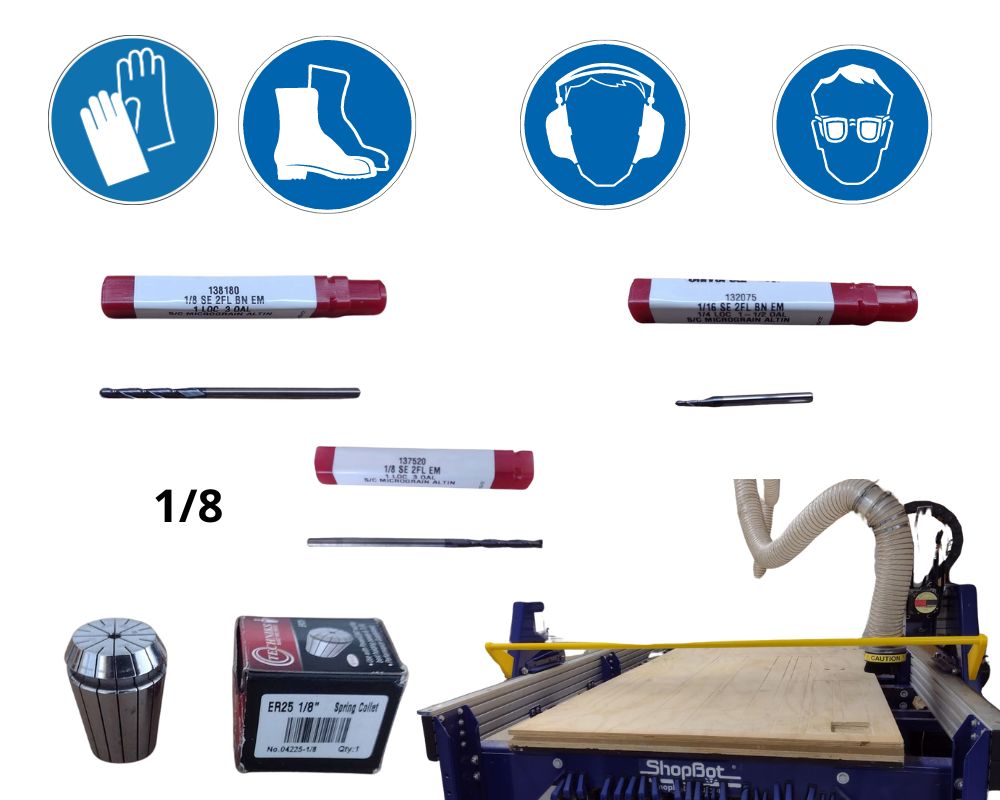
To finish use a 1/8" milling cutter.
CONFIGURATION TO MILLING ROUG WITH MODS CE
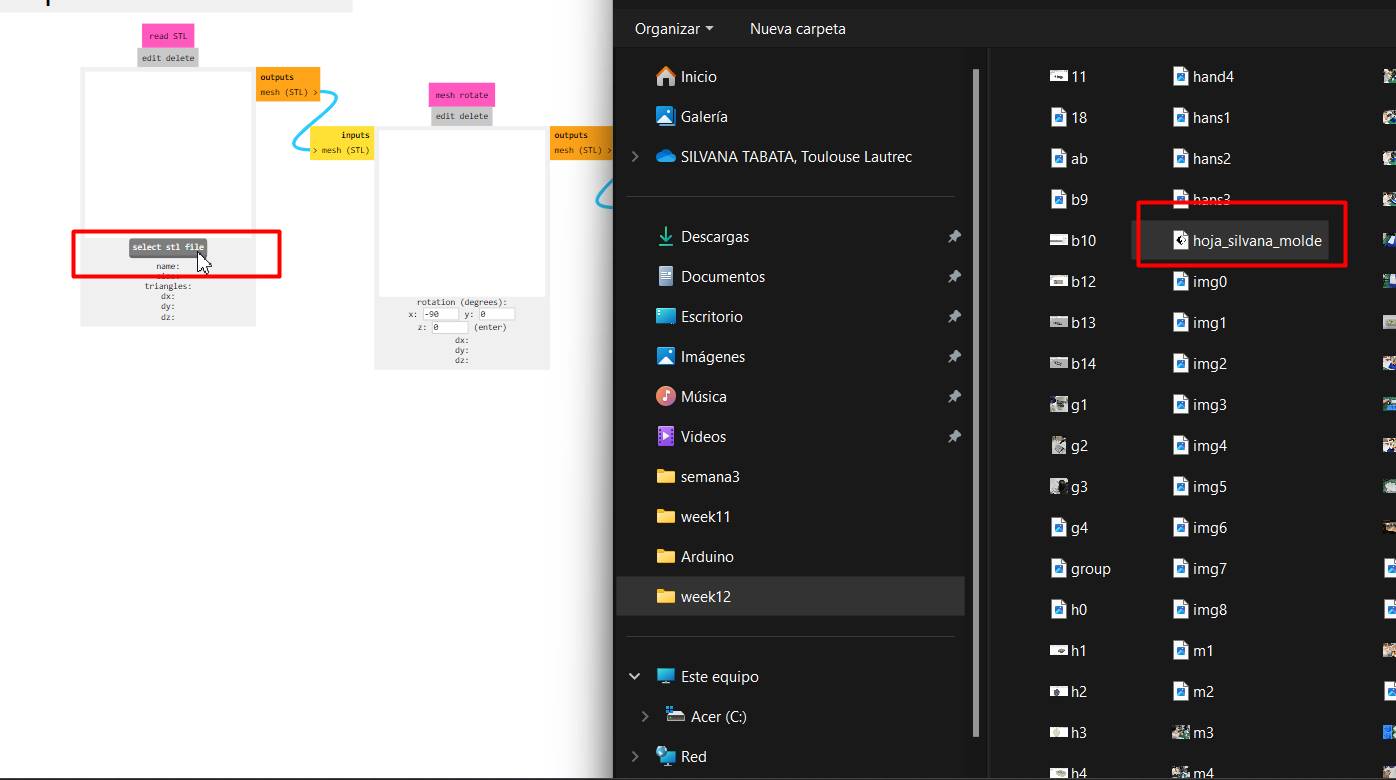
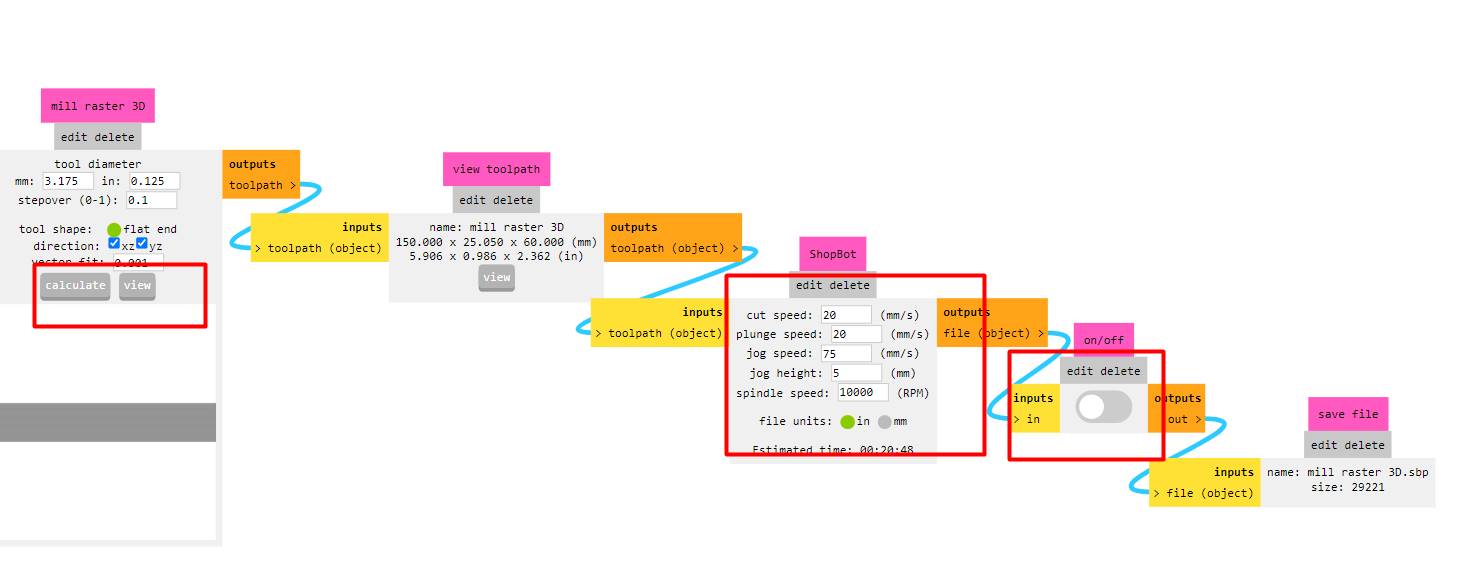
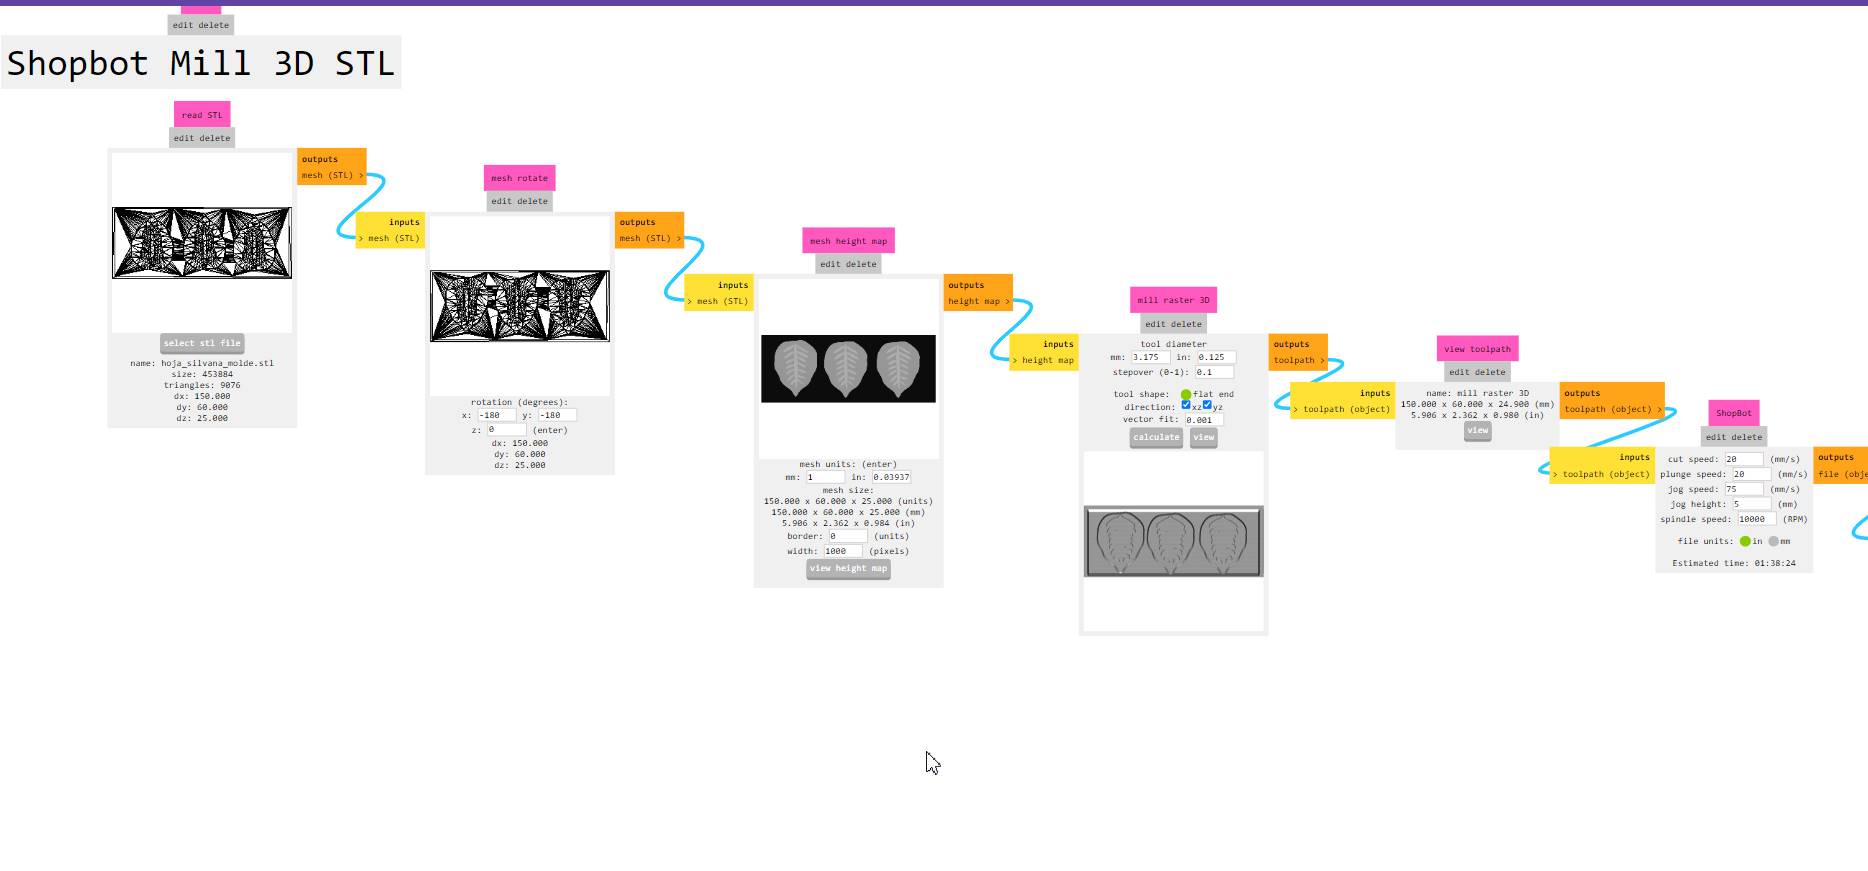
First, we start by setting up the machine we'll use, the ShopBot, and then we load the STL file into the control software.

We select the STL file in MODS.
We'll load all the components of MODS CE and configure the critical parameters for milling the wax.
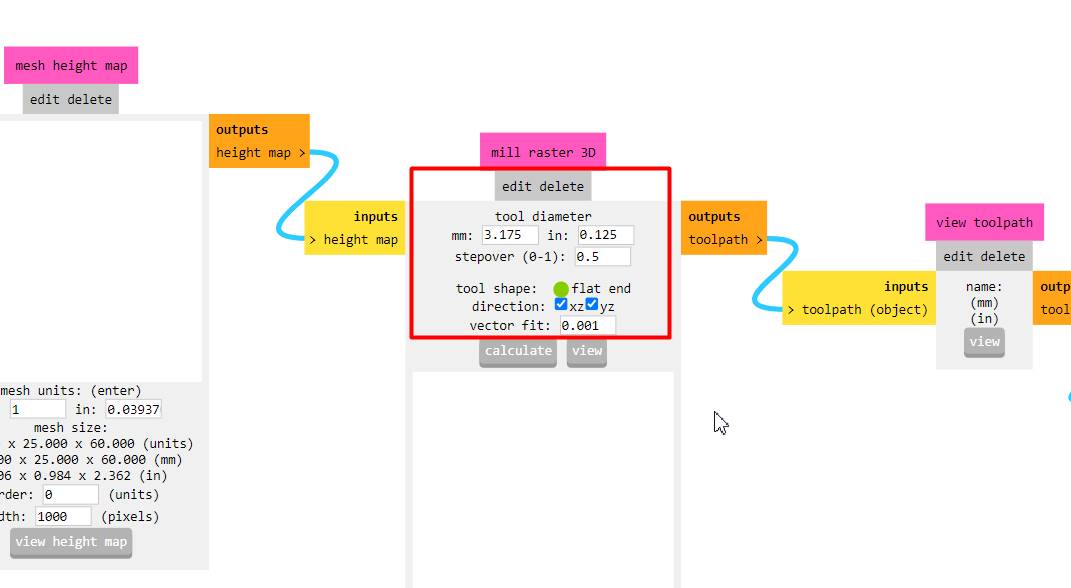
Then we'll adjust the MAX DEPTH configuration, determining the maximum height MODS CE will mill. In my case, I increased it to 40 mm, but ideally, models should be less than 30 mm, as per Hans's testing.
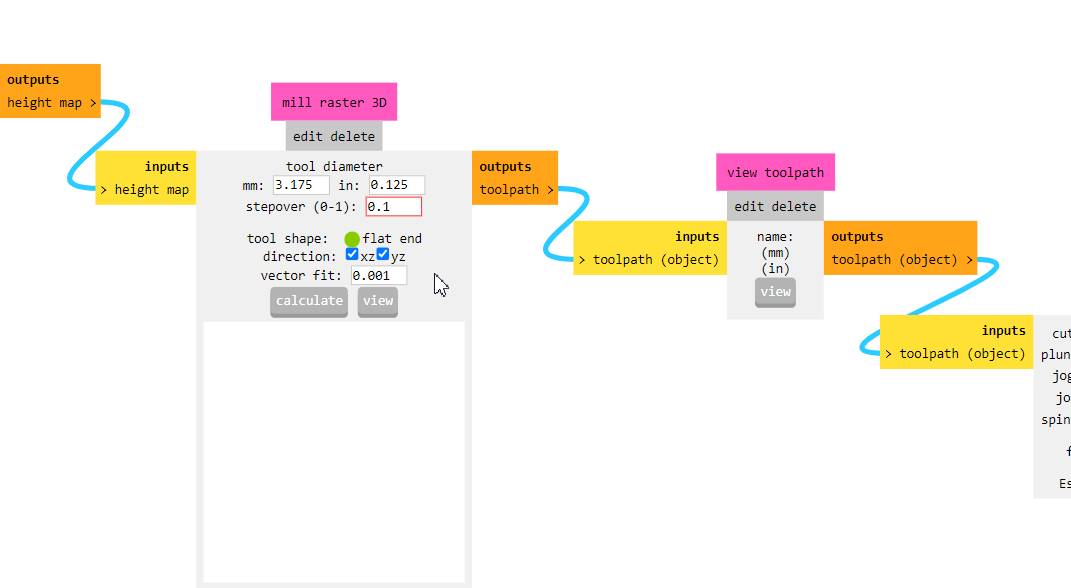
Generate the view.
Here, it's important to rotate the model until the view is correct, ensuring we check all areas and cutter paths. Once everything looks good, we can move on to the next configuration.
According to your machine's unit configuration, and then activate the download button for our toolpaths.
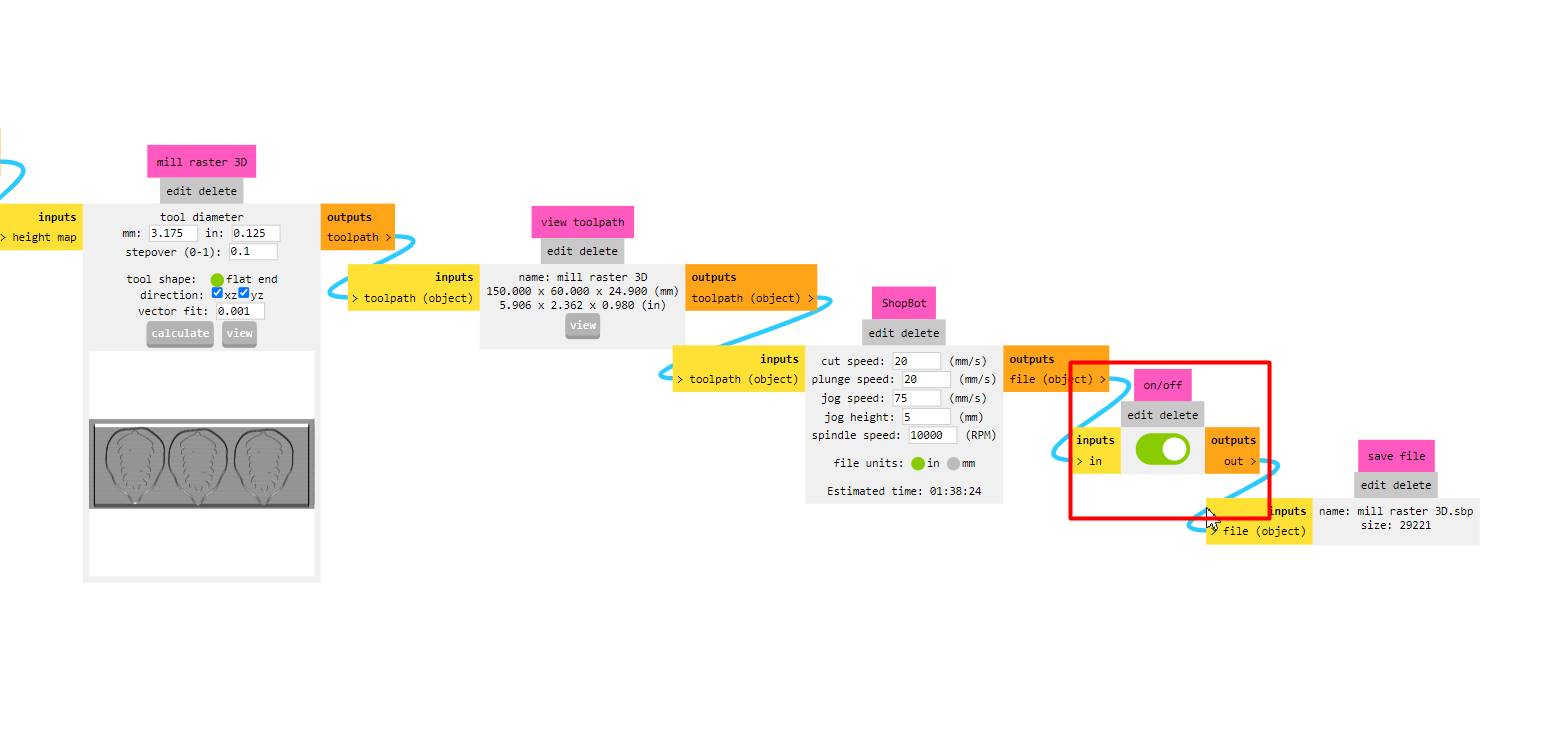
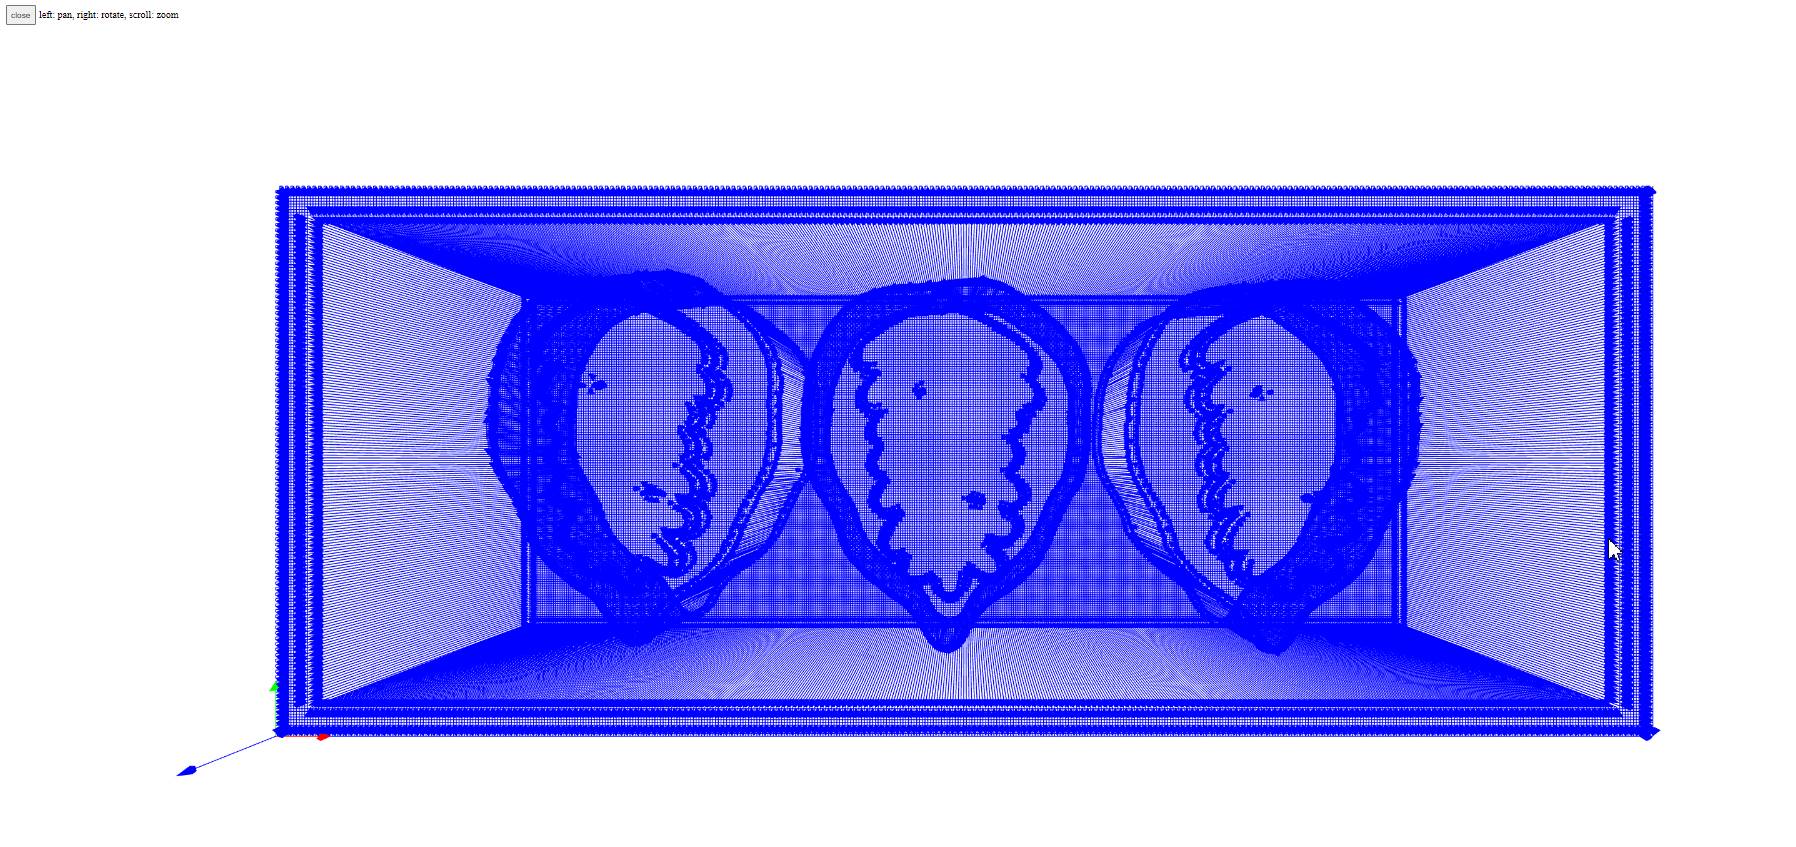
Here, we can see an overview of how it looks.
MILLING MY MOLD
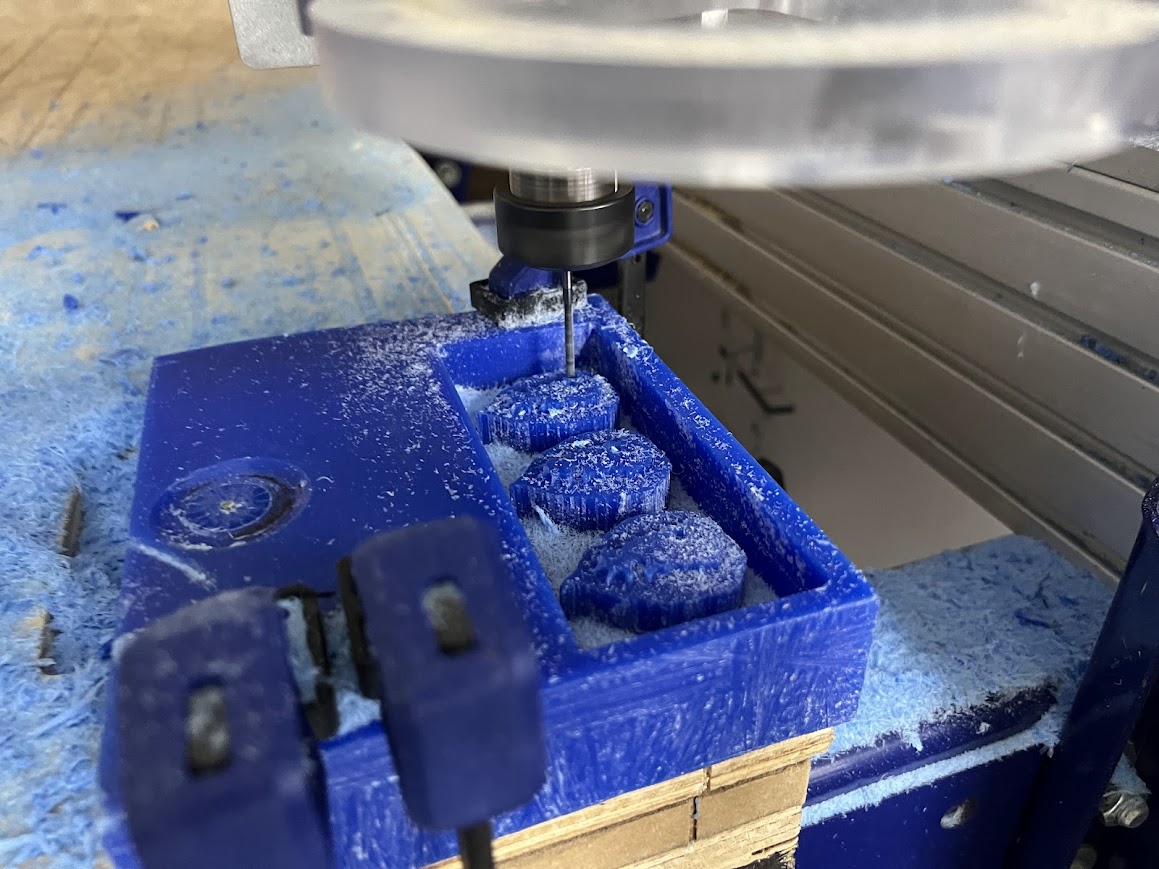
After obtaining the MILLING file, we proceeded to configure the SHOPBOT for milling. hans installed the 1/8" round nose cutter and adjusted the Z axis, Hans assisted me in this process, providing guidance on calibration and cutter installation. While there were some initial errors, we continued to practice and refine our technique.
Here, it was being milled.
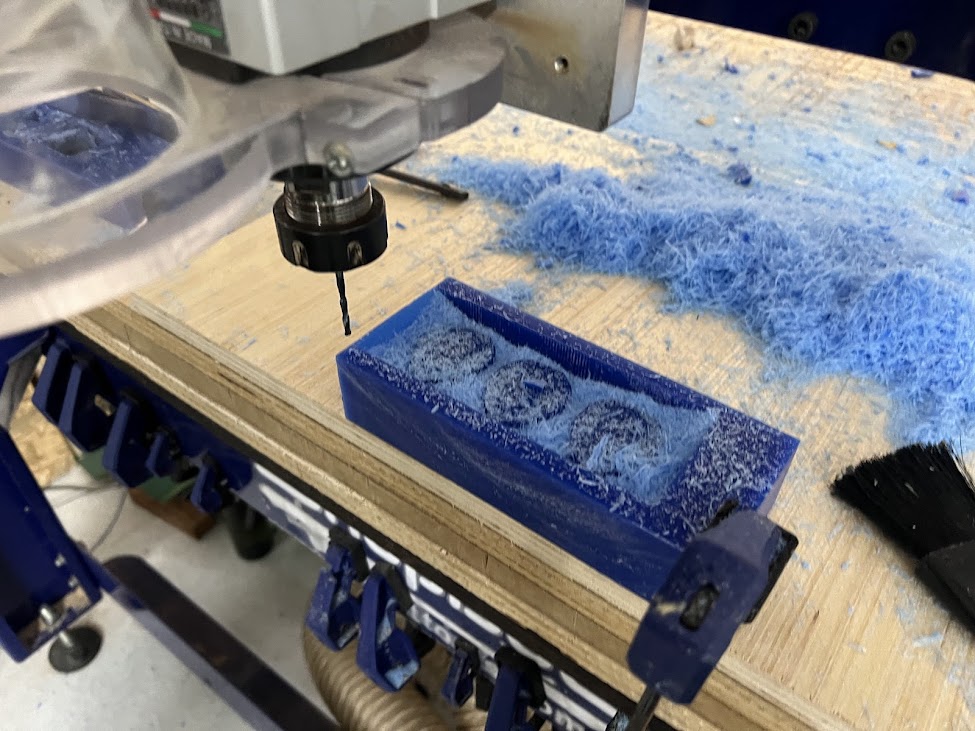
Here, it took an hour to do the details.
SILICONE MOLD
We started with all the enthusiasm to create my mold!
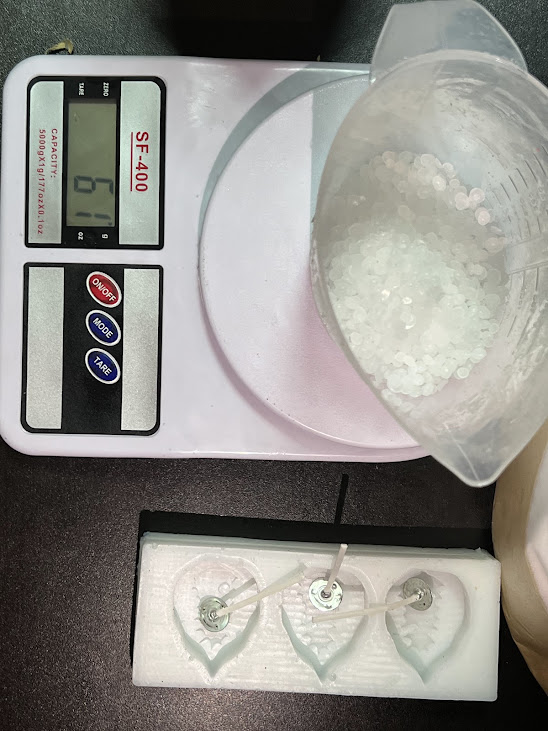
Here, taking note of the measurements of my container.
Here, pouring the silicone to 100 ml.
Adding only 1 ml of catalyst.
We begin to mix slowly and evenly.
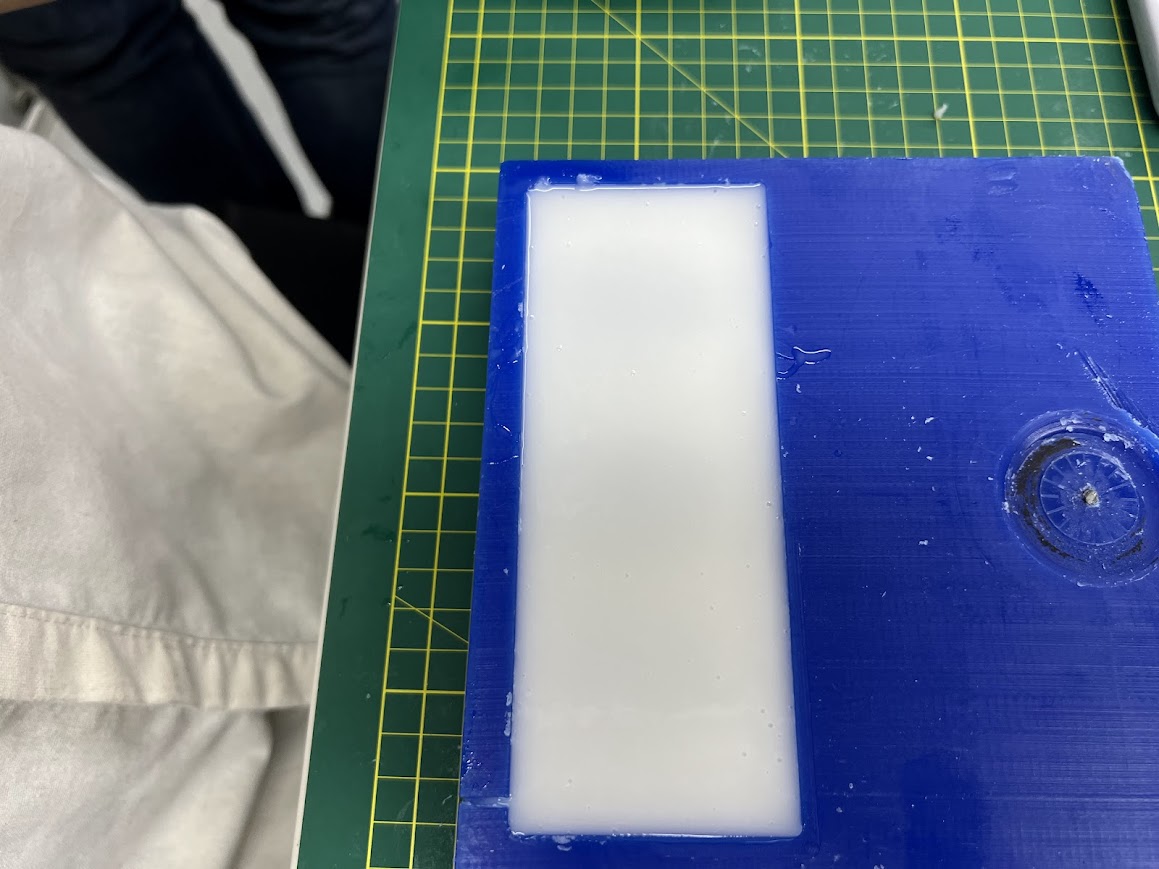
We add the silicone to the wax mold.
I started tapping it gently to remove any bubbles.
I tried two tapping methods, but found that releasing one side several times worked better.
Here, we can see the bubbles.
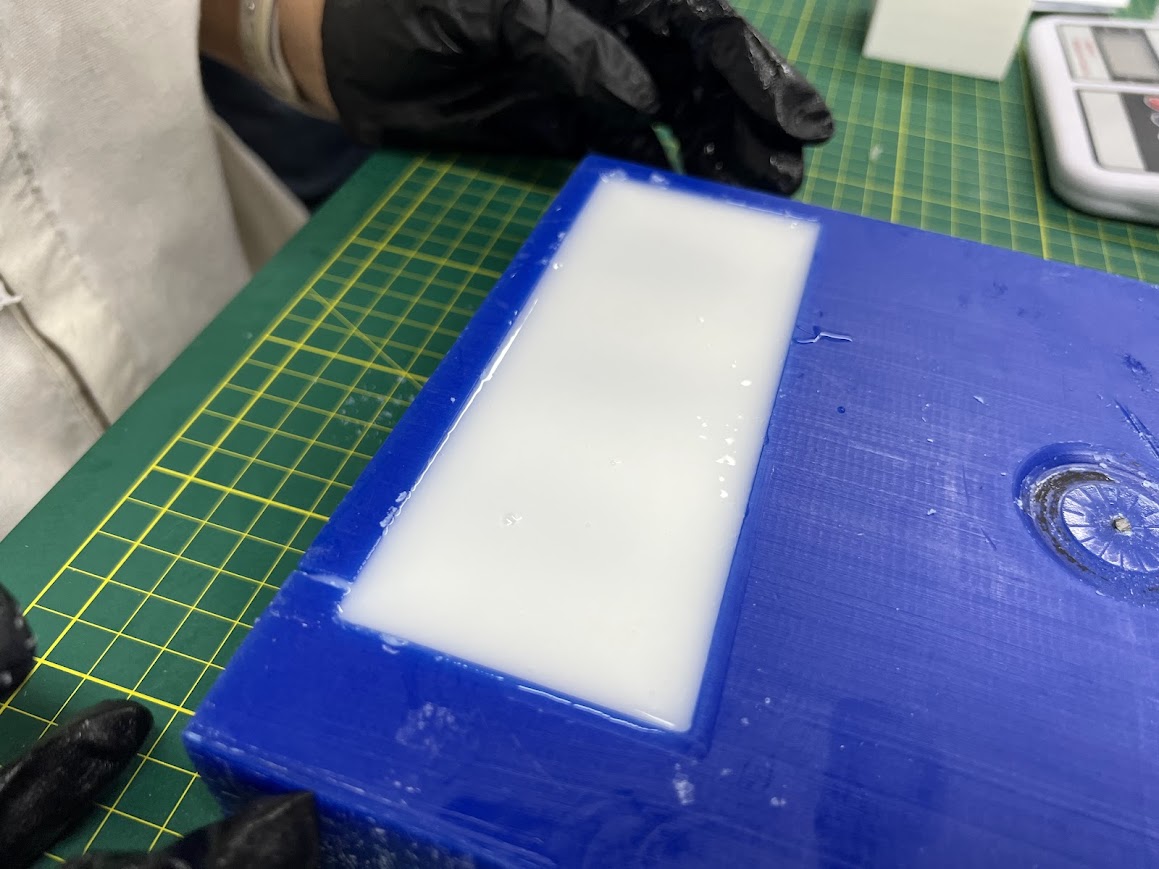
All bubble-free after a few taps.
The main thing is to understand how to use the oscilloscope and then obtain accurate measurements. Recently, we performed tests on a servo motor using the Miniware DS213 Portable Mini Oscilloscope. During these tests, we focused on key aspects such as frequency, amplitude and voltage, with the aim of understanding its behavior and verifying its correct operation. Using the oscilloscope, we were able to observe in detail the waveform generated by the servomotor, which allowed us to analyze aspects such as stability, response to different commands and consistency in its operation. This information was invaluable to ensure that the servomotor was operating within the expected parameters and to identify any anomalies that might require attention.
In summary, the use of the oscilloscope allowed us to perform extensive testing and obtain accurate measurements, giving us greater confidence in the quality and performance of the servo motor.
The test with the sound sensor was to turn on an LED with noise generated by a hiss.
I made the respective connections with the xiao for correct operation
The test with the sound sensor was to turn on an LED with noise generated by a hiss.
I made the respective connections with the xiao for correct operation
The test with the sound sensor was to turn on an LED with noise generated by a hiss.
I made the respective connections with the xiao for correct operation
Final result
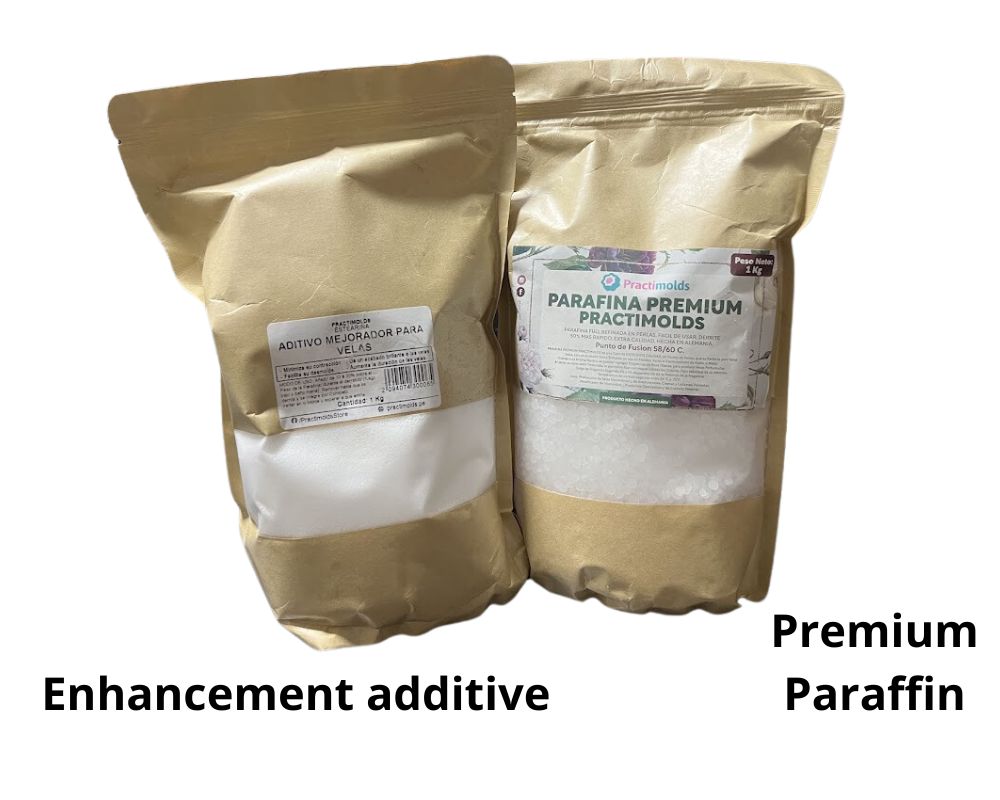
Prepare the materials: Gather all necessary materials, including premium paraffin, additive enhancer, wicks, the candle container, and any fragrance or colorant if desired.
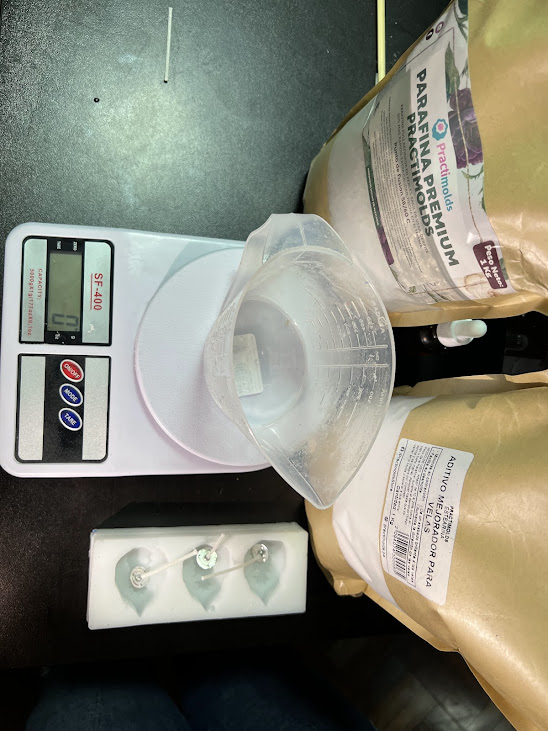
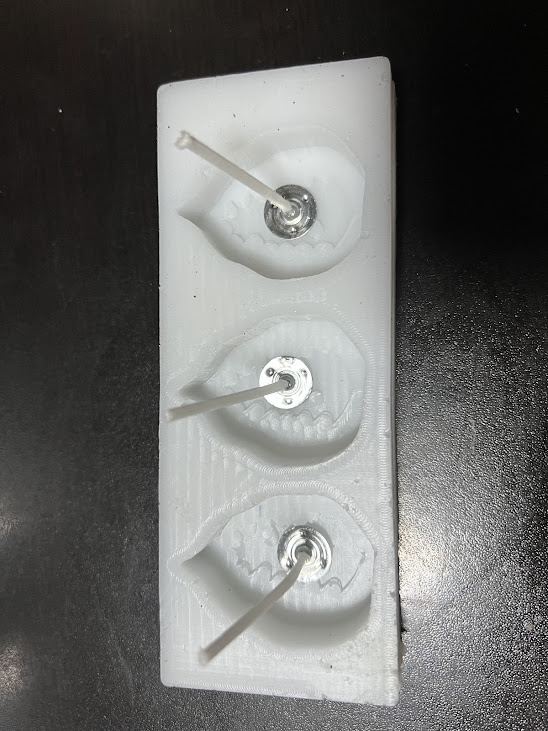
Prepare the container and wicks: While the paraffin is melting, prepare the candle container ensuring it's clean and dry. Place the wicks in position, making sure they are centered and straight.
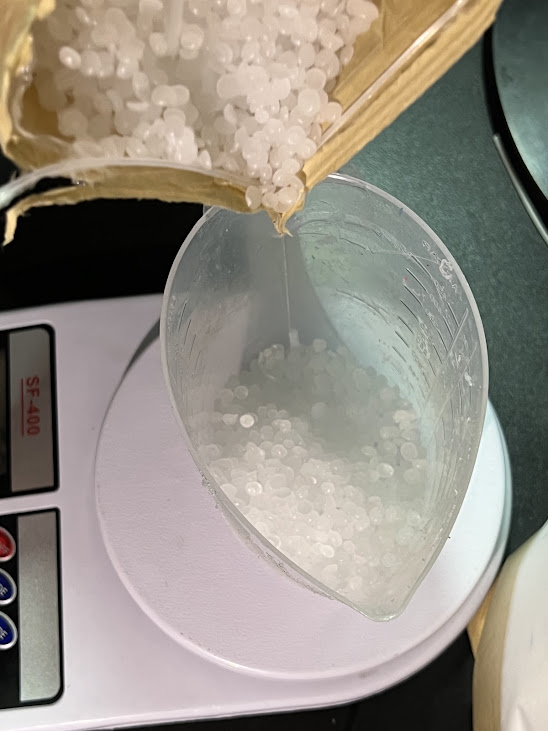
Melt the paraffin: Melt the paraffin in a heat-resistant container, such as a double boiler or in the microwave, following the manufacturer's instructions. Add the additive enhancer during the melting process and stir well to ensure even distribution.
Add fragrance and colorant (optional): If you want to add fragrance or colorant to your candle, now is the time to do so. Add a few drops of fragrance and colorant to the melted paraffin and mix well.
.
.
.
.
.
.
Cooling and solidification: Let the candle cool and solidify completely at room temperature. This may take several hours depending on the size of the candle and environmental conditions.
Una vez que la vela esté completamente fría y lista, está lista para ser almacenada o usada. Disfruta de tu vela casera y enciéndela según sea necesario para disfrutar de su luz y fragancia.
CONCLUSIONS
This week's task has been quite a challenge for me, since I entered a new field that I was completely unaware of: working with molds. Despite the setbacks I faced during the week with the material, we managed to make considerable progress. As I mentioned, we had hard silicone that was no longer useful and we had to buy others. Consider this, if it has been stored for more than a year, it is probably already hard.
In conclusion, this week has been crucial for my learning in mold-making and the proper use of silicones. Understanding the technical specifications of these materials is essential to achieve quality molds that are durable and suitable for our projects.
It is crucial to consult the datasheet of each silicone to avoid wasting time and materials through trial and error.
Described problems and how you fixed them
This week's task has been quite a challenge for me, since I entered a new field that I was completely unaware of: working with molds. Despite the setbacks I faced during the week with the material, we managed to make considerable progress. As I mentioned, we had hard silicone that was no longer useful and we had to buy others. Consider this, if it has been stored for more than a year, it is probably already hard.
Regarding the finish of my mold, I admit that I would have liked to obtain a more polished finish on the machine molds. I think we could achieve even better results if we do more research on how to improve the finish of the wax bar on the CNC machine.
On the other hand, I really enjoyed the process of working with the molds and the various characteristics and configurations that we must take into account. It is fascinating to discover the wide variety of silicones available and how each one of them has a specific function, whether for objects or food.
Regarding aspects to improve, we identified some key points. For example, we ran into difficulty achieving 90 degree angles in some cases, which affected the final shape of my piece. It is clear that we need to explore more strategies to address this challenge and ensure that we can reproduce more accurate ways in the future.
Despite the obstacles encountered, this project was extremely interesting and enriching. I learned a lot and, although I experienced a certain amount of anxiety, I am encouraged to continue expanding my knowledge about working with molds and to achieve perfection in making them with our machine.