Principles and Practices (1/2)
The challenge in this first week was to work on the final project idea. So, I researched the final projects of previous years related to the topic I want to work on, I made a first description of my final project, in addition to working on the first sketches.
Assignments
Practices and Principles (1/2):
- Plan and sketch a potential final project
Project Management (2/2):
- Work through a git tutorial.
- Build a personal website describing you and your final project. Refer to the lecture material for examples.
- Upload parts 1 and 2, to the class archive.
- Sign and upload the Student Agreement
Learning Outcomes
- Communicate an initial project proposal
- Identify and utilise version control protocol(s)
- Explore and use website development tool(s)
Final Project Idea
For my final project I want to work on a product that incorporates concepts of landscaping, interior design and decoration that is accessible, sustainable and interactive and responds to the user's needs in terms of connection with nature in urban environments.
Research
For inspiration and guidance, I reviewed Fab Academy final projects from the past few years.
2023
| Author | Project title | Project video |
|---|---|---|
| Daniel Collins | Moss Wheel | Link |
| Sibin K S | Gropod | Link |
| Ekaterina Kormilitsyna | Symbiotic Devices | Link |
| Ryan Kim | Rotary Hydroponics Garden | Link |
| Lisa Schilling | Selfwatering Flowerpot | Link |
2022
| Author | Project title | Project video |
|---|---|---|
| Pablo Pastor García | Smartpot | Link |
| Paola Zanchetta Muñoz | Fab, Meditation and Plants | Link |
| Juan Carlos Cristaldo | Shadowhouse | Link |
| Rachelle DeCoste | Demeter`s Garden | Link |
| John Story | Growing Microgreens | Link |
2021
| Author | Project title | Project video |
|---|---|---|
| Ismael Larrea Bravo | Seedling Nursery | Link |
| Jeffery Naranjo | Sustainable Bus Stop | Link |
Concept
Fab&Plant is a revolutionary urban oasis, seamlessly merging technology and nature. It's not just a green facade; it's an ecological statement, transforming walls into vibrant ecosystems. Smart, interactive modules respond to your presence with a symphony of light, bird sounds, and plant movement. Beyond aesthetics, Fab&Plant embodies sustainability, with automated irrigation and real-time water management. It's more than a project; it's a lifestyle, redefining urban living by bringing the tranquility of nature to your home.
Design
This product is an interactive green modular facade that is placed at the entrance of a house. Every time a person is at that point, he/she will receive a greeting from the plants through a movement of pots. The maintenance of this facade is very easy because it has automated irrigation.
It can be used by all those who live in cities and wish to reconnect with nature. It is also intended for those who live alone and want the company and interaction with plants.
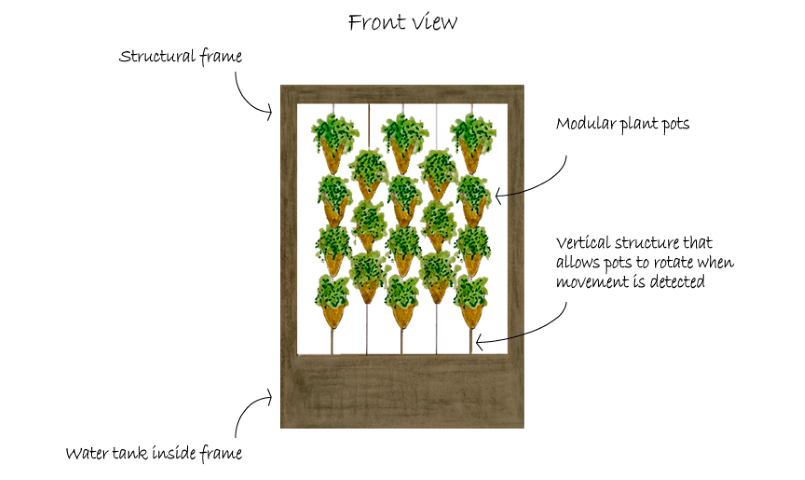
First sketch of the front view of the final project
Product characteristics:
- User interractivity: movement sensor so that each module rotates when a person is at the entrance of his house to welcome her/him or wish her/him a good day when he/she left.
- Automatic irrigation through a humidity sensor for each module and another for the water tank.
- Panel to warn the user when there is no water in the tank.
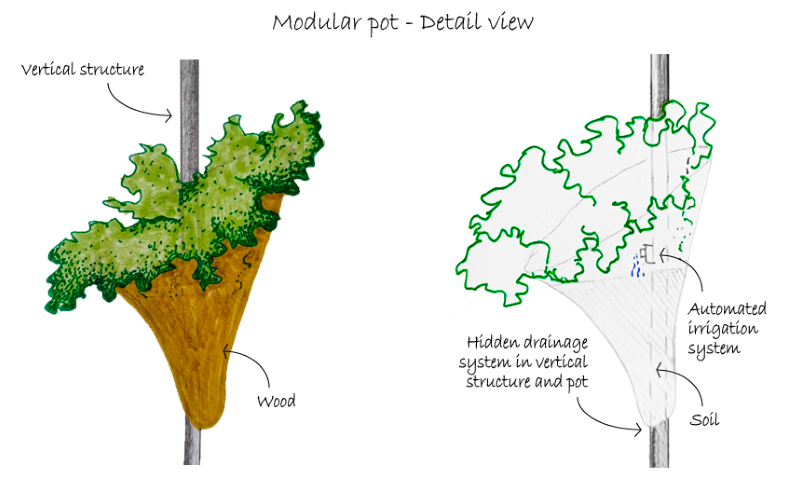
First sketch of the detail view of the final project
To make the plants move, they will rotate on their vertical axis when the motion sensor detects the user in the nearby environment.
Project Management (2/2)
Continuing with the work to be done this first week, I must customize my web page with my information and document the process.
Working on my Webpage (or the story of my first frustration in the program)
After the first Fab Academy class, I searched for tutorials and installed the corresponding programs to work on my web page. I started making modifications in the cloud, then worked in my local folder with Visual Studio Code and finally updated the changes. Everything worked fine until I tried to make the second push. Visual Studio loaded forever and could not finish the push. To fix it, I looked for more tutorials and help. Finally, I managed to perform the push using the codes in the Visual Studio Code terminal.
Organization
Before doing the tasks of this week, I decided to plan how I would work throughout the Fab Academy. During the boot camp Phanuwit Rico Kanthatham gave us some tips about it and one of them I am using is the spiral development.
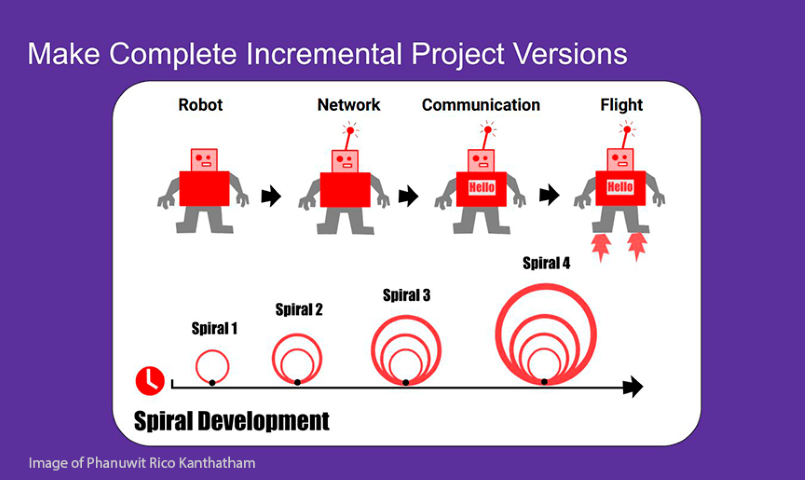
Phanuwit Rico Kanthatham spiral development method
Based on this, my first step was to create a file in Google Sheets where I have a checklist and a schedule in which I have written down the tasks to be carried out and I advance them according to the topic of the week.
I also have a Fab Academy notebook where I documented the sessions, recitations and my progress on the final project.
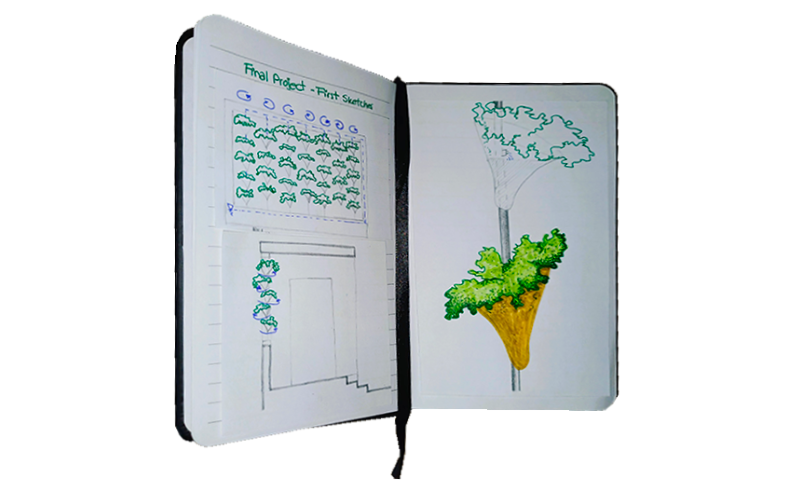
Fab Academy notebook
Preliminary concepts
Before modifying my website, I wanted to understand the concepts that I will use to modify my site throughout the Fab Academy.
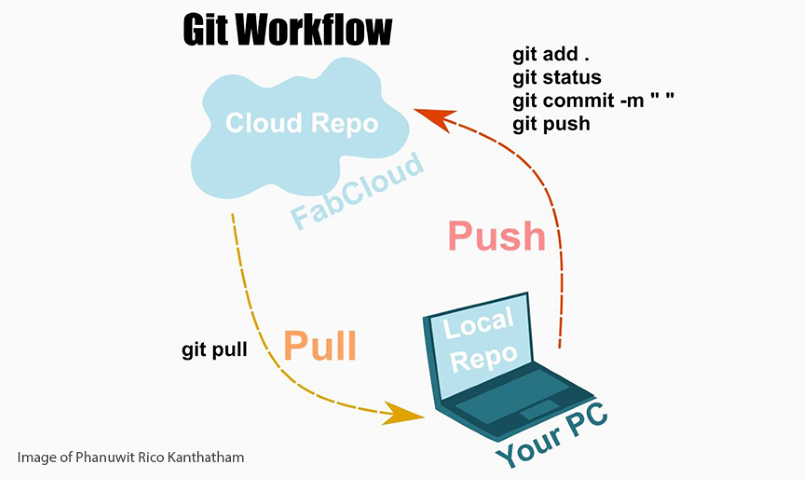
Phanuwit Rico Kanthatham git workflow scheme
I have made websites with WordPress before, but this is the first time I work with Git and Visual Studio Code so I felt a bit dizzy at the beginning. So I did some research, asked for help and I think I managed to understand the basic principles that allowed me to do my task this week. I used analogy to understand the commands better. I am a Google Drive user and know it quite well, so for me - at least now - push is uploading information to the cloud which is now called GitLab instead of Drive and Pull is downloading information from the same cloud.
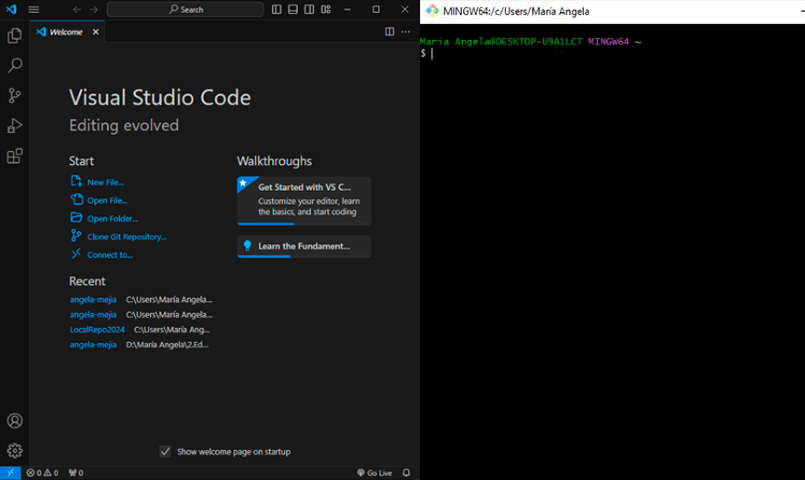
Connecting GitLab to my PC
To connect the cloud with my local repository I followed this video tutorial made by my tutor Hayashi Mateo.
The steps I followed were:
- I opened Visual Studio Code and opened a new window. Meanwhile, Git Bash was already running on my computer.
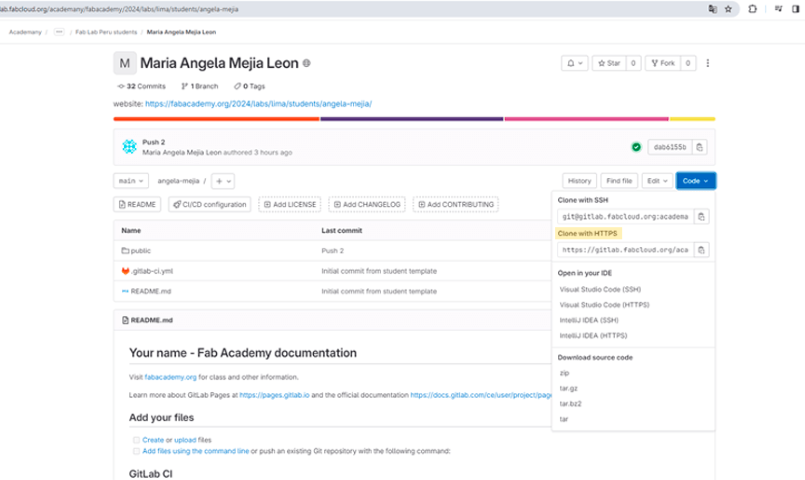
- I created a new folder in :C/Documents where my local repository will be and
- I cloned the cloud repository with the HTTPS key obtained from the GitLab website.
- I copied the files that I have previously been working on in Visual Studio Code to the local folder where the clone has been saved.
- To link the local repository to the cloud, in the terminal window, I placed the commands git config --global user.name "my user name" and git config --global user.email "my email".
- I pressed commit and a window pop-up asked me to put my password.
- The result was this:
- I used the code git add .
- I used the code git commit -"actualization name"
- I used the code git push
- The result was this final code in the terminal window.
- Experiment with editing in the cloud first. It helps to understand the interface and the meaning of the code.
- Your local folder must be in :C, otherwise you will have errors in the push or pull.
- In this first week, measure the time it takes you to learn something new. It will serve to adjust your initial schedule and plan more precisely how long each task will take.
- Be patient and consistent, especially if you have programmed very little or nothing before.
- You are not alone. You have a support network with the other students in your node and your tutors. To finish this task I thank my fellow students and tutors, especially Henry Sanchez, Hayashi Mateo, Vaneza Caycho , Luis Rodriguez , Silvana Espinoza, Hans Moncca and Maryori Vasquez.
git config --global user.name "@angela-mejia"
git config --global user.email "mmejia.fa@gmail.com"
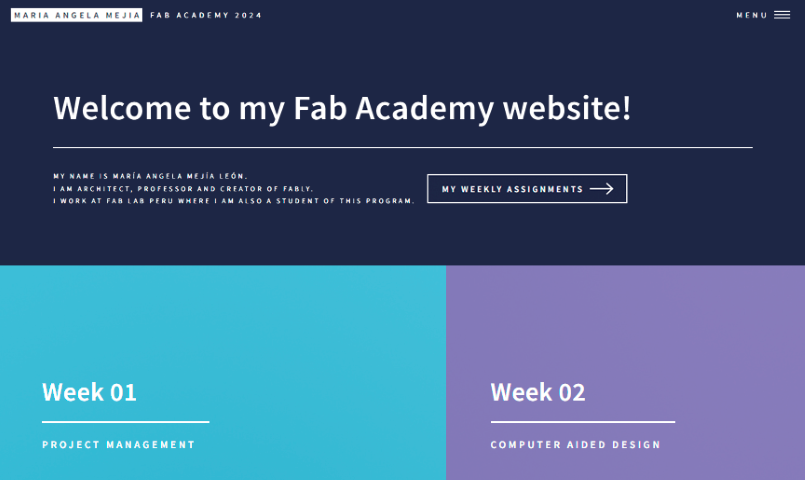
First version of my Fab Academy website
To upload the updates was a tricky deal because I tried several times to do it by pressing the button commit on Visual Studio Code but it never finished the upload. For fixing that, I followed this video tutorial.
The steps I followed were:
git add .
git commit -"week01-actualization"
git push
Enumerating objects: 19, done.
Counting objects: 100% (19/19), done.
Delta compression using up to 8 threads
Compressing objects: 100% (11/11), done.
Writing objects: 100% (11/11), 365.68 KiB | 20.32 MiB/s, done.
Total 11 (delta 6), reused 0 (delta 0), pack-reused 0
To https://gitlab.fabcloud.org/academany/fabacademy/2024/labs/lima/students/angela-mejia.git
ef6f87d..dab6155  main -> main
With this last step, I managed to update my cloud repository.
Finally, to see the changes I make will I am still editing Visual Studio Code, I enabled Live Server. I found all the steps to follow in this tutorial.