Week 9: Molding and casting

Group assignment
Review the safety data sheets for each of your molding and casting materials, then make and compare test casts with each of them-
First of all we reviewed the safety data sheet of the Feroca TinSil 80-15 silicone:
Feroca Tinsil safety datasheet part A (in Spanish)
Feroca Tinsil safety datasheet part B (in Spanish)
After reading it we protected our eyes with safety glasses, our hands with gloves and our body and clothes with a lab coat.
Safety datasheet of the Feropur PR55+E55 -Rigid Polyurethane Resin:
Polio safety sheet PR55 (in Spanish)
E55 isocyanate safety sheet (in Spanish)
Molding test
Milling and Ferris File-A-Wax molding wax
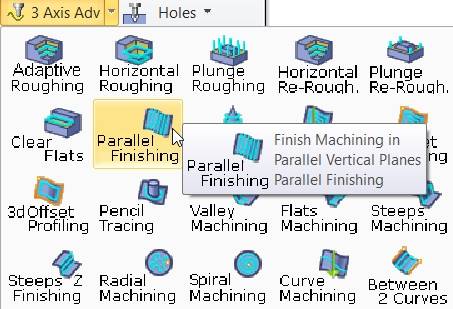
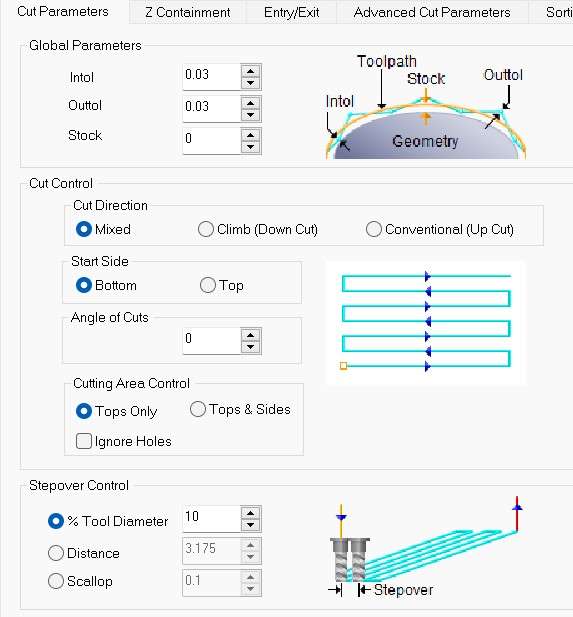
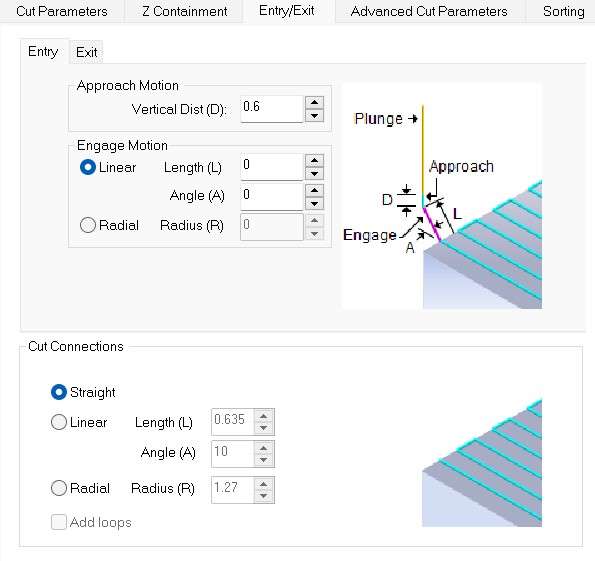
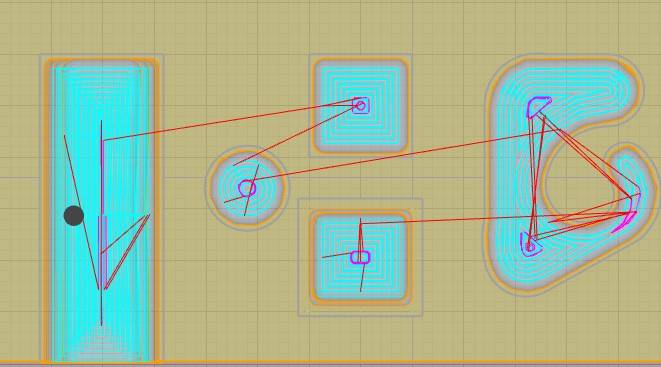
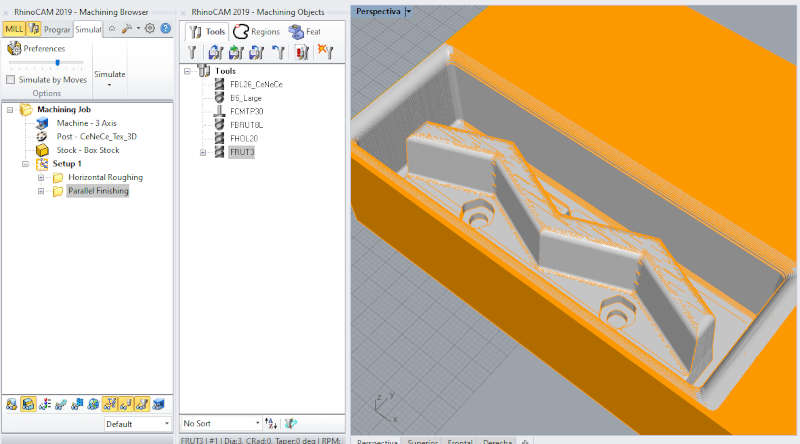
As it was our first molding experience we wanted to make a first milling test. We set the RhinoCAM 3 axis milliing with horizontal roughing and pararell finishing, following the steps:
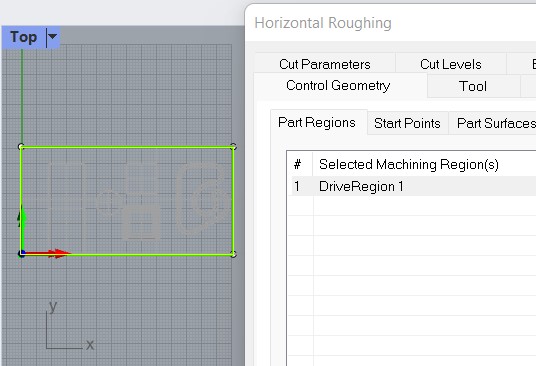
| Open RhinoCAM plug-in in Rhino software. upload your .step file design. In our case we designed different shapes and sizes, with and without chamfers to see how they come out. |
| Introduce the material positioning. This time, we will create a rectangle that will have the size of our design, and that is what weré going to select in the control geometry region. |
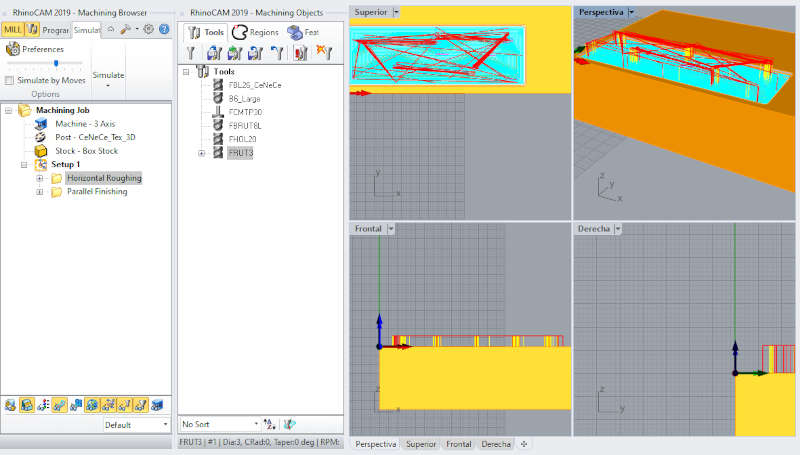
| Make sure that we are in the MILL module. Open 3-AXIS ADV -> Horizontal Roughing and set the parameters. |
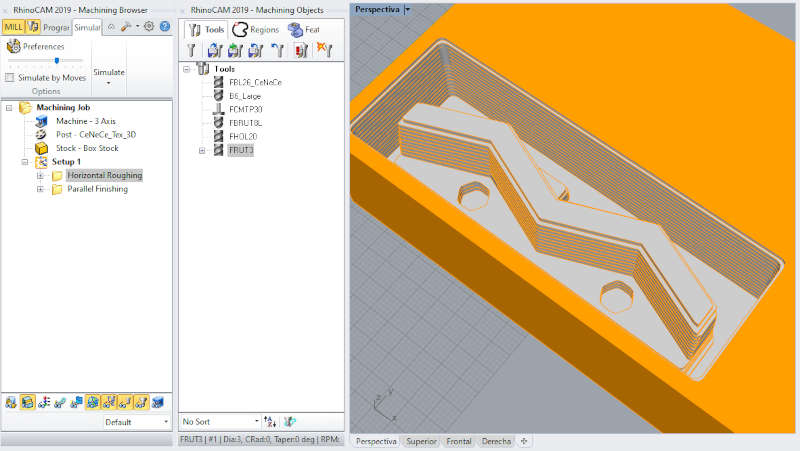
| once you´ve got all the parameters set it´s mandatory to simulate and check your toolpath and time duration. There´s high risk of shank collision! |
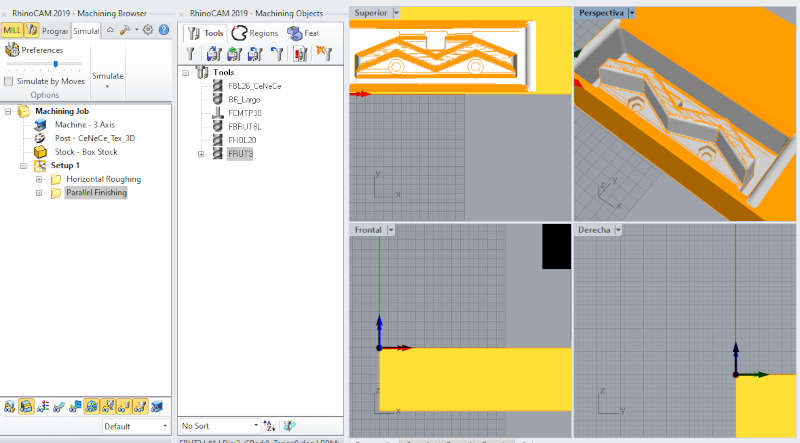
| If, everything is ok with the horizontal roughing, it´s time to set the Paralel Finishing. |
| Once we check that the settings are correct, and that the toolpath is Ok: We post both files and export it in order to open it in our CNC Machine. |
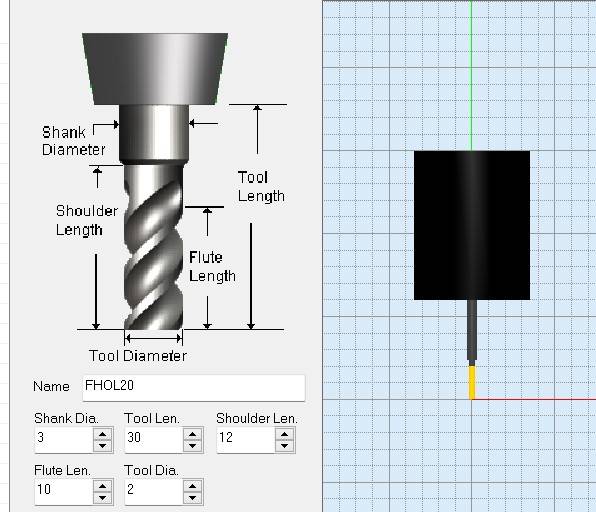
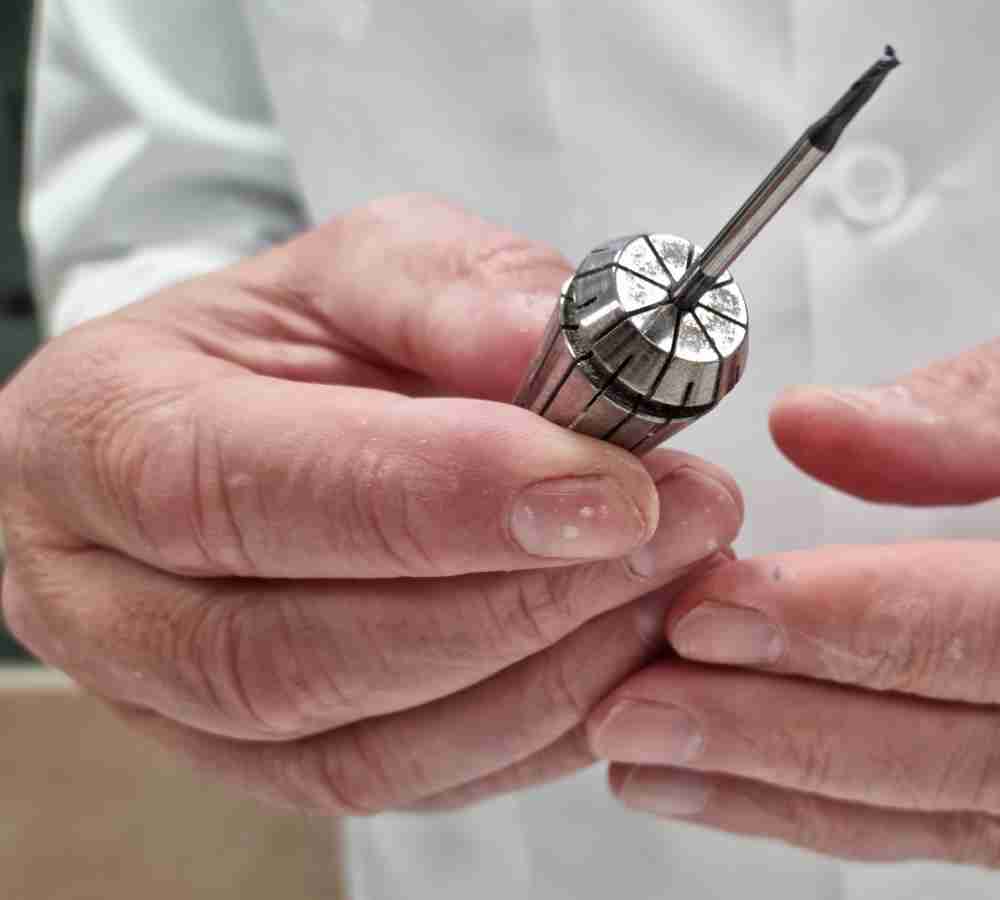
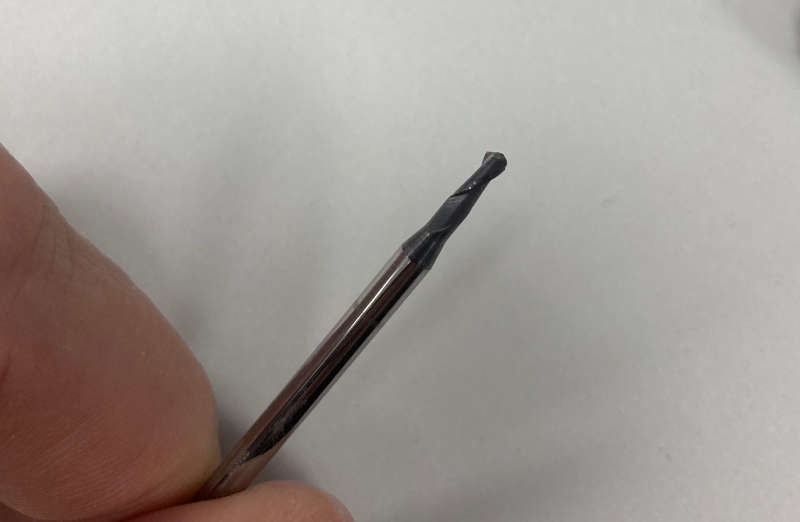
We used a 2 mm diameter mill, and after checking the toolpahs and time duration we fixed the wax block to a wooden rigid base to clamp it to the CNC machine.
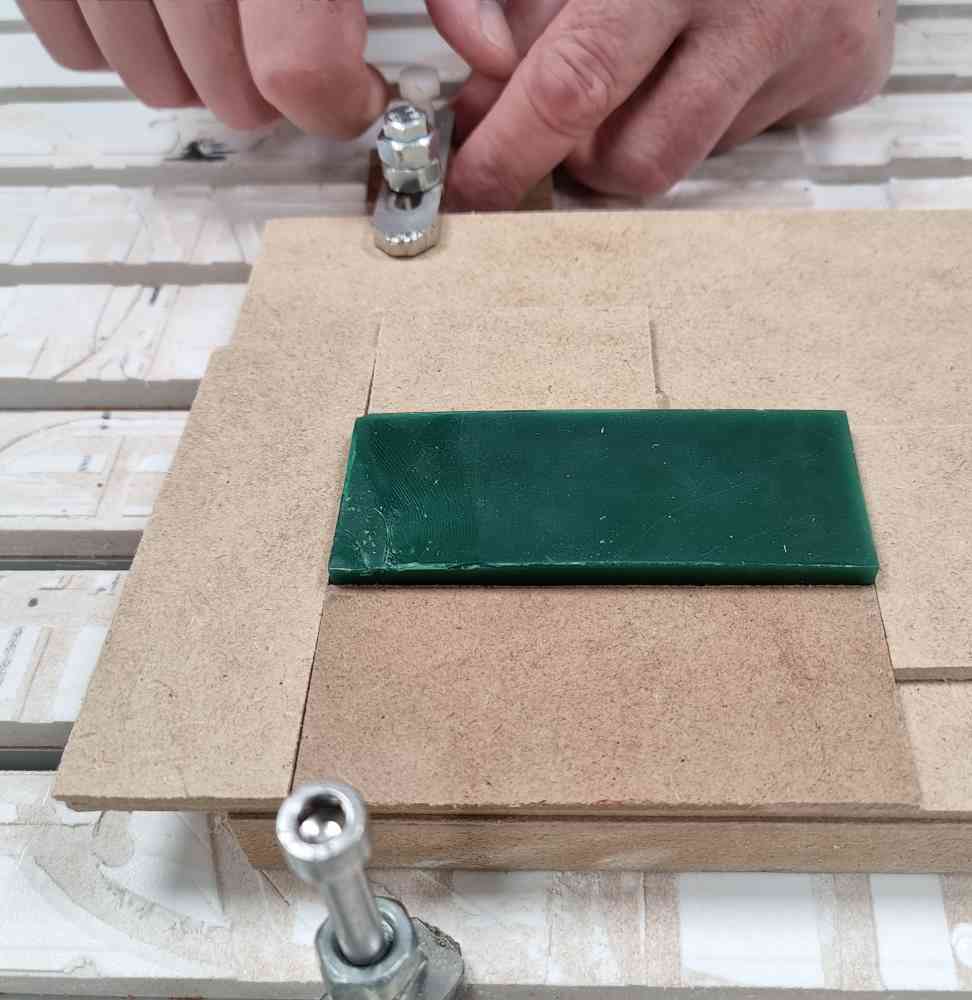
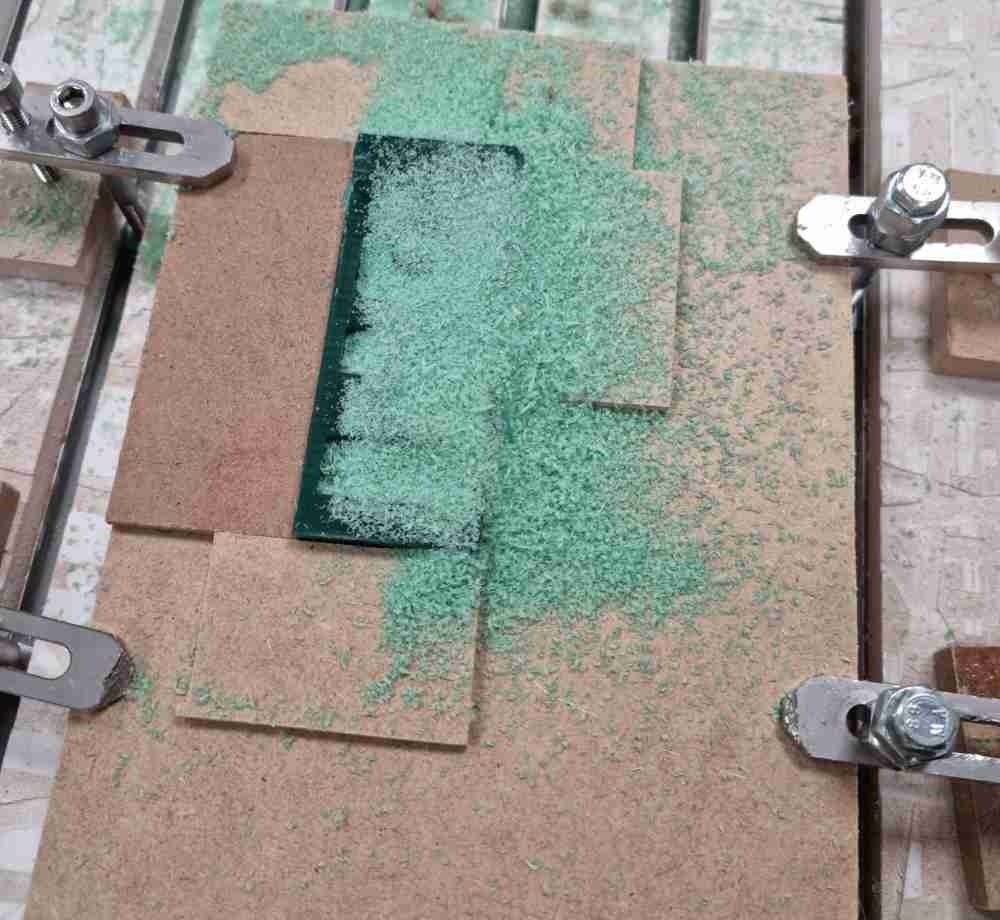
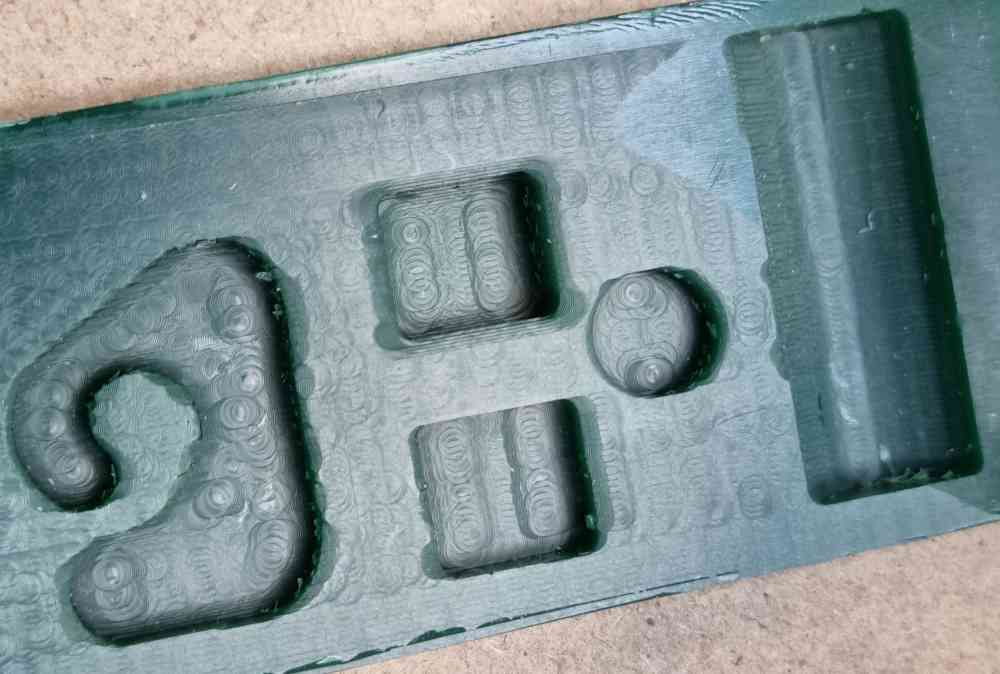
The final result went quite well, except perhaps some marks at the entry/exit of the mill.
We used that test just for milling, because we thought it was too small for proper testing of casting. Later we tested different casting resins with the molds we had made in our individual assignments.
Polyester resin
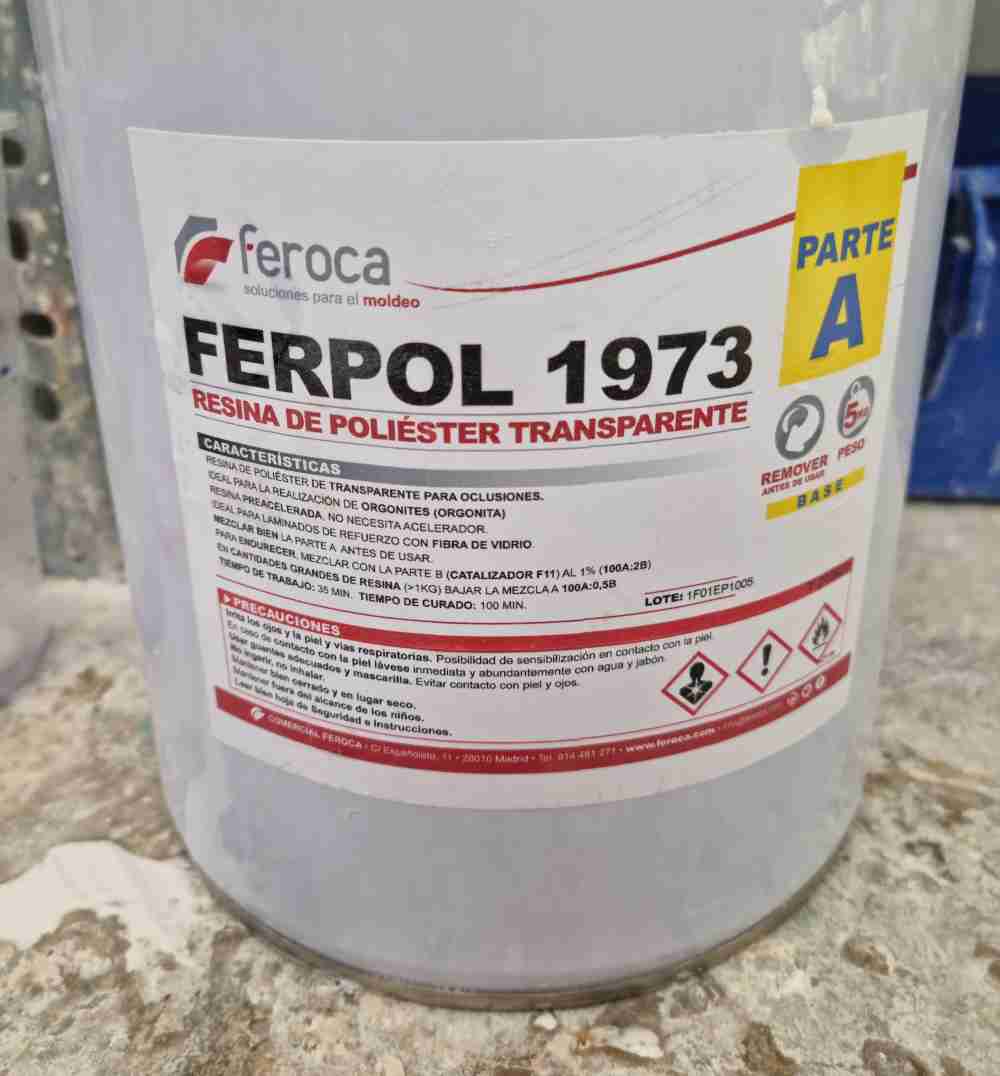
Feroca Ferpol 1973 safety datasheet
- RESINE: Transparent polyester resin.
- Work time: 35 minutes.
- Release time: 100 minutes.
- Mixing ratio: Mix with catalyzer in a ratio 100:2.
The result of the polyester resin was a very good and sturdy semi-transparent piece.
Epoxy resin

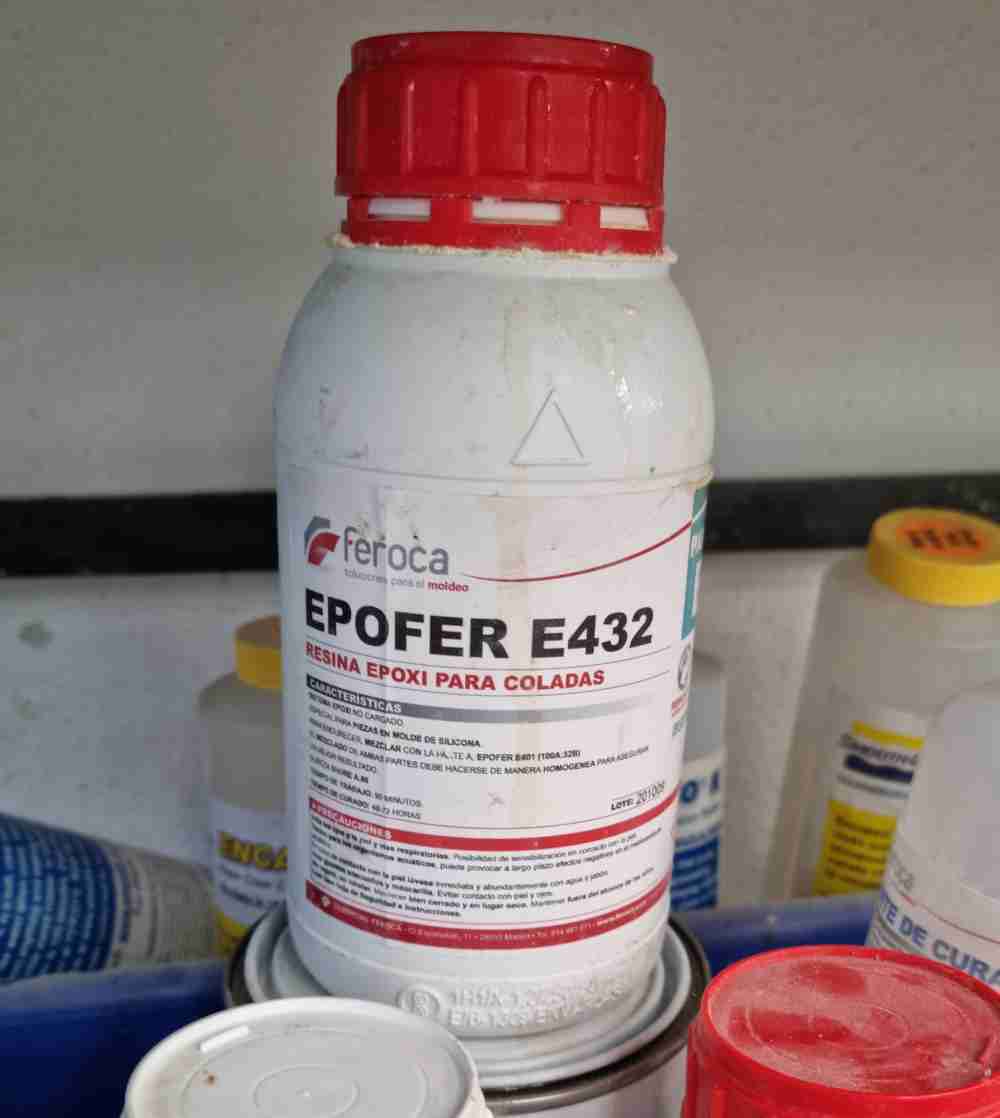
Feroca Epofer E432 safety sheet
This time we mixed epoxy resin with a 50% of cement load.
- Mixing Ratio 100% part A, and 32% part B.
- Working time: 90 minutes.
- Curating time: 48-72h.
Individual assignment
Design a mold around the stock and tooling that you'll be using, mill it (rough cut + three-axis finish cut), and use it to cast parts.
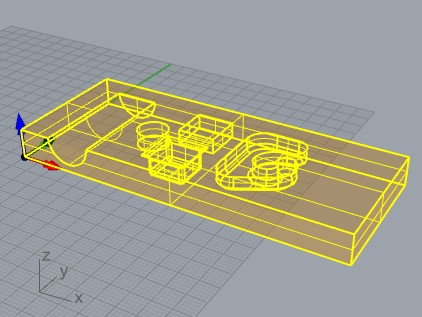
The design
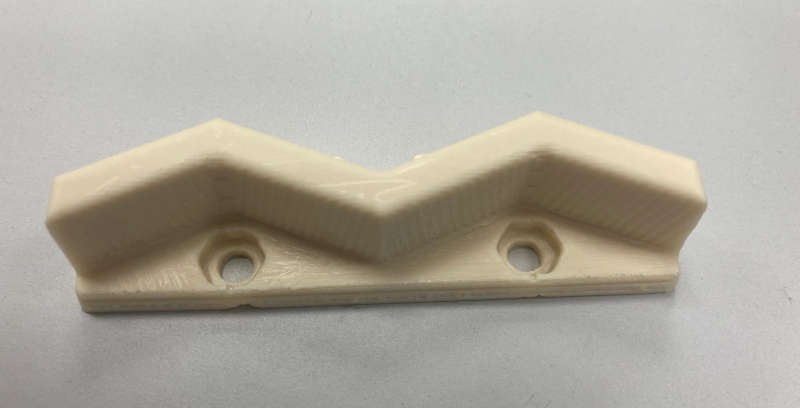
As I constantly think about how to apply the week assignments to my final project, I thought it would be a good idea to cast the pads of the caterpillar track, because they are dozens of pieces, all of them the same.
The V-shape is very good for traction, but they can't be very wide, because they have to turn around the wheels. So a double V seems to be a good option.
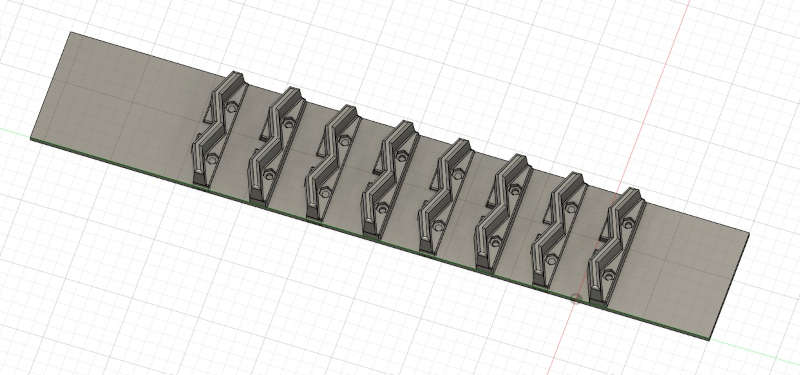
So I designed the piece in Fusion 360, adding two nut holes to screw the pieces to the belt and one slot in the middle to nest a gear pinion.
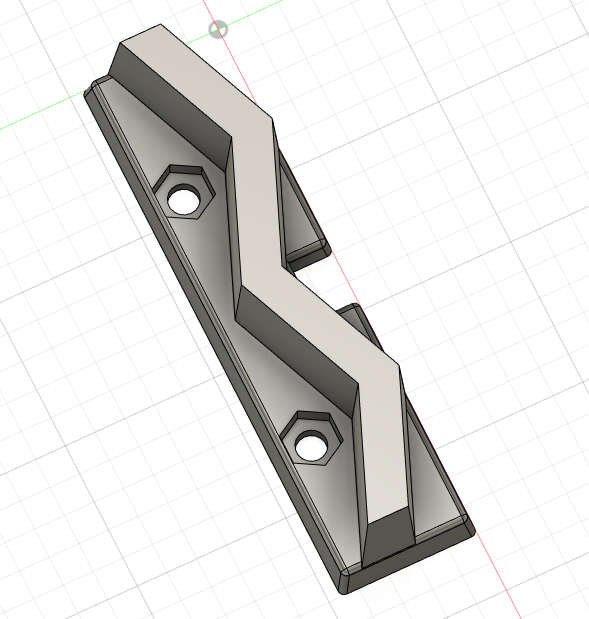
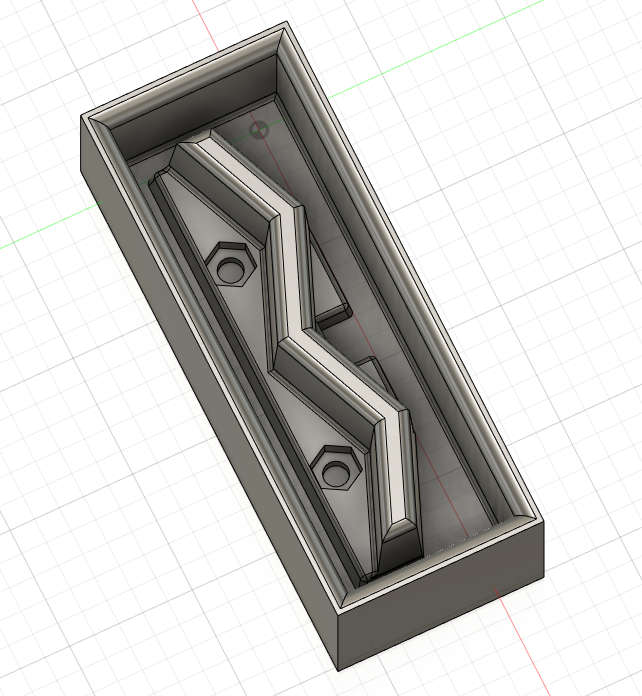
I gave some slope to all of the faces and filleted all of the edges. Finally I added a "box" to allow the molding.
The milling
I thought the milling was going to be a piece of cake but problems showed up. I knew the mill had to be longer than the depth (25 mm), but anyway the Rhino CAM software warned of a shank collision. It happened that the cut diameter was 2mm but the shank diameter was 3mm. So the mill was unable to make high "walls". So I had to change and choose a 3mm mill, both cut and shank.
After that I simulated the milling, and mysteriously my piece disappeared on the simulation. 11 versions later, I thought that something wrong was with the box on Fusion 360. I had changed its dimensions and there was something odd with the sketches. I decided to delete the box and do it again. It was 10 minutes and after that the program went perfectly.
This is the simulation of the horizontal roughing:
Simulation of the parallel finishing:
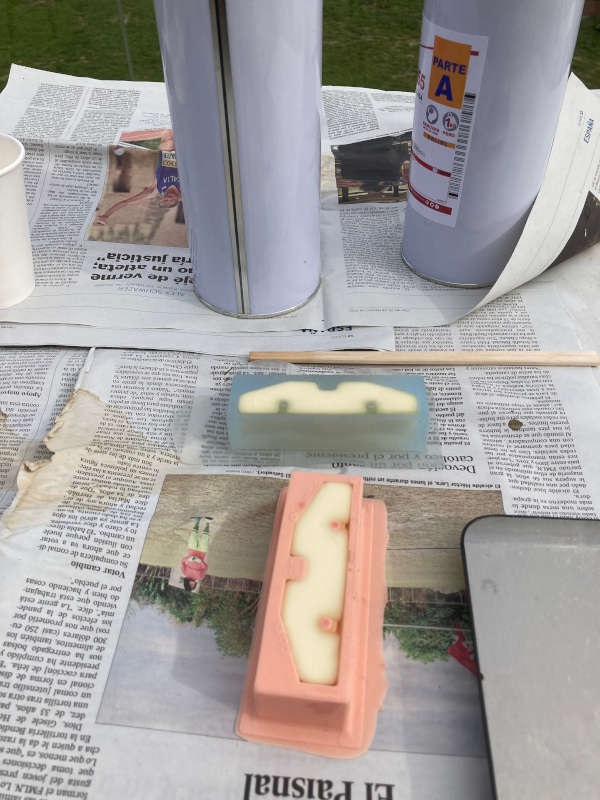
I fixed the wax block with double-side tape and silicon glue.

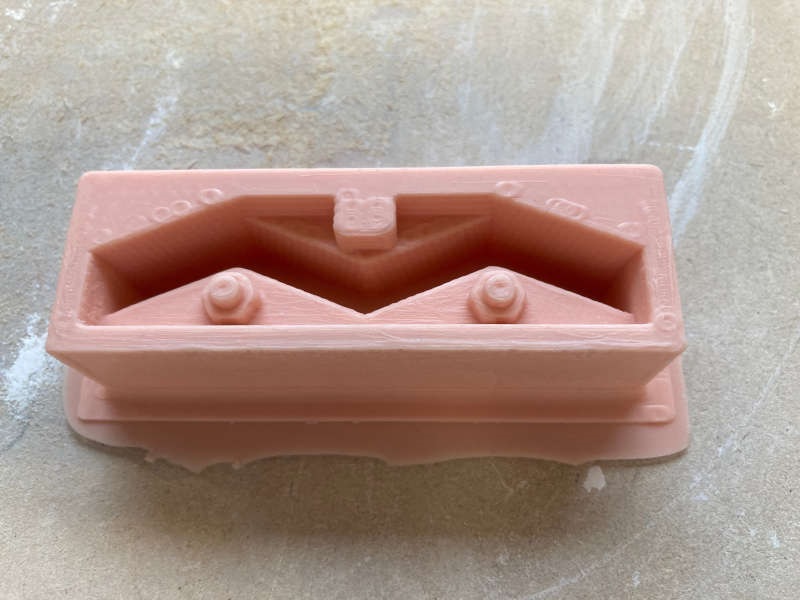
And about one hour later I had the mold:
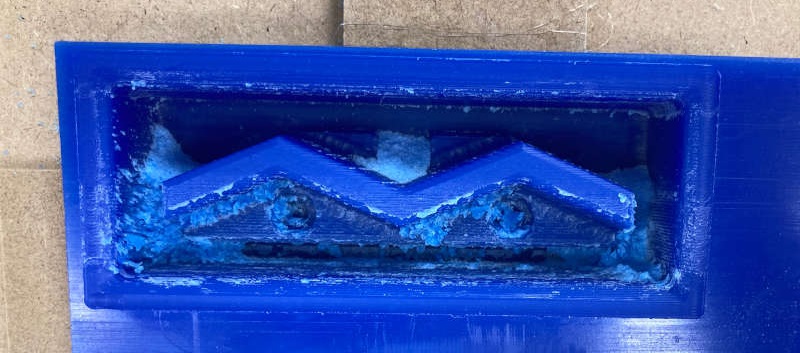
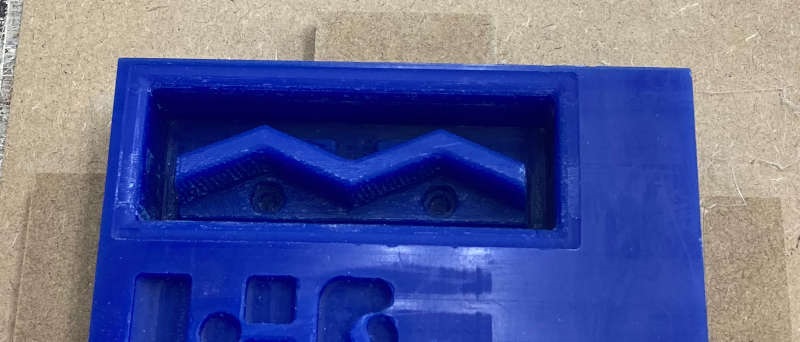
After cleaning all the remains, the first mold is ready for the silicone.
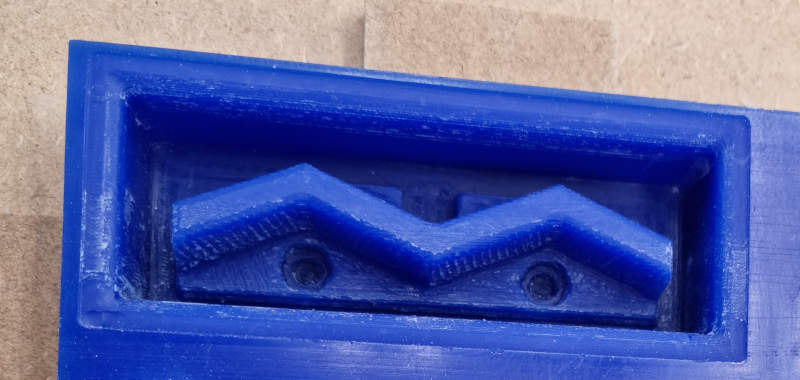
Changing the mill
When we had the regional review, the instructors told us that the mill we used (FRUT3) warms up with the spining, so the remains stick to the mold. We also didn't stop the CNC between roughing and finishing, so the problem increases.
So, following their advice, we changed the mill, using a 4 mm mill (FL4), and stopping between the roughing and the finishing.
This time we got much less remains while milling and the finishing was much better.
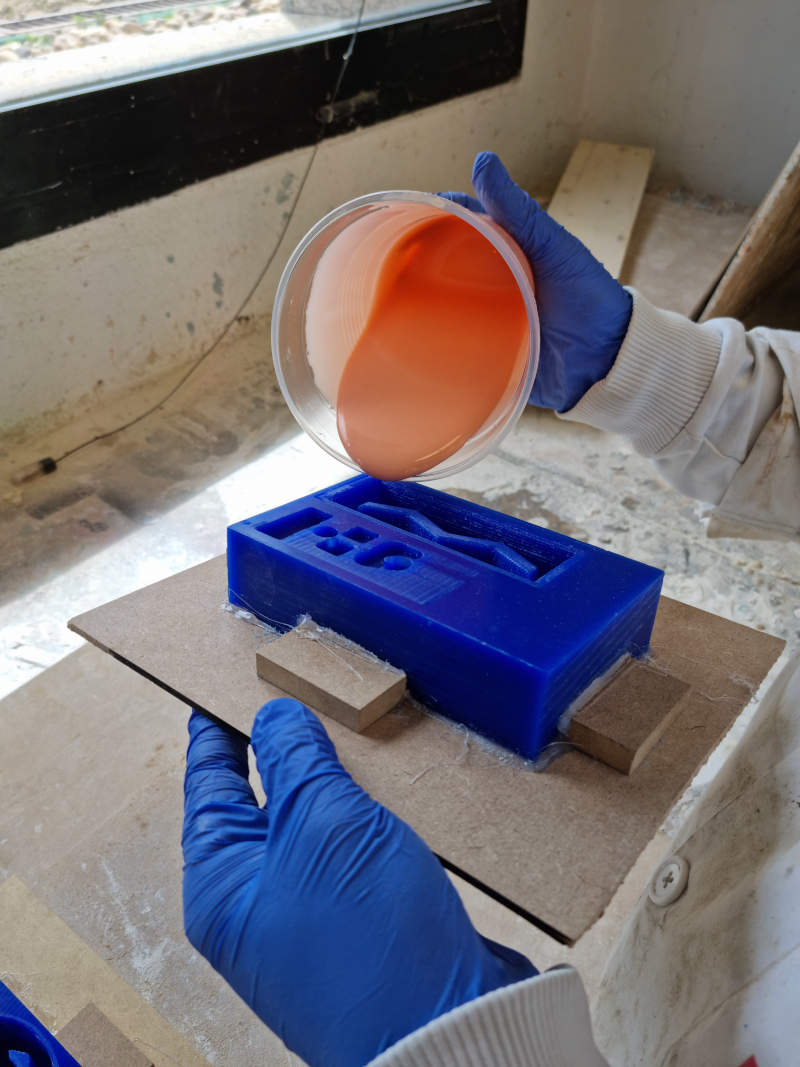
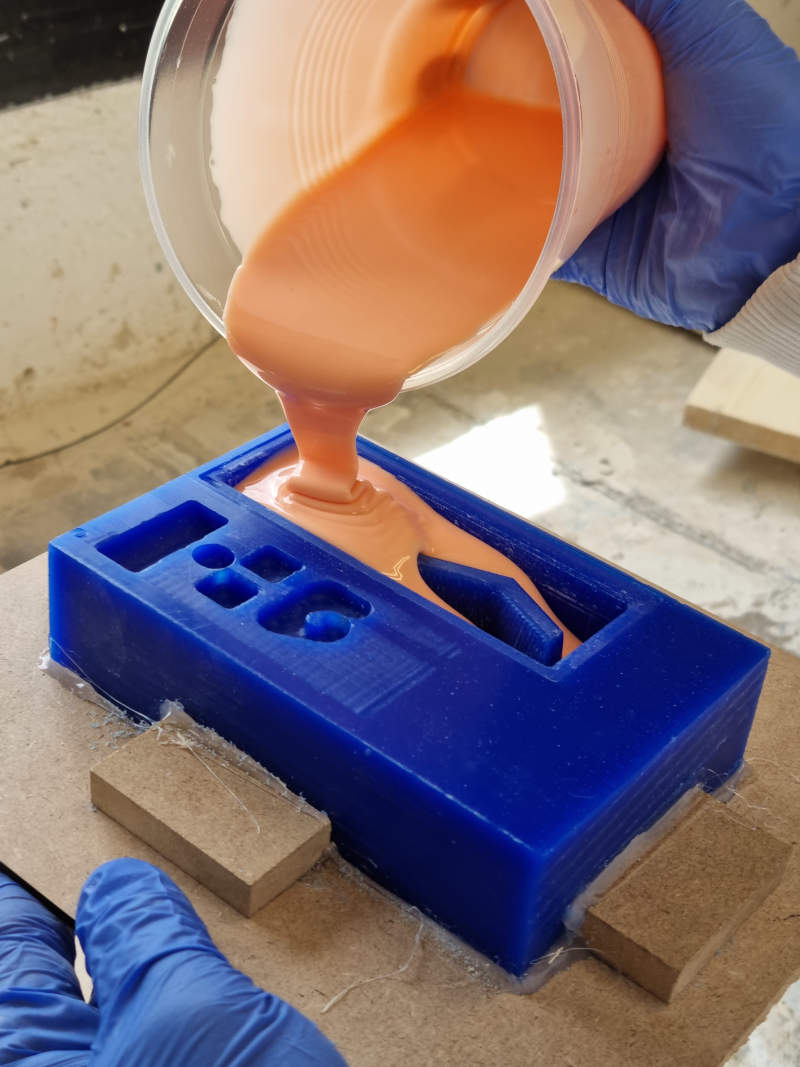
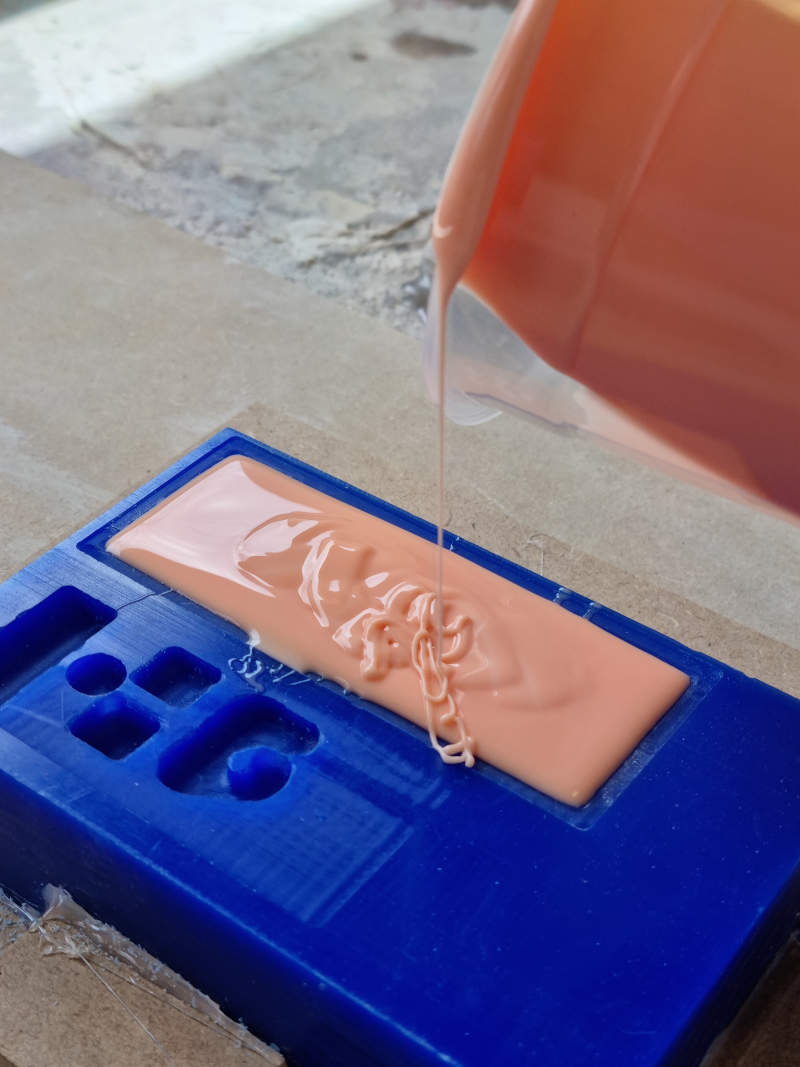
Molding
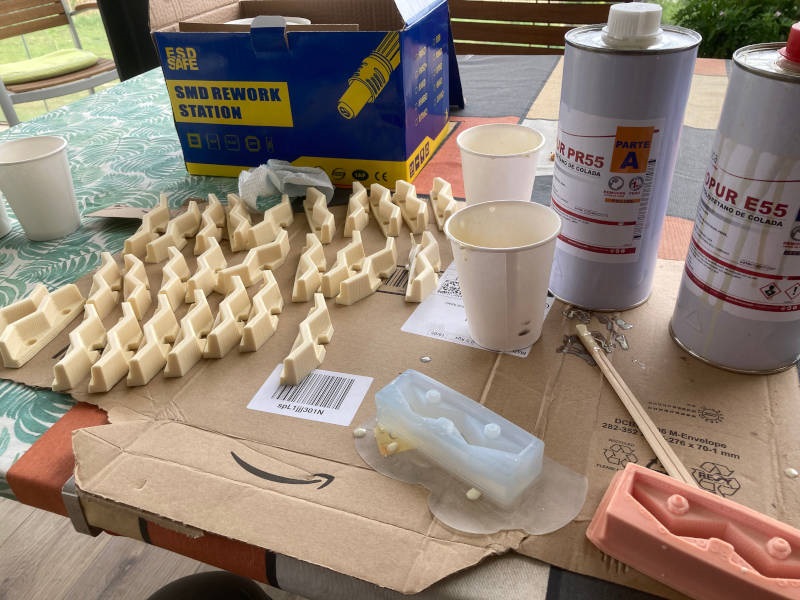
At the lab we've received the Feroca Tinsil 80-15, a silicon with a tin catalyst, very suitable to make molds.
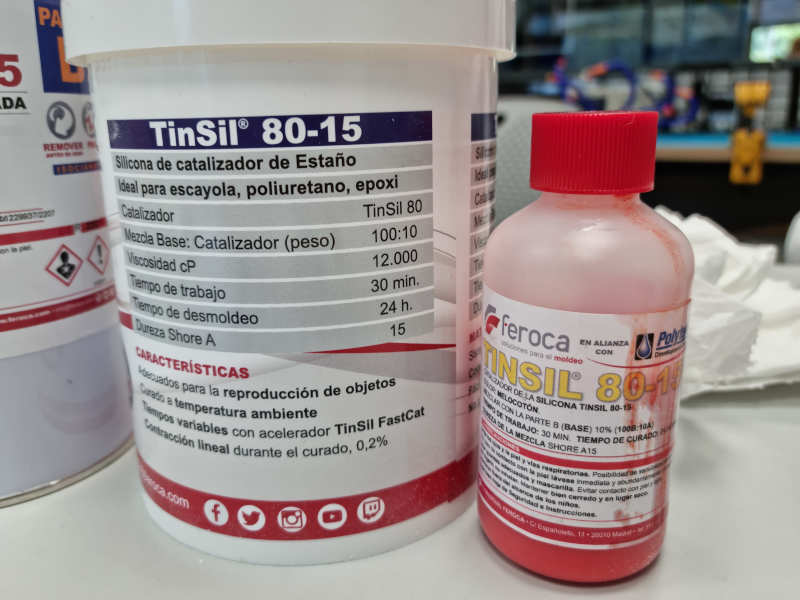
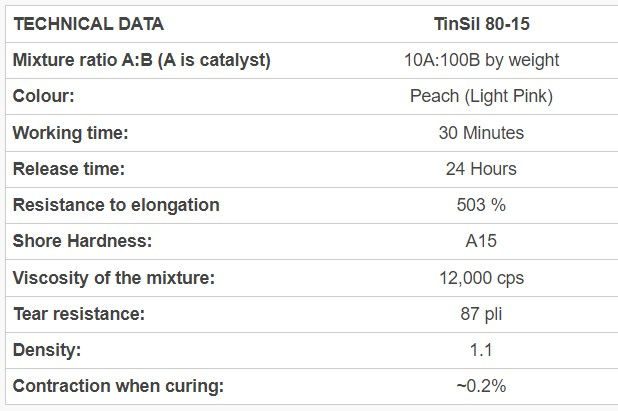
Theses are the technical data of the silicone:
My fabmate Pedro Chana and I make the silicone for both molds, and we calculated a total volume of about 200 cm3. We needed a 10% of catalyst, hence 20 cm3 (4 caps).
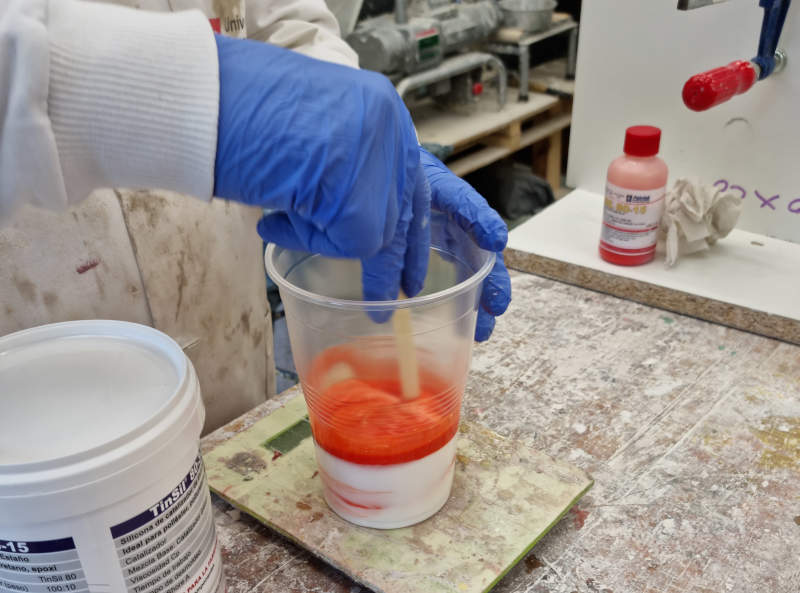
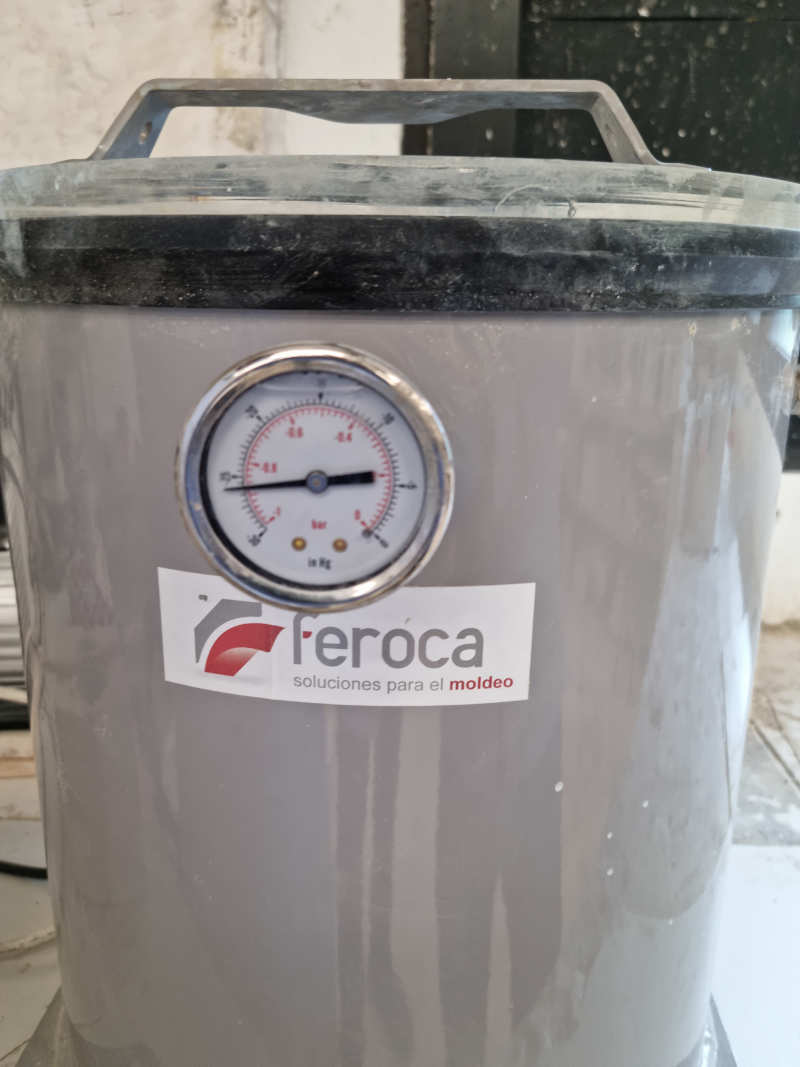
We are lucky to have a vacuum chamber at the lab, so we put the mix into it at -0.85 bars during 10 minutes to put bubbles off.
The manager of the art laboratory at the university told us to fill the molds slowly and pouring at the same point of the mold.
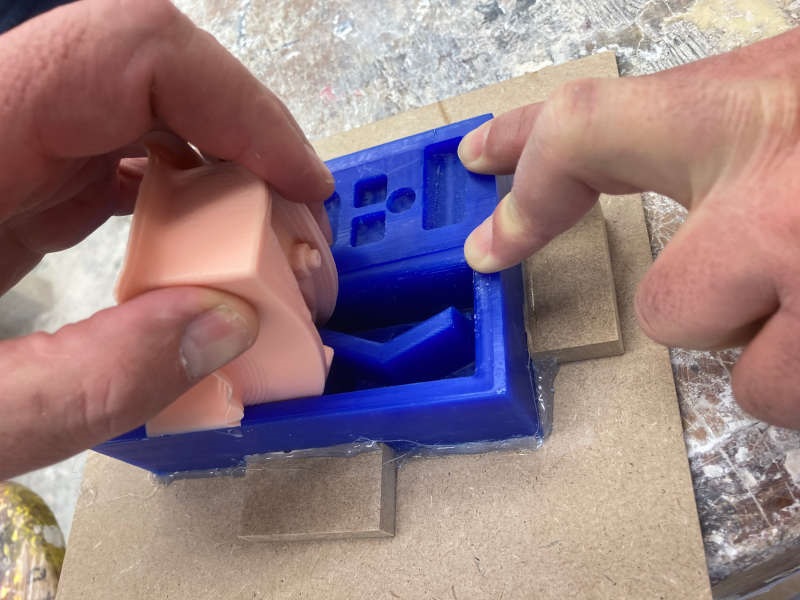
Casting
Polyurethane resin
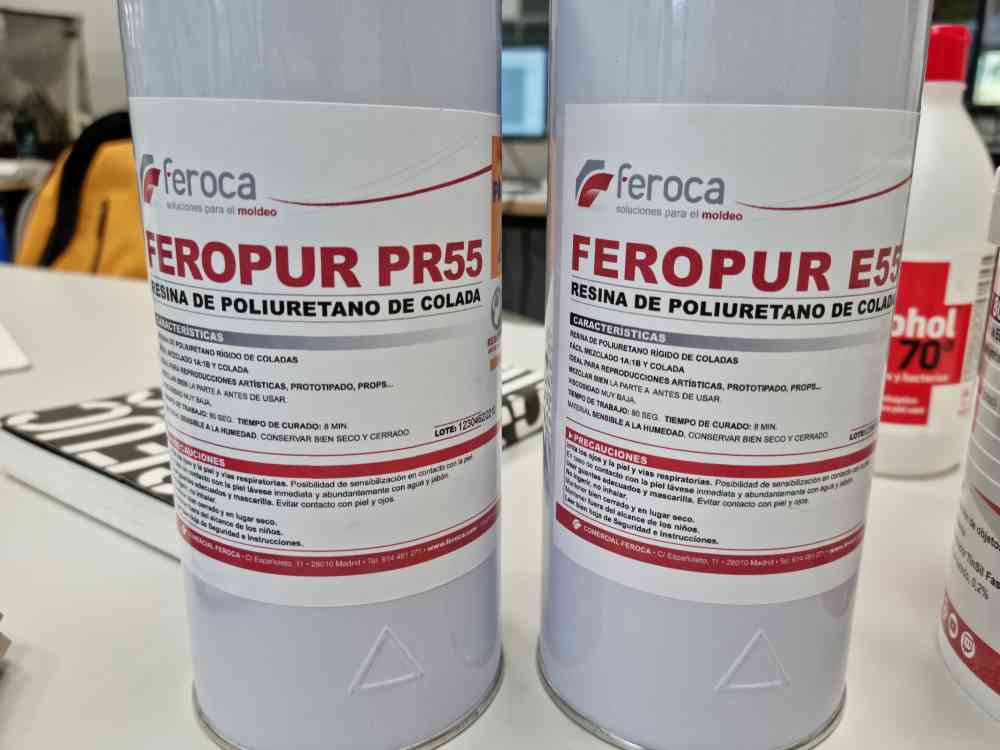

Safety datasheet of the Feropur PR55+E55 -Rigid Polyurethane Resin:
Polio safety sheet PR55 (in Spanish)
E55 isocyanate safety sheet (in Spanish)
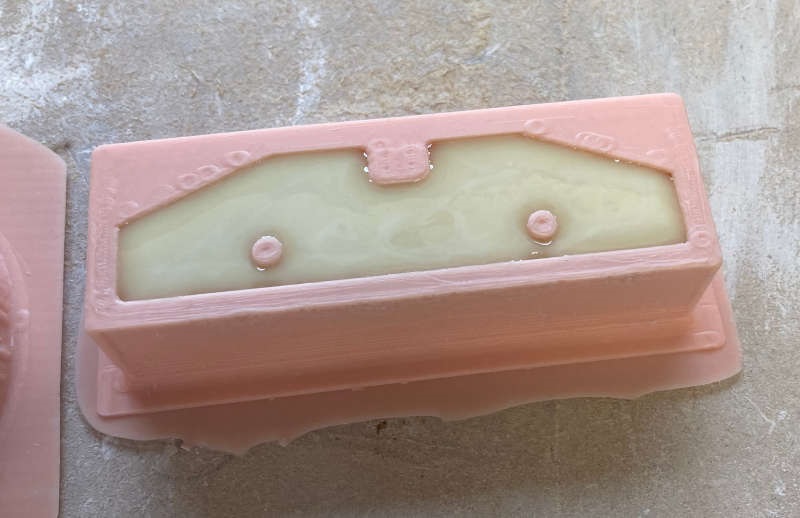
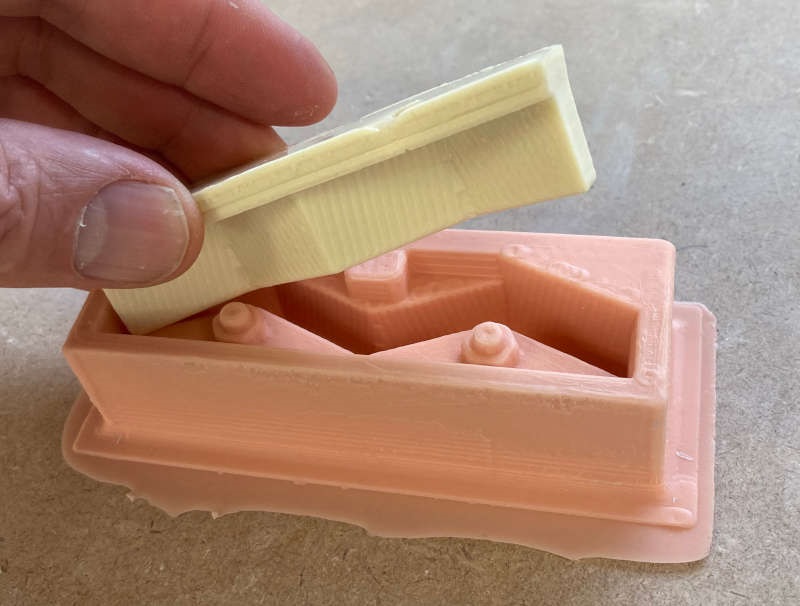
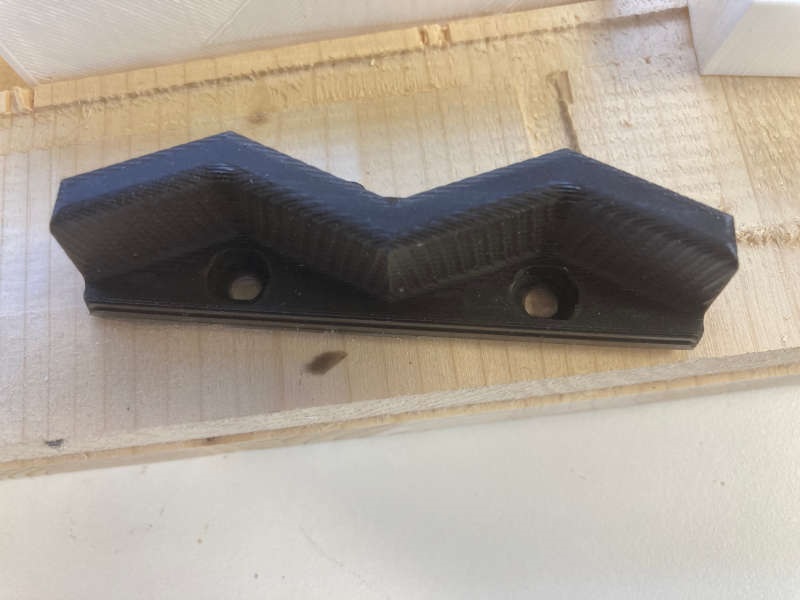
The polyurethane resin cured very fast, so we could get our firs piece very quickly.
After the first piece with rigid polyurethane resin, we made another one with transparent polyester resin.
And finally we made another one with epoxy resin including some cement powder in it:
Update (04/17/2022): I keep using the mold to make more pieces in order to complete the caterpillar track:
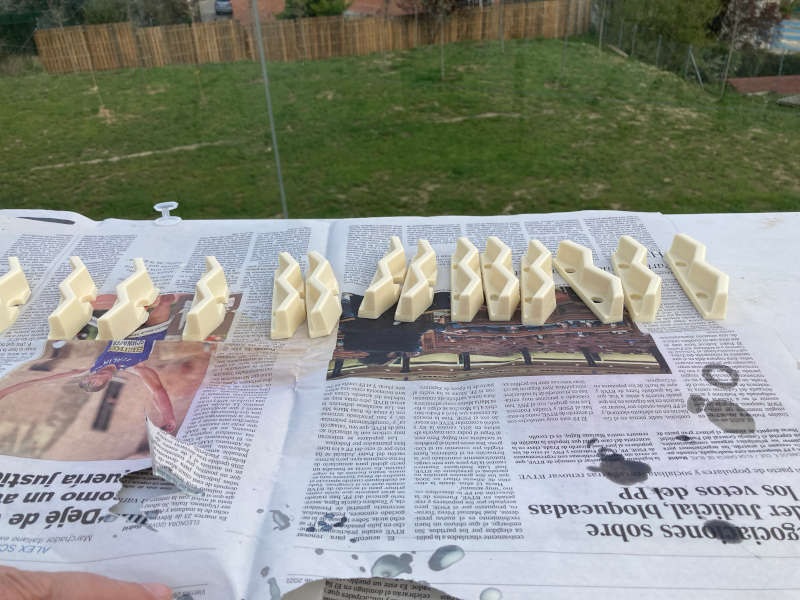
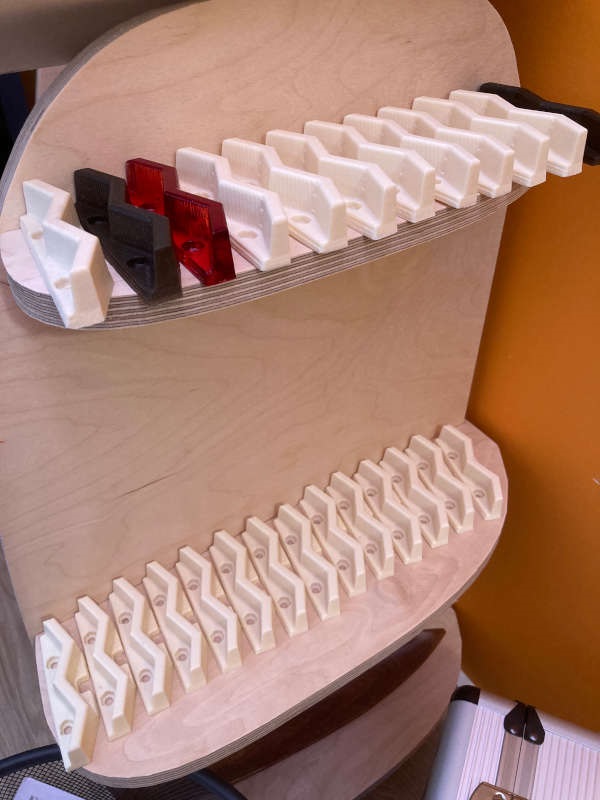
Update (30/05/2022) I molded 23 more pieces for the second caterpillar track: