Week 15: Wildcard week. Composite ski making

As my final project is an electric ski (well, a pair of them), it's time to make the ski blades. A modern pair of skies is made as a "sandwich" of different materials:
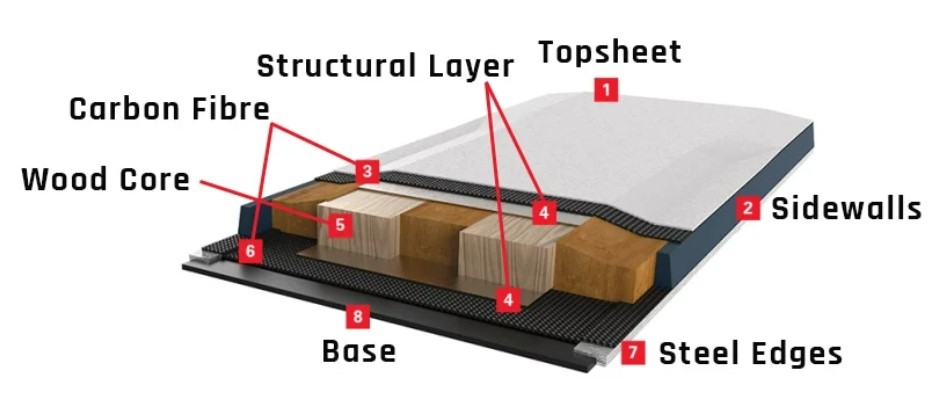
In my case, I will use:
1-A base of PTEG plastic
2-Steel edges
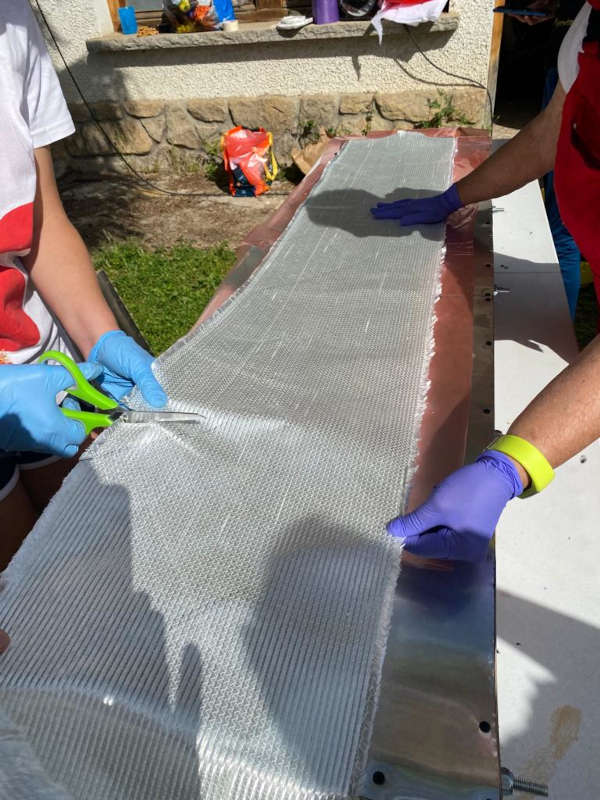
3-A first layer of fiberglass with epoxy resin
4-The wood core
5-A second layer of fiberglass with epoxy
6-Vinyl decoration
All of it has to be put inside a vacuum bag and pressed to have the fibers as close as possible.
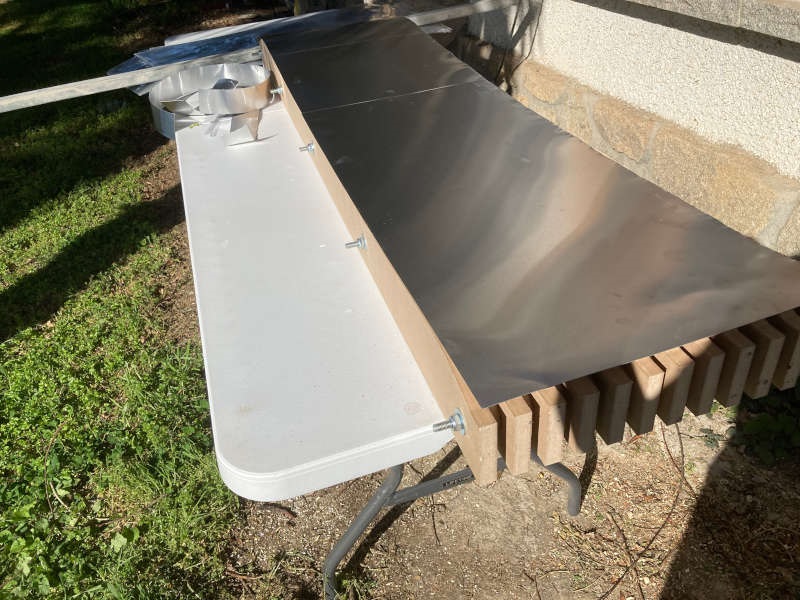
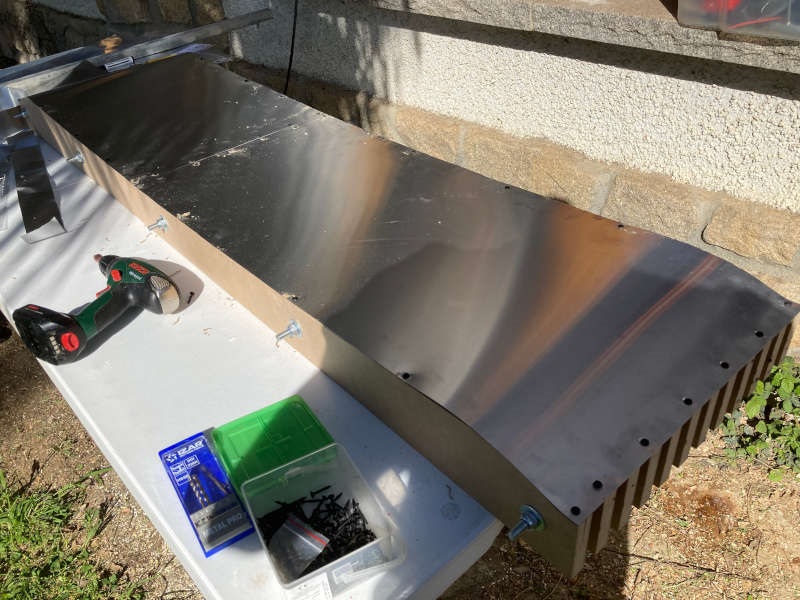
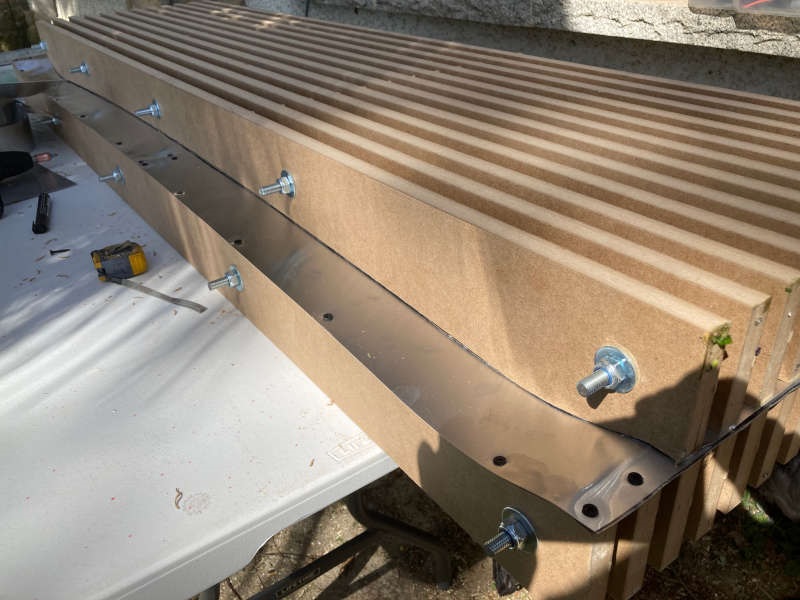
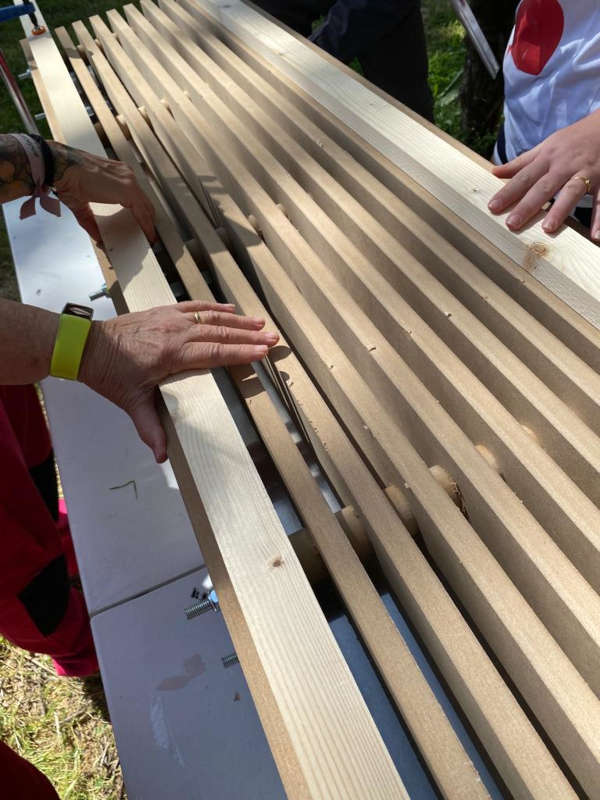
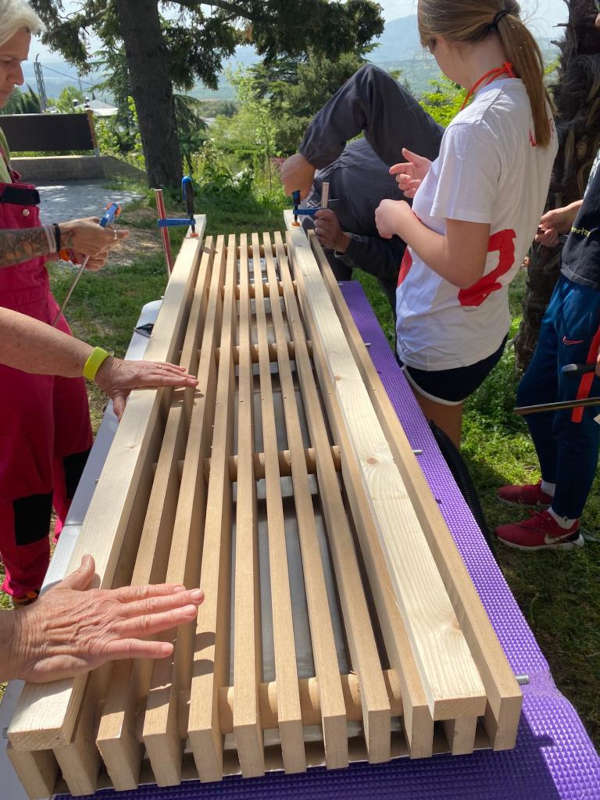
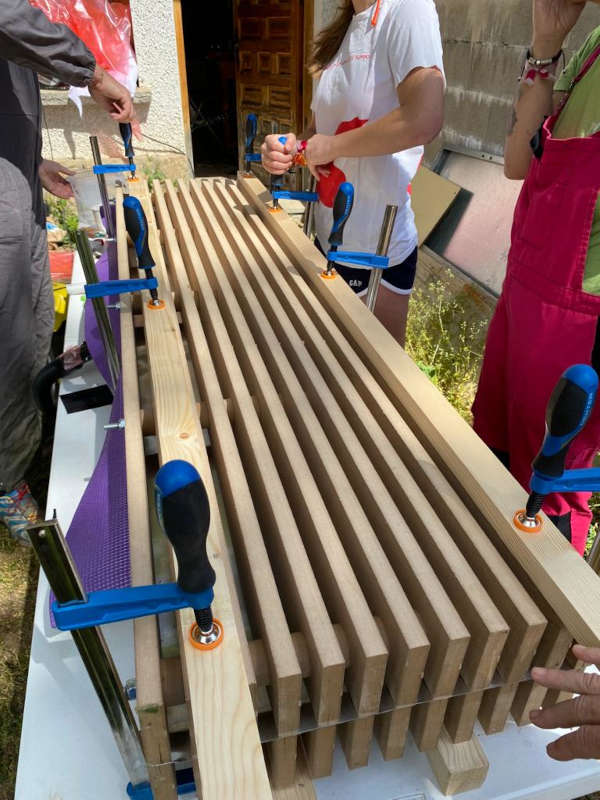
The press
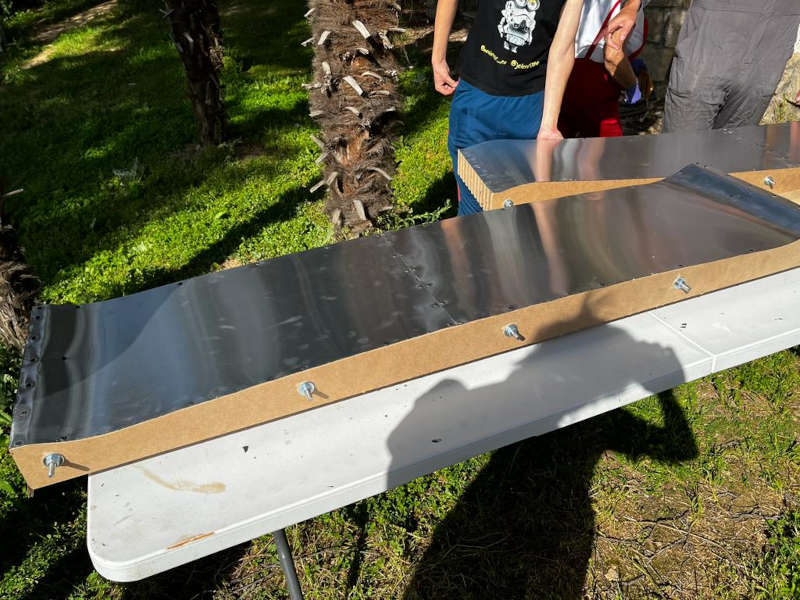
In the CNC week I had made the wooden press with MDF (Details and files here).

After covering it with steel sheets I had the pressed prepared:
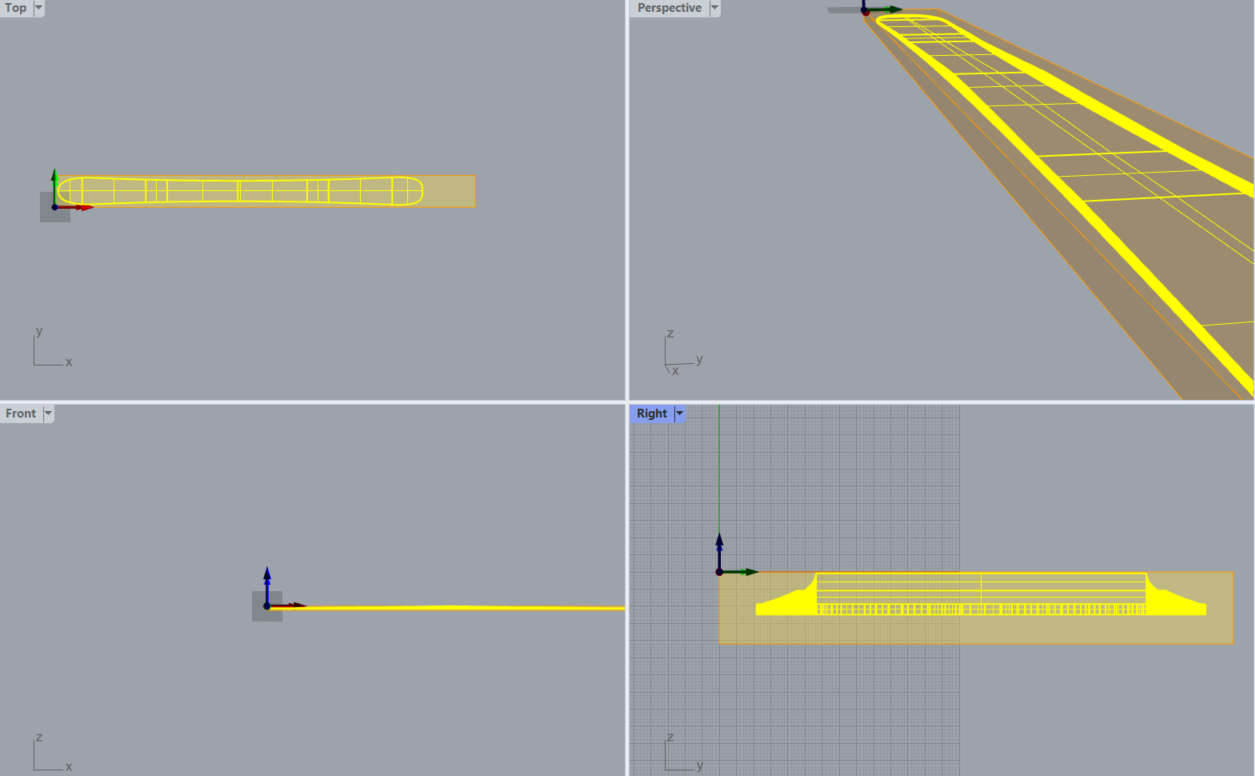
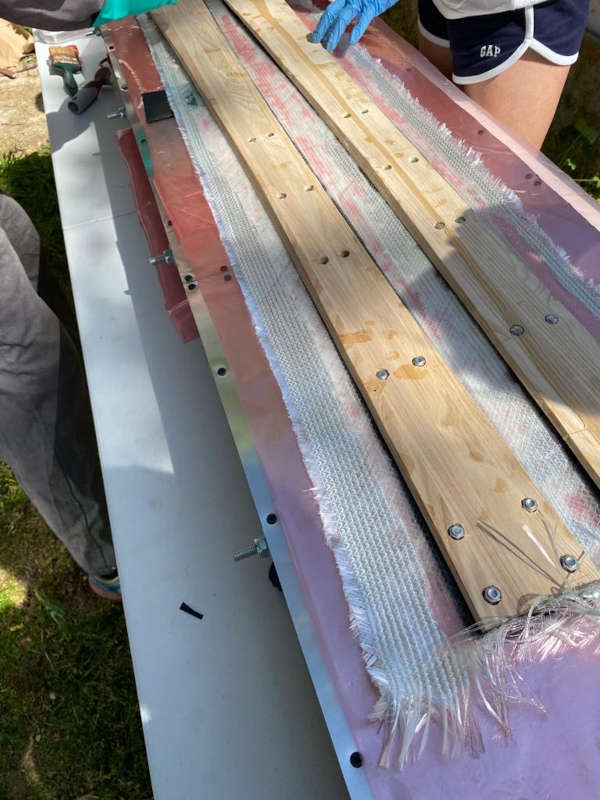
The wooden core
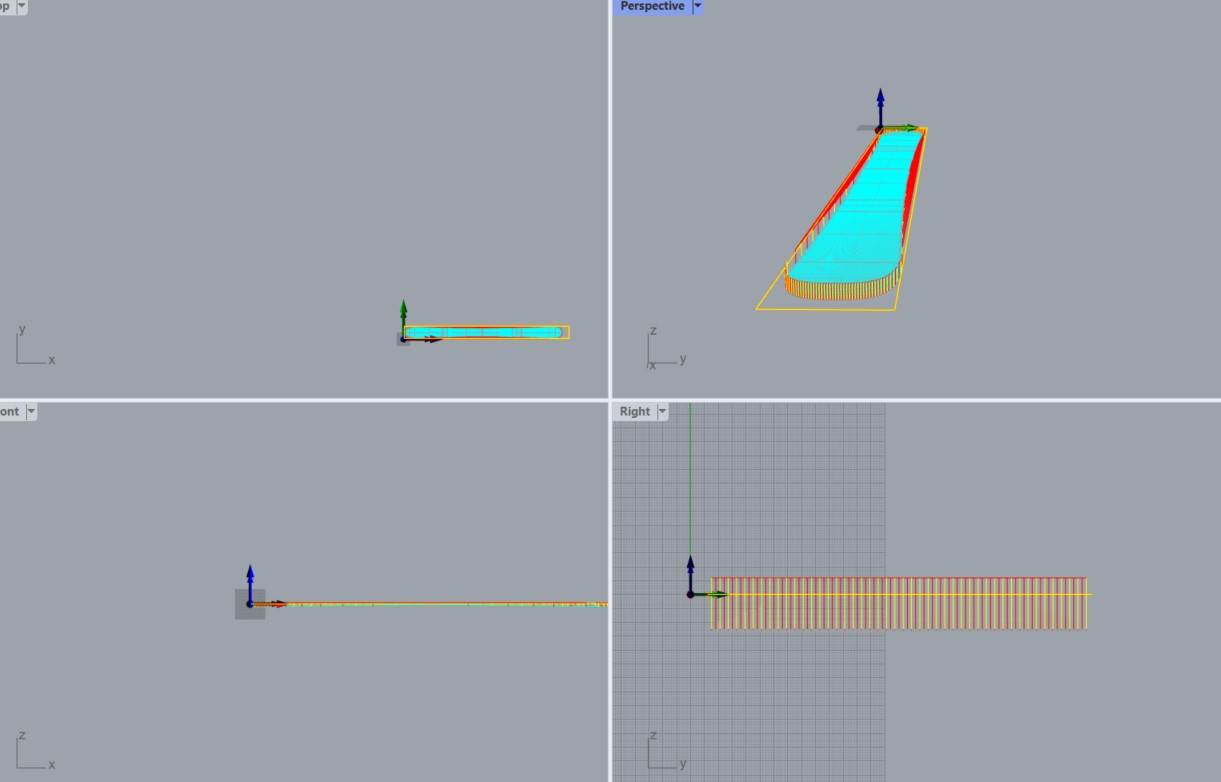
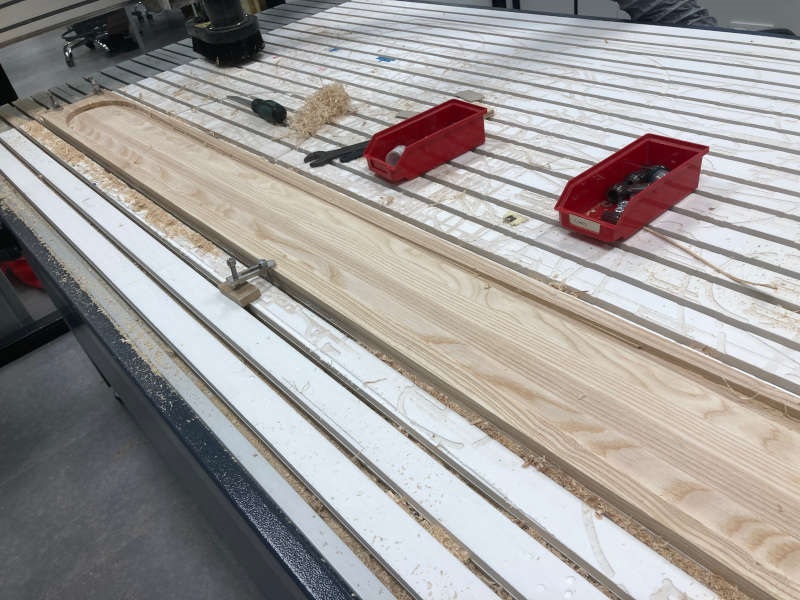
I previously had made the wooden core, also with the CNC machine. I had to do it with 3-axis milling, because the skis are thinner at the ends and thicker on the middle. The material is a laminated plank of ash wood 198 x 15 x 2cm (for each of the skis).
Setting material and model on RhinoCAM:
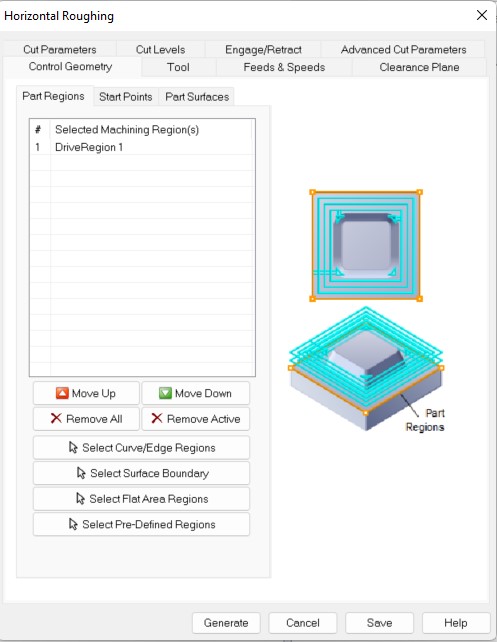
I made an horizontal roughing, a parallel finishing and a profiling.
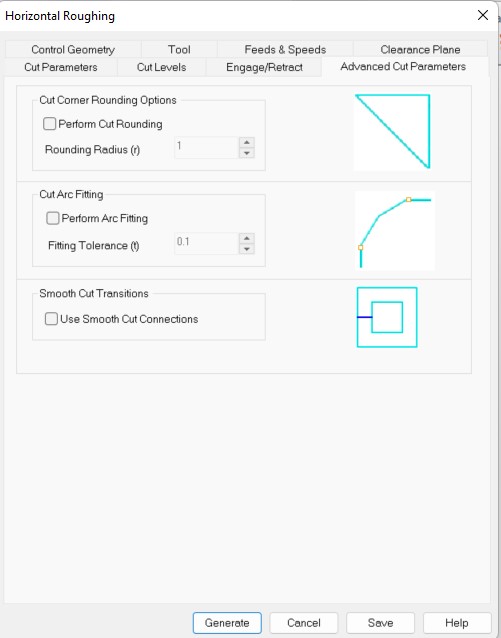
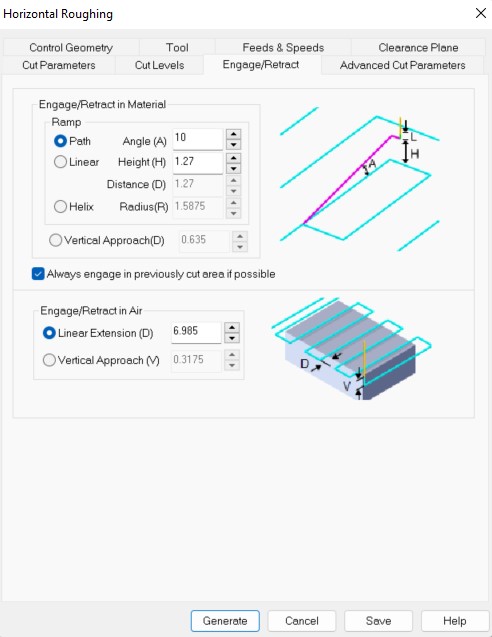
Horizontal roughing:
Here there are the parameters I set up
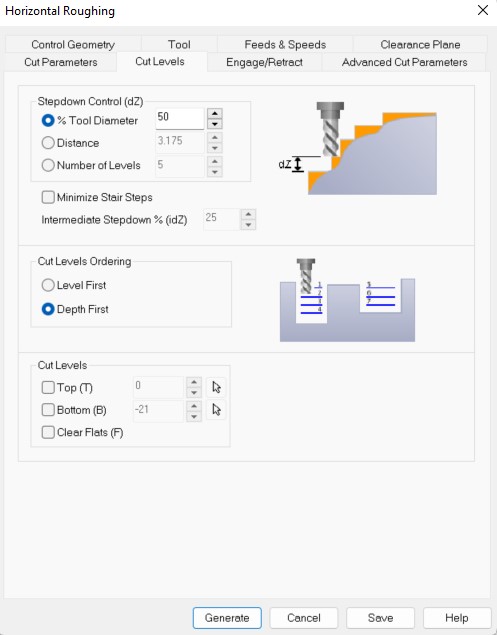
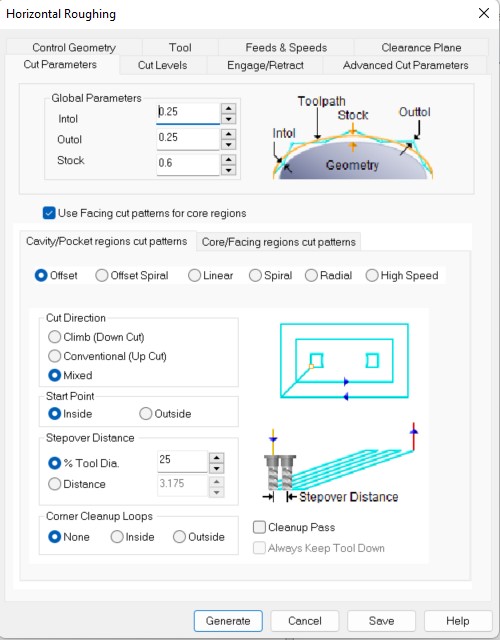
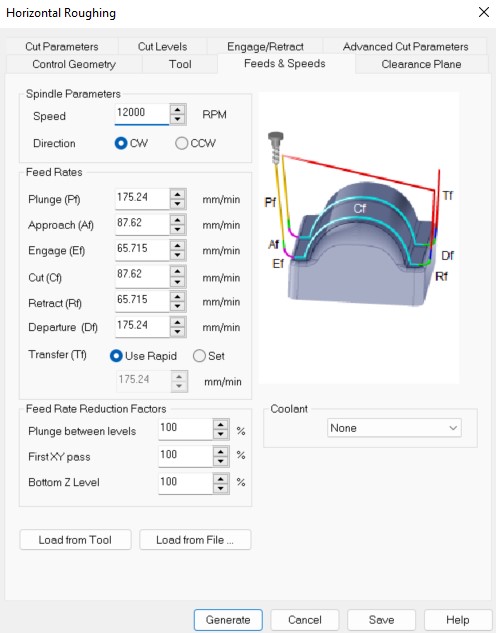
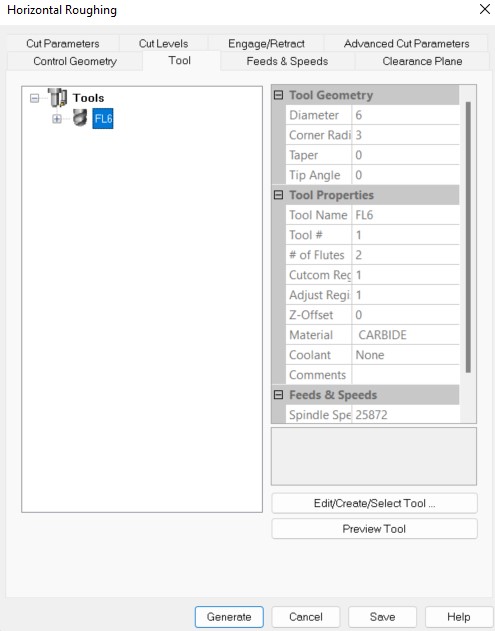
Graphics of the horizontal roughing generation and simulation:
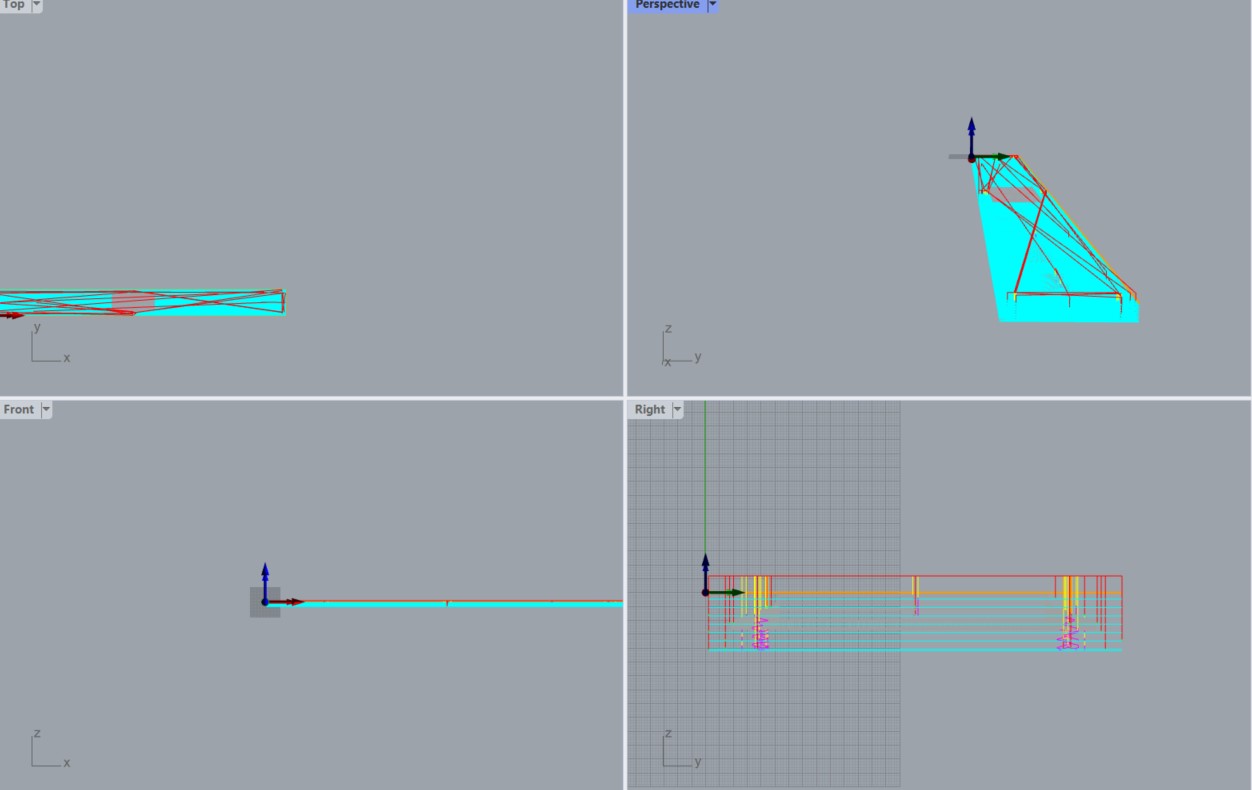

Horizontal roughing result

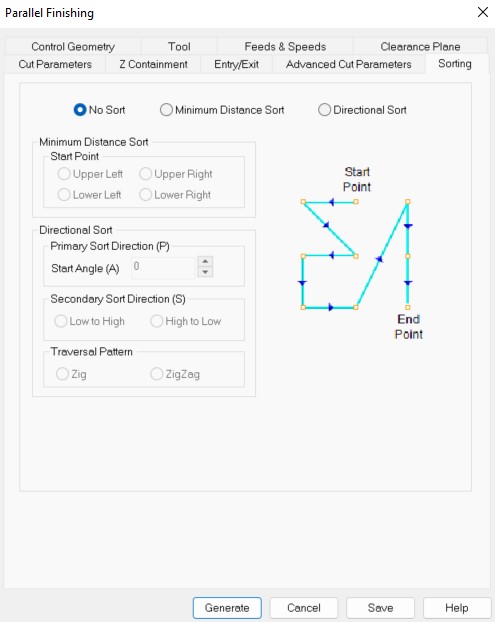
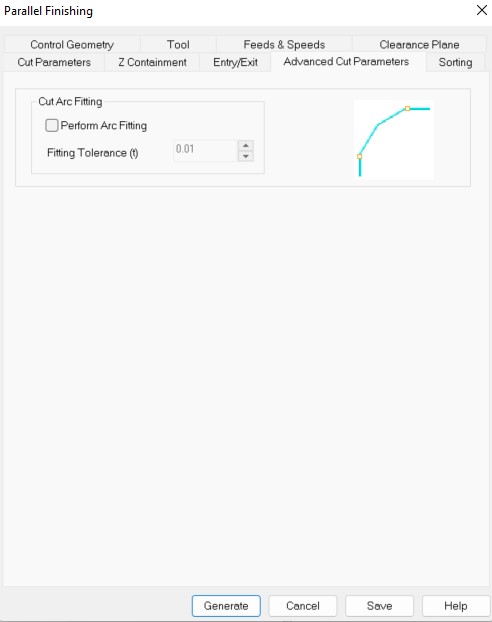
Parallel finishing
Parameters:
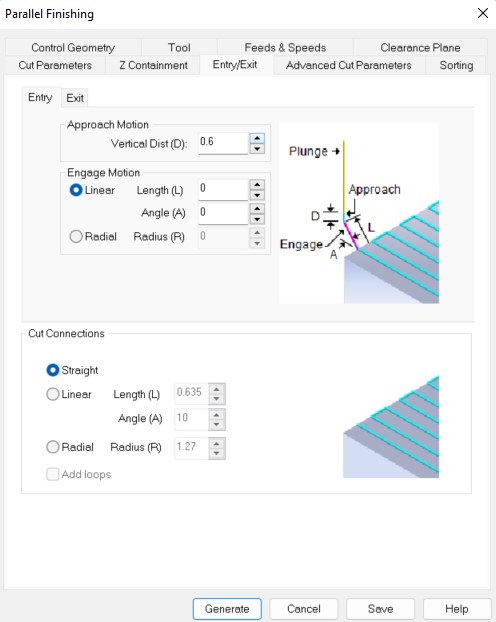
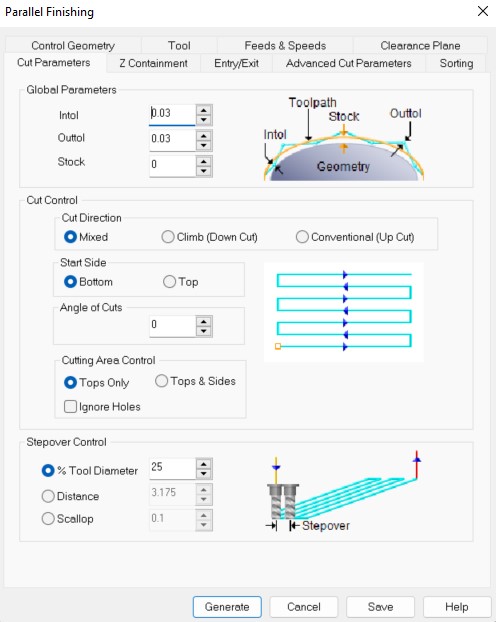
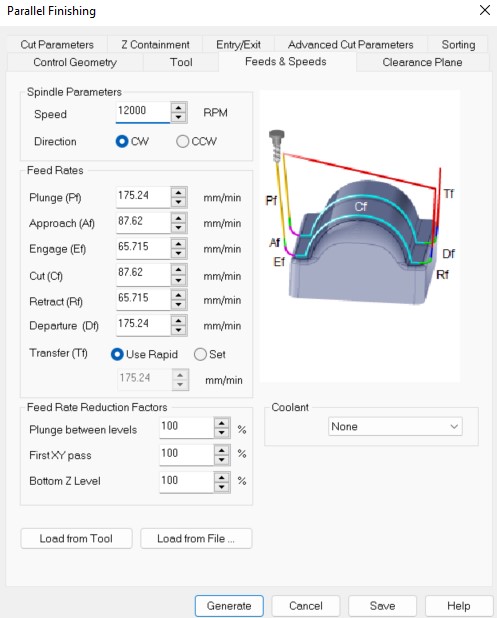
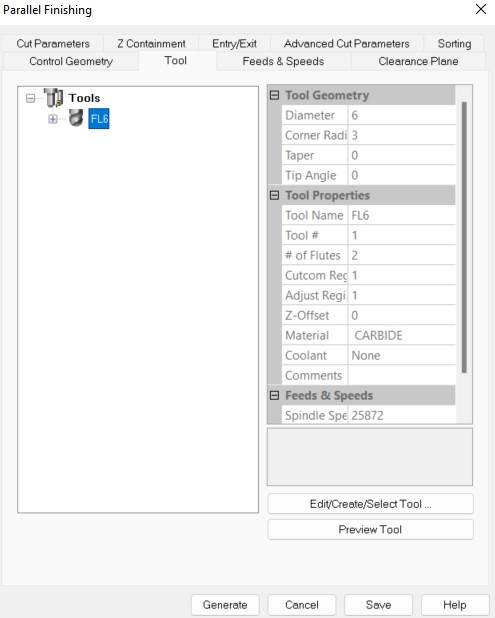
Graphics of the parallel finishing generation and simulation:
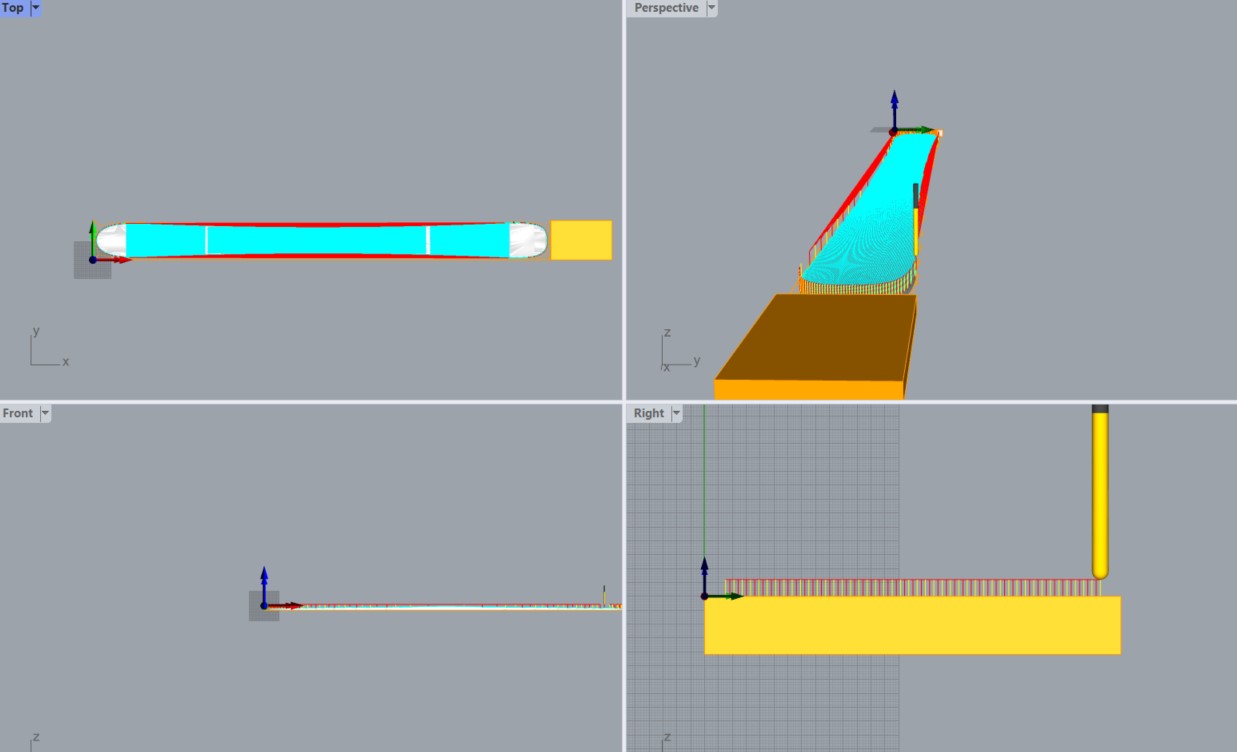
Parallel finishing result
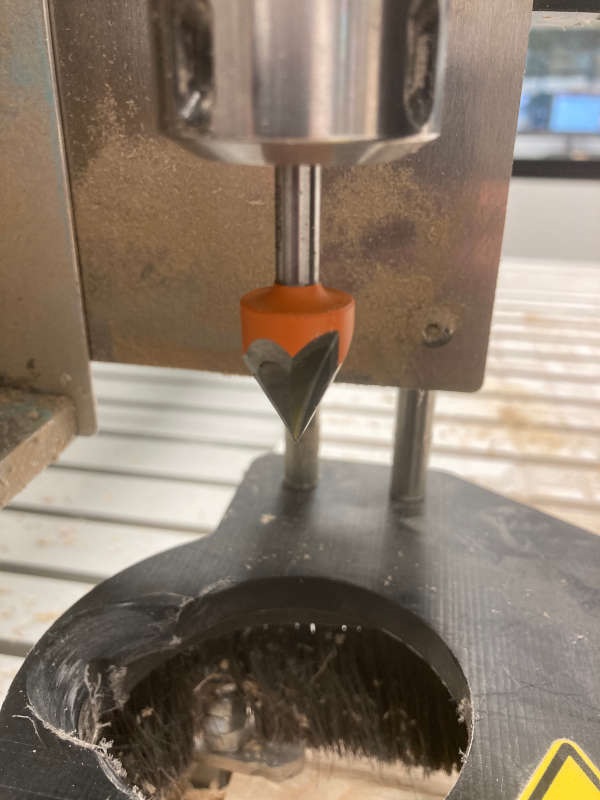
It is also important to use a V-shaped mill for the profiling, so I got an angle along all the edges of the ski.
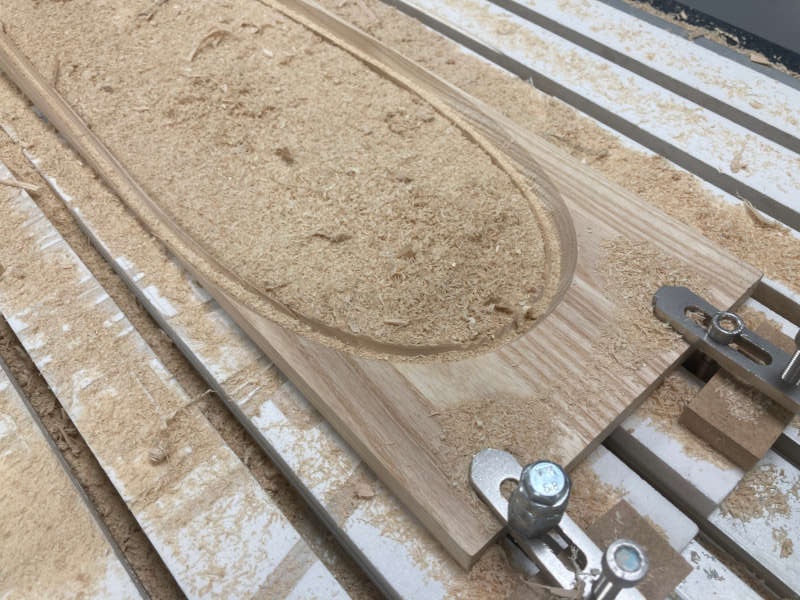
I cut the tails of the skis (30 cm), because that's the place where the electric caterpillar will be.
The file of the ski core can be found here.
I don´t have a vacuum pump, so I will use my vacuum cleaner to do the job.
The epoxy resin work time is 45 minutes, so I had to be quick. It's a difficult task to do it alone, so this time it was going to be a familiar assignment.
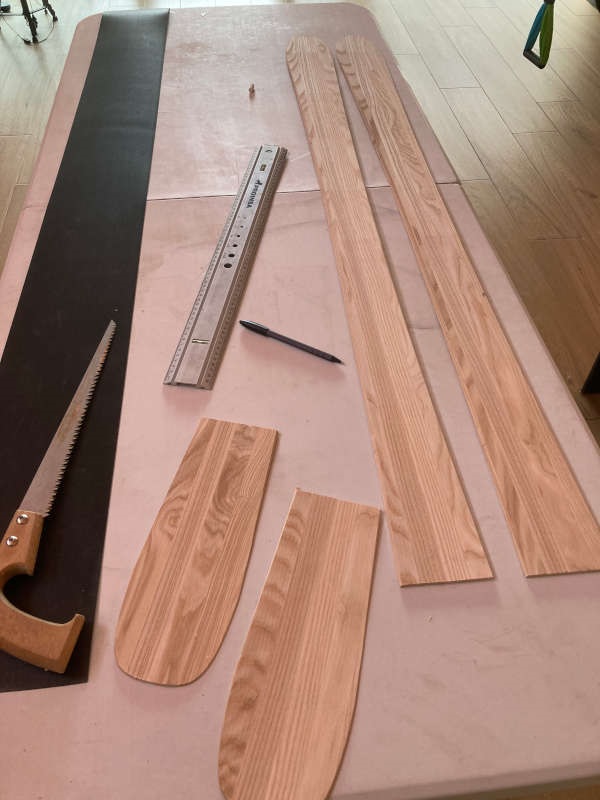
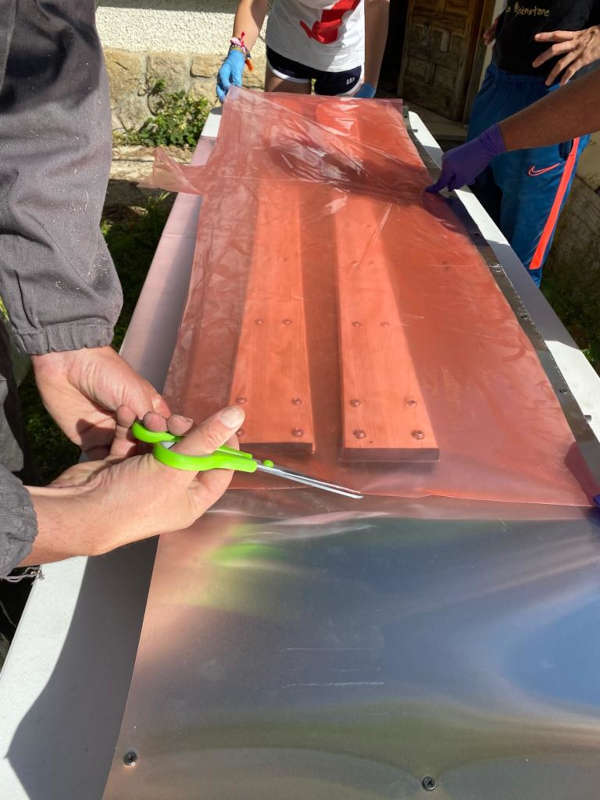
The base and the edges
I cut the PTEG sheets with the ski shape, and glued the steel edges to them:
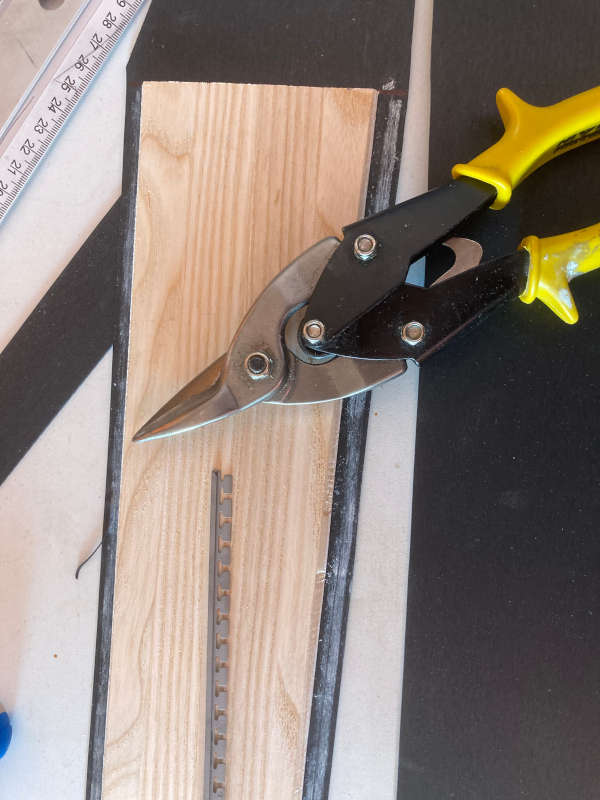
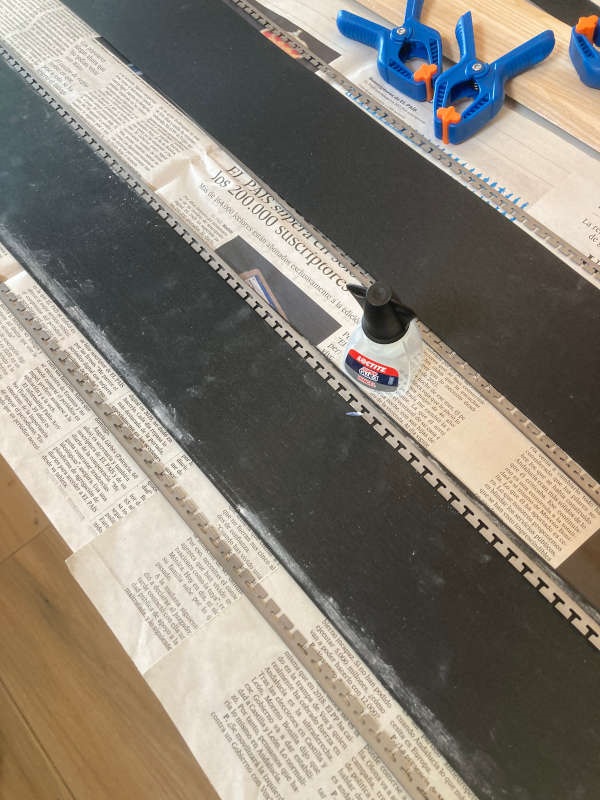
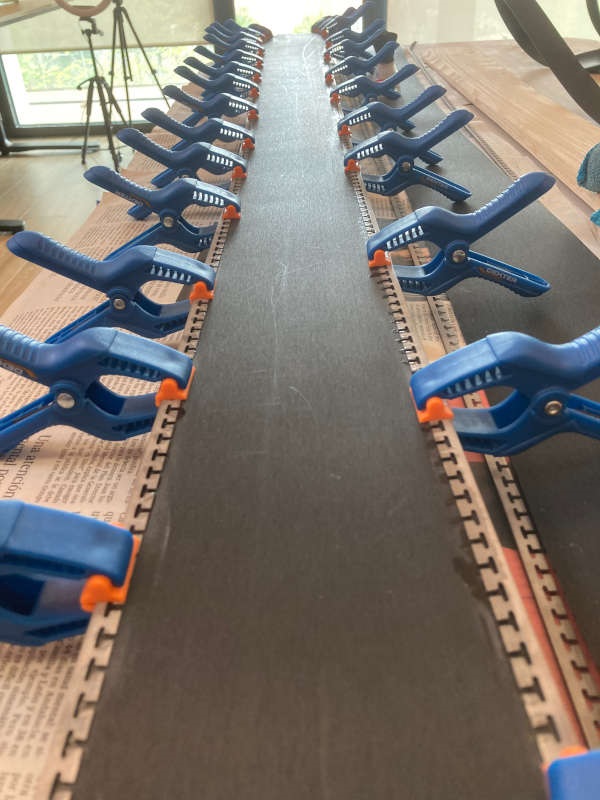
I glued them with cyanoacrylate and held with clamps every 5-10 cm (less space between clamps on the ends and more on the middle).
Preparing the materials
As we only have 45 minutes to work, the materials had to be already cut and prepared to use before mixing the epoxy resin.
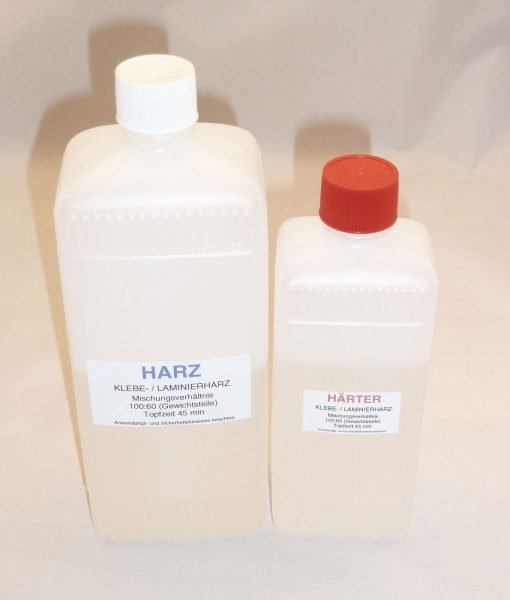
Working time: 45 minutes
Curing time: 14 hours at 20º for the ski to be processed, but 7 days for the final curing and ski use.
Amount: 700-800 gr per pair of skis (recommended to have 1Kg, 625 g resin / 375 g hardener)
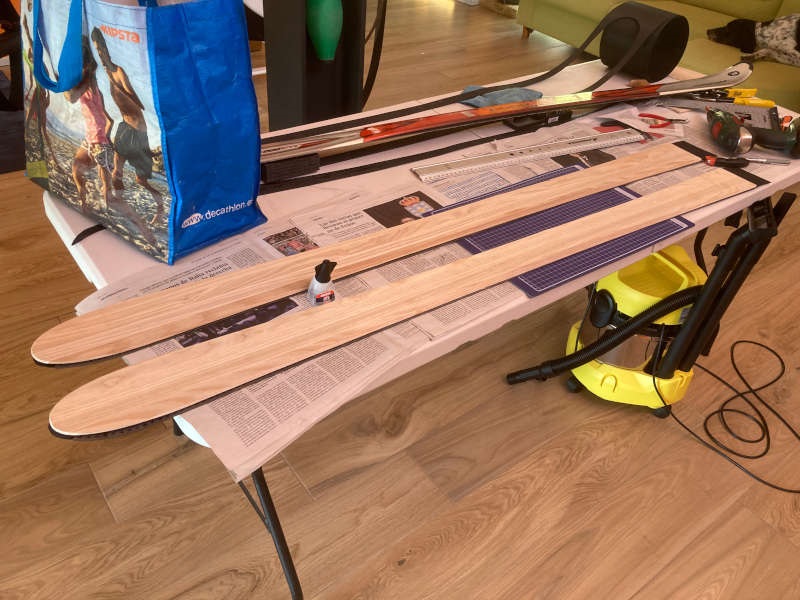
We found a well balance place to put the press. Then we cut the fiberglass and the cotton cloth to the length of the skies. After that we prepared the vinyl logo and made the vacuum plastic bag, taking into account that we had to leave a "plastic tube" to insert the vacuum cleaner.
Making the sandwich layers
We had two options: to make the "sandwich" apart and put it into the vacuum bag and then on to the press or to make it just on the top of the press. We decided to make the second one, because we thought it could be difficult to move everything. The con is that the vacuum plastic bag has to be done one the fly.
So the list of tasks was:
1-To put the bottom of the vacuum plastic bag on the press.
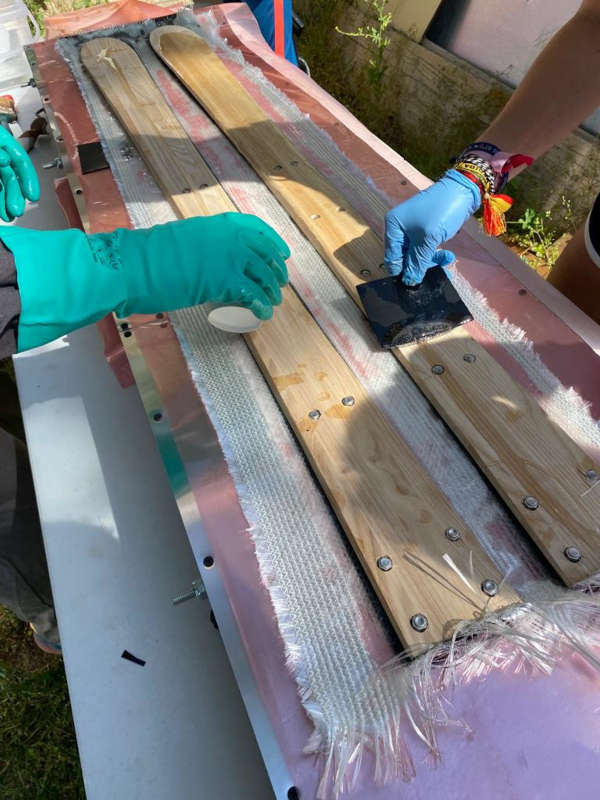
2-To put the PTEG black base on it.
3-To mix the Epoxy resin. Clock starts counting 45 minutes (work time of the epoxy)
4-To apply a first layer of epoxy resin
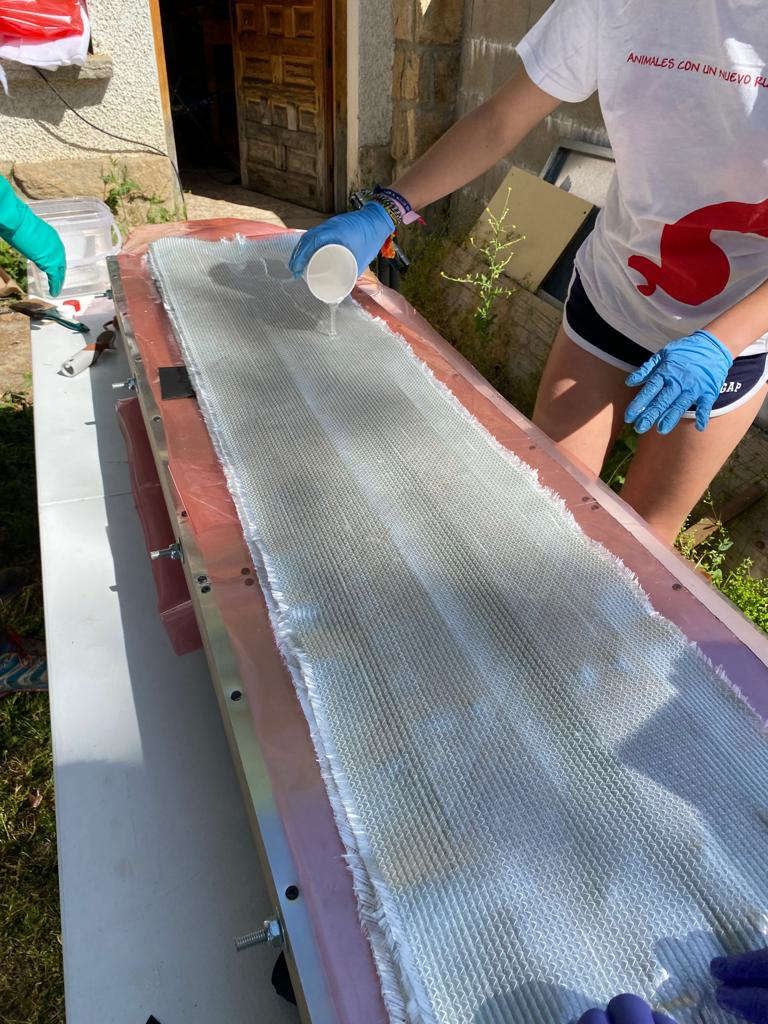
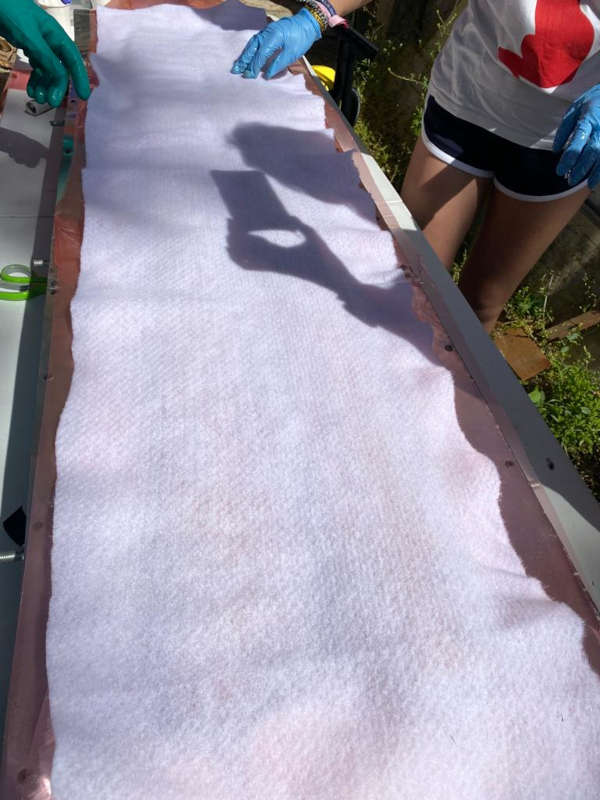
5-To put the first fiberglass sheet
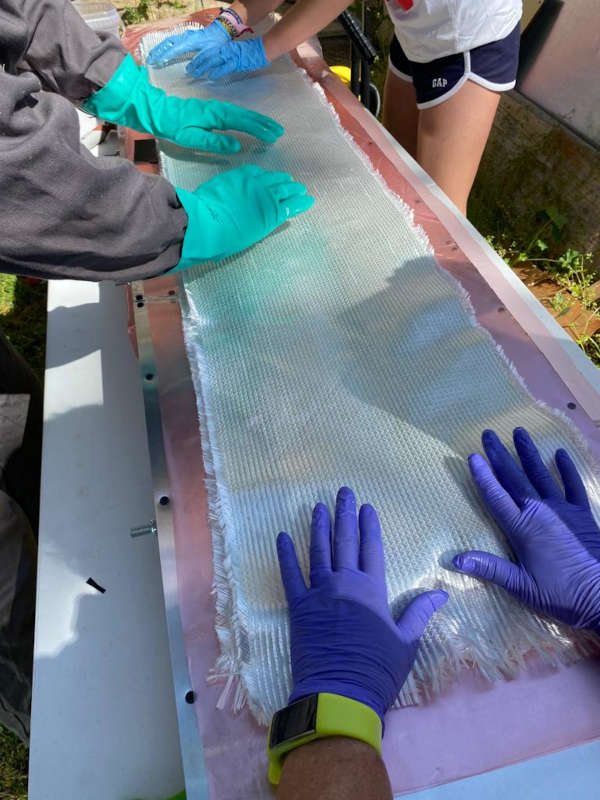
6-To apply a layer of epoxy resin on the fiberglass, until it is transparent.
7-To put the wood core of the skis, adjusting it to the base.
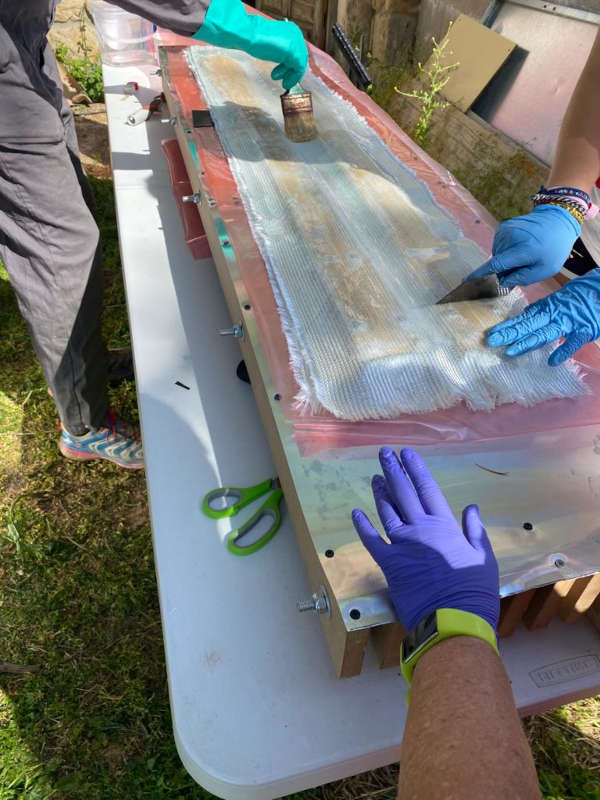
8-To apply another layer of epoxy.
9-To put the second fiberglass sheet.
10-Epoxy again until it is transparent
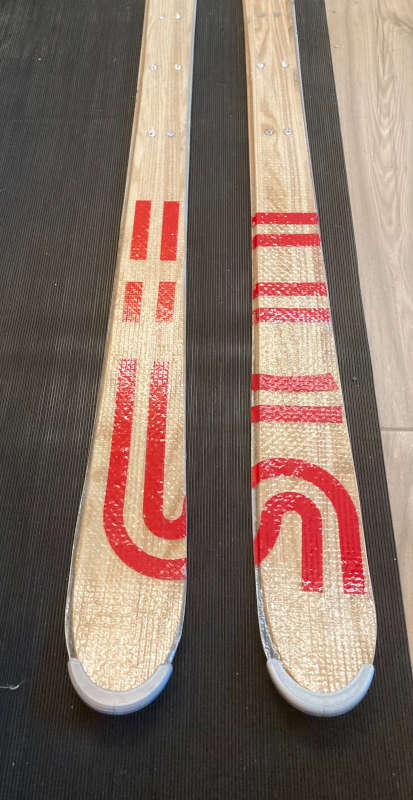
11-The vinyl logo. This was a mistake, because trying to put the vinyl logo on the epoxy was very difficult. It would have been much better to put it on the wooden core. I thought the epoxy resin wasn't going to be so transparent. Because of that I decided to put it on the top. But once I saw the final result, it's clear that it would have been better the other way.
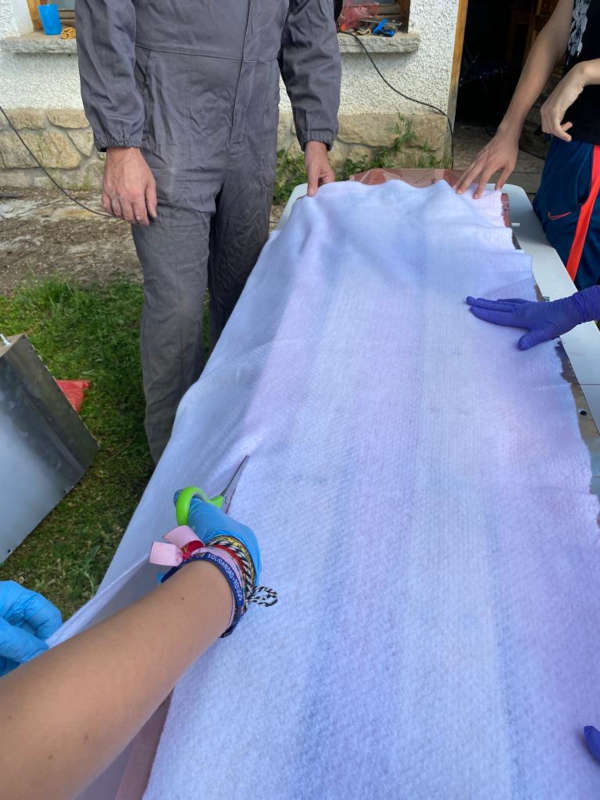
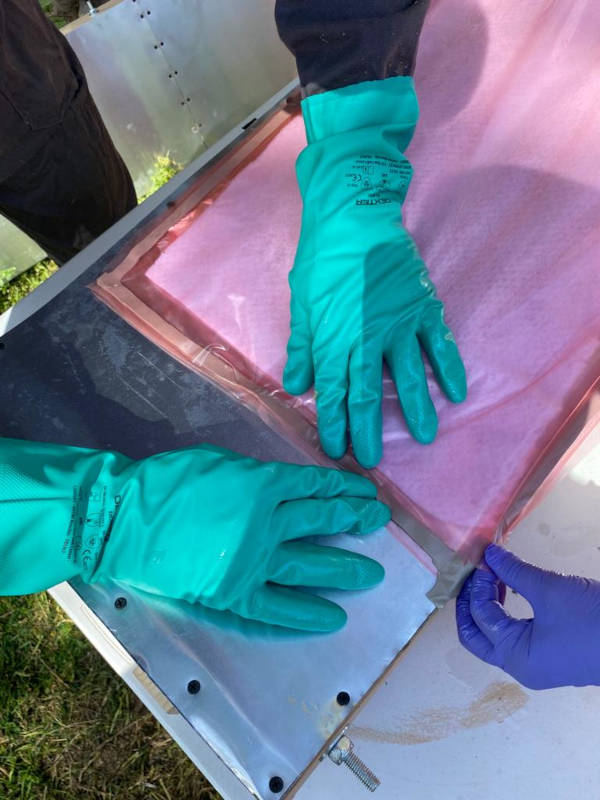
12-A polyethylene sheet. With this we avoid the epoxy resin to stick.
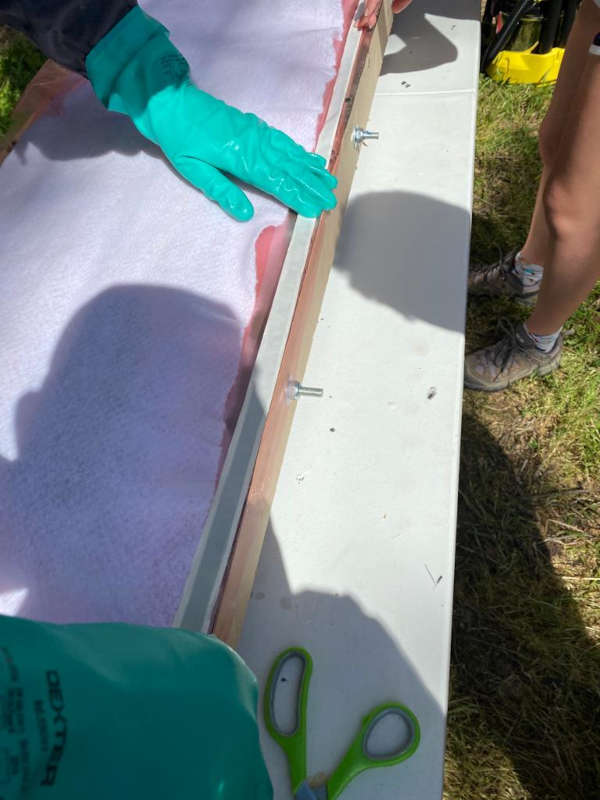
13-A cotton cloth to absorb the excess of resin once it is compressed.
14-After that we put sealant tape on the border of the plastic bag
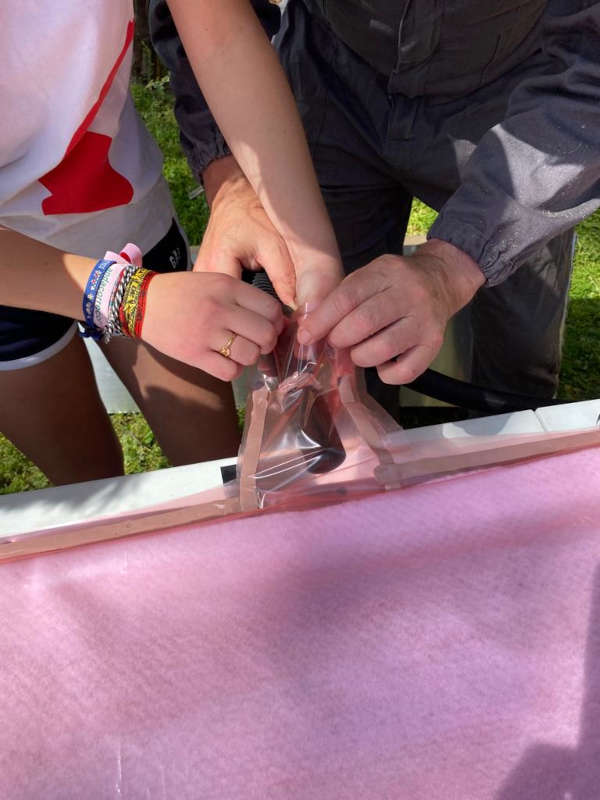
15-To put the top of the plastic bag to make the vacuum bag, adjusting the tube of the vacuum cleaner with sealant and duct tape.
16-To turn on the vacuum cleaner and check the air is going out.
17-To put a rubber mat on the top, so the pressure is well distributed.
18-To put the top of the press and hold it with steel bar clamps.
19-To wait 24h to open the press. I didn't know how much time to wait. But taking into account that the working time of the epoxy is 45 min, I assumed that in 24h it has to be completely hard. A good tip is to check the remains of resin on the bucket to check its hardness.
After having everything ready, we mixed the epoxy resin and began to put the layers:
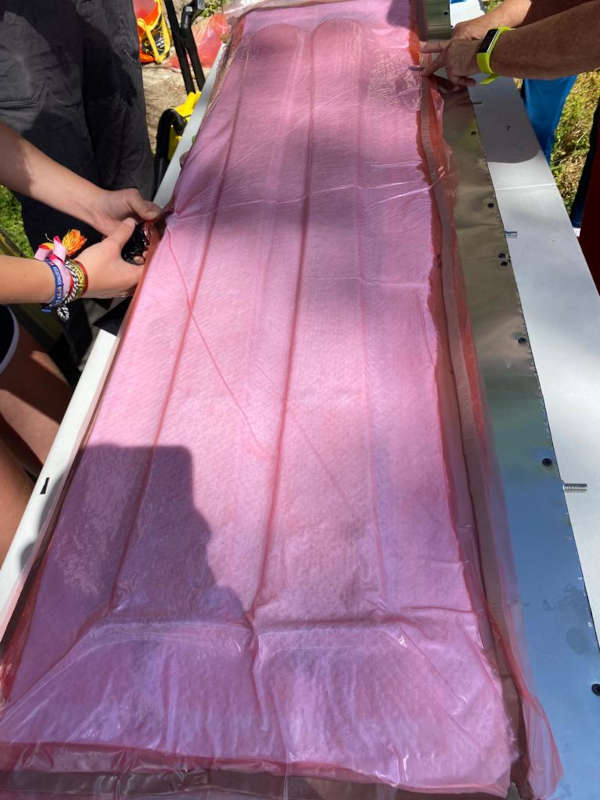
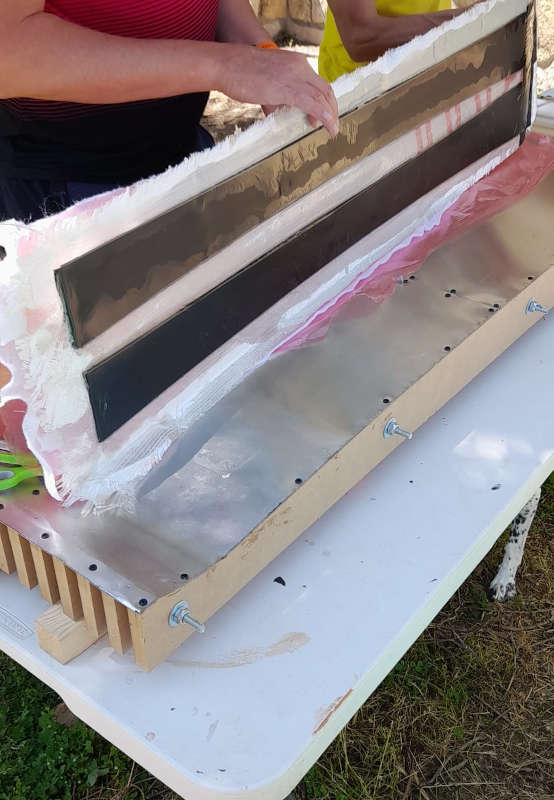
Putting everything inside the press:
Opening the press
I opened the press next day, 24h later of closing it.
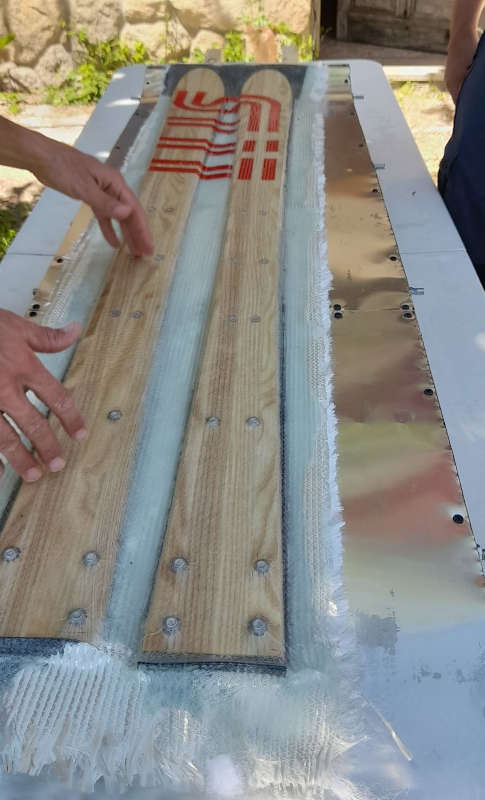
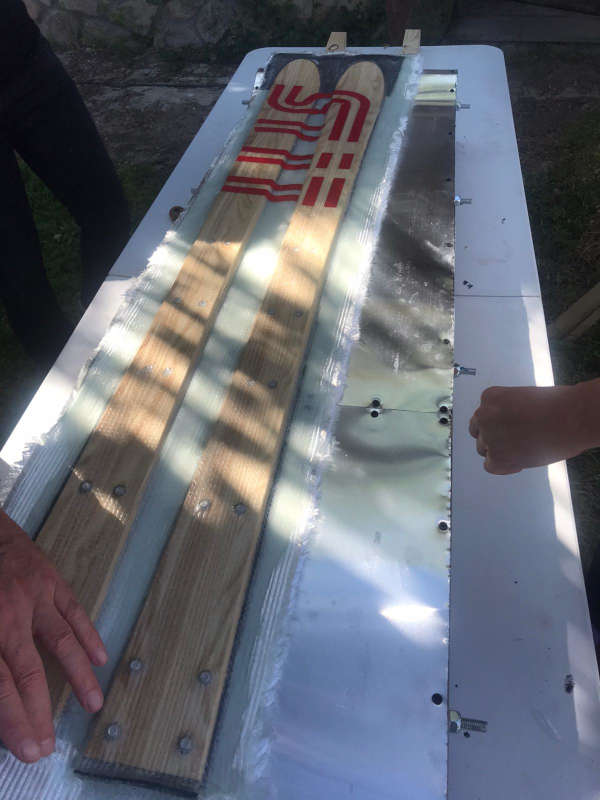
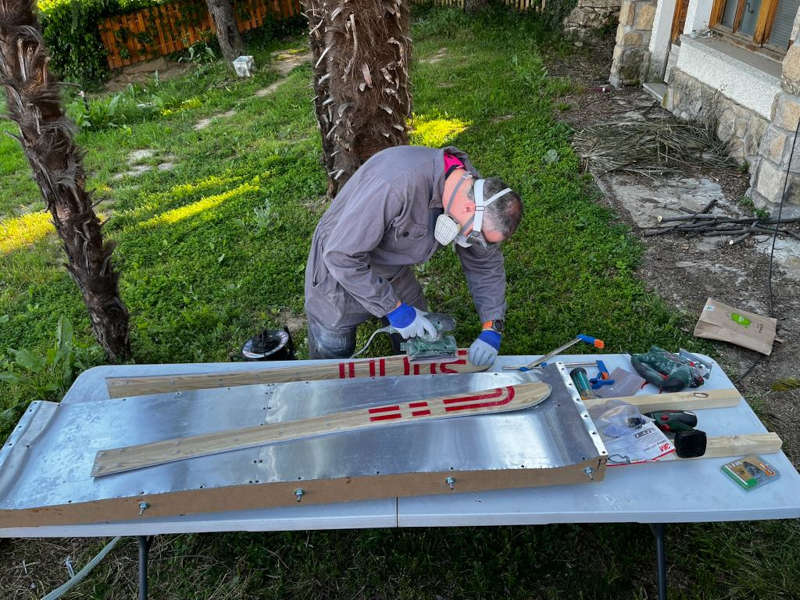
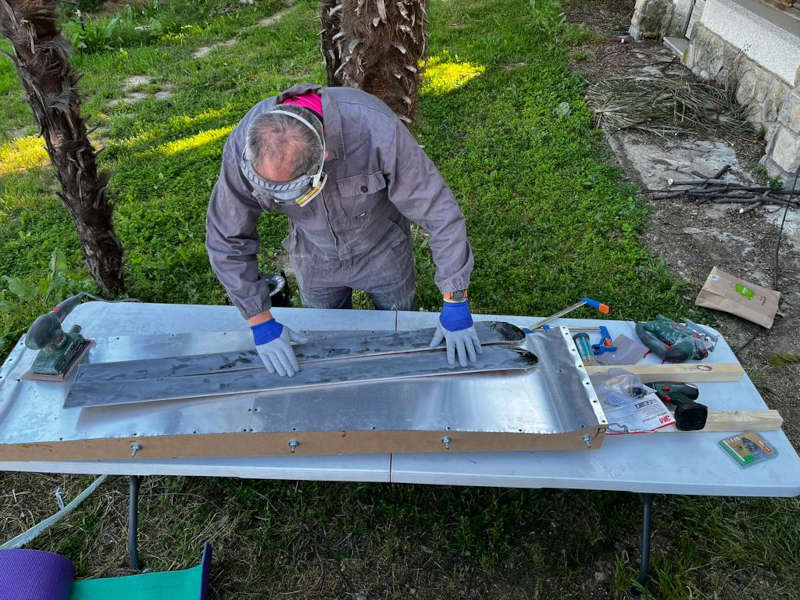
After opening the press I had to cut the shape of the skies with a jigsaw. The steel edges of the ski are very useful to support the blade and cut on the line, but you have to be careful to avoid cutting the edges. Finally I sanded the edges and the bottom of the skies, as they had some epoxy resin on them.


Finally I 3D printed 2 tip protectors:
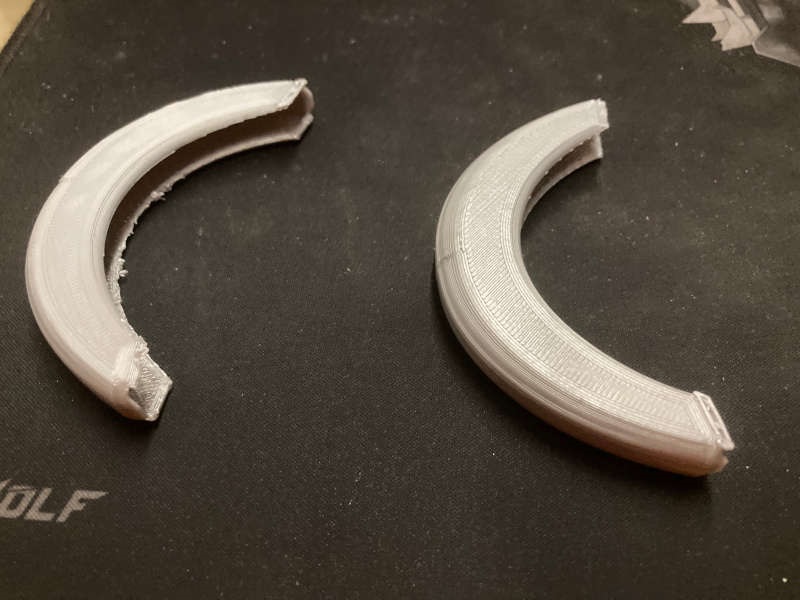
Here is the .stl file of the tip protectors.
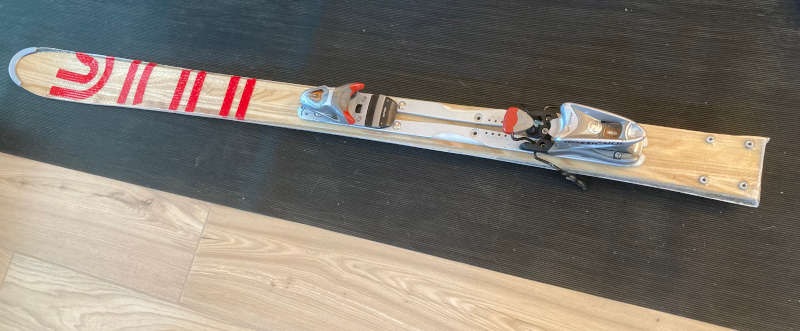
Final result
The result was quite good.The fibers were apparently very tight, and the pattern of the cotton cloth was printed on the surface. .
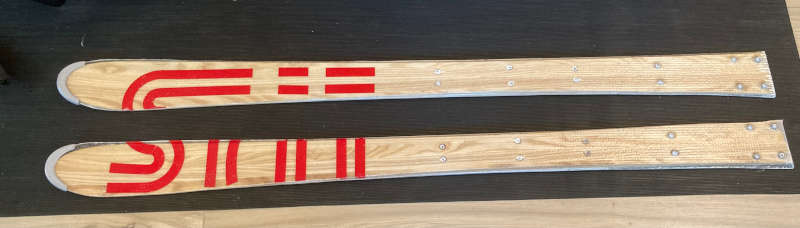
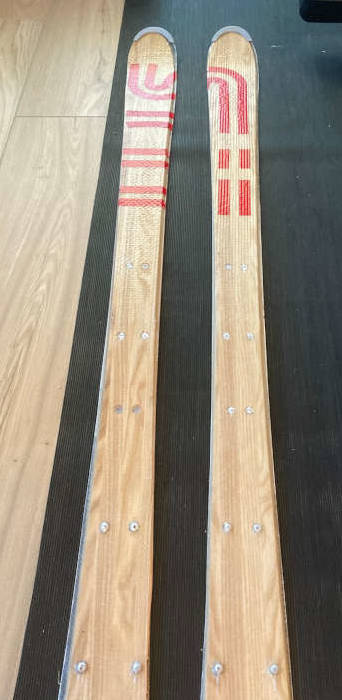
I fixed the bindings to the ski, and they fitted perfectly.
Problems I found
As the time is limited by the working time of the epoxy resin, problems found during the process have to be solved quickly.
The main problem is that the different layers can move during the process so they don't fit properly.
1-When we put the first fiberglass layer it moved forward, so it didn't reach the tail of the ski. We had to get it up quickly and put down again (with the fiberglass already wet with resin).
2-Something similar happened with the vacuum bag. It moved during the process and when we folded it didn't reach the other end. We had to cut another cover for the vacuum bag (and to do it quickly).
3-The pressure I got with the press was really high, so small irregularities of the press and material got marked on the base of the ski. So it can be useful to put another rubber mat below the skis.
So learnings here are to let enough letfover material at both ends of the skis, so you don't have problems during the process.
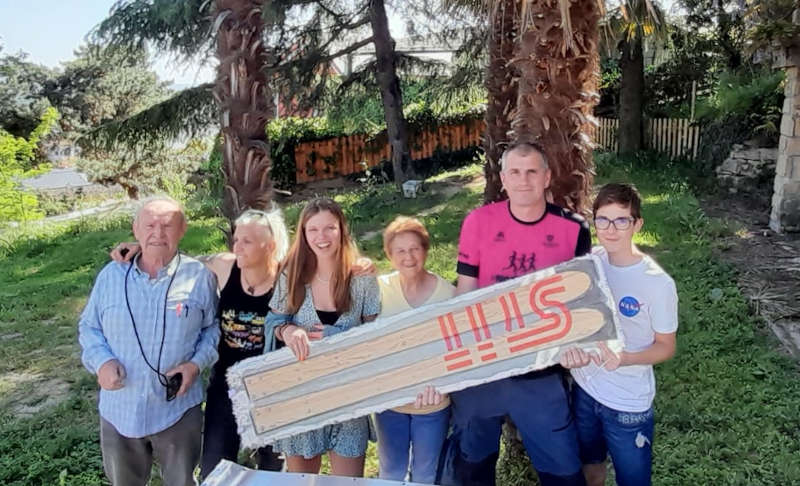
As I told you, this time it was a family assignment. Thank you Alberto, Gadea, Luis, Elena (mother) and my wife Elena. Without you it wouldn't have been possible.