9. Embedded programming
At this time we still do not have the Fab Lab installed, we will work on this assignment until the preview. We are from the MINEDU-Peru project.
Group assignment 
Compare the performance and development workflows for other architectures.
For this experience we will compare the ATMEGA 328P microcontroller, used in Arduino with the PIC 16F877 microcontroller.
Arduino Is a free software and hardware development company, as well as an international community that designs and manufactures hardware development boards to build digital devices and interactive devices that can detect and control real-world objects. (Wikipedia).
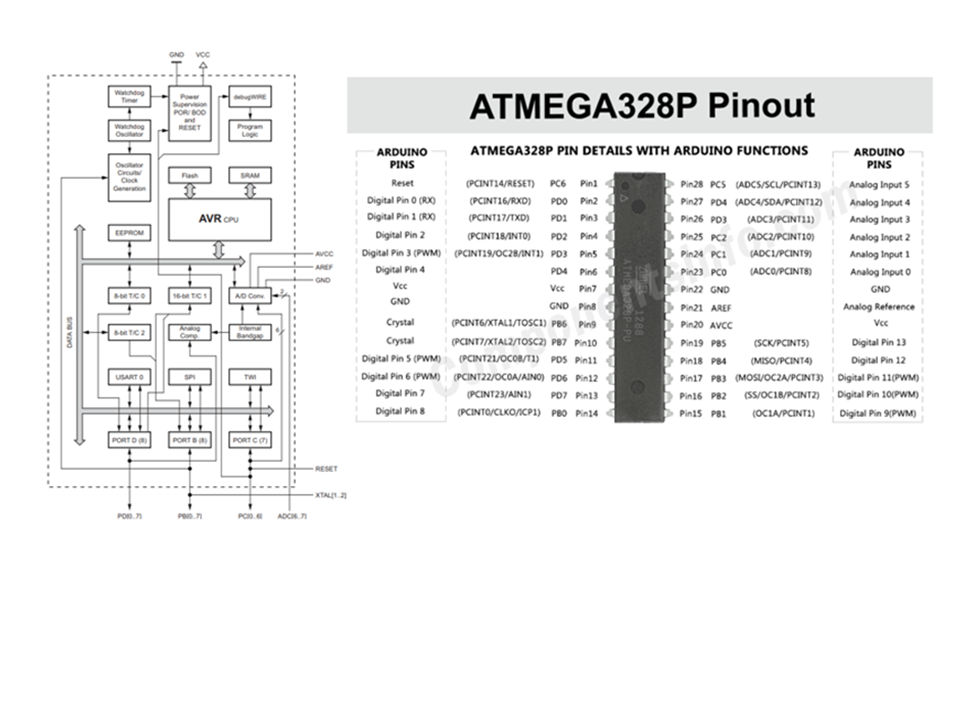
Features of the ATMEGA 328P microcontroller used in Arduino
Taking as a reference the manufacturer’s data sheet we summarize the following:
- Microcontroller manufactured by the company ATMEL.
- High performance, low power AVR 8-bit microcontroller
- Advanced RISC architecture
- 131 powerful instructions – most single clock cycle execution
- Fully static operation
- On-chip 2-cycle multiplier
- Microcontroller combines 32 KB ISP Flash memory with read-while-write capabilities.
- 1024B EEPROM, 2 KB SRAM, 23 general purpose I/O lines, 32 general purpose working registers.
- Three flexible timer/counters with compare modes, internal and external interrupts.
- Serial programmable USART, a byte-oriented Two-Wire serial interface.
- SPI serial port.
- 6-channel 10-bit A/D converter (8-channels in TQFP and QFN/MLF packages).
- Six PWM channels.
- Programmable watchdog timer with internal oscillator, and five software selectable power saving modes.
- The device operates between 1.8-5.5 volts.
- By executing powerful instructions in a single clock cycle, the device achieves throughputs approaching one MIPS per MHz, balancing power consumption and processing speed.
- Speed grade:
- 0 to 8MHz at 2.7 to 5.5V (automotive temperature range: –40°C to +125°C)
- 0 to 16MHz at 4.5 to 5.5V (automotive temperature range: –40°C to +125°C).
Programming Software
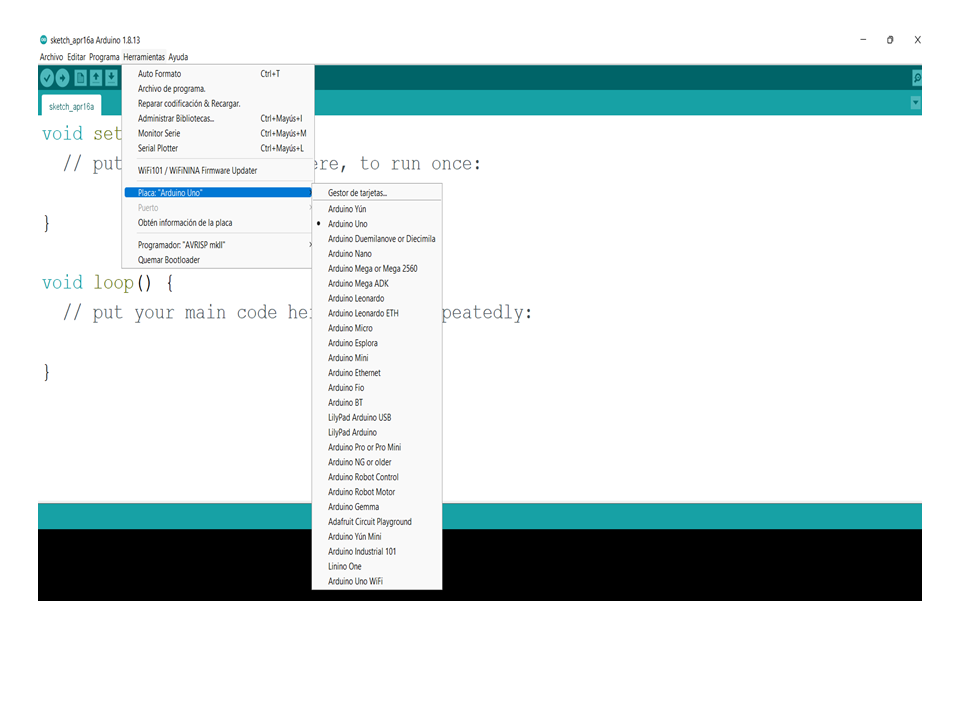
To start programming the Arduino board it is necessary to download an IDE (Integrated Development Environment).
The IDE is a set of software tools that allow programmers to develop and record all the code necessary to make our Arduino work as we want. The Arduino IDE allows us to write, debug, edit and record our program (called “sketches” in the Arduino world) in an extremely simple way, in large part to this is due to the success of Arduino, to its accessibility.
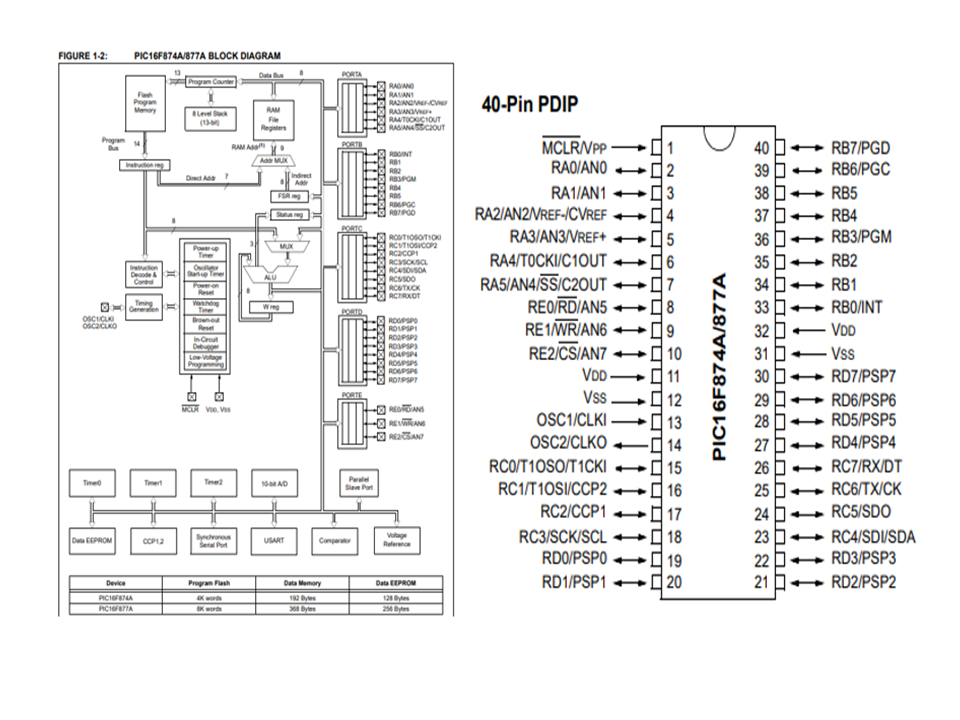
Microcontrolled system based on el PIC 16f877A
The family of microcontrollers known as PIC is also manufactured by the company Microchip.
The microcontroller chosen for comparison this time is the PIC 16F877A, because it is the one, we have at hand.
Characteristics of the microcontroller taking reference to the data sheet.
High-Performance RISC CPU:
- Only 35 single-word instructions to learn
- All single-cycle instructions except for program branches, which are two-cycle
- Operating speed: DC – 20 MHz clock input DC – 200 ns instruction cycle
- Up to 8K x 14 words of Flash Program Memory, Up to 368 x 8 bytes of Data Memory (RAM), Up to 256 x 8 bytes of EEPROM Data Memory.
- Two Capture, Compare, PWM modules
- 10-bit, up to 8-channel Analog-to-Digital Converter (A/D).
- Wide operating voltage range (2.0V to 5.5V).
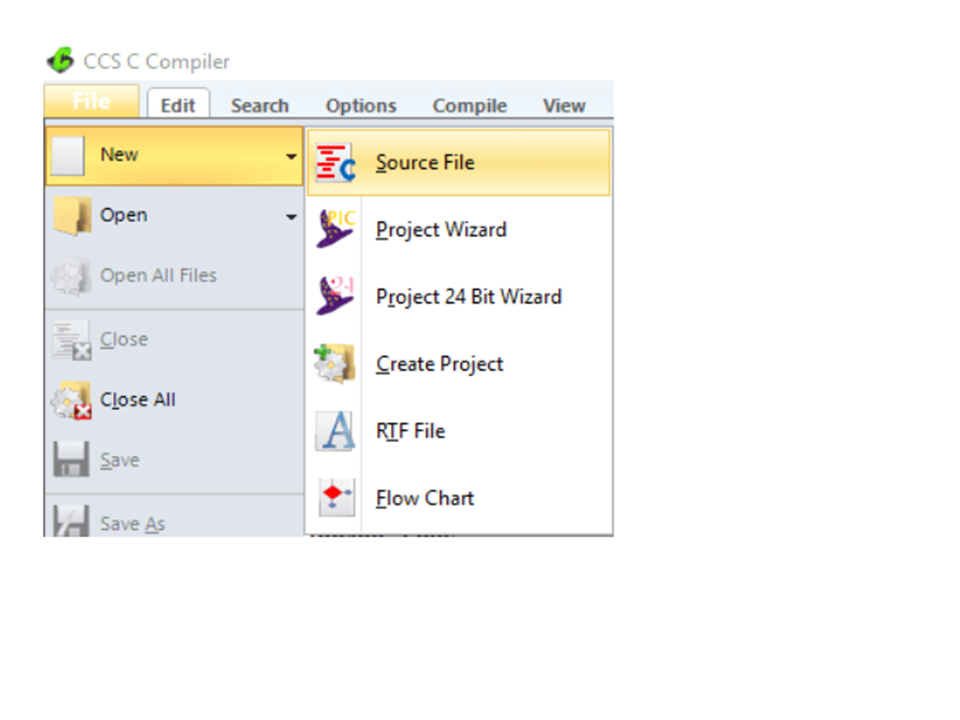
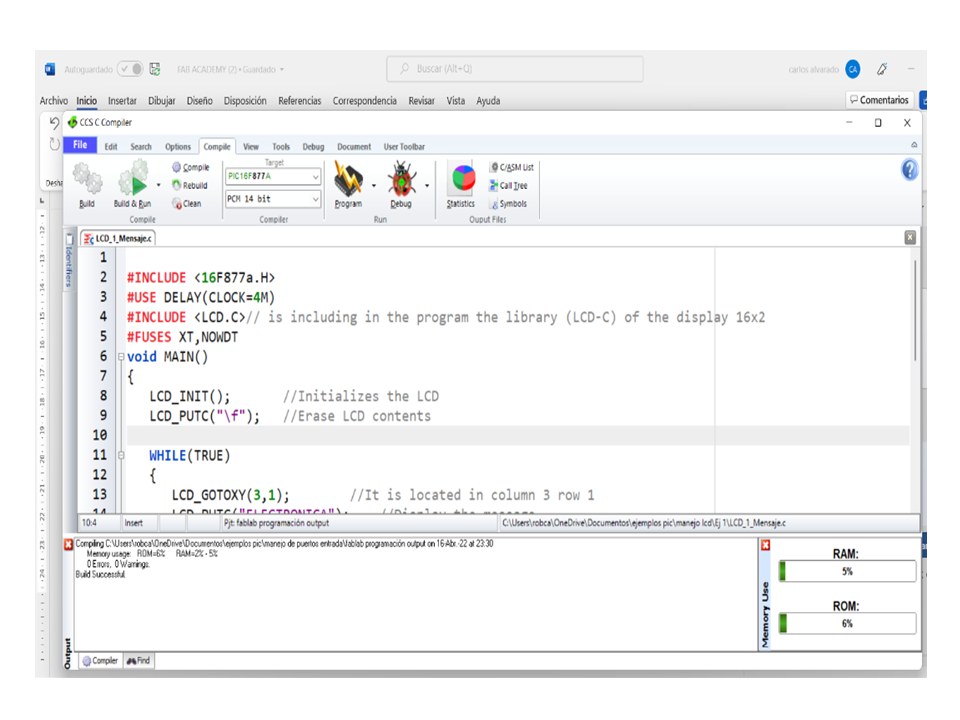
Programming Software To carry out the programming of the PIC family there are several software, the one we will mention on this occasion is the PIC C COMPILER. It is a software designed for programming PIC microcontrollers. It has a wide variety of PIC devices compatible with the software.
Creating a new Project Once the software is installed, to create a new project, go to the top left of the program window, select File, click New and Source File.
It will be displayed to the next window, assign the name of the project and the path in which it will be located. Once configured click on Save.
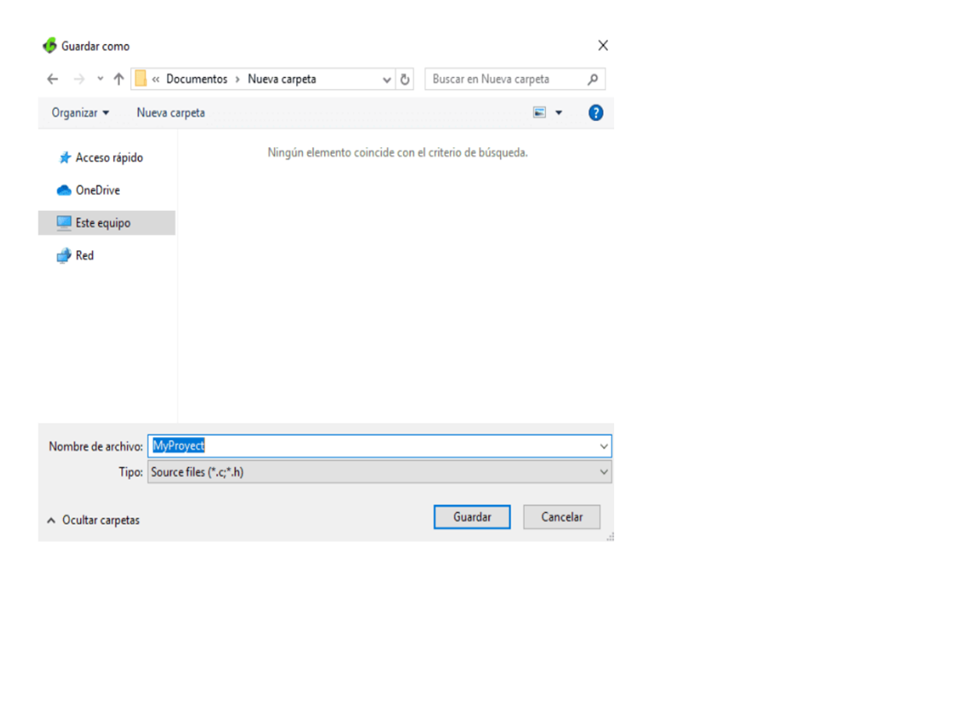
Once the project is created, the next window will be displayed where you will start writing the code.
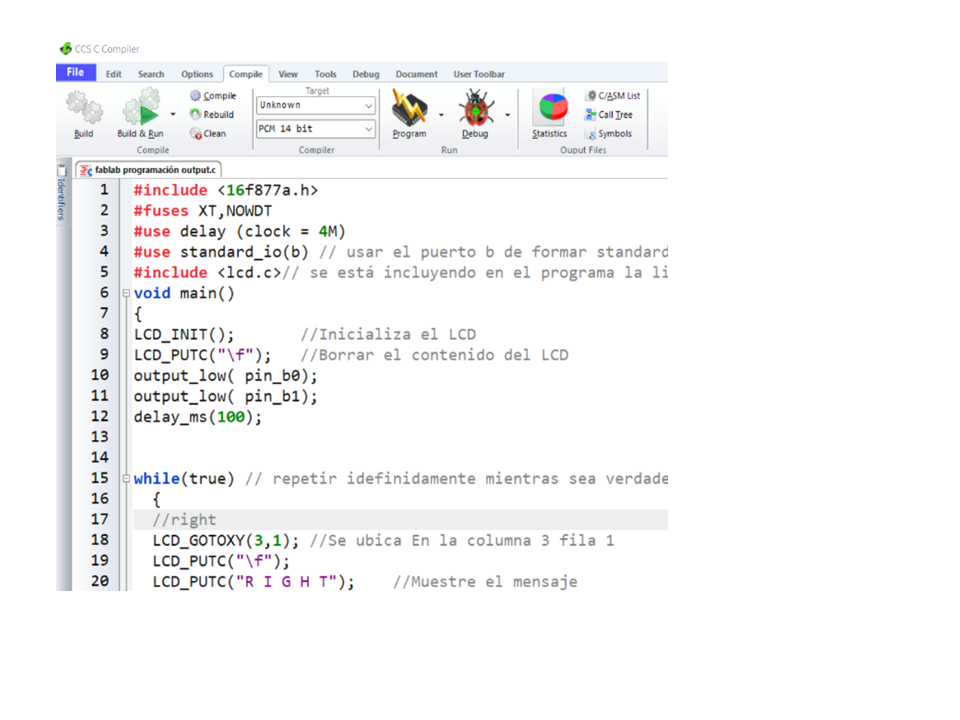
Compilation
To compile the project, in the top bar go to the compile tab and proceed to compile:

Recording
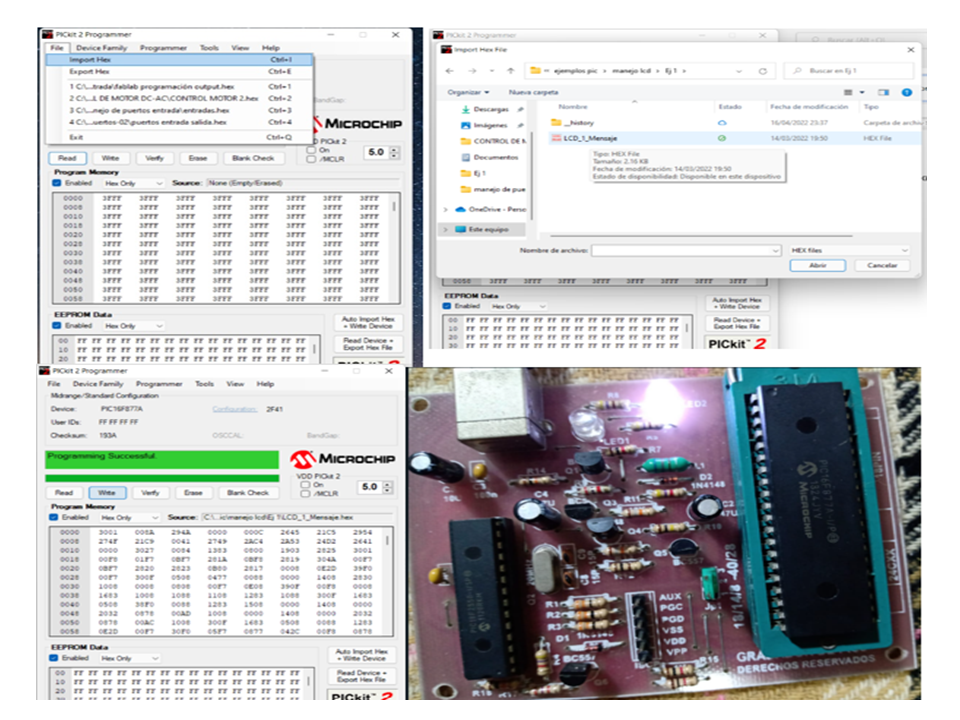
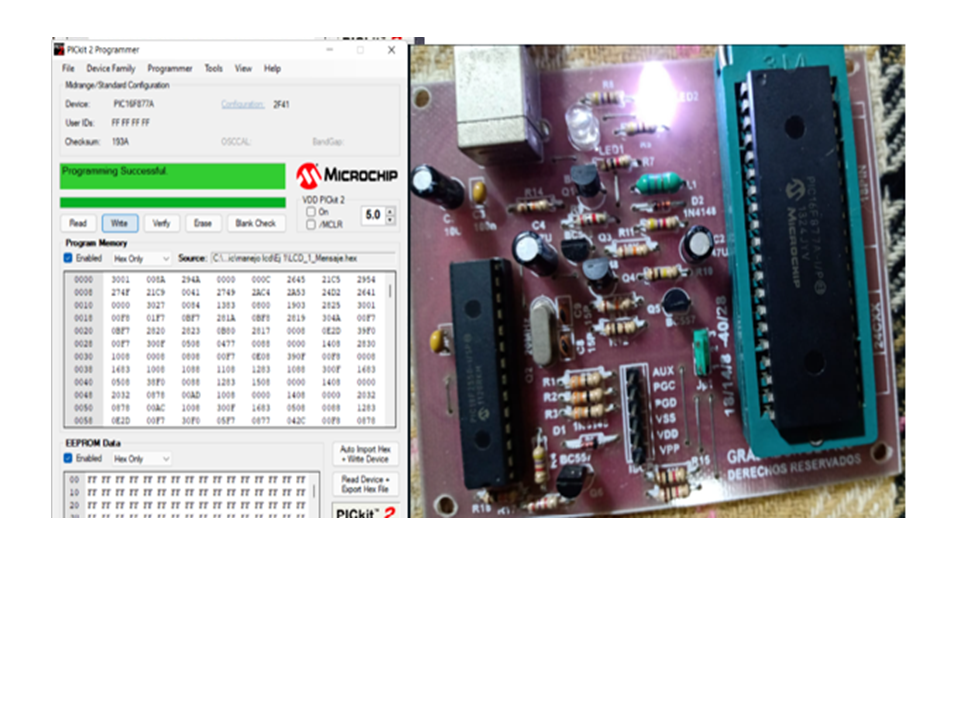
To make the recording of the PIC microcontrollers an external recorder is used where the data is loaded in hexadecimal, this time we will use the commercial recorder of the same company the PIC Kit 2 programmer.
Reflect on your individual page what you learned
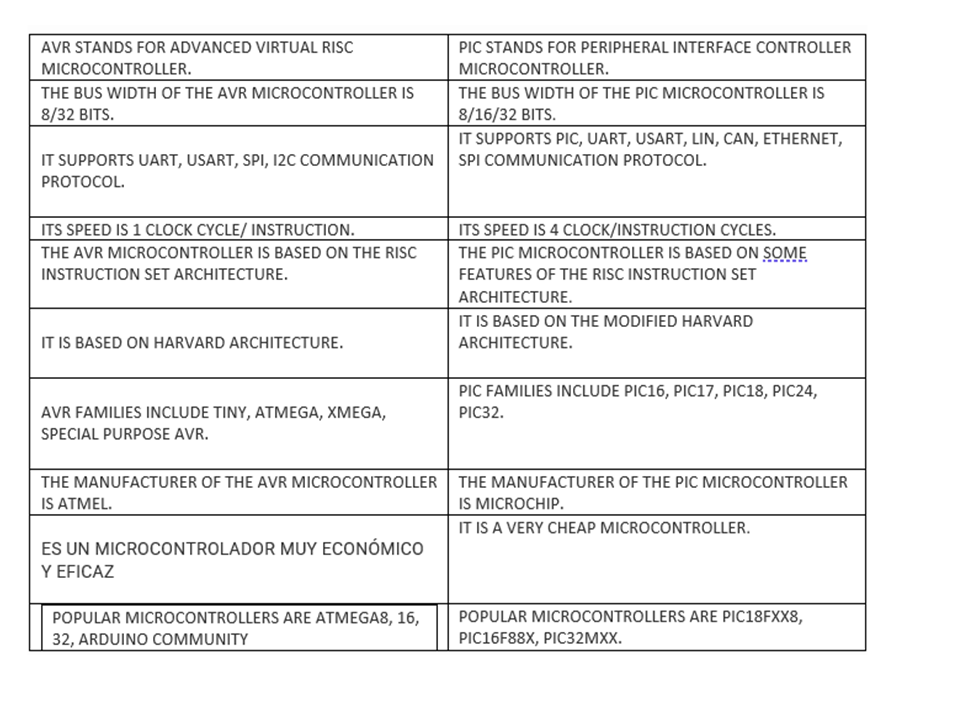
A microcontroller is a single integrated circuit (IC) that is comparable to a small standalone computer and is designed to perform the specific tasks of embedded systems. A microcontroller contains a processing unit and a small amount of memory (ROM, RAM, etc.), few I/O ports for peripherals, timer, etc. AVR and PIC belong to the family of microcontrollers. The PIC microcontroller and the AVR microcontroller differ from each other in terms of different architecture and different sets of instructions, speed, transmission, memory, power consumption, bus width, etc. Now let’s understand in detail how they differ from each other.
Difference between AVR and PIC
Individual assignment 
In this experience to explore other microcontrollers I will use the PIC 16F877, because it is the one, I have at hand and not the ATMEGA 328P that we find in ARDUINO.
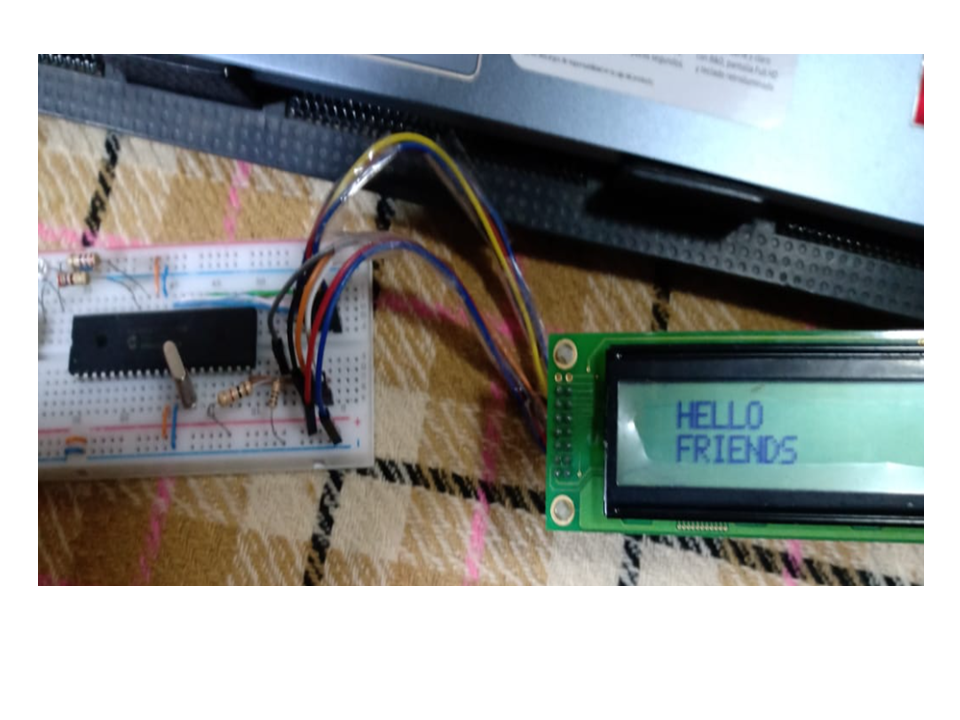
As an application exercise we will use a 16x2 display to present a message ” HELLO FRIENDS “.
Development of the application program in PIC COMPILER
Recording the Hexadecimal Code on the microcontroller using the PICKit2 recorder