6. 3D Scanning and printing
Group assignment: 
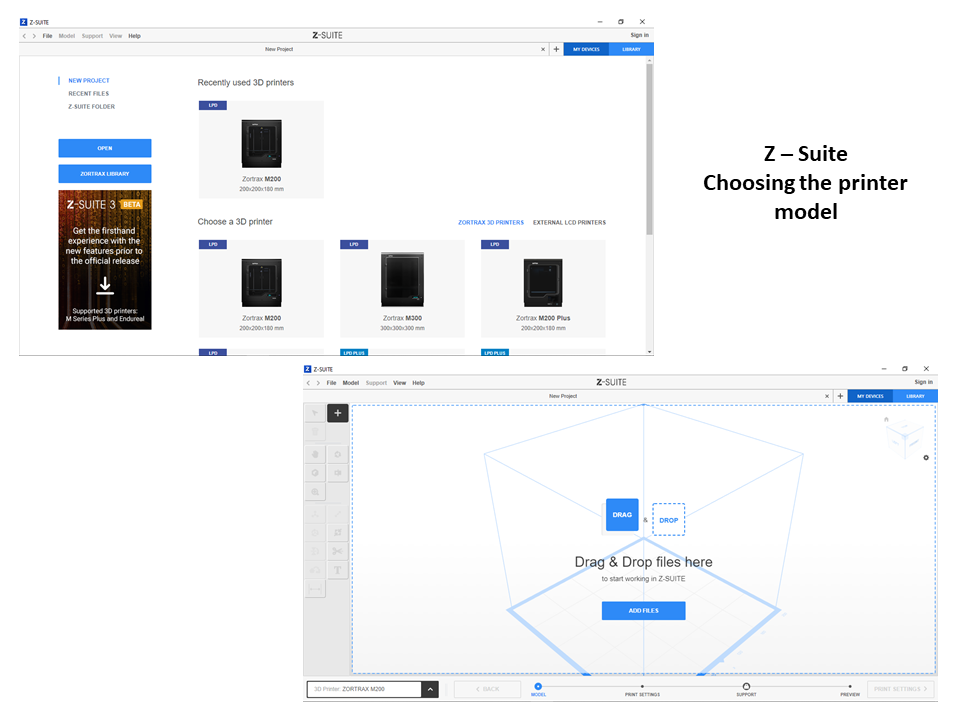
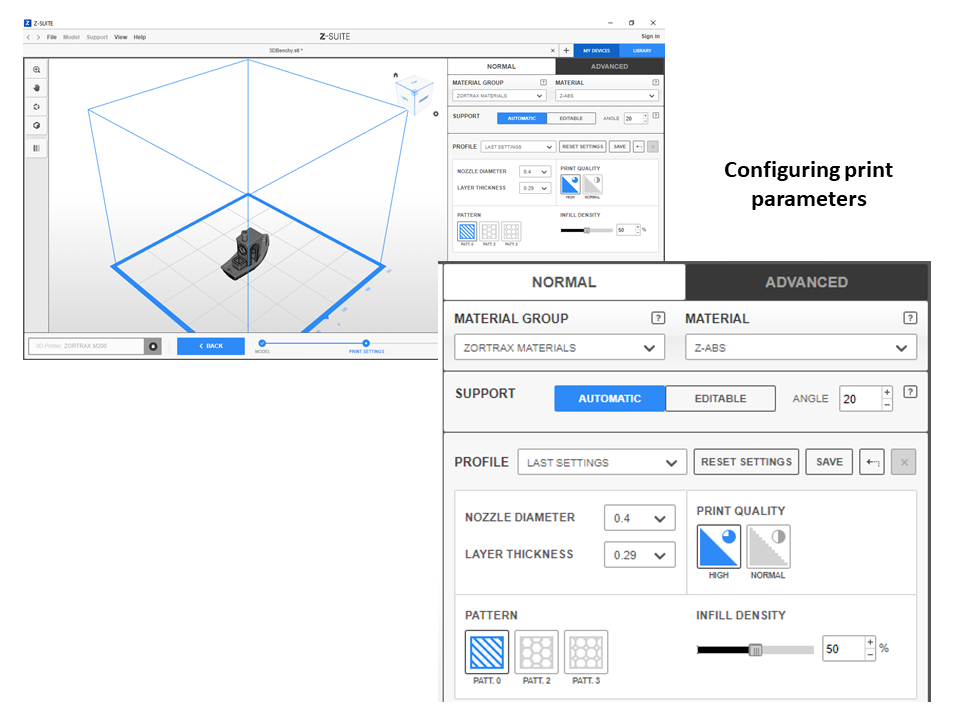
We are going to use the Z suite to be able to configure the printing parameters, for this we must have the file that we are going to print
We will choose the Zortrax M 200 printer
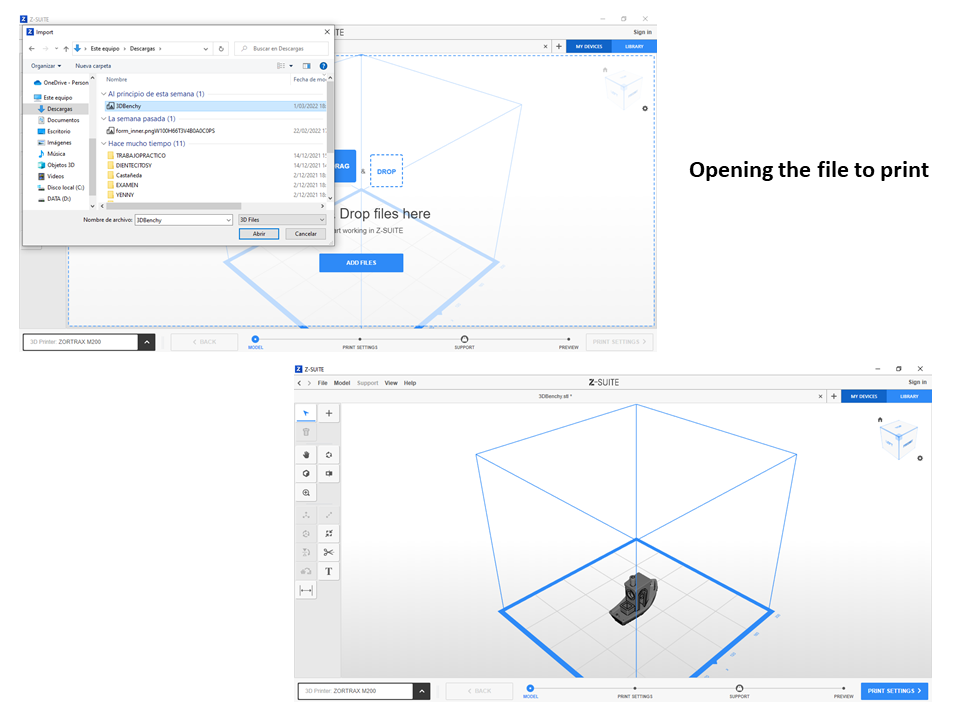
Then we open the stl file 3DBenchy.stl
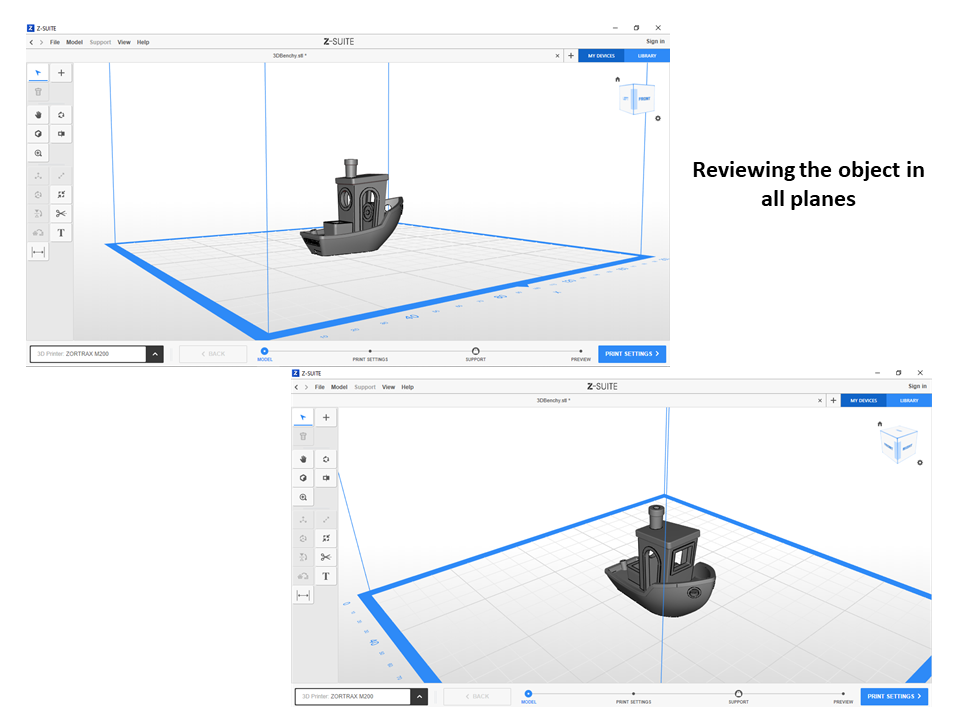
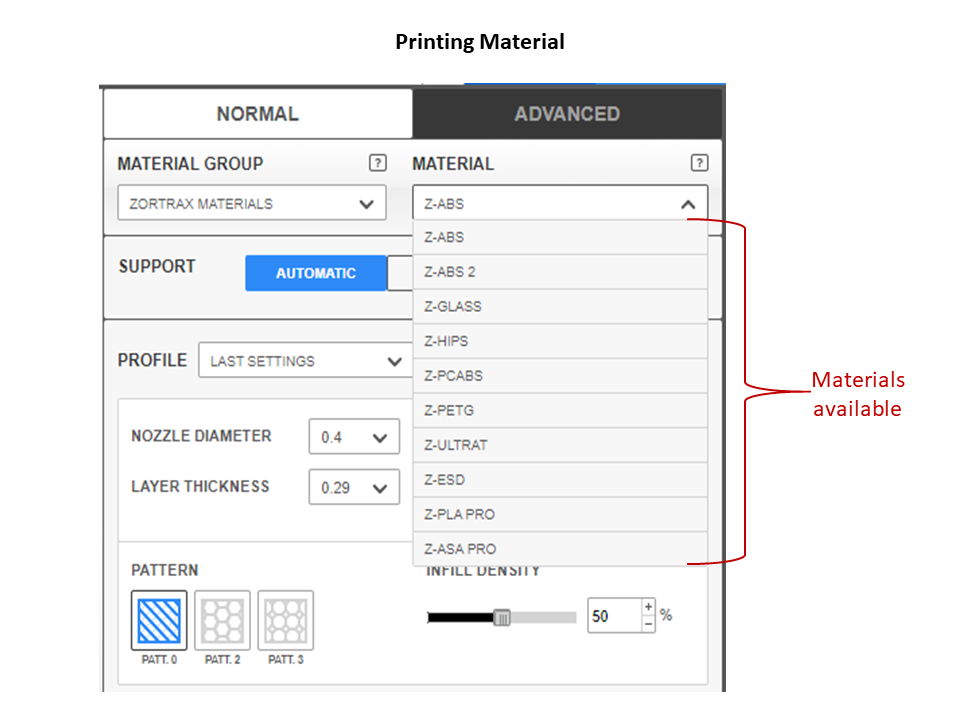
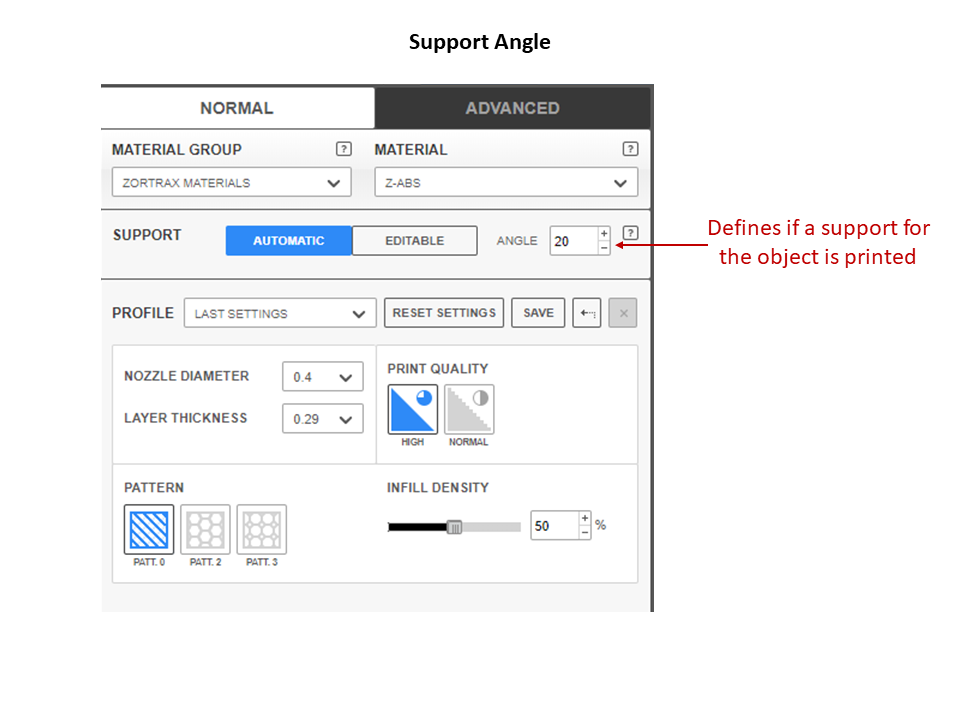
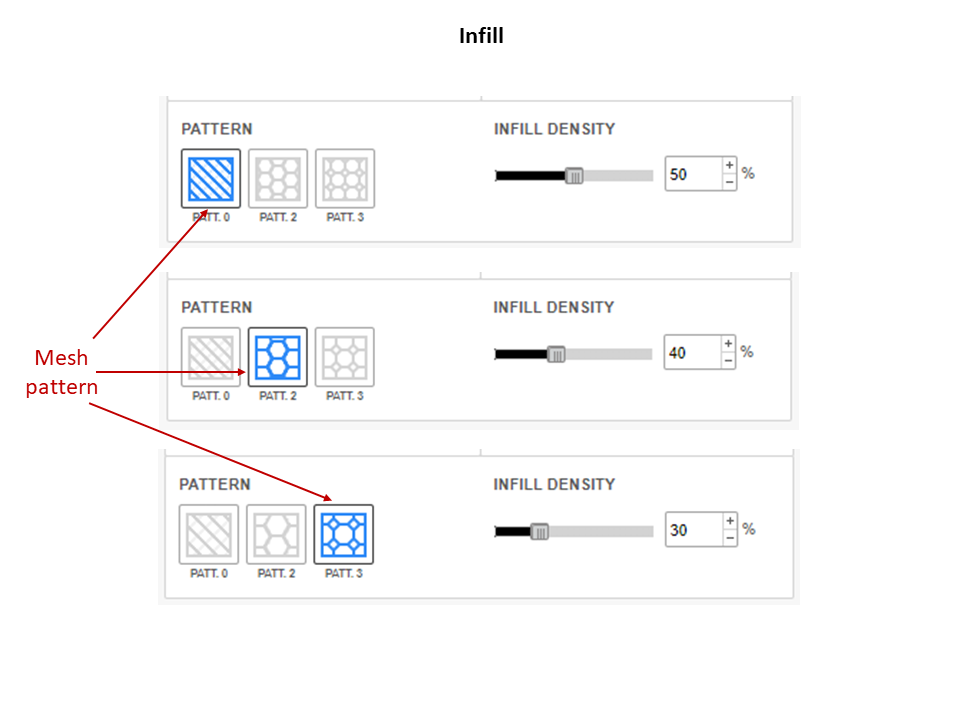
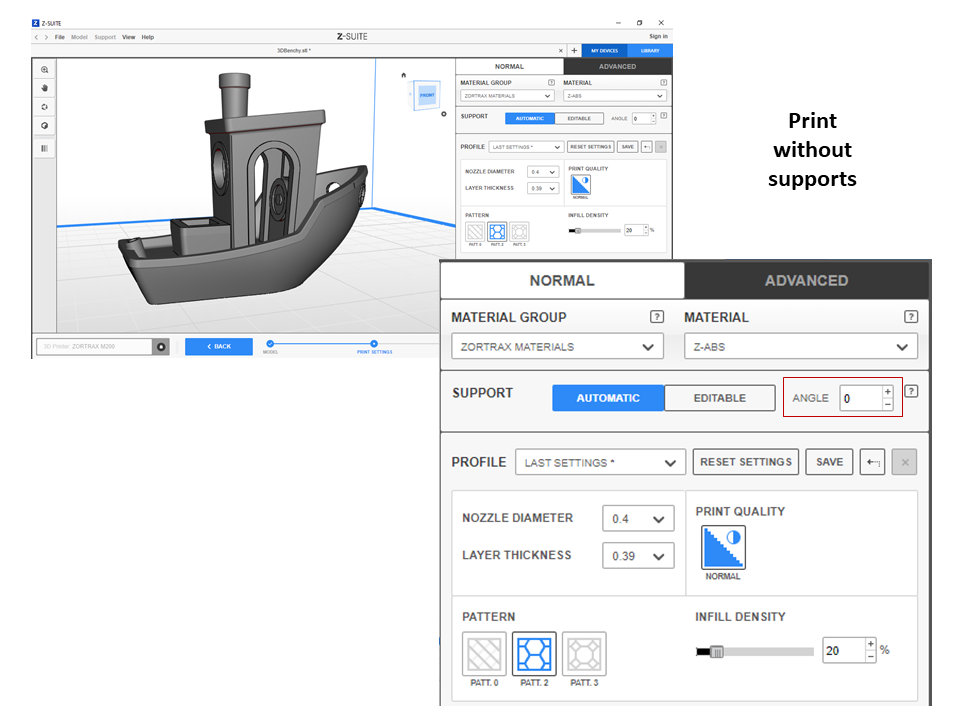
And we start configuring the parameters

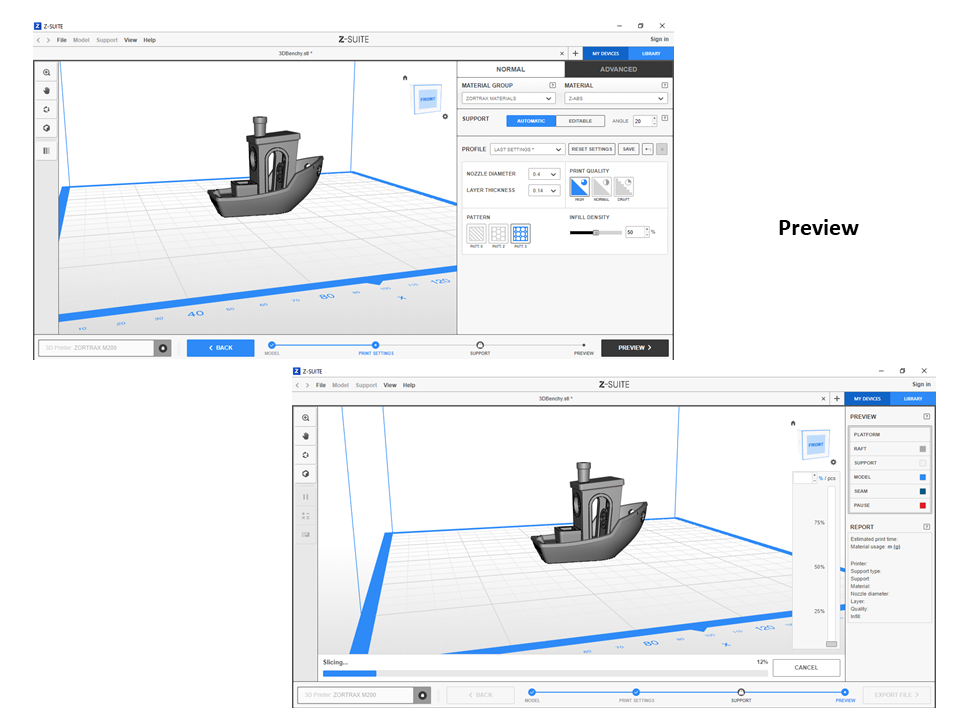
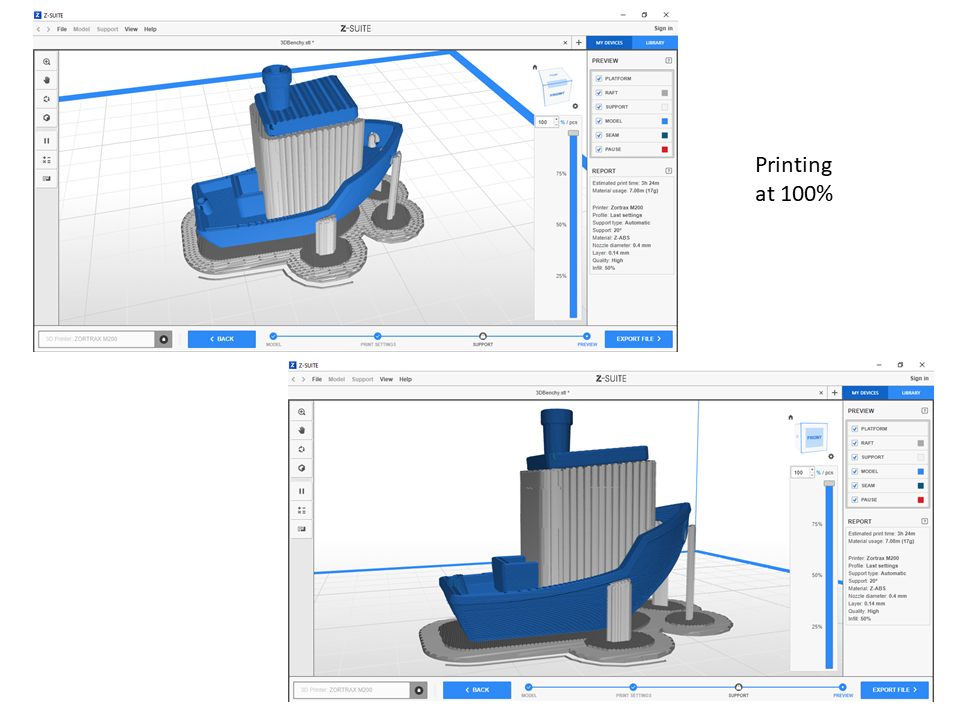
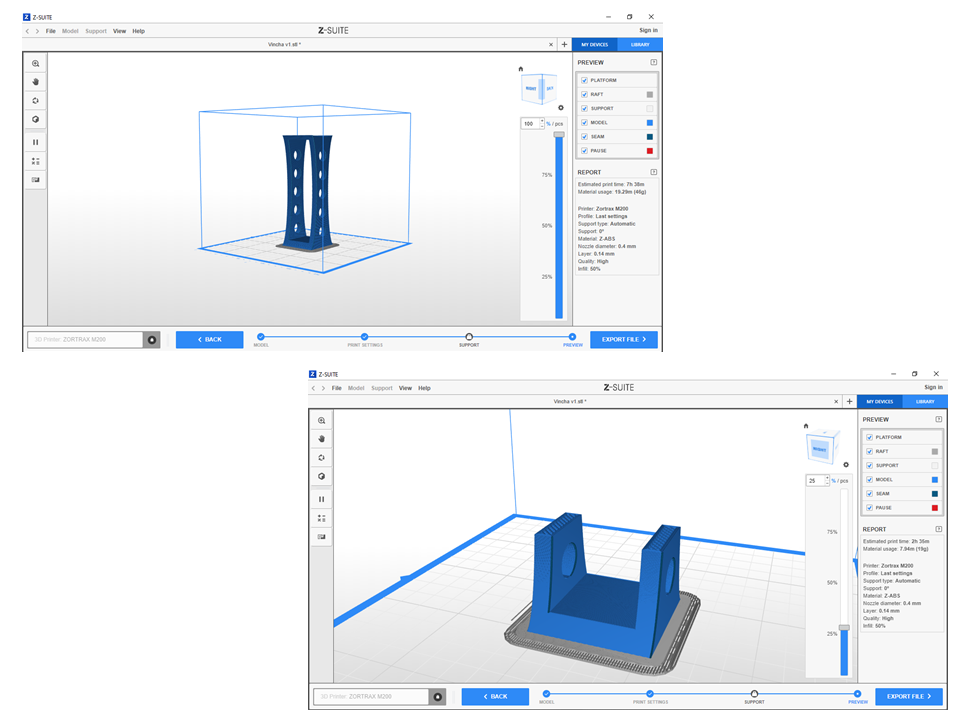
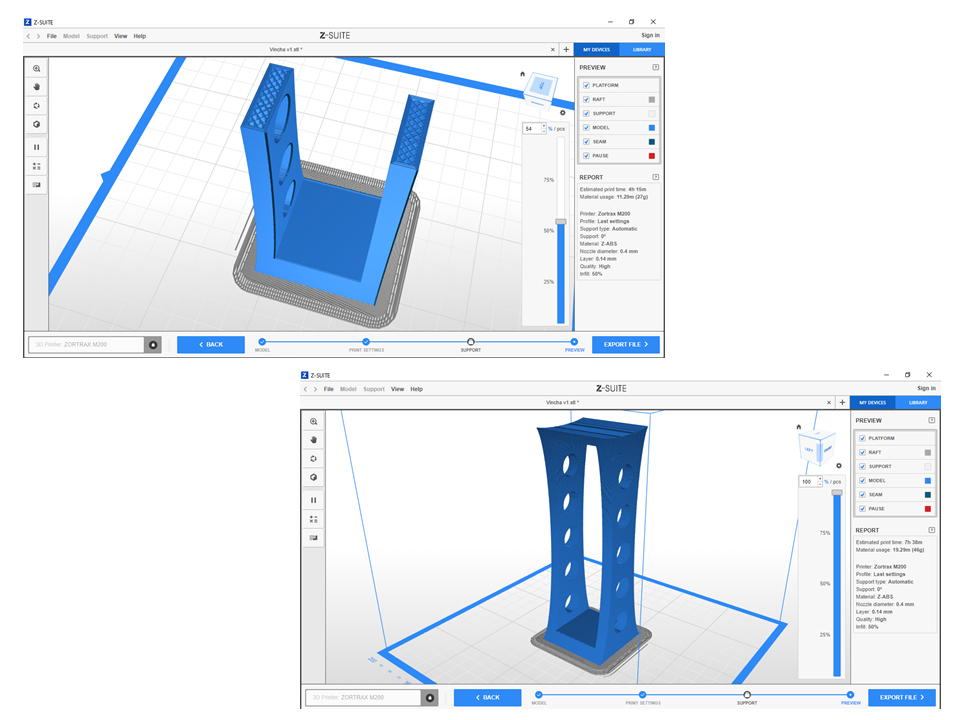
We activate the preview
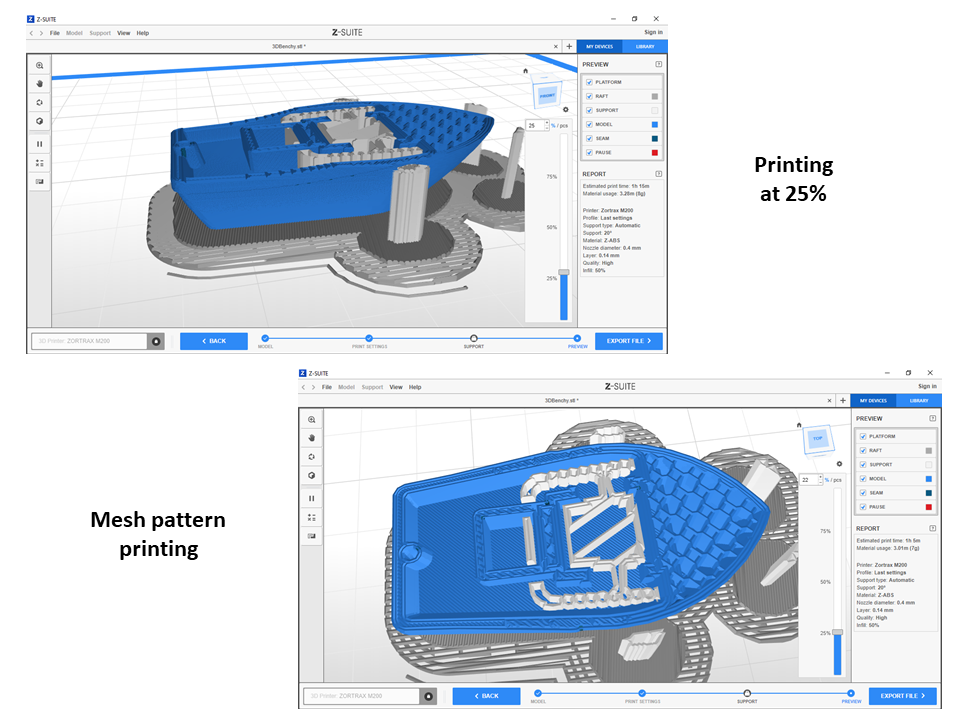
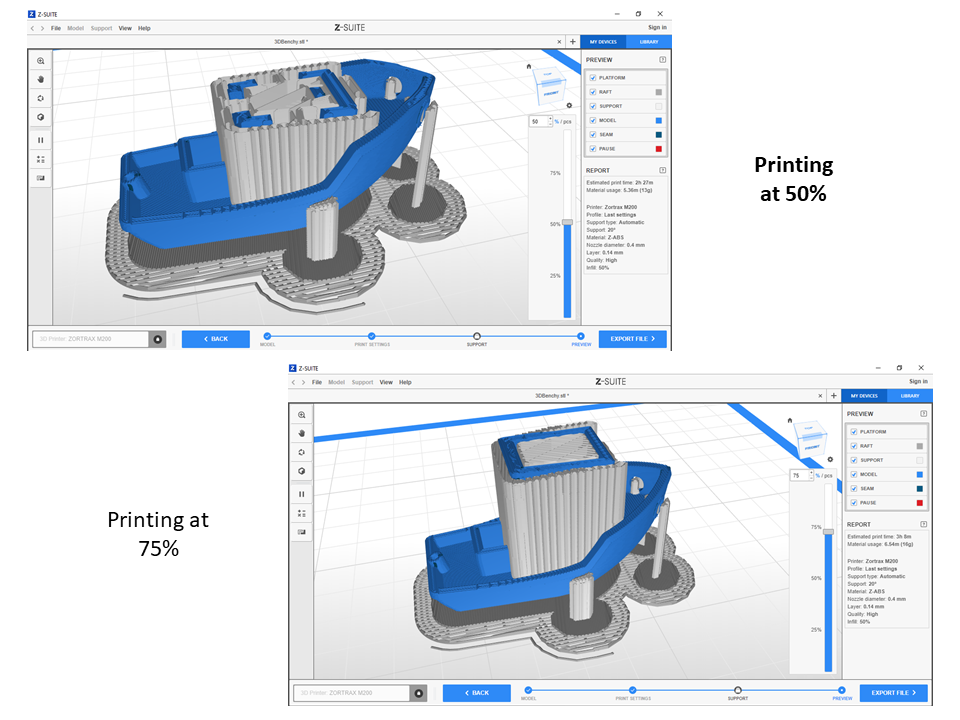
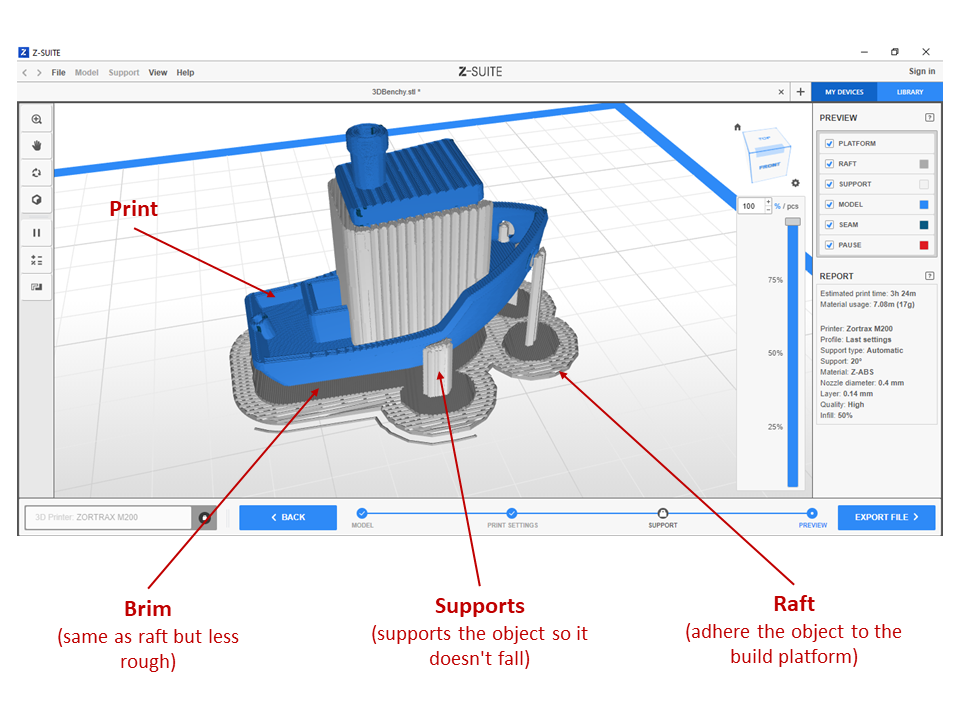
We modify parameters
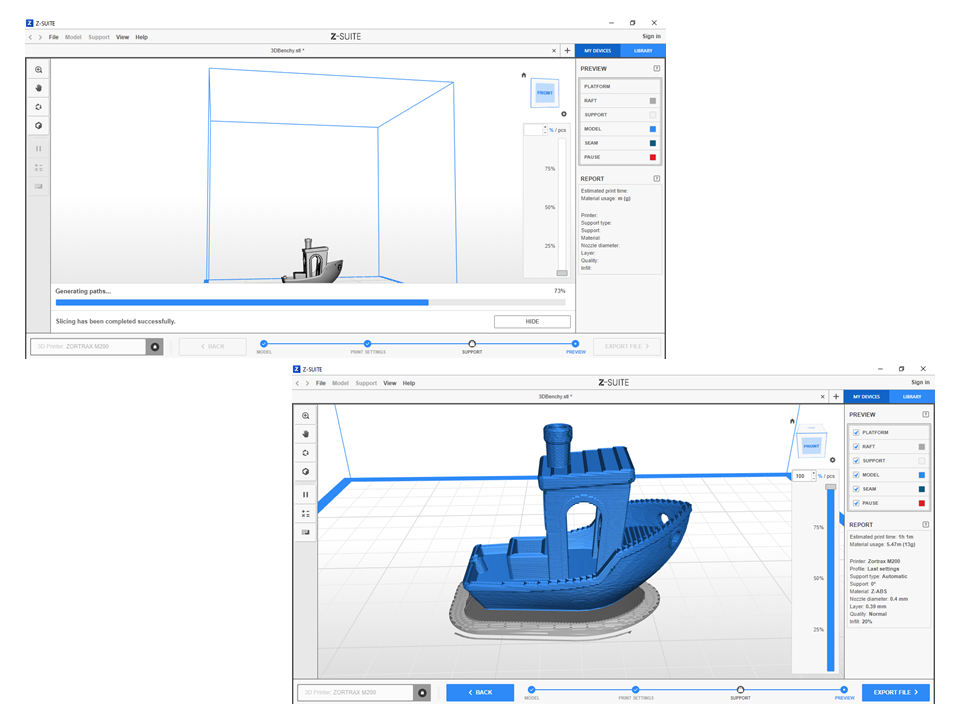
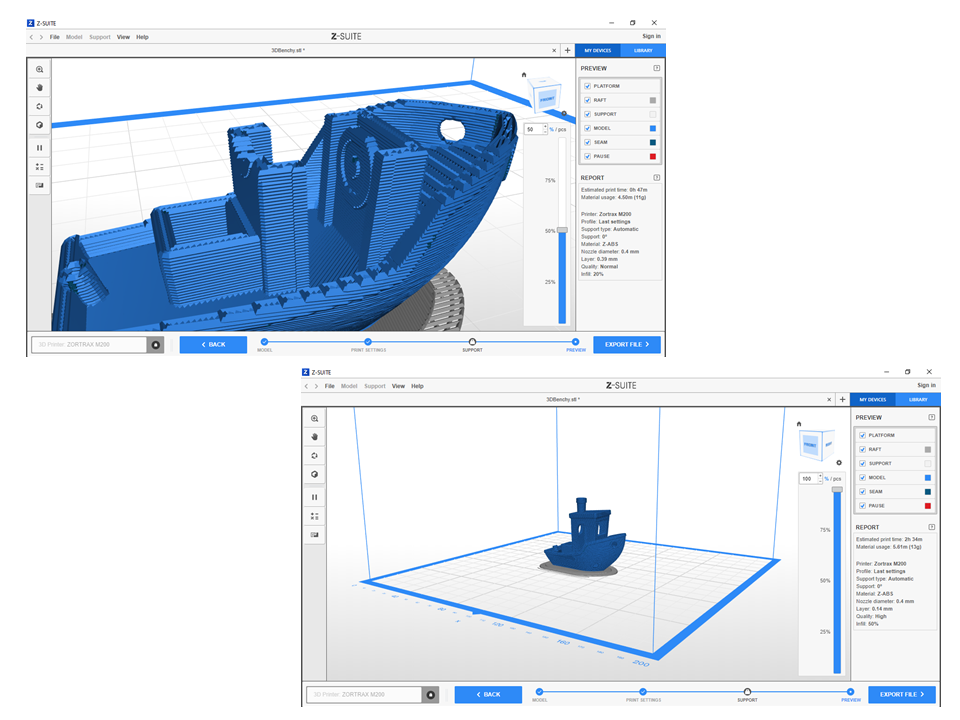
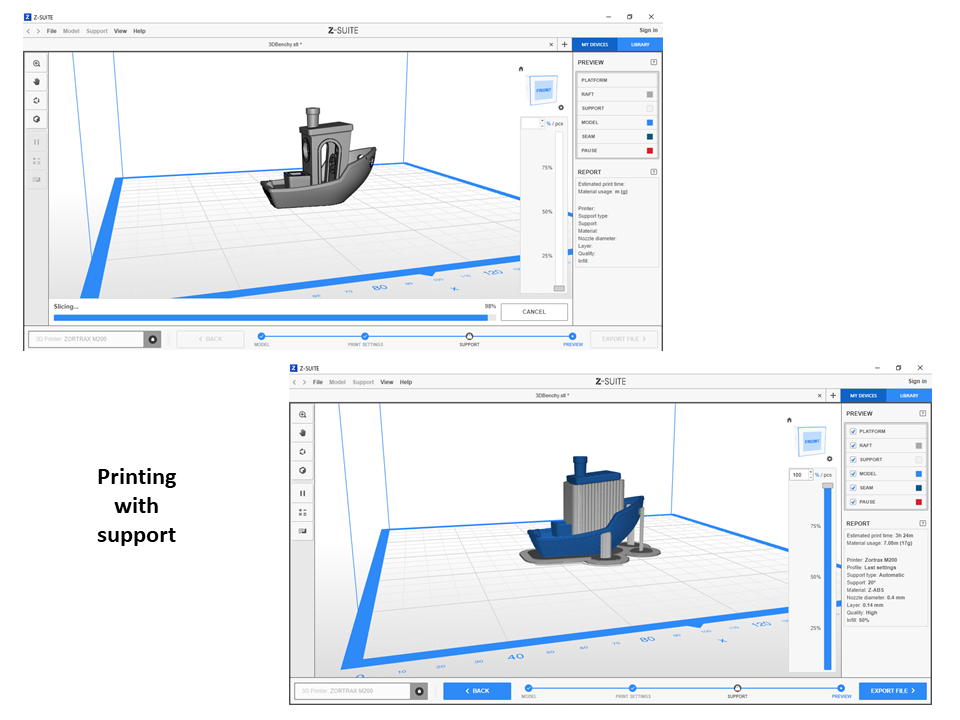
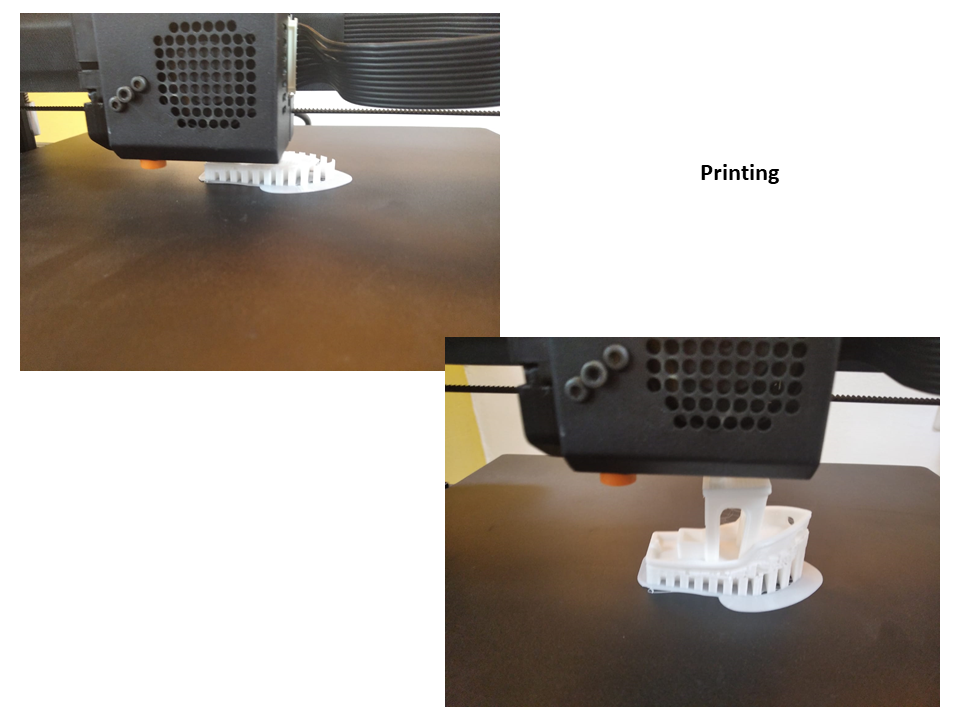
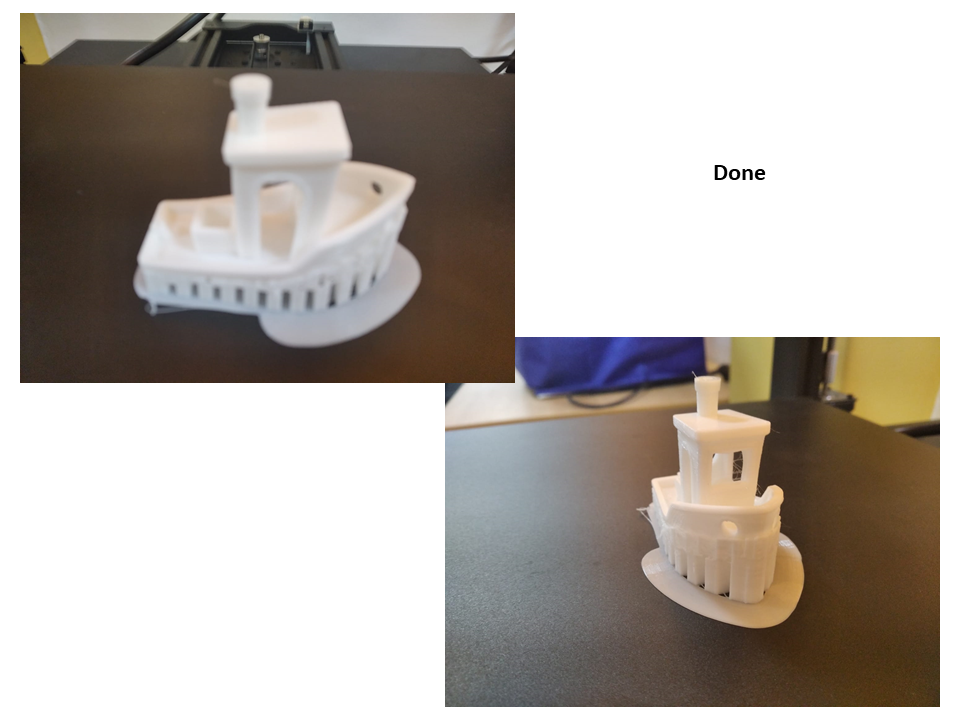
When printing, the object is obtained with the indicated configuration
Individual assignment: 
Printing in 3d
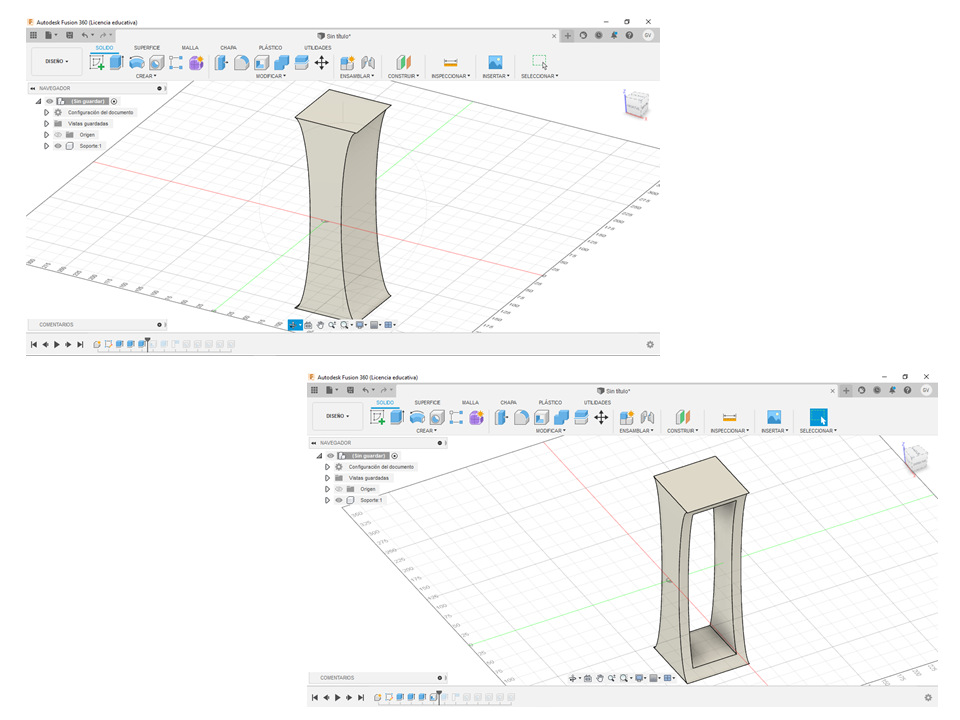
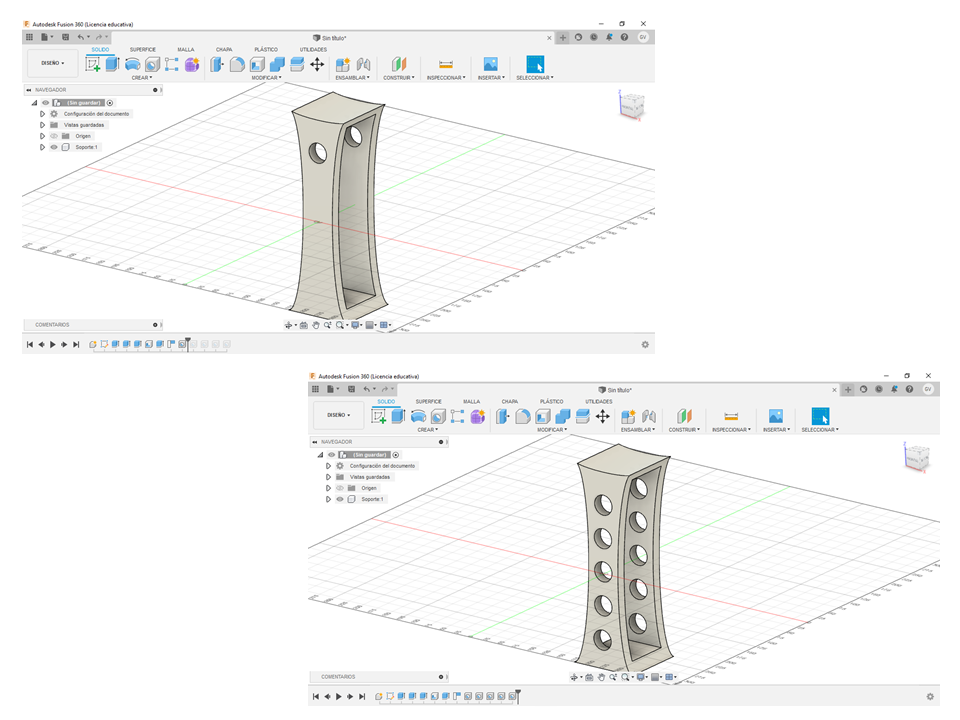
Designing a Support for a Micro Headset
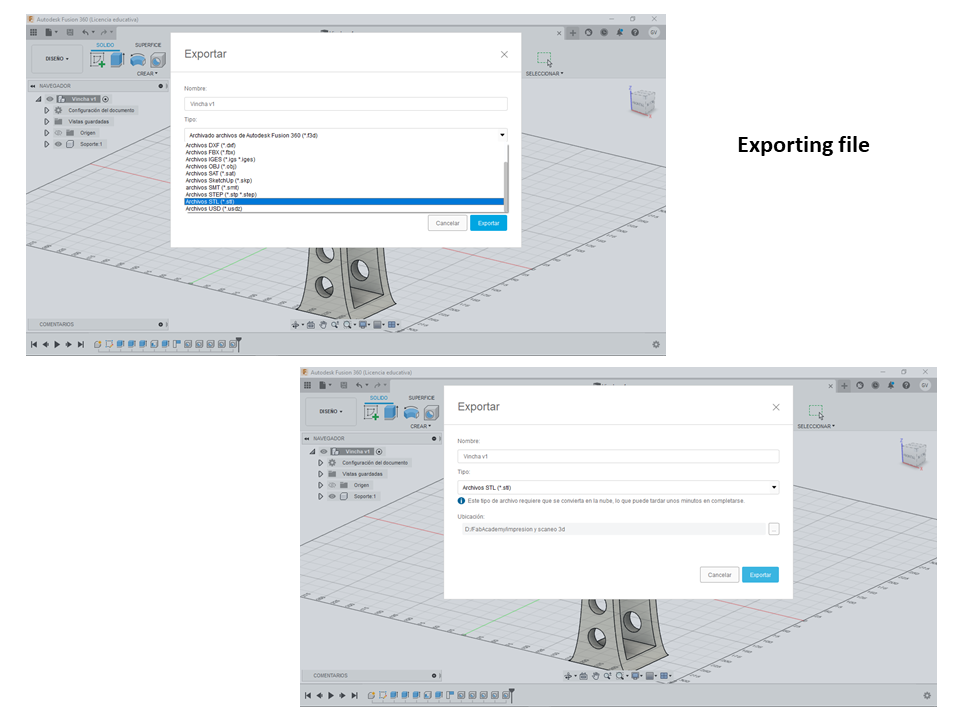
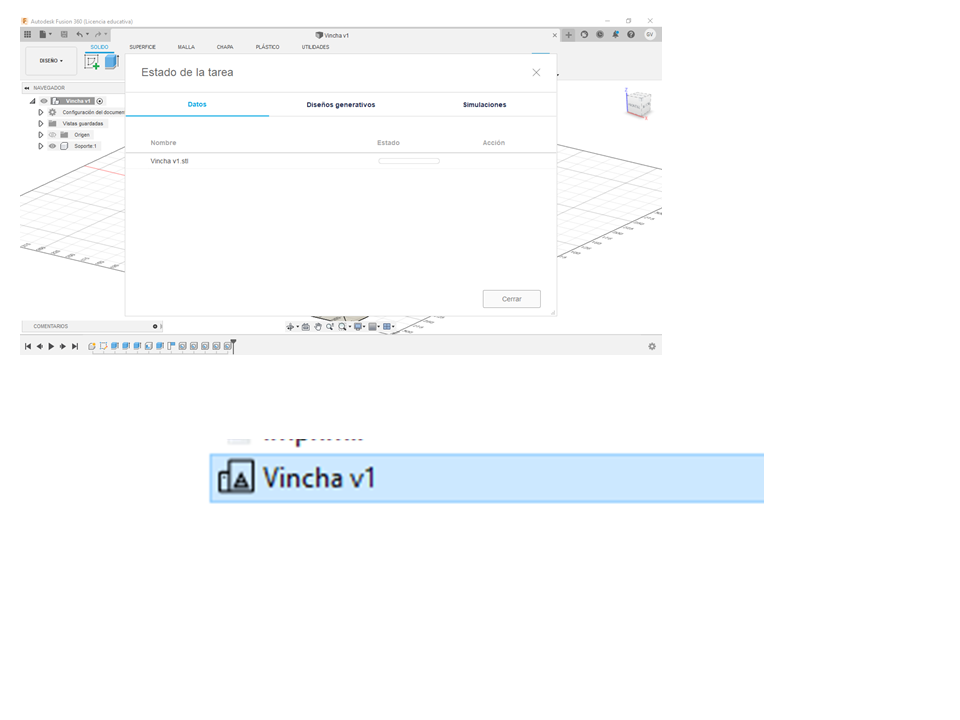
Exporting to stl file
Configuring the parameters in Z suite
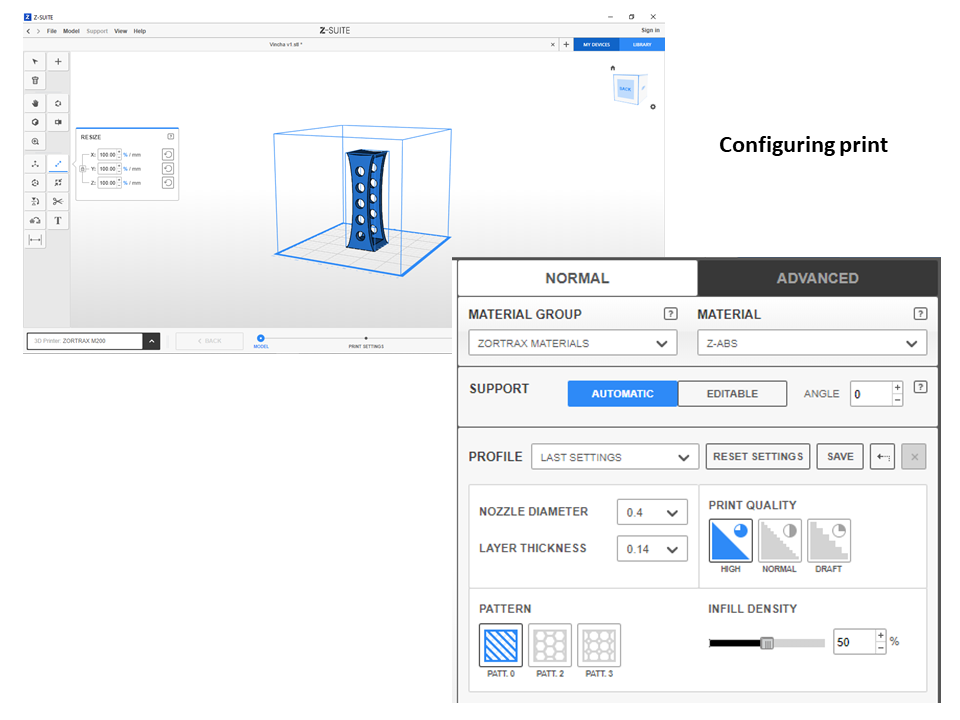
File: Vincha.stl
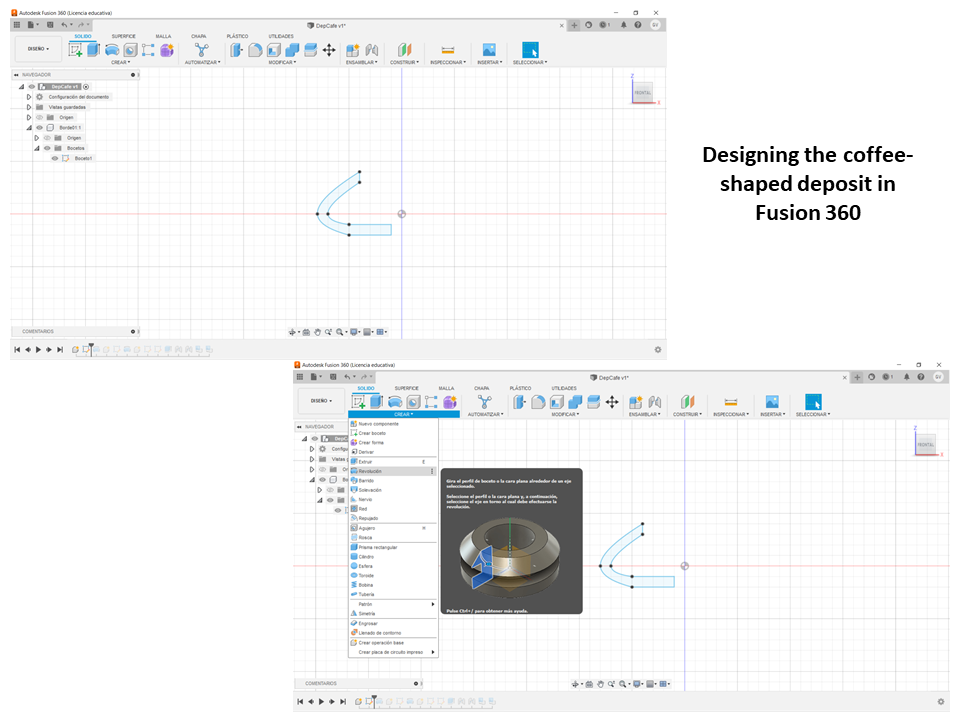
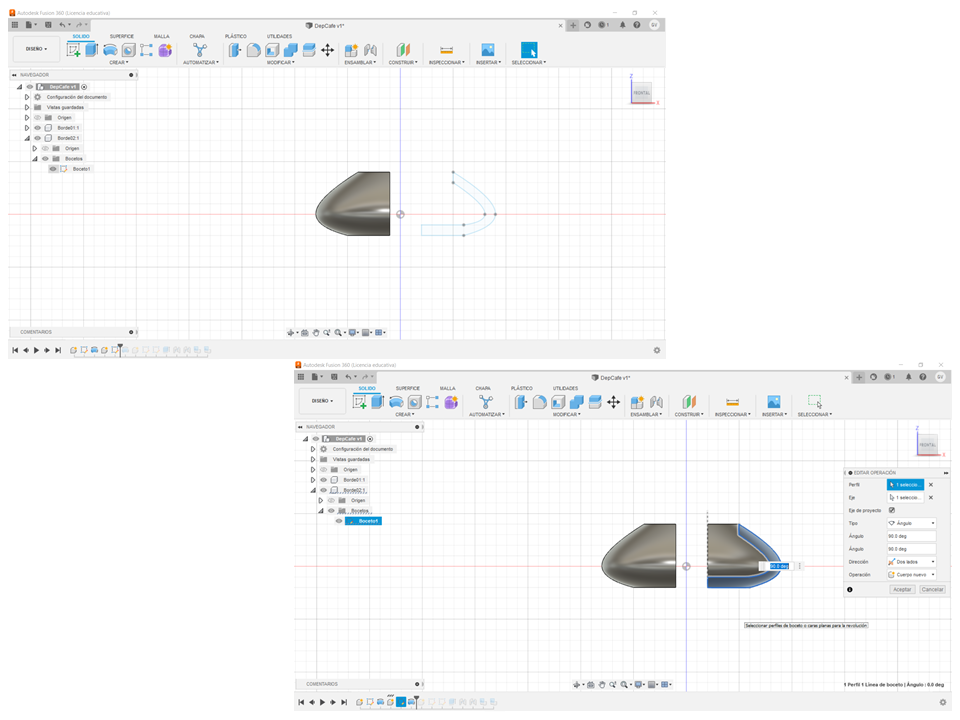
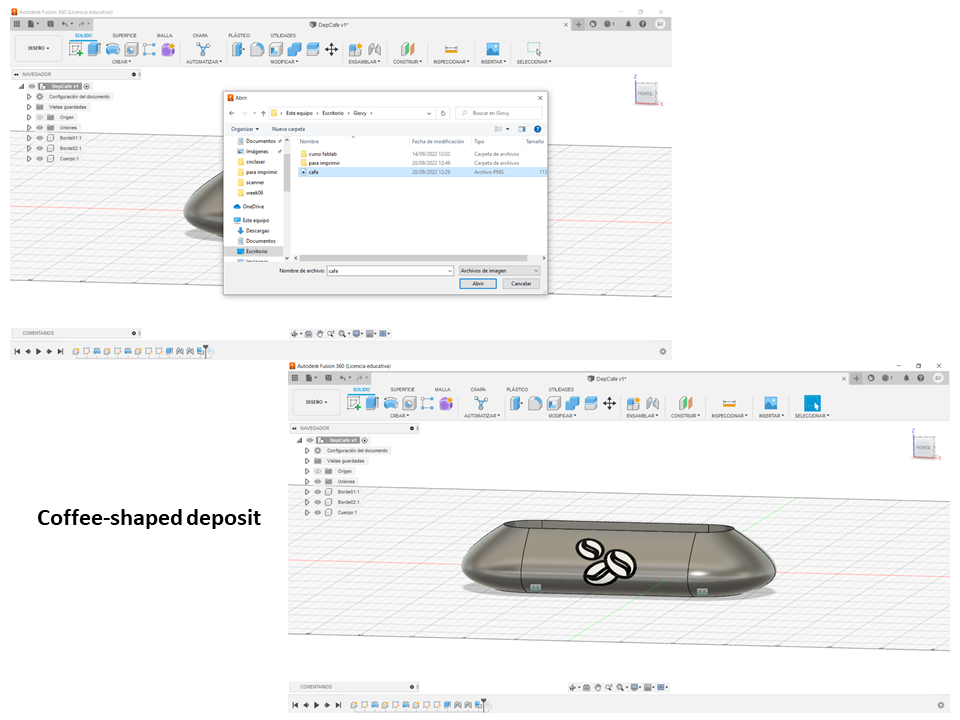
The headband was designed but a lot of material is required for printing, so it was decided to design a coffee-shaped deposit
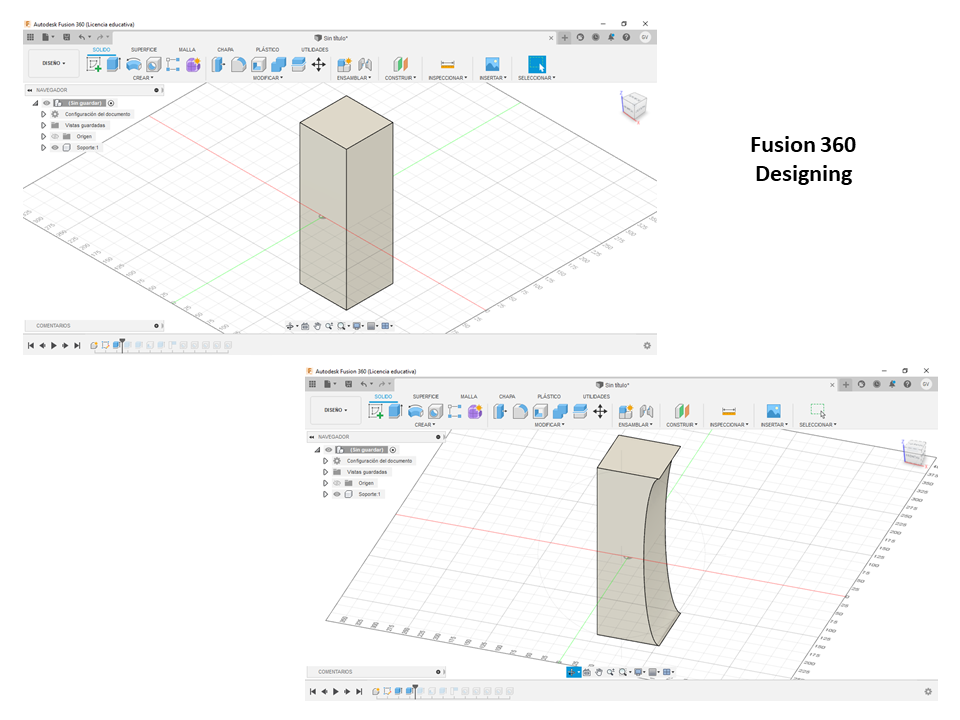
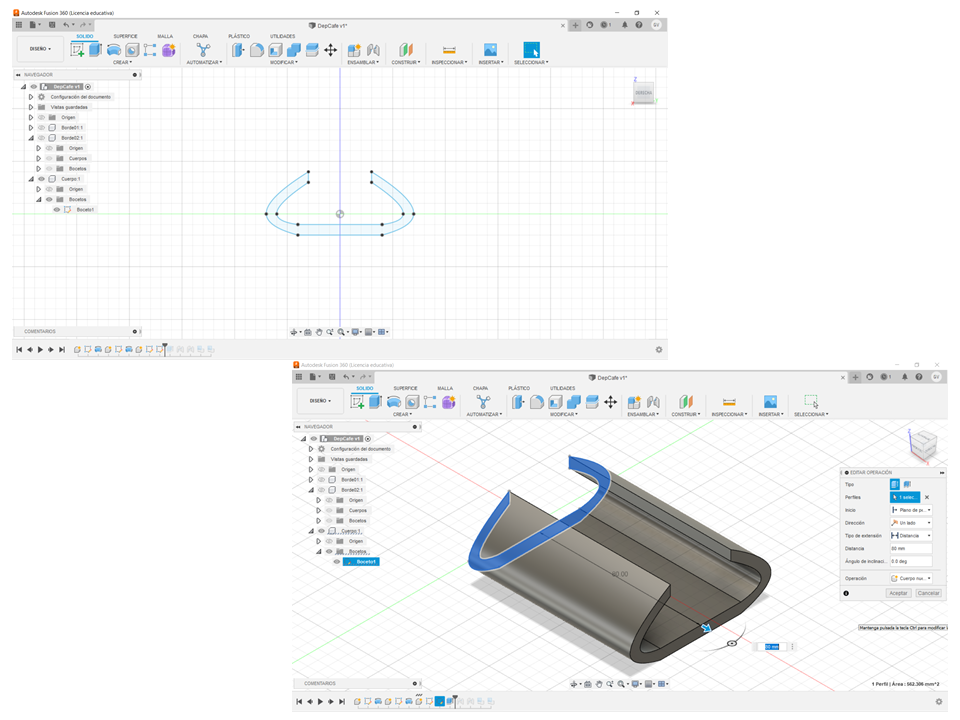
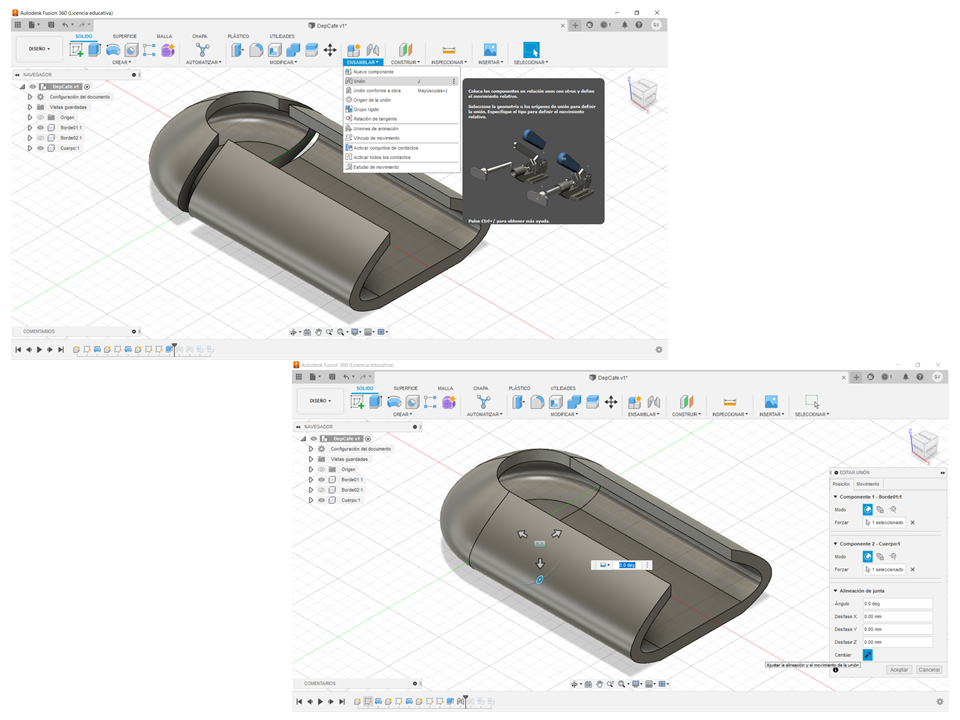
Designing the coffee cup in Fusion 360

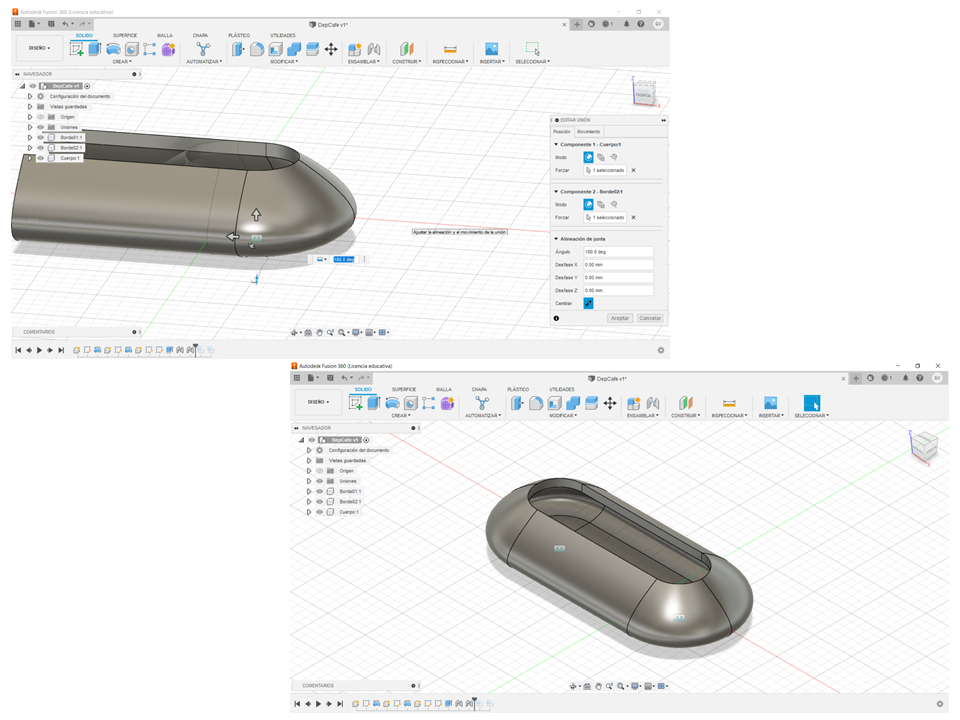
Assembling
Inserting a sticker
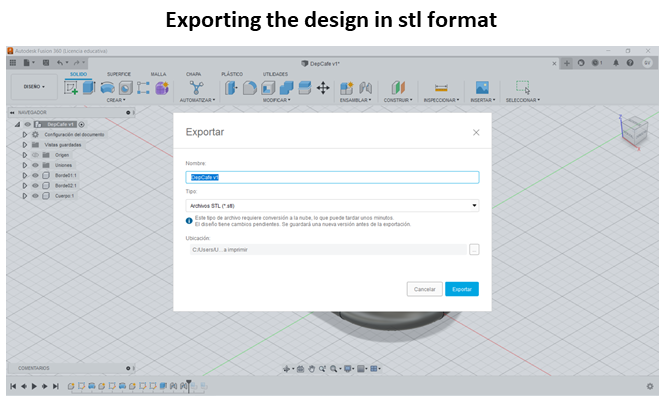
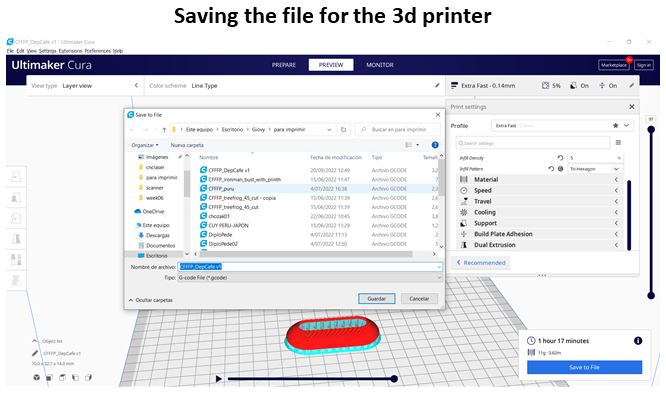
Exporting the file
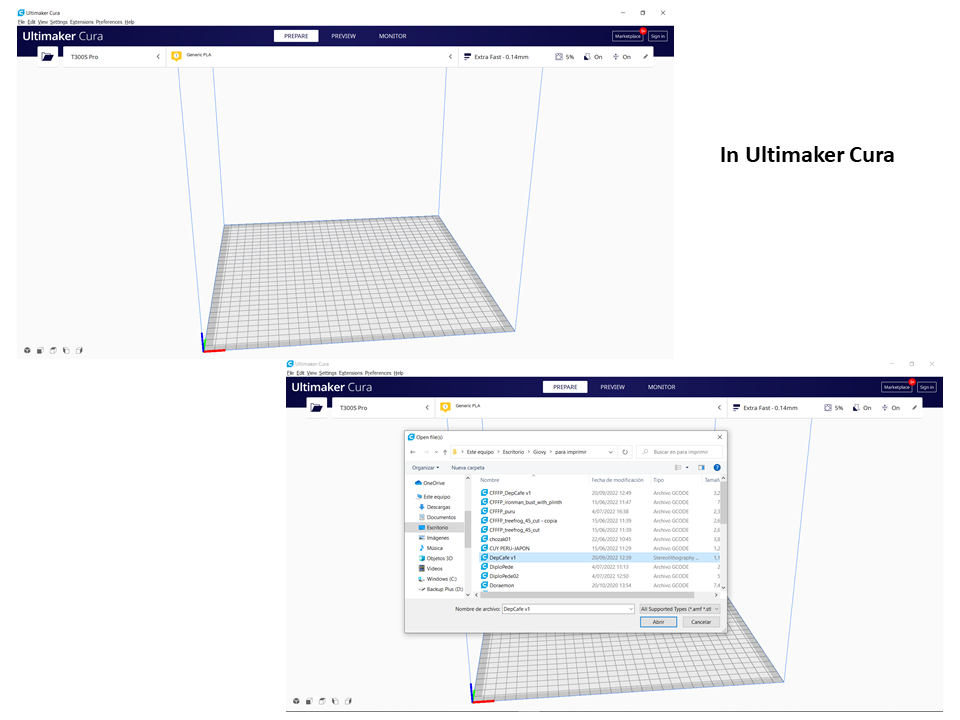
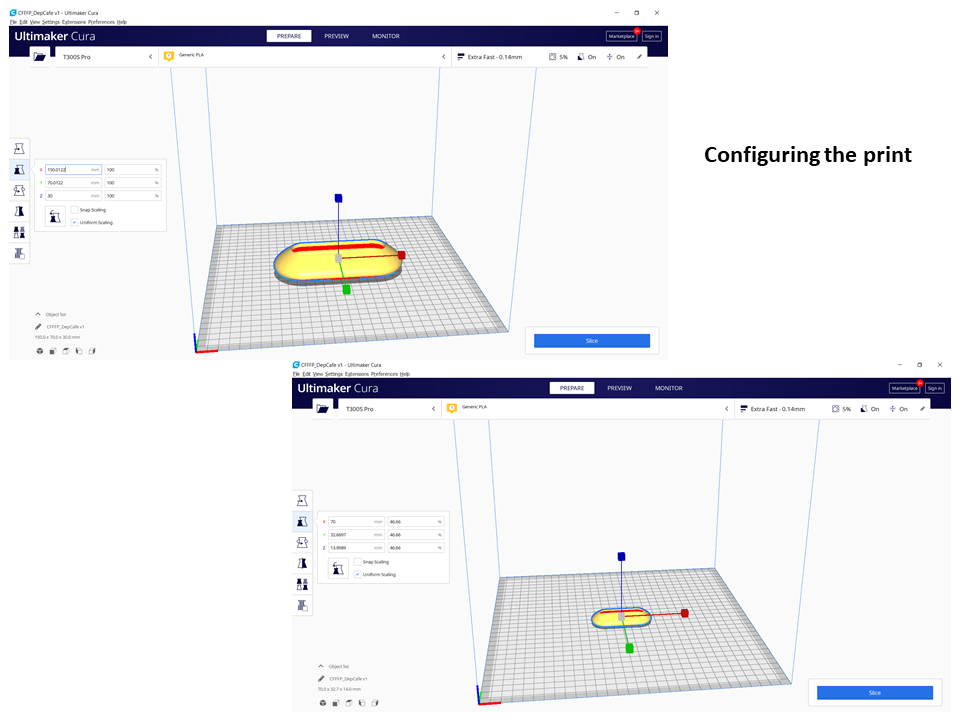
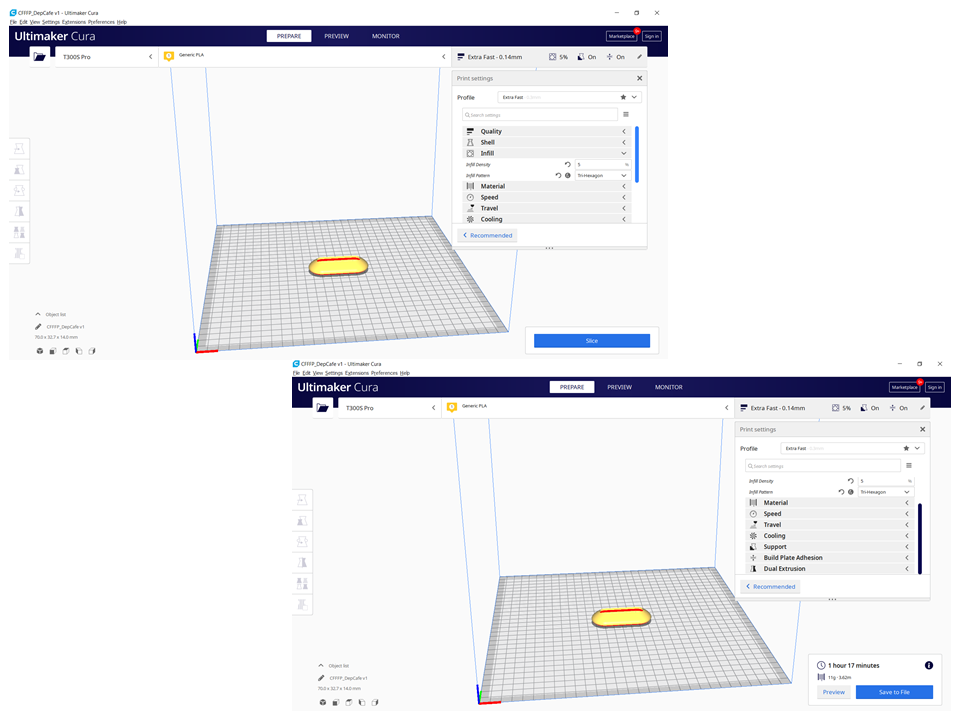
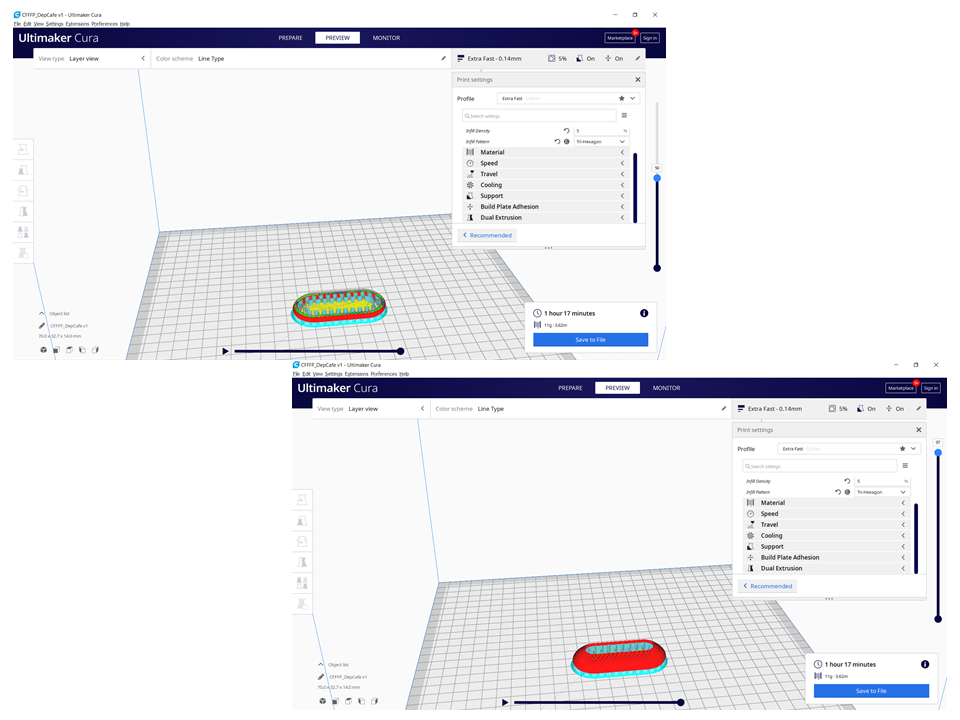
Configuring printing in the Ultimaker Cura
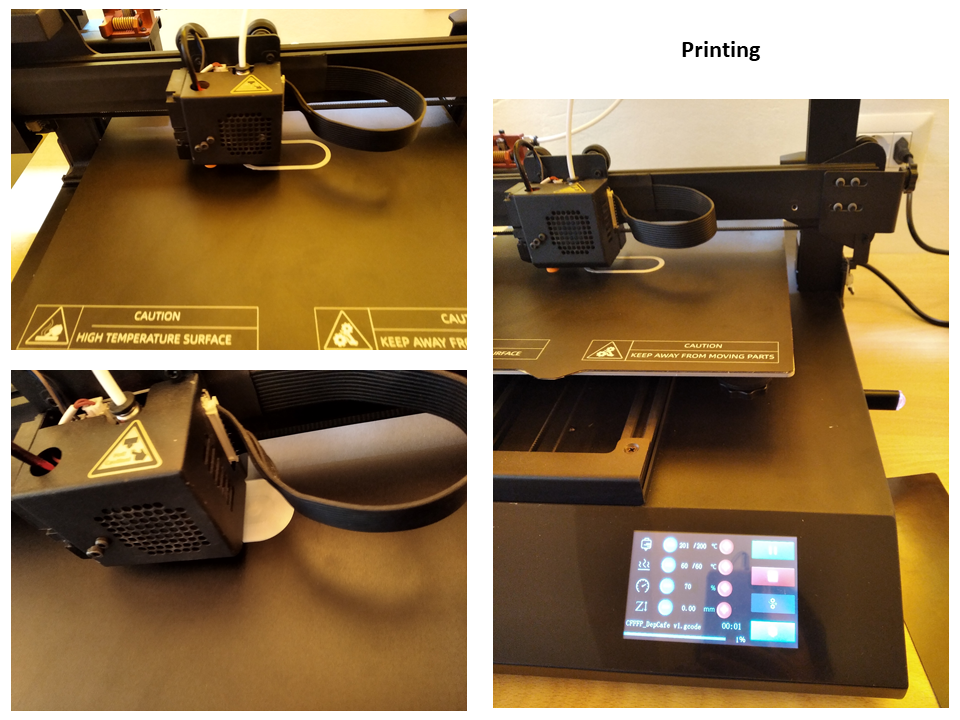
3d printing
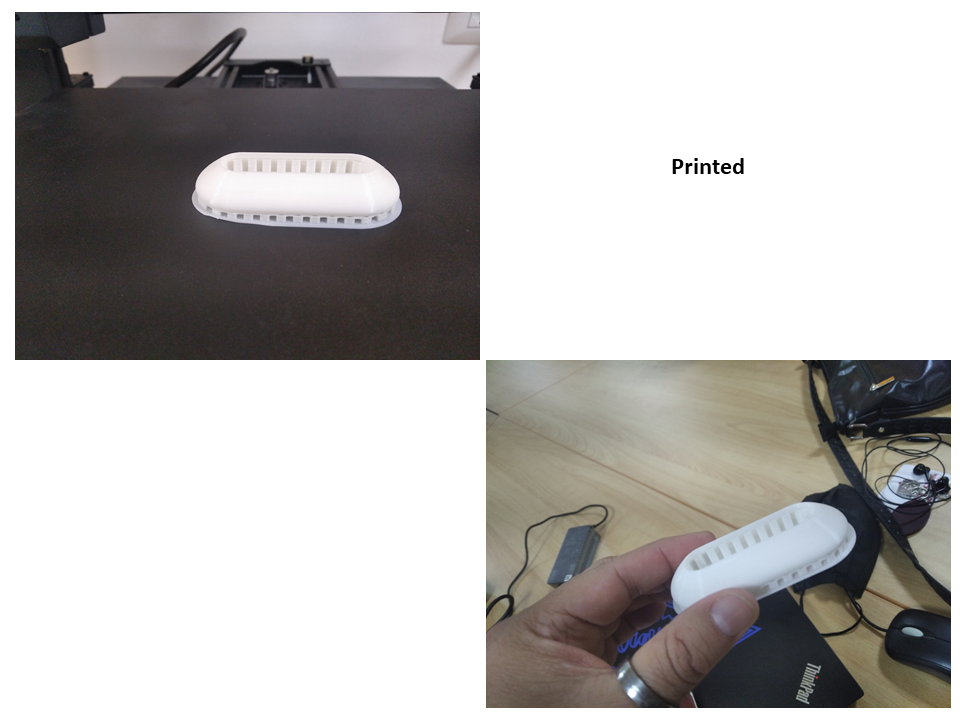
Done!!!
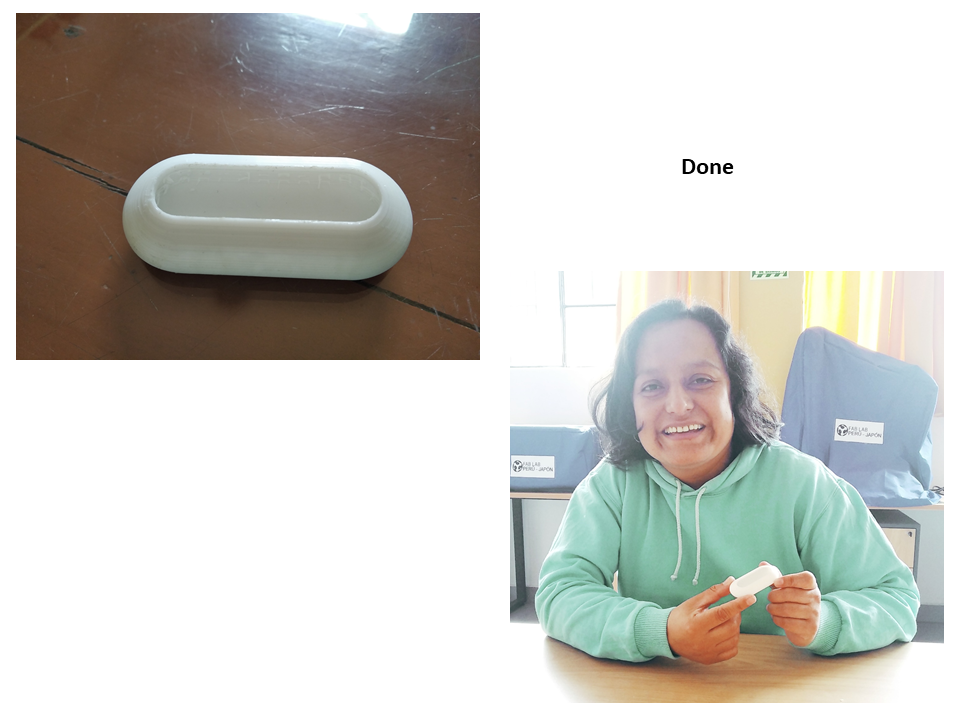
File: Desposit.stl
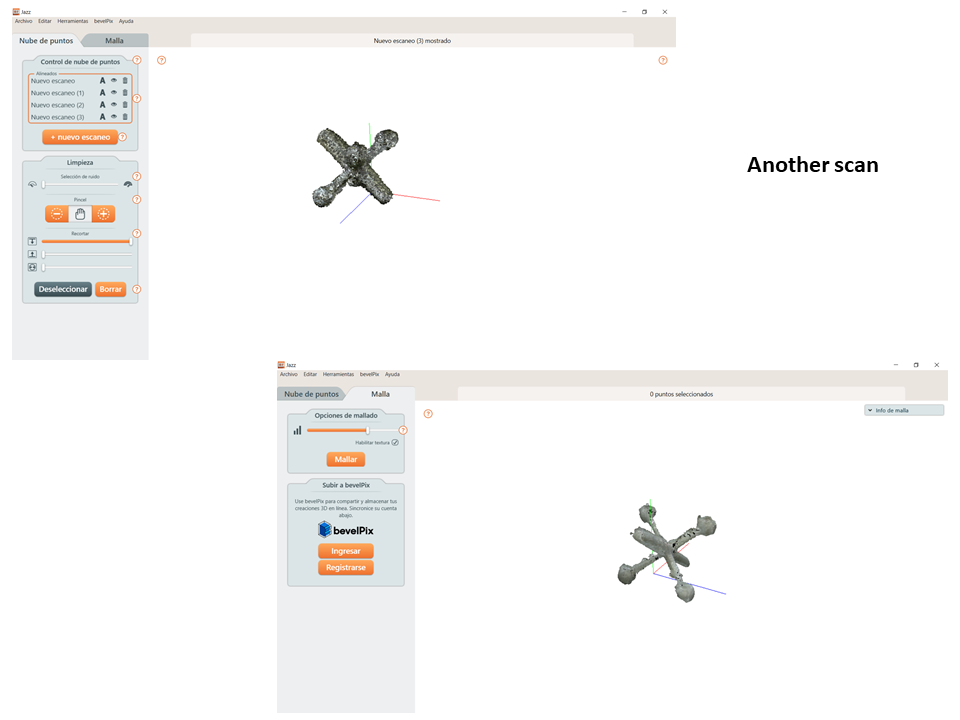
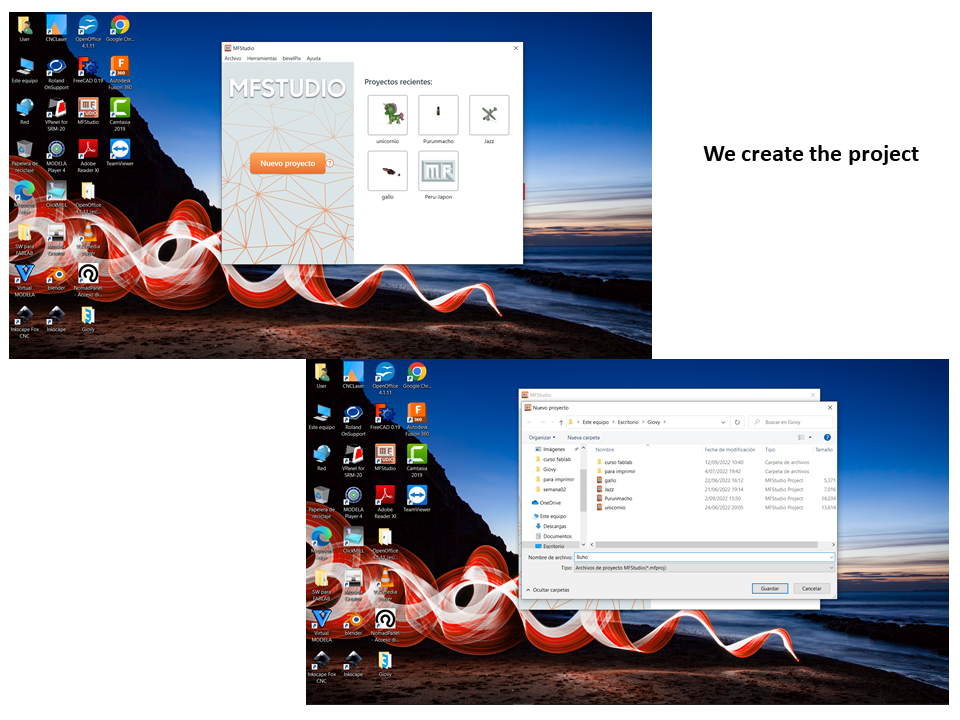
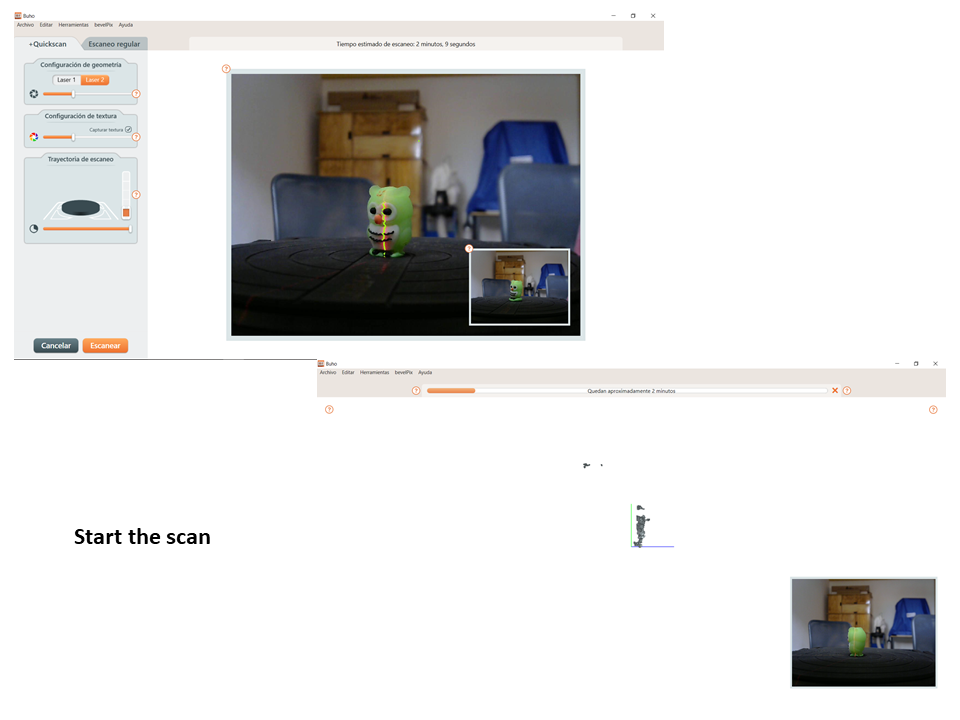
Scanning in 3D
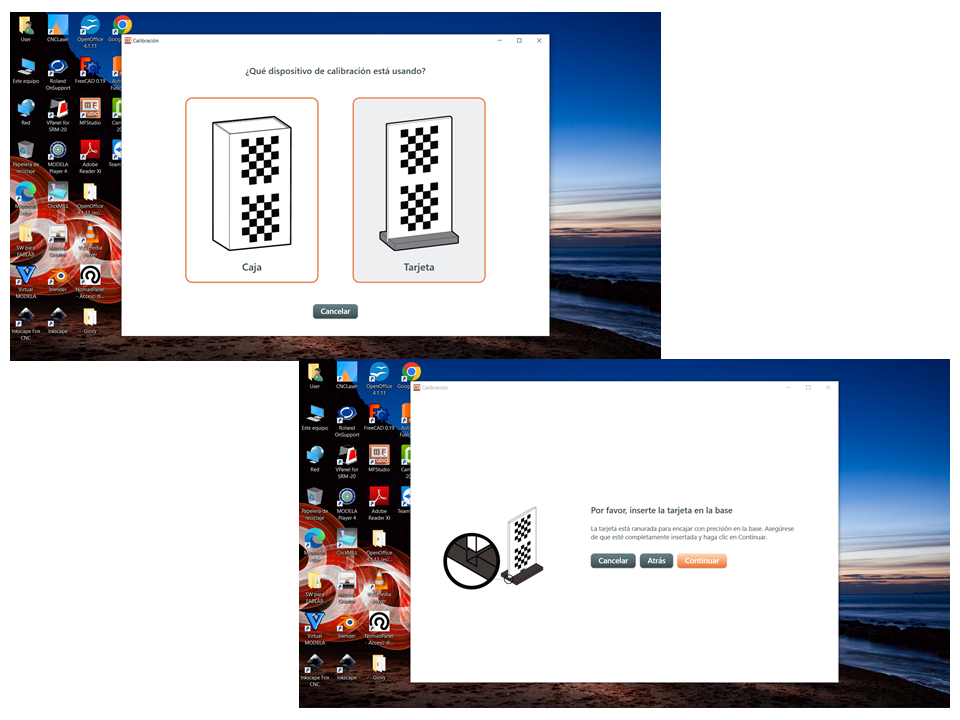
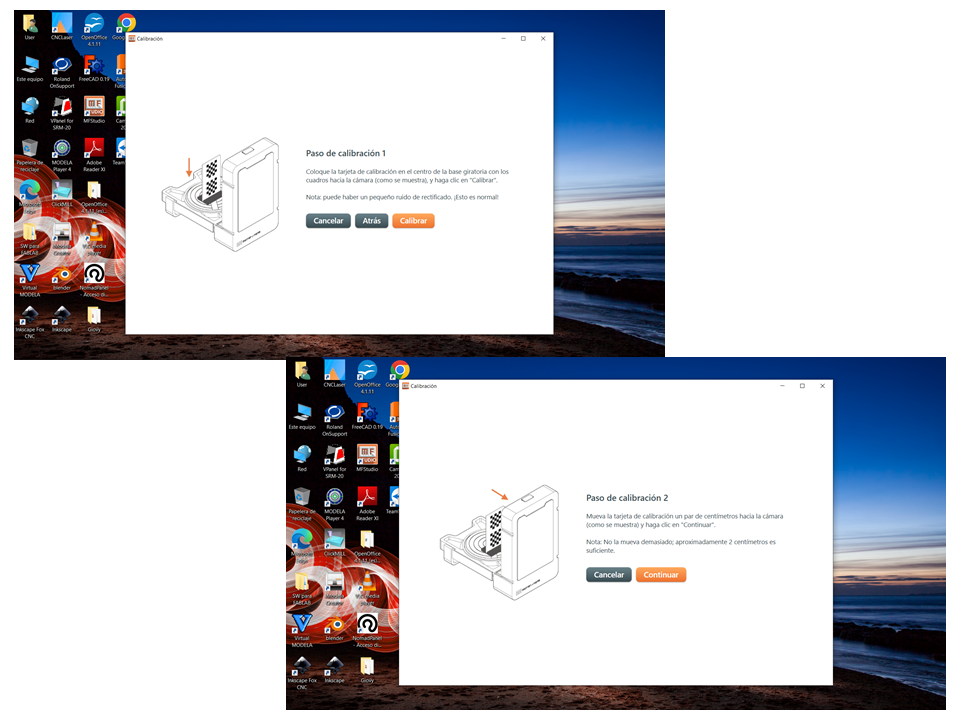
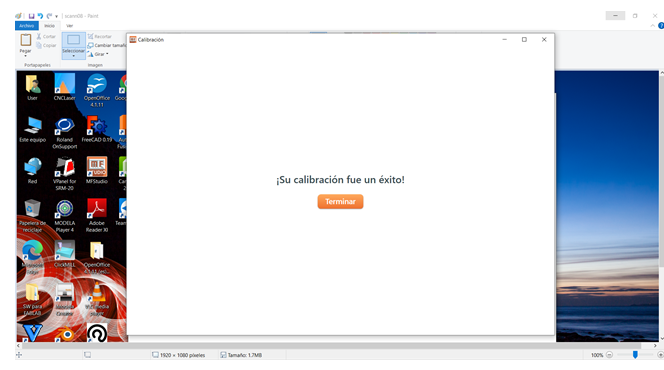
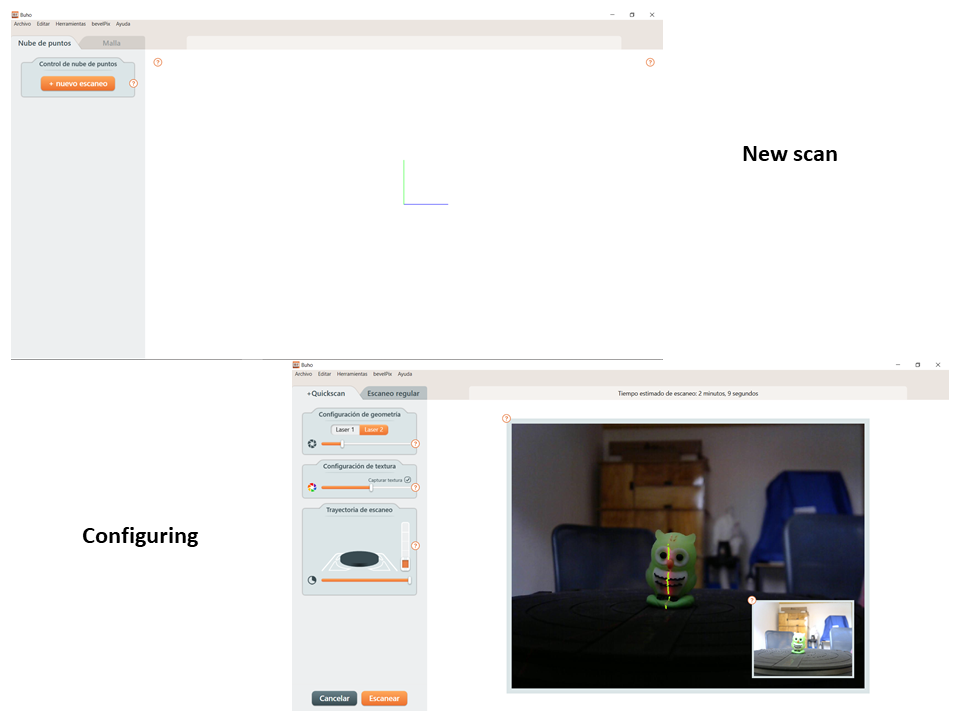
The equipment is connected Matter and Form 3D Scanner V2 and is calibrated before use, we enter the MFStudio Software
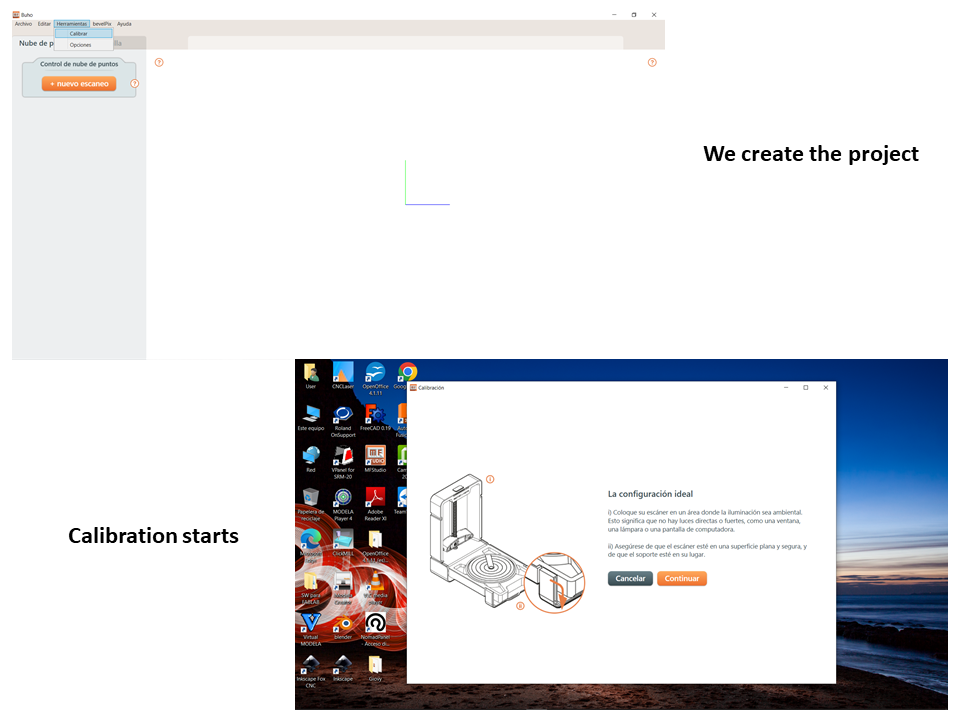
The scan is started by placing the object and setting
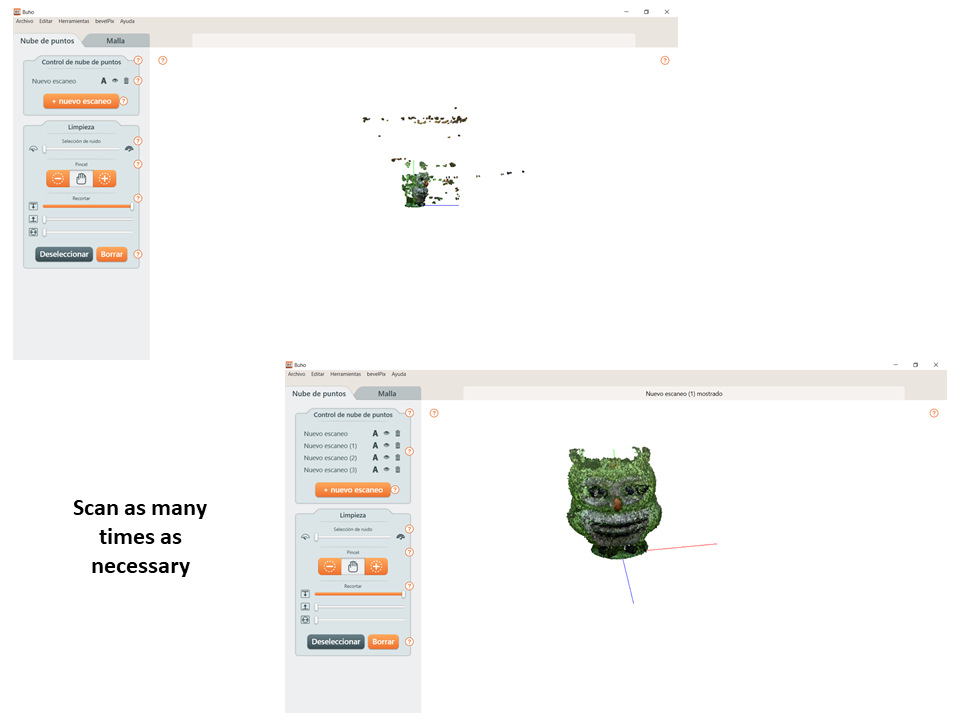
Another scan
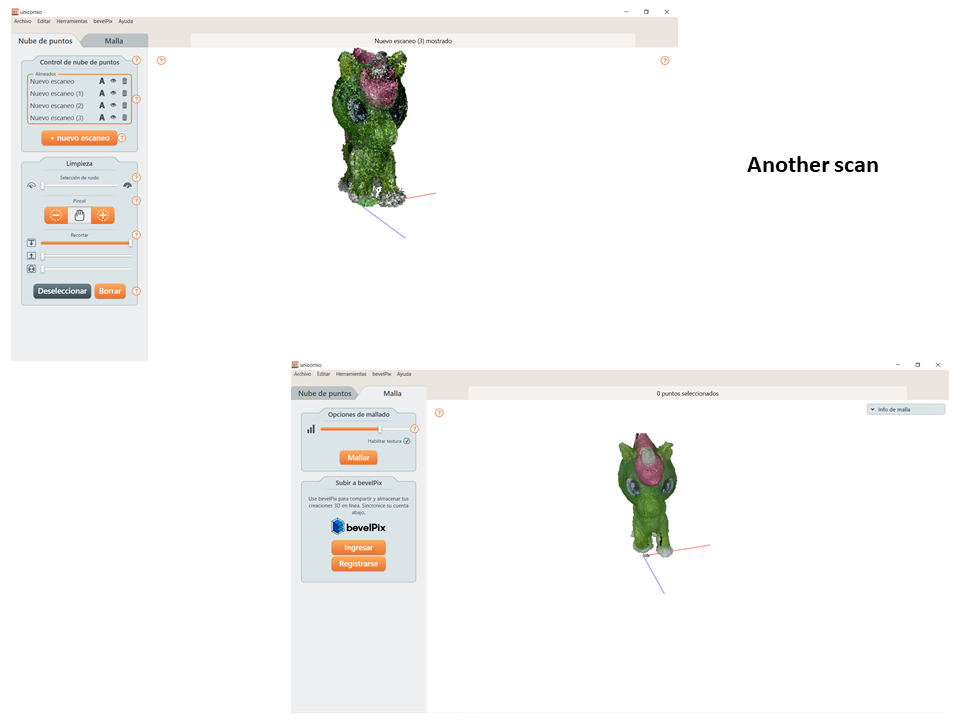
Another scan