5. Electronics Production
The group assignment this week was focused on getting to know our PCB milling machines and the PCB production process. Our mills are from Roland and Sainsmart.
Useful links to our Student Sites for this group assignment
Group Assignment
- Characterize the design rules for your in-house PCB production process: document feeds, speeds, plunge rate, depth of cut (traces and outline) and tooling.
- document your work (in a group or individually).
- Document your work to the group work page and reflect on your individual page what you learned.
Learning Outcomes
- Described the process of milling, stuffing, de-bugging and programming
- Demonstrate correct workflows and identify areas for improvement if required
Research
For this assignment we researched and worked with our mills individually. Jim used the Roland SRM-20 in his previous cycle and the MySweety CNC3-3018Pro this cycle. Abby’s machine is a Sainsmart Genmitsu 3018 PROVer and similar to Jim’s.
Milling Parameters and Design Rules
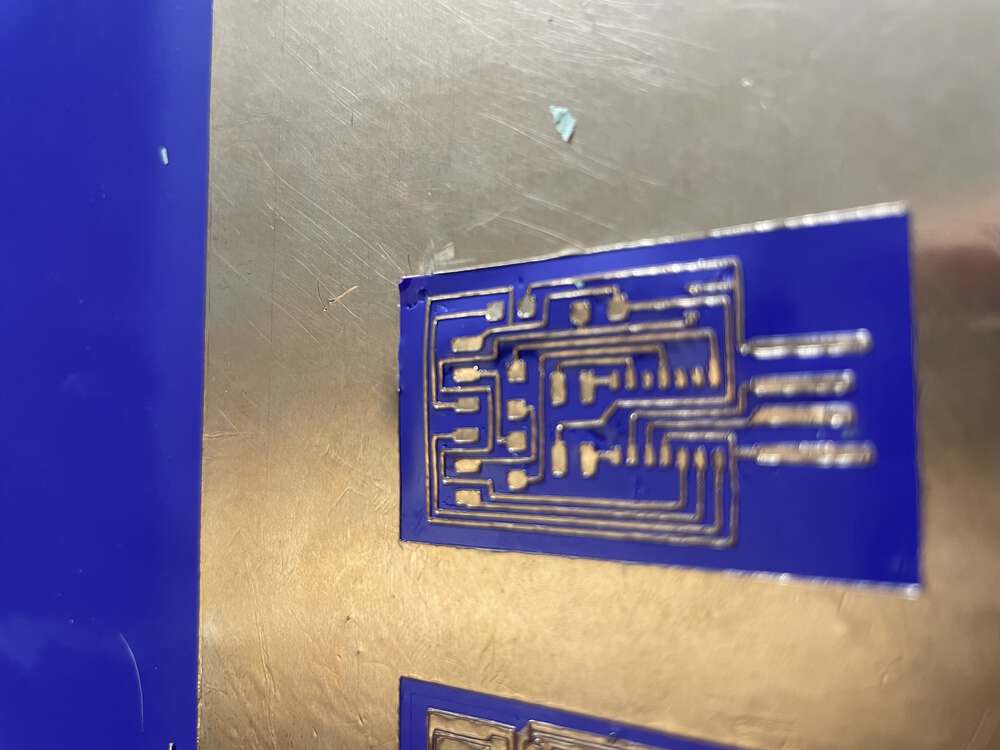
- Feeds - Our milling spindle was equal to 10,000 rpm and controlled by the software. The milling spindle speed is sufficient to cut FR-1 boards with good accuracy with a cut speed (feed) of 2.5 mm/sec.
- Speeds - speed is 10,000 rpm with a 2 flute 1/64” endmill.
- Material Thickness - 1.34 millimeters
- Copper Thickness - 0.034 millimeters
- Cut Depth per pass - .1 millimeters
- Plunge Rate - 2.5 mm/sec
-
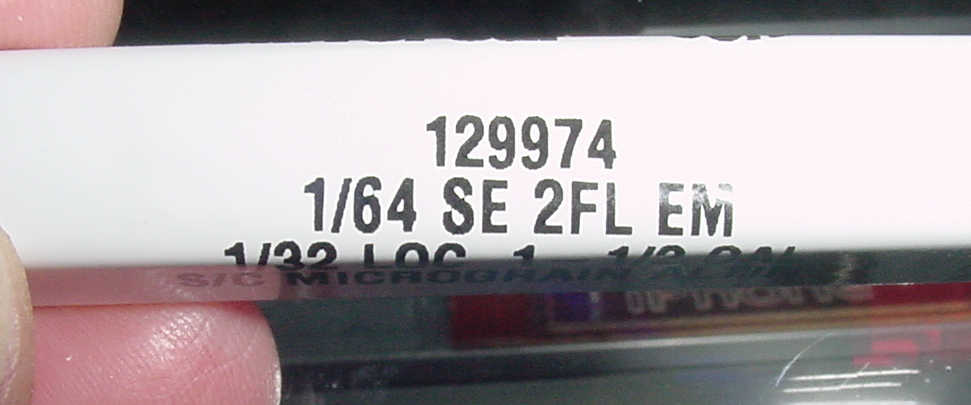
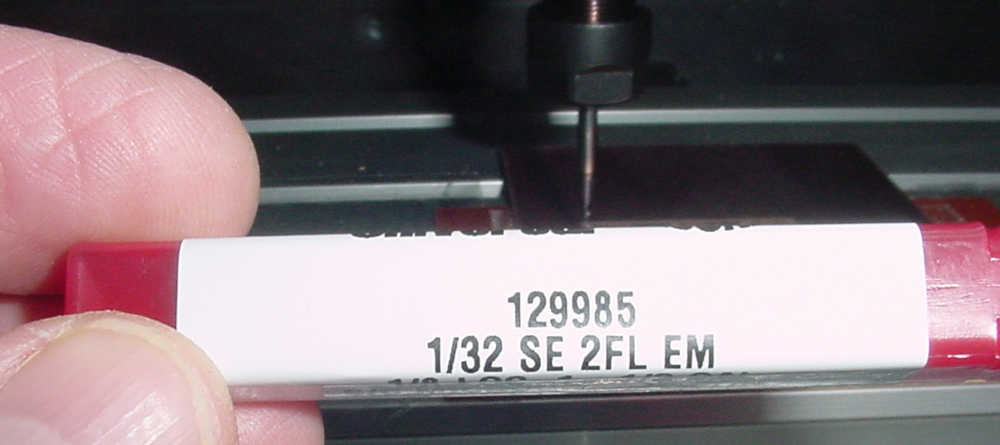
Tooling
- End Mill 1/64” SE 2FL EM - mills the traces
- End Mill 1/32” SE 2FL EM - mills the outline
Results
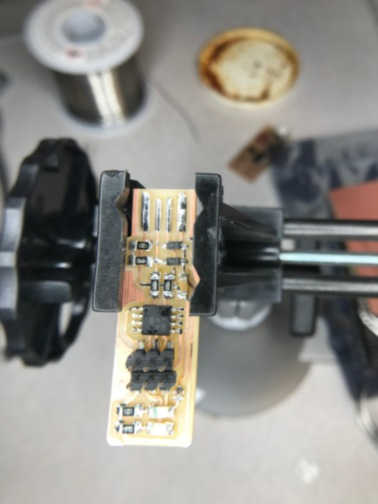
We were both able to complete the PCB production with good results. Abby went above and beyond with making a PCB with a vinyl cutter. Way to go, Abby!!
- Jim’s board from the Roland
- Abby’s boards from the Sainsmart

- Abby’s vinyl cut PCB!!