3. Computer Aided design
This week is all about CAD design software, along with getting an indepth feel for both Raster & Vector images.
Adobe Photoshop - Raster Image
Given Adobe Photoshop is a go to design software option within the creative space, including game design, along with being part of the Adobe Creative Cloud package, I decided to use it for my Raster image design.
For my first ever drawing on Photoshop, and maybe while also lacking a little design inspiration, I decided to draw my computer mouse.
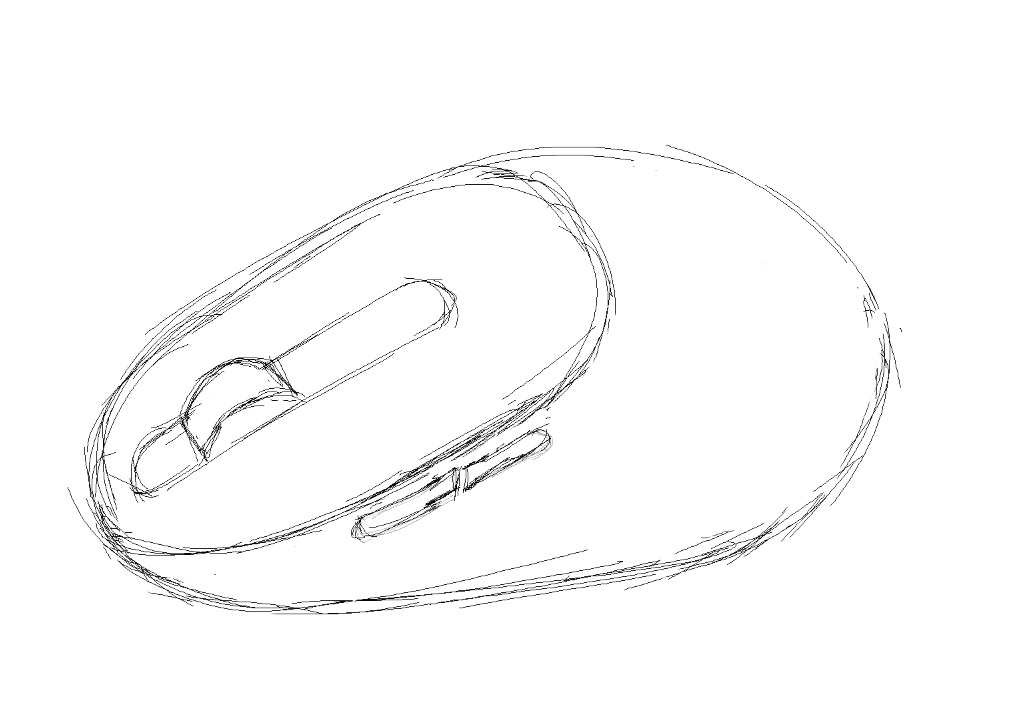
So the tool I used for my initial sketch was the Brush tool, a very helpful tip is the use of [ or ] keyboard buttons to decrease / increase the size of your drawing pointer.

Another tool I also enjoyed using was the Smudge tool, as seen above its effect on the silver and grey colouring, is similar to what you’d expect on a charcoal drawing and smudging with a finger. My drawing lacks colour but the smudge tool can be used across the entire colour range.
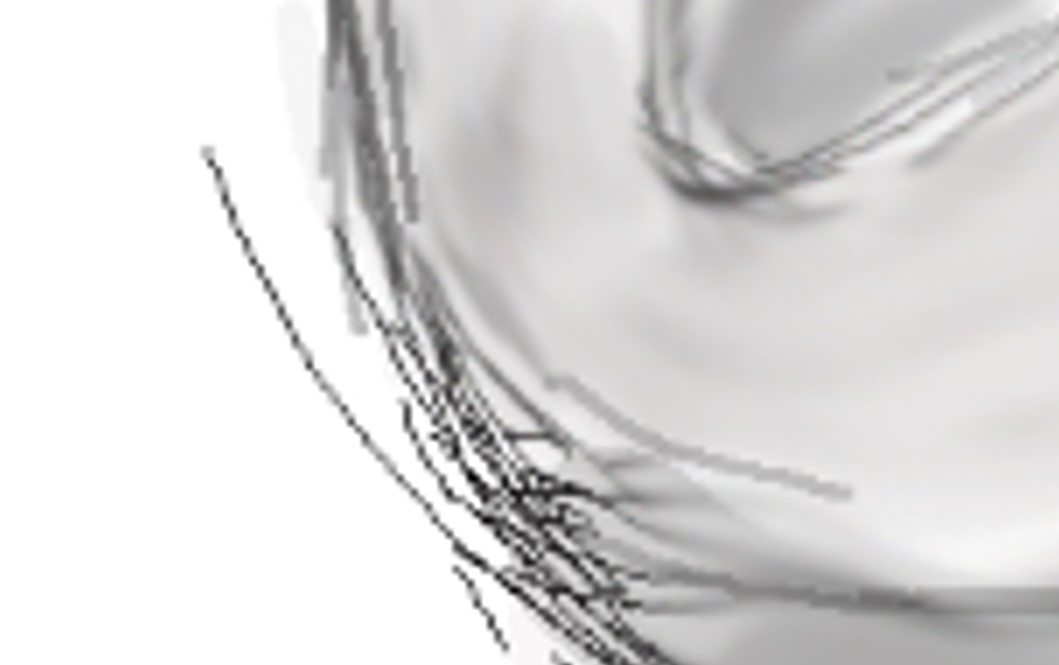
The image above shows that this Photoshop image is made up of many pixels or dots, this is the nature of a Raster (or bitmap) image, this pixel / dots element is not found in a Vector image.
Adobe Photoshop Highlights
This was the first time I’ve used both Photoshop and a Tablet / Pen combo, what I find exciting is the increased freedom to experiment / erase when compared to my pen & paper sketching in the past.
I’m also looking forward to experimenting with more colour and the laying feature in future drawings.
Inkscape
Inkscape is for creating and editing vector graphics, an excellent free and open source alternative to the likes of Adobe Illustrator.
As seen in the photo below, downloading Inkscape and getting it up and running was simple, being free and no account creation needed.

I have over the years attempted many logo designs / redesigns for my business ventures, mostly its been a hodgepodge of using online logo design sites, mixed in with some alterations via Paint (seeing Raster up close as at times this alterations were done pixel by pixel!).
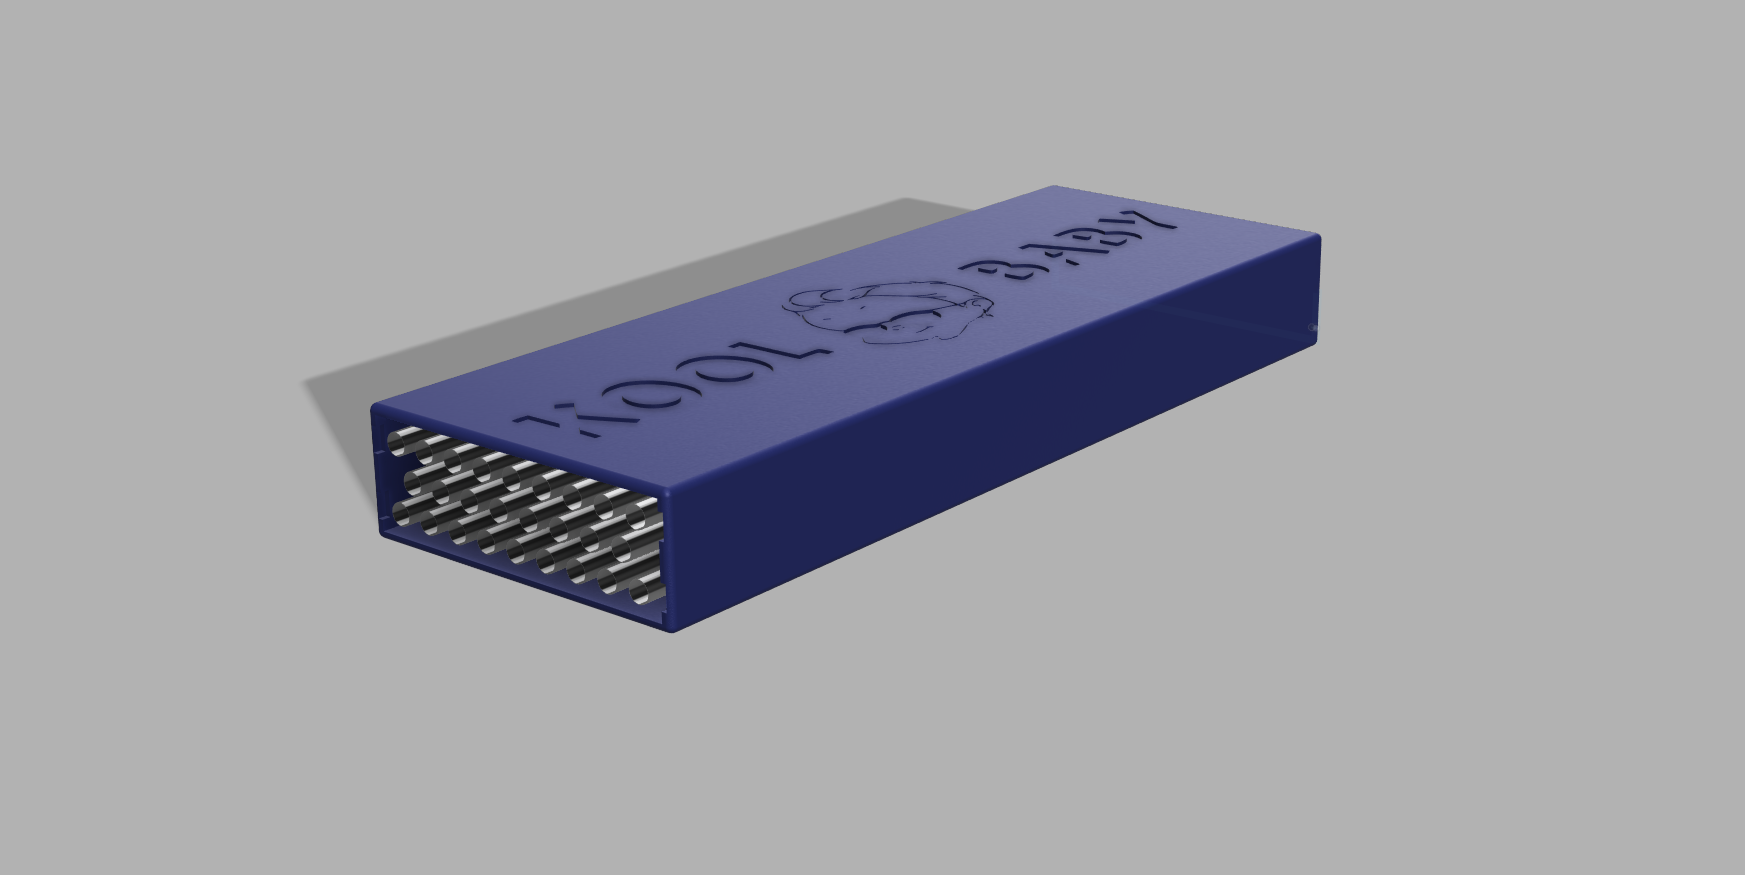
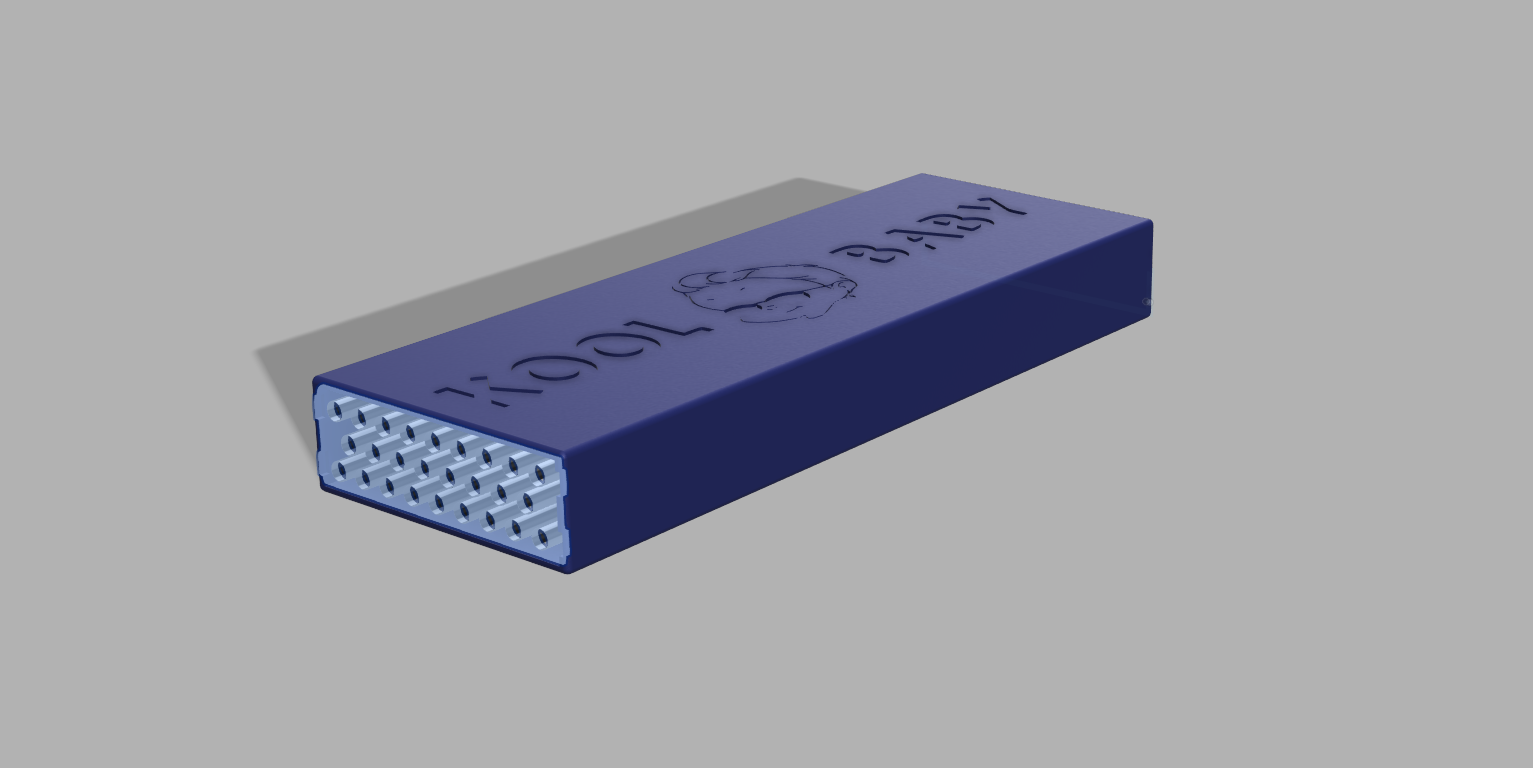
As Inkscape is considered an excellent option for logo design, I decided to convert my original Kool Baby logo (in Raster) into a Vector image.
Step 1 - Opening my logo file within Inkscape
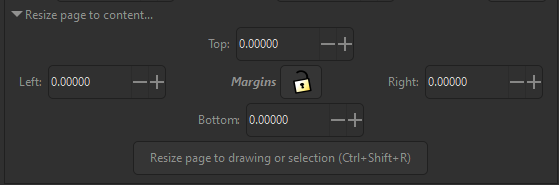
Step 2 - Given the odd shape of logos at times, there is a need to make sure you resize the page within Inkscape, making sure all the logo is included / selected. File > Document Properties > Resize page to content > Resize page to drawing or selection (as seen below)
Step 3 - Converting image into Vector form. Path > Trace bitmap > Select Opens then Apply
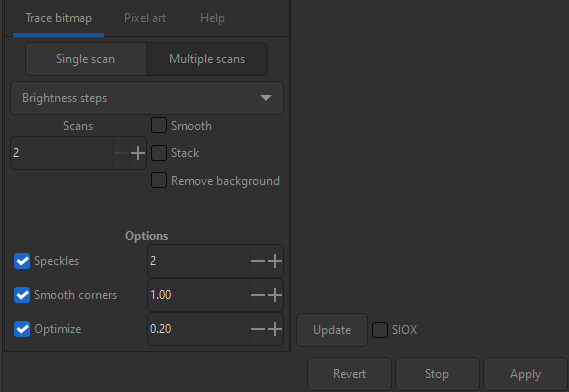
Step 4 - What options work for you? I tested multiple options, with “Multiple scans” being better for colour images along with a higher number of scans. However in Raster form, my logo had many unbounded areas, so I found the 2 “Scans” option to be the best, producing a clear image in which I could then edit.
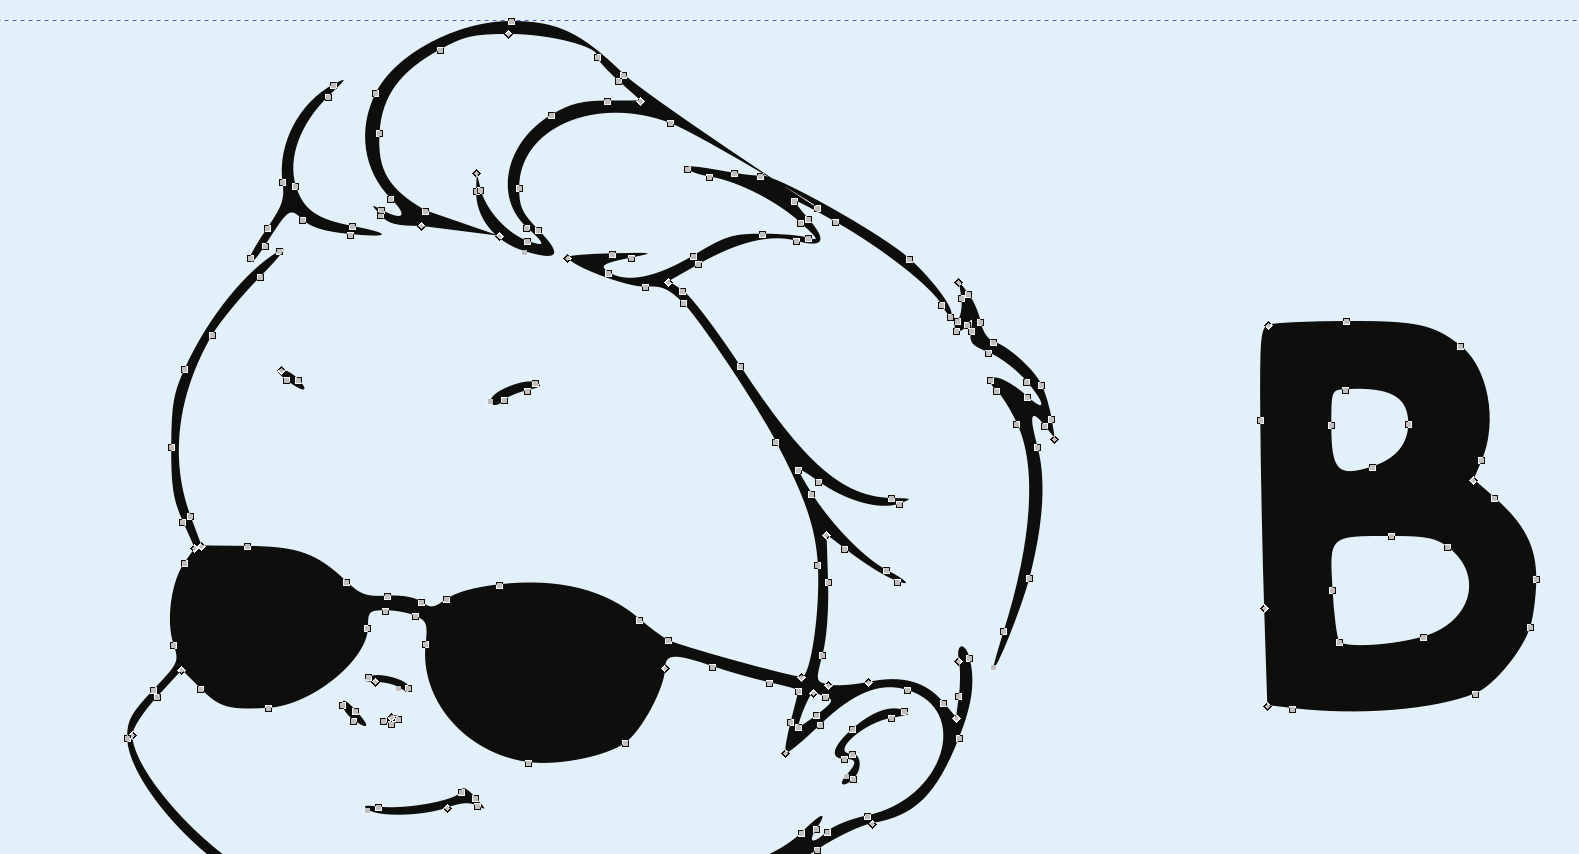
Step 5 - Editing the Vector image
a) To close up the many unbounded areas on my image, I used the “Edit paths by nodes” tool found on the left hand side of the screen
b) To add colour back into the image, I used one of my favorites tools, the “Pick colours from image” tool on the left hand side of the screen. I used this to identify the original colour scheme, to then use the “Fill bounded areas” tool to complete.

Inkscape Highlights
During previous logo design processes, a real pain point has been colour matching, jumping between and researching different HEX / RGB codes etc, and at times left with patchy colour work when merging designs from different software tools. I really like the “Pick colour from image” tool in Inkscape, I wish I had found it earlier!!! Additionally, Inkscape gave me the ability to convert my image to SVG form, very advantagous given my design in Fusion 360!
Additionally, Inkscape gave me the ability to convert my image to SVG form, very advantagous given my design in Fusion 360!
Useful links For Inkscape
Fusion 360