11. Molding and casting
As we learned during week 6, 3D scanning and printing, unless you have a printing farm, 3d printing is very slow even for short run productions. In such cases, molding and casting might be the way to go.
Molding and casting involves creating the mold to cast the final objetcs. And for the mold, often times, we need to make a first mold. The fabrication of the mold can be done in a number of ways, depending on the chosen casting material, but for a Lab production, silicone molds offer great advantages.
- Molds are flexible, allowing demolding of complex shapes
- Great range of materials that can be cast: high temperatures, food safe, skin safe
- Variety of hardness and detail replication characteristics
- Curing times ranging from about 1 to 24 hours
What to mold and cast
Once my final project has completed one full development spiral, it will for sure have parts that will be suitable for molding and casting. But until that moment comes, I will practice and learn with something smaller. While I was at the hospital, one of my best friends, Pedro, who runs a chess club and academy, challenged me to play online a correspondance game. I barely knew how to move the pieces, but it was great fun, so I thought that I could mold and cast a chess set and give it to Pedro as a present.
A chess set has a total of 32 pieces, that can be made out of just six molds. During this week, I will test as much as I can, both with geometries, molds and materials, and in the next iteration, finish the set.
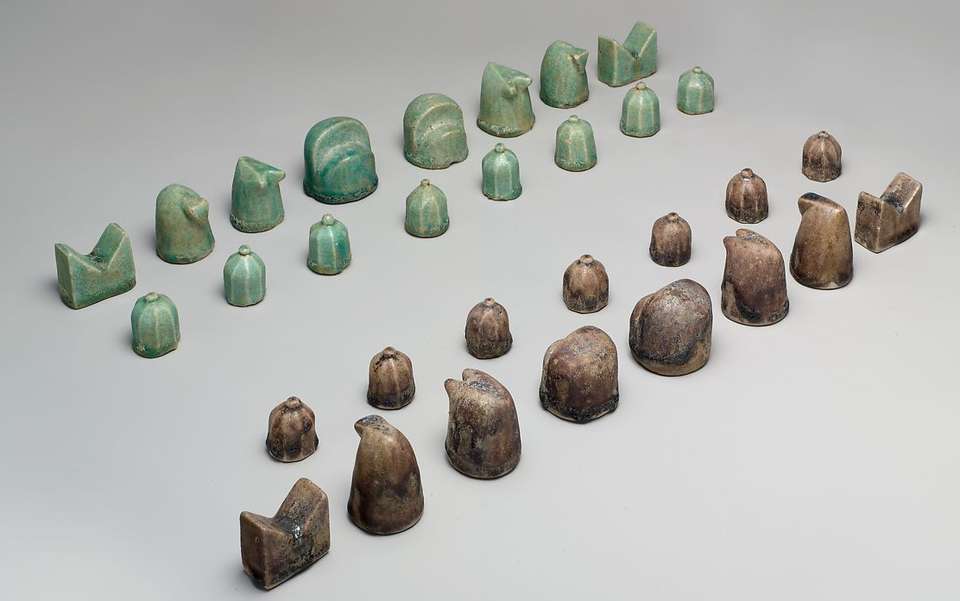
Even though probably the most common chess set int the world is the Staunton, designed by Nathaniel Cooke, chess is an ancient game, and of course in every culture the game has been played, there have been great designs. In the Metropolitan Museum of New York, there is this 12th century Iranian chess set, one of the earliest extant examples in the world.
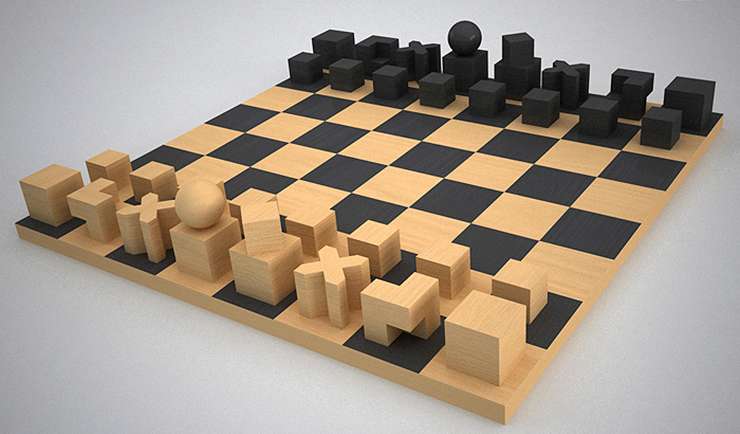
There are also great examples in modern art, such as the the one designed by Joseph Hartwig, during his tenure at the Bauhaus. Besides its elegant simplicity, it follows one of Bauhaus' mantra, form follows function: the shape of the pieces hints the player how it moves in the board: square for the rook, L-shaped for the kight, and an X for the bishop.
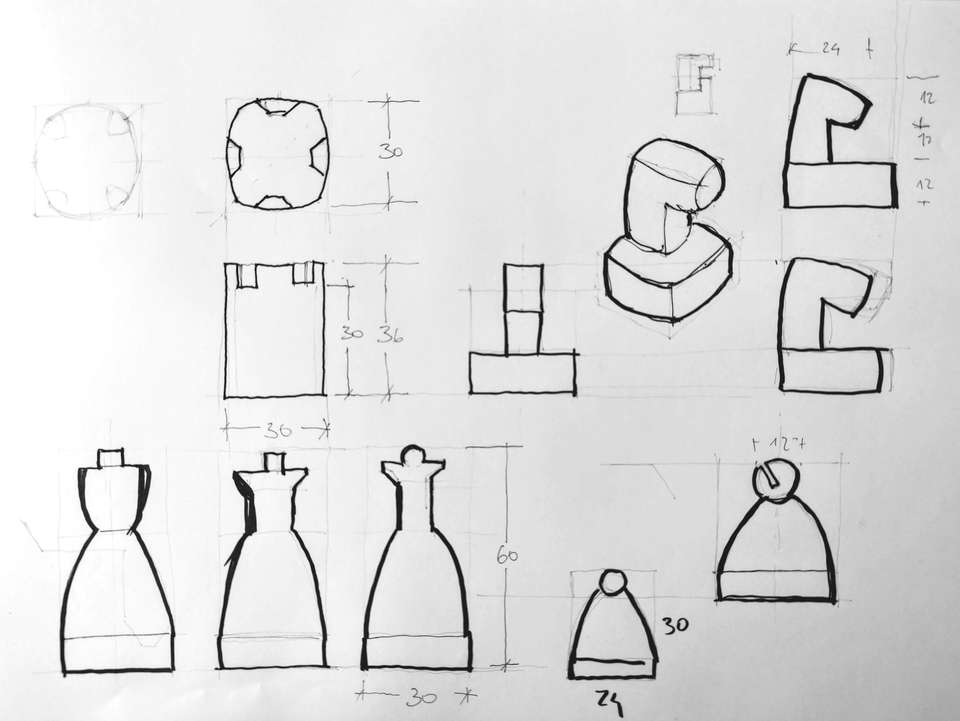
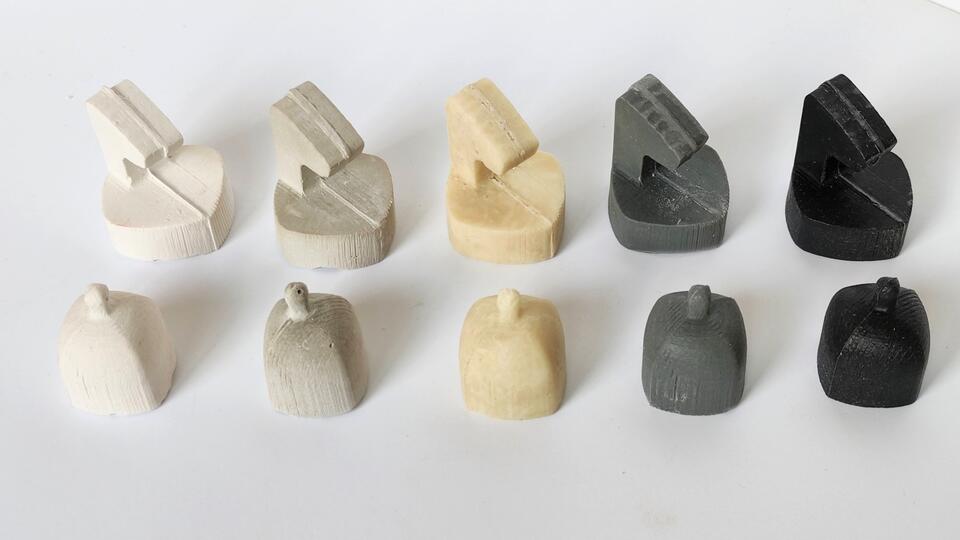
For my design I considered several options, such a FabChess edition, whith electronic components for each piece, or black and white chocolate pieces, so you can actually eat them when you capture. But in the end, I decided to keep the design simple yet easily recognizable. Another of the design goals was using globally accepted figures, so I went with sphere for the Queen and square for the King, instead of the classic Staunton cross. I tried to keep the pieces with nice overall proportions, being the royal couple the tallest in the set, fitting a double square rectangle. Rook, bishop and kight share the containing volume, and the pawn is the smallest, following the 12 century Iranian set overall shape.
Before continuing, I checked with my 5 year olds, to see if they could recognize the pieces. Thankfully, they did right away, so I kept going designing them in Rhinoceros.
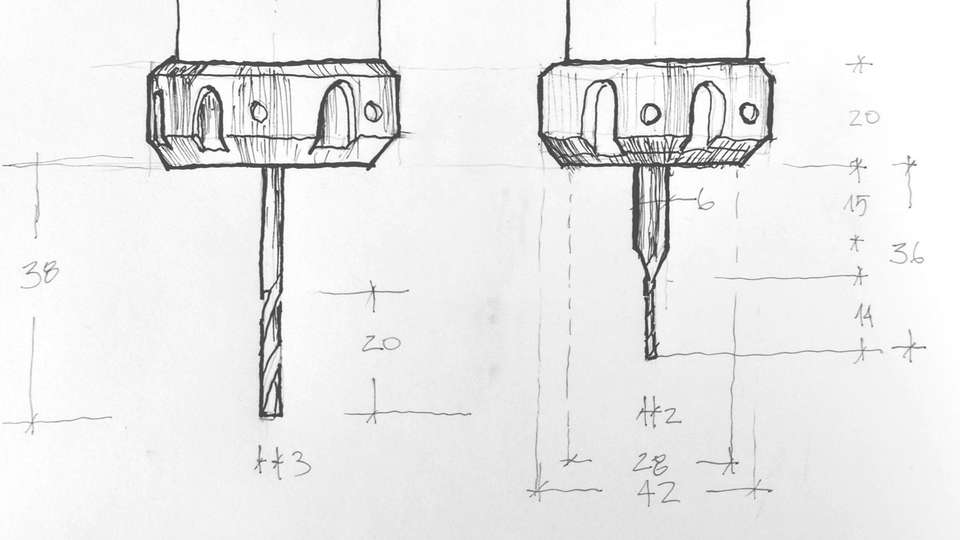
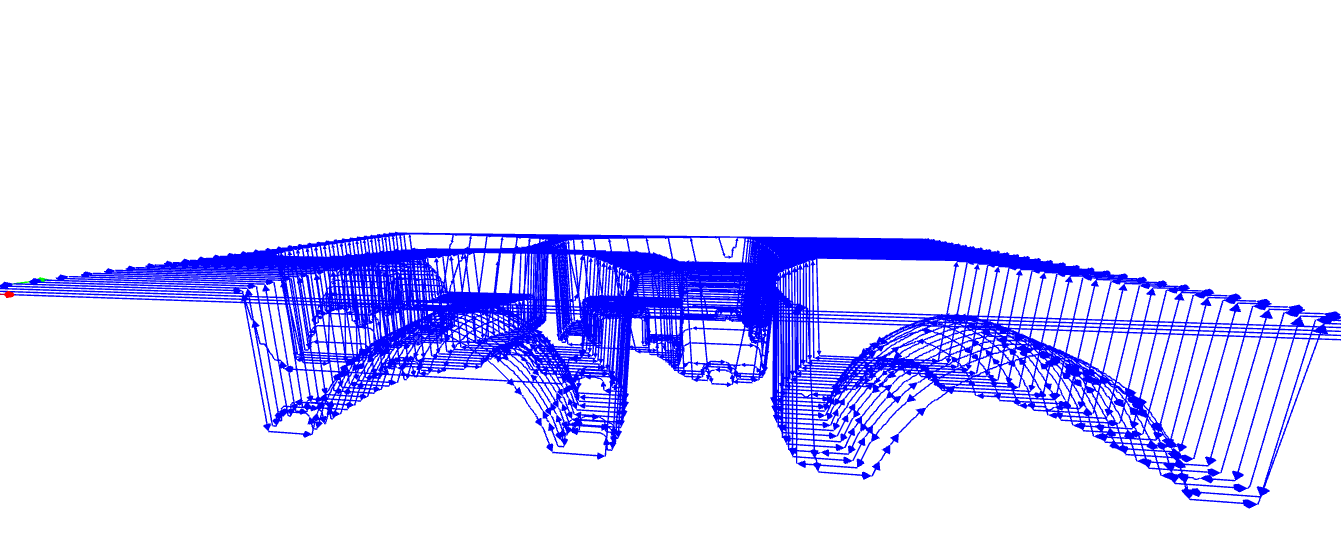
I also considered how the pieces were going to be made, so I carefully measured the tools that I have available for the task. I have two end mills that could be used, 2 and 3 mm in diameter. I would have used the 2mm, but the cutting edge was just too small, and the shank is 6 mm, so it would be difficult to use for the cut that I need. So finally, I opted for the 3mm end mill, which measured 38 mm from the tip to the collet. The main problem I encountered was the clearence needed for milling the "dots" connecting both sides of the mold.
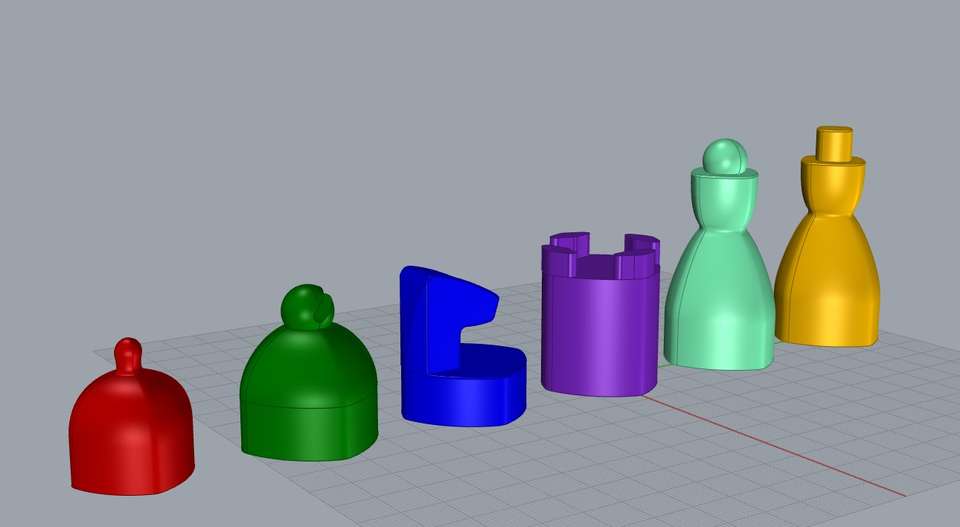
The pieces I designed are based in a curved side square in plan view. The starting figure is a 30 mm sided square. The height of the king and queen is 60 mm, twice that side. That side is also the height of the rook, knight and bishop up to its characteristic feature. Out of the six molds, five of them will be two sided, and just the rook will use a one sided mold, filling the material from the bottom of the piece. All pieces will be cast upside down, and the molds have two holes, one to fill them up and the second to let the air out.
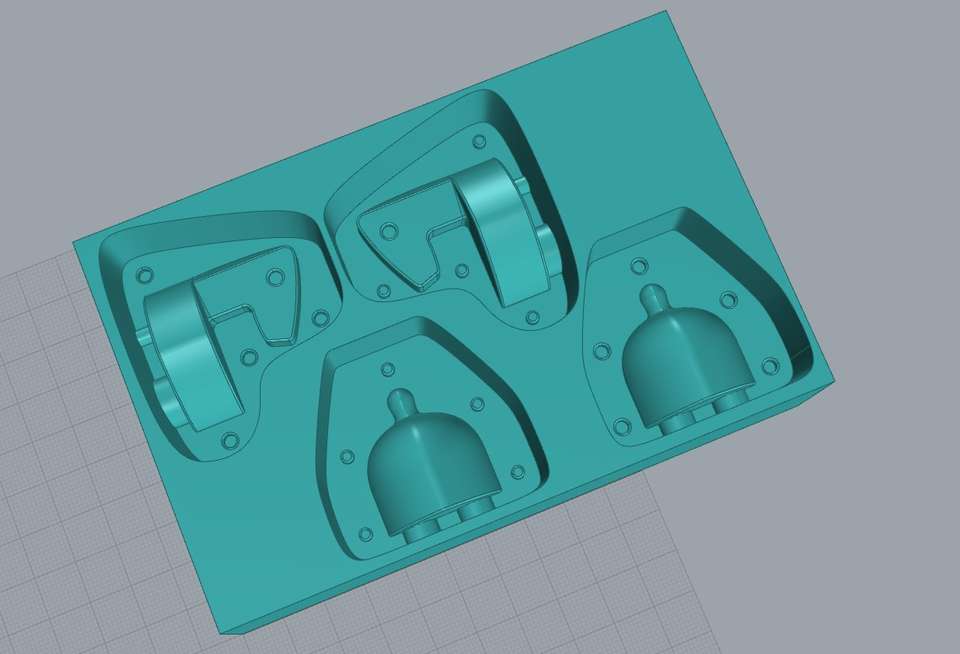
Since there will be a joint because of the two sided mold, I decided to make it along the diagonal of the base of the pieces, to try to hide it as much as possible. It would also give me the chance to check in which milling direction a smoother finish is achieved. As a remote student, I only have available a 140x100 wax block, so I decided to fit two pieces in it, and use the 3d printer for the other four. There will be a problem with the knight, since a part of the joint will be in a flat face, instead of in a crease, so it will definetly be noticeable.
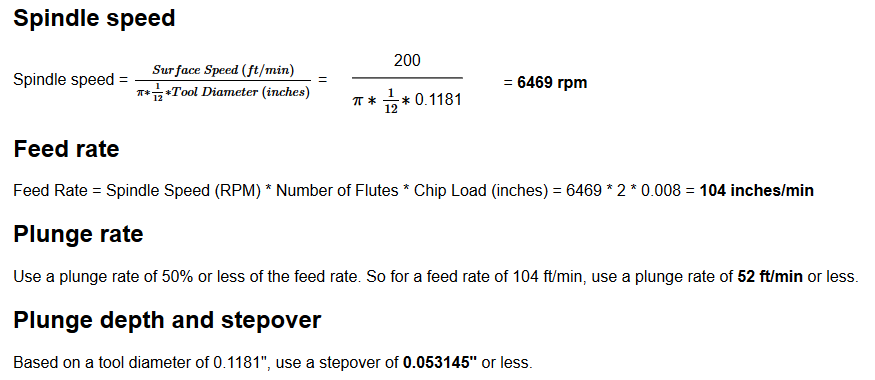
Next, it is time to machine de mold in wax, to cast there the silicone, which will be the final mold. I have never machined wax before, so to get a starting point for the cutting parameters, I used this speed and feeds calculator, found on the CBA website. Talking to my instructors, I found that the feedrate was about double what they normally use. But since wax is quite soft, I decided to go with them anyway: they were about what I would try for a small piece like this. Going faster does not make much sense, since there is no room for a smooth ramping in acceleration.
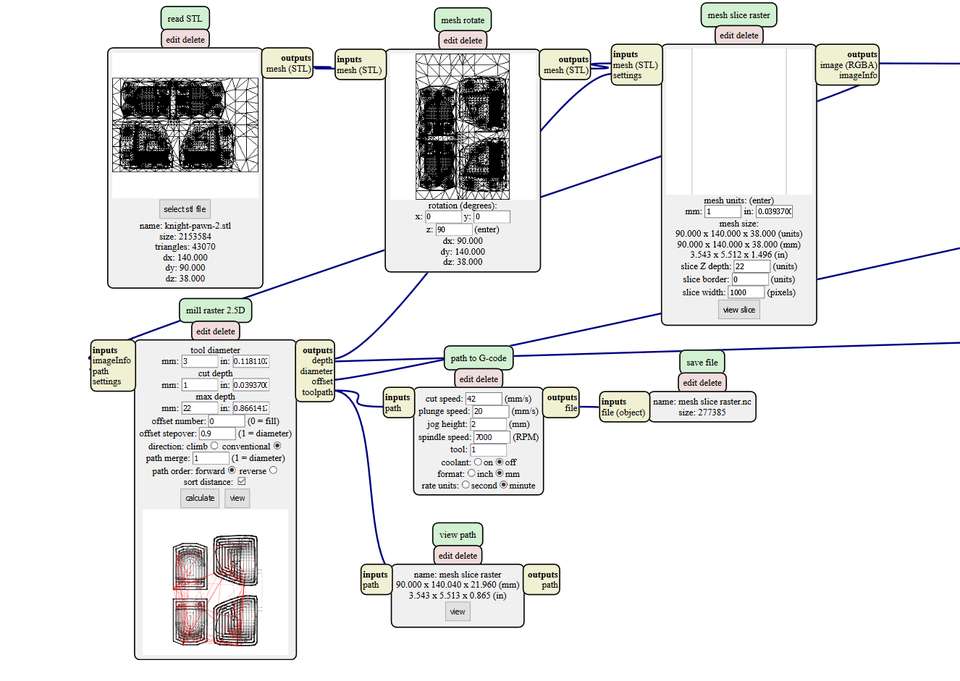

I ended up using again the Mods CBA edition, instead of community edition, because when outputting the g-code, the community edition writes the feed in mm/sec, and the CBA edition allows to choose between mm/sec and mm/min, which is the flavor my machine likes. I know is an easy fix, but I am still not confident enough programming to tackle it properly.
Before milling, I noticed that output path did not include the holes of the positioning "dots". Probably it was because I used the same diameter of the milling bit. So I went on to change the mold, using this time a diameter of 5 mm for the dots.

In mods, I rotated the piece 90 degrees, so the mill would travel in the short direction of the wax stock. But then, once I arrived to the Lab, I fixed it in the wrong direction. It was firmly attached by double-side tape, covering all the base. So instead of removing it, I used a gcode comand, G68 R90, which rotates the job around the set origin. It was really handy, and worked just fine!
For the roughing, I used a quite agressive stepover of 0.9, and the stepdown in Z was set to 1 mm. It took 27 minutes to get the job done, with a maximum Z travel of 22 mm. The only problem I noticed was that, at pass Z=2, it went out of the block and then back in, leaving two cuts in the edge of the mold. I wonder if it happened because of the G68 command, or if it is a bug from mods... Anyway, it was just a small cut that could be easily fixed.
The finishing took much longer... I set the stepover this time to 0.06 in mods, which means it was just 0.2 mm. And the plunge speed was 20 mm/mm. I wander if that was a mistake: next time, I will test using the same 42 mm/min both for plunging and surface moves. My guess is that milling time will come down by about a third. This time, it took the machine two and a half hours to finish the job.
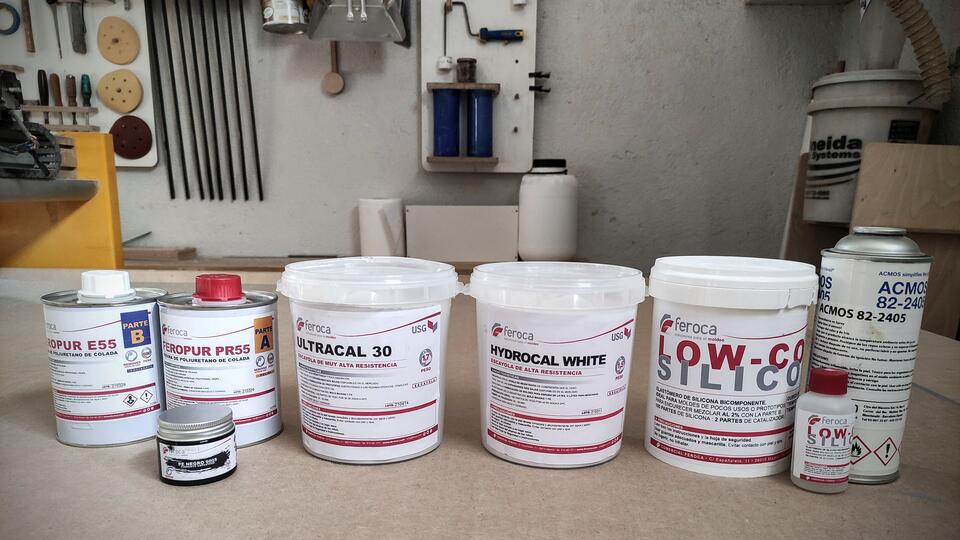
Then, it was time to get out all the products, read the safety data sheets, and set up my very own Breaking Bad like Lab. I bought all the products from a local vendor, Feroca, that also provided all the data and safety sheets of the products. I got a low cost silicone, for the molds, a polyurethane resin in two components and two high resistance plasters. All the proportions provided by the vendor were in volume.
Group assignment: reading safety data sheets & testing different materials
The data sheets of the products and their safety data sheets can be found here:
- Low cost silicone data sheet
- Low cost silicone SDS - A
- Low cost silicone SDS - B
- Polyurethane resin data sheet
- Polyurethane resin SDS - A
- Polyurethane resin SDS - B
The most dangerous material to work with this week is the Polyurethane resin. Safety measures include using it in a highly ventiladed room, using both googles and a respirator with active carbon filter, use nitrile gloves and a propper garment. For disposal, the best way is to activate it and let it cure, and then treat as any other plastic waste.
For the plaster, there is no special security instructions in the vendor's site, but it can be found here. The precaution I had was that it was used in a highly ventilated room, with two opposite windows open.
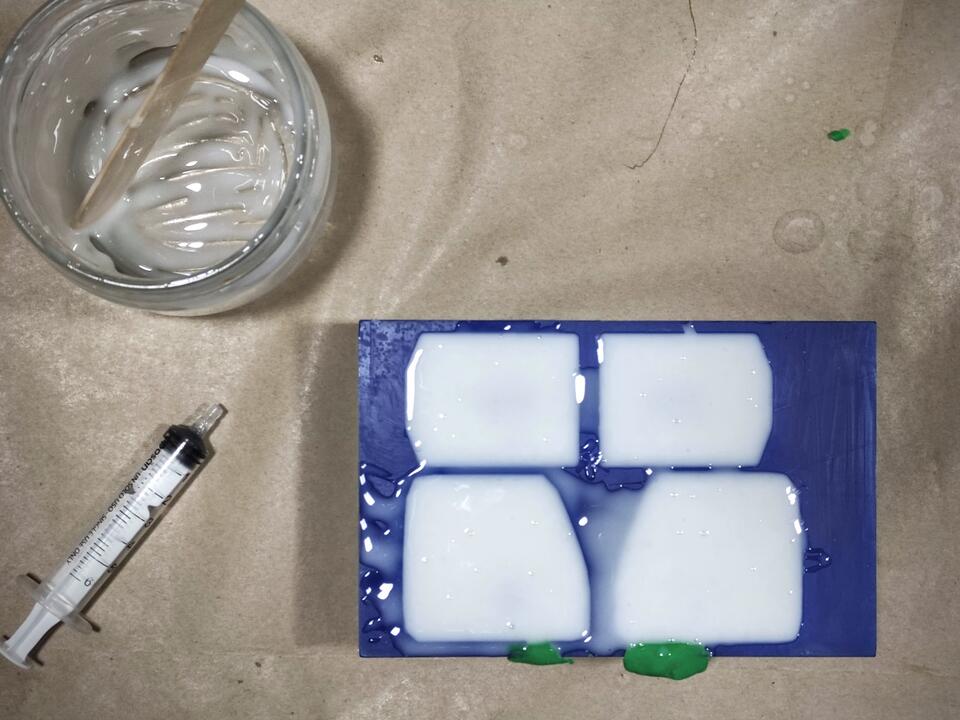
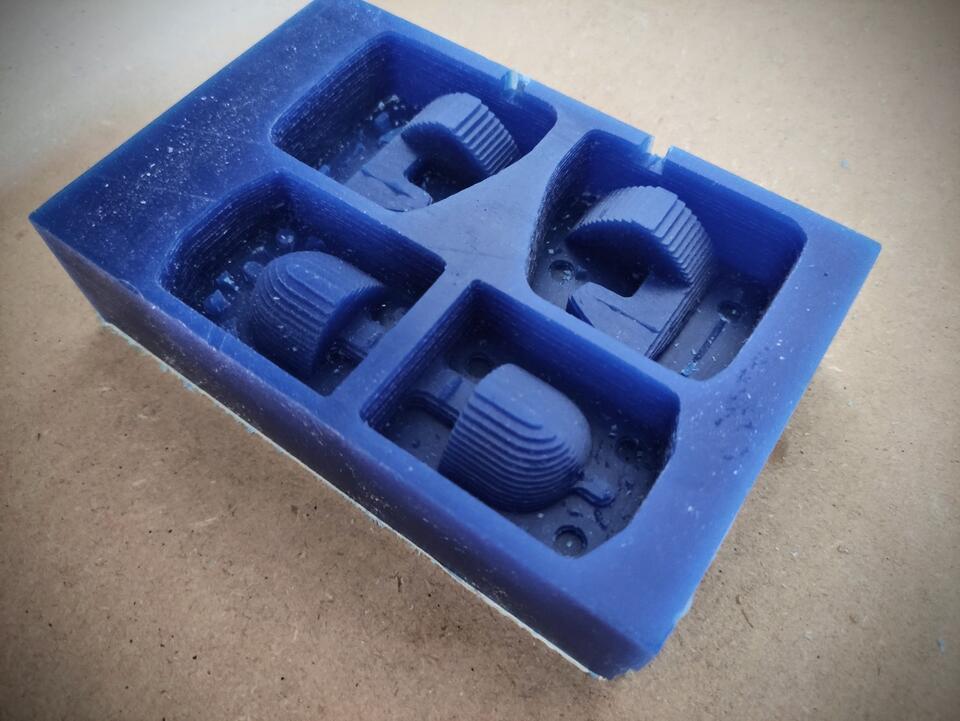
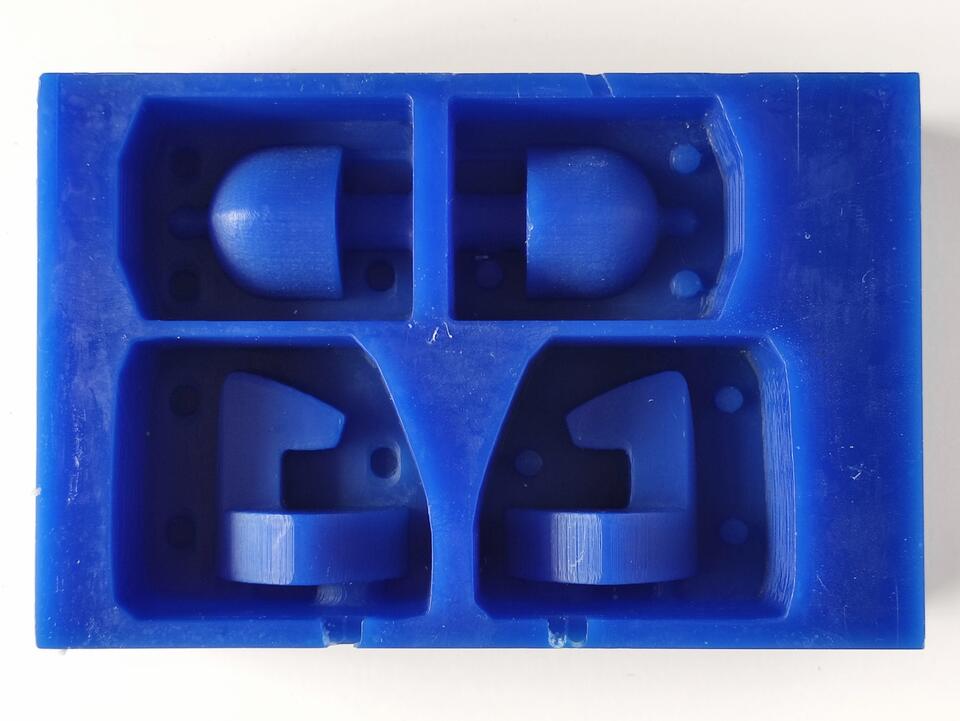
The silicone used has a rated strength of 25, which is quite low. That will help in the demolding process. It has an open time of 25 minutes, and it will cure in about 15 hours @ 23 Celcius. The open time was just enough I mixed the two components for about 10 minutes, and it took me more than 10 to slowly pour it over the wax mold. Even I tried to do it carefully, I could see bubbles popping on the surface. The first time I attemped to demold, it was still somehow sticky, so I waited a couple of hours more. Demolding was easier than I thought it would be, and every part of the mold fit whith its symmetrical perfectly.
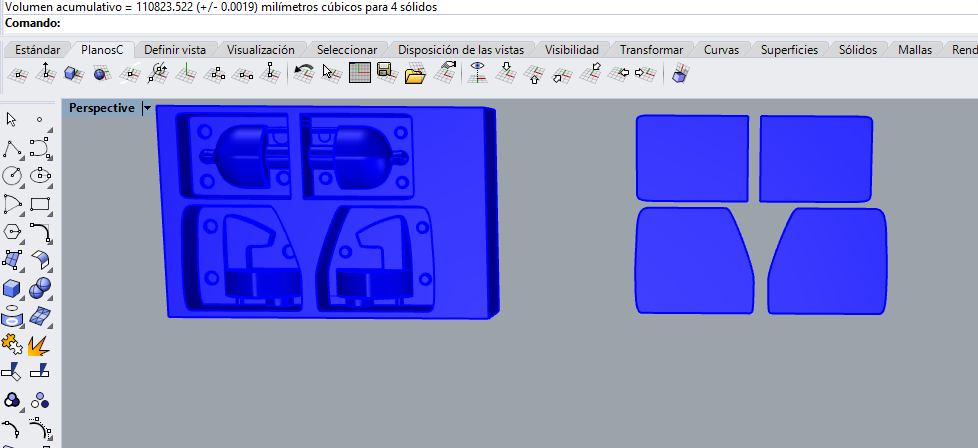
To calculate the amount of silicone, instead of using rice, or water filling, I just measured it in Rhino, to roughly estimate how much I would need.
To make the pieces, I am using both plaster and polyutherane resin. Since this is a proccess that I have only done once in the past, I am a bit nervous about the outcome.
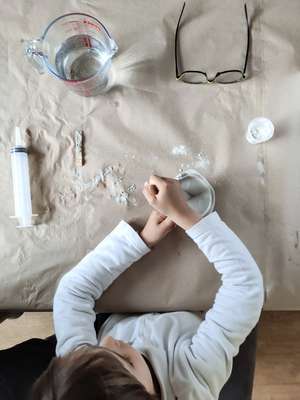
For the firs try, I used the plaster, and some help from my very young assistants. I used both Hydrocal and Ultracal, local names in Spain for USG Hydrostone. The first time, I missunderstood the mixing proportions, and I added the amount of water that should have been plaster, resulting in a very liquid slurry. I quickly fixed it, and got it right. Working both with Hydrostone and Hydrocal is quite similar. The only apparent difference is the color. Hydrostone is soposed to have better strenght, whereas Hydrocal is completly white.
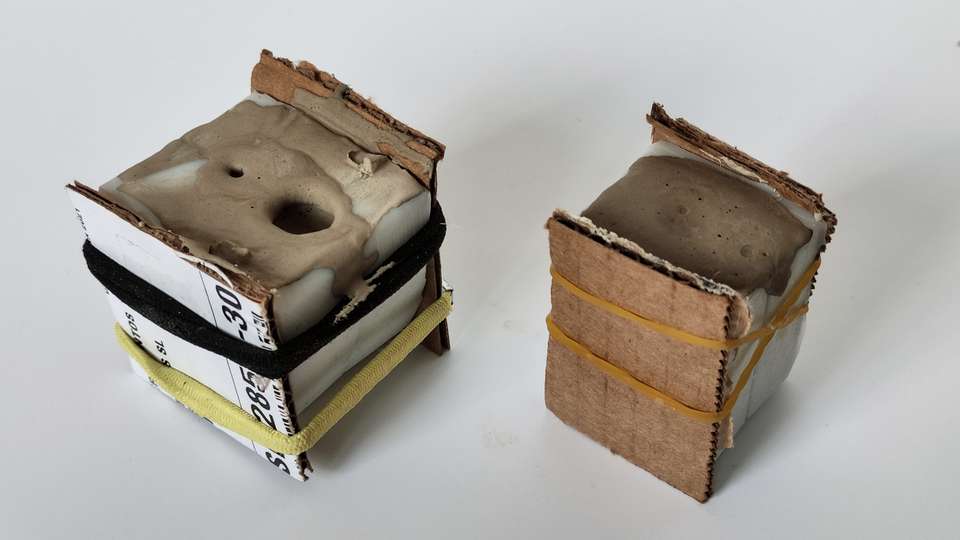
We tried to mix it slowly, moving the stick only horizontally, so no bubbles would be added to the mix. In about two minutes, it looked homogeneous and with a nice consistency, so It was time to pour it over. The mold had two holes, one large, for the material to come in, and another one small, for the air to go out. To keep the two sides of the mold toghether, I used elastic bands.
Pouring the mix took a while, and I helped it in with a thin stick. The stick was also used to vibrate it once in the mold, pretty much the way it used to be done with concrete before vibrators were common in construction, but at a small scale. Even though I tried to avoid them, there were places where the plaster did not reach, due to air bags that did not get out.

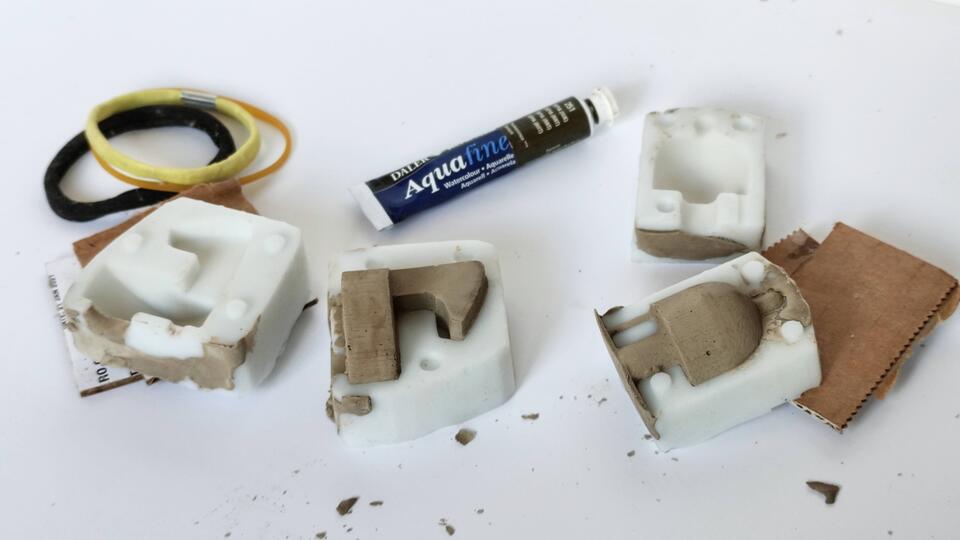
The plaster cured quite fast, in about 25 minutes, and we were finally ready to demold for the first time!!!
One of my assistants did the process, carefully removing the elastic band and opening the mold. He found a knight, which he recongnized, and was very happy with the result...Success!!!

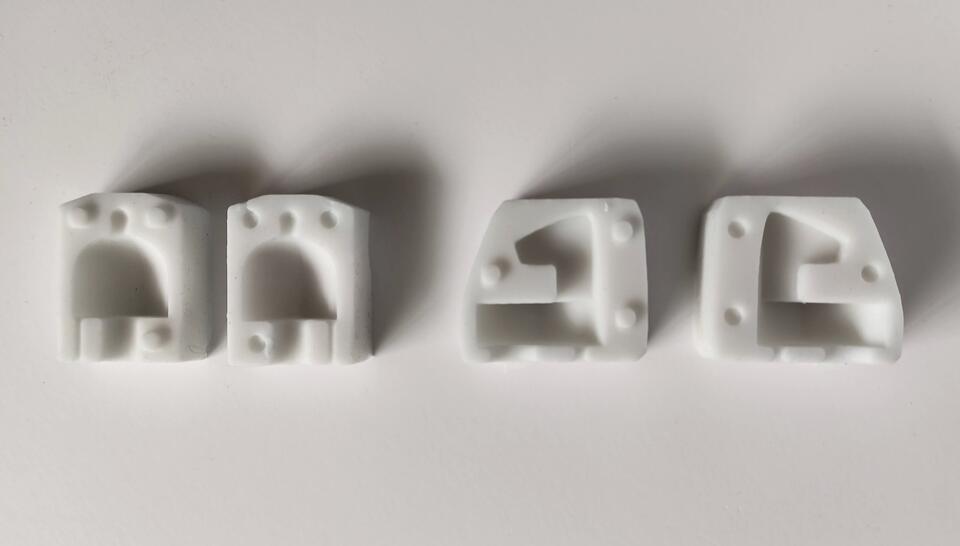
We had filled the mold all the way to the holes, so I had to cut out the two cilinders at the base of the pieces. It was done easily with a handsaw and a little bit of sanding paper. I was quite happy with how the pieces look, altough I did not completely align the two sides of the molds, and the joint is clearly visible. Maybe the problem was that the silicone is very elastic, and the rubber bands missaligned the two faces...
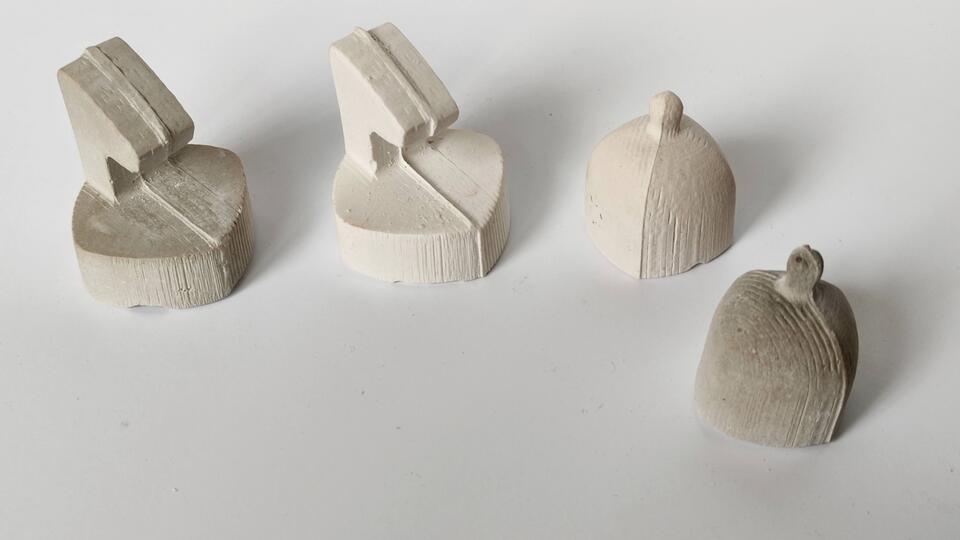
So for the next batch, which we colored with watercolor, instead of using the rubber bands directly on the mold, I cut two pieces of cardboard, so the closing pressure would be evenly distributed over the face of the mold.
This time, I liked the result much better... practice makes perfect!!! Hopefully, by the time I can cast the whole chess set.
Once my young assistants were at school, I could move on and use the very toxix stuff. So I used working clothes, gloves, safety glasses and a respirator with carbon filter. I also opened two opposite windows wide open, following the SDS.
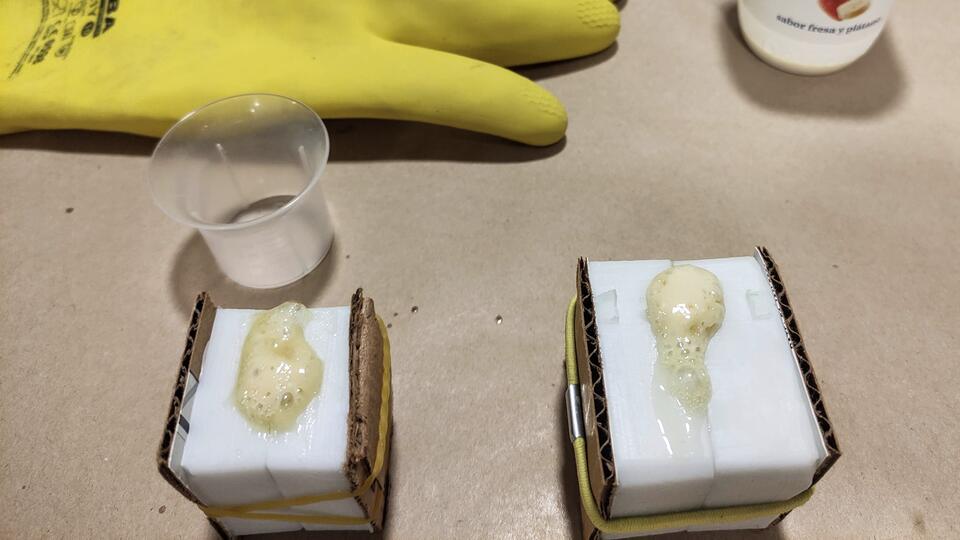
The polyurethane resin that I used is very fast. It has an open time of just 80 seconds, and it sets in just 8 minutes. So it is perfect for repeating the process over and over...
For the white pieces, I think the natural ivory color of the resin might be ok, but of course, the dark pieces would need some kind of tint. I got a solvent based pigment, that I mixed in two different proportions, 1% and 2%, and got quite different results. Since the open time is so short, I mixed the color first with one of the components, then added the second. And since the final color is so sensitive for the proportions, I guess that for a larger batch you have to premix one of the components with the pigments, so the whole batch has the same color.
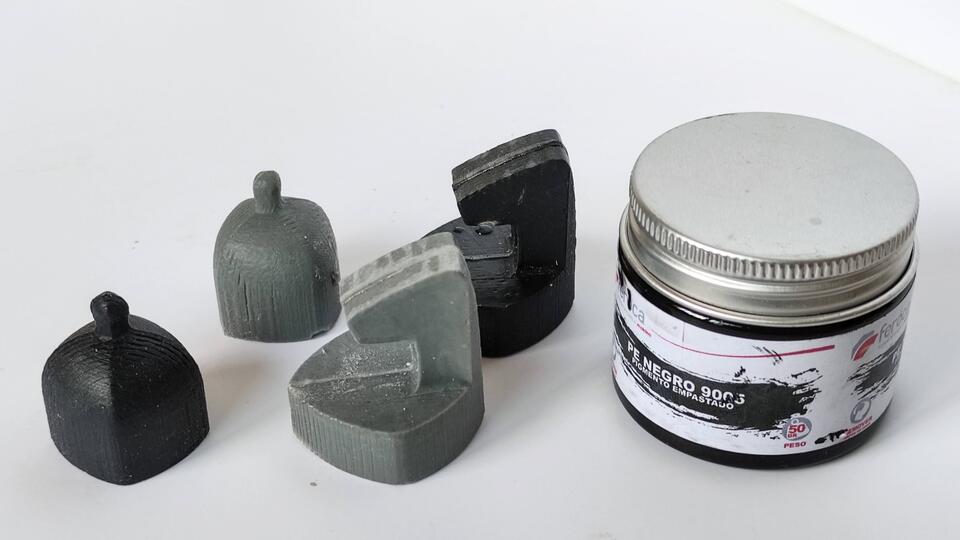
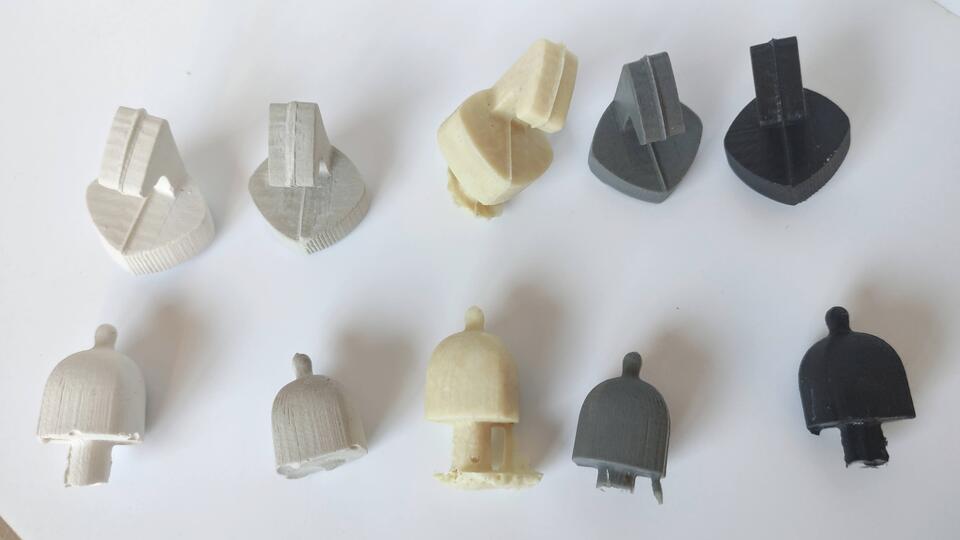
This is the result of this run. To be honest, I found the joint way too visible. So I was wondering, if, by making a first mold with the 3d printing, and since the silicone is so flexible, I could make it work with one part molds.
3D printing is quite slow, so I did not finish have time to test as much as I would have liked to. I used standard settings, whit 0.2 mm layer height and 0.4 nozzle. If the molds work fine, I would like to test with finer printer settings ans an epoxi coating over the 3D printed mold.
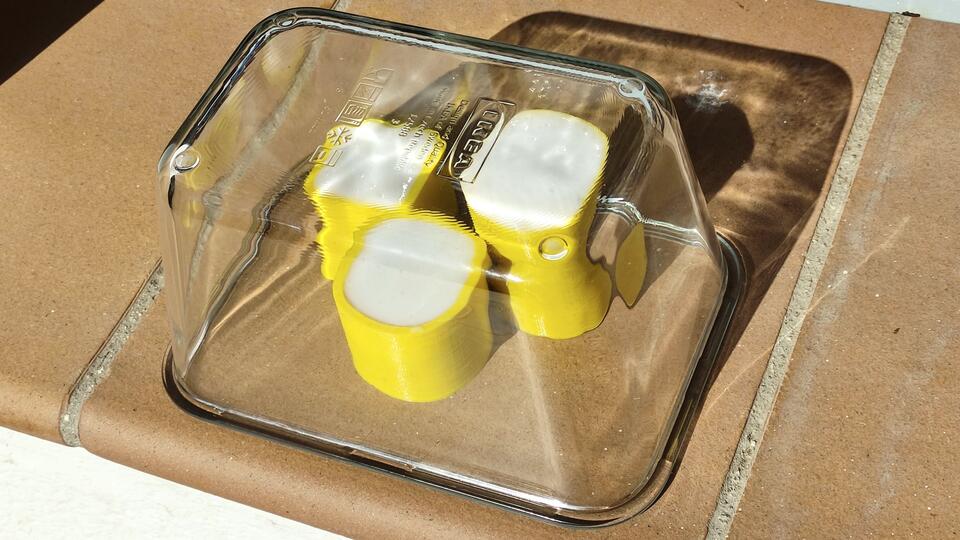
Since I am really short on time, I wanted to speed up a little bit the curing of the silicone, so I improvised this solar oven, to raise the temperature above room temperature. It did work, and I finished the mold just before the class started...
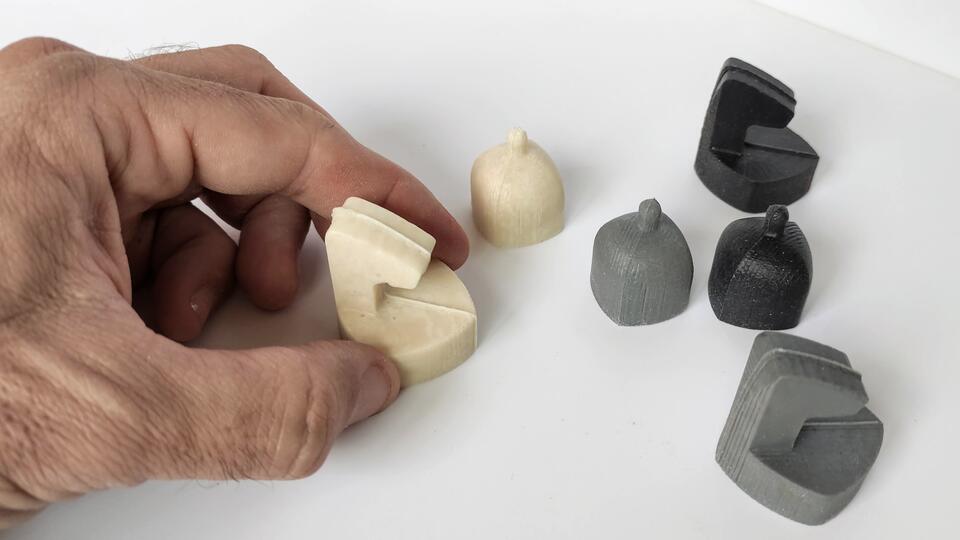
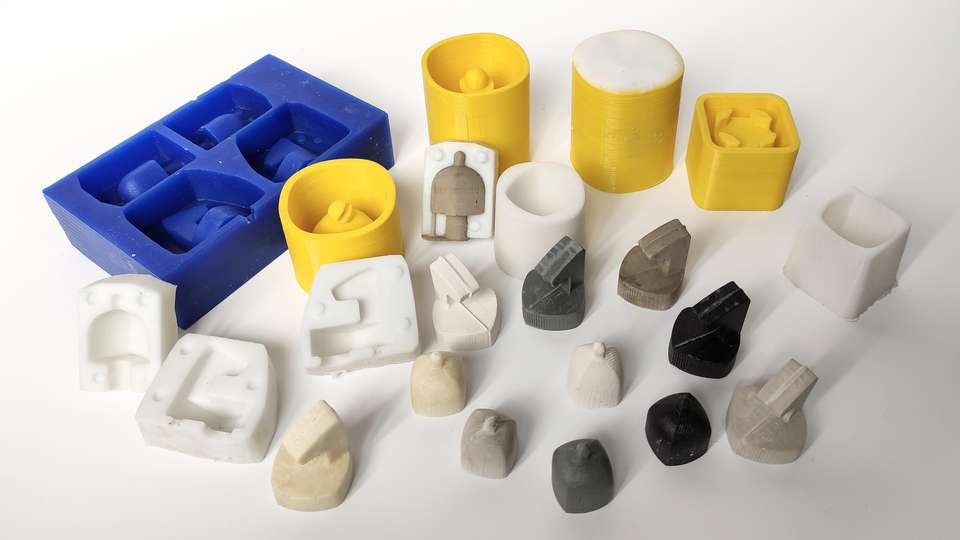
Finally, this is what I managed to make over the week. I am quite happy with what I have learned so far, and even I have not yet tested the one side molds, I am really looking forward to see if its viable.
That was that for the week... hopefully, with all the info gathered, I feel I am ready to retouch and finish a complete chess set!!!
The files used this week can be found here: