8. Computer controlled machining
This week we focus on Computer Controlled Machining - sometimes known also as CAM (Computer Aided Machining). This is where we use a Computer Numerical Control mills and lathes - also known as CNC.
CNC falls into the area of Subtractive Rapid Prototyping (SRP) - which cannot be produced with additive processes, such as 3d printing uses (SLA/FDM).
CNC and SRP teaches real manufacturing constrains - these are typical of the aerospace, biomedical, consumer goods and electronics industries. Often a part for rapid prototyping can be difficult or impossible to manufacture - this process provides the designer with feedback about the manufacturability of the design - which in turn can save considerable time and money.
The group assignment was divided into
  - do your lab's safety training
  - test runout, alignment, speeds, feeds,
  materials, and tool-paths for your machine
individual assignment
make (design+mill+assemble) something big (~meter-scale)
Group Assignment:
For CNC milling MACHINE we are using a RECONTECH 1312.
Our large scale CNC machine is 1200 x 1200 in the xy and a maximum z height of 900mm.
The Recontech 1312 is a large-format CNC Router can take a half-sheet of standard panel material and has an increased Z-axis capacity to enable even bigger 3D-carved projects.
Incredible accuracy and finish quality can be achieved with this machine - and can be adapted to using heavier solid materials. According the Aalto FABLAB page, Two sided milling is also possible but stock material and designs should account for clamping and required calibration.
safety guidelines
Cnc machines are generally safer than manual machine tools. However should something go wrong, you may not be alive to tell the tale - it can be fast and ruthless.
Some examples of careless behaviour that would compromise safety: - Forgetting safety glasses and sustaining eye injury - Leaning against a bench where a cutting chip has fallen, creating a cut - Open sandal or soft shoes and heavy objects or chips falling - Person leaning over suddenly hits their head on a sharp machining bit - Person reaches into machine, and rakes their arm against the end mill - Fingernails ripped while changing drill bit (happened already) - Hair getting caught in the machine - Due to misaligned bits or other errors, fragments being thrown off at high speed
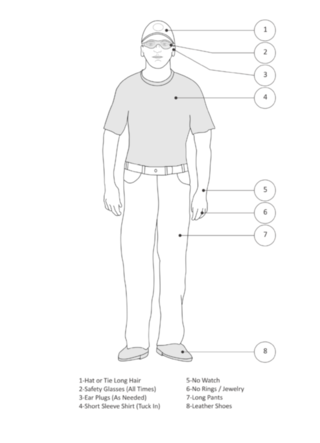
Recommended outfit for Safety
Apart from a long list of cautions available online, the most basic rules are always :
Wear a hat or tie long hair (it only takes a few strands to get caught!) Safety glasses at all time use Ear Plugs (as needed) Ideally wear a short sleeve shirt, tucked in - avoid long sleeve No watch, jewellry, dangling objects Long pants Leather shoes preferably - safety boots even better, those milled pieces can be sharp/heavy even when the machine is off Avoid long nails when operating the tool bits or machine
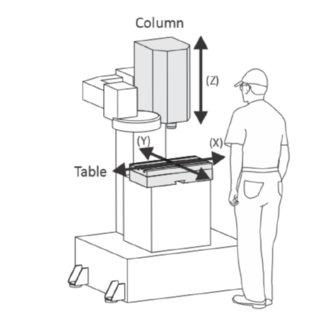 It is also good to get an overview of how the machine moves and behaves before getting close to it
With the CNC, if you are not a professional “machinist” (by industrial standards) - then please do not be alone. You need someone to come running when you scream for help and you can’t call 911 if you are stuck in a lathe.
For safety we used headgear for noise protection and safety glasses both during and after the CnC ing.
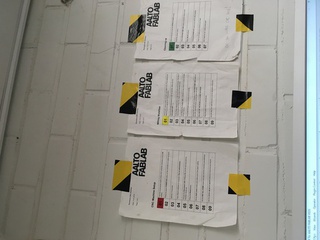
An overview of the Machine Workflow: It is also best to follow the instructions such as one above before jumping into the job - as that is basically tacit knowledge on the wall.
In a nutshell, the basic workflow can be charaterised as : 1. Design : CAD (Computer Aided Design - the basic 2d or 3d file)>> 2. Manufacture: CAM (Computer Aided Manufacturing - the material, tool and toolpath definitions)>> 3. Process: CNC (Computer Numerical Control - G-Code / Control Box)
Testing the runout, alignment, speeds, feeds, materials, and tool-paths
Next, Moving on to the actual testing of the runoff, feed, speed and related test parameters >
Most machines use three choose usually 2 or 3 dimensional cuts.
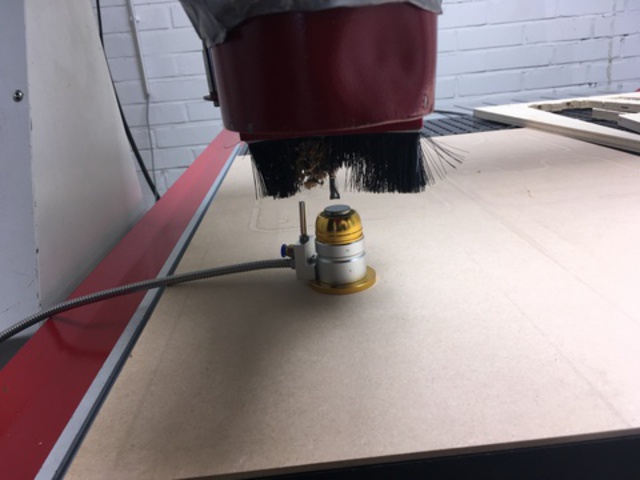
First step was to choose an appropriate end mill or cutting tool. The one that we use is a Twist drill, and are available in many diameters and lengths. They are usually made of high speed steel, carbide or cobalt.
A wide range of tool types are available for CNC milling depending on the design, machine and material. These include : End mills Corner Rounding tools Slot tools Spot-Center Drills Twist drills Tap Reamers Counterbores
As a general rule, the cutting tool must be smaller than the object we need to cut.

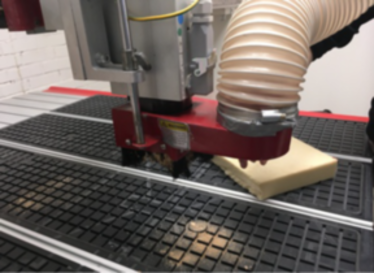
The drill-bit needs to be secured flat to surface else it can wobble and mess up your design
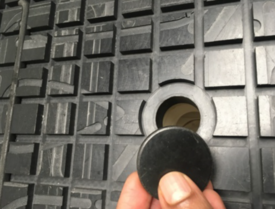
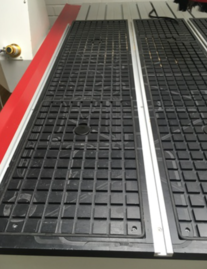
Instead of using fixtures or vise to position and fix the material, this machine uses Vacuum holes to secure the piece. In our case, both the sacrificial layer as well as the main material are both secured using the vacuum.
Without a sacrificial board, the drill bit can will likely penetrate the wood piece and leave marks like these. 2 additional knobs exist for securing the materials if needed only on one half of the surface area.
After securing the sacrificial layer , the Z is calculated from the base (in our case the zero being the “bottom” of the wooden material).
After this one enables the vacuum pump in order the secure the board to the CNC bed.
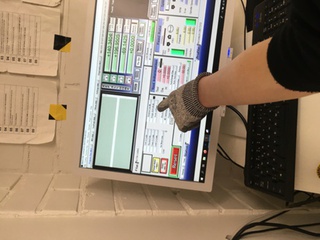
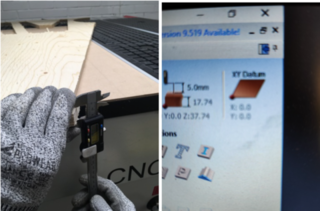
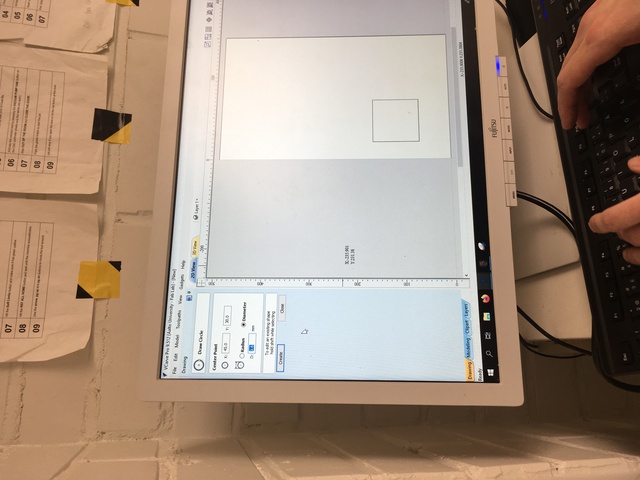
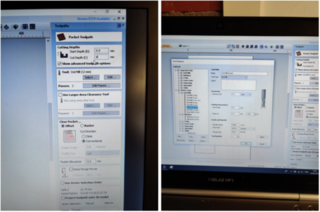
The Z is needing to be set on the CAM software - in this case the Sensor Setting that is using a non translated and Finnish text “terrän mitaus”!
The standalone CAM software we use is - VCARVE Pro 9.512. These softwares need considerable time and “experiential knowledge” (as opposed to just tacit knowledge) to run correctly. As a result, we can only train our muscle memory on the CAM - and a substantial amount of the design and simulations are recommended to be run on the Fusion 360 or other CAD software.
One of the problems for the beginner is to calculate the correct cutting speed and feed rates. Here the feed rate was set at a standard default for the material, there was a sheet with the standards mentioned - usually its also a best practise to refer to this as there is some heavy math involved in it.
The cutting speed defines how fast the material moves in relation to material.
The feed rate defines how far the tool travels during one revolution of the tool. The feed rates and spindle speed are generally available from the machinist - or in our case the lab.
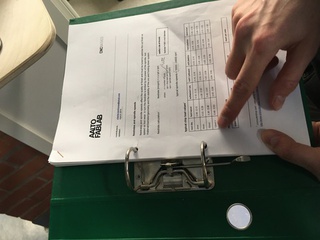
The recommended parameters for typical materials
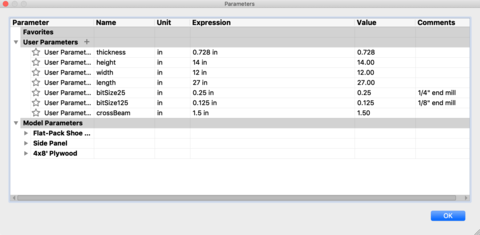
Next step once the X,Y, and Z were set were to measure the thickness of the board.
The actual thickness of the board was measured at 17.74mm.
An important part of the setup process is the design of fillets. 3D printing do not need fillets as it is an additive process. A fillet is used to reduce the sharpness of corners.
Types of fillets commonly used in CNC include :
Dogbone: preserves most of the wood, but not leave the most aesthetically pleasing joint. T-bone fillet: basic rectangular joint, 2 point circle and clean excess lines Sniglet fillet: allows router to move freely though cut - momentum leading to better result
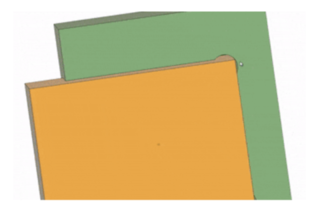 an example of a dog fillet for the sharp corner from this website
Because the router bits are round, the inner corners can never be sharped than the diameter of the cutting tool. This can cause problems in fitting. A dogbone fillet create a circular arc that is outside of the edges.
Toolpath Choice: A pocket toolpath & Pocket Allowance allows one to quickly create a toolpath that will machine the pocket either smaller or larger than the defining closed vector. These toolpaths automatically compensate for the tool geometry - both diameter and angle.
Once the tool path is chosen, one begins to define the start and cut depth. The start depth defines the depth at which the pocket toolpath is calculated. This will usually be zero when cutting directly onto the surface of the material.
The depth of the cut is input as 8mm steps. The tool which is our end mill is 8 mm size, and the current pocket clearing method is selected as Conventional (starts from zero and increases to the maximum).
The feed and speed rates were defined as below.

Once the settings are finalized, the machine sends the data to the machine in the form of a universal code called G-CODE.
Testing Climb vs Conventional milling
Milling Tools can advance through material, so that the cutting flutes can engage the material at maximum thickness and then decrease to zero. This is called Climb Milling.
Cutting in the opposite direction causes the tool to scoop up the material, starting at zero thickness and increasing to maximum. This is called Conventional Milling.
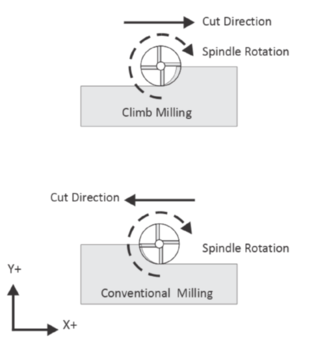
It is hard to imagine what the difference really is - one from thick to zero, and other from zero to thick. I try to imagine this as a scooping of ice cream - you scoop it one way, you get a certain result and opposite way, it is slightly different.
Conventional milling apparently causes the tool to rub against the cutting surface, generating heat and causing more tool wear. Also apparently can lead to a poorer finish. So it goes that unless specifically recommended by the manufacturer, climb milling is recommended. We can however see the results below.
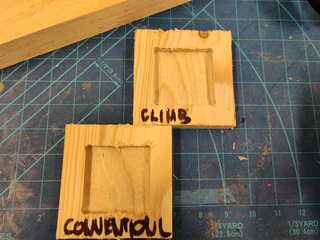

Climb vs Conventional Milling results were pretty close - with the Climb we were at 59.99mm and with conventional it was 59.98 mm - the edges were rougher and more cracked wit the Climb setting.
Individual Assignment - make (design+mill+assemble) something big (~meter-scale)
Ever since Ikea happened, I have been interested in making flatpack furniture design - and been curious about the design process involved.
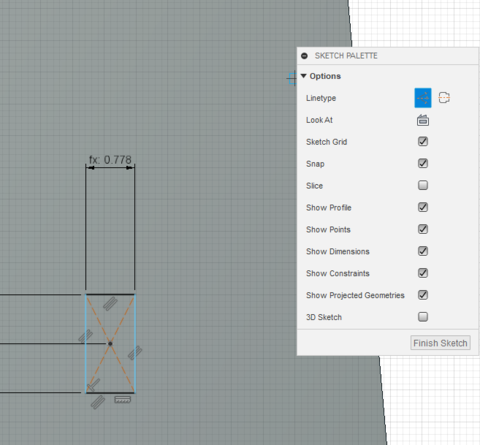
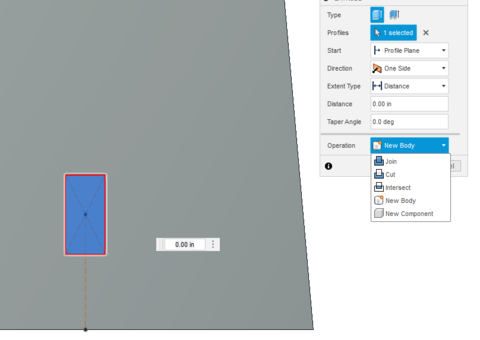
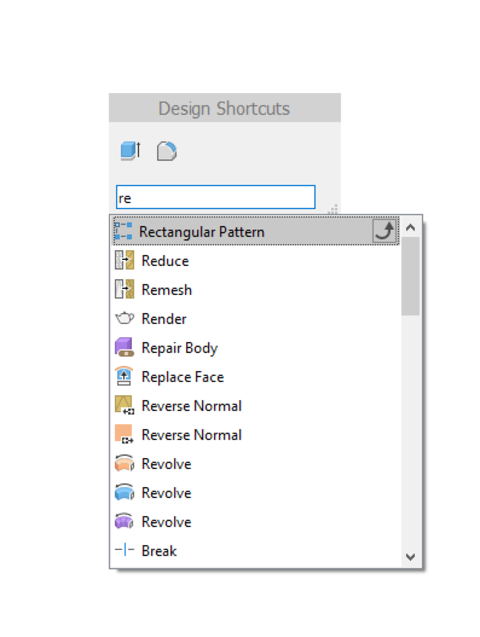
For the design exercise, I chose Fusion 360 which I was still getting used to.
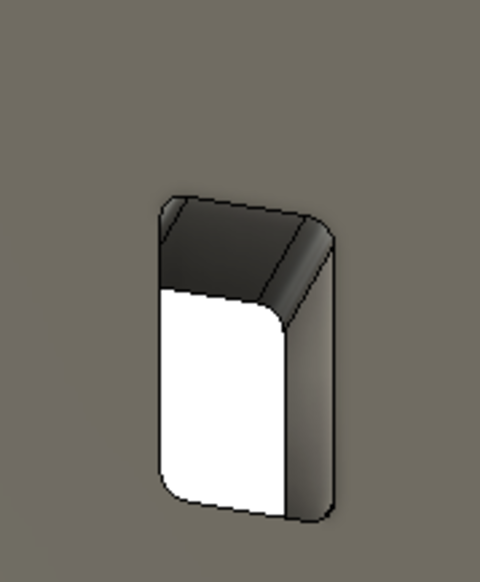
Initially I tried to design a basic conventional stool - and thought I would design a Shoebox. It is compact enough for assembling in Fusion - and not as demanding or complex as other projects - and can be well suited as a flatpack.


to be continued…
At this stage I had gotten stuck at the Fusion software due to a bug - the next morning there was a power outage and a damage to the CNC machine that stalls the work for now. I hope to finish this as soon as things are back to normal and my design gets done.
Continuation! (aka drop the shoebox)
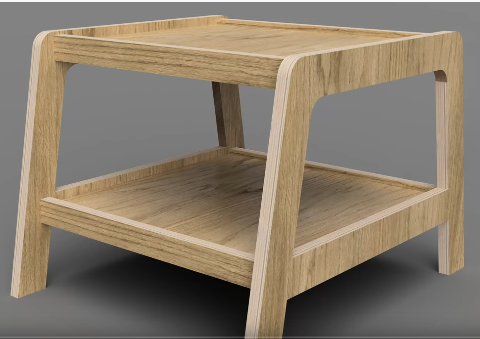
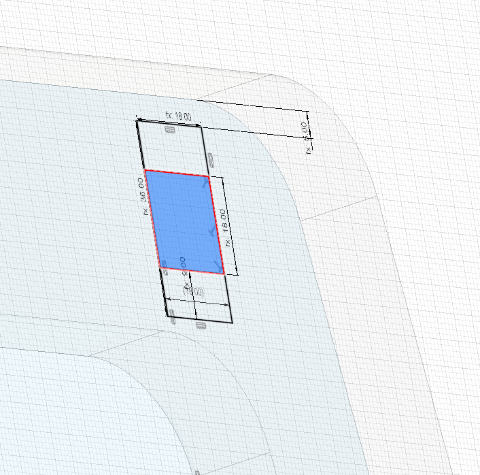
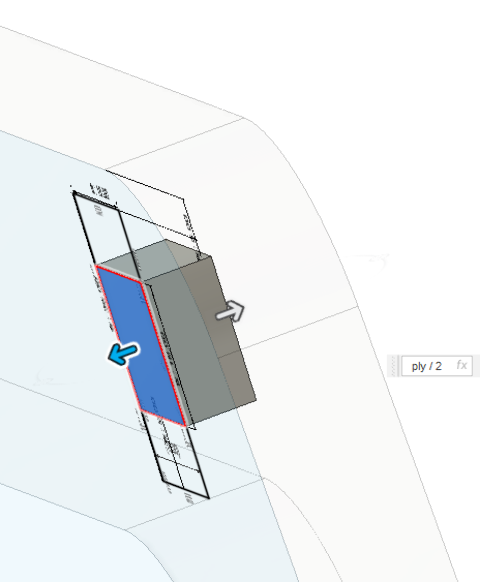
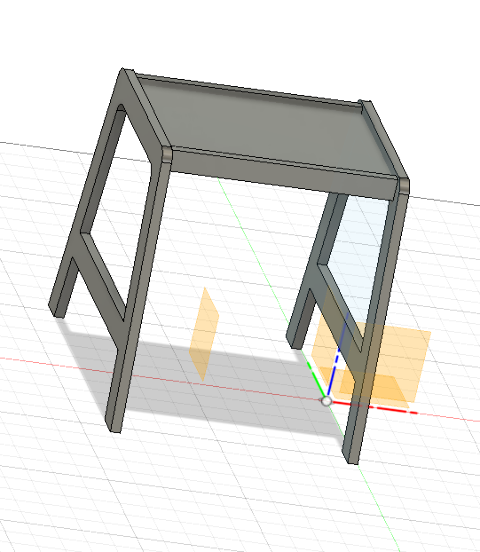
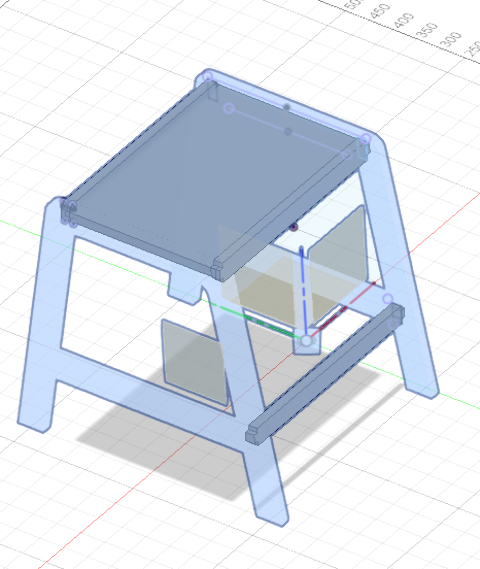
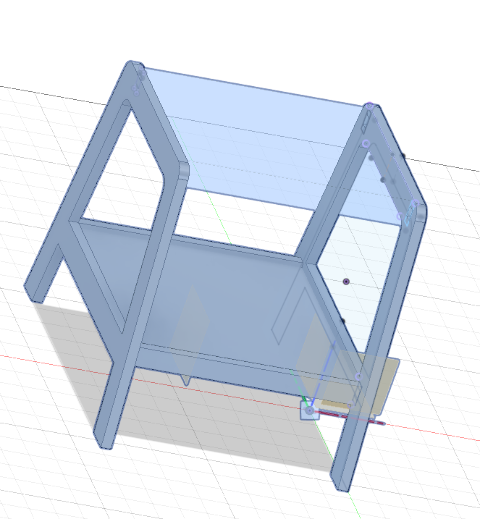
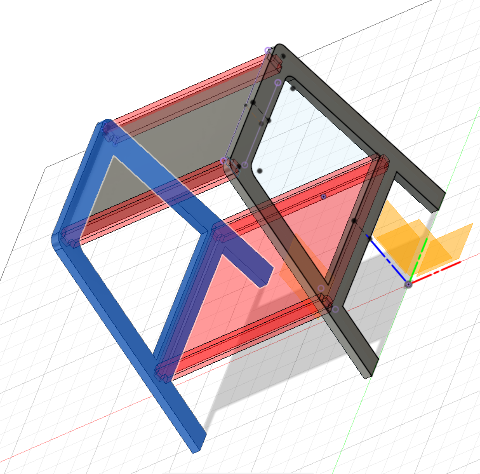
I switched from the shoebox idea to a side table - it would be nice for tea and magazines, and also with a logo CAM’ed out of the wood if possible.
Here is the basic form of the side table that I found on a tutorial website.
![]()

Applying the paint! taking some tips
tools needed: safety equipment, painter’s tape, builder’s bog, putty knife, paint opener, paint, paintbrush, sander, disposable gloves.
[paint vs varnish](http://www.howstuffcompares.com/doc/p/paint-vs-varnish.htm#:~:text=A%20primer%20paint%20coat%20is,applying%20top%20coats%20of%20paint.&text=Paint%20can%20be%20applied%20with,be%20sprayed%20or%20wiped%20on.
GREAT BRIEF on plywood painting
painting furniture - beginners guide
personal favourite playwood painting instructions!
Paint Paint consists of a coloring pigment suspended in an oil or water solvent (the “vehicle”), a resin that binds the pigment particles together and provides adhesion to the surface being painted and various additives that enhance properties such as mold resistance, scuff resistance, drying and sag resistance. Paint is a “film-forming finish” in that it forms a thin layer that lies on top of the surface to which it is applied with minimal absorption below the surface. It is used to both protect and decorate surfaces.
Paints fall into two broad categories: water-based latex paints, and oil-based paints or “alkyds.” Most of the liquid portion of latex paints is water and for oil-based paints, the liquid component consists of petroleum distillates and other organic solvents. About three-fourths of all paint sold today is of the latex variety. Advantages of these paints include easy cleanup with soap and water, faster drying, and less likelihood of cracking.
Varnish Varnish is a clear film finish that is made from oils and resins. It is one of the more durable clear finishes, providing excellent protection against water, water vapor, chemicals, and heat. Varnish is applied as a top coat to stained wood to protect the wood, to make it easier to clean, and to impart a nice shine to the surface. It is used when one wishes to retain the natural beauty of wood. The characteristics of a varnish are determined by the type of resin, type of oil, and the proportion of resin to oil. The oils used in varnish include linseed oil, tung oil, soybean oil, walnut oil, and safflower oil.
Most varnishes use a synthetic resin, usually alkyd, phenolic, or polyurethane. Alkyd is the most common type of varnish for interior applications. It is not as tough as phenolic varnish, but it is cheaper and doesn’t yellow quite as much. Phenolic varnish is a flexible, moisture and UV resistant finish for exterior applications. It cures tough yet flexible and tends to yellow faster than other varnishes. Spar varnish is an example of a phenolic varnish. Polyurethane varnish (also called urethane) provides the most resistance to scratches, heat, and solvents of all the varnishes. However, it has a somewhat cloudy appearance and tends to peel when exposed to direct sunlight. It is most appropriate for indoor applications.
Appearance Varnish imparts a sheen to stained or bare wood and does not obscure the wood’s grain or texture. Some varnishes, particularly oil-based ones, have a slight amber color that gets more pronounced over time. The effect is most noticeable with light-colored woods such as maple or pine. Varnish comes in three different sheen levels: satin, semi-gloss, and gloss.
Paint can totally transform the appearance of an object. Depending on the color and concentration of the paint, it can completely obscure the grain and texture of wood. It also covers up knots and other irregularities. Paint comes in four basic sheens: flat, satin, semi gloss and gloss.
Protection and Durability For interior applications, paint and varnish perform both provide decent protection against water and solvents. For outdoor applications, paint is more protective and longer lasting than varnish. The pigments in paint provide superior UV resistance compared to varnish and other clear finishes. Varnish will last only 1 to 2 years on wood exposed to full sun compared to 7 to 10 years for paint.
Application A primer paint coat is usually required before applying top coats of paint. If the surface is not primed, paint will not adhere to the surface and it will peel off very easily. Paint can be applied with a brush, a roller, or a spray gun.
Varnish can be applied directly to bare or stained wood that is free of dust. The traditional way of applying varnish is with a brush but it can also be sprayed or wiped on. Wiping varnish is regular varnish to which mineral spirits have been added to thin the varnish (which means additional coats are required to achieve the same level of protection as un-thinned varnish). Many varnishes require two to three coats for a smooth finish.
Drying Time Paint varies considerably in drying time, depending on how it is applied (spraying versus brushing) and whether it is water-based or oil-based. A brushed on oil-based paint can take up to 8 hours to dry where as a sprayed on paint may dry in less than 1 hour.
One of the biggest challenges with varnish is its long drying time which allows pesky dust particles to settle on the surface. You can generally figure on 24 hours for varnish to dry although newer water-based formulations and polyurethane often dry more quickly.
After a lot of thought, and watching this video - I decided to skip the paint and go with wood oil!
OTHER LAYERS
Boiled linseed oil:
From this excellent blog it seems noiled linseed oil, with proper precautions - can give an amazing finish to the wooden furniture piece.
The first thing to do is to get a cotton rag - and have a metal contained with water inside to ensure it goes not “combust”.