15. Molding and Casting
Assignments
group assignment:
- Review the safety data sheets for each of your molding and casting materials, then make and compare test casts with each of them.
individual assignment:
- Design a mold around the stock and tooling that you’ll be using, mill it (rough cut + (at least) three-axis finish cut), and use it to cast parts.
X. Group Assignment
Link to group session page.
X. Individual Assignment
1. Design a mold
Firstly, I cleared what I do at this week as I saw Fablab Kamakura’s good documentation.
-
Decide a object I’d like to make
-
Design a mold to make a mold to make my object
-
Make a tool path
-
Mill the wax
-
Make a mold
-
Make my object using a mold
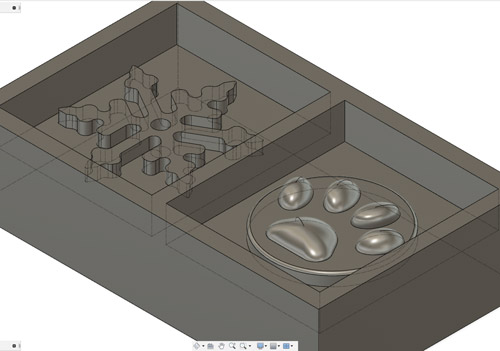
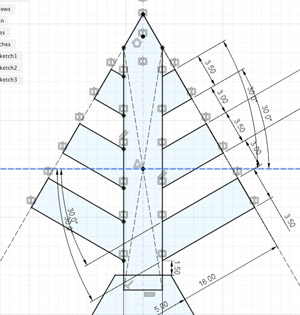
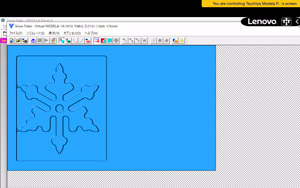
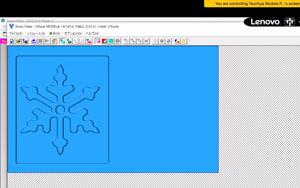
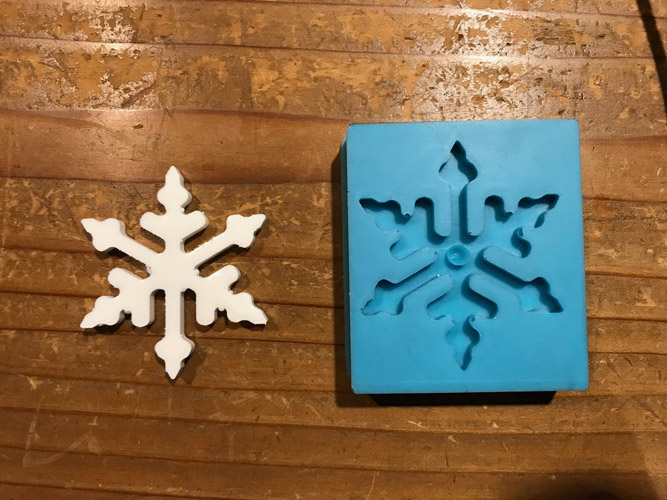
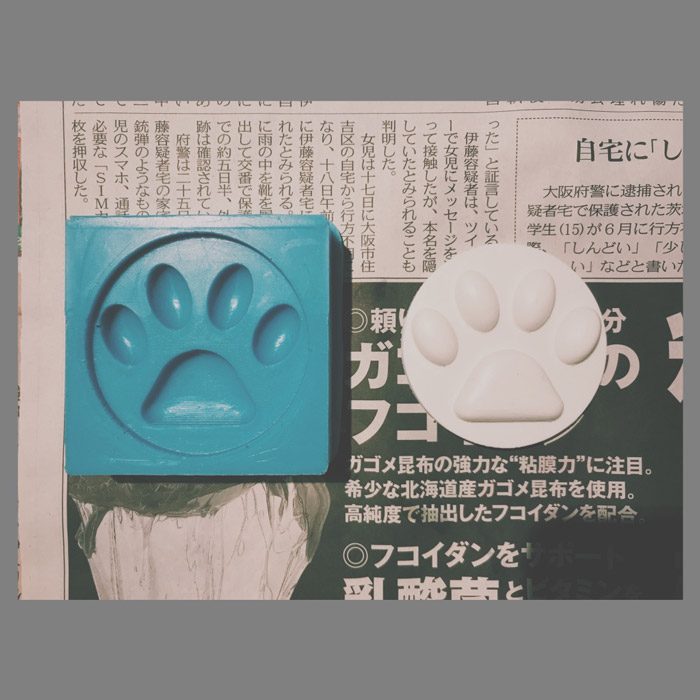
This week, I designed and made a snow flake as 2.5D object and a cat paw-like object as 3D object.
Note
2.5D design cannot meet this week’s assignment
For the first time, I designed and made a snow flake and its mold. but it was 2.5D design which is the object like designed at 2D and extruded it with Z axis.
The object which meets this week’s assignment needs the curve part with Z axis like a dorm shape and stairs shape.
Not just this week, make sure to confirm the week assignment well!!
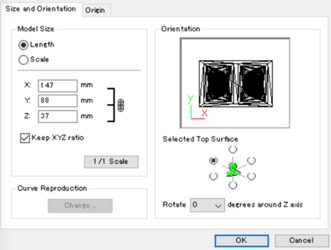
The actual dimensions of a wax is 147 mm x 88 mm x 37 mm so you need to design your model within that area.
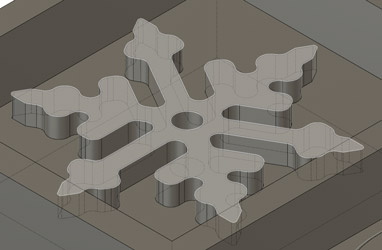
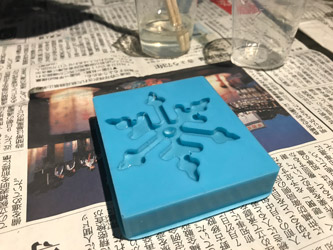
Snow flake

Failure
Don’t design a short angle in your design
First, there were shorter angle than 90 degree in my design. As well as the PCB design, we need to consider the radius of a mill. It’s 3.18 mm. So I revised my design so that I round off every corner.
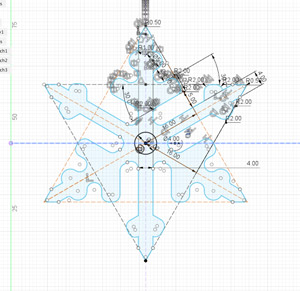
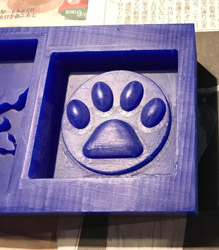
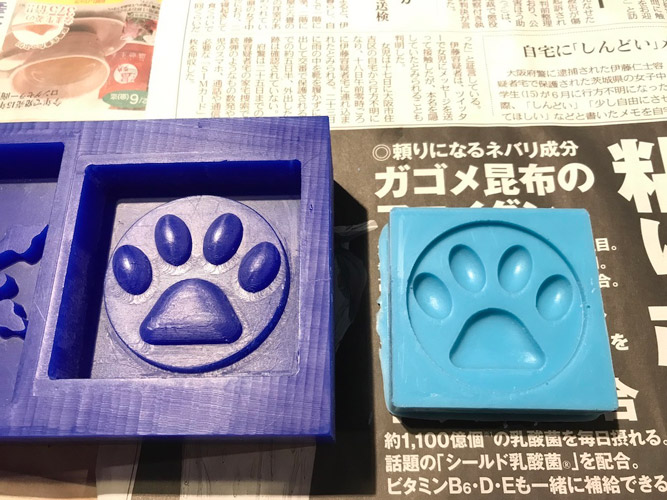
Cat paw
Note
Make sure to check if every space between objects are enough wider than the diameter of a mill
The air-vent tube part don’t be needed in both models because my models can be made by only one side mold.
2. Make a tool path and mill
I’d like to explain how to make a tool path with 3D model.
I set the same milling conditions for both 2.5D and 3D models.
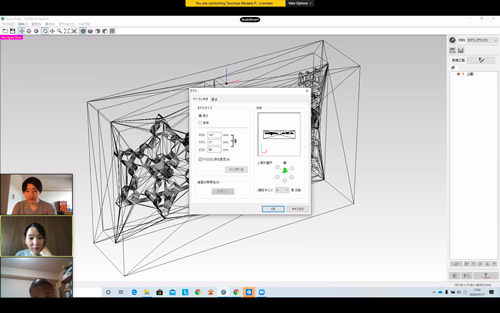
First, I used “MODELA Player4” to make a tool path for my design.
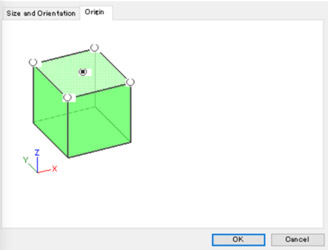
I imported my design and checked the origin from toolbar -> Setting -> Model.
Note
Origin Point
I set the origin point at the center of the wax because it’d rather be easy to set it. You can change the origin point from tool bar: Set -> Model.
Don’t forget to set it at the same part when you mill the wax using SRM-20.
Next, I set the cutting condition with rough cut and finish cut.
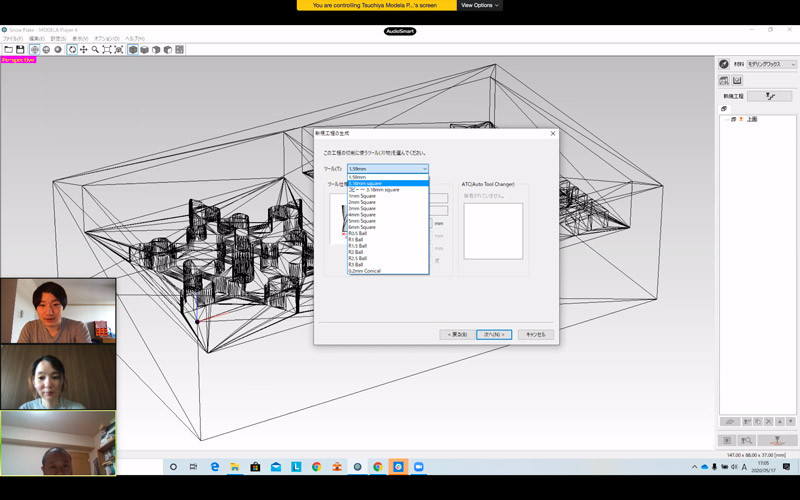
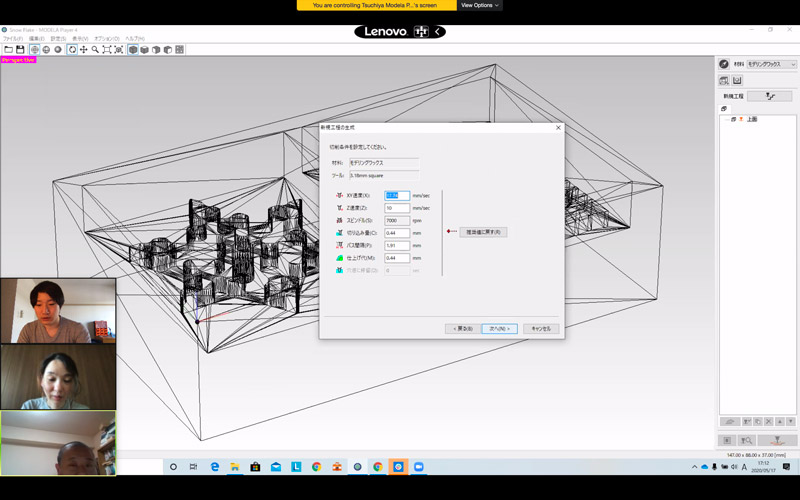
I used the mill with the diameter of 3.18 mm Square, and showed the milling condition in the below.
Actually, Z cut depth is only different for me.
| Factors | Rough cut | Finish cut |
|---|---|---|
| Moving speed of the mill for X-Y dimensions | 17.74 mm/sec | 17.74 mm/sec |
| Moving speed of the mill for Z dimension | 10 mm/sec | 10 mm/sec |
| Spindle | 7000 rpm | 7000 rpm |
| Z cut depth | 1.2 mm | 0.44 mm |
| Distance between passes | 1.91 mm | 1.91 mm |
The 2D and 3D simulation of the rough cut are here;
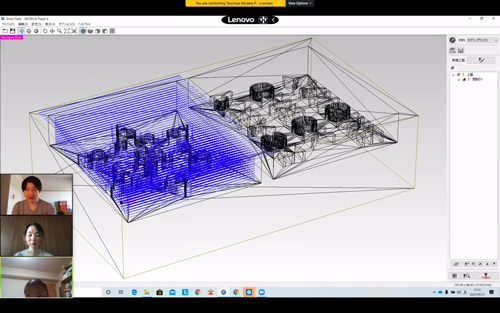
Look at the 3D simulation and the left side of my model. My model connected with the side of the wax. But this is the rough cut. So as I simulate the finish cut, the these are not connected.
(Left: Rough cut, Right: Finish cut)
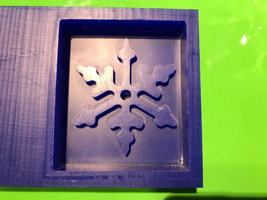
Created .pm file to let SRM-20 mill the wax along with the models.
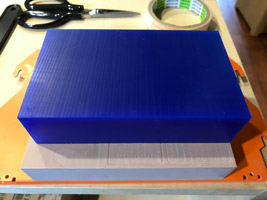
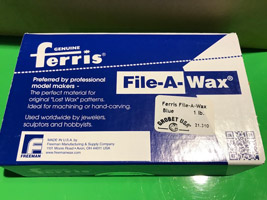
Next, Ferris File-A-Wax Blue was used for the wax to make a mold (Size: 147 x 88 x 37mm (Actual measurement).
I set the wax on the wood board on the stage of SRM-20 because it has the good flatness. I used 1/8 inch mill.
Open VPanel for SRM-20 and read .pm file, and then, start milling!
Notes that I didn’t mill both model at once. As one has finished milling, another has started.
Mold for mold of snow flake and cat paw…
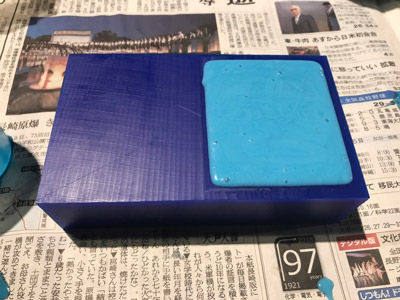
3. Create a mold
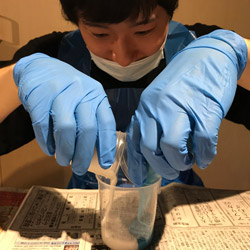
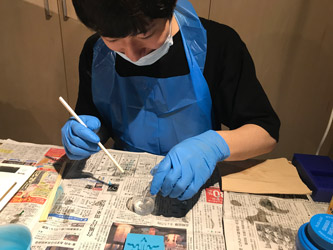
MOLD STAR 16 FAST was used for making a mold. You can watch the movie of how to make a mold with MOLD STAR 16 FAST on that website.
You have to mix both materials to make it hard, but before starting mixing, please check the below things;
1.Mix ratio
For the website and SDS of this material, the appropriate mix ratio is 1A:1B = 1:1 by volume.
2.Safety
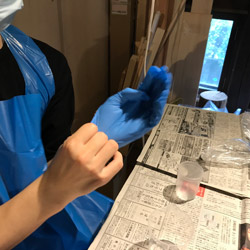
To protect from adhere the silicone materials to your skin, please wear gloves and an apron.

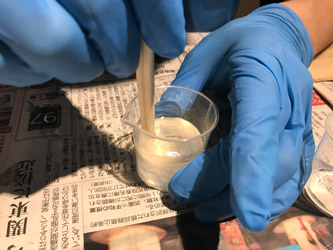
3.Pot life and cure time
Please check the pot life and cure time of materials you used.
Pot life is the time that you can pour the materials to the wax from starting mix those.
Cure time is the time that the materials turns solid completely.
In the case of MOLD STAR16 FAST, the pot life is 6 minutes and the curing time is 30 minutes at room temperature (73°F/23°C).
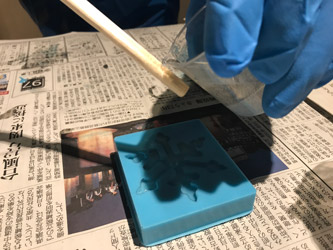
Mixed both, stirred and poured it.
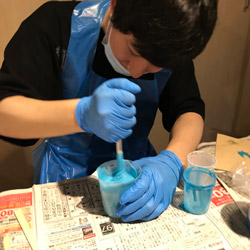
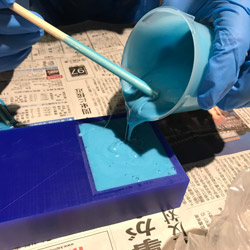
After 30 minutes, took the material off from the wax.

4.Create the object
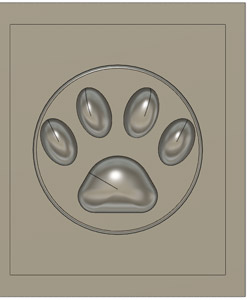
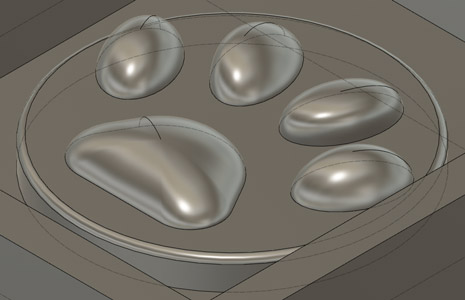
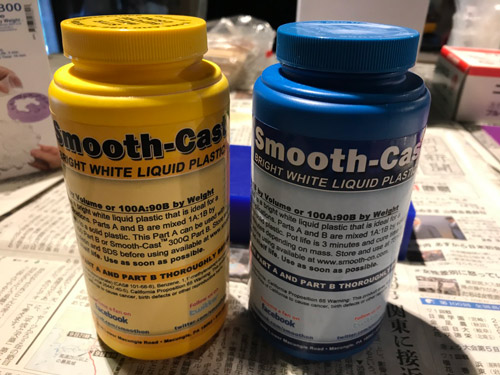
SMOOTH-CAST 300 was used for making the object that I designed.
Spec: Pot Life: 3 minutes, Cure Time: 10 minutes, Mix Ratio By Volume: 1A:1B, Mix Ratio By Weight: 100A:90B
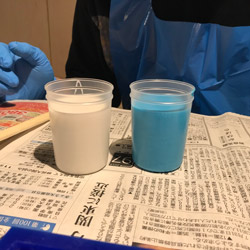
I mixed both liquids and stirred it. The mixture before hardening is transparent and resin cures to a bright white finish.
 ,
, 
 ,
, 
Finished!!
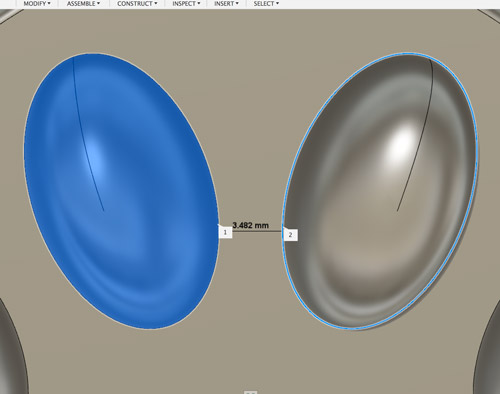
I could make a beautiful snow flake and a cute cat paw!
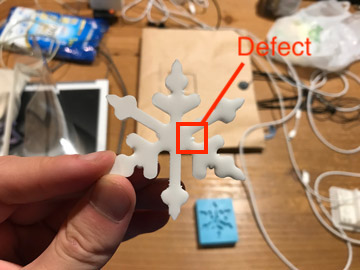
Failure
The bubbles into the material
Due to the high viscosity of the silicone materials, it is difficult to remove the bubbles in the materials. You can remove them by vibrating the materials with something to vibrate.
I saw the defects due to the defect of the mold caused by the air bubbles.
If I get the chance to use a mold next time, I’d like to try the air bubble removing technique.

X. Conclusions
Submission
- Cat paw: f3d, Nikukyu_v1.stl
Again, you can’t achieve this week’s assignment using 2.5D design model. But as the reference, I attached the snow flake 2.5D design model in the below.
- Snow Flake: f3d, Snow_Flake.stl