Principles and practices
Resume
This week I worked on defining my initial project idea and started to getting used to the documentation process.
Documentation process
Fablab Charter reminderDocumentation
The documentation provided is very complete and it's hard to read all the pages and documents.But it's important to browse it to have a good idea of its content.
I know that I will probably have to go back to it each time I need informations.
So here is a quick link to its content.
Initial project
I started the Fabacademy without any project in mind. I need a bit more time to think about it…
But to be able to produce this page and show some work, I had to find something.
As a continuing student I started to think about another project for this year (2021)
Project idea - inspiration and description
As a music enthousiast I started to search ideas related to that and found something I liked. It’s a “Card reader Jukebox”.
Not only it can be a good looking device (if made with quality material) but it’s also an excellent and easy way to
- show your music collection to friends
- let them choose something
- let them make their playlist
- interact with the music
- talk about souvenirs (“Do you remember this album / artist ?”)
And without the need for a mobile, tablet or laptop to browse your collection.
It lets you play music in an old fashion way, by manipulating a physical support (cards), just like we were used with vinyls, K7, MiniDisc and CD.
Project research
I found a few similar projects using different type of input cards that were worth reading.
Some are RFID based, others are QRcode or even Barecode based.
RFID based
RFID Jukebox with Google Home (youtube)
François GUILLIER’s blog
SPOTQRcode based
La bonne soupe - Project “QRocodile”
QRocodile - Source codeBarecode based
Technomestique site
I like the QRcode approach best because the card production is cheap.
Cards can represent
- a song title
- an entire album
- a playlist
- an action (next track in a playlist for ex.)
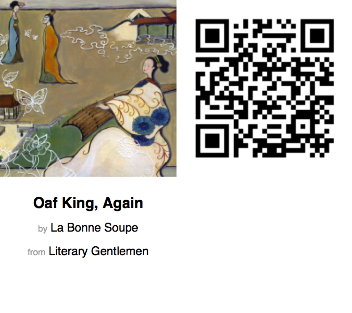
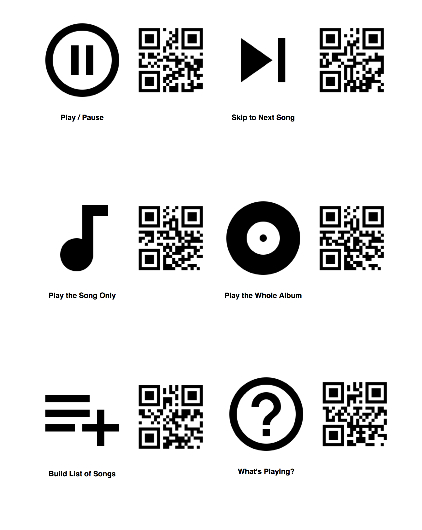
Exemple of cards used by the QRocodile
A song card :
Some action cards :
Project goal
I really like the QRocodile.
And the kids seem to like it aswell on that video :
But it connects to a commercial speaker system (Sonos) and I don’t want that.
I’d like to be able to play the cards either on
- an internal speaker
- or my old home hi-fi system
:gifv():no_upscale()/cdn.vox-cdn.com/uploads/chorus_image/image/62763421/musicbox.0.gif)
These 2 sources of inspiration will have to be mixed.
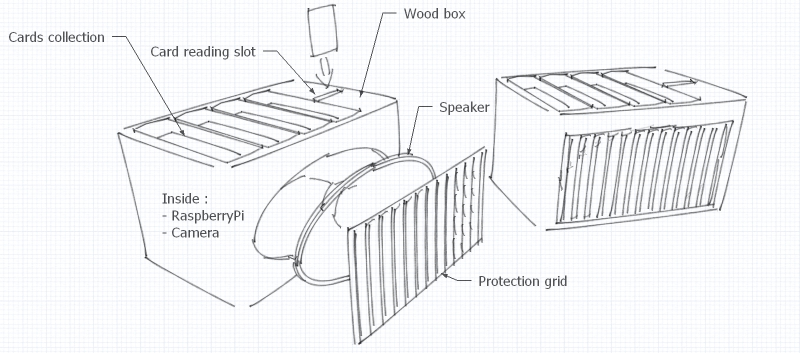
Project sketch
Here is a rapid sketch I've made showing the final look I’d like to achieve.
It could be made from scratch or maybe just implemented in a ready-made old speaker.
Project management
Resume
This week I worked on building my website and started to getting used to Git.
Git install and website design
We first learned how to build our website and how to use Git to update it.
Then I spent time at reading the documentation provided and to get used to Git commands.Git and SSH key
Git is a distributed control system that allows history maintenance, multiple versions management, and collaboration. We will use it all along the Fabacademy to show our progress thru a dedicated website (which you are just reading).
After installing Git on Windows by simply following the install procedure, we must initialize an empty local "git repository" on our PC (workstation).
To do so, we must create an empty directory on the hard drive, open a prompt command Windows/R + cmd + Enter and move inside that directory cd C:\Users\Admin\Documents\ambroise-devries\docs.
Then we can initialize it by typing git init .
We also need to generate a SSH key that will be used for authentication. It can be done by typing the following command with your email adress:
$ ssh-keygen -t rsa -b 4096 -C "email_me@example.com"
Here is a link to a very complete explanation on how to install Git and help you get started.
Once we have initialized our local Git repo, it's time to take a "snapshot" (clone) of our predefined Fabacademy website if we want to work locally on it.
For that we need to know its SSH name config which can be found here (see image):
 The following Git command let you do just that:
 git clone config_name:repo_name (where you need to replace "config_name:repo_name" with the SSH key of the repo you just copied).From there we can start working locally on our website (editing files, create images, etc.) and upload it back on the server once satisfied.
To do so we can use in sequence these Git commands:
git add -A will add all our modifications (-A argument) in a buffer
git commit -m "This is a comment/description" should return a summary of the changes made
git push to upload back your modifications on the server
By further reading this page you will see that I didn't follow this route at first...
Website design
I looked at the default website we all have and tried to understand how it works.It’s a Mkdocs website with a default “Material” theme (by the time of writing ~ 2020).
Editing the .md files directly on Gitlab seemed easier and faster at first than to use Git to Push my local modifications.
I don’t know if there is a drawback with that practice and if it’s recommended or not…
I have modified my website this way so far (up to day 3).
On day 4, I started to maintain my local copy of the website and to use Git instead because I started to understand the advantages of such a protocole.
Modifying the Mkdocs theme was more difficult than I thought.
I tried to modify my mkdocs.yml file to add a custom_dir directory without success.
						theme:
							name: 'material'
							custom_dir: 'custom_theme'
Commit/Push since then failed so I revert back and started all over again.To be able to revert back to a situation where I could Commit/Push again, I had to use this Git command:
git reset --hard origin/master.
New website from scratch and workflow
To give the website its new look I started all over again with a predefined template ("Typerite" from "styleshoot.com" - copyright and link at the bottom of the website)
I modified my stylesheet (CSS/base.css) to change the police of all links from "normal" to "bold" for example, along with a few other things.
My personal workflow is now as follow: