Week 15: Mechanical design
05/07/2019 - Stéphane Muller
This week is the first week of a big group project. We have to design a machine that includes mechanism, actuation and automation. Build the mechanical parts and operate it manually.
We decided on the project a couple of weeks ago, to be sure we had all the parts necessary at the lab and that our project would check all the criterias we needed to validate the week. Especially since we wanted to work together all 5 of us and this is usually a 2 or 3 people project. We had to make sure everyone had an interesting part to build, so everyone got to choose their sub-project and was happy with it.
After a lot of brainstorming we decided on building a cocktail machine! We wanted to work all together here at the Sorbonne, so we will each be working on a separate part of the project. There will be five sub-projects:
- The frame of the machine and making sure everything fits together (Leo)
- The x-axis slider for the glass (me)
- The 4 peristatic pumps (Madjid)
- The mixer to stir the cocktail (Luc)
- Decoration, gimmicks and thumbs up indicator (Julie)
I chose the x-axis because I wanted to work on a positioning system. It's a very basic and important component of most machines. I thought it would be a useful skill to have.
After the global lecture, Adel gave us a box with parts used in building a 3D printer and explained to us how we could use each part for our project.
Research
Below are a couple of inspirations we found on the subject.
- Link 1
- Link 2
- Link 3
Planning and list of tasks
- CAD design of the parts
- Making the parts
- Assembling the slider
- Assembling it all
Step by step
CAD design and making of the parts
For my axis I could design a system with a belt or use a screw. I decided to go with the screw because it seemed to be the easiest of the two and I was more comfortable with that. Also, the design seemed clearer in my head. I started out by making a sketch on paper, measuring and writing down the dimensions of the parts I would be using.
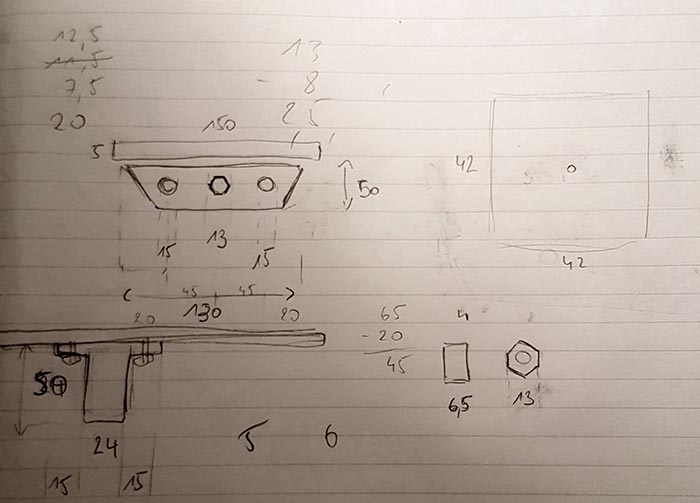
I was going to use the following parts (see complete and final BOM at the end of the page):
- Two 8mm straight shafts for the rails
- Two LM8UU linear ball bearings for the rails
- One 8mm threaded shaft for the guiding rail
- An M8 nut for the slider
- A NEMA 17 stepper motor
- A flexible shaft coupling
Designing a mechanical system was a little daunting. I wasn't very confident in my CAD skills at first, especially with Fusion 360. But I felt this was the better tool for the job and what better way to learn?
So I went ahead and modeled my sketch and this was my first result:
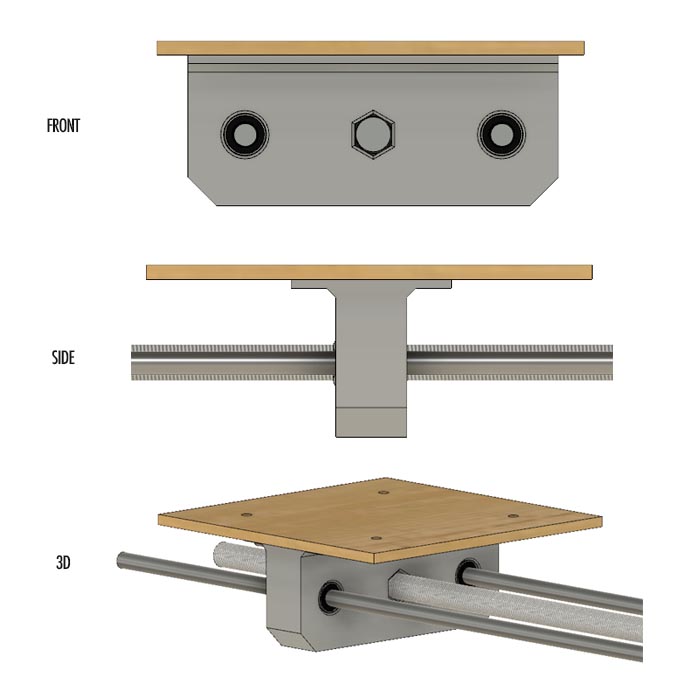
I showed my work to Adel and he pointed out a couple of problems that could arise with my design. Only two linear ball bearings to guide the rails could produce some alignment problems, he advised on using at least 3. He also suggested a better way to lock the nut in my part. In my original design I was going to glue the nut in the cavity.
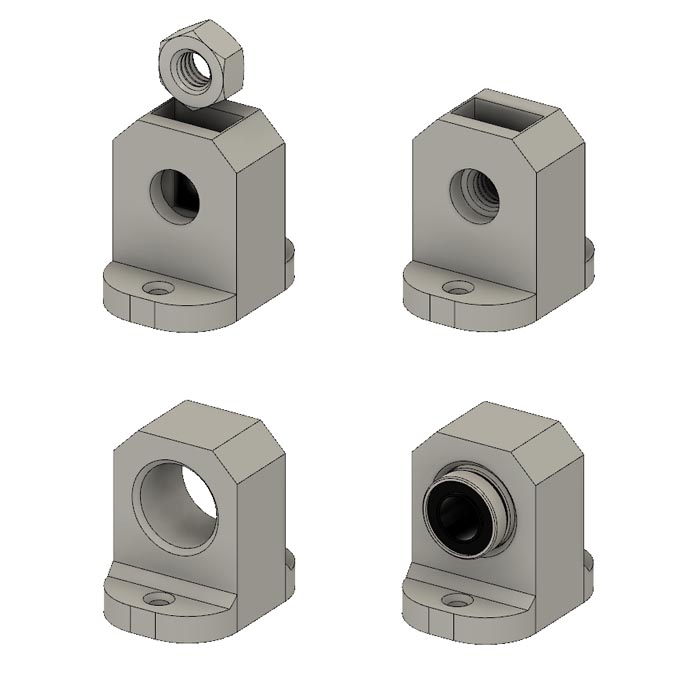
So in my second version I decided to use four linear ball bearings and redesign the nut holder. This time the part holding the nut would have a rectangular slot to slide the nut in and keep it from turning and it'll have a round opening for the shaft.
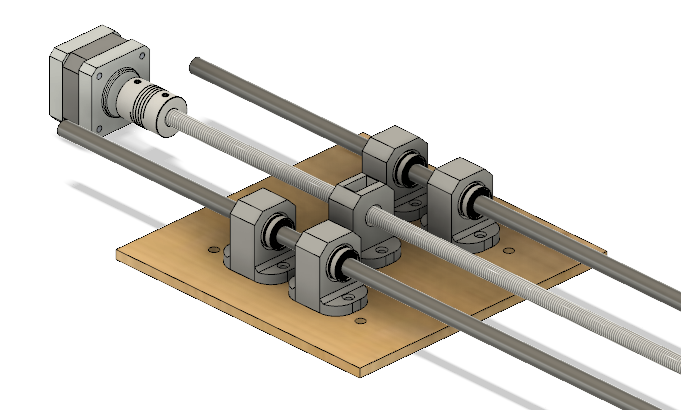
A view of the whole support, the motor and the shafts:
Luc was the first to 3D print parts on the Ultimaker 3 and he advised us to add a 0.4mm tolerance. So I printed my first bearing support with this tolerance and tested it. It fitted perfectly!
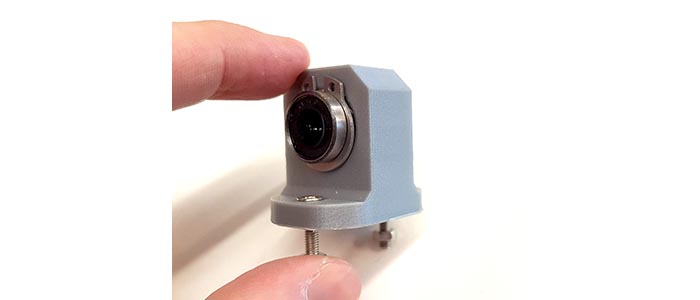
Then I printed the part 3 more times and started laser cutting the support for the motor and the shafts, as well as the plate that would move the cup. To do that I just had to right-click on the right sketch in Fusion 360 and export it as a DXF file.
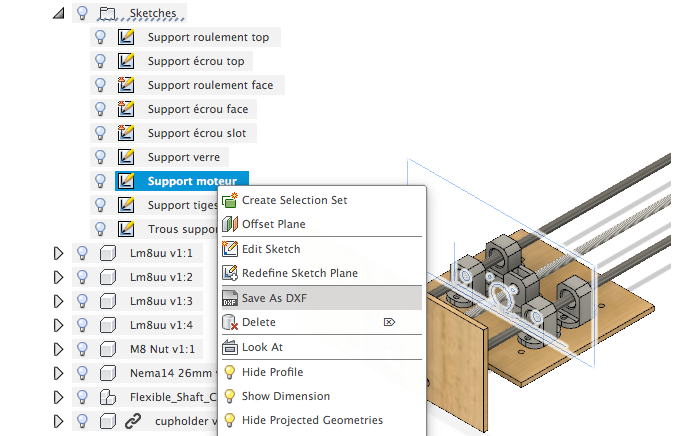
I added two little notches to be able to keep the supports up and test them outside of the actual machine. I used transparent 6mm PMMA for the supports (because I thought it would look better, and it did!) and plywood for the plate.
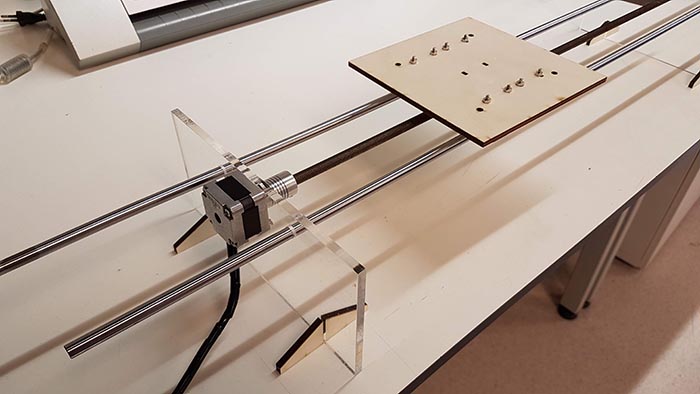
To test the system I used a drill and lo and behold... it worked!
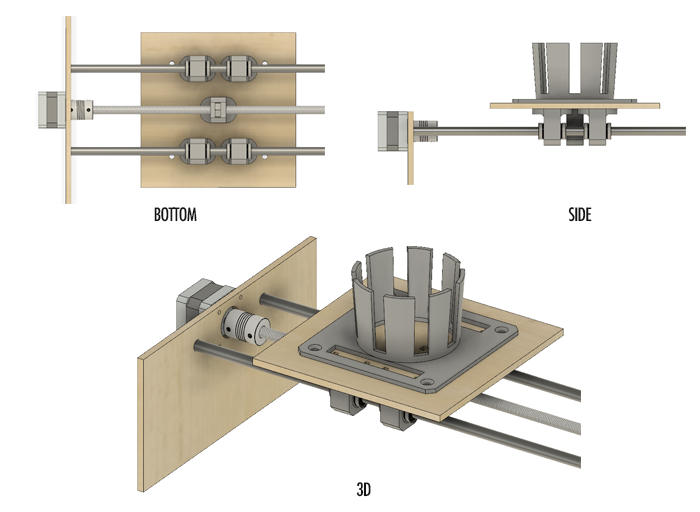
Then I had to model a cup holder to keep the cup in place while the mixer stirrs the drink. I modeled it around a standard plastic cup of which I knew the dimensions. What I didn't foresee though is that my screws and nuts holding the bearings would point outwards... I thought of a number of solutions and decided to make holes in the design for it. It would print faster too.
In a next version I would design it the other way around, with the head screws up. Maybe I'll improve the design and print them again during the second week.
To make the 3D model as realistic and complete as possible, I found 3D models on GrabCAD and McMaster-Carr of the other components I used, like the motor, the bearings and the nut.
The final model looks like this:
Assembling
For the system to fit into the machine frame I had to saw the shatfs with a metallic saw. The threaded shaft was easy, but the straight shafts were made from really durable steel. The saw was just sliding on it. Here you can see how much they stood out:
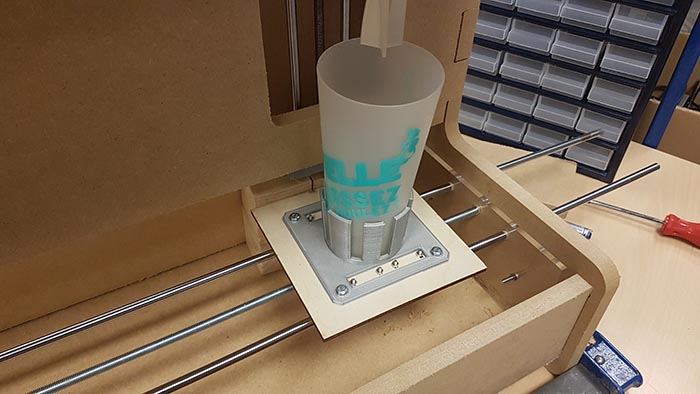
Luc had the same issue, so we looked for another machine or saw that could do it at the university. We couldn't find any. Next we tried a dremel to make the initial cut and then use the saw. We managed to make a cut but then the saw was still useless. Adel then advised us to use the dremel all the way and it worked! It made a hell of a show, with lots of sparks.
Always use protective gear to do something like that. The steel gets really hot and sparks fly everywhere, so gloves and glasses.
Then we drilled holes in the frame and the support plates to add screws and nuts to fix it. Here is the final result:
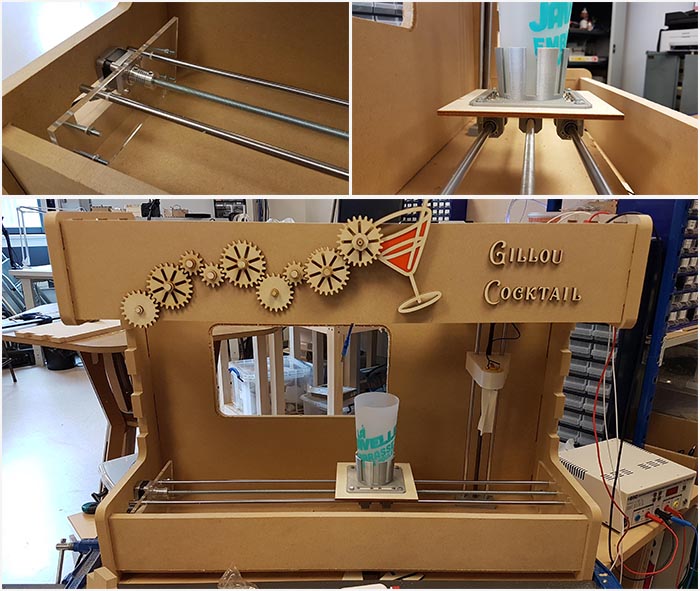
Here's a demo of the motor turning. It's quite slow... but it works! And I'll have to check but there's probably a way to make the motor turn faster. I'll also have to do something about the noise...
Conclusion
Making the system was very challenging but also very rewarding at the end! I'm very proud of my slider and of our work together.
I learned a great deal this week. I'm a lot more confident using Fusion 360 now and I'm starting to see how everything in a machine is connected and how to design one. It's exhilarating and it makes me want to do more!
Check out part 2 of the project here!