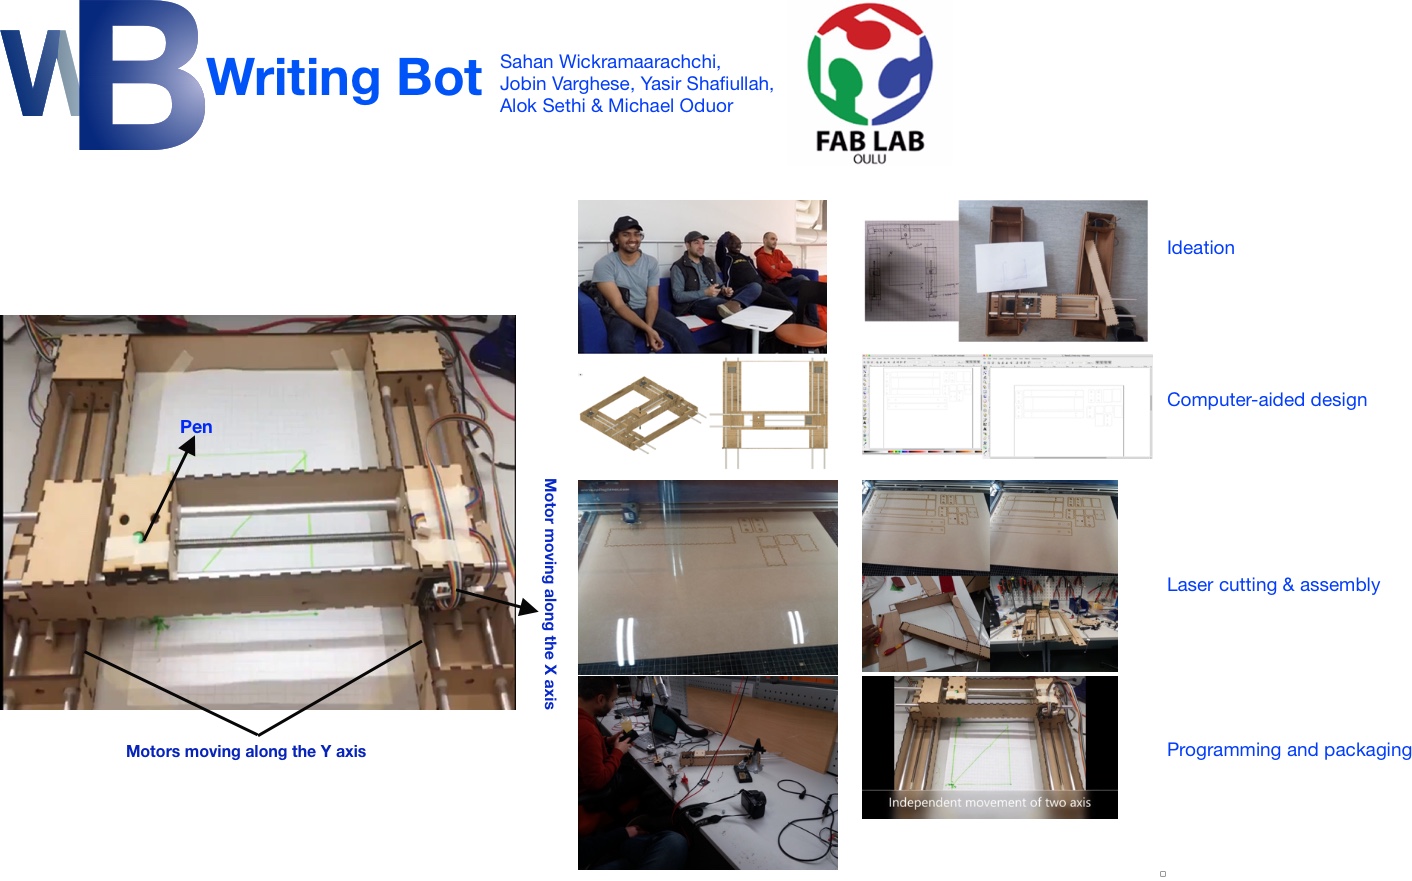
Writing Bot
Group members
Machine Design
Writing Bot
- Designing a machine that includes mechanism+actuation(+automation).
- Building the mechanical parts and operating it manually.
- Documenting the process.
Getting started
We begun by going through different ideas which ranged from an elevator-like structure that carried a small object either vertically or horizontally to a dispenser that moved when a refill was needed.

For the machine, we initially had problems deciding on the number of motors needed, the direction of motion (whether X, Y, Z or just X and Y) and what the machine would do. After a few rounds of discussion, we finally settled on a writing machine. This was inspired by this project for the same assignment a few years back and how to make a homework writing machine at homefrom YouTube. There are a few other videos with same title in YouTube which offered different ideas for implementing the pen holder. After settling on this, we then considered different options for the structure of the machine and for operating the pen. For the pen holder, we considered using a solenoid or a servo motor.
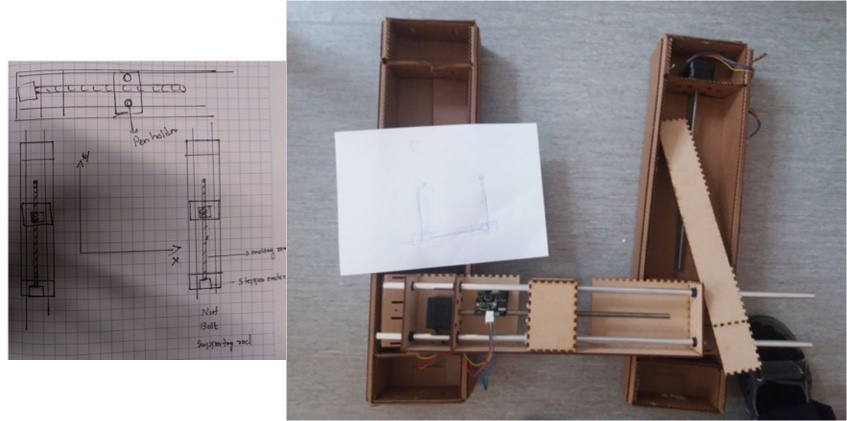
We also decided to re-use most of the material from previous years such as the linear bearings, stepper motors and screws by removing them from the machines built earlier.

3D Modeling in Fusion 360
As we wanted to have a visual model of the final machine, we decided to design a 3D model. For this, Sahan used Autodesk Fusion 360.

More details about this 3D design can be found on Sahan's page.
2D Design in Inkscape
Even though we utilised the components from the previous year, we still needed to create the main body of the machine. For this, we needed to laser cut the different parts. Yasir unfolded the 3D model above in Inkscape and prepared it for laser cutting following the process outlined in week 4.
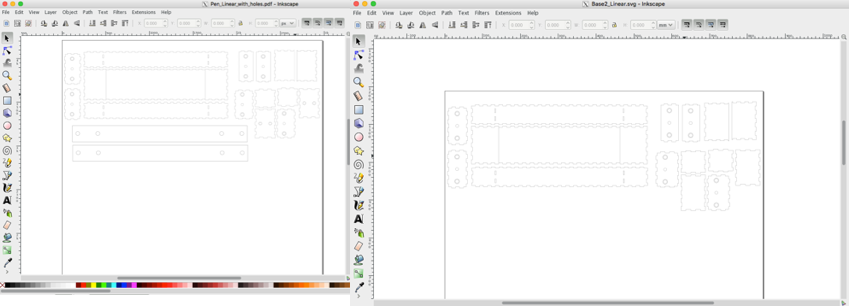
2D design in Inkscape
More details on 2D design available from Yasir's page.
Laser cutting and assembly
After the 2D design files were ready, Yasir, Sahan and Jobin laser cut and assembled the first part.
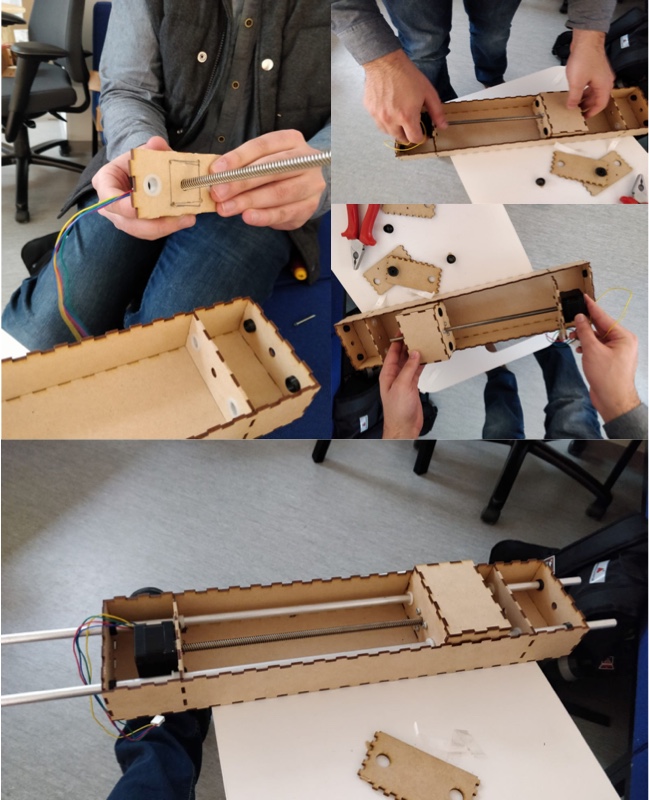
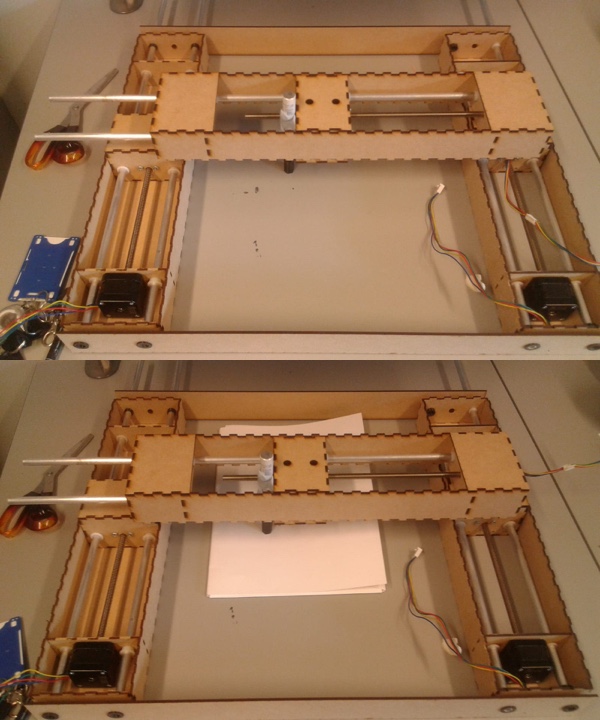
The following Monday, Jobin and I cut the other two parts, and Jobin started working on the assembly, positioning, and motion of the pen.
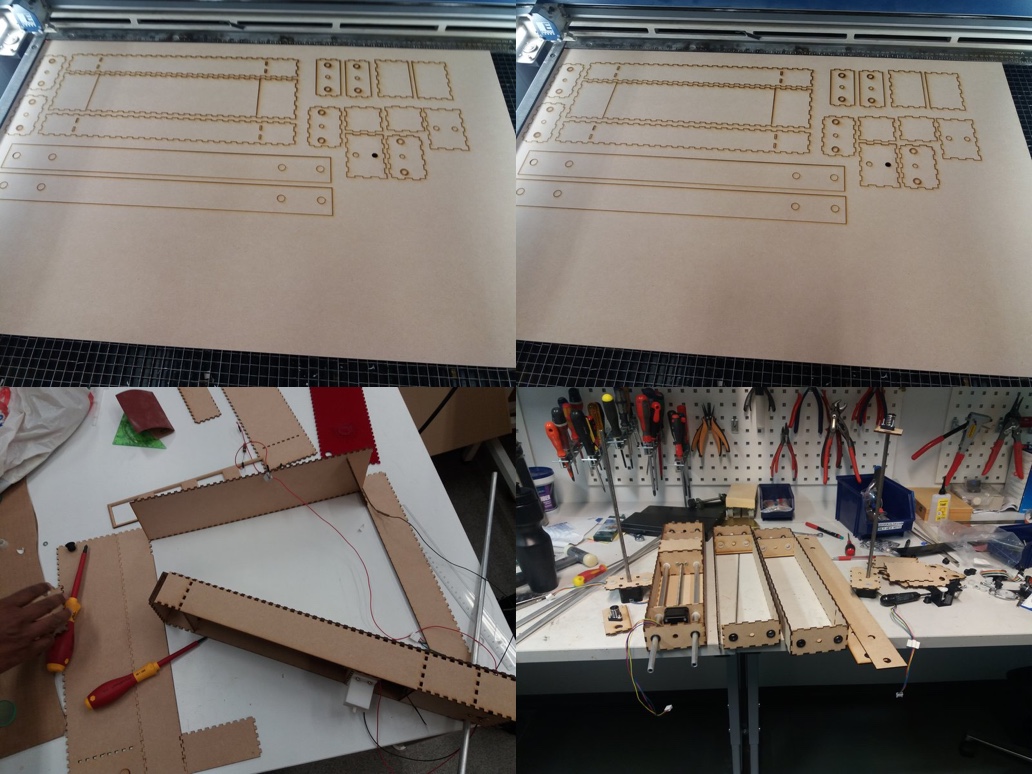
Image of the final structure below. Adhesive will be used to attach the top part, that is to move along the X and Y axes, to the other two (that will control its movement along the vertical path). For the next phase, we have to think about the options for the pen holder, design the holder and either laser cut or 3D print it.
Mechanical Design
Group assignment
- Actuate and automate your machine.
- Document the group project and your individual contribution
Prior to starting the main tasks for this week, we were considering whether or not to modify the project a bit. Instead of using three Stepper motors, we thought to simplify it by using one and perhaps attach a diagonally placed penholder controlled by servo motor on top of the one structure. Ultimately, we decided to stick with our original idea and started working on the programming.
The main tasks for the week were to: - Program the three gestalt nodes - Reinforce the support holding the nodes together - 3D print joints to attach the top node to the other two.
Additional minor tasks included designing a logo and a one-page presentation of the group project.
Programming
The programming environment was prepared by:
For programming, we first tested one motor and when this worked, the other two. The motor needs 12 Volts power supply and we set the current limit to 0.600 Amps. Below is a video of all three nodes moving. More details of programming can be found in Sahan's, Yasir's and Alok's pages, who were each responsible for different parts of the programming.
Laser cutting
As the support connecting to the two nodes on the Y-axis was not strong enough, we laser cut 2 additional ones to reinforce the front and the back.
3D printing
Using Formlabs, we also 3D printed joints to attach the three nodes together. This was to ensure the top node was firm when it was moving along the Y axis.
Final presentation and video
Below are the presentation and video of the Writing bot at work!
 Group work presentation

Files
- Fusion - Design file / STL
- Inkscape - Zip file
- Python - Single node / Three nodes
- Logo - Project logo
- Presentation - Group presentation