17. Machine design
This week we have to generate a real machine not just with structure but with electronics that control it in autonomous way.
We have met all the members of remote FabAcademy to do this assignment.
Getting Started With Gestalt Nodes
My principal task this week is prepare my computer with the necessary plugins to achieve the motors runs.
For that reason I used this tutorial to install them, you can find in FabAcademy webpage:
Installing Python and Pyserial
We wanted to do exactly the same steps as Nadia´s teams did! First thing I needed was to install Python to include control commands in our terminal and Pyserial to communicate with the board and Nadia Modules.
Here is the site I used for that:
You have to install it from here:
but in Mac and Linus there is already installed just not in Windows
Now you have to install Pyserial from here:
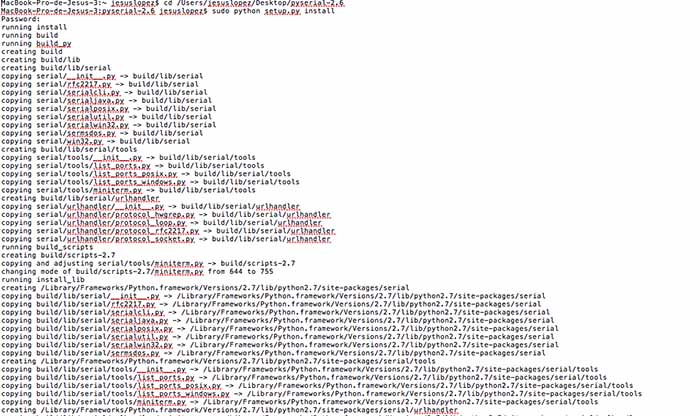
This tutorial is based on a 2.6 version so I tried to search it and download exactly the same.
We have found some problems searching it, because no one saw this part of Realase history.

open terminal
"cd Downloads"
"cd pyserial-2.6"
"sudo python ./setup.py install"
Now you have already both installed
Installing PyGestalt
Now you have to do the same steps but with PyGestalt package you can download here:
open terminal
"cd Downloads"
"cd pygestalt-master"
"sudo python ./setup.py install"
Now write the following command with Nadia modules connected to your computer
ls /dev/tty.usb*
In our case it give us /dev/tty.usbserial-FTXW9XTL copy it because you will need in the following steps.
Go to pygestalt-master > examples >machines > htmaa.
Then open Singlenode with your text editor, search for /dev/tty.usbserial and change your serial number.
Finally type in the command bar when you have change your serial port:
python single_node.py
Now it should work!
As you will see in the group website, finally one of the wires broke down so we can not communicate with the motors… so we decide to make everything again with Arduino.
Later we need a new plan to continue with the machine … so we decided to use Ramps
I have to say that my work in the group was focusing on the conception part of the idea, the mechanical development and 3D modeling of the base. However, in order to complete my contribution to the group, I studied with fab Academy tutorials and helped by my FabLeon tutors, how to program Nadia’s modules because the logic was different from Arduino’s.
With such bad luck that at the last moment something went wrong and we were not able to fix it having practiced all the programming and the computer logic made … (you can consult Nuria who was present) So, yes, I helped my teammates with the Ramps by mounting them, wiring the electronics, but I would not like to attribute a merit that is not mine.
And finally it works!!

Este obra está bajo una licencia de Creative Commons Reconocimiento-NoComercial-CompartirIgual 4.0 Internacional.