16. Interface and application programming
Group assignment
Compare as many tool options as possible
Individual assignment
Write an application that interfaces with an input &/or output device that you made
| Documentation |
|---|
| 1. Boat_Processing |
| 2. MPU6050_Arduino |
| 3. MPU6050_Processing |
This week I’m going to make a user interface to control my boat and have feedback from it. I’ll be using processing, a bluetooth app, and blynk.
Android bluetooth app
During the networking and communications week I’ve used an android app to control my boat dolly.
It was really just interfacing an existing app to a code in my microcontroller. I wanted to go further and create my own interface to visualize the yaw angle of my boat. I’ll use processing for that.
Processing
Processing is an environment that let you code, using javascripts, visual interfaces. During my tests in the input device week I’ve successfully interfaced a MPU6050 with my boatduino to collect the yaw angle of my boat. I’ll try to make an interface to visualize the yaw angle of my boat.
Interfacing the MPU6050 using Processing.
I’ve never tried processing before but as the environment is pretty similar to the arduino IDE, I wasn’t lost. I’ve first followed this tutorial to get started with.
To make this work we need :
- To install processing
- To install MPU6050 library for arduino
- To install i2cdev library for arduino
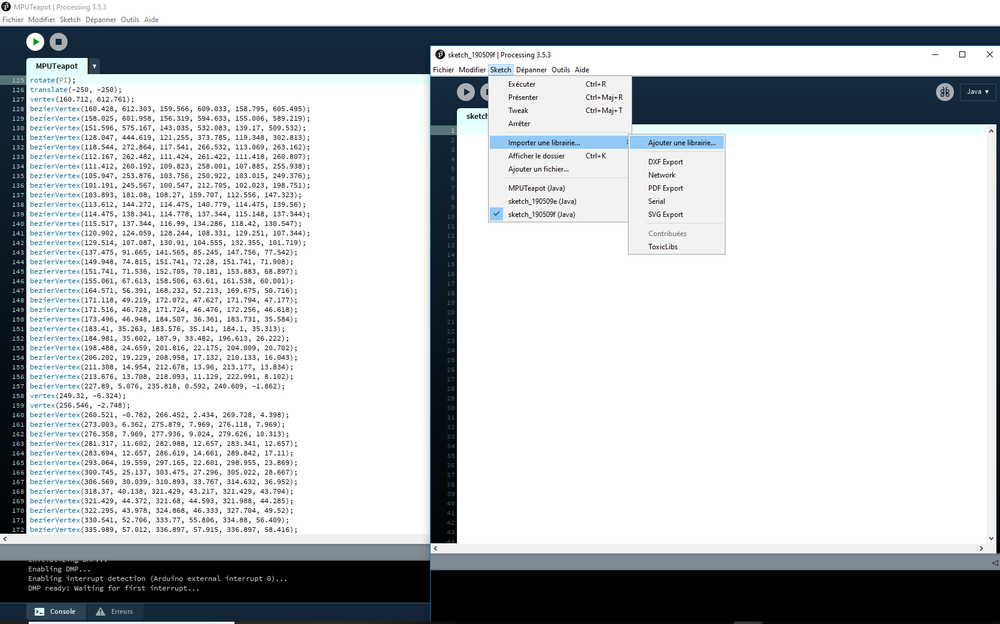
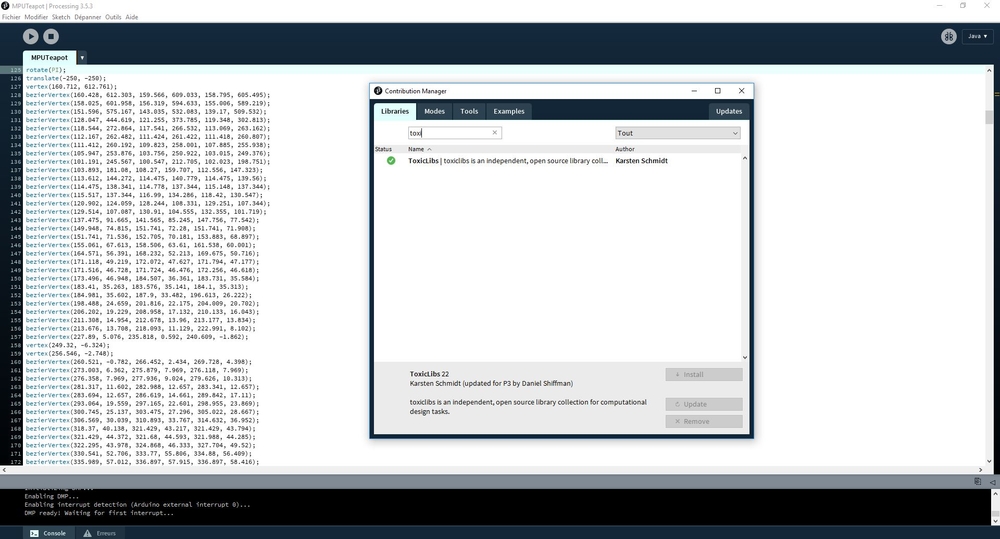
- To install the toxic library for Processing
I had some troubles installing this library but a way that worked for me is directly from Processing IDE go to SKETCH >> IMPORT LIBRARY >> ADD LIBRARY. It will open a library manager window. Type ToxiLibs and click install.
 |
 |
Then we need to upload this code to the Atmel328p.
Then we need to use this code in processing.
NOTE : To make it work we need to tune the COM our system is plugged to (COM38 for me)
EDIT : I removed the whole codes from this page because they were to long. Howeverer it’s possible to download them on the top page.
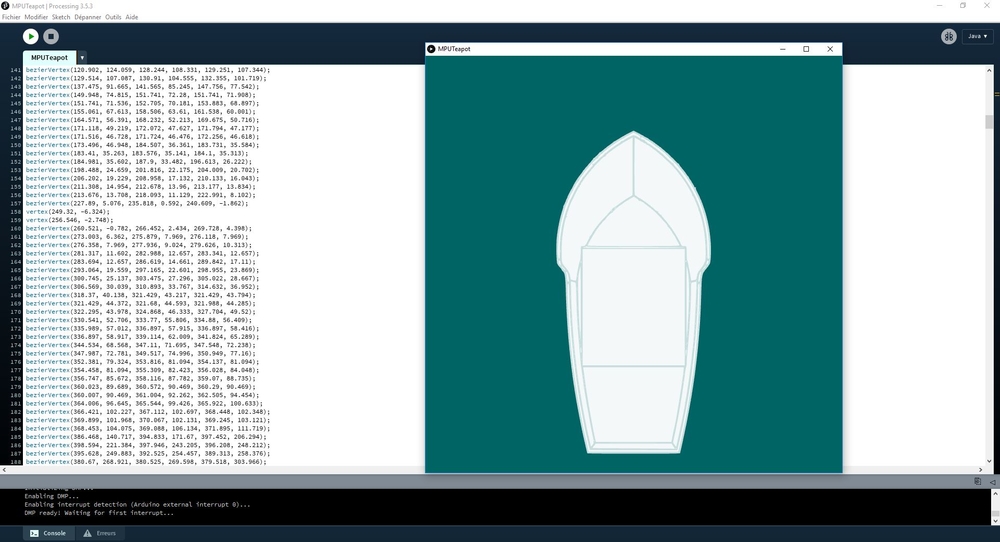
If all the libraries are properly installed we can run the processing code and we will get the following 3D representation :
NOTE : my MPU6050 is not callibrated correctly so the origins are offset, yet it’s working fine.
Changing the interface
After making sure everything worked fine, I modified the processing code to get what I wanted. My objectif is to visualize the yaw angle of my boat.
- I changed the window size : size(800, 800, OPENGL);
- I removed all the lines that created the plane shape
- I allow to visualize only one rotation : rotate(-axis[0]);
- I made a white box to visualize my boat : box(200, 200, 200);
- I made the box white : fill(255, 255, 255, 200);
Then I compiled the program :
It’s getting close to want I expected, now I need to change the box into the shape of my boat.
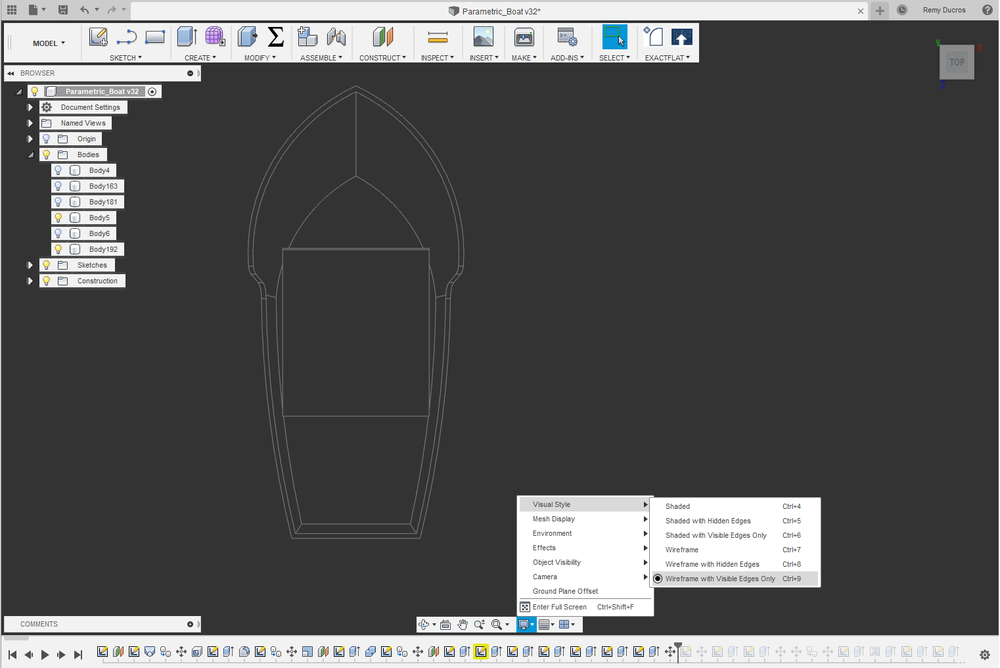
Uploading my boat into the interface
To make this work I started with Fusion360. I changed the environmental and visual settings to get a nice top view with sharpe edges of my boat.
 |
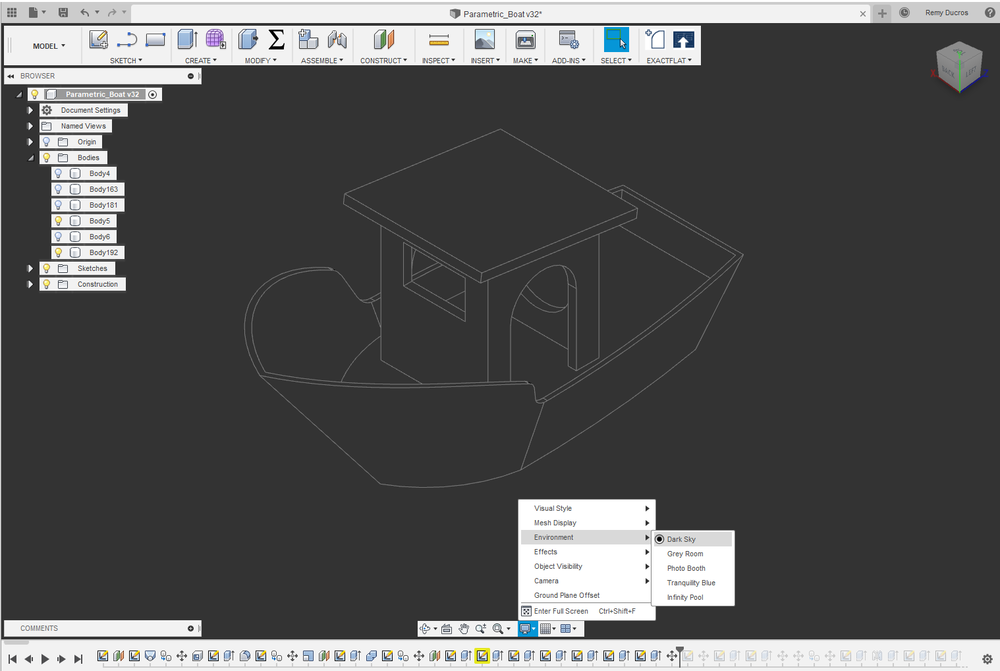 |
I’ve made a screenshot of the top view and uploaded it into inkscape and vectorized my image.
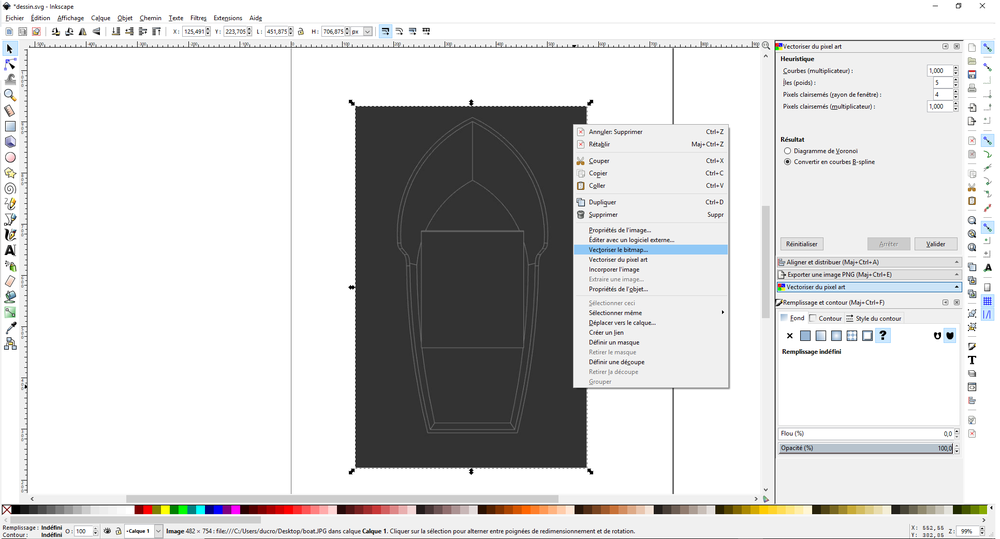 |
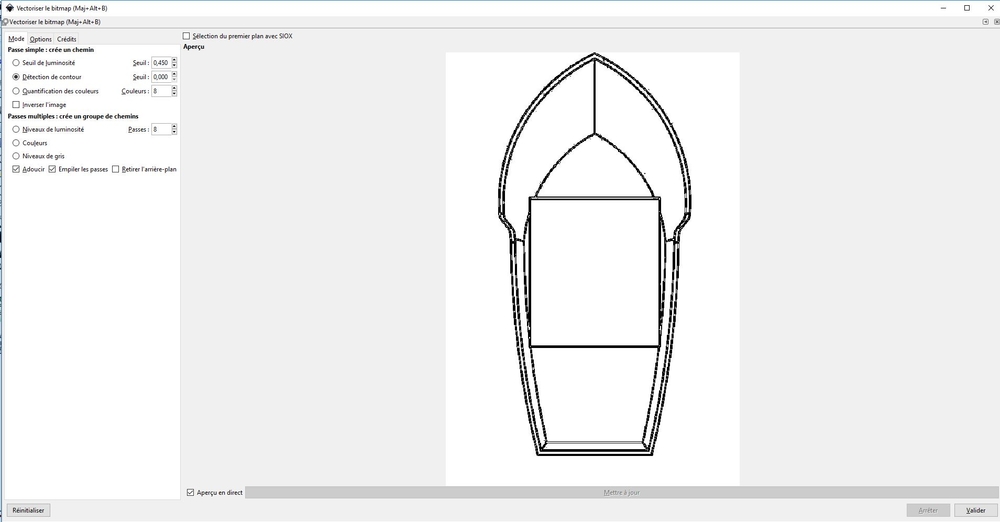 |
Once everything was done I saved the file to SVG

I then found this website which let you transform an svg file into a javascript code. We just need to upload the image and it will make the code for us.

I’ve done some modifications in the code to get what I expected :
- I changed the background color to blue (water) : background(0,100,100);
- I removed the box I replaced it by the shape from the website
- I needed to translate the form to place it in the center : translate(-250, -250);
- To have an interface which makes sense, I needed to rotate the shape : rotate(PI);
You can find the modified code here
Here’s a video of it working :
It was a good learning experience, I can see the great potential that Processing offers.
Blynk
Bluetooth blink
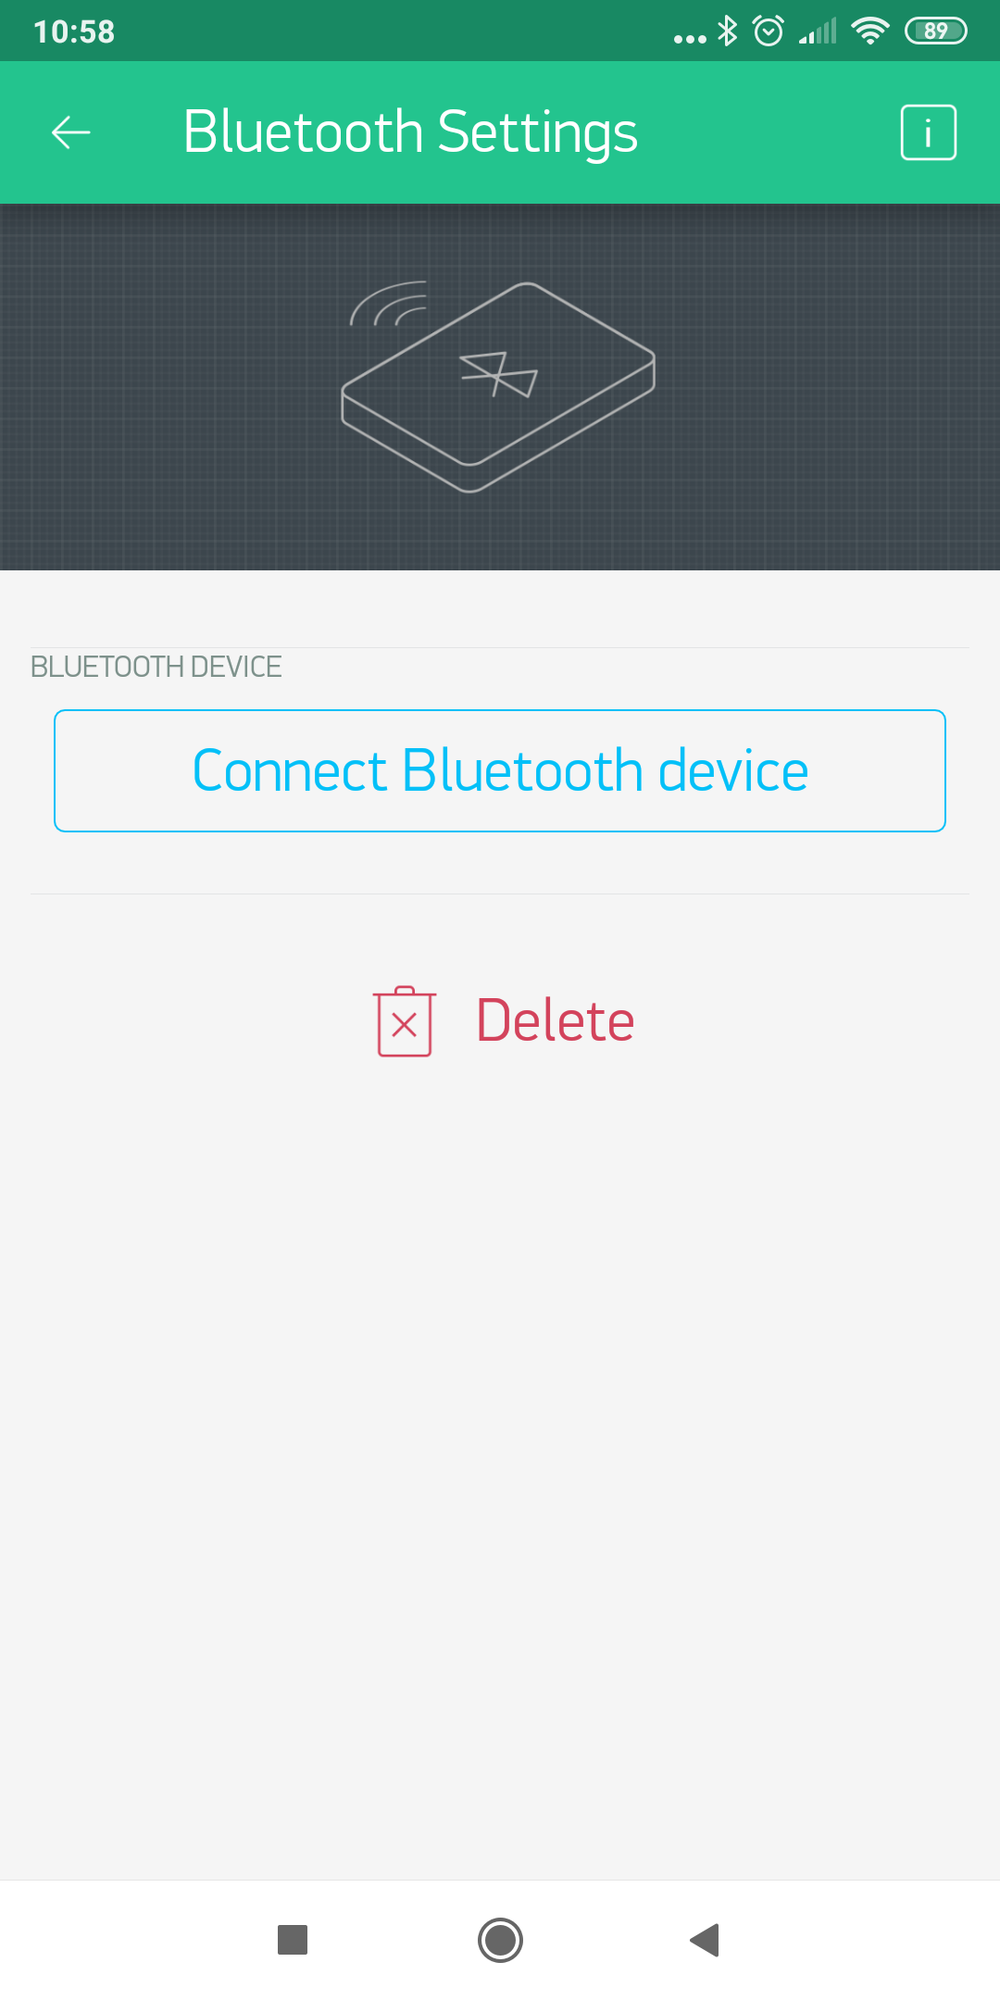
During the networking and communications week I’ve implemented bluetooth on my boatduino. I used the blynk environnment to interface my board with an android app using bluetooth.
NOTE : To work in the blynk environment we need :
- To donwload the Blynk library
- To download the blynk app
- To create a blynk account
Each time we create a new project using the app, a token is sent to our email account. We have to put this token into our code so our hardware is linked to the app.
Using the blynk envrionnement we don’t have to worry much about the coding part as we have a drag and drop interface for the visual app and we can generate codes using this website.
To begin with, I’ve controlled the in-built LED of my boatduino using the app via bluetooth.
Here’s the code I’ve used :
/*************************************************************
  Blynk is a platform with iOS and Android apps to control
  Arduino, Raspberry Pi and the likes over the Internet.
  You can easily build graphic interfaces for all your
  projects by simply dragging and dropping widgets.

    Downloads, docs, tutorials: http://www.blynk.cc
    Sketch generator:           http://examples.blynk.cc
    Blynk community:            http://community.blynk.cc
    Social networks:            http://www.fb.com/blynkapp
                                http://twitter.com/blynk_app

  Blynk library is licensed under MIT license
  This example code is in public domain.

 *************************************************************
  This example shows how to use Arduino with HC-06/HC-05
  Bluetooth 2.0 Serial Port Profile (SPP) module
  to connect your project to Blynk.

  Note: This only works on Android! iOS does not support SPP :(
        You may need to pair the module with your smartphone
        via Bluetooth settings. Default pairing password is 1234

  Feel free to apply it to any other example. It's simple!

  NOTE: Bluetooth support is in beta!

 *************************************************************/

#define BLYNK_USE_DIRECT_CONNECT


// You could use a spare Hardware Serial on boards that have it (like Mega)
#include <SoftwareSerial.h>
SoftwareSerial DebugSerial(2, 3); // RX, TX

#define BLYNK_PRINT DebugSerial
#include <BlynkSimpleSerialBLE.h>

// You should get Auth Token in the Blynk App.
// Go to the Project Settings (nut icon).
char auth[] = "5d81b1590d854e0da378eb135dbf807b";

void setup()
{
  // Debug console
  DebugSerial.begin(9600);

  DebugSerial.println("Waiting for connections...");

  // Blynk will work through Serial
  // 9600 is for HC-06. For HC-05 default speed is 38400
  // Do not read or write this serial manually in your sketch
  Serial.begin(9600);
  Blynk.begin(Serial, auth);
}

void loop()
{
  Blynk.run();
}
Here are the specifications I gave to my app :
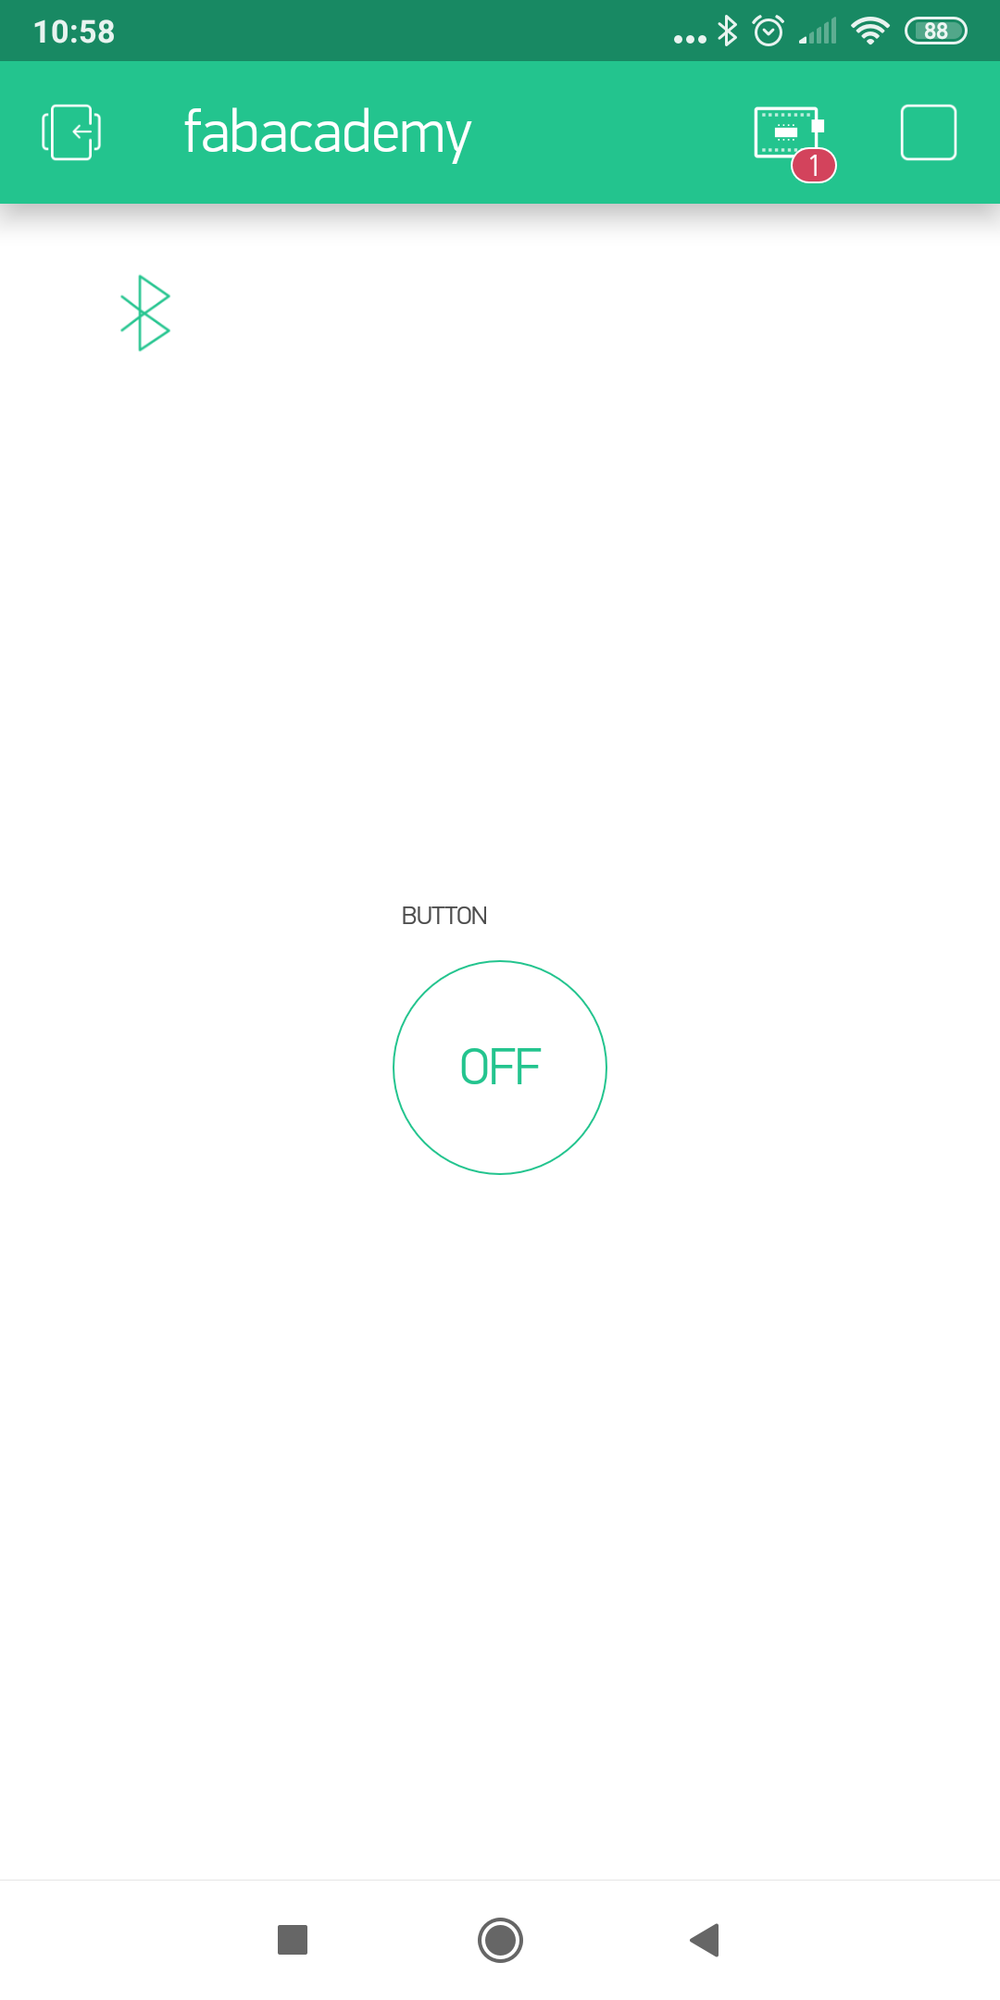 |
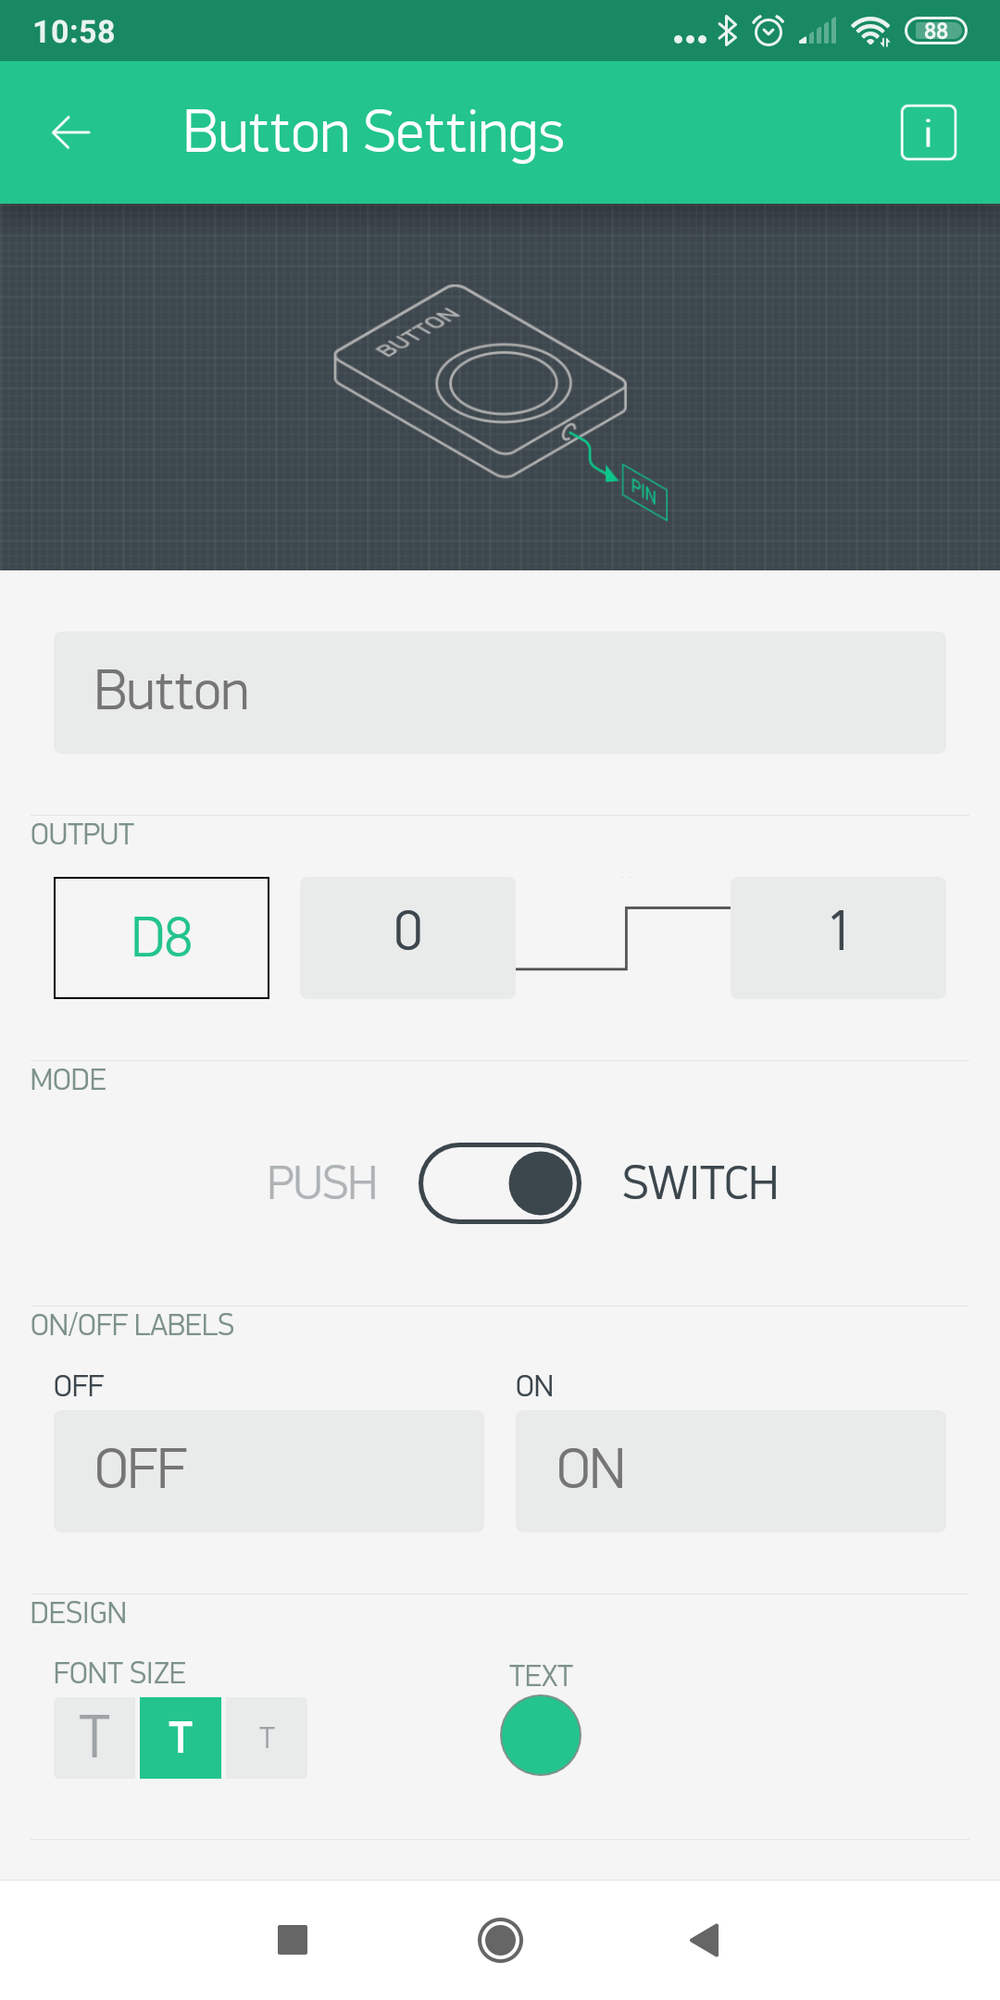 |
 |
Here’s a video of it working :
Bluetooth Joystick
I then decided to interface a joystick with my dolly boat.
I used the same code as before but I initialized my two motors. Here’s the code I’ve used :
/*************************************************************
  Blynk is a platform with iOS and Android apps to control
  Arduino, Raspberry Pi and the likes over the Internet.
  You can easily build graphic interfaces for all your
  projects by simply dragging and dropping widgets.

    Downloads, docs, tutorials: http://www.blynk.cc
    Sketch generator:           http://examples.blynk.cc
    Blynk community:            http://community.blynk.cc
    Social networks:            http://www.fb.com/blynkapp
                                http://twitter.com/blynk_app

  Blynk library is licensed under MIT license
  This example code is in public domain.

 *************************************************************
  This example shows how to use Arduino with HC-06/HC-05
  Bluetooth 2.0 Serial Port Profile (SPP) module
  to connect your project to Blynk.

  Note: This only works on Android! iOS does not support SPP :(
        You may need to pair the module with your smartphone
        via Bluetooth settings. Default pairing password is 1234

  Feel free to apply it to any other example. It's simple!

  NOTE: Bluetooth support is in beta!

 *************************************************************/

#define BLYNK_USE_DIRECT_CONNECT

// You could use a spare Hardware Serial on boards that have it (like Mega)
#include <SoftwareSerial.h>
SoftwareSerial DebugSerial(2, 3); // RX, TX

#define BLYNK_PRINT DebugSerial
#include <BlynkSimpleSerialBLE.h>

// You should get Auth Token in the Blynk App.
// Go to the Project Settings (nut icon).
char auth[] = "5d81b1590d854e0da378eb135dbf807b";

void setup()
{
  // Debug console
  DebugSerial.begin(9600);

  // Motor settings
  pinMode(5, OUTPUT);
  pinMode(9, OUTPUT);
  pinMode(11, OUTPUT);
  pinMode(12, OUTPUT);

  digitalWrite(5,HIGH);
  digitalWrite(9,HIGH);
  digitalWrite(11,LOW);
  digitalWrite(12,LOW);

  DebugSerial.println("Waiting for connections...");

  // Blynk will work through Serial
  // 9600 is for HC-06. For HC-05 default speed is 38400
  // Do not read or write this serial manually in your sketch
  Serial.begin(9600);
  Blynk.begin(Serial, auth);
}

void loop()
{
  Blynk.run();
}
Here are the specifications I gave to my app :
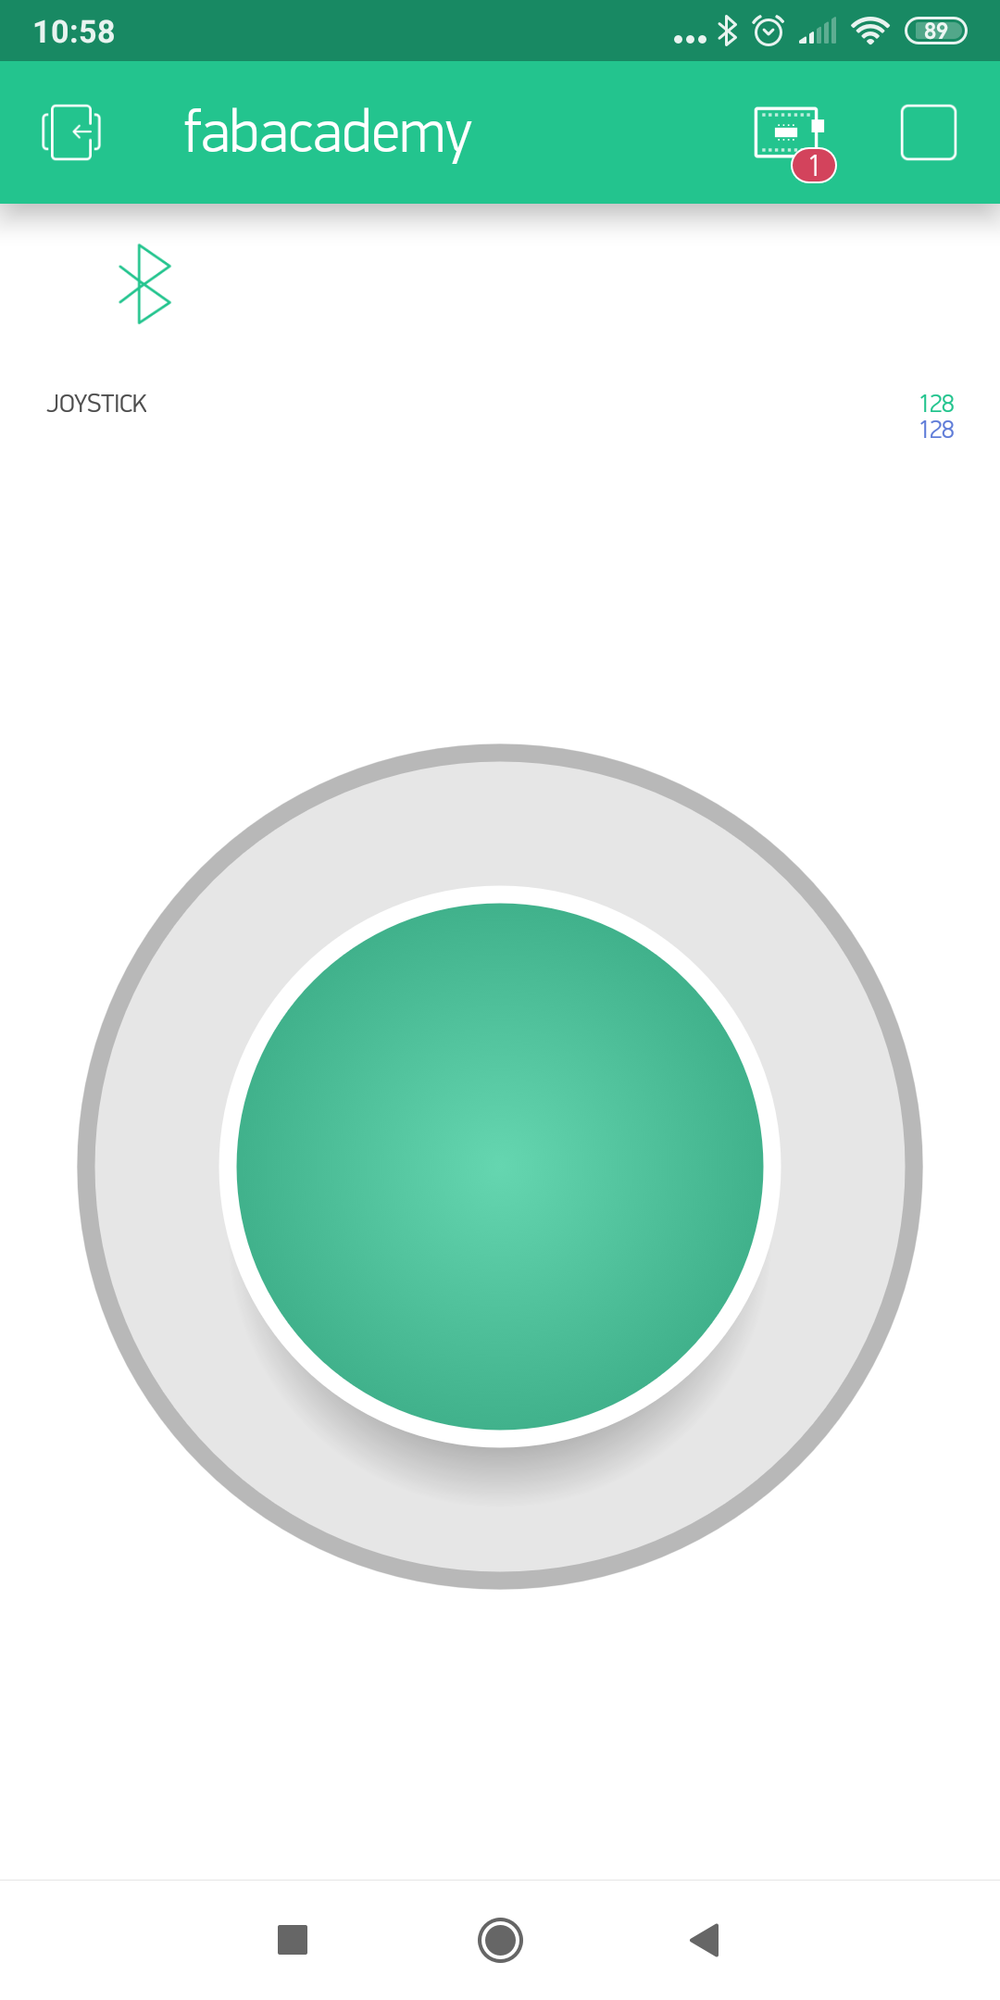 |
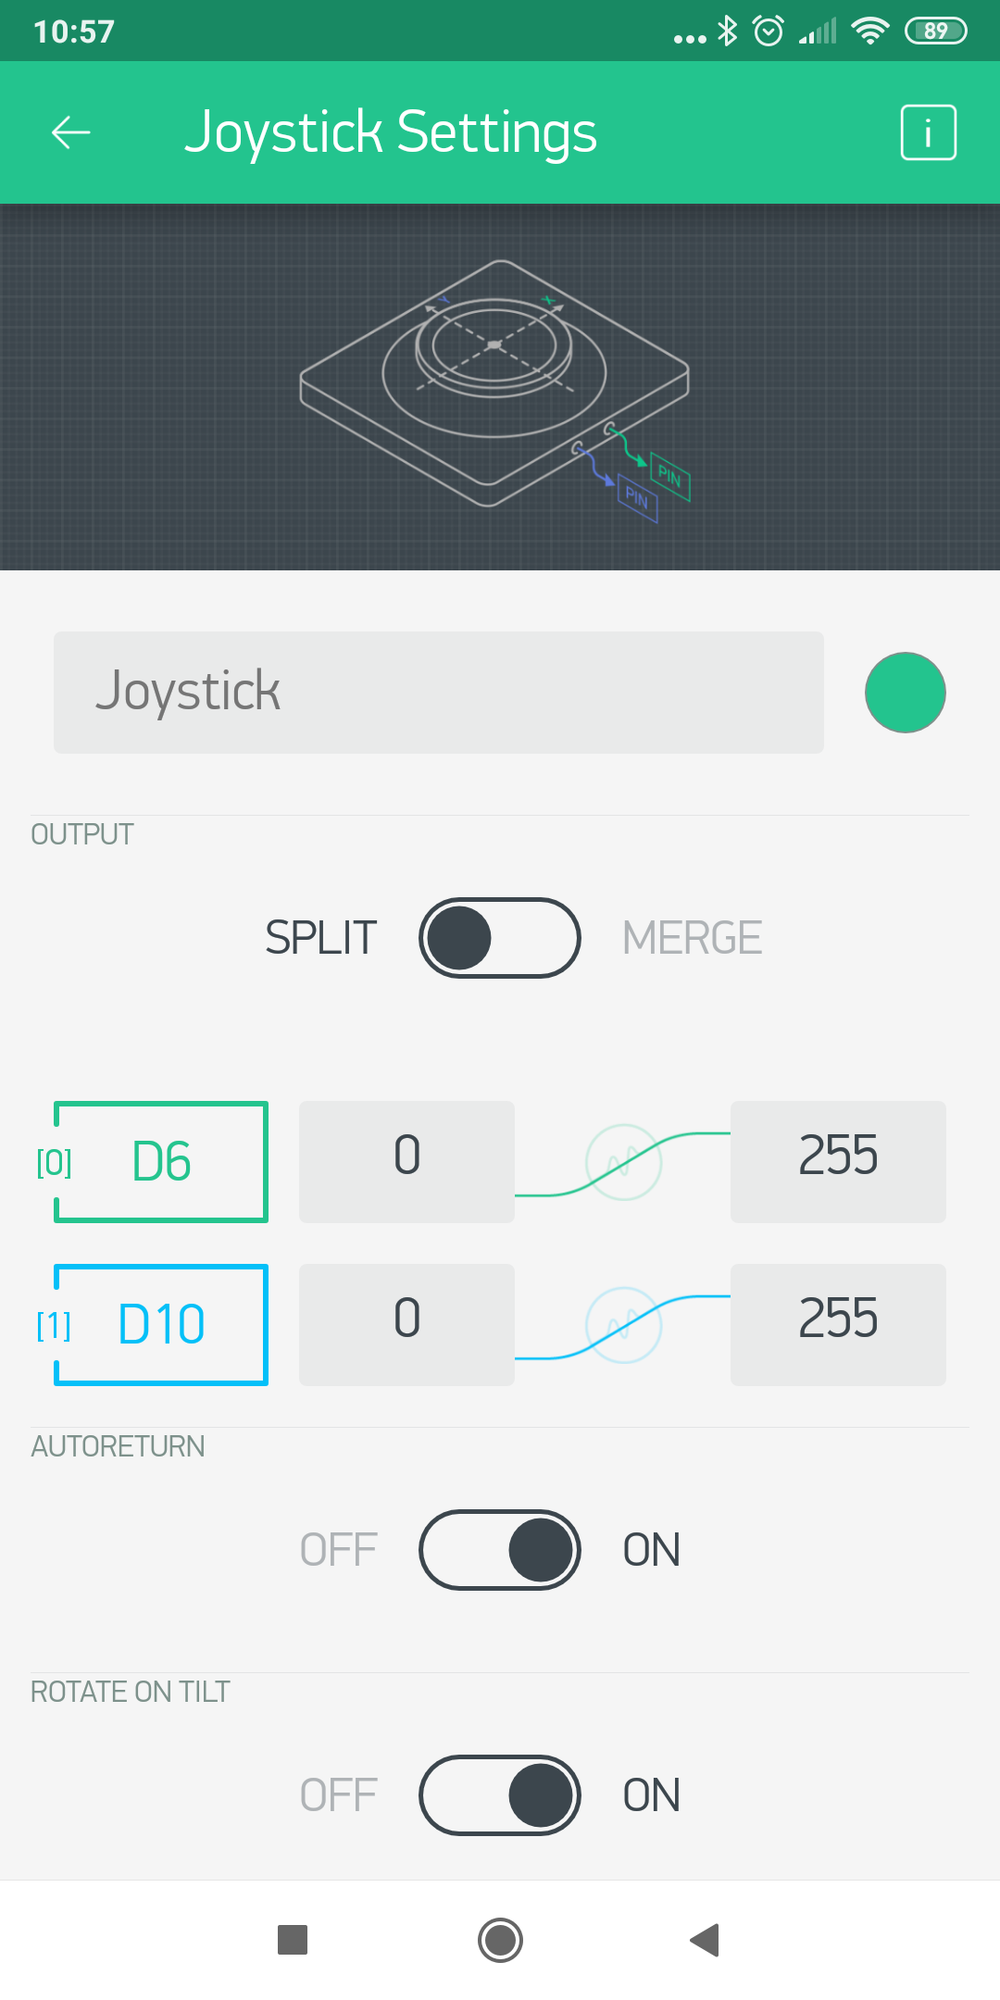 |
Here’s a video of it working :
Blynk is also a great tool to create apps for IOT. However, even if we can easily come with an app, I think we can be quickly stuck if we want to do more complicated things.

Ce(tte) œuvre est mise à disposition selon les termes de la Licence Creative Commons Attribution - Pas d’Utilisation Commerciale - Partage dans les Mêmes Conditions 4.0 International.