Computer-Controlled Cutting
Creating a Press-fit Construction Kit
Inspiration: The first thought that came to mind when hearing the phrase "press-fit" was Tinker Toys, a simple construction toy set consisting of only shapes and connectors that fit together, that can be used to build many things.
After spending alot of time thinking about what I wanted to make using Press-fit, I thought it might be interesting to create a "Tinker-toy-like" kit, that others can use to create simple press-fit objects.
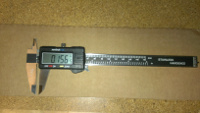
Material and Method: I began by creating simple shapes (circle, triangle, square, heptagon) in Inkscape, and a rectangle shaped "connector." I created a notch and placed it over the edge of the rectangle, then used Boolean opertions ("difference") to create the notch, and the clone function to replicate the notch. To determine the width of the notch I should use, I used calipers to measure the width of the corrugated cardboard being used:
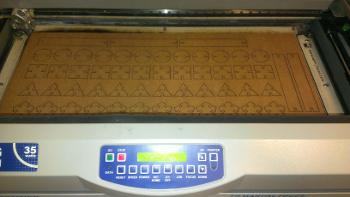
Laser Cutting the Cardboard: WIth the shapes drawn in Inkscape, it was simple to copy and paste them along a 24 x 12 in document, that could be printed on our 35W Epilog laser cutter. Since only vector cuts were needed, it was recommended that we set the Power and Speed settings to 75% and 20%, respectively. This worked quite well, and the shapes cut out nicely:
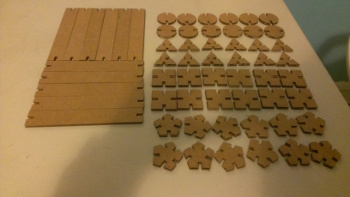
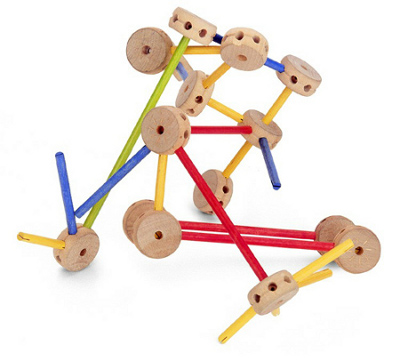
Results: With the toy pieces in hand, I began to play :) The possibilities are limitless, but here is an example of what I built:
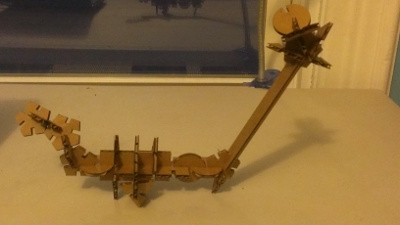
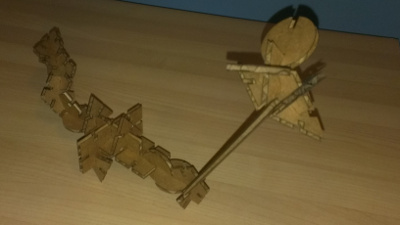
This was an extremely simple test of press-fit design and construction, though I found the kit fun to try.

