14. Interface and application programming (Indonesia group)
This is group assignment page of Interface and application programming (Indonesia Student) :
Group assignment:
- compare as many tool options as possible
Comparison with some other interfaces
In this week assignment, We will work on the interface using different programming, namely:
- processing
- Tkinter (Python)
- C# (Visual Studio)
In this section we will read data from the interface (computer) that is sent via serial, then the MCU will read the data to turn on the RGB LED. The program that will be uploaded to the MCU is a basic program to read data on the next serial port based on the incoming data which will be used to turn on the led (R,G,B).
Sketch to upload on MCU
int sensorPin =2 ;
int value = 0;
void setup()
{
 Serial.begin(9600); }
void loop()
{
 value = analogRead(sensorPin);

Serial.println(value, DEC);

delay(50);
}
Processing
The following is the use of processing for the interface as output (visualization data)
import processing.serial.*;

Serial mySerial;

String myString = null;
int nl = 10;
float r=0, g=100;

float myVal;

void setup(){
  size(200,600);

  mySerial = new Serial(this, "COM28", 9600); //type your port name in the middle
}

void draw(){

 while (mySerial. available() > 0) {
   myString = mySerial.readStringUntil(nl);

   if (myString != null){
   background(150,10,100); //change the color
   myVal = float(myString);

   myVal = myVal/1000* height;

  rectMode(CENTER);
  r = myVal/2;
  g=255-r;
  fill(r, g, 00);
  rect(width/2, height-(myVal/2), 100, myVal);

  stroke(100,100,100);
  fill(200, 60, 0);
  textSize(30);
  text(r, width/2-50, height/2);
}
 }
  }
Tkinter (Python)
The following is the use of Tkinter (Python) for the interface as output (visualization data)
import tkinter
from tkinter import *
from time import *
import serial

arduinoData = serial.Serial('COM25', 9600)
master = Tk()

canvas = Canvas(master, width = 700, height = 700)
canvas.pack()

center_x = 350
center_y = 350
circle_size = 10

canvas.create_oval( center_x-circle_size, center_y-circle_size, center_x+circle_size, center_y+circle_size,fill = "red", tags = "circle1")
teksLabel = Label(master, text="Light Sensor", width=20, height=5)
teksLabel.pack()

def resize_circle_blue():
    global circle_size
    global canvas
    while True:
        myData = arduinoData.readline().strip()
        circle_size = int(myData)/2

        canvas.delete('circle1')
        canvas.create_oval( center_x-circle_size, center_y-circle_size, center_x+circle_size, center_y+circle_size,fill = "red", tags = "circle1")
        canvas.update()
        sleep(0.001)

master.after(100, resize_circle_blue)
master.mainloop()
C# (Visual Studio)
The following is the use of C# (Visual Studio) for the interface as input data. We will create a GUI interface for the commands to be sent to the serial. The process of making the program is as follows:
-
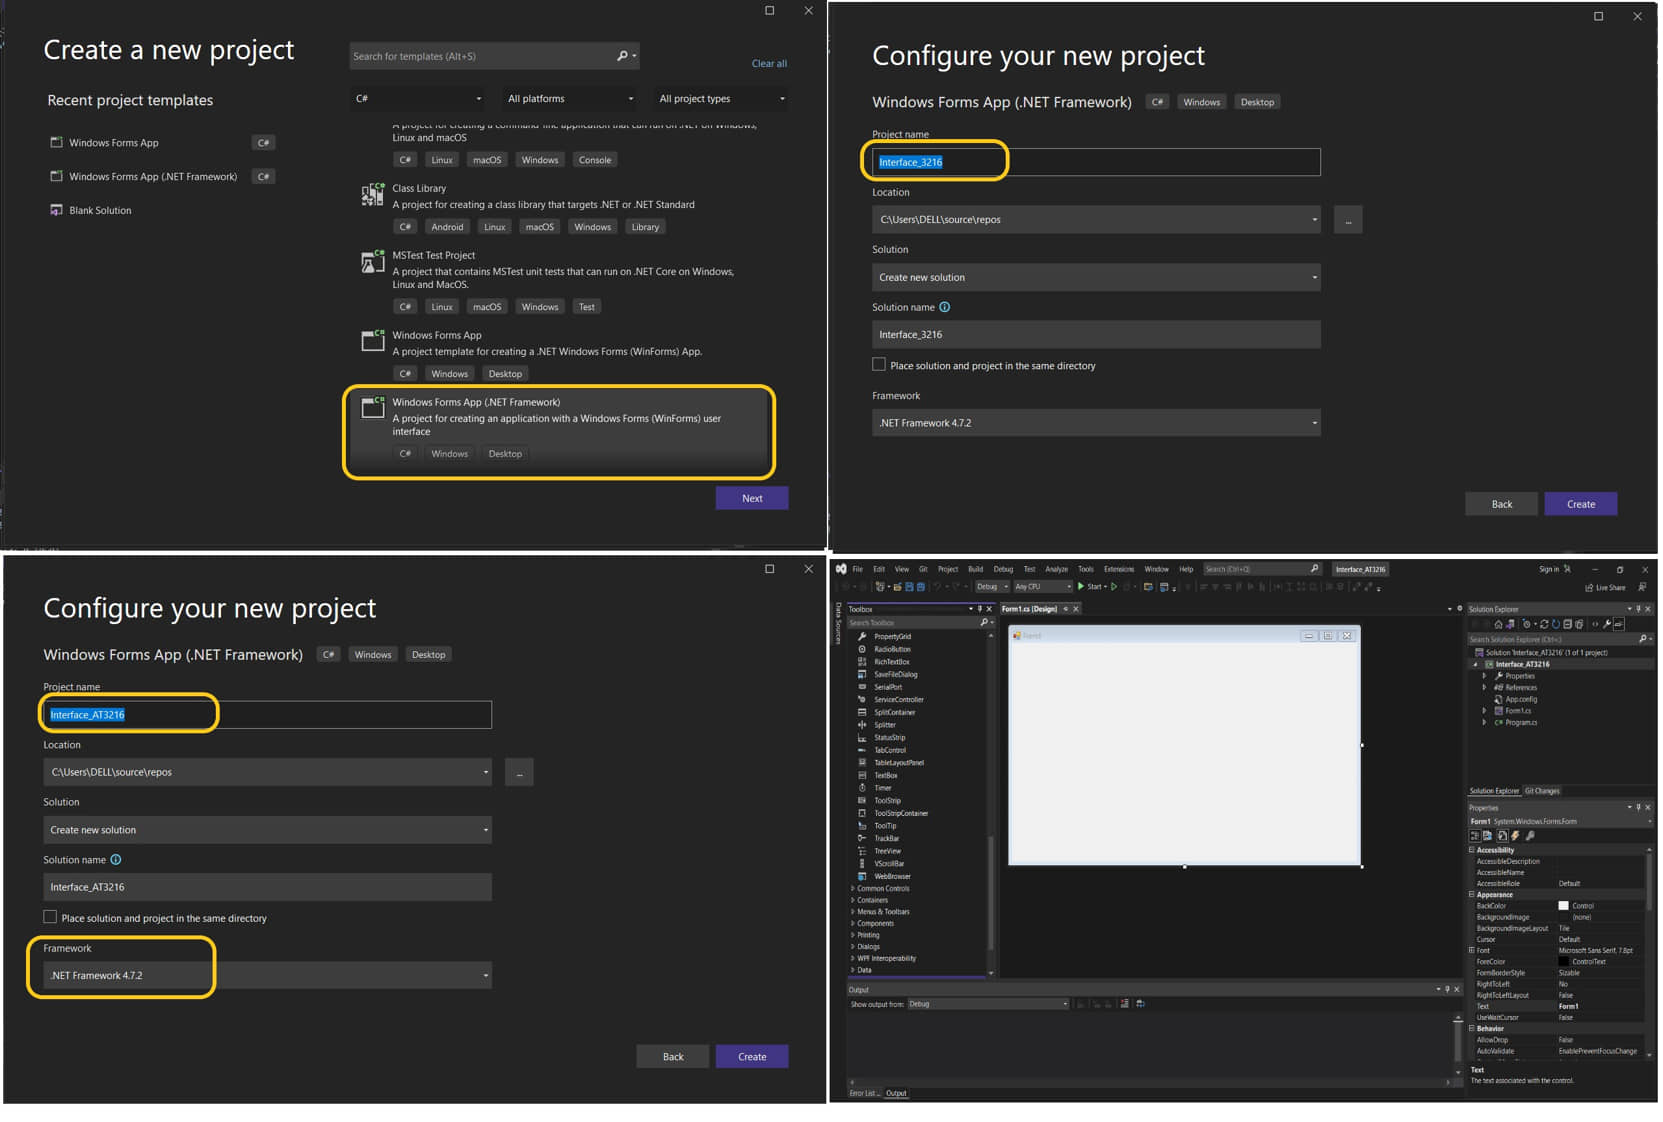
Run Visual Studio (I’m using Microsoft Visual Studio Community Edition, you can download it here)
-
Create a new project, give the project a name
- Create Form
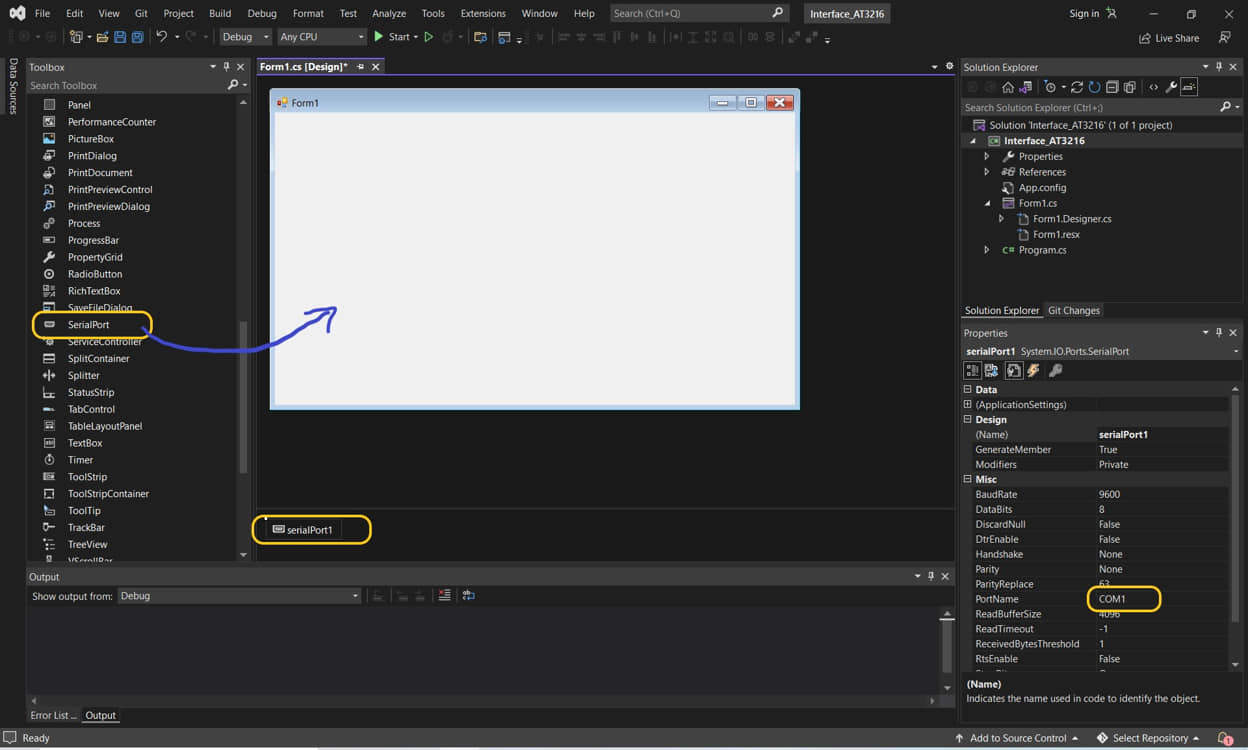
- take the toolbox (left): SerialPort, drag towards the form. Setting properties (baudrate, COMxx according to the program on the MCU-Arduino IDE)
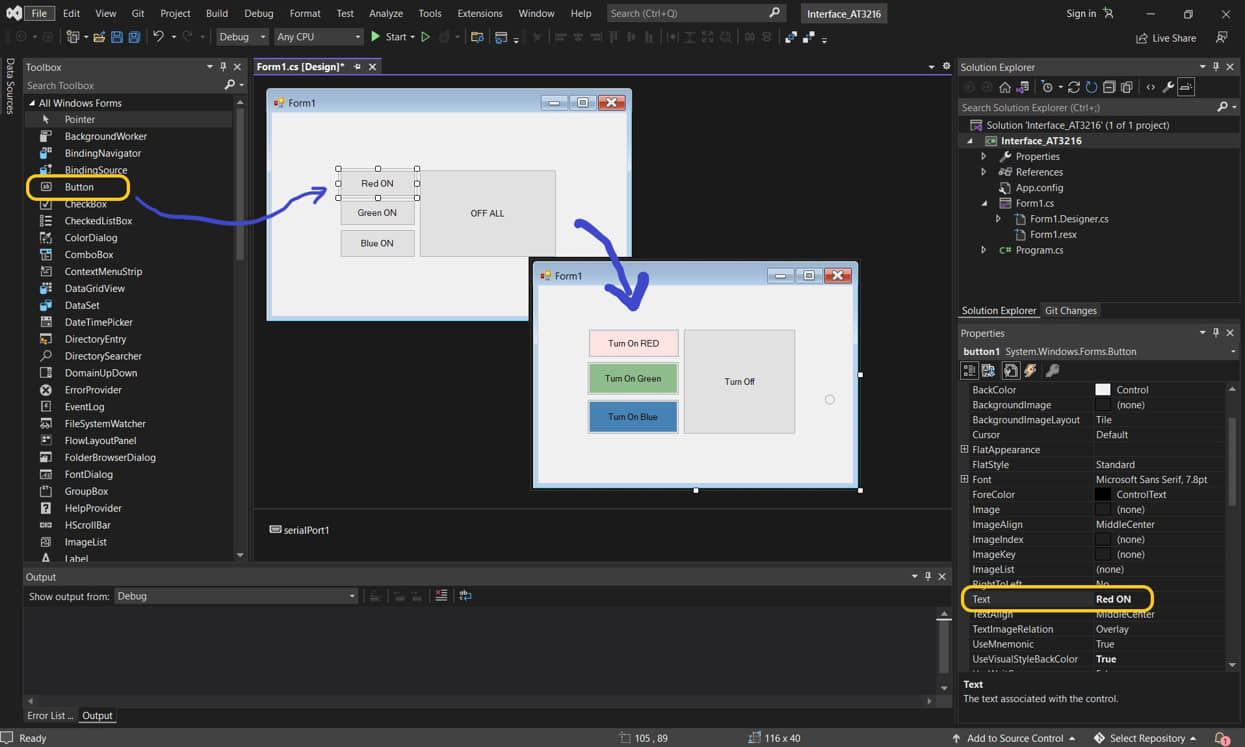
- take the toolbox button, point to Form, change the text (eg: “Turn ON RED”), do it for another button. Buton can be set the size and color according to what we want
- create a code, enter the code editor (Press-F7, or click the View-Code menu).
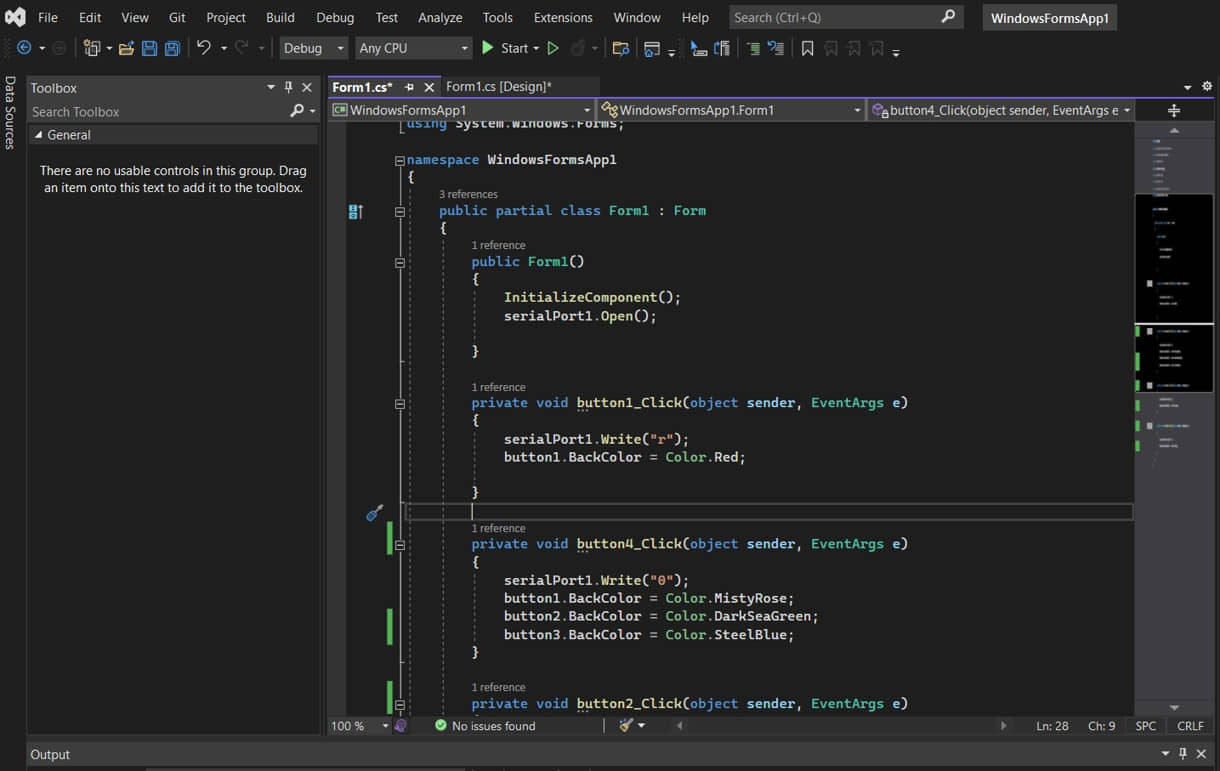
- enter the code for each logic button press by double clicking on the button according to the logic planned.
namespace WindowsFormsApp1
{
    public partial class Form1 : Form
    {
        public Form1()
        {
            InitializeComponent();
            serialPort1.Open();
        }

        private void button1_Click(object sender, EventArgs e)
        {
            serialPort1.Write("r");
            button1.BackColor = Color.Red;
        }

        private void button4_Click(object sender, EventArgs e)
        {
            serialPort1.Write("0");
            button1.BackColor = Color.MistyRose;
            button2.BackColor = Color.DarkSeaGreen;
            button3.BackColor = Color.SteelBlue;
        }

        private void button2_Click(object sender, EventArgs e)
        {
            serialPort1.Write("g");
            button2.BackColor = Color.Green;
        }

        private void button3_Click(object sender, EventArgs e)
        {
            serialPort1.Write("b");
            button3.BackColor = Color.Blue;
        }
    }
}