16. Wildcard week
For this week, I have learnt on different Digital Fabrication Process
Design and produce something with a digital fabrication process that is incorporated computer-aided design and manufacturing as follows:
- Machines
- Welding
- Molding and Casting
- Folding
- Robotics
- Electronics
- Embedding Programming
- Materials
- Biotechnology
- Textiles
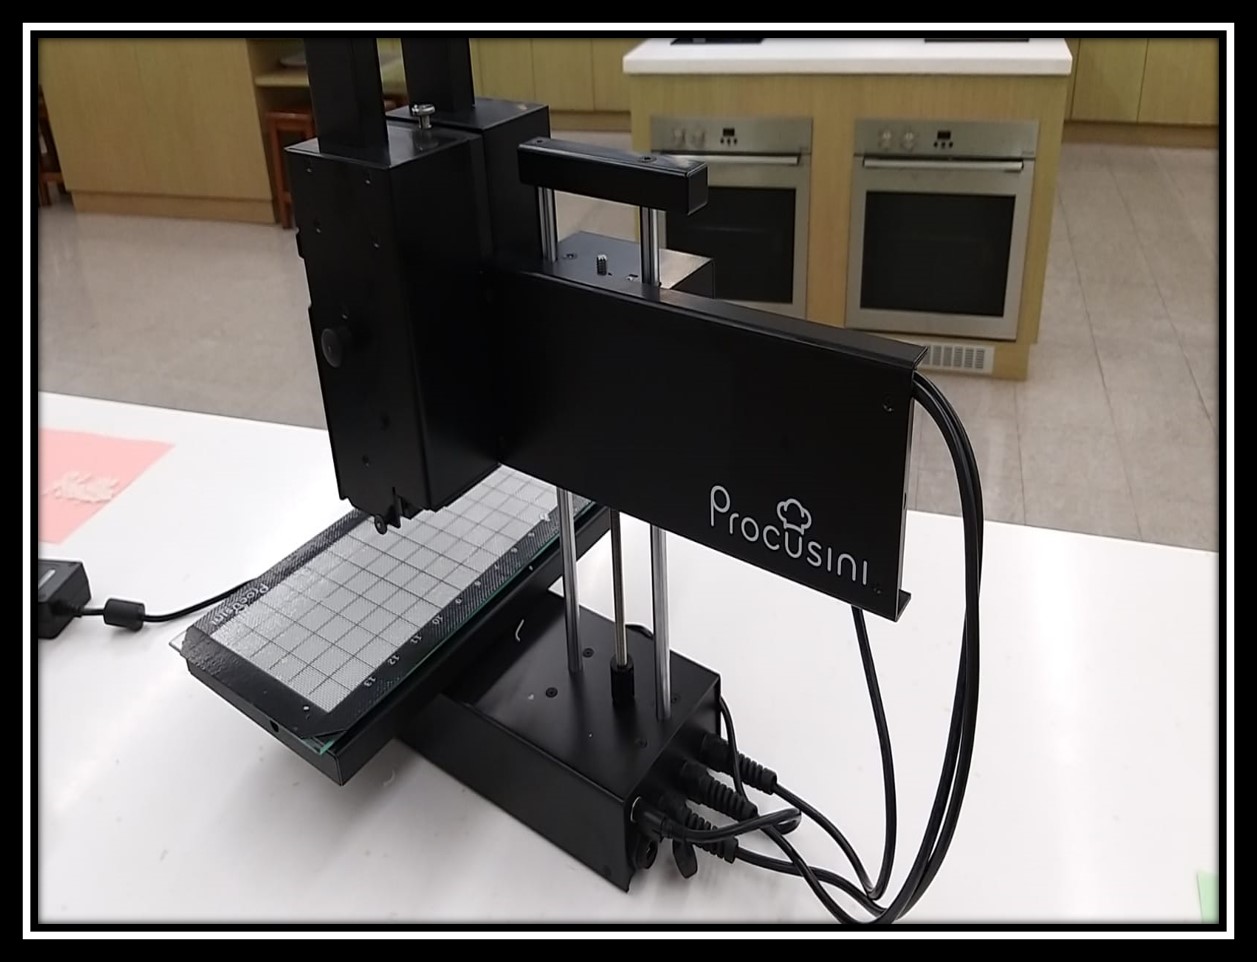
For this week, I have worked on 3D Food Printing
Procusini is an easy-to-use 3D Food Printer that is more commonly used in catering services and bakery.
Step 1: Procusini and WLAN enabled device was then connected.
Wi-fi connections was opened and “procusini_6d92c8” could be found on any mobile device. Please type “procusini” as password to start the wi-fi connection. At this time, I used my mobile device for remote controlling the work of this 3D food printer.
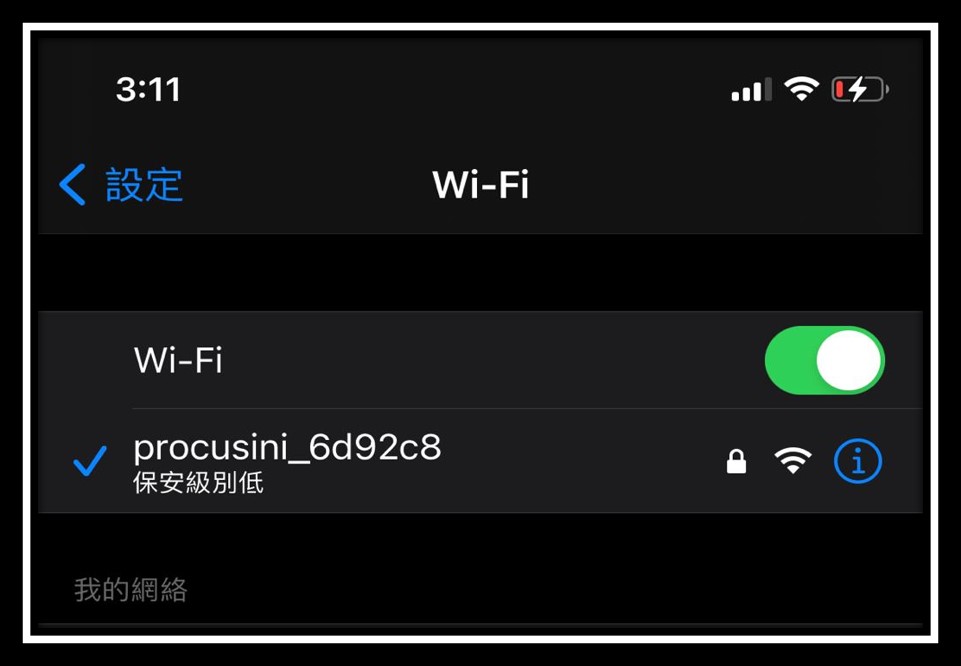
If you cannotfind the name of “procusini_6d92c8”, please check you turn on the machine or not.
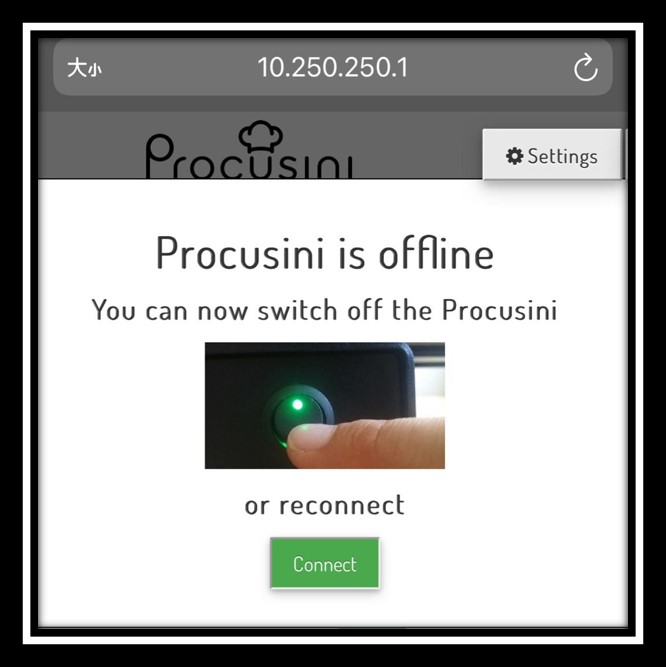
Step 2: Google Chrome was opened in the mobile device
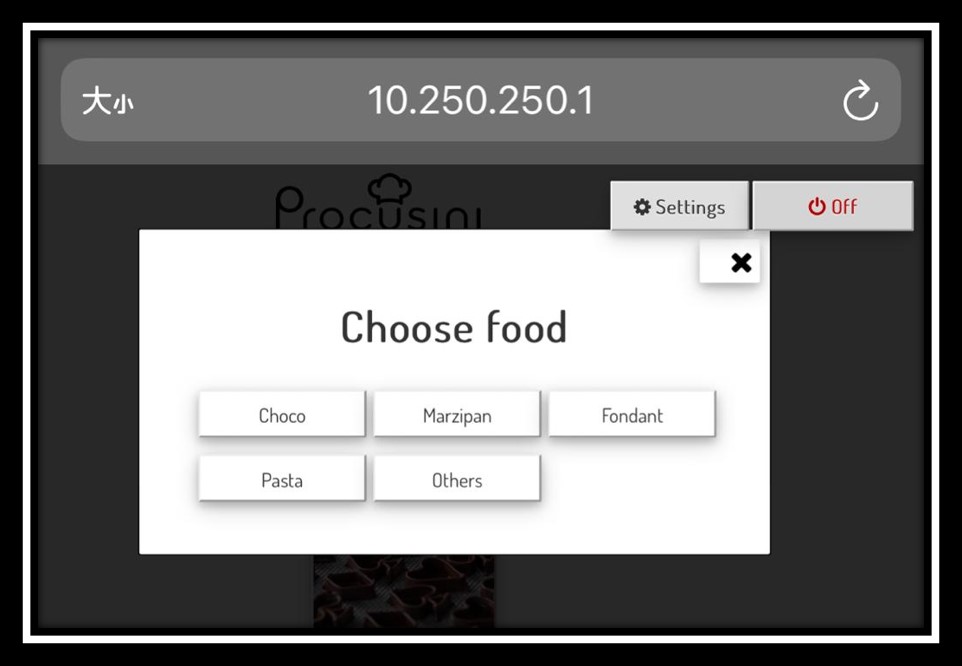
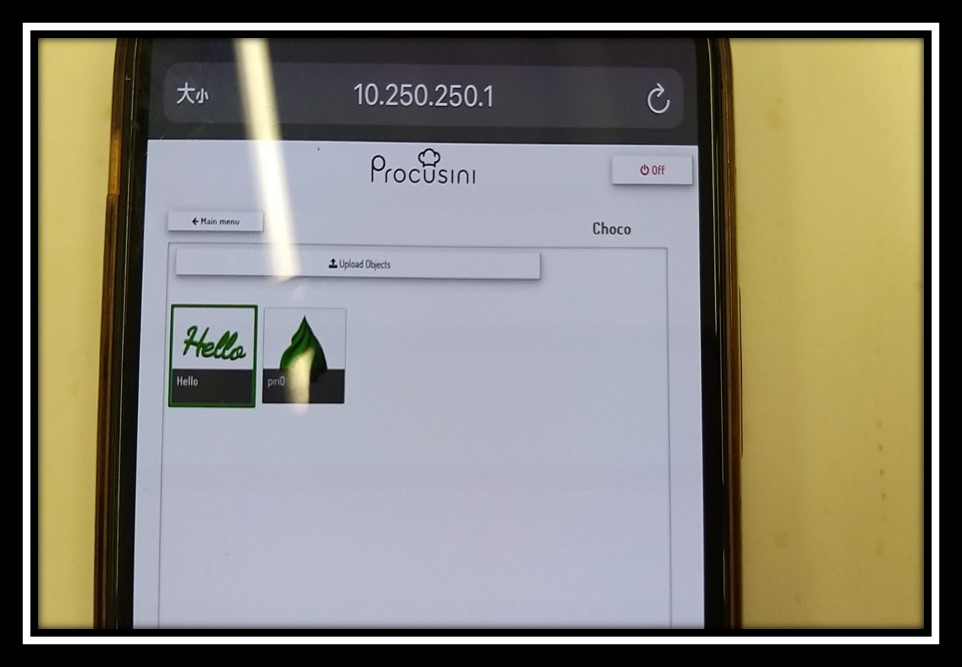
“10.250.250.1” was entered in the address bar of Google Chrome. The Procusini user interface was then opened. If you see the message of “Procusini is offline”, you can switch off it or choose to reconnect.
Step 3: Appropriate Lanaguage was selected. I chose English for this time.

Step 4 The food material was chosen.
There are five types of food materials those you can choose such as choco, Marzipa, fondant, pasta and so on.
In our school kitchen, only Choco, Fondant, Green Marzipan and Yellow Marzipan.
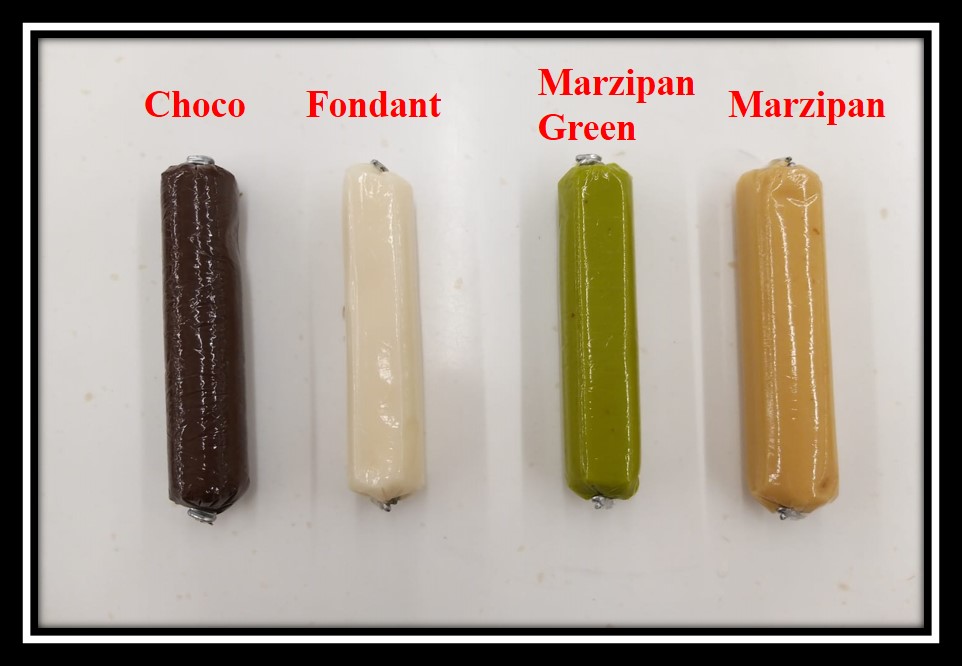
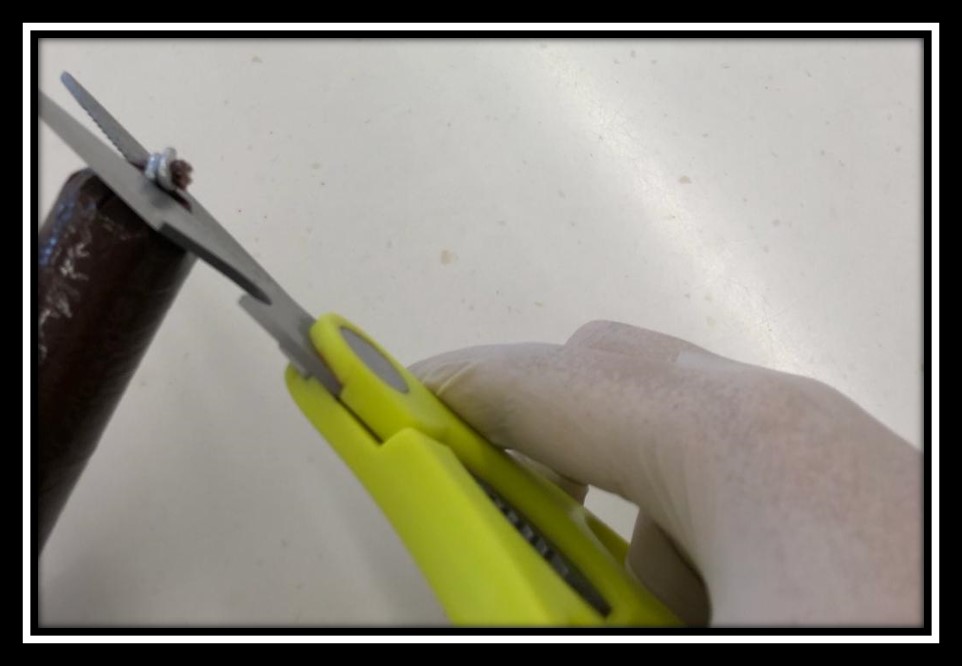
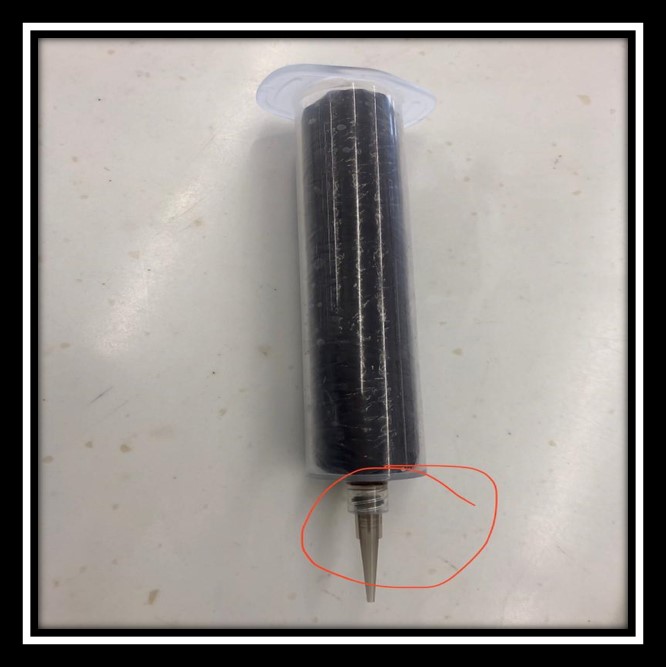
I have choosen Choco and Marzipan as the food refills this time. The fillings was then opened on one side with the included scalpel.
Step 5 The open refill was placed in one of the supplied catridges with the cut side down.
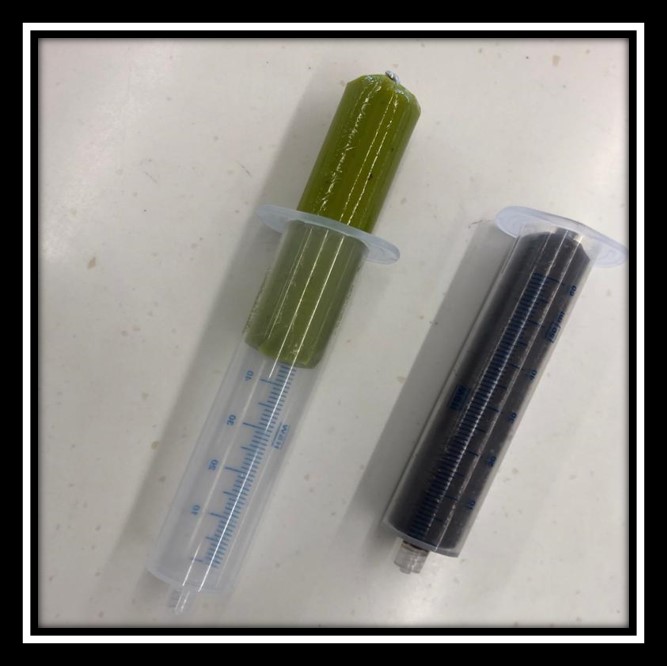
A tip was put onto each supplied catridge.
Step 6: Two supplied catridge were placed to the machine. You could refill the other food materials after all refills used.
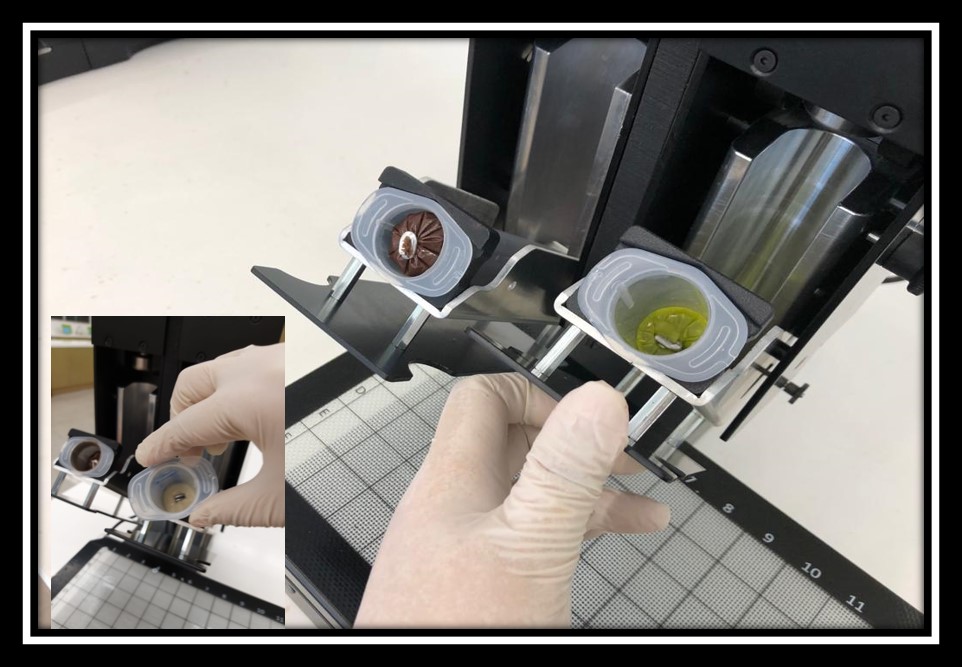
The pull buttons at 2 sides were pulled outside and let the cartridges placed into the machine. The cover was then closed.
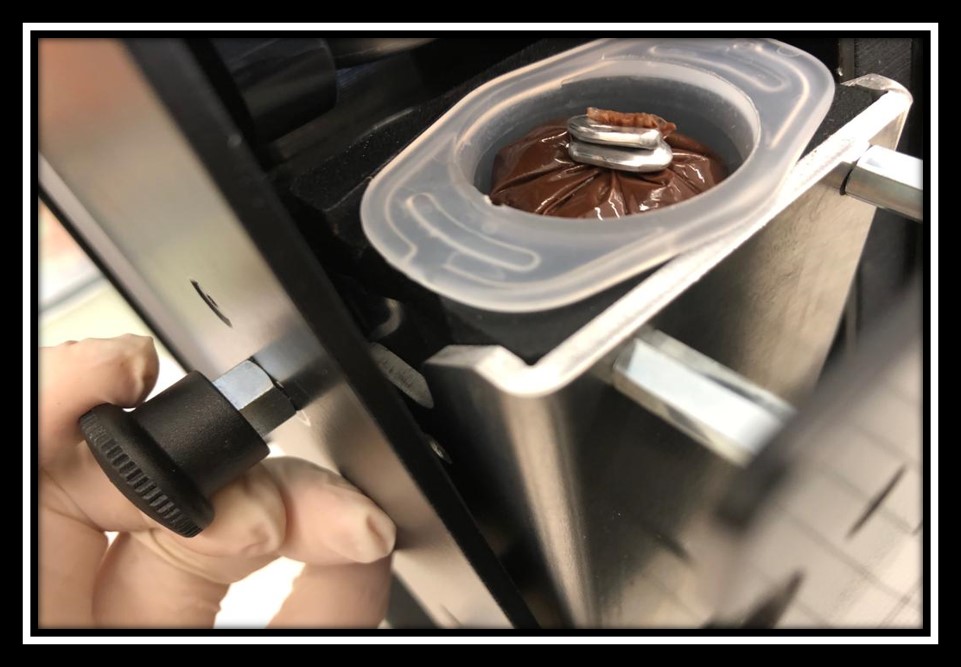
Down-Arrow would be pressed continuously until a bite of refills coming out from the tips. The button of “OK” would be pressed to start printing.

Step 7: The Preheating button was pressed and the refills were preheated.
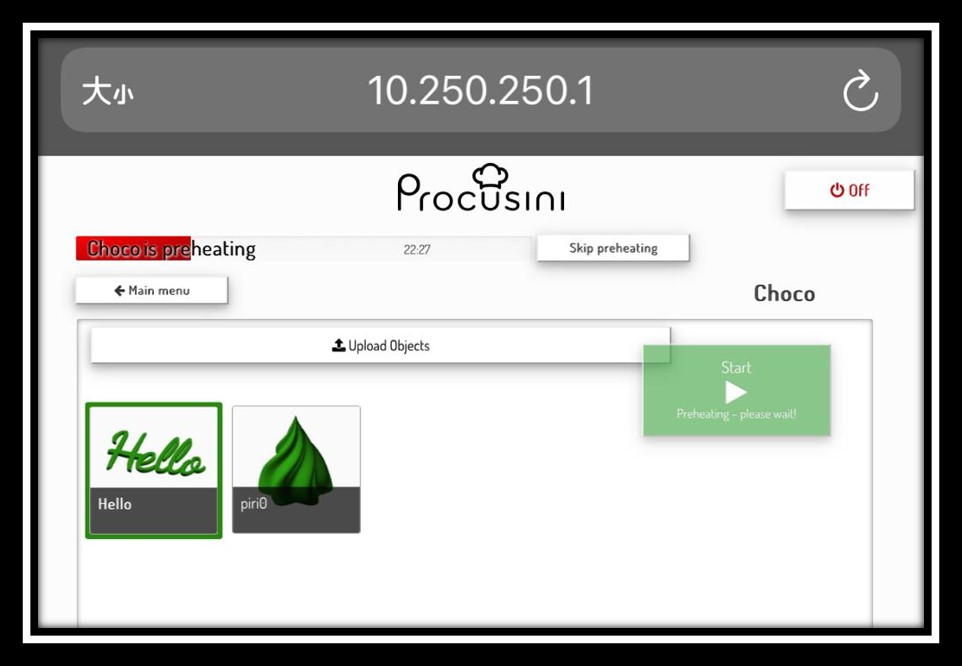
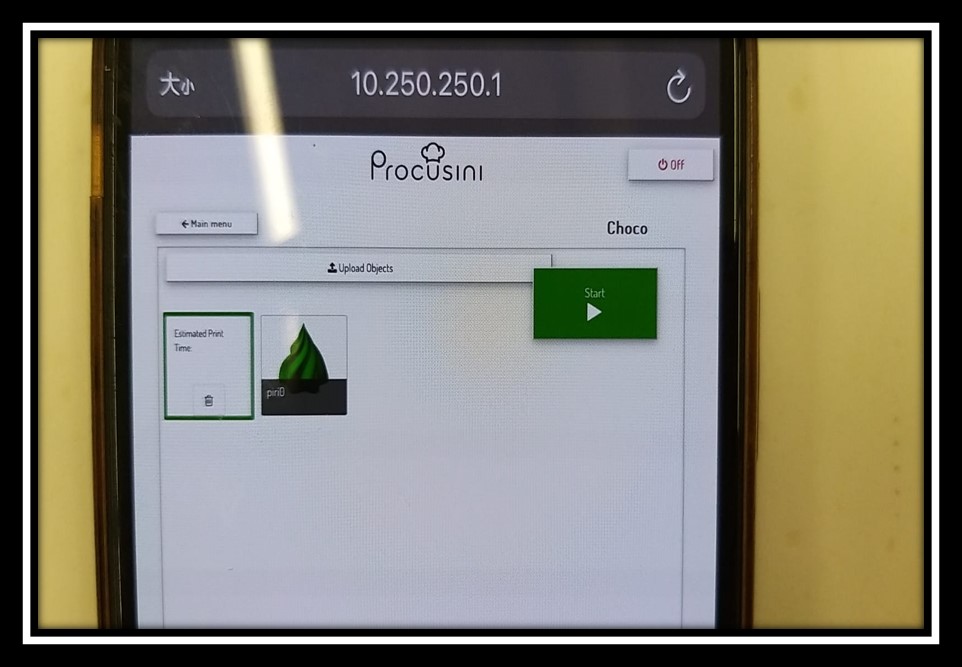
Step 8: When the preheating process was completed, you could choose any default diagram for further 3D Priniting.
Step 9: When everything was ready, the button of “Start” could be pressed for the process of 3d printing.
Step 10: 3D product was printed.
From the experience at this time, I had some recommendation for using “Procusini” as 3D food printer as follows:
-
To choose Fondant or Marzipan which is more easily to handle at the first trial of 3D food printing.
-
The same refills should be inserted into the 3D Printing. This is because the preheating time for different refills.
-
If the preheating time is not enough, the 3D product was not easily formed in shape as follow:
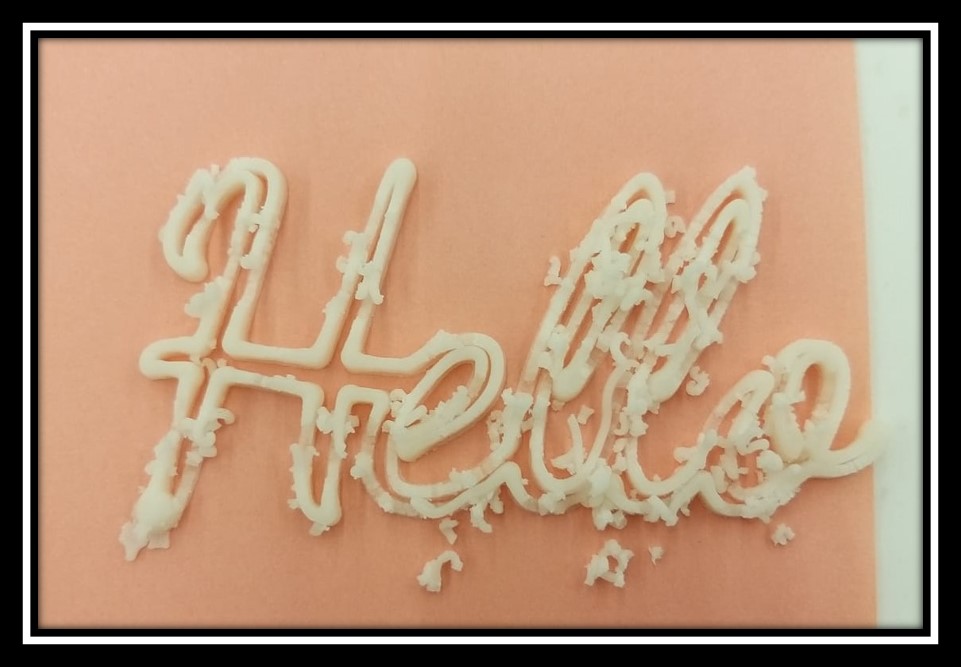
This is an appropriate and safety 3D printing product that can be placed beside the food on the plate for decoration.