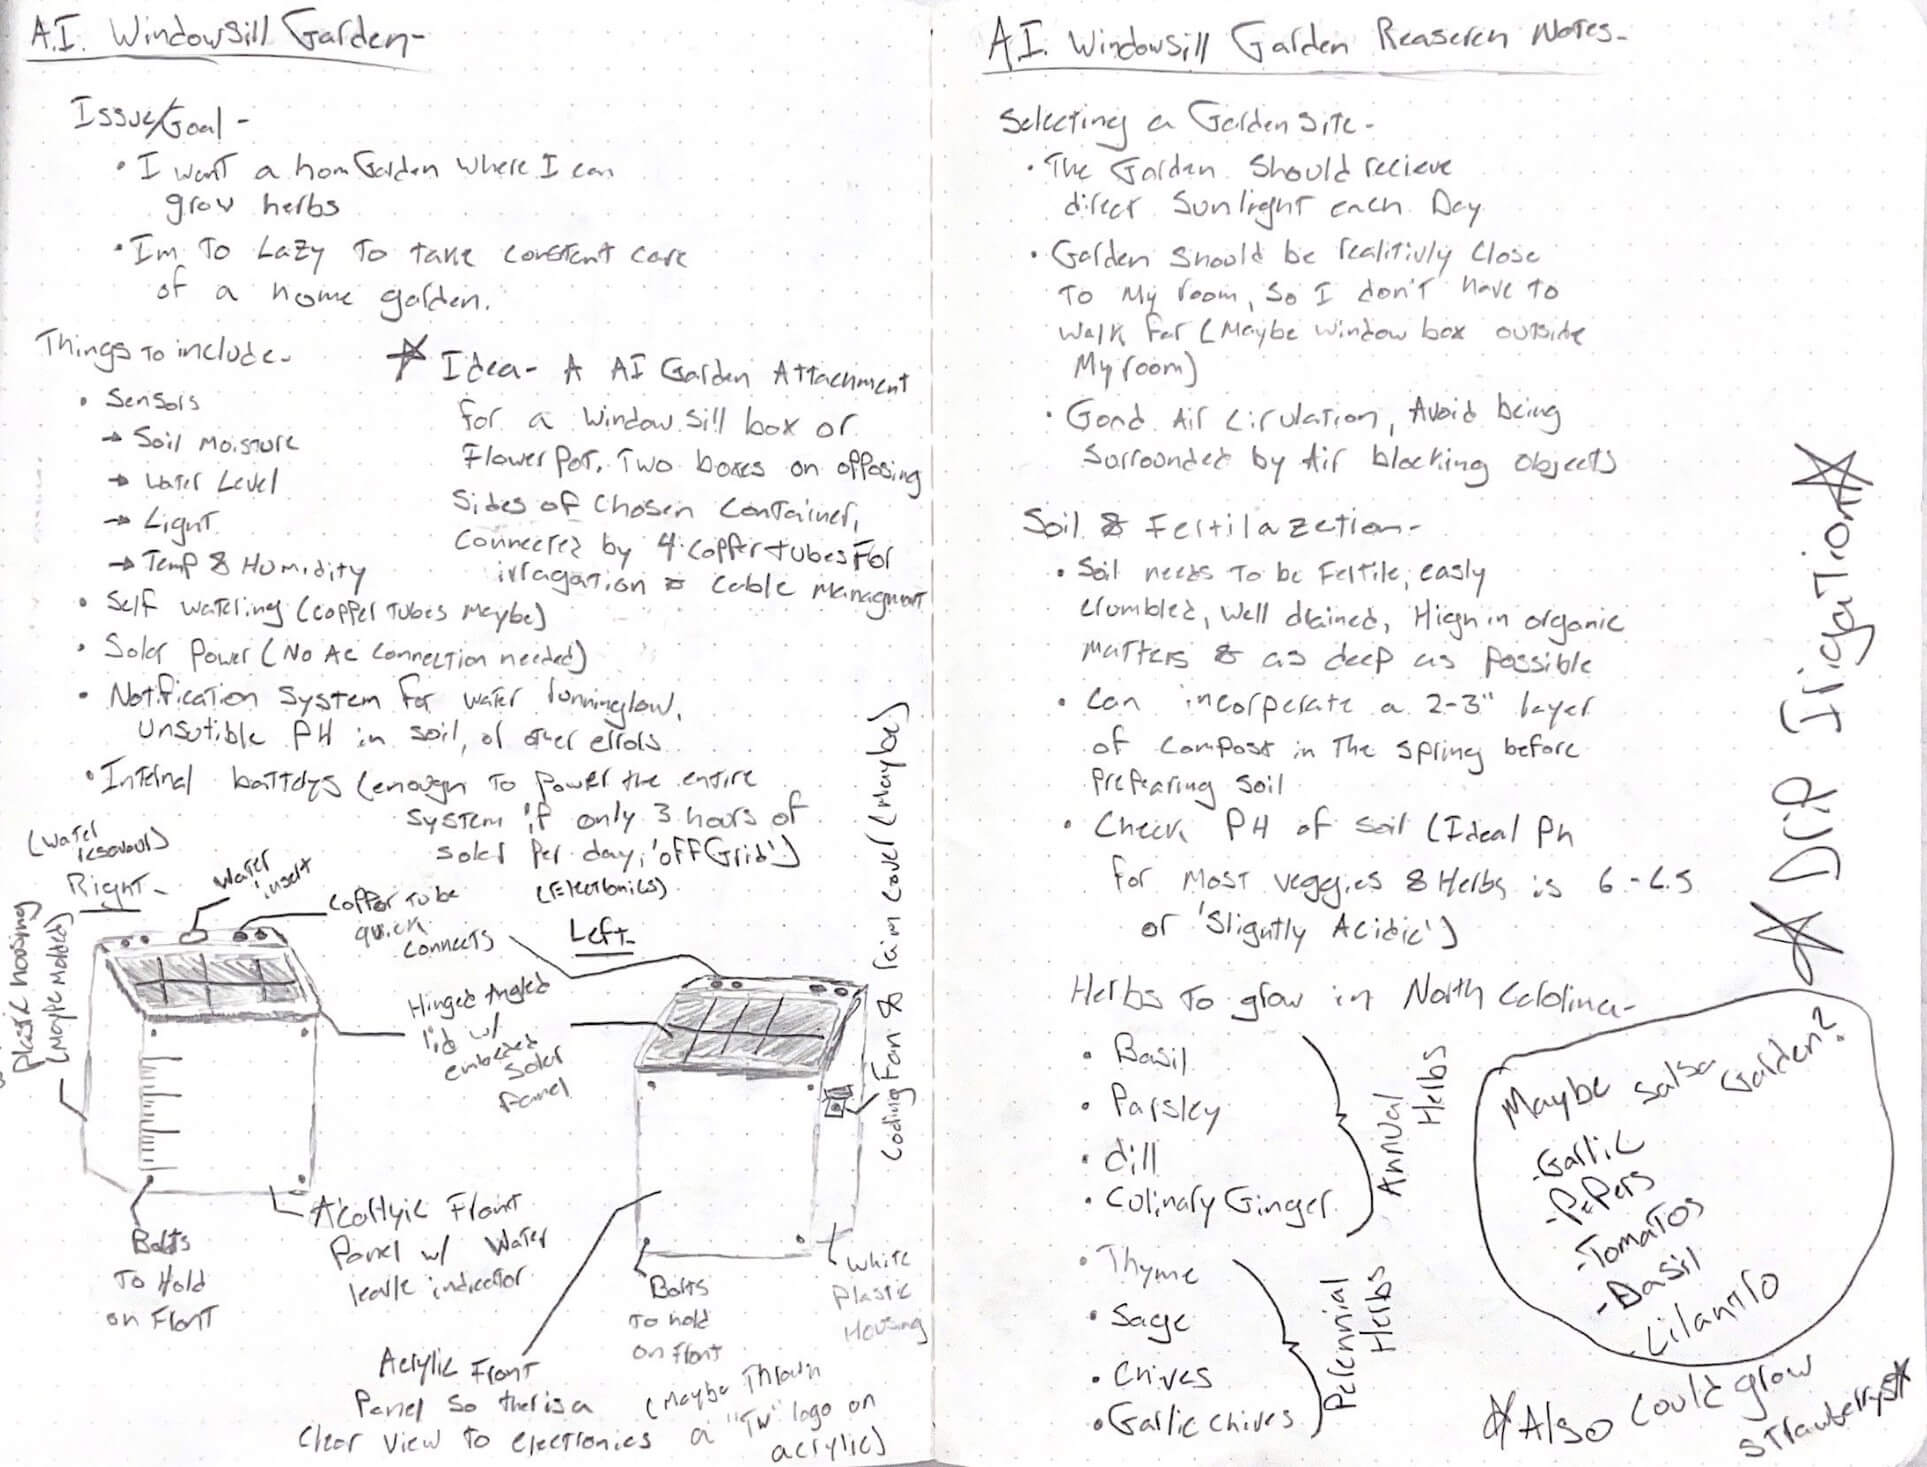
Orginal Project Concept
I’ve always had an interest in having my own home garden capable of growing plants and herbs, as I enjoy the access to fresh foods, however, my past attempts at gardening always seemed to be relatively fruitless. Due to my structured highschool student schedule, I am usually not around to look after and take care of a garden, and thus, this want for fresh foods hasn’t become a reality. For my Fab Academy, I want to aim to fix my issue, by removing the time-consuming part of gardening, the growing of the plant itself. I’m aiming to create an automated window-sill garden, that can take measurements of soil moisture, rain/humidity, and temperature, compare the found values to a threshold, and water the plants accordingly. In addition to that, I think it would be great if all this collected data was output in a readable format for a user, so although they may not be able to be there when the plant needs to be watered, they still can check up on their garden. While researching for my final project idea, I stumbled across countless other ideas like this, many helping me form my goals for this project. Here are some links that I found helpful or influential to my idea Gardening + Arduino, Garduino, DIY Home Assistant Garden Automation System, Raspberry Pi Powered IOT Garden, and the Advanced Irrigation System. Although looking at projects like these gave me some inspiration, I have many personal design factors that have also helped me form my idea. For example, many gardens take advantage of red and blue lights to optimize plant growth, however, after settling on a window box form factor, the light pollution caused by these lights, would not outweigh the benefits of having them. In addition to that, I settled on a windowsill box, that way I could hang this garden outside of my bedroom window, and conveniently enough, this window is in direct sunlight most of the day, so there would be no need for additional lights.
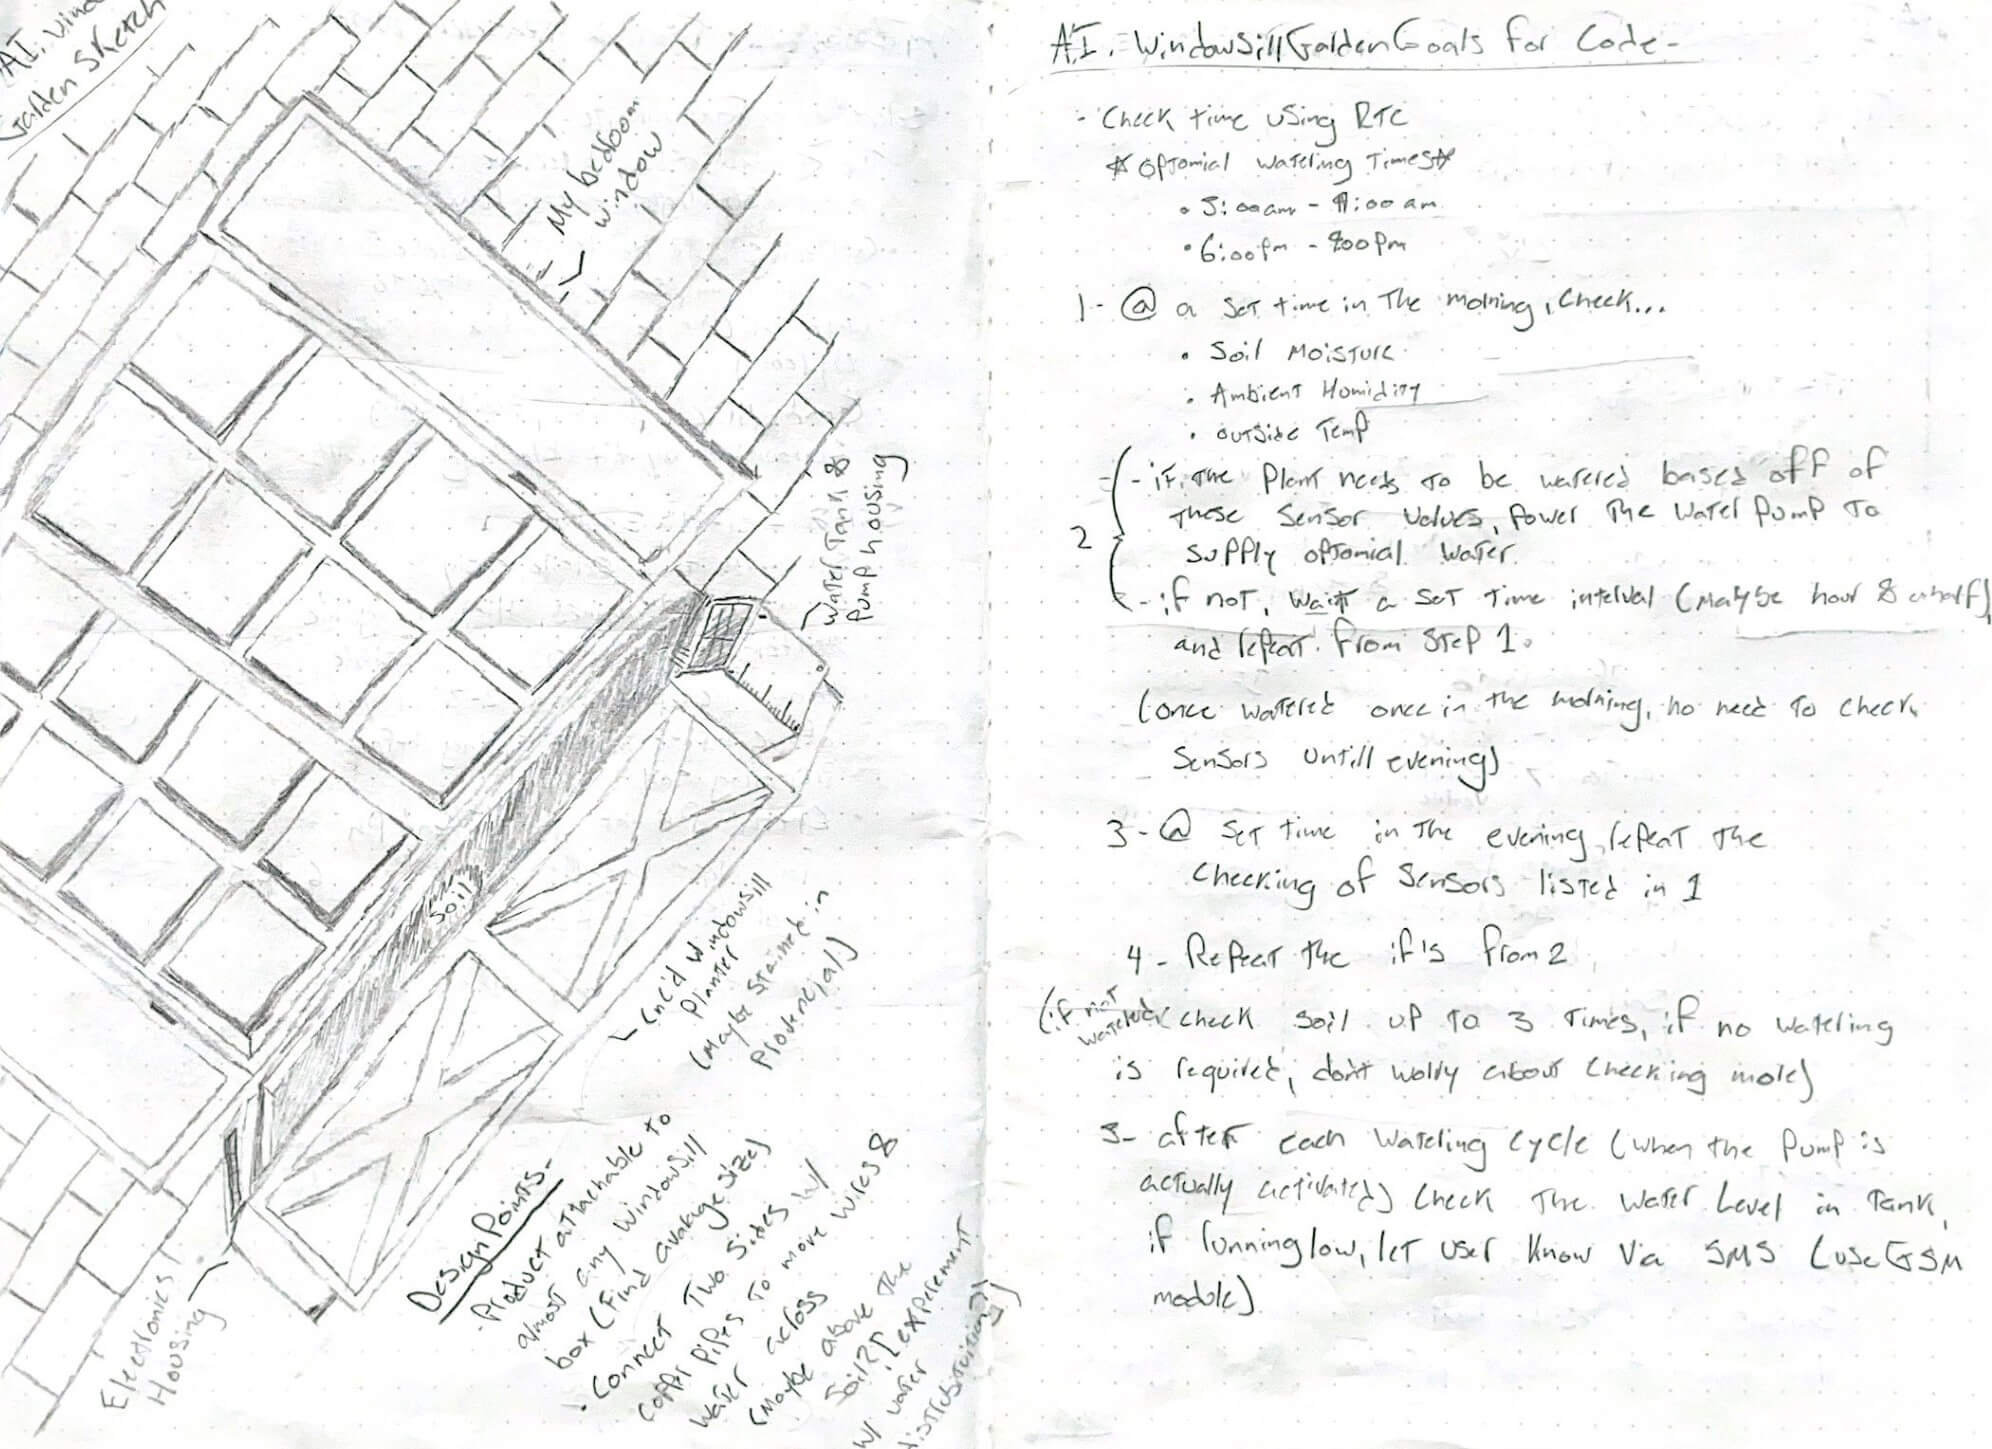
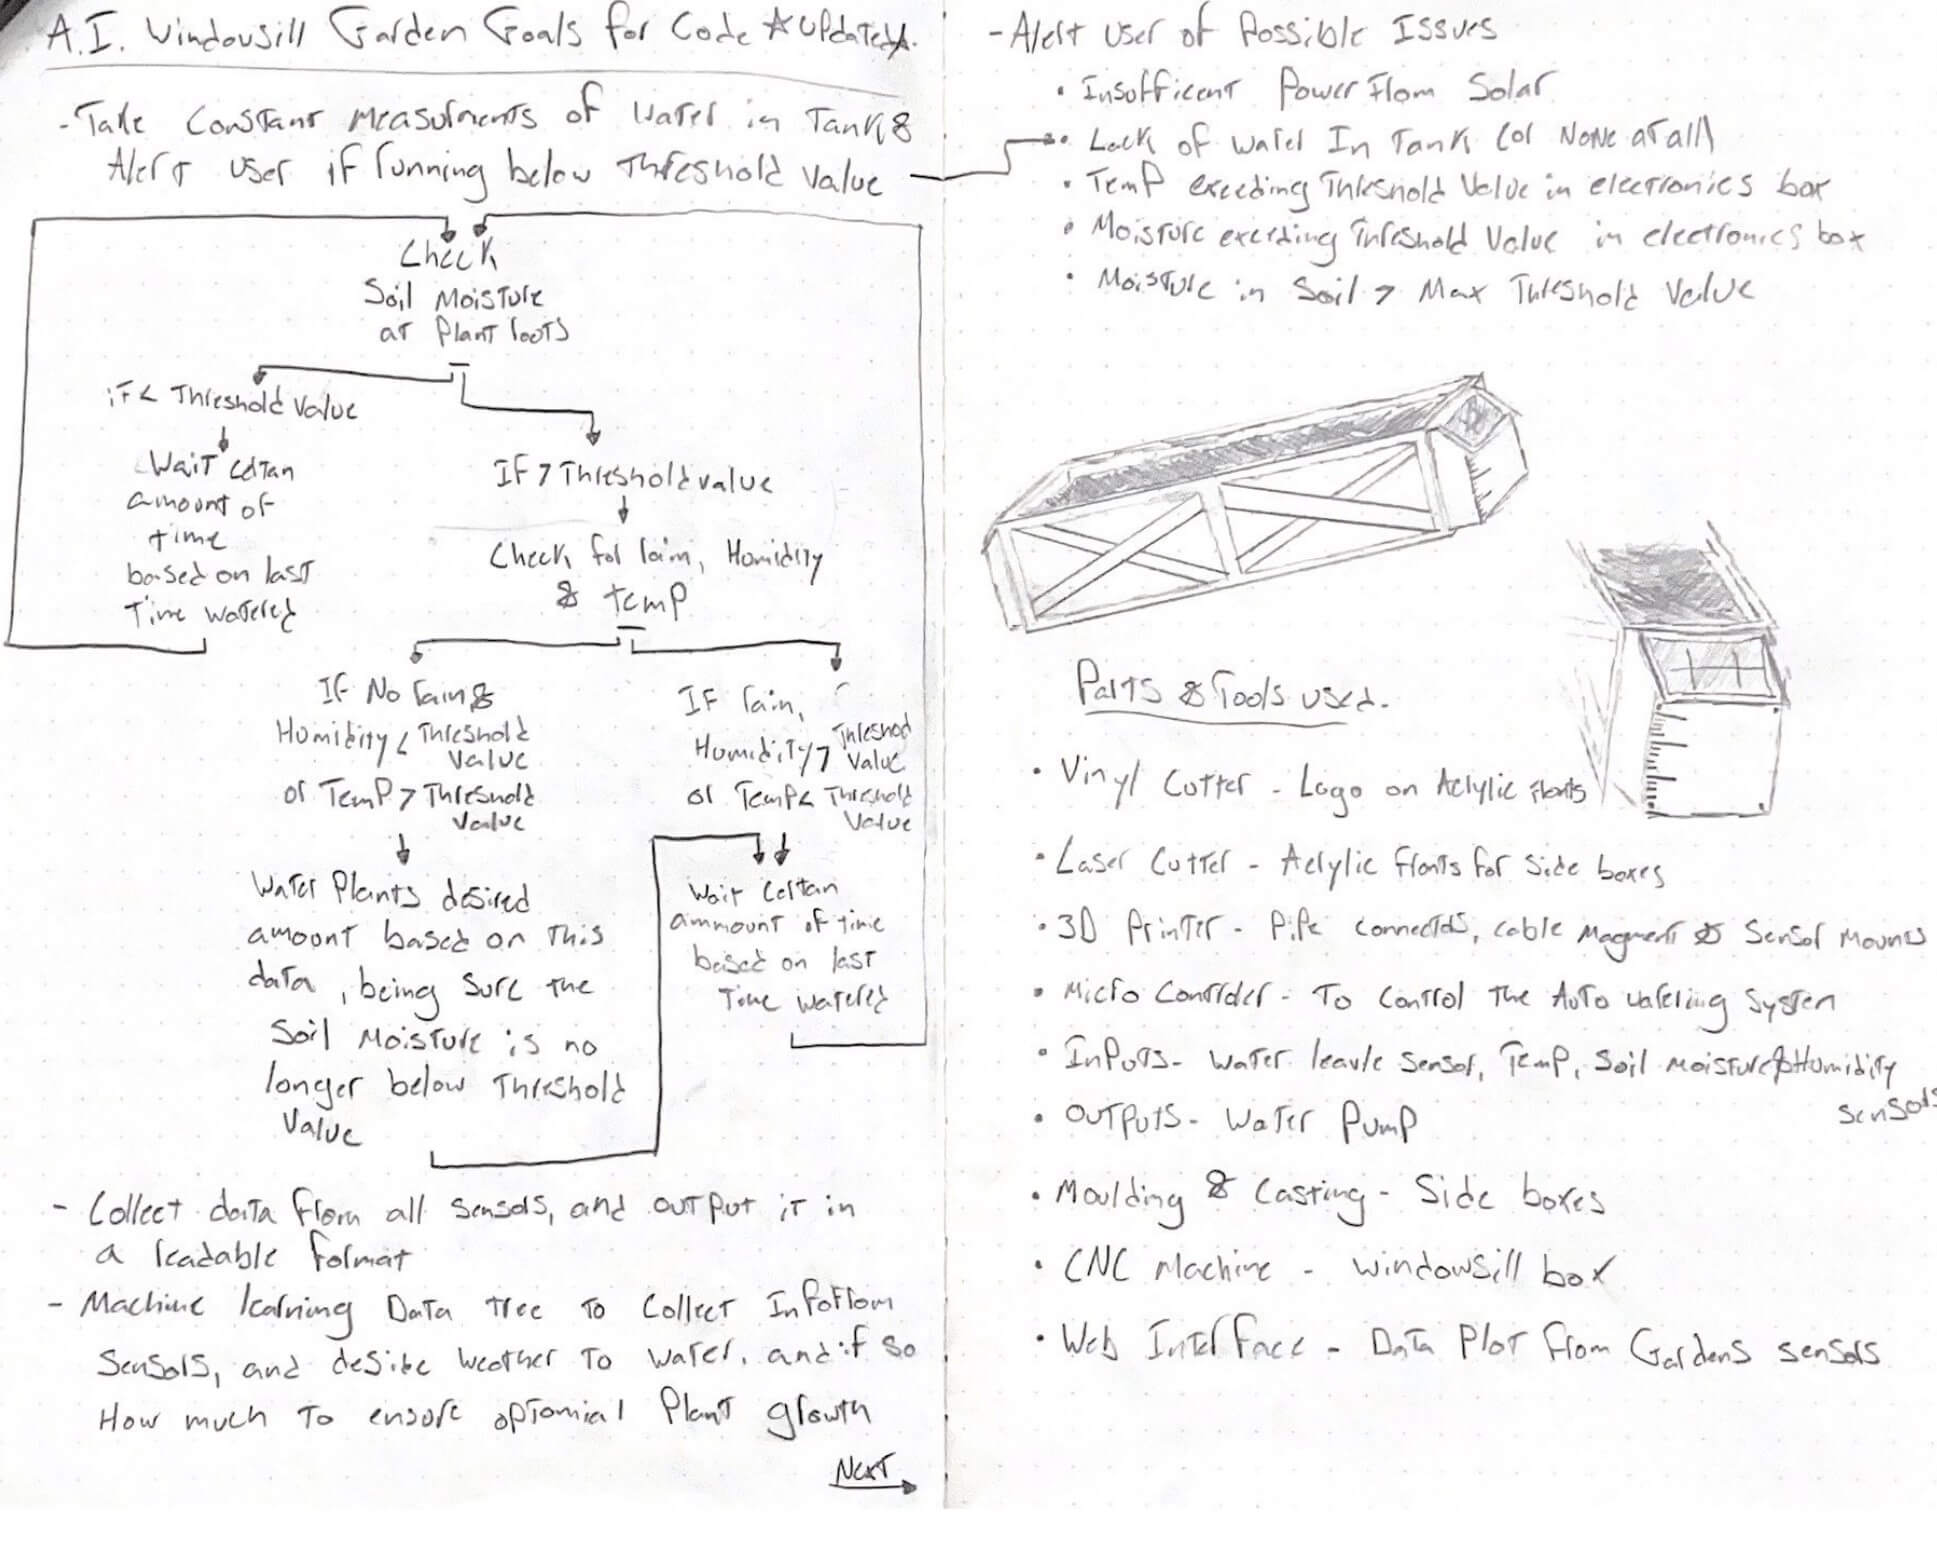
Final Project Sketches & Planning
In preparation for the following weeks of class and my final project, I spent a little bit of time planning through my ideas and goals for a final project shown in the images below. None of these ideas have been set in stone, and I’m excited to see how my project goals may change over time as the course runs. This process has already started to happen, shown in the images below, I’ve started to go through different iterations of goals for my final project code. After talking about final projects with one of my software-oriented classmates, Drew Griggs, I was able to better specify some goals for my code. In addition to this planning, I sketched out some concepts for my final project, that I will base my CAD designs on next week. I was greatly inspired by the ‘Farmhouse’ design style when sketching the windowsill box itself, this is one of the styles I appreciate the most and I tend to consider it when planning aesthetically. An example of another place I’ve used this style is on my Remote Learning Desk Project talked about on my About Me page.
Fusion 360 Model
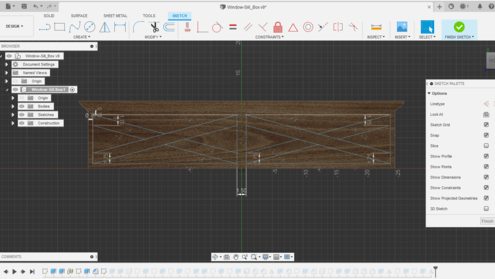
Using the sketches I drew up during week 1, and some measurements of my window sill, this week I was able to model my final project in Autodesk Fusion 360. I started by recreating my original design sketches in Fusion and then scaling them up to my desired size. These measurements took a while to flatten out, as I want a windowsill box that will fit the entirety of my bedroom window but also keeping it under 6 feet in length for transportation reasons was a priority of mine. After completing these sketches in Fusion, I created new components for each different major body in my design, the windowsill box itself, the two side boxes for the electronics and the water resolver, as well as the front acrylic panels for both of those boxes. The Window-sill box has these two ‘x’ crosses on the front, keeping with the ‘farmhouse’ design style I talked about in my Final Project Concept page. I also took the time to add a nice stained pine look to the model, I’m not sure that this will be the final look I go for, but I thought it looked nice and added to the model for now. For the side boxes on the garden, I chose a nice white ABS appearance in Fusion, as I could see this being a material I would potentially use for the side boxes in the final project.
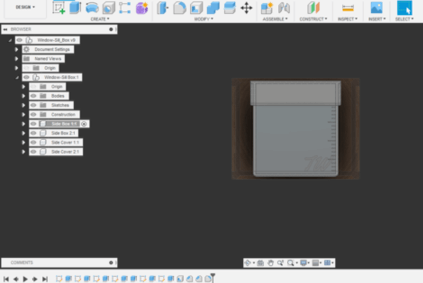
Throughout making this model in Fusion 360, I tried to keep some best design practices in mind that I picked up from the Learn Autodesk Fusion 360 in 30 Days series talked about earlier, as well as some that I’ve picked up from my time on Fusion. I’ve found that for me, the best way to start a CAD model is with a ‘New Component’, and to make bodies in that component. I used that technique when making my windowsill box, by starting with the box itself, and then making another component branched from it for one of the side boxes. Then I was able to mirror this entire side box component from one side of my model to the other, a task made easy by the practice of making components in your model.