Week 2 - Project management
This week was dedicated to project management. Although the title might let you think the contrary, this lecture was given at the same time than WEEK 1 - Principles and practices lecture. Project management is a very important topic. During this lecture Neil Gershenfeld explained that when it's about project management most people have the habit to manage their time linearly, task after tasks. He highlighted that usually this habit leads to projects that are not ready on time or never finished. Instead of linearly approaching projects management he surveyed several techniques that are proved to be more efficient to bring a project to fruition. Among them the most important concepts are "triage", "demand- vs supply-side time management", "serial vs parallel development", "spiral development" and "bottom-up vs top-down debugging".
From a more practical point of view this week also focused on available software and tools to build websites, keep track of previous versions and manage projects.
FAB ACADEMY 2020 source
20200129 Project Management from Academany on Vimeo.
Recitation - Monday the 3rd of February 2020 source
20200203 Version Control from Academany on Vimeo.
During the recitation different other sources were also provided. They are listed hereinafter:
My assignment
This week assignment consisted in working through a git tutorial and building a personal website in the class archive with a biography and a description of a final project. In the next first section I will explain how I made my website. In the second section I will document the steps for uploading files to archive. I will explain the procedure to clone a git repository, add changes, commit them and push the modifications to the class archive on GitLab. There is also a third section with a link to my biography and to the student agreement.
Website creation
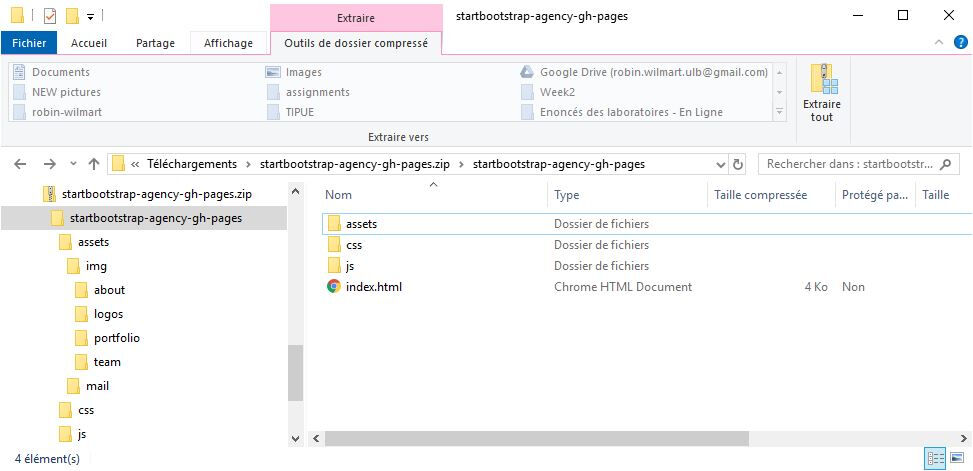
Before starting my website, I first had a look on different options addressed by Neil, i.e. raw HTML, HTML complemented with CSS and JavaScript, Bootstrap, Markdown syntax and MkDocs in particular. On our individual git repository provided by the FAB ACADEMY a complete MkDocs solution was already deployed and viable. The easiest solution to build my website would have been to keep what was already deployed but I felt a little bit restricted by the Markdown syntax. Moreover I knew that I would also have the opportunity to use this type of web development environment while working on the group assignments. As a consequence I found it more exciting to develop my website in HTML with additional features such as CSS and JavaScript. Moreover I knew that there were plenty of HTML templates freely available on the net. To ease my work I therefore started with "Agency", a free Bootstrap theme/template from which I modified the HTML, CSS and JavaScript files.
To edit these files I used Atom, a hackable text editor. I configured it by adding some features such as a package called "spell-check".
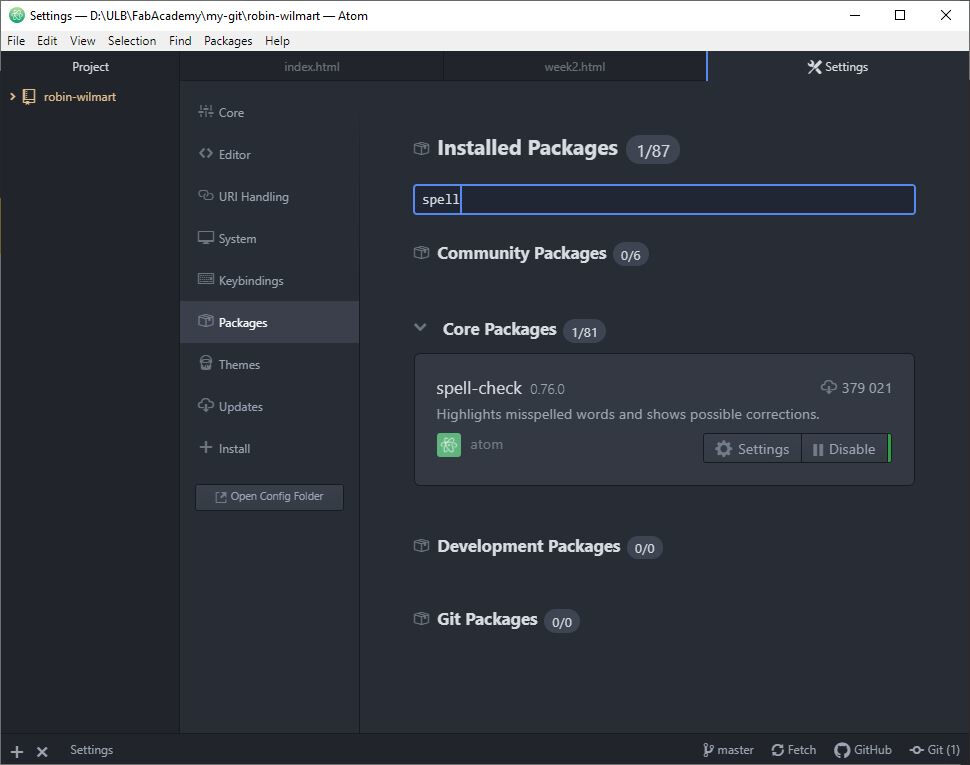
To make this package work I had to add text.html.basic and source.css in the entry Grammars of the package settings.

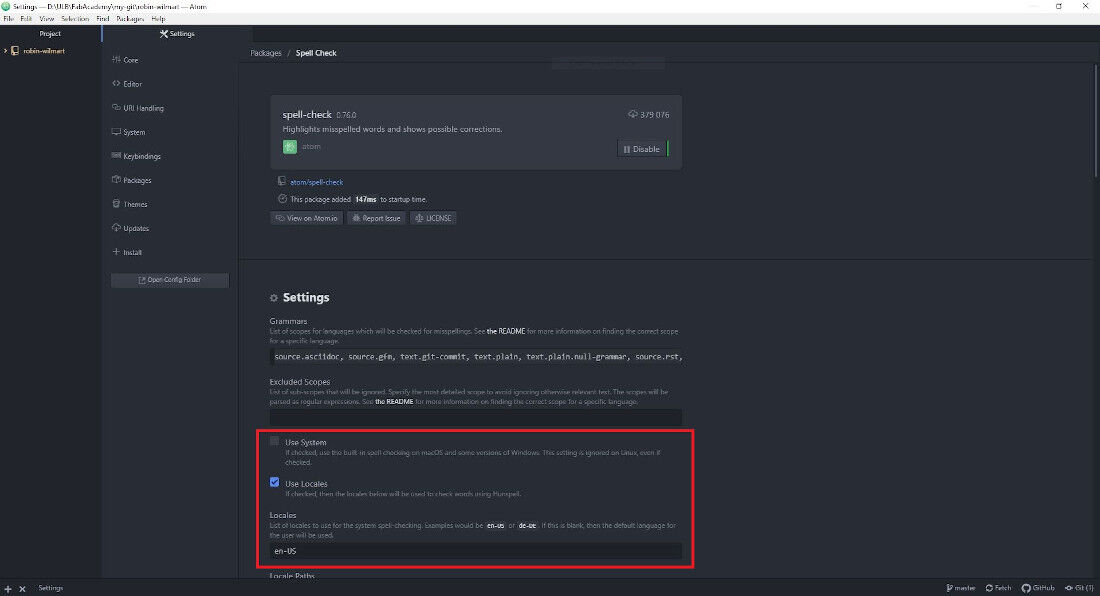
During WEEK 15 my spell checker wasn't working anymore. I finally solved the problem by unticking the box Use System and ticking the box Use Locales as shown in the picture bellow.
HTML
The most basic HTML file must start with a document type declaration: <!DOCTYPE html>. The HTML document itself begins with <html> and ends with </html>. In between these tags there are the <head> tag, a container for meta-data (data about data), followed by the <body> tag, a container for the visible part of the HTML document.
<!DOCTYPE html>
<html>
<head>

<!-- Put the metadata here e.g. a page title -->

</head>
<body>

<!-- Put the content of the website here -->

</body>
</html>
To learn more about HTML I recurrently went to the same very useful and very well documented website, w3schools.com, where there are free tutorials about HTML, CSS, JavaScript and more.
For example I changed the favicon of my website by adding the following code after the <head> tag:
<!-- Favicon -->
<link rel="shortcut icon" type="image/x-icon" href="favicon.ico">
JavaScript
JavaScript code can be added in an HTML document by employing the dedicated HTML tag <script> that wraps around JavaScript code. The <script> tag can be placed in the <head> section of your HTML, in the <body> section, or after the </body> close tag, depending on when you want the JavaScript to load. The code can either be written directly between HTML tag <script> or in a separate JavaScript file. In order to accommodate larger scripts or scripts that will be used across several pages, JavaScript code generally lives in one or more js files that are referenced within HTML documents, similarly to how external assets like CSS are referenced. The benefits of using a separate JavaScript file are multiple : it makes the code reading clearer and the maintenance easier and when JavaScript files are cached, pages load more quickly. To speed page loading JavaScript file included between <script> tags must be placed at the bottom of the HTML page right after the HTML tag </body>.
More information about that topic can be found here.
Bootstrap 4
Bootstrap is very useful to ease the placement of the content boxes and easily makes the site responsive. It also has many functionalities such as predefined containers, navigation bars, buttons, forms... To enable these functionalities on my web-pages I just had to add few lines of code on each HTML pages. In the <head> container I added these three lines:
<!-- Bootstrap CSS and jQuery -->
<link rel="stylesheet" href="https://stackpath.bootstrapcdn.com/bootstrap/4.3.1/css/bootstrap.min.css">
<script src="https://ajax.googleapis.com/ajax/libs/jquery/3.4.1/jquery.min.js"></script>
<script src="https://stackpath.bootstrapcdn.com/bootstrap/4.3.1/js/bootstrap.min.js"></script>
Then right after the HTML tag </body> I added these two lines:
<!-- Bootstrap core JavaScript -->
<script src="vendor/jquery/jquery.min.js"></script>
<script src="vendor/bootstrap/js/bootstrap.bundle.min.js"></script>
With Bootstrap I was able to add a fixed navigation bar with only a few lines of code:
<!-- Navigation -->
<nav class="navbar navbar-expand-lg navbar-dark fixed-top" style=" background-color: #212529" id="mainNav">
  <div class="container">
    <a class="navbar-brand js-scroll-trigger" href="#page-top"> <h4 class="FabAca"> <img class="img-fluid FabAcaLogo" src="../img/fabacademy_logo.png" alt="FABACADEMY Logo in yellow"> <strong>FAB</strong>ACADEMY <strong>2020</strong></h4>   <i class="fas fa-graduation-cap"></i>   Robin Wilmart</a>
    <button class="navbar-toggler navbar-toggler-right" type="button" data-toggle="collapse" data-target="#navbarResponsive" aria-controls="navbarResponsive" aria-expanded="false" aria-label="Toggle navigation">
      Menu

    </button>
    <div class="collapse navbar-collapse" id="navbarResponsive">
      <ul class="navbar-nav text-uppercase ml-auto">
        <li class="nav-item">
          <a class="nav-link js-scroll-trigger" href="../index.html#final_project">My Final Project
        </li>
        <li class="nav-item">
          <a class="nav-link js-scroll-trigger" href="../index.html#assignments">Assignments
        </li>
        <li class="nav-item">
          <a class="nav-link js-scroll-trigger" href="../index.html#about">About me
        </li>
      </ul>
    </div>
  </div>
</nav>
I was also able to set buttons easier by taking advantages of the predefined class class="btn btn-primary". For example, here is code I wrote to display a button that leads the student agreement file:
<button class="btn btn-primary" data-dismiss="modal" type="button">
  <i class="fas fa-times"></i>
  Close Student Agreement
</button>
The container class of Bootstrap made it also easier to create responsive layouts with the use of its grid system:
<div class="container">
  <div class="row">
    <div class="col-sm">
      One of three columns
    </div>
    <div class="col-sm">
      One of three columns
    </div>
    <div class="col-sm">
      One of three columns
    </div>
  </div>
</div>
Bootstrap made also possible the adaptation of images or videos size to the display size thanks to its responsive images and embeds features. Here is the code for a responsive image centered with a legend:
<div class="image-center">
  <img class="img-fluid" src="filepath/image.JPG" alt="">
  <p>Legend of the picture</p>
</div>
Here is the code for a responsive video centered with a legend:
<div class="image-center">
  <div class="embed-responsive embed-responsive-16by9">
    <video class="embed-responsive-item" controls autoplay loop>
      <source src="filepath/video.mp4" type="video/mp4">
      Your browser does not support the video tag.
    </video>
  </div>
  <p>Legend of the video</p>
</div>
As you can see in these examples Bootstrap was not sufficient to customize my website. I also needed to build my own classes in a CSS file.
CSS
To customize my website I modified the CSS file that I had downloaded within the Agency template. For example, I changed the color of the hyperlinks:
a {
  color: #fed136;
}

a:hover {
  color: #fec503;
}
To make the site even more responsive I also created media queries, like so:
@media (min-width: 1200px) {
  [id]::before {
    content: '';
    display: block;
    height:      200px;
    margin-top: -200px;
    visibility: hidden;
  }
}
This specific code, for example, adapts the place of the block content display when the user clicks on a link to a specific part of a page. This code was required because of the top-fixed navigation bar. Without this code the content towards which the hyper-link points would be displayed at the page top and hidden by the navigation bar. By putting an offset tailored to the navigation bar height, the website content is correctly displayed beneath the navigation bar.
Create a Search bar
I looked for many different solutions to create a search bar. At the beginning I genuinely thought that a simple JavaScript file would be sufficient to make a search engine. As a consequence I started to design the search bar with some Bootstrap features and CSS.
<div class="input-group md-form form-sm form-2 pl-0">
  <input class="form-control my-0 py-1 amber-border" type="text" placeholder="Search" aria-label="Search">
  <div class="input-group-append">
    <button class="input-group-text amber lighten-3 btn btn-primary" id="basic-text1"><i class="fas fa-search" aria-hidden="true"></i></button>
  </div>
</div>
.btn-primary {
  background-color: #fed136;
  border-color: #fed136;
  color: white;
}

.btn-primary:active, .btn-primary:focus, .btn-primary:hover {
  background-color: white !important;
  border-color: #fec810 !important;
  color: #fec810;
}

.btn-primary:active, .btn-primary:focus {
  box-shadow: 0 0 0 0.2rem rgba(254, 209, 55, 0.5) !important;
}
Then I sought for Search Engine plugins. I found several blogs that resume the available solutions such as this website that explains how to build your own search engine or these 14 jQuery Live Search Plugins and these Free jQuery search Plugins.
Unfortunately I didn't found anything like a search engine that could simply be added to that search bar and that would work efficiently. Even TIPUE, from my point of view the most promising solution, had to be put aside because of maintenance burden and because of the fact that the referencing had to be done manually with the site content stored in the tipuesearch_content.js file. I finally surrendered to Google Search Engigne.
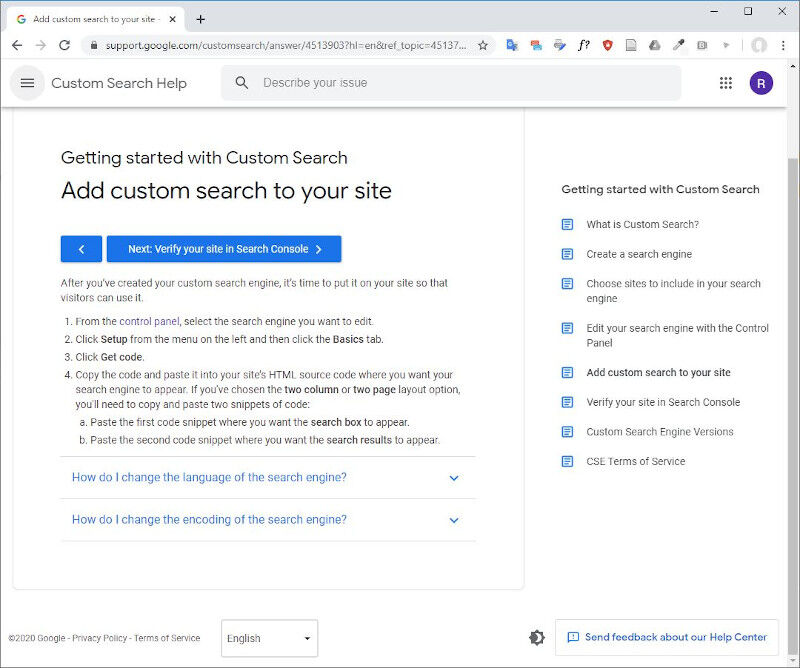
To create that Search Bar I followed step after step the Getting started with Custom Search section.
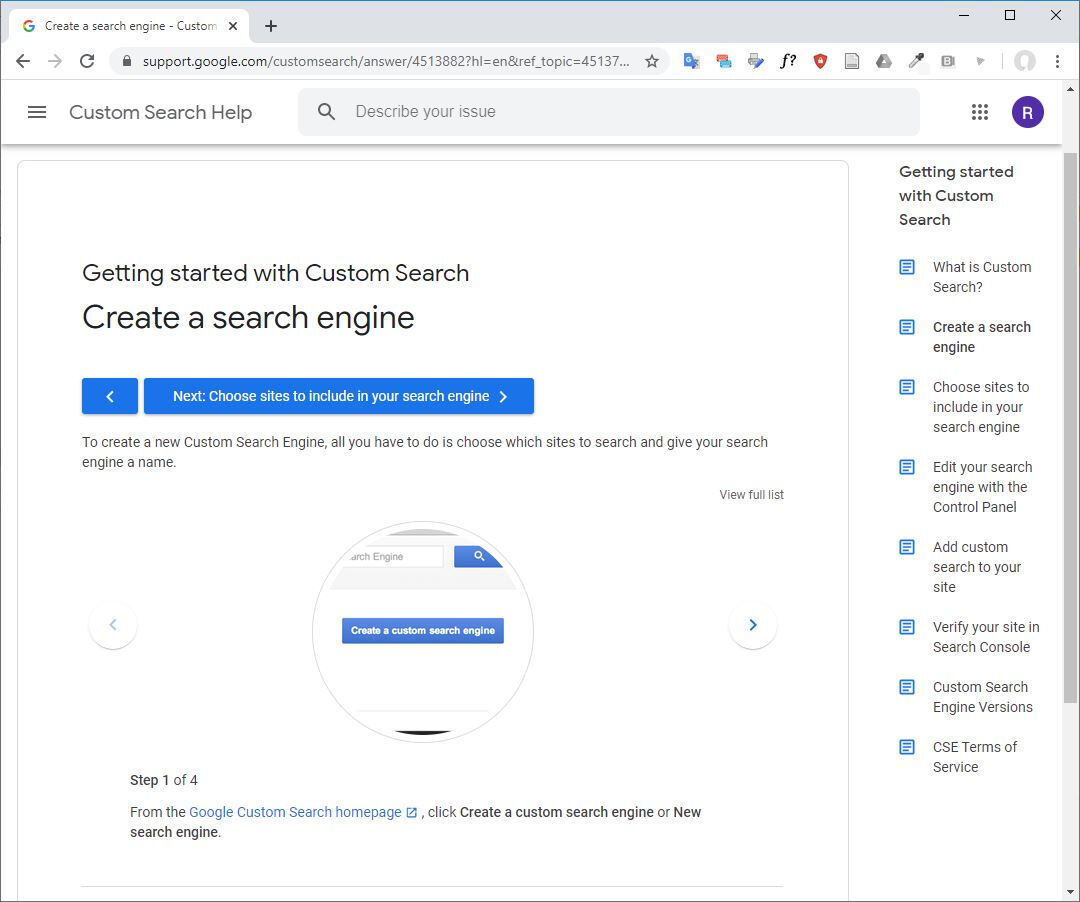
First I created the search engine.
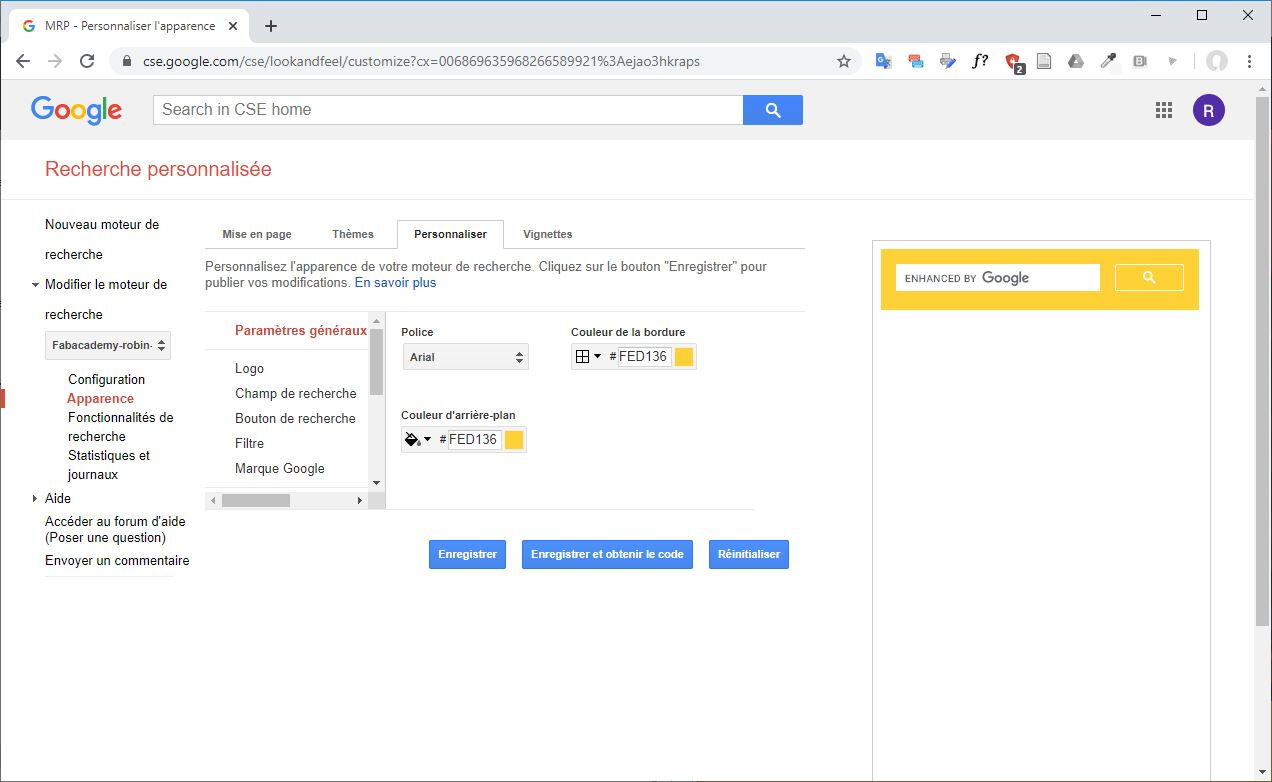
In the control panel I customized the search bar with the same colors than my web-site's.
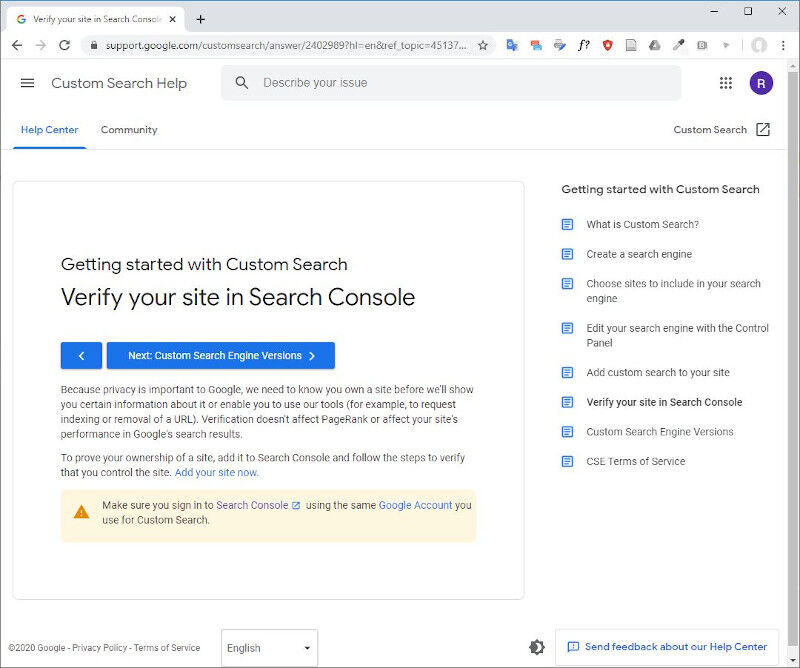
Afterwards I verified my site in the Search Console.
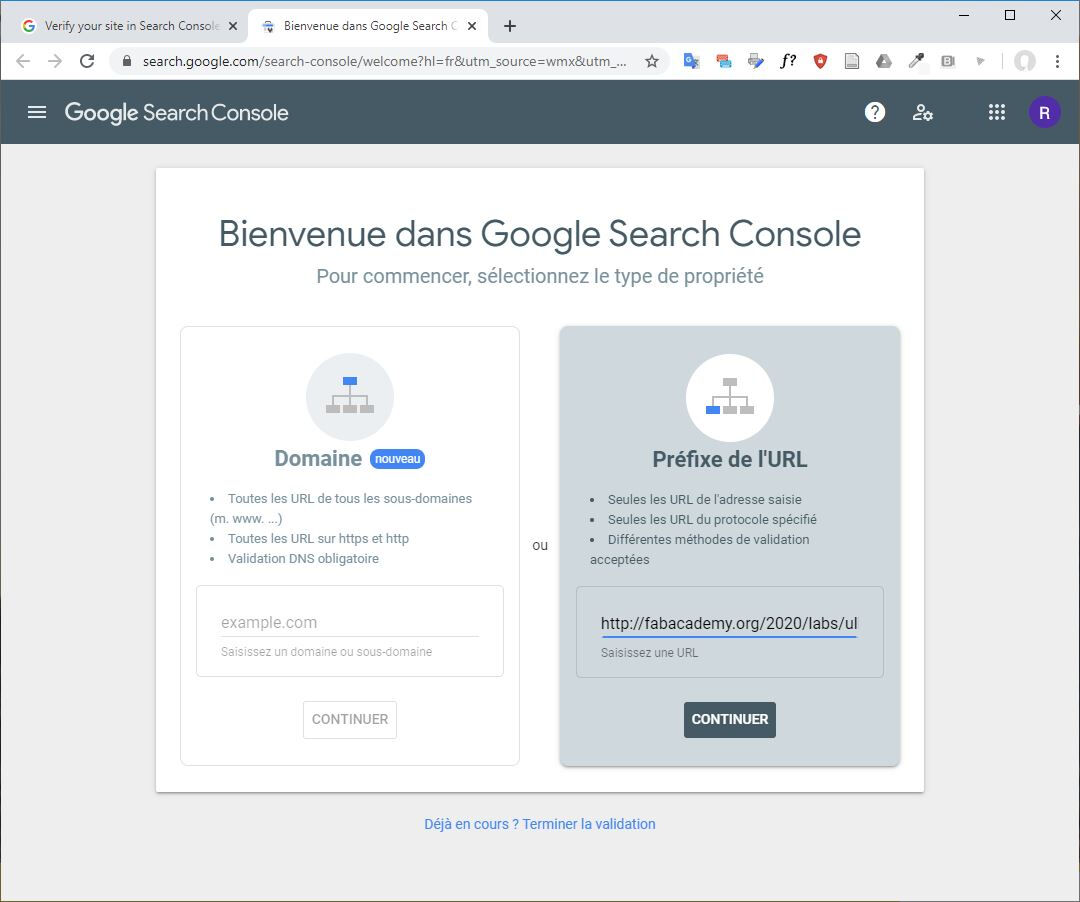
I added the URL of my website: http://fabacademy.org/2020/labs/ulb/students/robin-wilmart/.
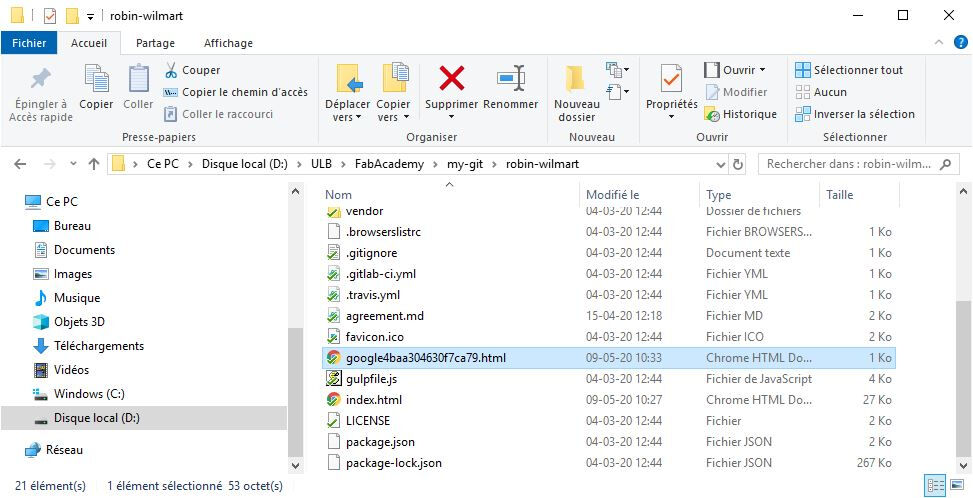
I downloaded the file google4baa304630f7ca79.html.
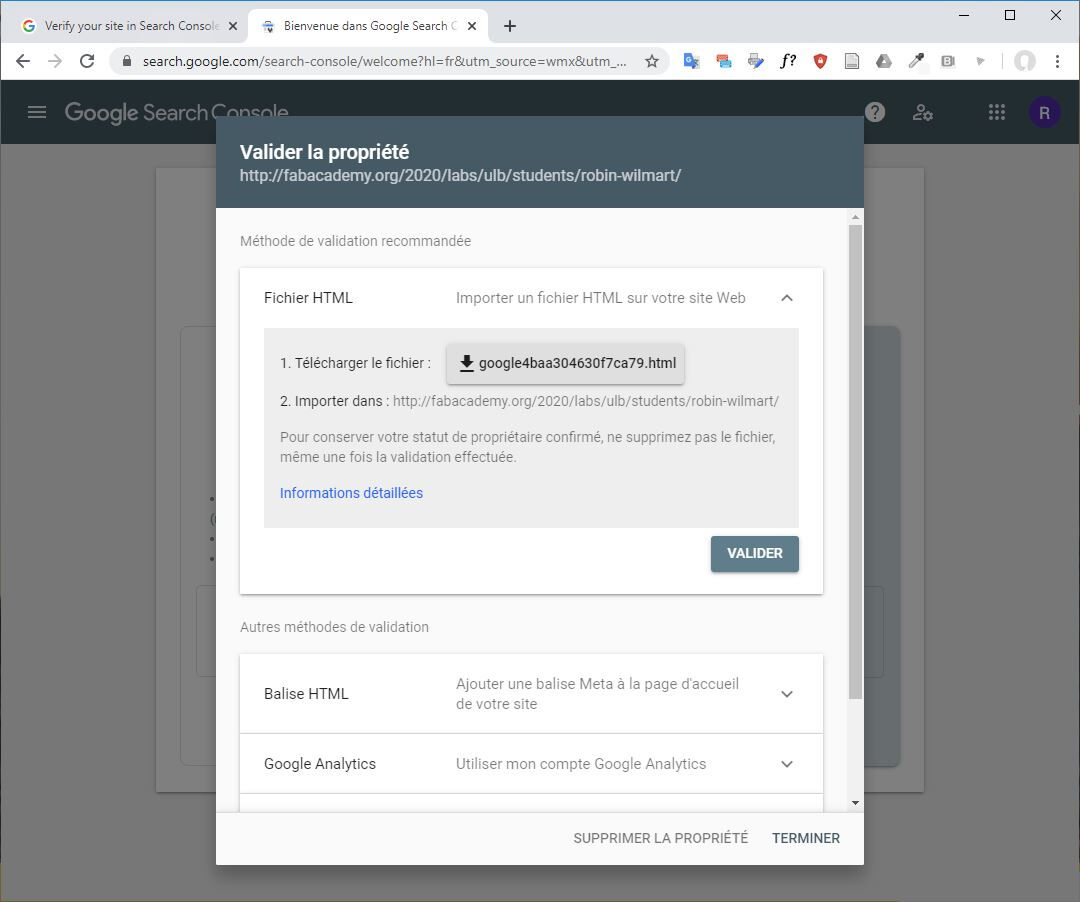
I imported it at the root of my repository.
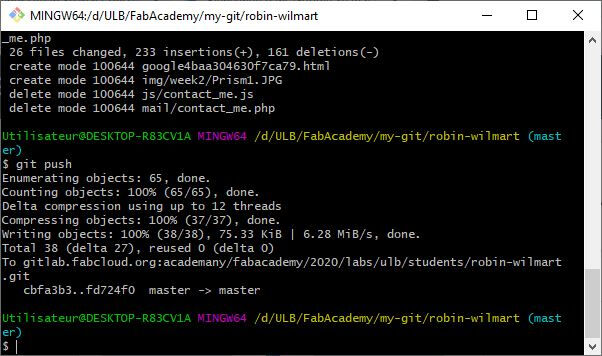
I pushed the modifications on my git-repository.
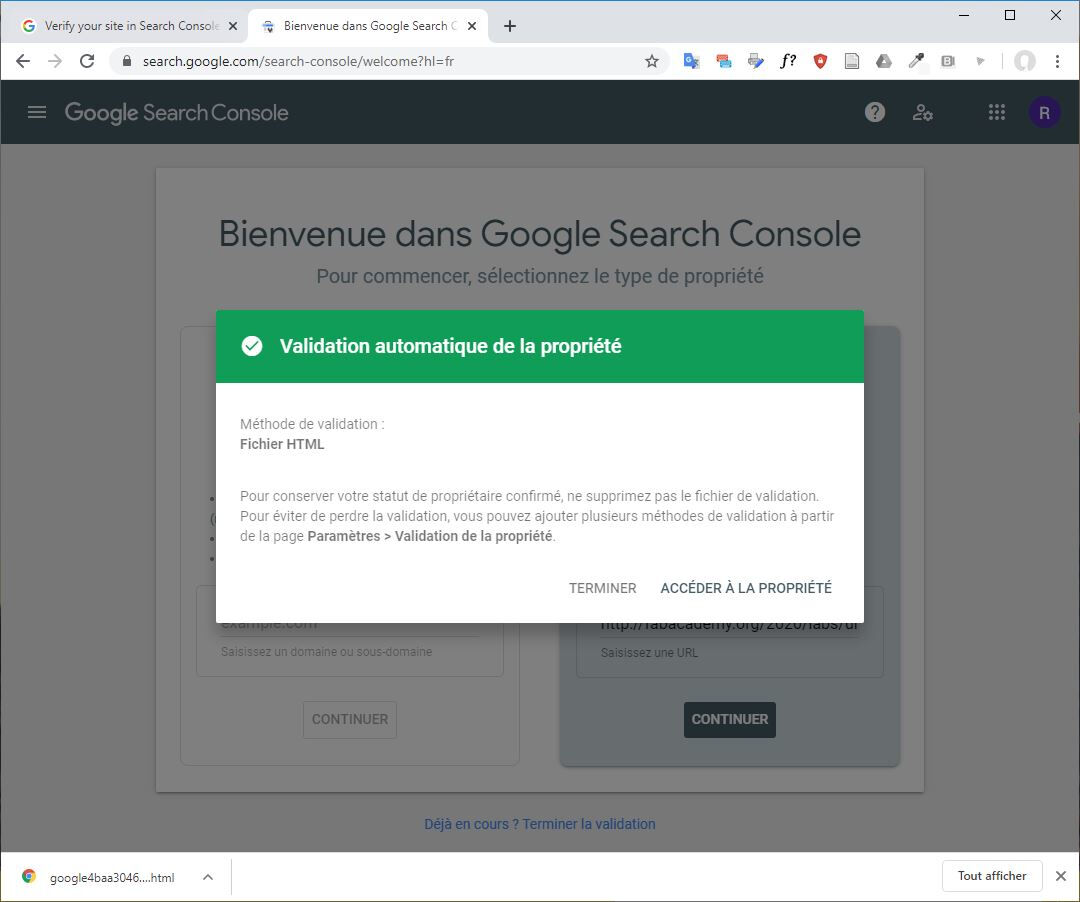
Back to the Google Search Console, the verification of my site was validated.
Then I added the generated code in the HTML page. I added the <script> tag at the bottom of the page:
<!-- Search Engine -->
<script async src="https://cse.google.com/cse.js?cx=006869635968266589921:ejao3hkraps"></script>
And I added this code line at the search bar location:
<div class="gcse-search"></div>After that I tested the Search Engine by looking for "final project" for example.

Unfortunately it gave no results.
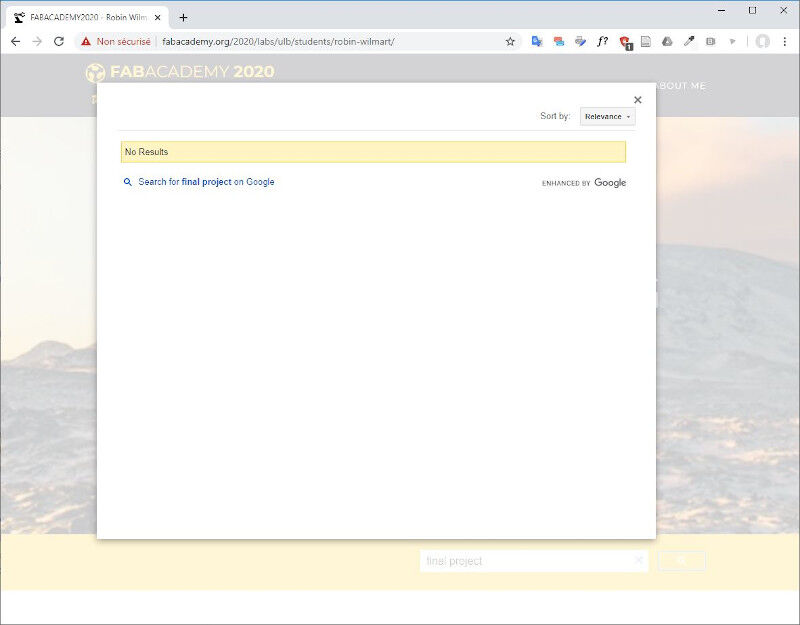
Before worrying Google support suggested to wait for a few hours.
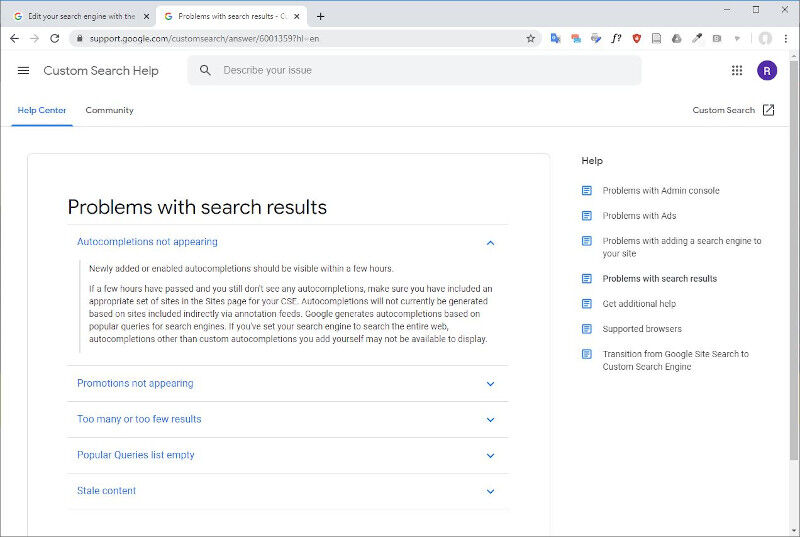
After an hour there were still no results. I found a website that explains that it is because Google has not indexed the website yet.
Create a Table of content
I also created a Table of content. Here is the code I wrote:
<!--SideBar-->

<nav class="fixed-top lateral_align">
  <div class="lateral">
    <button class="accordion"><h1>Table of content</h1></button>
    <div class="panel">
      <ol type="I">
        <li><h2><a href="#H2_1">WEEK 2 - Project management</a></h2></li>
        <ol>
          <li><a href="#H4_1_1">References</a></li>
          <li><a href="#H4_1_2">Recitation</a></li>
        </ol>
        <li><h2><a href="#H2_2">My Assignment</a></h2></li>
        <ol>
          <li><a href="#H4_2_1">Website Creation</a></li>
          <li><a href="#H4_2_2">Version Control</a></li>
          <li><a href="#H4_2_3">Biography and Student agreement</a></li>
        </ol>
      </ol>
    </div>
  </div>
</nav>
Here is the complementary CSS code:
.accordion {
  background-color: white;
  cursor: pointer;
  padding: 20px;
  margin-bottom: 12px;
  width: 100%;
  border: none;
  text-align: left;
  outline: none;
  font-size: 20px;
  transition: 0.4s;
}
.accordion:hover {
  background-color: #fed136;
}
.accordion:active {
  background-color: white;
}
.accordion:after {
  content: '\002B';
  font-weight: bold;
  float: right;
  margin-left: 5px;
  margin-right: 10px;
}
.accordion.active:after {
  content: "\2212";
}
.panel {
  padding: 0 10px;
  background-color: white;
  max-height: 0;
  overflow: hidden;
  transition: max-height 0.2s ease-out;
}

.lateral h1{
  font-size: 24px;
}
.lateral h2, h3, h4{
  font-weight: 700;
}
.lateral h2{
  font-size: 15px;
}
.lateral li a{
  color: #212529;
}

  @media (min-width: 992px) {
  .lateral_align{
    margin-top: 185px;
    padding-top: 20px;
    width: 250px;
    background-color: white;
    border-bottom: none;
  }
  .lateral{
    padding-bottom: 60px;
    margin-left: 20px;
    margin-right:0px;
    padding-right: 5px;
    border-right: 4px solid #fed136;
  }
  .accordion {
    background-color: white;
    cursor: pointer;
    padding: 5px;
    margin-bottom: 12px;
    width: 100%;
    border: none;
    text-align: left;
    outline: none;
    font-size: 20px;
    transition: 0.4s;
  }
  .accordion:hover {
    background-color: #fed136;
  }
  .accordion:active {
    background-color: white;
  }
  .accordion:after {
    content: '\002B';
    font-weight: bold;
    float: right;
    margin-left: 5px;
    margin-right: 10px;
  }
  .accordion.active:after {
    content: "\2212";
  }
  .panel {
    padding: 0 10px;
    background-color: white;
    max-height: 0;
    overflow: hidden;
    transition: max-height 0.2s ease-out;
  }
}

  @media (min-width: 1200px) {
  .search{
    padding-top: 10px;
    padding-bottom: 10px;
    margin-top:125px;
    background-color: #fed136;
  }
  .lateral_align{
    margin-top: 185px;
    padding-top: 20px;
    width: 320px;
    background-color: white;
    border-bottom: none;
  }
  .lateral{
    padding-bottom: 60px;
    margin-left: 20px;
    margin-right:0px;
    padding-right: 5px;
    border-right: 4px solid #fed136;
  }
}
At the beginning you can see the initialization of the classes and later the customization of these classes depending on the screen size to make the site more responsive.
HTLM color codes
Here is a link to a HTML color code generator. I also installed ColorZilla, a Google Chrome extension that assists web developers and graphic designers with color related tasks - both basic and advanced.
Equations and formulas
During WEEK 12 - Output devices I had to write some mathematical formulas. To do that I found a pretty straightforward solution based on JavaScript and LaTeX syntax: MathJax. There were only two lines of codes to add to the HTML page to make it available (I added them at the bottom of my HTML pages):
<!-- MathJax -->
<script src="https://polyfill.io/v3/polyfill.min.js?features=es6"></script>
<script id="MathJax-script" async src="https://cdn.jsdelivr.net/npm/mathjax@3/es5/tex-mml-chtml.js"></script>
Then the use of MathJax in a HTML page is quite straightforward. For example to write this sentence with the famous Einstein equation \( E = m c^2 \) I just wrote the equation with the LaTeX syntax between \( and \), like so:
<p class="section-subheading text-muted">
  Then the use of MathJax in a HTML page is quite straightforward.
  For example to write this sentence with the famous Einstein equation
  \( E = m c^2 \) I just wrote the equation with the LaTeX syntax between
  <code>\(</code> and <code>\)</code>, like so:
</p>
To known more about the MathJax syntax, you can have a look here or you can also directly write your equations with this free Online LaTeX Equation Editor.
A syntax highlighter
After WEEK 13 - Interface and Application Programming I wanted to make the layout of my website code samples easier and clearer for the reader. I wanted to make them appear as if they were inside an IDE or a text editor. I found several solutions such as PASTEBIN and SyntaxHighlighter.
PASTEBIN is really easy to use but the generated codes are hosted on PASTEBIN own servers and I didn't find that a nice solution because I feared that part of my documentation would disappear with PASTEBIN services if they had to close in the future. I would have preferred a solution possibly based on JavaScript that I could be hosted on my own server. That's how I found SyntaxHighlighter. Unfortunately I found it very difficult to install. In fact I didn't succeed to do it and when trying to figure out why I wasn't able to install it I saw that the GitHub repository that hosts the project wasn't updated for 4 years ago. As the releases were not very up to date I decided not to use that solution but at least I had new keywords to find what I was looking for: a syntax highlighter.
By looking for a syntax highlighter I easily found an article with the Top 5 : Best code syntax highlighter javascript plugins. Among them one caught up my interest: Prism. Their online tool allows to customize a Prism.js file and a Prism.css file and to download them. The customization offers different possible themes, many programming languages, and several plugins such as Line Numbers. I chose the COY theme, default programming languages + Arduino + C + C# + C++ and several plugins such as Line highlight, Line Numbers, Show Language, Highlight Keywords, Inline color, Previewers, Autoloader, Toolbar, Copy to Clipboard Button and Download Button.
The use of the prism.css and prism.js files is explained on the homepage of Prism website. For my part I added these two in the folder prism_syntax_highlighter that I created on purpose on my git repository.

In the HTML pages where I wanted to use the syntax highlighter I added a link to the CSS file and prism.js in a <script> tag.
<!-- Syntax Highligther -->
<link href="../prism_syntax_highlighter/prism.css" rel="stylesheet" />
<!-- Syntax Highligther -->
<script src="../prism_syntax_highlighter/prism.js"></script>Then I followed the recommended way to mark up a code block (both for semantics and for Prism), i.e. by using a <pre> element with a <code> element inside. For example, the two previous HTML code blocks were written like so:
<pre><code class="language-html"><!-- Syntax Highligther -->
<link href="../prism_syntax_highlighter/prism.css" rel="stylesheet" /></code></pre>
<pre><code class="language-html"><!-- Syntax Highligther -->
<script src="../prism_syntax_highlighter/prism.js"></script></code></pre>
Version Control
Among the various solutions for version control git is the version control system on which the GitLab platform is based. Another part of this week assignment was to go through a git tutorial. There is nothing better than a picture to explain what is git with less words and a little bit of humor.

In the following sections I will explain how I secured my connexions to GitLab with a SSH key and how I cloned my repository. I'll explain how I push the changes to my GitLab repository and how I configured my GitLab account for HTML instead of Markdown.
Create an SSH key pair and Clone the repository
As a starting point I had to clone the git repository and configure my GitLab account to set the SSH connexion. I first installed Git Bash, then, in GitBash, I changed the directory to the repertory User/.ssh and I generated a new SSH key pair by writing the command:
ssh-keygen -t ed25519 -C "my_email_address"
Then, to add the SSH key to my GitLab account, I copied my public SSH key in text format with the command cat id_ed25519.pub | clip.
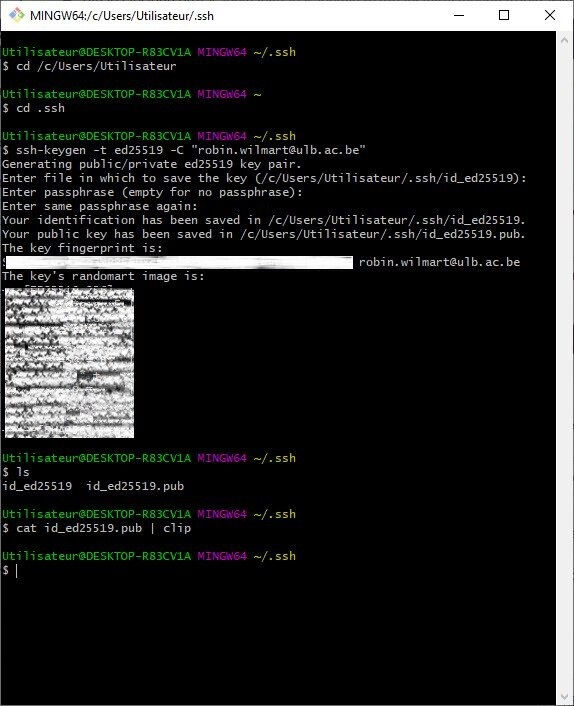
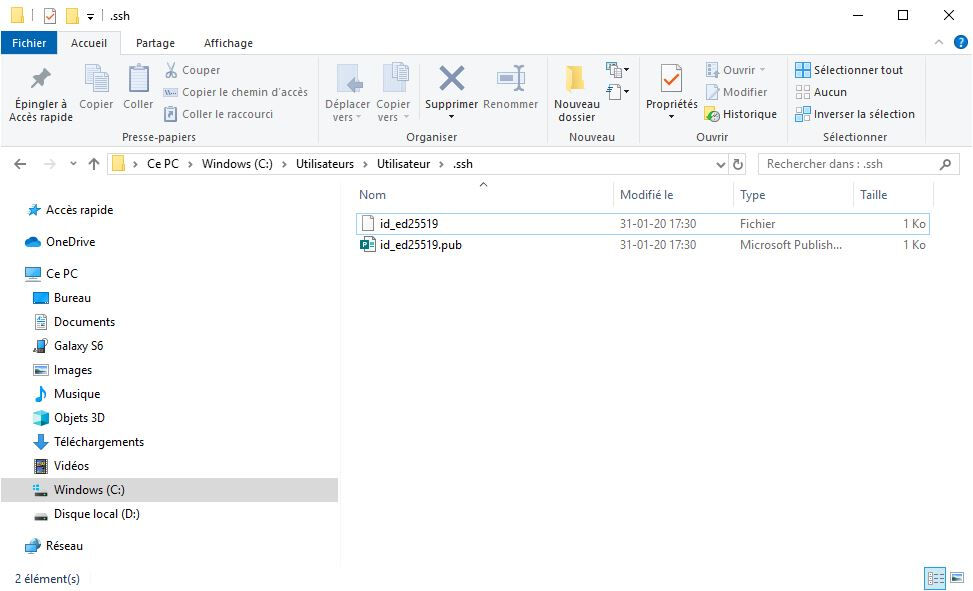
Here is the SSH key pair newly created.
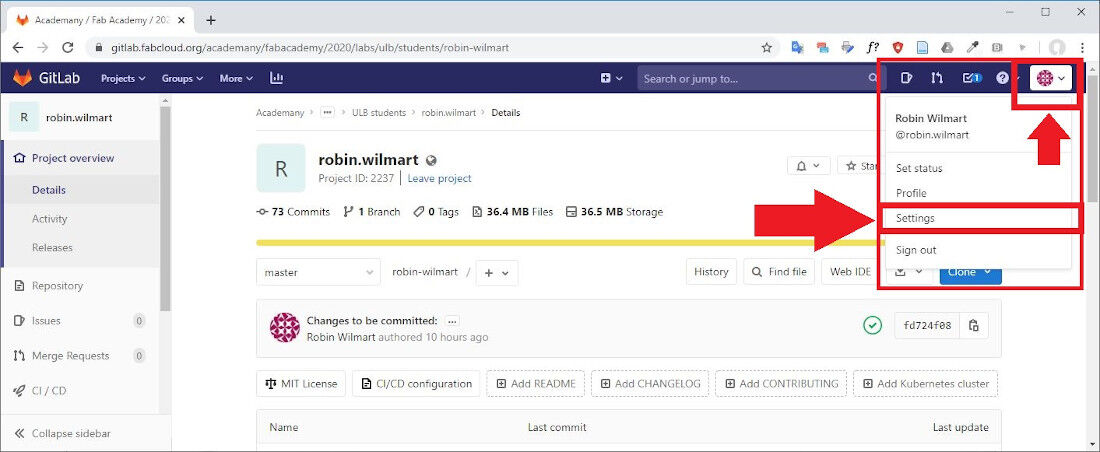
Then I navigated to http://gitlab.com and signed in. I clicked on my avatar and selected Settings.
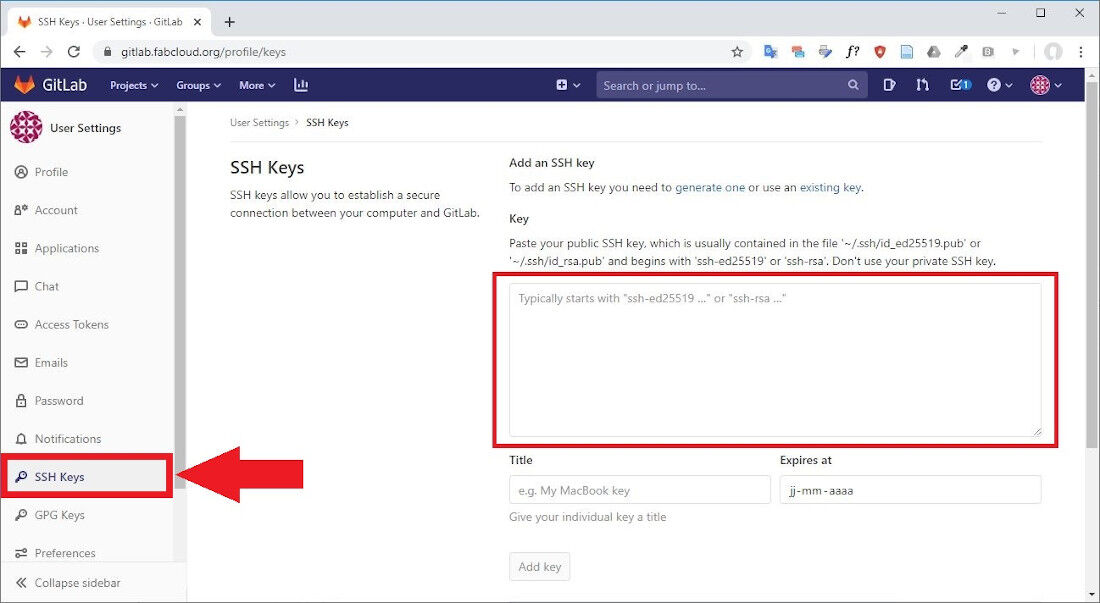
Afterwards I clicked on the SSH Keys tab and I pasted my public key into the Key text box, provided a title to the SSH key and clicked the Add key button.
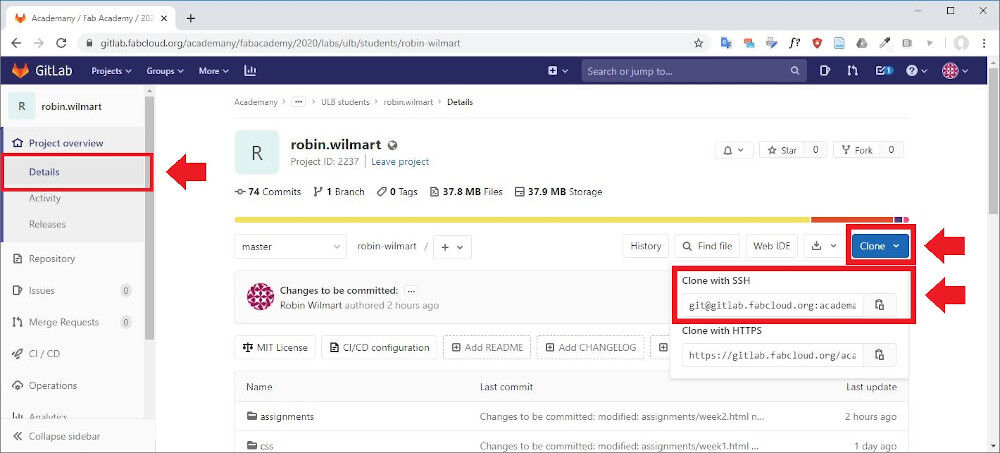
Once configured the SSH connexion I needed the URL of my git repository to clone it. I found it on my GitLab account in the Project overview folder. I just clicked on the button Clone and copied the URL beneath Clone with SSH: git@gitlab.fabcloud.org:academany/fabacademy/2020/labs/ulb/students/robin-wilmart.git
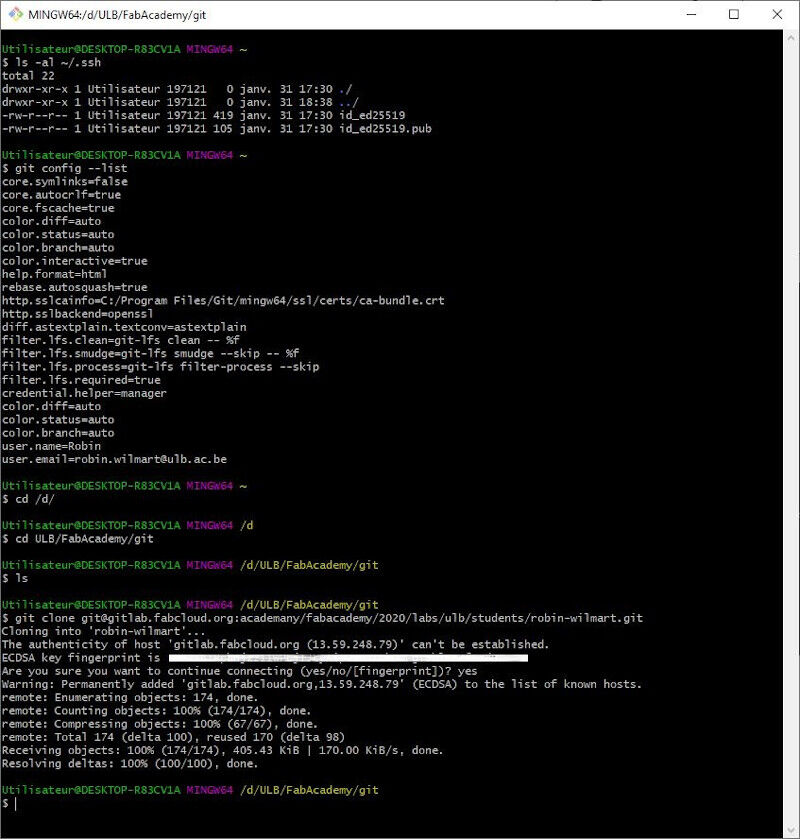
Finally, in GitBash, I changed my directory to the location where I wanted to clone my repository i.e. D:/ULB/FabAcademy/git and I executed the command:
git clone git@gitlab.fabcloud.org:academany/fabacademy/2020/labs/ulb/students/robin-wilmart.git
Git and GitLab
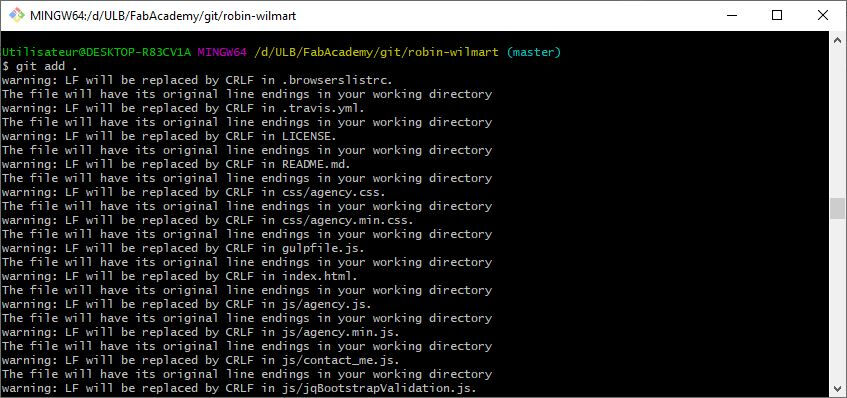
In my cloned GitLab repository I replaced the files with my project (developed around the "Agency" template, see section Website Creation). To transfer the files to the class archive I first changed my directory to the location of my cloned repository and I used the following commands: first the command git add . to add the changes.
Note: Before adding anything to the git repository make sure that the files size is maximum 5Mo.
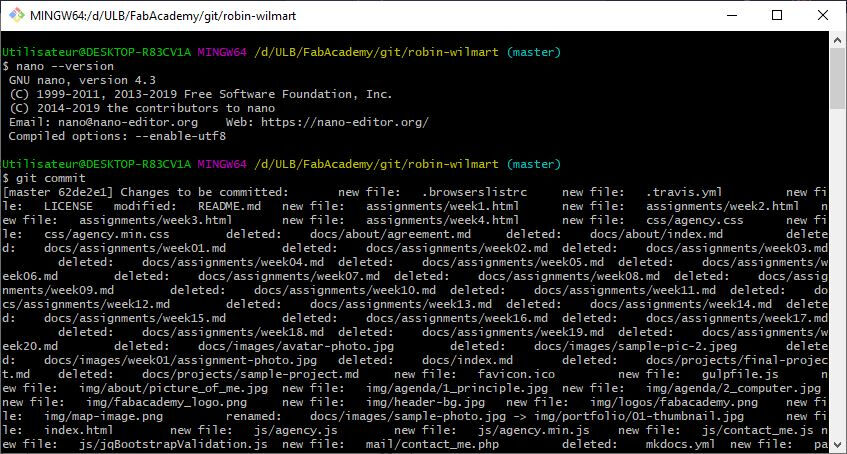
Then I run the command git commit to commit the changes. This command opens a text editor (in my case the text editor Vim) with the logs to uncomment. Once I removed the # in front of the lines I want to display I press Ctrl + c and I write :wq to save and quit the text editor. Here is the result:
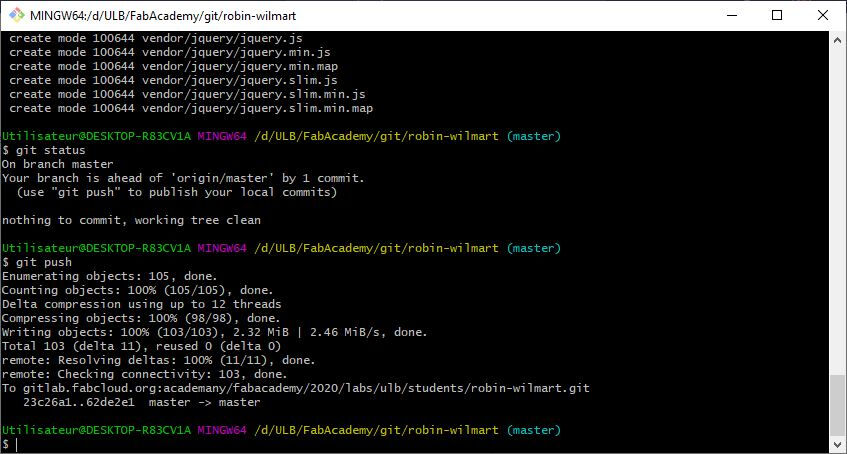
Finally I check the git status with the command git status. If there is no error in the git status I push the commits to the class archive with the command git push.
GitLab HTML configuration -> .gitlab-ci.yml
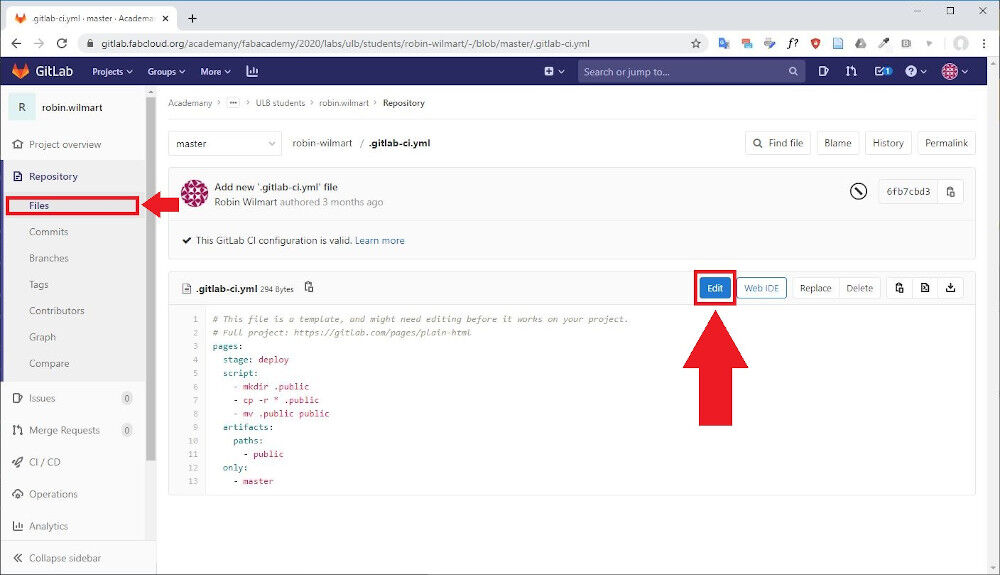
As I chose to build my website with HTML instead of the MkDocs my GitLab project needs to be configured adequately. This is done by modifying the YAML file: .gitlab-ci.yml located on my GitLab repository, tab Files. Fist I made a copy of it (just in case) then I selected the file and clicked on the Edit button.
Afterwards I clicked on Apply a template and I selected HTML.
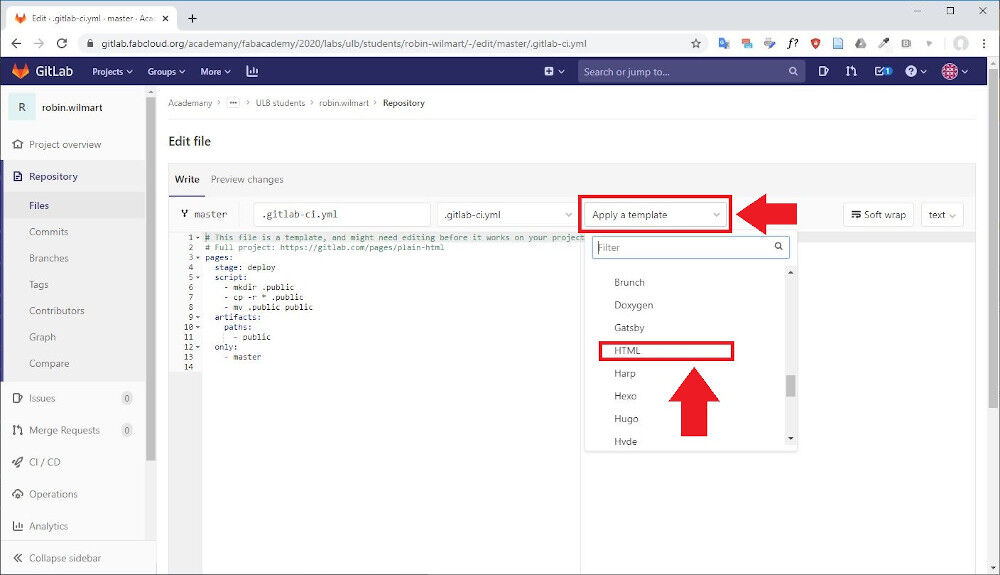
Finally I pressed the button Commit changes. That's it!
Biography and Student agreement
For what regards my biography I wrote it in the index.html file, the main page of my website, in the ABOUT ME section. In the ABOUT ME section you'll also find the Student Agreement. I also copied it in the root directory as a markdown file: agreement.md.