Week 13 - Interface and Application Programming
This week is about user interface programming. It covers several topics such as programming languages, graphical interfaces and 3D graphics.
FAB ACADEMY 2020 source
20200422 interface application from Academany on Vimeo.
My Assignment
This week assignment was about writing an application that interfaces a user with an input/output device. Therefore I decided to interface the HC-SR04 sonar. In fact I had already done that during WEEK 10 through a python interface (using Tkinter) and a HTML/JavaScript interface. Yet I was really interested to bring 3D visualization inside the interface so I decided to focus on Blender Physics and three.js.
Please follow this link to know about the group assignment.
HC-SR04 sonar | Python GUI
During WEEK 10 I developed a GUI interface for the HC-SR04 sonar in Python. Obviously this requires Python installation and pySerial installation, a python module for serial communication. Hereinafter is the full code. It is based on the original hello.HC-SR04.py python script provided by Neil. More explanations about the script can be found here.
from Tkinter import *
import serial
import sys

WINDOW = 600 # window size
SOUND_SPEED = 340.0/1000
filt = 0
eps = 0.2

def idle(parent,canvas):
   global SOUND_SPEED, filt,eps
   SOUND_SPEED = 340.0 / 1000
   #
   # idle routine
   #
   byte2 = 0
   byte3 = 0
   byte4 = 0
   ser.flush()
   while 1:
      #
      # find framing
      #
      byte1 = byte2
      byte2 = byte3
      byte3 = byte4
      byte4 = ord(ser.read())
      if ((byte1 == 1) & (byte2 == 2) & (byte3 == 3) & (byte4 == 4)):
         break
   low = ord(ser.read())
   high = ord(ser.read())
   measure = (256*high + low)
   filt = (1-eps)*filt+eps*measure
   distance_mm = filt / 2.0 * SOUND_SPEED
   cm=distance_mm/10
   x = int(.2*WINDOW + (.9-.2)*WINDOW*cm/300)
   canvas.itemconfigure("text",text="%.0f cm"%cm)
   canvas.coords('rect1',.2*WINDOW,.05*WINDOW,x,.2*WINDOW)
   canvas.coords('rect2',x,.05*WINDOW,.9*WINDOW,.2*WINDOW)
   canvas.update()
   parent.after_idle(idle,parent,canvas)

#
#  check command line arguments
#
if (len(sys.argv) != 2):
   print("command line: hello.HC-SR04_final_2_filtered.py serial_port")
   sys.exit()
port = sys.argv[1]
#
# open serial port
#
ser = serial.Serial(port,9600)
ser.setDTR()
#
# set up GUI
#
root = Tk()
root.title('hello.HC-SR04.py (q to exit)')
root.bind('q','exit')
canvas = Canvas(root, width=WINDOW, height=.25*WINDOW, background='white')
canvas.create_text(.1*WINDOW,.125*WINDOW,text=".33",font=("Helvetica", 24),tags="text",fill="#0000b0")
canvas.create_rectangle(.2*WINDOW,.05*WINDOW,.3*WINDOW,.2*WINDOW, tags='rect1', fill='#b00000')
canvas.create_rectangle(.3*WINDOW,.05*WINDOW,.9*WINDOW,.2*WINDOW, tags='rect2', fill='#0000b0')
canvas.pack()
#
# start idle loop
#
root.after(10,idle,root,canvas)
root.mainloop()
It is now time to test the code. At the file location I typed cmd in the location bar. A command prompt popped up. In the command prompt I wrote python hello.HC-SR04_final_2_filtered.py COM10 and a Tkinter window appeared. Hereinafter is the result in video.
Python GUI for measurements from an ultrasonic sensor
HC-SR04 sonar | HTML and JavaScript GUI
During WEEK 10 I also developed a GUI interface for the HC-SR04 sonar in HMTL and JavaScript. Hereinafter is the full code. More explanations about the script can be found here.
  var server_port = '1234'
  var client_address = '::ffff:127.0.0.1'
  //var serial_port = "/dev/ttyUSB0"
  var serial_port = "COM10"
  var baud = 9600
  var sound_speed = 340.0 / 1000
  var eps = 0.1
  var filt = 0
  var distance_mm = 0
  //
  // open serial port
  //
  var SerialPort = require("serialport")
  var sp = new SerialPort(serial_port,{baudRate:baud})
  sp.on('error',function(err) {
     console.log("error: "+err)
     process.exit(-1)
     })
  //
  // look for framing and then update field value
  //
  var byte2 = 0
  var byte3 = 0
  var byte4 = 0
  var byte5 = 0
  var byte6 = 0
  var value = 0
  var measure = 0
  var ByteLength = SerialPort.parsers.ByteLength
  var parser = sp.pipe(new ByteLength({length:1}));
  parser.on('data',function(data) {
     byte1 = byte2
     byte2 = byte3
     byte3 = byte4
     byte4 = byte5
     byte5 = byte6
     byte6 = data[0]
     if ((byte1 == 1) & (byte2 == 2) & (byte3 == 3) & (byte4 == 4)) {
        measure = (byte5 + 256*byte6)
        filt = (1-eps)*filt+eps*measure
        distance_mm = filt / 2.0 * sound_speed
        value=distance_mm/10
        }
     })
  //
  // wait for socket request and then send field value
  //
  console.log("listening for connections from "+client_address+" on "+server_port)
  var Server = require('ws').Server
  wss = new Server({port:server_port})
  wss.on('connection', function(ws) {
     if (ws._socket.remoteAddress != client_address) {
        console.log("error: client address "+ws._socket.remoteAddress+" doesn't match")
        return
        }
     console.log("connected to "+client_address+" on port "+server_port)
     ws.on('message', function(data) {
        ws.send(JSON.stringify(value.toFixed(1)))
        })
     })
The video provided by Neil also helped me a lot to understand what was the procedure to use the JavaScript in combination with the HTML file. First open the HTML file, then make sure the board is connected to the computer and execute the JavaScript. Finally refresh the HTML page. The following video presents the results.
JavaScript and HTML GUI for measurements from an ultrasonic sensor
Blender Physics
To get familiar with Blender Physics I followed step by step the video provided by Neil. Beneath I'll describe step by step the procedure I followed.
- Add a torus: To add a torus click on
Add->Mesh->TorusOR simply pressShift + Aand selectTorus. - Smooth the shape: Right click on the torus and select
Shade Smooth. - Set physical properties: In the lateral right panel go to the
Physics Propertiestab. UnderRigid Body, select the type : Active and in settings tickDynamic. - Duplicate the ring: Right click on the torus and select
Duplicate Objects. Instead you can also just pressShift + D. - Move the duplicated object along x axis: Press
gto move, thenxto set the axis, then type1.4to set the distance and pressEnter. - Rotate the duplicated object around x axis: Press
rto rotate, thenxto set the rotation axis, then type90to set the rotation angle and pressEnter. - Duplicate again: Select both torus by pressing
Shiftmeanwhile left clicking on the torus, then duplicate them by pressingShift + D. - Move both duplicated torus to form a chain: Press
g, thenx, then2.8. - Repeat the two latest points as often as you want depending on the desired length of the chain.
- Play the animation. At that stage the chain falls in the void. We need to block one ring of the chain.
- Select one ring of the chain. In the lateral right panel go to the
Physics Propertiestab. UnderRigid Body, select the type : Passive and in settings tickAnimated.
Hereinafter is a video of the result.
Animation of a chain by using Blender Physics
After that I saved my model as chain.blend than I exported it as an OBJ file: File -> Export -> Wavefront(.obj). As a result I got two files: the OBJ file chain.obj and its texture chain.mtl.
three.js
My plan here is to use the 3D object created upper and insert it in a 3D web environment using three.js.
In the documentation of three.js I copied the code from the "Before we start" section and I pasted it in a new HTML file. Then I added a copy of three.js in the js/ directory. In between the script tags, I defined a scene, a camera and a renderer. There are a few different cameras in three.js. For now, let's use a PerspectiveCamera. The first attribute is the field of view, in this it is set to 75 degrees. The second attribute is the aspect ratio. Most of the times it is the width of the element divided by the height. The next two attributes are the near and far clipping plane. They allow to set values in between which the objects will be rendered. About the renderer, in addition to the WebGLRenderer we use here, three.js comes with a few others, often used as fallbacks for users with older browsers. In fact the documentation of three.js is very well done so I decided to follow it from top to bottom to understand what does very single line.
<!DOCTYPE html>
<html>
	<head>
		<meta charset="utf-8">
		<title>My first three.js app</title>
		<style>
			body { margin: 0; }
			canvas { display: block; }
		</style>
	</head>
	<body>
		<script src="js/three.js"></script>
		<script>
      // Let's define a scene, a camera and a renderer.
      var scene = new THREE.Scene();
      var camera = new THREE.PerspectiveCamera( 75, window.innerWidth / window.innerHeight, 0.1, 1000 );

      var renderer = new THREE.WebGLRenderer();
      renderer.setSize( window.innerWidth, window.innerHeight ); // Here we set the size at which we want it to render our app.
      document.body.appendChild( renderer.domElement ); // Here we add the renderer element to our HTML document.

      // Let's define a geometry (a box), a material and a mesh (an object that takes a geometry, and applies a material to it, which we then can insert to our scene).

      var geometry = new THREE.BoxGeometry();
      var material = new THREE.MeshBasicMaterial( { color: 0x00ff00 } ); // Green color.
      var cube = new THREE.Mesh( geometry, material );
      scene.add( cube ); // By default, when we call scene.add(), the thing we add will be added to the coordinates (0,0,0). This would cause both the camera and the cube to be inside each other. To avoid this, we simply move the camera out a bit.

      camera.position.z = 5;
      // At this point of the code we we're not actually rendering anything yet, so let's create a render or animate loop.
      function animate() {
	       requestAnimationFrame( animate );

         cube.rotation.x += 0.01;
         cube.rotation.y += 0.01;

	       renderer.render( scene, camera );
        }
      animate();

		</script>
	</body>
</html>
There are quite a few different ways to include three.js in your JavaScript application. For example you can also download the three.js file from a CDN (Content Delivery Network). That's the method I used in the second version of my first app. I also copied the code from in between the two script tags inside a separate js file to make the HTML file more compact and readable.
<!DOCTYPE html>
<html>
	<head>
		<meta charset="utf-8">
		<title>My first three.js app</title>
		<style>
			body { margin: 0; }
			canvas { display: block; }
		</style>
	</head>
	<body>
		<script src="https://threejs.org/build/three.js"></script>
		<script src="first_app.js"></script>
	</body>
</html>
After that I had a look on the different snippets of this website such as Import via modules, WebGL compatibility, Drawing lines, Creating text, and Loading 3D models. Unfortunately I was not able to import properly the WebGL module with the following command import { WEBGL } from 'https://threejs.org/examples/jsm/WebGL.js';. The syntax seems correct to me but I found an issue (dated from 2016) explaining that the content of the folder example was not updated yet and are therefore unusable. I also tried without success to add a texture by following the Texture section. So I decided to follow a series of 10 videos YouTube Tutorial.
Three.js Tutorial
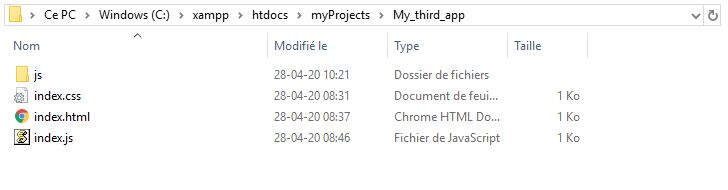
At the end of the first video of the series, the YouTuber explains that Same-origin policy, a security built-in feature of JavaScript, prevents loading of external resources. As we will use external resources such as Texture, Models and OrbitControls it is recommended to set up our own local server. As a consequence I first installed XAMPP then at the location of XAMPP C:\xampp in the folder C:\xampp\htdocs I created a new carpet myProjects and I started a new project in C:\xampp\htdocs\myProjects\My_third_app.
Then I started XAMPP application and I clicked on START in front of Apache and MySQL.
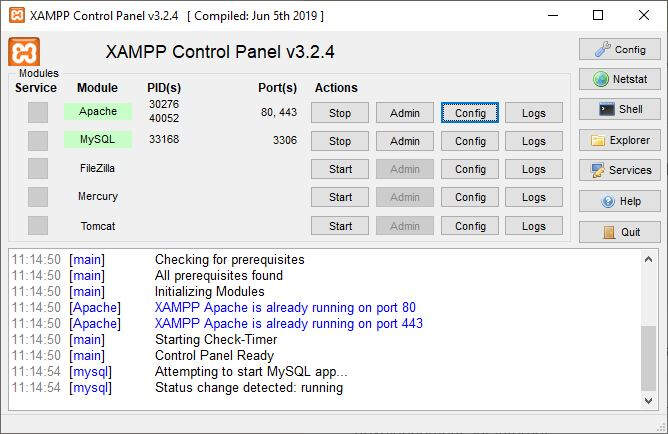
After the server started running, I wrote http://localhost/myProjects/My_third_app/index.htmlin Google chrome and the site came up successfully.
Afterwards I continued to follow the same YouTube tutorial series. First I wrote a code, that is nearly identical to the code I ended to write by following the documentation of three.js.
// Let's define global variables for the height and width of the window.
var width = window.innerWidth;
var height = window.innerHeight;

// Let's define a scene, a camera and a renderer.
var scene = new THREE.Scene();
var camera = new THREE.PerspectiveCamera( 75, width / height, 0.1, 1000 );

var renderer = new THREE.WebGLRenderer();
renderer.setSize( width, height ); //Initialization of the renderer size.
document.body.appendChild( renderer.domElement );

// Create the shape
var geometry = new THREE.BoxGeometry( 1, 1, 1 );
var material = new THREE.MeshBasicMaterial( {color: 0x00ff00, wireframe: false} );
var cube = new THREE.Mesh( geometry, material );
scene.add( cube );

camera.position.z = 3;

// Game logic
var update = function( )
{
  cube.rotation.x += 0.01;
  cube.rotation.y += 0.05;
};

// Draw Scene
var render = function( )
{
  renderer.render( scene, camera );
};

// Run Game Loop (update, render, repeat)
var GameLoop = function( )
{
  requestAnimationFrame( GameLoop );

  update( );
  render( );
};

GameLoop( );
Between the section about the "definition of a scene, a camera and a render" and the section about the "creation of the shape", I added an event listener that will resize the renderer and update the camera aspect if the window size changes.
//Resize the renderer and the camera aspect
window.addEventListener( 'resize', function( )
{
  var width = window.innerWidth;
  var height = window.innerHeight;
  renderer.setSize( width, height ); //Refresh the rendered size when the window size is changed.
  camera.aspect = width / height;
  camera.updateProjectionMatrix( );
} );
To continue with the tutorial I had to download the three.js package. In the folder three.js-master\examples\js\controls I found the OrbitControls.js file that I copied and pasted into C:\xampp\htdocs\myProjects\My_third_app\js. Then in the index.html file I added the following script tag command: <script src="js/OrbitControls.js"></script>, and in the index.js file right beneath the event listener I added controls = new THREE.OrbitControls( camera, renderer.domElement );. Fun fact : I went to the three.js documentation about OrbitControls and I found that there was a mistake in the command line. No doubt that I found difficult to fully trust that documentation. It is better to look at the examples and then click on view source code.
Then I added some material on the cube. I used the water texture water.jpg that can be found in the three.js package, folder three.js-master\examples\textures. I pasted it a new folder C:\xampp\htdocs\myProjects\My_third_app\texture. To apply that texture on the cube I created a new material var watermaterial = new THREE.MeshBasicMaterial( {map: new THREE.TextureLoader( ).load( "./texture/water.jpg" ), side:THREE.DoubleSide } ); and I modified the declaration of the cube variable var cube = new THREE.Mesh( geometry, watermaterial );.
Another solution is to apply a texture on the cube, face after face. This can be useful to apply different materials on each face of the cube. This is done with the following code:
// Let's define global variables for the height and width of the window.
var width = window.innerWidth;
var height = window.innerHeight;

// Let's define a scene, a camera and a renderer.
var scene = new THREE.Scene();
var camera = new THREE.PerspectiveCamera( 75, width / height, 0.1, 1000 );

var renderer = new THREE.WebGLRenderer();
renderer.setSize( width, height ); //Initialization of the renderer size.
document.body.appendChild( renderer.domElement );


//Resize the renderer and the camera aspect
window.addEventListener( 'resize', function( )
{
  var width = window.innerWidth;
  var height = window.innerHeight;
  renderer.setSize( width, height ); //Refresh the rendered size when the window size is changed.
  camera.aspect = width / height;
  camera.updateProjectionMatrix( );
} );

controls = new THREE.OrbitControls( camera, renderer.domElement );

// Create the shape
var geometry = new THREE.BoxGeometry( 1, 1, 1 );
var watermaterial = new THREE.MeshBasicMaterial( {map: new THREE.TextureLoader( ).load( "./texture/water.jpg" ), side:THREE.DoubleSide } );
var disturbmaterial = new THREE.MeshBasicMaterial( {map: new THREE.TextureLoader( ).load( "./texture/disturb.jpg" ), side:THREE.DoubleSide } );
var cubeMaterials =
[
  watermaterial,    // RIGHT SIDE
  watermaterial,    // LEFT SIDE
  disturbmaterial,  // TOP SIDE
  disturbmaterial,  // BOTTOM SIDE
  watermaterial,    // FRONT SIDE
  watermaterial     // BACK SIDE
];


var material = new THREE.MeshFaceMaterial( cubeMaterials );
var cube = new THREE.Mesh( geometry, material );
scene.add( cube );

camera.position.z = 3;

// Game logic
var update = function( )
{
  cube.rotation.x += 0.01;
  cube.rotation.y += 0.05;
};

// Draw Scene
var render = function( )
{
  renderer.render( scene, camera );
};

// Run Game Loop (update, render, repeat)
var GameLoop = function( )
{
  requestAnimationFrame( GameLoop );

  update( );
  render( );
};

GameLoop( );
And here is the result obtained with this code.
Then I lightened the scene. The following picture shows different lighting model examples.
Different types of lighting
For this project I created an ambient light by adding the command var ambientLight = new THREE.AmbientLight( 0xFFFFFF, 0.5 ); // soft white light (light color, intensity value) followed by scene.add( ambientLight );. With these commands only we will not see anything different when refreshing the webpage. This is due to the fact that MeshBasicMaterial is not affected by the light and does need lighting to show up. The following picture shows different types of material

Different types of lighting
I changed the MeshBasicMaterial to MeshLambertMaterial for disturbmaterial and MeshPhongMaterial for watermaterial. Here is the result :
Afterwards I added a white floor. It will help to see the effect of the point lights.
// Floor
var floorGeometry = new THREE.BoxGeometry( 20, 0.01, 20 );
var floorMaterial = new THREE.MeshPhongMaterial( {color: 0xffffff, wireframe: false, side:THREE.DoubleSide } );
var floorCube = new THREE.Mesh( floorGeometry, floorMaterial );
floorCube.position.y = -2;
scene.add( floorCube );
Then I created three point lights that will fly around the cube by updating their position in the update function. Here is the code I ended up with:
// Let's define global variables for the height and width of the window.
var width = window.innerWidth;
var height = window.innerHeight;

// Let's define a scene, a camera and a renderer.
var scene = new THREE.Scene();
var camera = new THREE.PerspectiveCamera( 75, width / height, 0.1, 1000 );

var renderer = new THREE.WebGLRenderer();
renderer.setSize( width, height ); //Initialization of the renderer size.
document.body.appendChild( renderer.domElement );


//Resize the renderer and the camera aspect
window.addEventListener( 'resize', function( )
{
  var width = window.innerWidth;
  var height = window.innerHeight;
  renderer.setSize( width, height ); //Refresh the rendered size when the window size is changed.
  camera.aspect = width / height;
  camera.updateProjectionMatrix( );
} );

controls = new THREE.OrbitControls( camera, renderer.domElement );

// Create the shape
var geometry = new THREE.BoxGeometry( 1, 1, 1 );
var watermaterial = new THREE.MeshPhongMaterial( {map: new THREE.TextureLoader( ).load( "./texture/water.jpg" ), side:THREE.DoubleSide } );
var disturbmaterial = new THREE.MeshLambertMaterial( {map: new THREE.TextureLoader( ).load( "./texture/disturb.jpg" ), side:THREE.DoubleSide } );
var cubeMaterials =
[
  watermaterial,    // RIGHT SIDE
  watermaterial,    // LEFT SIDE
  disturbmaterial,  // TOP SIDE
  disturbmaterial,  // BOTTOM SIDE
  watermaterial,    // FRONT SIDE
  watermaterial     // BACK SIDE
];


var material = new THREE.MeshFaceMaterial( cubeMaterials );
var cube = new THREE.Mesh( geometry, material );
scene.add( cube );

camera.position.z = 3;

// Floor
var floorGeometry = new THREE.BoxGeometry( 20, 0.01, 20 );
var floorMaterial = new THREE.MeshPhongMaterial( {color: 0xffffff, wireframe: false, side:THREE.DoubleSide } );
var floorCube = new THREE.Mesh( floorGeometry, floorMaterial );
floorCube.position.y = -2;
scene.add( floorCube );

//LIGHTS
var ambientLight = new THREE.AmbientLight( 0xFFFFFF, 0.6 ); // soft ambient white light (light color, intensity value)
scene.add( ambientLight );

var light1 = new THREE.PointLight( 0xFF0040, 2, 50); // red point light (light color, intensity, distance until which objects are affected by light)
scene.add( light1 );

var light2 = new THREE.PointLight( 0x00FF40, 2, 50); // green point light (light color, intensity, distance until which objects are affected by light)
scene.add( light2 );

var light3 = new THREE.PointLight( 0x0040FF, 2, 50); // blue point light (light color, intensity, distance until which objects are affected by light)
scene.add( light3 );


// Game logic
var update = function( )
{
  cube.rotation.x += 0.01;
  cube.rotation.y += 0.05;

  var time = Date.now( ) * 0.0005;

  light1.position.x = Math.sin( time * 0.7 ) * 30;
  light1.position.y = Math.cos( time * 0.5 ) * 40;
  light1.position.z = Math.cos( time * 0.3 ) * 30;

  light2.position.x = Math.cos( time * 0.3 ) * 30;
  light2.position.y = Math.sin( time * 0.5 ) * 40;
  light2.position.z = Math.sin( time * 0.7 ) * 30;

  light3.position.x = Math.sin( time * 0.5 ) * 30;
  light3.position.y = Math.cos( time * 0.7 ) * 40;
  light3.position.z = Math.sin( time * 0.3 ) * 30;

};

// Draw Scene
var render = function( )
{
  renderer.render( scene, camera );
};

// Run Game Loop (update, render, repeat)
var GameLoop = function( )
{
  requestAnimationFrame( GameLoop );

  update( );
  render( );
};

GameLoop( );
And here is the result:
At this point I wanted to display OBJ file that I had previously design in a 3D design software. First I made a research in the examples of three.js and I found the source code of an OBJ loader. Based on that example, I wrote the following HTML code:
<!DOCTYPE html>
<html>
	<head>
		<meta charset="utf-8">
		<title>My first three.js app</title>
		<style>
			body { margin: 0; }
			canvas { width: 100%; height: 100%; }
		</style>
	</head>
	<body>
		<script src="js/three.js"></script>
		<script src="js/OrbitControls.js"></script>
		<script src="index.js"></script>
	</body>
</html>
In this HTML file I also wrote the following index.js:
import { DDSLoader } from './jsm/loaders/DDSLoader.js';
import { MTLLoader } from './jsm/loaders/MTLLoader.js';
import { OBJLoader } from './jsm/loaders/OBJLoader.js';

// Let's define global variables for the height and width of the window.
var width = window.innerWidth;
var height = window.innerHeight;

// Let's define a scene, a camera and a renderer.
var scene = new THREE.Scene();
var camera = new THREE.PerspectiveCamera( 75, width / height, 0.1, 1000 );

camera.position.y = 10;
camera.position.z = 10;
camera.rotation.y = -45;


var renderer = new THREE.WebGLRenderer();
renderer.setSize( width, height ); //Initialization of the renderer size.
document.body.appendChild( renderer.domElement );


//Resize the renderer and the camera aspect
window.addEventListener( 'resize', function( )
{
  var width = window.innerWidth;
  var height = window.innerHeight;
  renderer.setSize( width, height ); //Refresh the rendered size when the window size is changed.
  camera.aspect = width / height;
  camera.updateProjectionMatrix( );
} );


//Screen Control
var controls = new THREE.OrbitControls( camera, renderer.domElement );

// model

var onProgress = function ( xhr ) {

	if ( xhr.lengthComputable ) {

		var percentComplete = xhr.loaded / xhr.total * 100;
		console.log( Math.round( percentComplete, 2 ) + '% downloaded' );

	}

};

var onError = function () { };

var manager = new THREE.LoadingManager();
manager.addHandler( /\.dds$/i, new DDSLoader() );

// comment in the following line and import TGALoader if your asset uses TGA textures
// manager.addHandler( /\.tga$/i, new TGALoader() );

new MTLLoader( manager )
	.setPath( 'models/' )
	.load( 'chain.mtl', function ( materials ) {

		materials.preload();

		new OBJLoader( manager )
			.setMaterials( materials )
			.setPath( 'models/' )
			.load( 'chain.obj', function ( object ) {

				object.position.y = 4;
        object.position.x = -7.7;
				scene.add( object );

			}, onProgress, onError );

	} );


// Floor
var floorGeometry = new THREE.BoxGeometry( 20, 0.01, 20 );
var floorMaterial = new THREE.MeshPhongMaterial( {color: 0xffffff, wireframe: false, side:THREE.DoubleSide } );
var floorCube = new THREE.Mesh( floorGeometry, floorMaterial );
floorCube.position.y = -2;
scene.add( floorCube );

//LIGHTS
var ambientLight = new THREE.AmbientLight( 0xFFFFFF, 0.7 ); // soft ambient white light (light color, intensity value)
scene.add( ambientLight );

var light1 = new THREE.PointLight( 0xFF0040, 2, 50); // red point light (light color, intensity, distance until which objects are affected by light)
scene.add( light1 );

var light2 = new THREE.PointLight( 0x00FF40, 2, 50); // green point light (light color, intensity, distance until which objects are affected by light)
scene.add( light2 );

var light3 = new THREE.PointLight( 0x0040FF, 2, 50); // blue point light (light color, intensity, distance until which objects are affected by light)
scene.add( light3 );

// Game logic
var update = function( )
{
  var time = Date.now( ) * 0.0005;

  light1.position.x = Math.sin( time * 0.7 ) * 30;
  light1.position.y = Math.cos( time * 0.5 ) * 40;
  light1.position.z = Math.cos( time * 0.3 ) * 30;

  light2.position.x = Math.cos( time * 0.3 ) * 30;
  light2.position.y = Math.sin( time * 0.5 ) * 40;
  light2.position.z = Math.sin( time * 0.7 ) * 30;

  light3.position.x = Math.sin( time * 0.5 ) * 30;
  light3.position.y = Math.cos( time * 0.7 ) * 40;
  light3.position.z = Math.sin( time * 0.3 ) * 30;
};

// Draw Scene
var render = function( )
{
  renderer.render( scene, camera );
};

// Run Game Loop (update, render, repeat)
var GameLoop = function( )
{
  requestAnimationFrame( GameLoop );

  update( );
  render( );
};

GameLoop( );
When I tested the code there were several errors when inspecting the console. The first error that I fixed is the following message: "Uncaught SyntaxError: Cannot use import statement outside a module". I solved that issue by adding type="module" in the script tag of the HTML file. I also modified the three JavaScript files required to load an OBJ file:
./jsm/loaders/DDSLoader.js, ./jsm/loaders/MTLLoader.js and ./jsm/loaders/OBJLoader.js. Indeed these files need to import some functions located in the three.module.js file. Here is the new HTML code.
<!DOCTYPE html>
<html>
	<head>
		<meta charset="utf-8">
		<title>My first three.js app</title>
		<style>
			body { margin: 0; }
			canvas { width: 100%; height: 100%; }
		</style>
	</head>
	<body>
		<script src="js/three.js"></script>
		<script src="js/OrbitControls.js"></script>
		<script type="module" src="index.js"></script>
	</body>
</html>
Hereinafter is the result of the code.
Yet there are still plenty of things to learn about three.js. Here is a link to fundamentals.
What if I had had more time?
If I had had more time:
- I would have gathered 3D animation with Blender Physics inside a three.js environment. Several examples are provided at threejs.org and most of them use the module
GLTFLoader()to load a GLB file. This kind of file can easily be exported from Blender. - I would have aminated my 3D model by interfacing it with my HC-SR04 sonar.
- I would have a look on USB protocols to automate my application access to the USB port both with the Python application and the HTML/JavaScript application.
- I would have a look on D3.js.
- I would have a look on Unreal Engine and Unity.
- I would have a look on MySQL.
- I would have a look on HTML forms, Python socket and Flat UI, a library of nice buttons, progress bars,...
- I would have read the book The Nature of Mathematical Modeling.
- I would have a look on JavaScript application development environments such as Meteor to build JavaScript applications faster.
- I would have make use of Bootstrap JavaScript plugins.