Week 4 - Computer Controlled Cutting
This week will cover processes that cut in two dimensions (2D) with a focus on laser cutter and knife cutter. Cutting machines can be split into different categories depending on the tool used to cut, be it a knife, a laser, a plasma, a waterjet, a hot wire or EDM.
Cutting Tools
Knife - Knifes are used for example to cut vinyl, paper, tapes or copper within a vinyl cutter machine.
Laser - A laser is a device that emits light through a process of optical amplification based on the stimulated emission of electromagnetic radiation.
Plasma - Plasma cutters create a plasma that can be used for metal cutting. It is therefore a good alternative to rotating tools for metal cutting. Nevertheless this process produces a lot of sparks. As a consequence it is recommended to perform it in safe environment. There is some cleaning afterwards.
Waterjet - Waterjet cutters use a supersonic jet made of a mixture of water and garnet abrasive. It can cut almost every kind of material.
Hot wire - Hot wire cutters use a heated wire for the cutting. They are mostly used for cutting foam for architectural molding.
EDM - EDM stands for Electrical discharge machining. EDM machines generally cuts with a wire that makes a plasma. They are used to make precision machine components.
CAD Softwares
To design the parts that are meant to be cut, most of the softwares used in WEEK 2 are eligible. Both FreeCAD and Inkscape (or an equivalent software) are recommended to be able to cut or engrave almost everything in almost any shape.
A usefull functionality for these programs might also be the ability to draw online.
Aside the traditional softwares there is a number of tools that are specifically aimed at cutting things out:
Kiri:Moto is an integrated cloud-based tool-path generator for CAM (Computer-aided manufacturing), 3D Printing and Laser cutting. Its laser mode will intelligently slice a 3D model and layout the cross sections for export to DXF or SVG. It is embedded within Onshape, a product development platform that unites CAD, data management, collaboration tools and real-time analytics.
KYUB takes 3D shapes and turns them into 2D structures you can cut out and assemble.
PePaKuRa is a tool designed for folding. It can unfold 3D object into 2D printable objects.
VisiCut is a free, open-source lasercutter software.
flatfab is software that helps to design and fabricate 3D objects only by drawing flat shapes in 2D.
ExactFlat is a software extension for Solidworks, Rhino 3D or Monarch. It is designed to take shapes and turn them into things that can be cut.
Finally there is mods. mods is a tool developped by the MIT. It is a modular programming interface that aims at remplacing the tremandous amount of user interface by only one standardized interface. For example, mods can be used to directly control a laser cutter or a vinyl cutter. As a consequence it decreases the number of interfaces and printer drivers that must be learned by a user.
Vinyl Cutter
There are a lot of applications for vinyl cutters and they are usually underestimated. A nice project is a folding crane that flaps its wings by itself. Another application is thermal transfer of vinyl on a fabric. It is also possible to print radio antennas.
A material list is provided by the FABACADEMY in the standard inventory. The use of some of thoses materials will be highlighted bellow.
- Copper Foil Tape (3M) - It is a copper tape with an electrively conductive glue which main use is to make circuitery.
- 3M Epoxy Film Electrical Tape - It looks like vinyl but it is much heavier duty, physically much stronger then vinyl. It goes to higher temperature and is used as a subtrate.
- Masking tape: 3M#214 - When you cut out, it is used to lift off the traces with that tape.
- Permacel #595B - It is a transfer adhesive. It has a layer of glue that doesn't like to stick to the material. It is used to give a backing to a material that doesn't have one or for flimsy materials to make them thicker.
- Sandblast stencil - It is an elastic material from which stencil are cut out to etch glass with a sand blaster.
Settings
The knife can come with different angles. A flatter angle knife is stronger thus adequat for heavier material. A sharper angle can cut deeper but bends in a hard material.
The settings of a knife cutting machine are Force, speed and cut depth. All these parameters depend on temperature, humidity and condition of the material which make probably the knife cutter unpopular.
Weeding
When weeding the material after cutting, instead of lifting the material make sure you shear it to let the material almost on the same plan to avoid that the parts that must remain on the tape are removed from it. Weeding must be done on the final destination. For example, if you cut a circuit on a copper foil tape and you try to weed it on its own backing, it will come right off. So first use an adhesif to transfer the whole structure then weed the circuit on its final destination.
Laser Cutter
Laser cutters are used in many ways. They can be used to mark, engrave or cut. They can also be used for screen printing halftones: they empty small holes in an image such that when it's lighted back the pictures appears. It is the holes density that creates contrast on the image.
Halftone is the reprographic technique that simulates continuous-tone imagery through the use of dots, varying either in size or in spacing, thus generating a gradient-like effect.
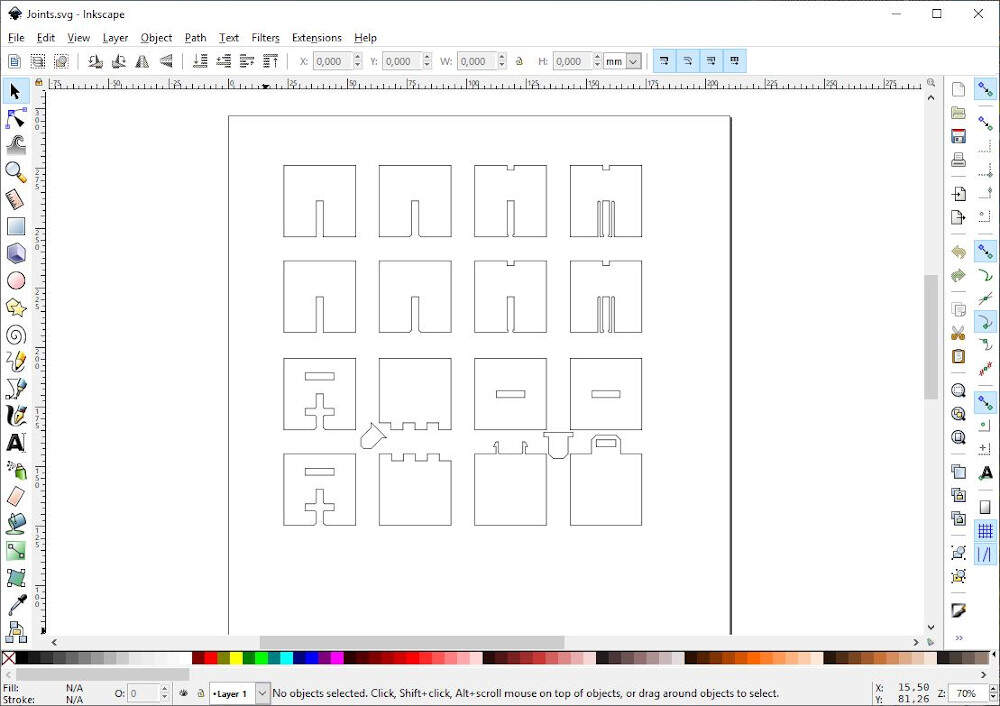
Different types of joints are used to assemble laser-cut parts. They are summarized in the picture bellow.

The chamfer joint for example helps for alignment of the parts. Indeed if the thickness of one part is too big with respect to the slot of an assembly, the chamfer will create pressure in the slot such that its edges move closer therefore preventing the parts to join and the slot to be damaged.
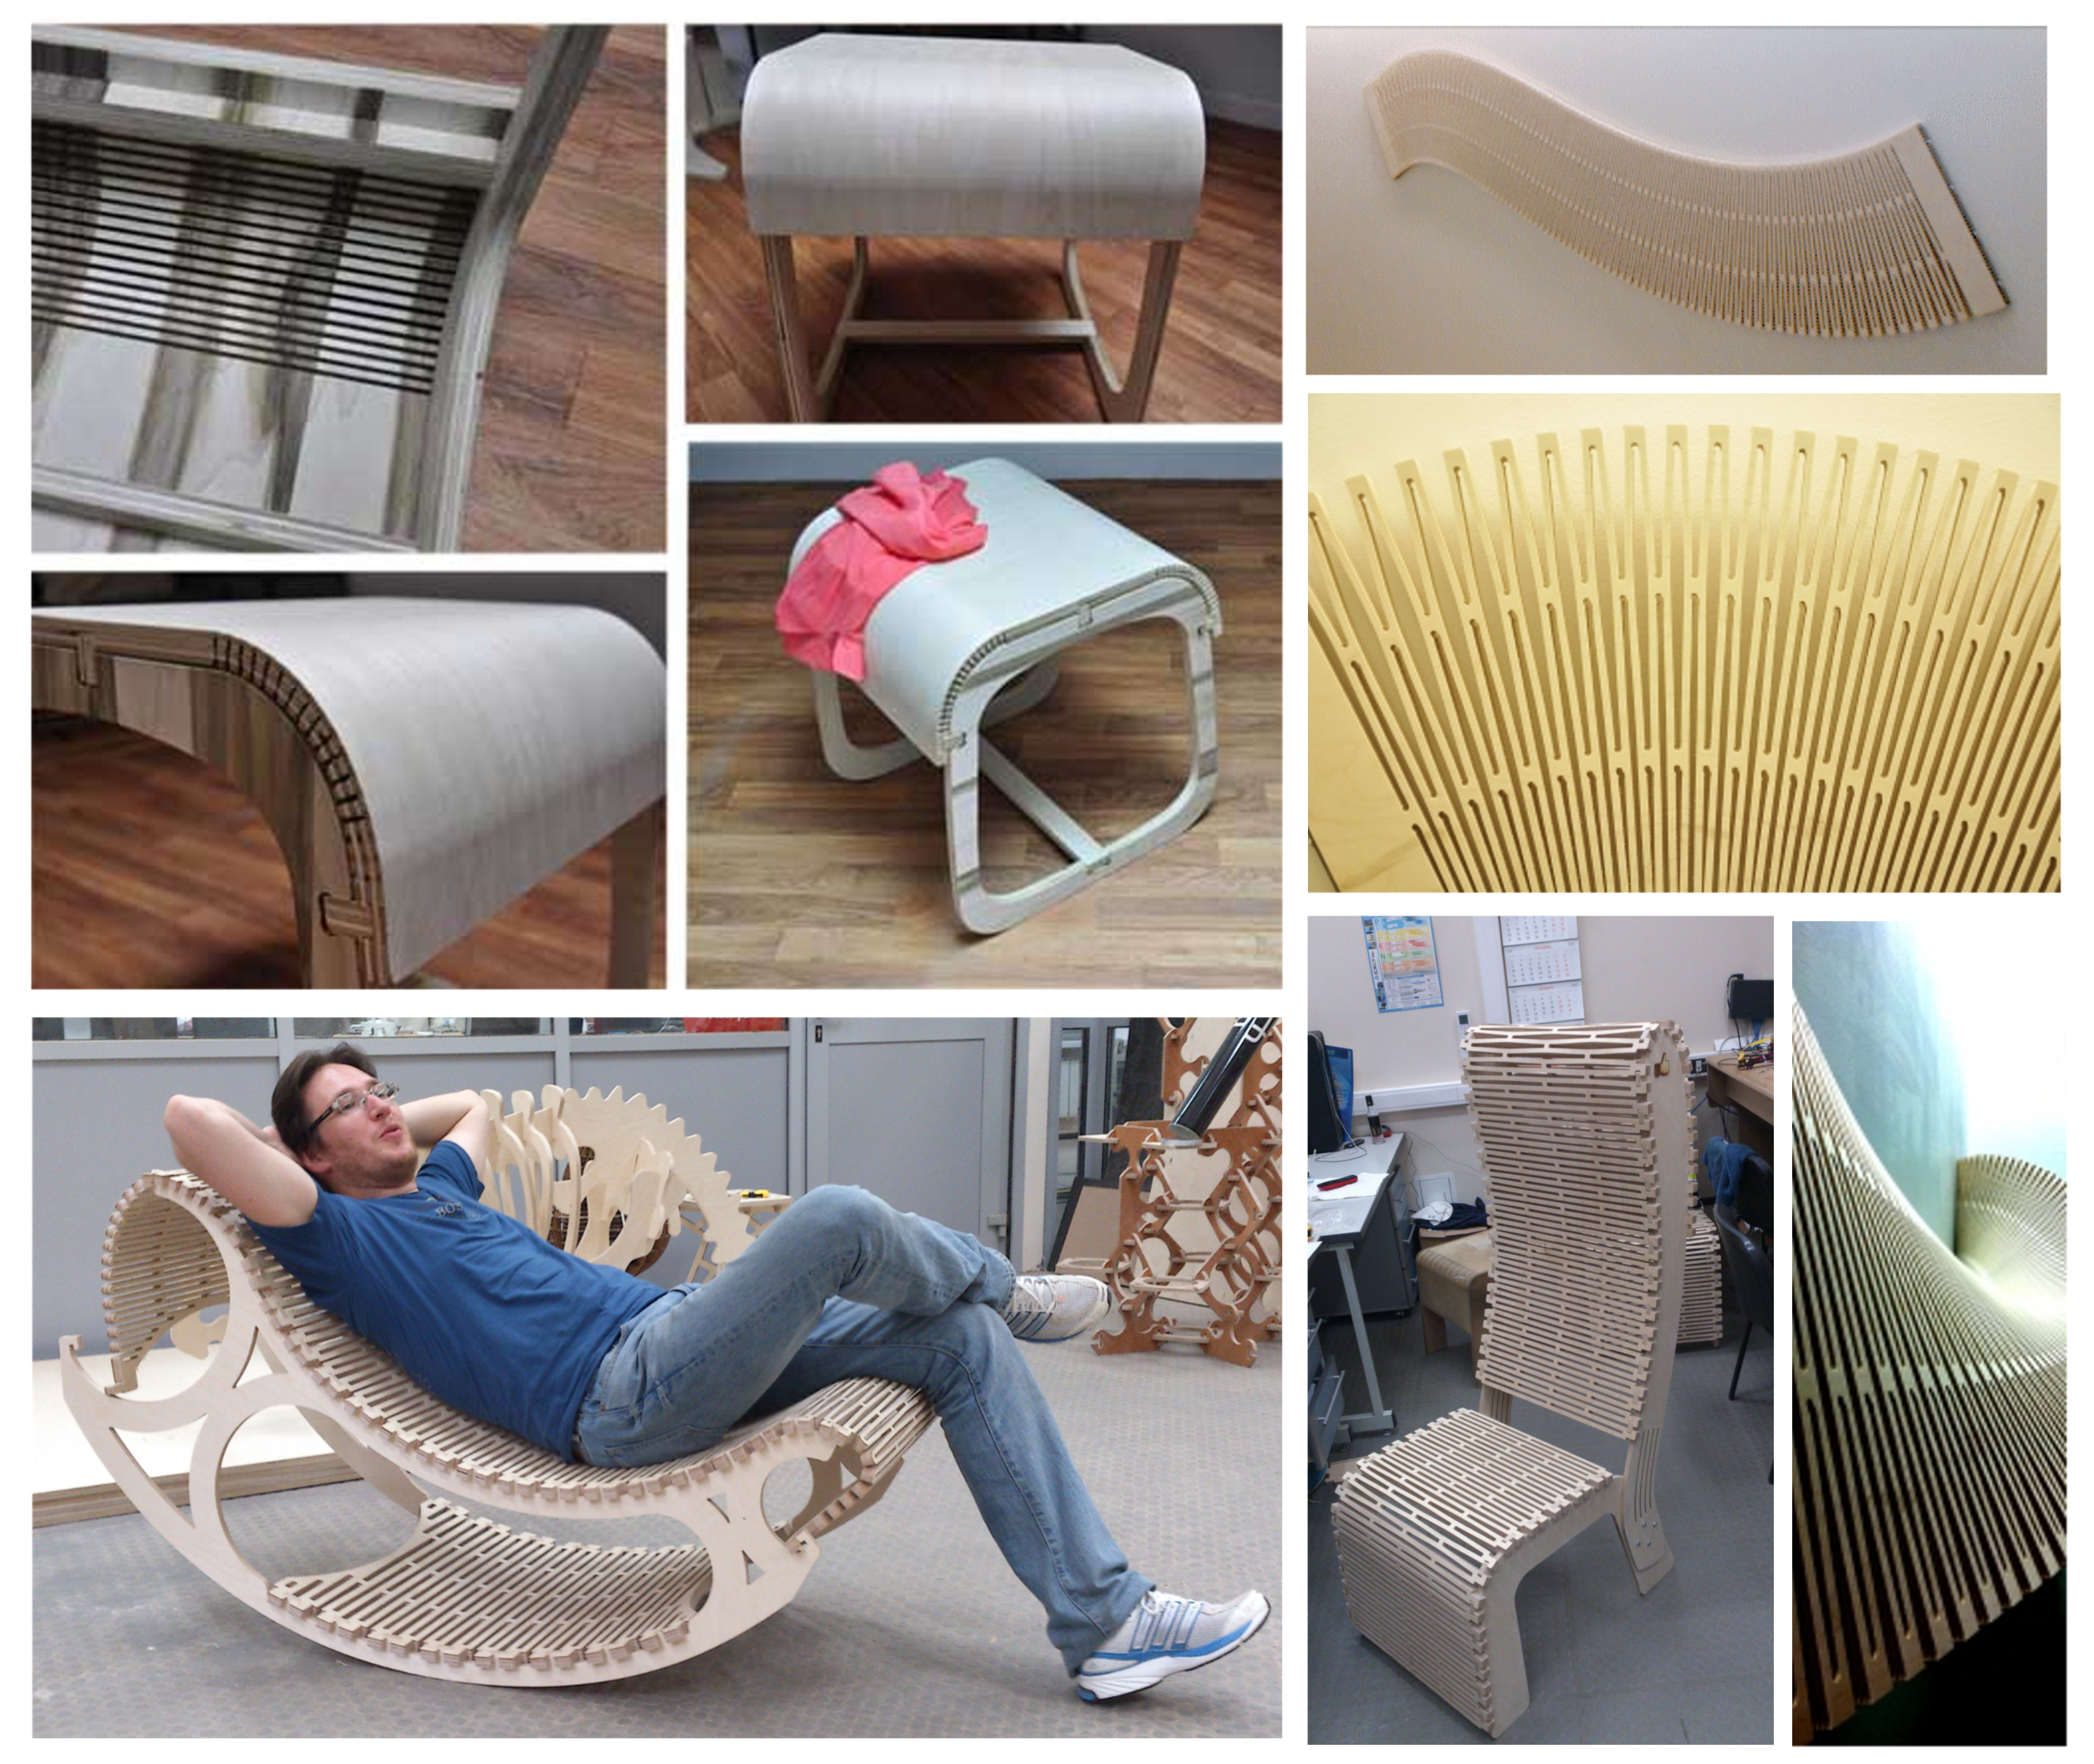
More than these fixed joints, some geometrical patterns allow the parts to fold, flex or bend.
With a fancier laser cutter it is even possible to make MEMS (micro electro mechanical systems).
Laser types
Laser stands for Light Amplification by Stimulated Emission of Radiation. There are many kinds of lasers:
CO2 (10.6 u) - The most common laser is the CO2 laser tube. A safety issue associated with these lasers is that their laser beam cannot be seen. CO2 lasers are usually used to cut wood, cardboard or plastics.
fiber (1-2 u) - Fiber laser are great to make electronics circuits.
There are other types of more specialized laser cutters. They are various types of shorter wave blink lasers :
- InGaAsP (1-2 u)
- AlGaAs (600-900 nm)
- Nd:YAG (1064, 532 nm)
- Ti:sapphire (650-1100 nm)
- excimer (100-300 nm)
Cutting Mechanisms
When cutting something with a laser, the material does not dissappear but it either burns, melts, evaporates or ablates. For thin material one pass is usually sufficient to cut parts. For harder material multiple passes might be required. In a laser cutter there is a nasel that supply an air flow and a bed that has an exhaust. All these parts are important be it for the cutting or the safety. On the one hand, when the laser beam produces a lot of combustion products, the nasel prevents them to go up and soil or damage the laser optic. On the other hand, the exhaust extracts these combustion products out of the machine. Then the smokes pass through a filter before being released in the room or outside. Therefore extraction prevents anybody to directly breath toxic smokes. It is also essential to avoid fire. If there is no filter, the smokes are directly released outside.
Materials
All the materials cannot be used in a laser cutter machine. Some materials are recommended, others are not recommended because of some restrictions and others are forbidden because they can damage the machine.
recommended materials - The following materials are recommended for laser cutting: paper, cardboard, wood, plywood, Acrylic (PMMA/Plexiglas), textile. With the acrylics the cuttings are clean but the smokes are toxic. When using paper or cardboard, it is worth to use one without acid. Most of the time the recycled ones contain acid.
Not recommended materials - The following materials are not recommended but can still be used for laser cutting: MDF, ABS, PS, PE, PET, PP, fiber-composite materials, metals. MDF is not recommended because of the thick smokes that are deleterious at long term. It is the same with ABS and PS that also easily melt. PE, PET, PP easily melt. Fiber-composite materias produces very toxic dust. Metals are difficult to cut, this depend on the machine power.
Forbidden materials - The following materials are forbidden for laser cutting: PVC (it produces highly toxic acid smokes that might damage the laser), copper (it totally reflects the laser beam and might damage the laser), Teflon (acid smokes), Vinyl, leatherette (may contain chlorine), phenolic resin and epoxy (highly toxic smokes). If the material that must be cut is not identified a flame test might be required. If the material produces colored smokes when it burns, that's a sign that it has halogenes and it should not go in a laser cutter. Nevertheless a good rule to apply on laser cutting is to never put an unidentified material in a laser cutter.
Laser settings
Kerf - The laser has a spot size. The distance between the part that is cut and the residual material is named the kerf.
Focus - The beam waist (or beam focus) of a laser beam is the location along the propagation direction where the beam radius has a minimum.
Power, Speed and Rate - The laser is also characterized by its power, its speed and its rate. If the rate is high the pulses overlap and the laser draws a continuous line. If the rate is slow the pulses are separated. For materials that want to melt back slowing the rate down spreads out where the energy is dumped in.
FAB ACADEMY 2020 source
20200212 Computer Cutting from Academany on Vimeo.
My Assignment
This week there were to types of assignments: one group assignment and an individual assignment.
For the group assignment we had to :
- check the focus - What happens when you cut out of focus and in focus? Both recognize when focus is wrong to understand when it is worth to defocus.
- check the power - Start with cardboard and do a series where you go from too little to too much power.
- check the speed - Vary the cut speed and make a chart that go from low to fast.
- check the rate - Play with the rate (slow down and speed up the rate) and make a chart for different materials.
- measure the kerf - Compute the difference of measurements between a designed part and the cut part.
In the following section we will focus on the individual assignment.
Softwares
Machines
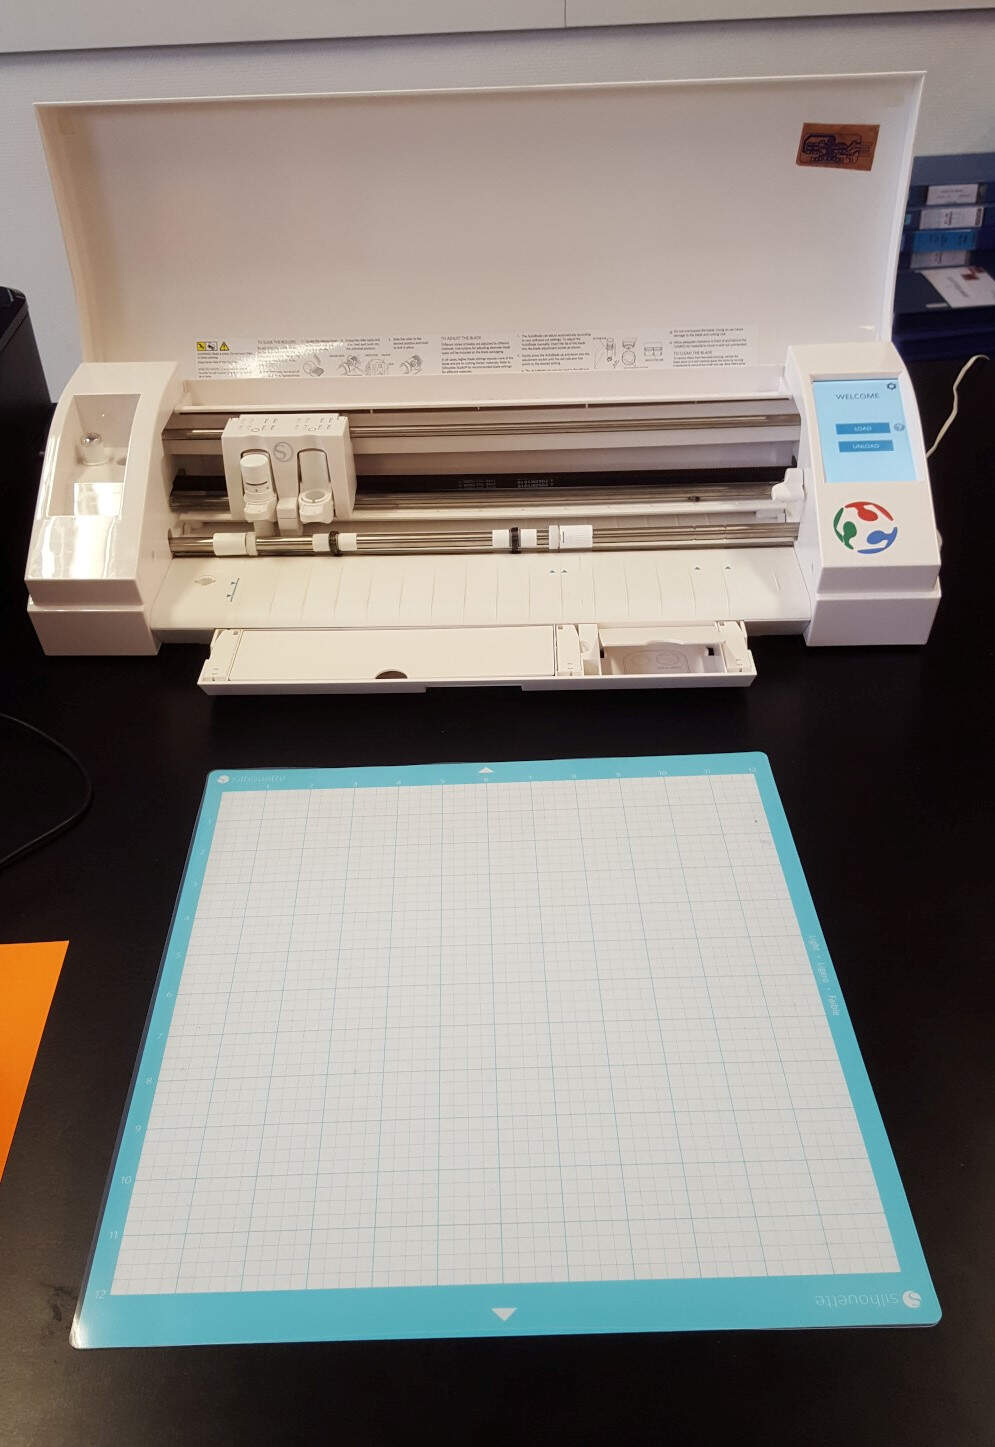
The Vinyl Cutter - Silhouette
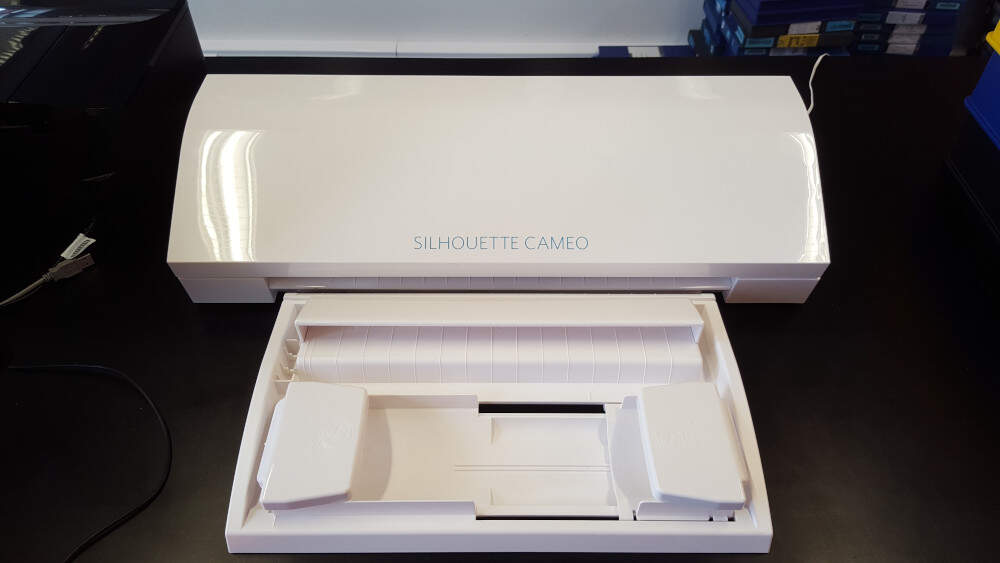
From the past experiences, it is recommended to started with a force between 15 and 20, a speed around 5. To set the thickness parameter it is worth to measured it with a calliper. The format of the file edited for cutting is DXF.
The Laser Cutter - Lasersaur

The Lasersaur is a laser cutter whose software and hardware are open source.
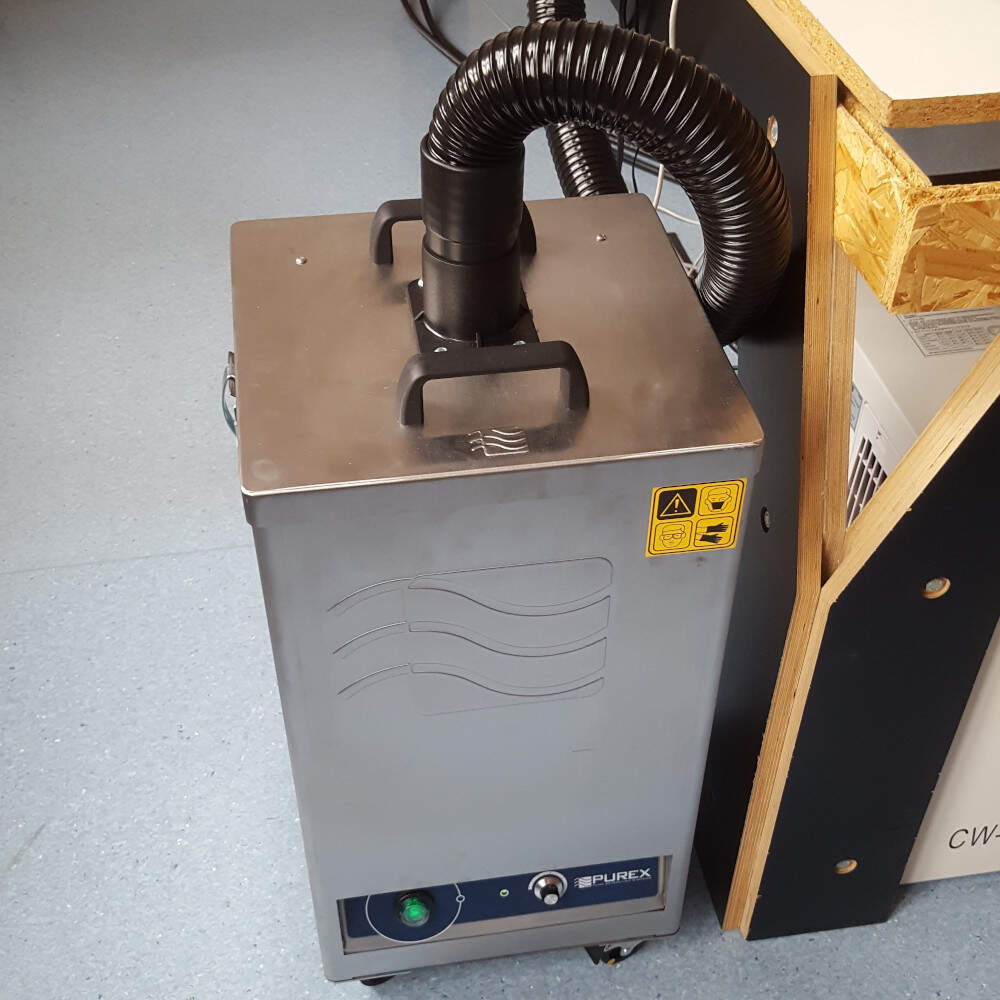
Filter of the lasersaur.
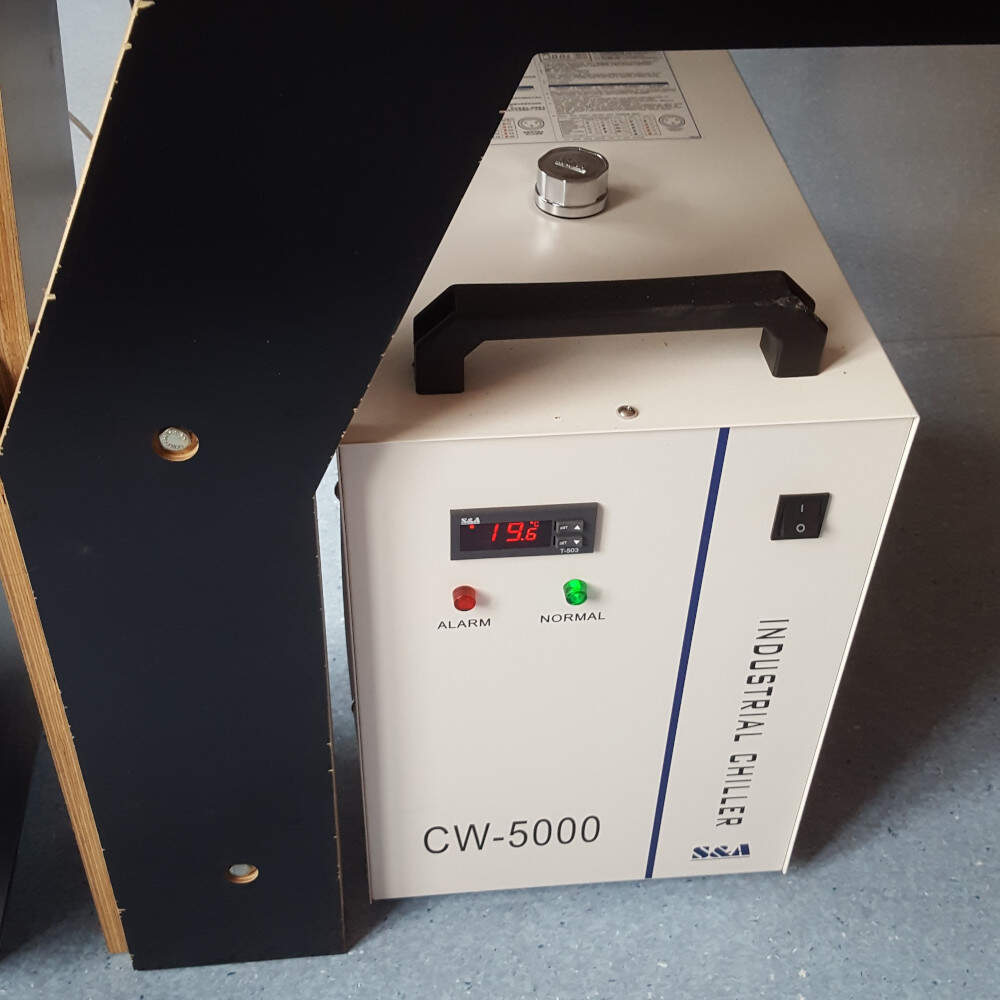
Chiller of the lasersaur.
Specifications:
- Cutting area: 122 x 61 cm
- Max speed: 6000 mm/min
- recommended speed: 1000 to 2000 mm/min
- Power: 100W
- Infrared laser beam
- Format: SVG
- Focus: Manual - If the material is too thick it can be usefull to work out of focus such that the focus is made at the middle of the material. Usually the focus is made on the upper layer of the material (laser lens at 15 mm far from the upper surface of the material).
Connection to the machine:
Cautions to take before cutting:
- Be 100% sure of the material composition.
- Always open the compressed air valve.
- Always switch on the smoke extractor.
- Always switch on the chiller. The chiller is a machine for cooling the laser.
- Be sure to know where is the emergency button. It is the same button than the one to turn the machine on.
- Be sure to know where is the CO2 extinguisher. Preferably a CO2 extinguisher to avoid to fill the laser with foam.
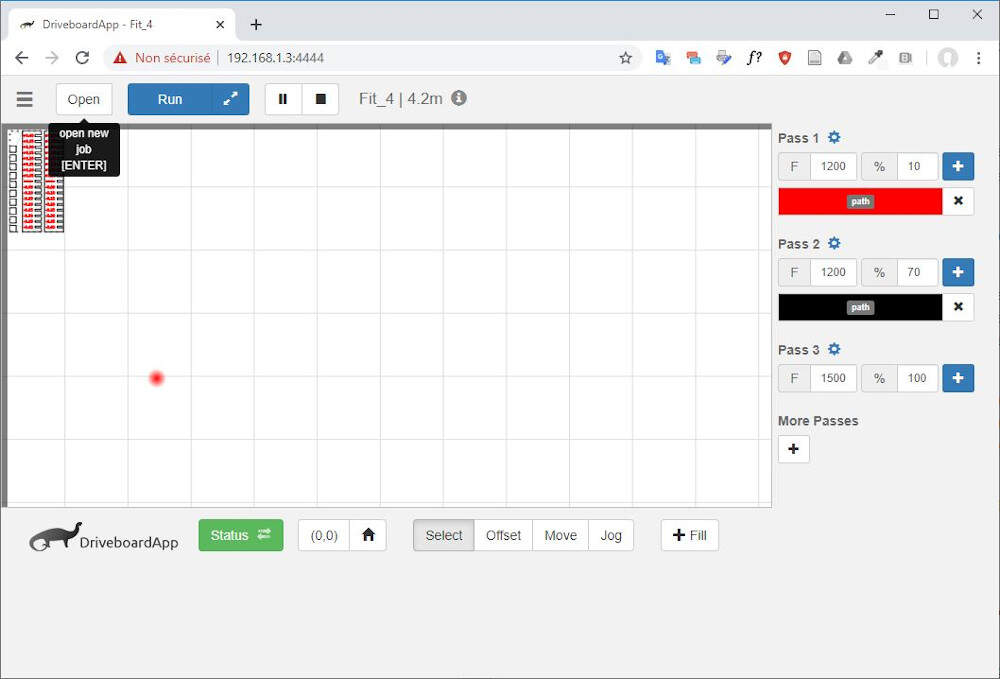
The interface
The interface of the Lasersaur displays the cutting area in its center. Different functionalities are associated to several buttons:
- Status - This button allows to see the machine status: Is the door is closed or open? Does the laser reach a limit switch?
- Home - Use this button if the machine is lost or if there is an error because the laser reached a limit.
- Open - Use this button to load a file for cutting.
- Run - Use this button perform the cutting with the laser.
- The arrows - The arrows next to the run button are used to move the laser without cutting around the borders of the loaded drawing.
- Select - This button is the selection mode.
- Offset - This button is used to move the drawing on the right place in the cutting area.
- Move - This button is used to move the laser with the mouse.
- Jog - This button is used to move the laser with the keyboard arrows.
- Path - By assigning the drawing colors to different settling configurations, DriveboardApp enables multiple tunings of power and speed. In the picture below, lines in red will be engraved (laser power on 10%) and lines in black (laser power on 70%) will be cut. It is recommended to first perform passes for engraving then the ones for cutting when tuning the passes.
Work flow
The work flow is the same for both types of cutter. First prepare the file, import it in the user-machine interface, set the parameters then cut the parts.
On the Vinyl Cutter - Silhouette
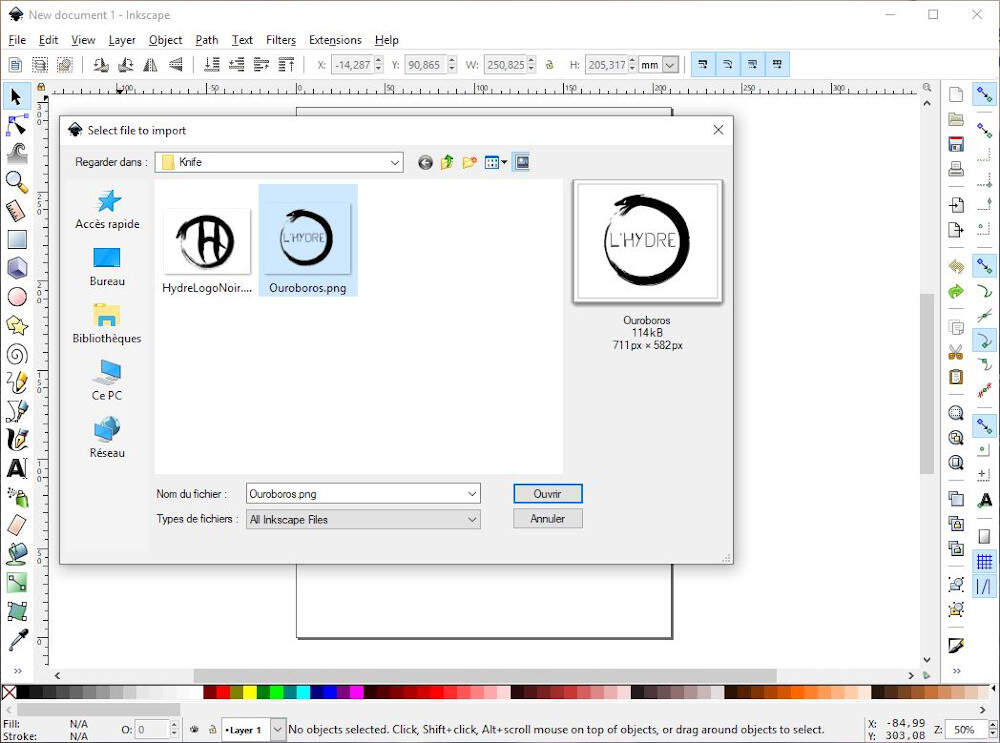
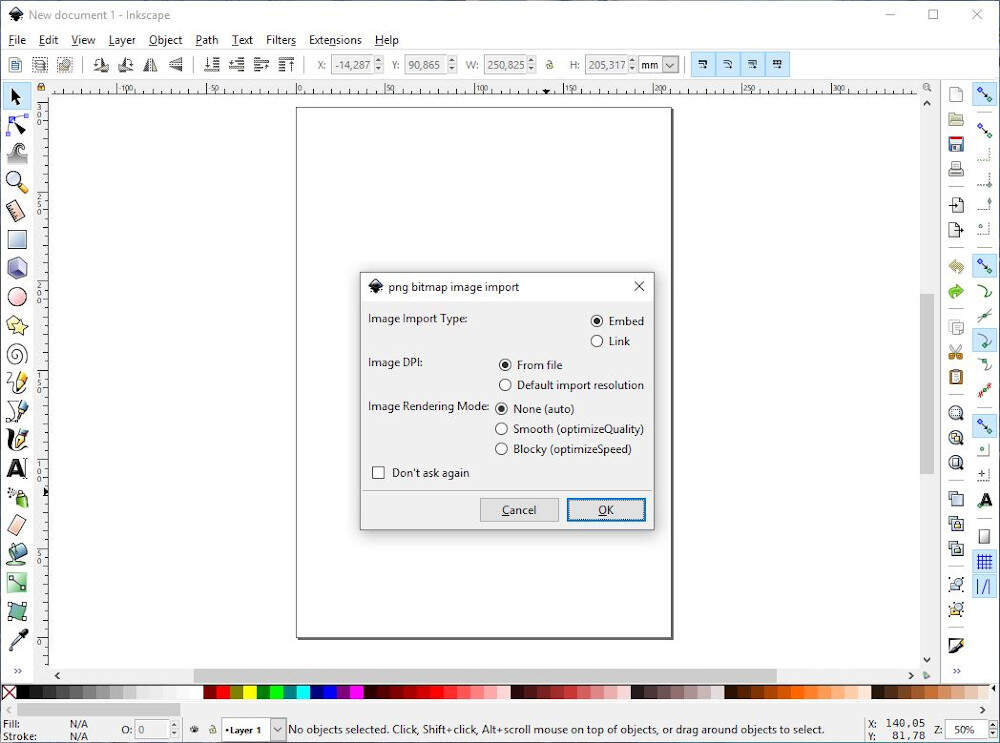
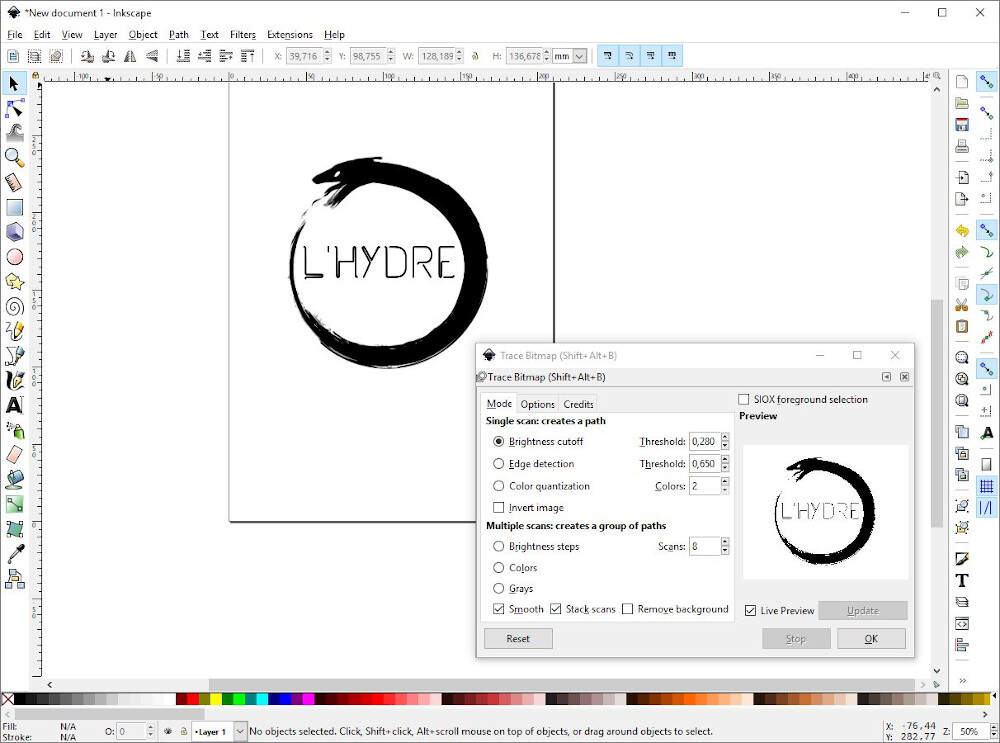
To prepare my file for cutting and because a DXF file is required I first imported my logo picture in Inkscape by clicking "File -> Import". I selected the .PNG file and used the default settings to import it.
As the knife cutter needs paths to follow the bitmap image must be transform into a vector image. To vectorize the picture, I selected the picture then clicked on "Path" in the navigation bar : "Path -> Trace Bitmap". In the pop-up window I ticked the checkbox "Live Preview" to see the changes when I modify the threshold of the Brithness cutoff. If installing a font, make sure you installed it for all users. Right click on the .ttf file and choose "Install for all users". Otherwise the font will not appear in Inkscape. To align object with Inkscape go to "Object" in the navigation bar and select "ALign and Distribute". Finally I converted all the objects to path ("Path -> Object to Path") and I saved the file with the .DXF extension.
I used a mat as a substrate for the black vinyl.
On Silhouette Studio I imported my DXF file by clicking "File -> Open". In the page setup I select the cutting mat I used to paste the black vinyl.

In the "SEND" tab in the up right corner, I selected the action "CUT", the force (10) and the speed (4). And after measuring the vinyl thickness (0.03mm), I set the knife depth to 1 tenth of mm. I ran a first test on the corner of the vinyl by clicking "TEST" in Silhouette. As the test was conclusive I proceeded to the cutting by clicking on "SEND".

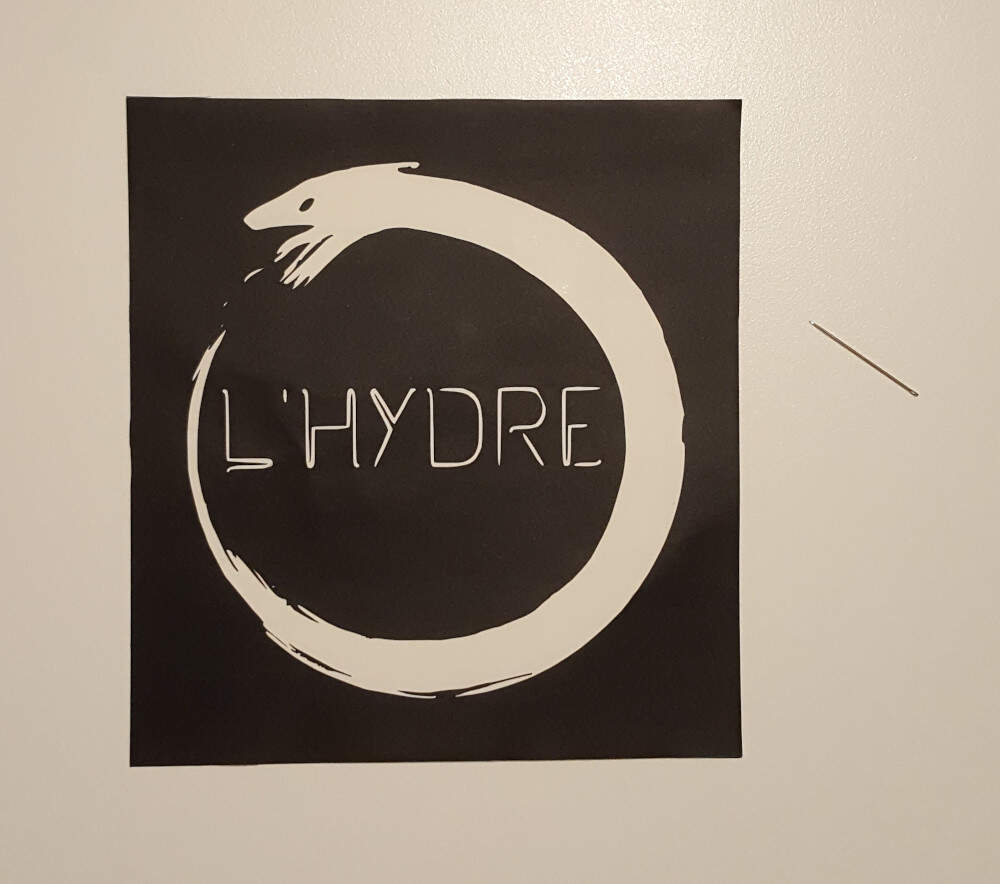
After the cutting I weeded the useless part with the help of a needle. Hereinafter is the final result, the logo of my theater compagny: La Compagnie de L'hydre.
On the Laser Cutter - Lasersaur
First I designed several kinds of joints that were mentionned earlier. To do that I use solidworks and its parametric capabilities to take into account the joint clearance, the kerf of the laser and the tickness of the material while designing the parts.
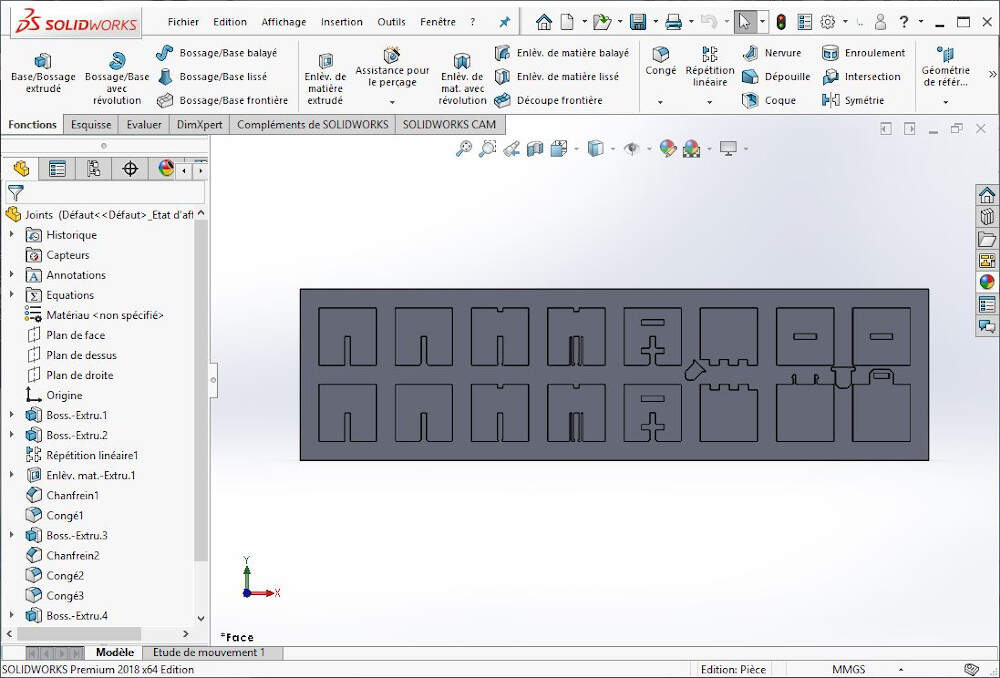
In SolidWorks parametric design can be easily done by configuring a set of variables that will be used later in the drawing. To do that click on "Equations" in the part hierarchy and select "Manage the equations".

The file format required to laser-cut a part is SVG. Therefore I created a new solidworks drawing file by using the "making drawing from part" functionality. Once this new file created it is possible to save it with the DXF extension.

By importing the DXF into Inkscape I was able to convert it to SVG but first I checked the objects, converted them to Path or changed their color if required.
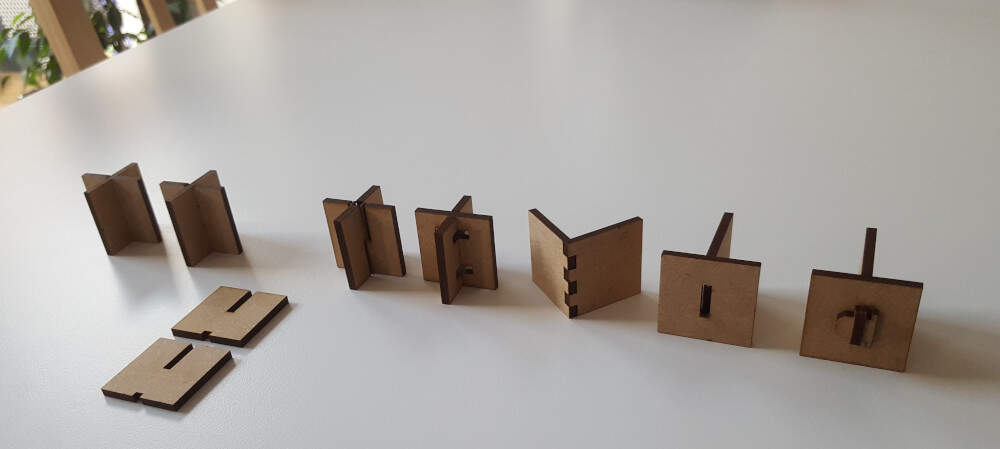
Finally, after configuring the passes in DriveboardApp, the cutting was done and I could test these different joints. It can be seen on the picture bellow that a MDF snap fit joint is not flexible enough to let the parts fit together. The wedge joint is the strongest joint with the pinned joint while the snap joint is in this case the most fragile. The flexure joint let the parts fit together but this joint is not totally constrained.
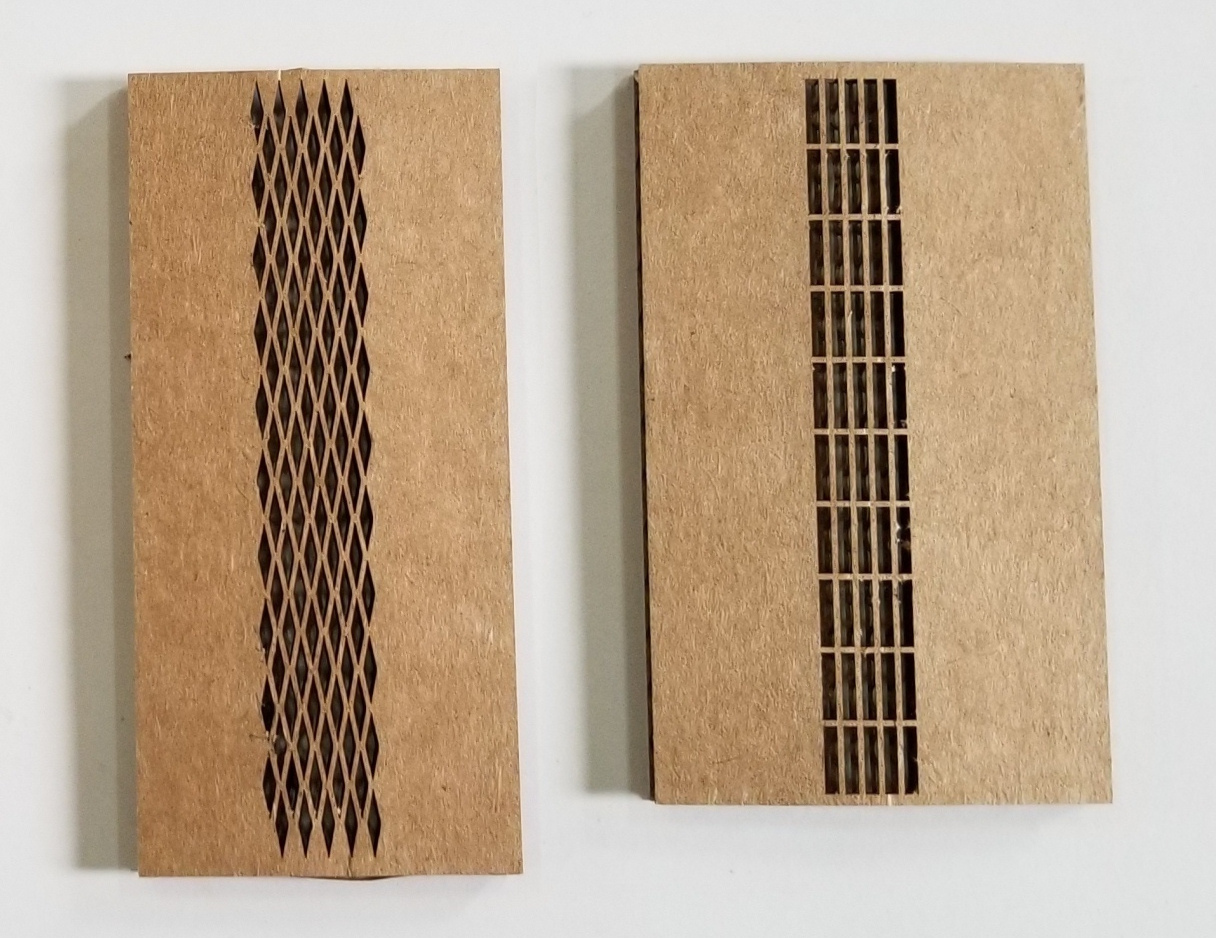
Before starting the kit I wanted to test bending patterns. I therefore made a test with three different patterns. The procedure to design the parts and prepare the file for cutting is the same then previously and will not be explained again for the sake of simplicity.
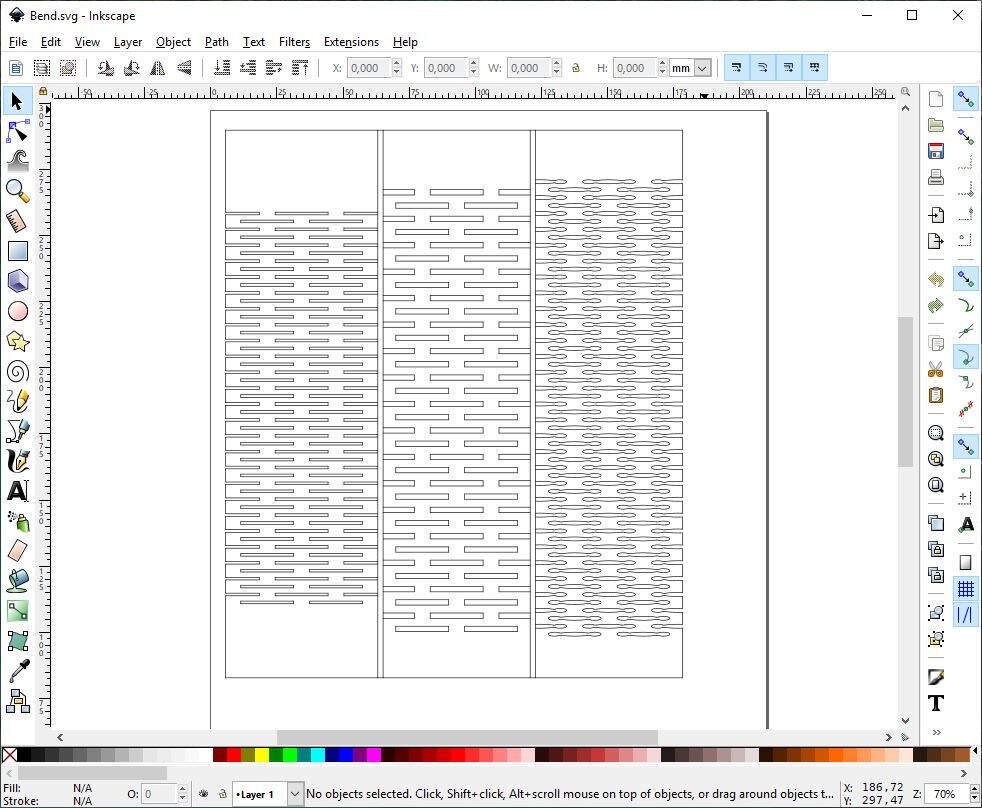
By playing with the bending parts I concluded that the third pattern (on the right) what the most flexible while the second pattern (on the middle) was the less flexible one.

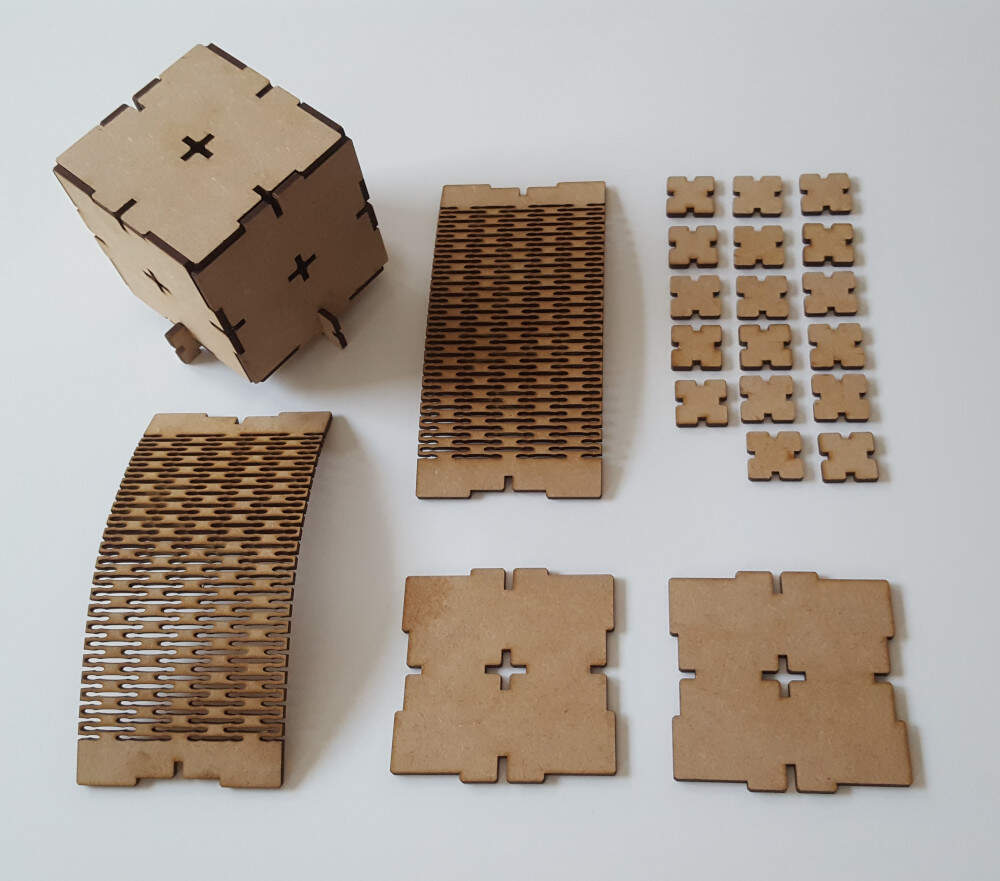
For my building kit I decided to keep the most flexible pattern for designing the bending parts. I also wanted to build boxes with only one face drawing. Therefore I designed the parts and test the assembly within SolidWorks and used Inkscape to prepare the file for laser cutting.
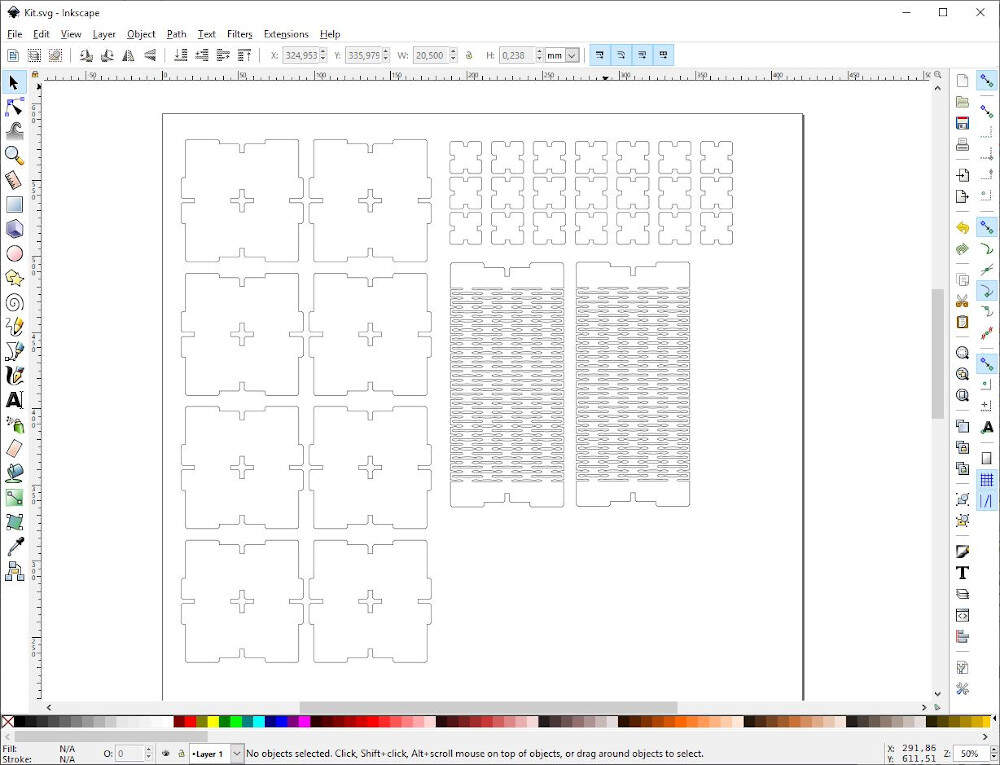
Here are the several parts of the kit cut out of MDF. This picture is followed by two assembly examples.


I also wanted to test the engraving of a picture by using the same logo than the one used for the knife cutting.
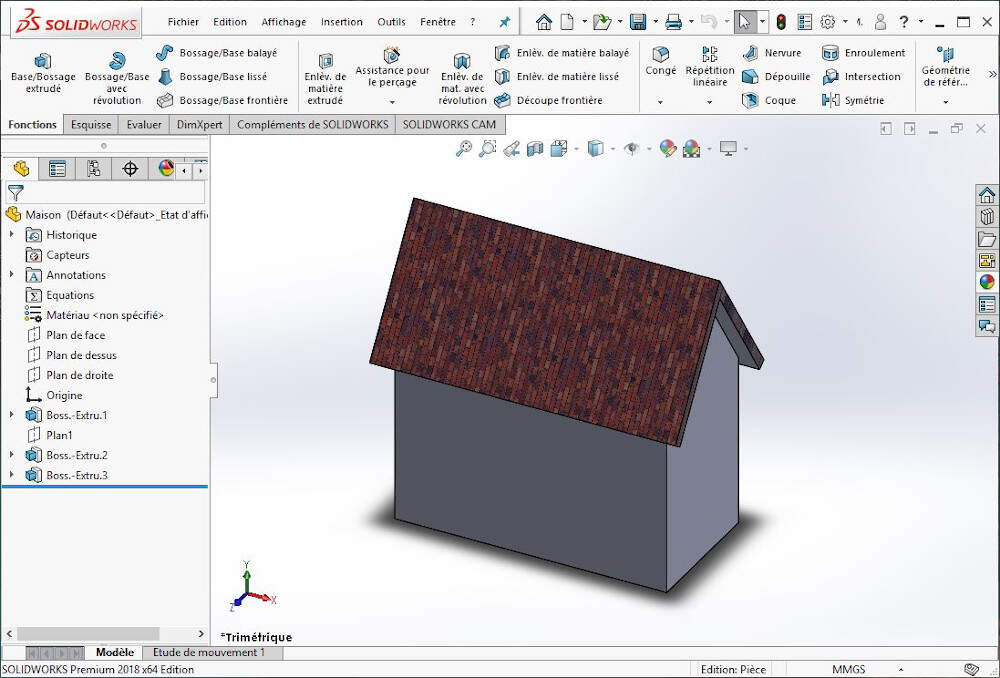
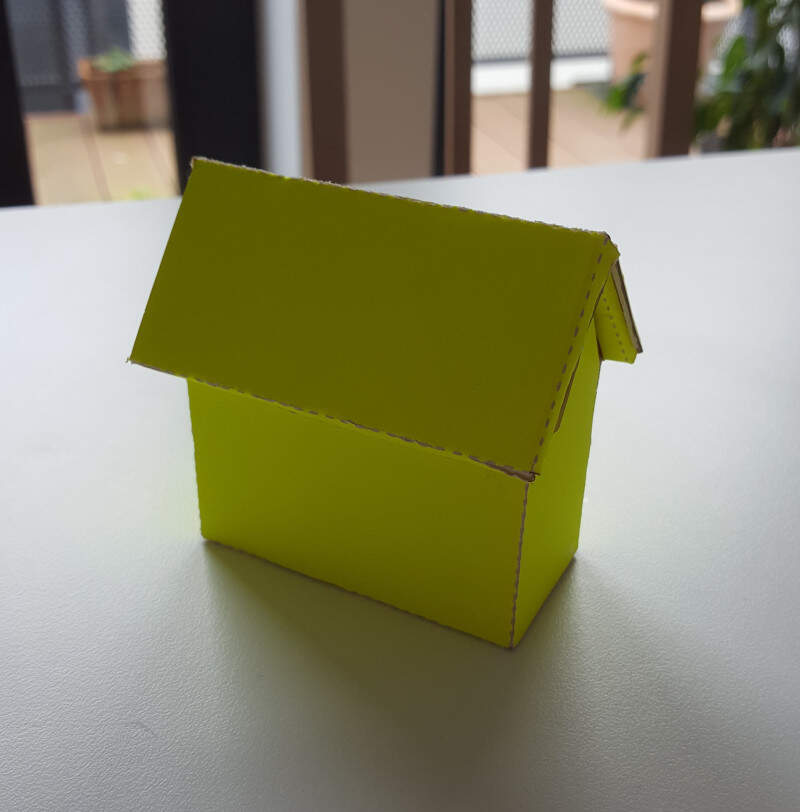
I also tested PePaKuRa. For that purpose I drew a simple 3D house within SolidWorks. I saved the file with an STL extension and I imported it in PePaKura by selecting "File -> Open".
Then I unfolded the 3D object by clicking on "Unfold". As I was using a free version of PePaKuRa I was not able to save my work in progress nor export the files as a Bitmap or a vector image. With the free version it is only possible to print the unfolded object.
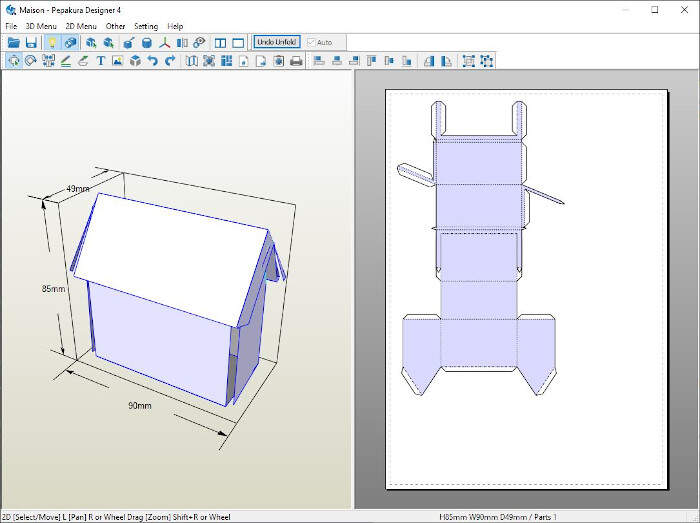
Note that if you are not satisfied with the disposition of the parts on the page, it is possible to change it by selecting "2D Menu -> Change Scale -> Scale Up 10% or Scale Down 10%". It is also possible to translate or rotate the pictures in the preview area (right side of the screen). If the scaling is not an option the paper size can be changed in "Setting -> Print and Paper Settings". I chose A4.
As the free version of PePaKuRa does not allow to export the unfolded object as a vector image e.g. a SVG format, there is a little bit more work to do for preparing the file for laser-cutting. First I used CutePDF to print the unfolded object as a PDF but before one must be sure that the checkbox "Print lines clearly (vector print)" is ticked in the "Print and Paper Settings". Once the PDF was generated I imported it in Inkscape and I edited the drawing in order to set different colors for the cutting lines (blue) and for the folding lines (red). After I followed the same procedure than described earlier to cut and engrave the cardboard with DriveboardApp, making use of the group assignment to know which power and speed to set for the different colors.
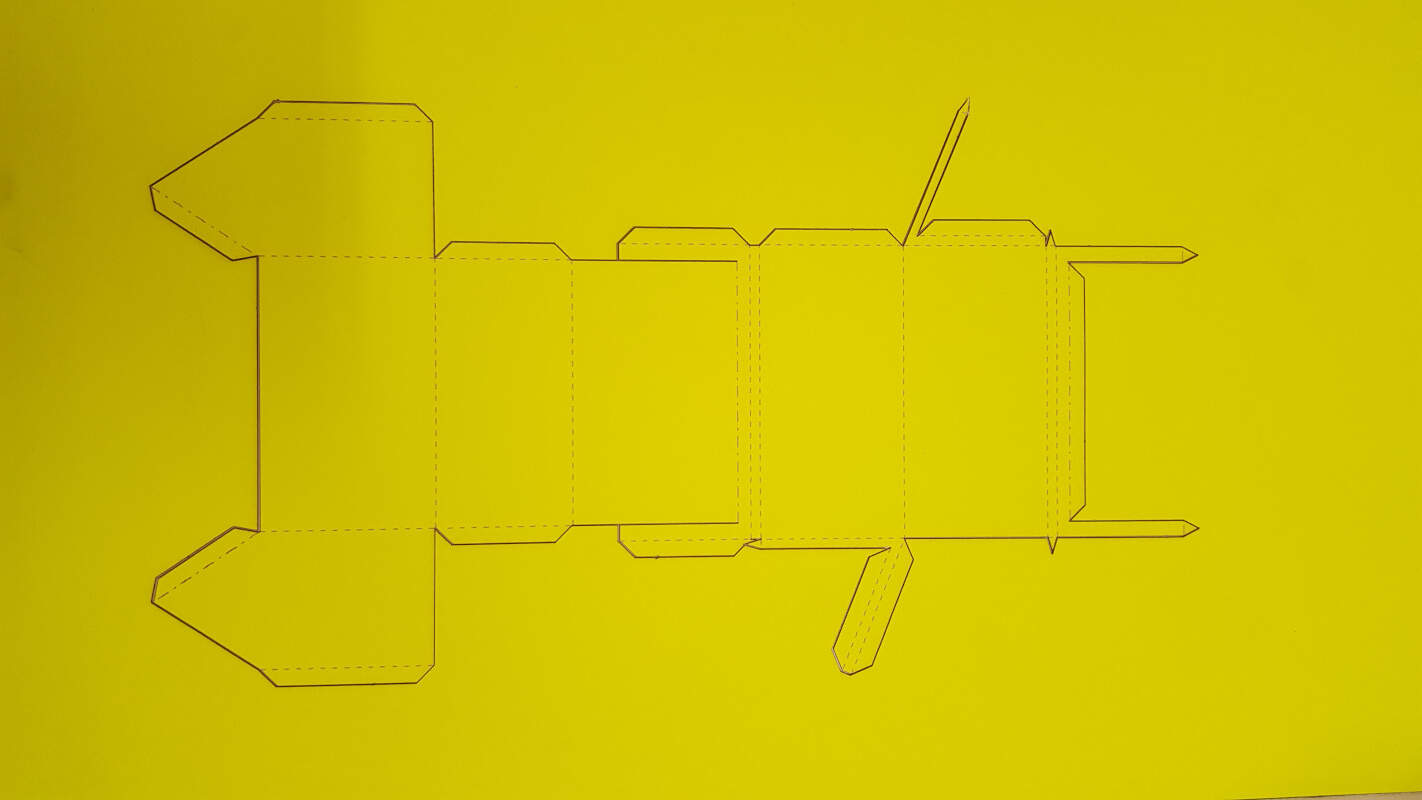
Finally I folded and pasted the edges of that lovely yellow house.
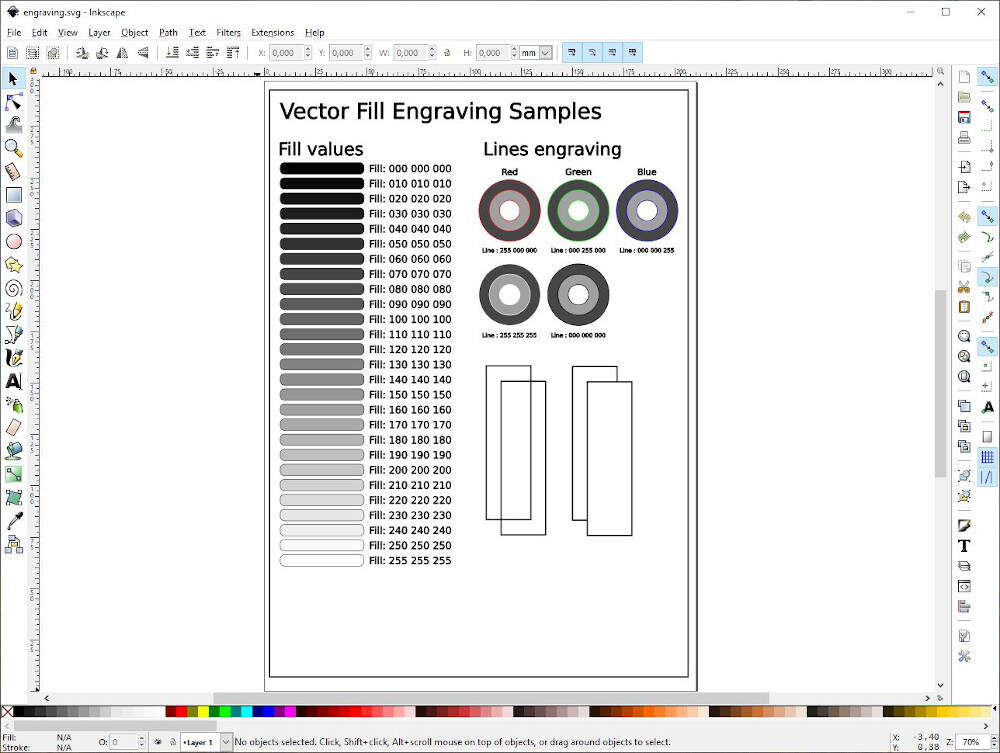
At the end I drew a sample sheet for engraving. As the shapes where designed with Inkscape they are vector shapes. If you fill vector shapes with a color, the laser cutter will completely ignore that filling color and the engraving will not be performed. To solve that issue fill the vector shapes with the desired color, select them and click on "Edit -> Make a Bitmap Copy". It will create a Bitmat Copy above the vector shape.
For the future
- How to play with the rate?
- Let's use Kirimoto.
References for the assignment
- Material Cutting Settings for the Lasersaur
- Vector And Raster Engraving Example Board
- 10 Tips and Tricks for Laser Engraving and Cutting
- Laser Cut Pepakura Files
Files