Week11. Output Devices
This week, I did several prototypes for my final project.
1. RGB LED
First, I played with analogWrite() function.
According to the documentation, Arduino UNO has 6 PWM pins. I connect R/G/B with pin 9/10/11.
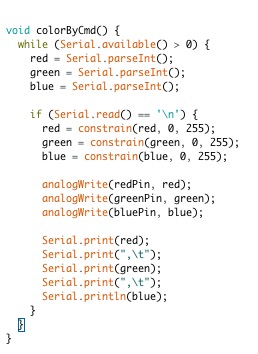
The following code use serial monitor to change the color :
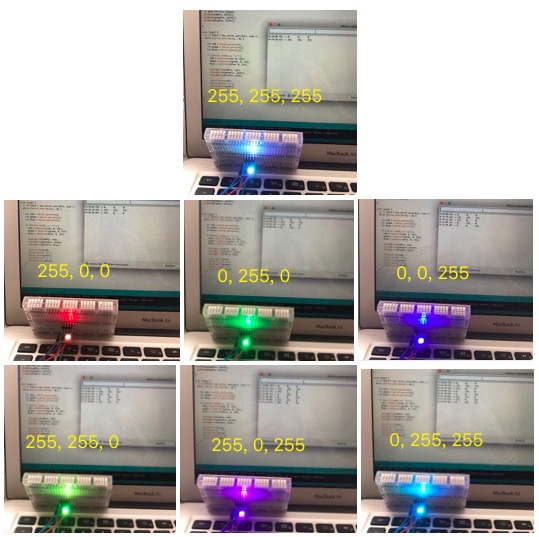
The result:
To understand PWM better, then I didn’t use analogWrite() but to implement the pwmColor by myself.
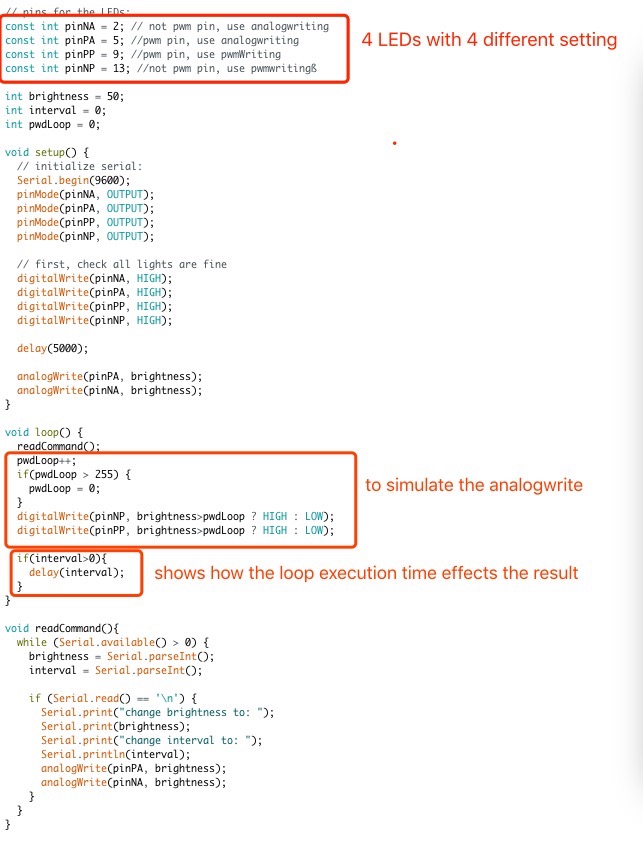
The result is interesting (interval=0 below):
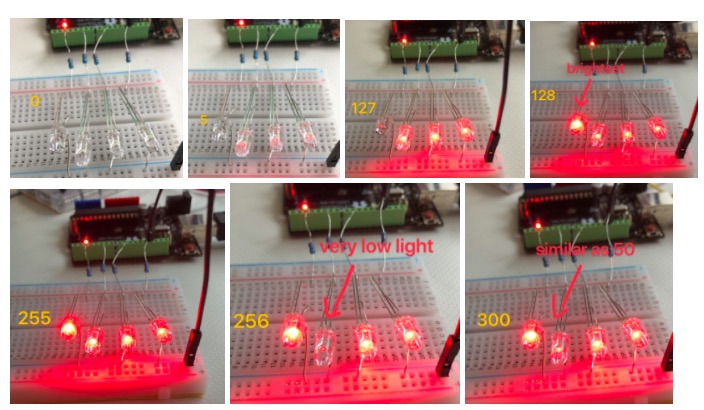
We can see that use analogWriting with non-pwm pin, the LED only on when brightness>127 (255/2), and it only has two status of totally dark or fully bright. Use analogwriting with pwm pin, the brightness 300 seems similar to 25 (300-255), so we can guess analogWriting is using mod implement the feature.
My own pwmWrite code seems the same as analogWriting when interval=0, but it is different if the loop execute time became longer. This explains why we need pwm pin.
2. CharliePlexing
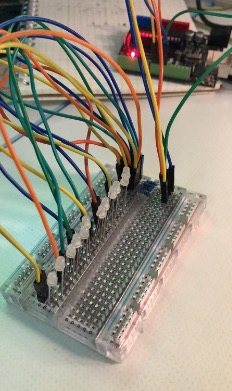
The next thing I did, was following this tutorial to create a circuit with 12 LEDs using CharliePlexing technique.
The lights didn’t turned on at first. I spent quite a long time to check the circuit, and finally I found the it was because of the LED.
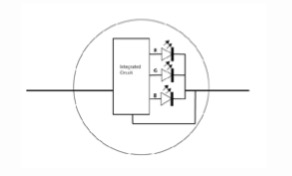
The LED can show different colors automatically, but only has two pins. This is because it has an integrated circuit to control the lights. I’ve no idea why it does not work in CharliePlexing yet.
Then I changed to single color LEDs and it almost worked except for two lights.
Again a lot of time on troubleshooting, and finally figured out it was because of a broken wire. Changed a new wire and worked then.
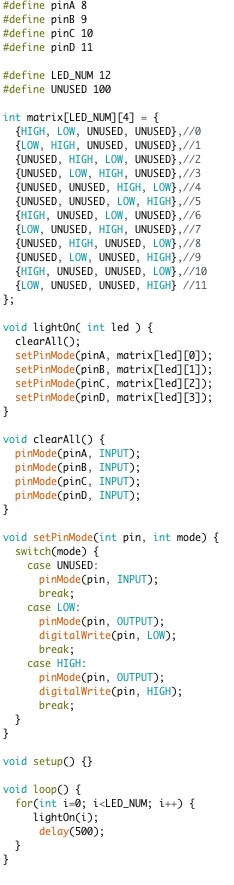
The code is as below:
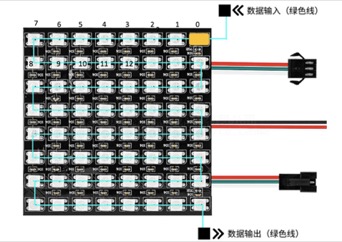
3. NeoPixel
Evan with CharliePlexing, it still requires lots of pins if I want to have some nice RGB effects. So I tried NeoPixel. [This video] explains NeoPixel in super detail.
The connection is easy, GND/VCC and any digital output pin. I use the Adafruit_NeoPixel library.
The components I have, is a 8*8 matrix, and the LEDs were arranged as below:
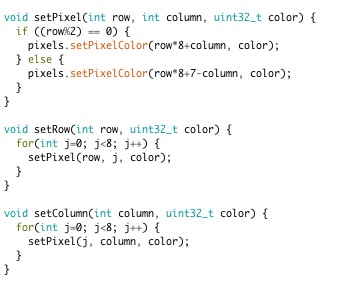
I wrote functions below to make it easy to use:
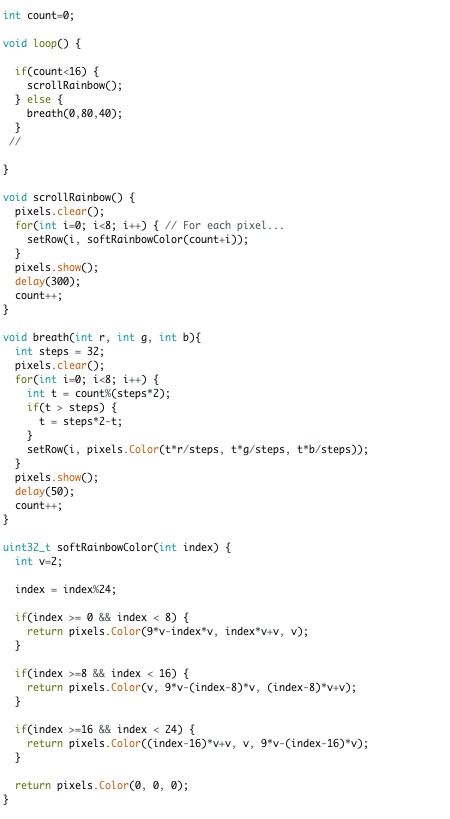
In my final project, I will use paper to soften the light. I don’t have the special paper now, so I use plastic cover from my notebook and it was nice.
The following code made the scrolling rainbow and breath effects.
4. SSD1306 OLED with DS1302 timer
I followed [this tutorial] to play with SSD1306 OLED. I connected the components as below:
SSD1306 –> UNO
Vcc –> 5V
GND –> GND
SCL –> A5
SDA –> A4
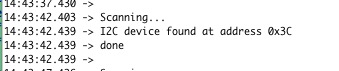
Then I installed the Adafruit SSD1306 library. However, the example did not work. The screen was always off. It was because the I2C address was not 0x3D. Use this program to scan the address, and found it was 0x3C.
I wanted to use OLED as a timer. I cannot relay on delay(1000) in Arduino’s loop function for 1 second, and all executions takes time. Thus, I found an DS1302 chip and a 32768 crystal, and connected the circuit as below:
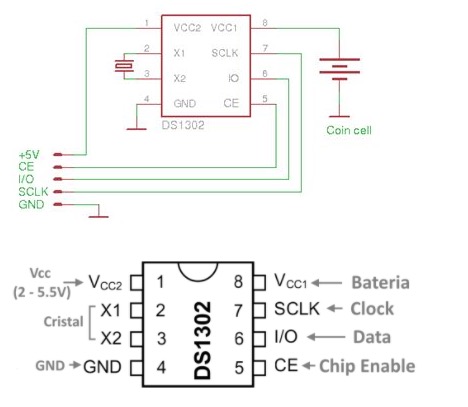
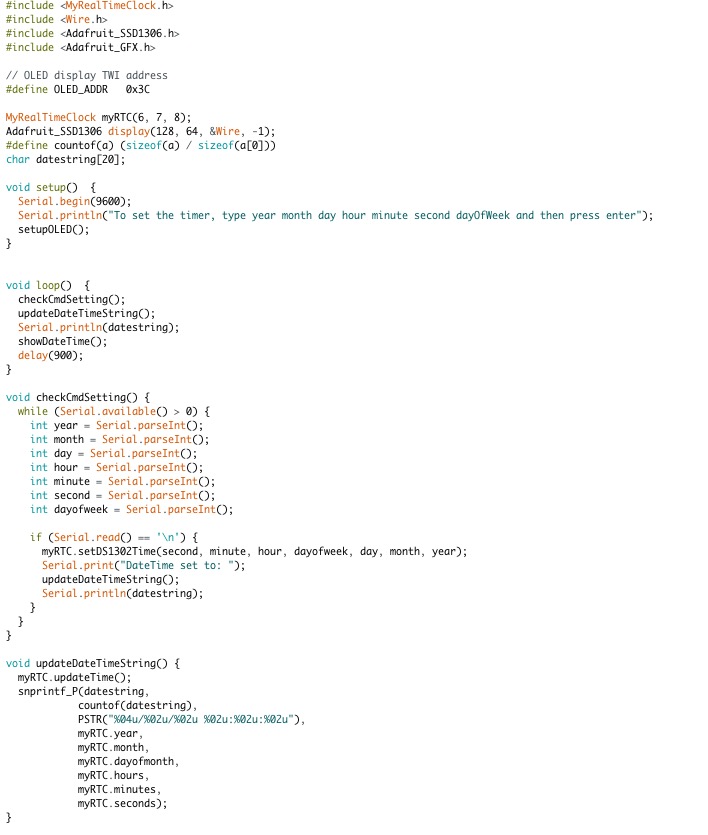
I downloaded the RTC library from this tutorial. My code is as below:
The code for OLED is as below:
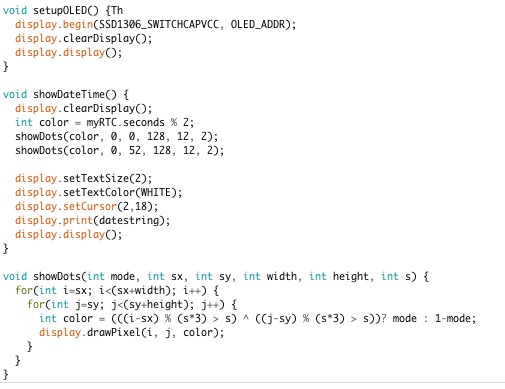
Together, they became a clock.
5. The speaker and the DFPlayer
I need an MP3 player in my final project. After doing a bit search, I chose DFPlayer. I followed this toturial.
The connection is as below:
DFPlayer –> Arduino UNO
VCC –> 5V
GND –> GND
RX –> Pin10 (with 1k resistor)
TX –> Pin11 (with 1k resistor)
The SPK1 & SPK2 pins connected to the speaker.
I installed the DFPlayer_Mini_Mp3 library. Modified the built-in example, to use the Rptary to control the volumn. The code is as below:
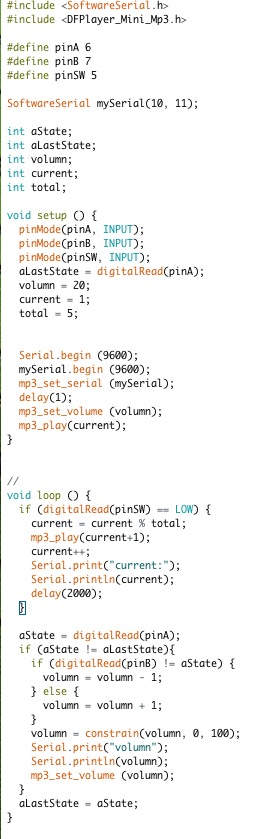
Turn clockwise –> volumn up; turn anti-clockwise –> volumn down; click –> next track.
Althouth DFPlayer’s introduction says it supports both mp3 and wav, I found most wav files cannot be played correctly. I found the sound files from FreeSound. It has a filter for file format, which is very convenient.
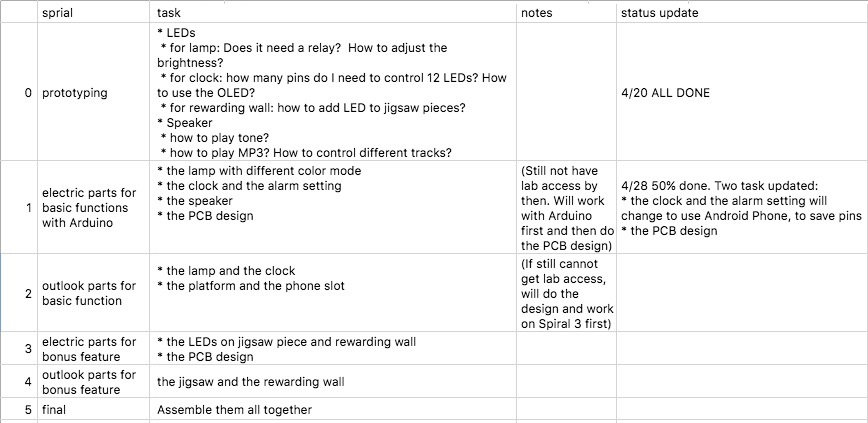
Schedule Updated for final project: