Molding & Casting
ASSIGNMENT
Individual Assignemnt
Design a 3D mold around the stock and tooling that you’ll be using, machine it, and use it to cast parts.
Group assignment
Review the safety data sheets for each of your molding and casting materials, then make and compare test casts with each of them.
Individual Assignement
WORK FLOW
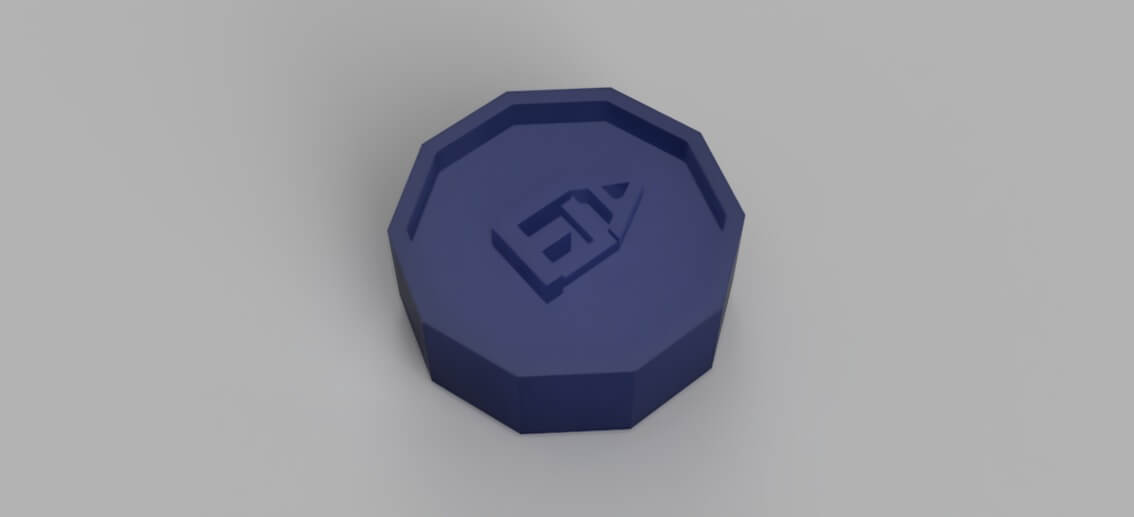
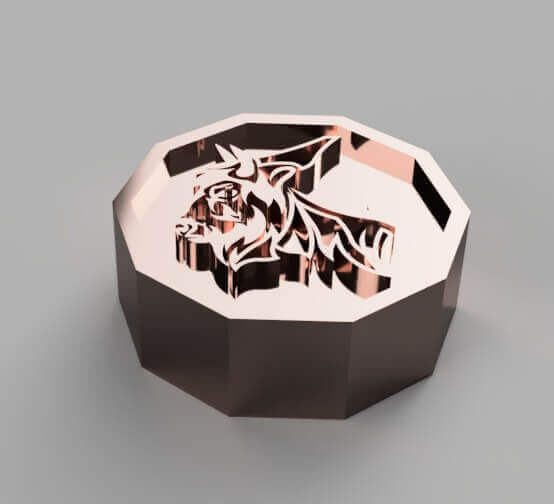
The first operation, after the descriptive sketches of the idea to be developed, was the realization with Fusion 360 of the project: a medallion with a face in which is represented the upper part of a bison (symbol of my person and personality) and a face with the FLA logo (F for Fab, L for Lab, A for Academy) with the letters rotated to give more prominence.

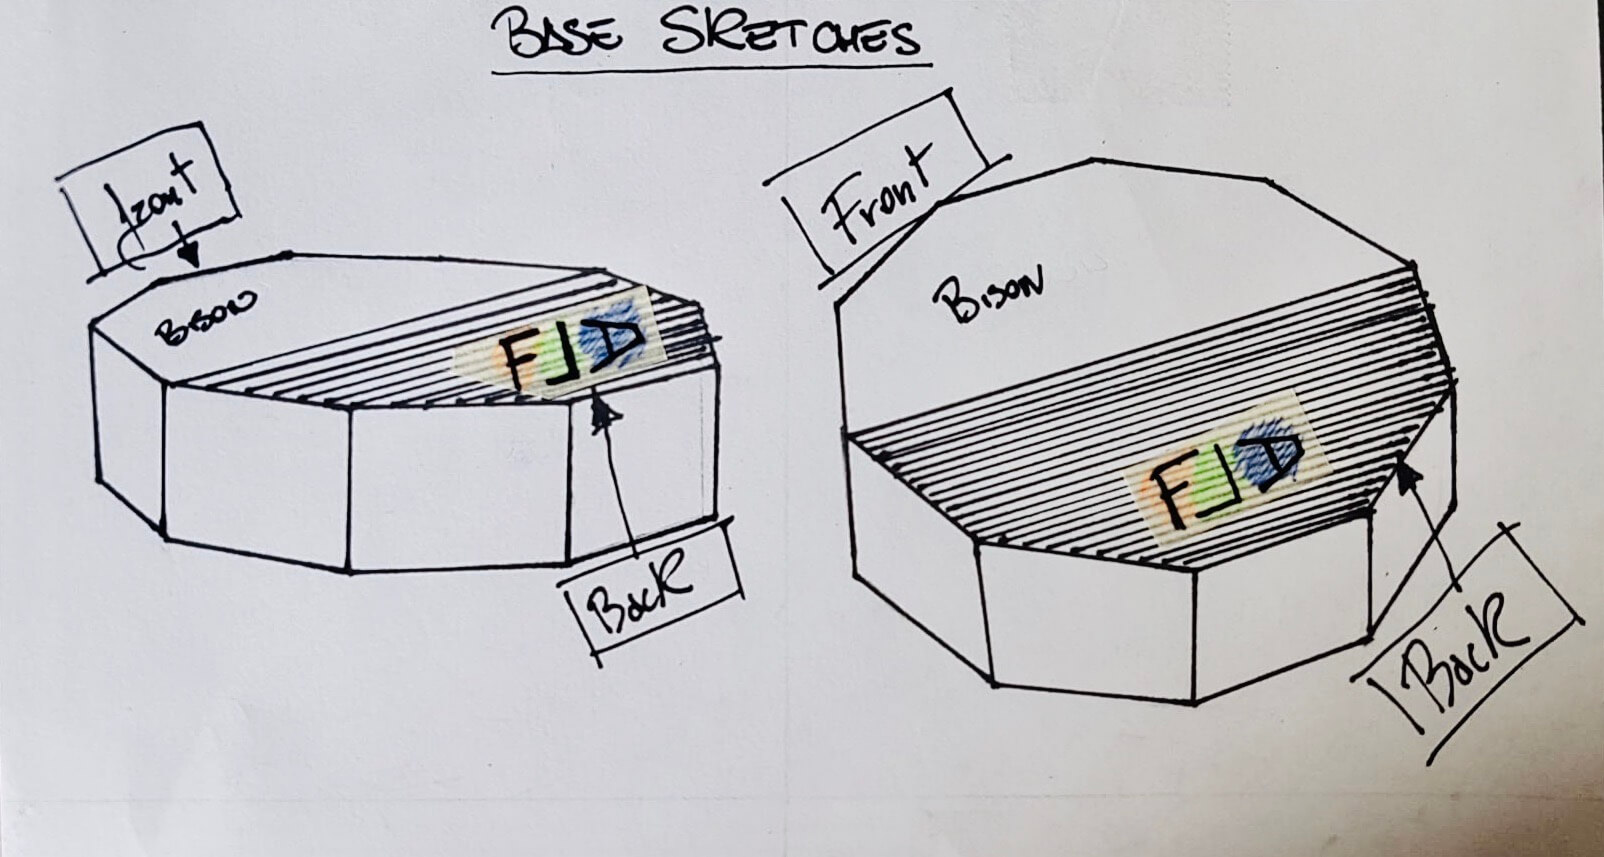
3D Vision of The Project
Draws by A.Fusion 360
I preferred to find a particular solution that required both the use of 3D printers and a more manual & complex work. First of all I printed the entire medallion on a filament printer, after the calibration operations. In order to prevent problems with the polyurethane resin, in 3D filament printing I left a support on one side, basically a cylinder with the function of a "pouring resin channel" and help in drowning the object in the silicone.
|

|
Studying The Product
|
|
INFROMATION OF THE PROCESS
An Example Of a Result
As said above, to succeed in all the steps in 3D filament printing I created the cylindrical support. Platinum Silicone is a bicomponent: so I mixed about 100 grams of product A with 100 grams of B and mixed it well to amalgamate it. I prepared 2 containers. First container. I poured the silicone in a container not too big, in this liquid I drowned the PLA medal hanging from the top so that it would fall to plumb with the small cylinder that came out a little bit from the surface of the silicone where I put the cable hanging from the top (for safety I added some bolts to make a weight). Once the hardening was finished, I opened one side of the box containing the silicone and made a cut with a cutter to extract the medallion (without damaging the mold too much). Repositioned the mould with the help of scotch, I poured the polyurethane resin I had prepared (liquid prepared in equal parts with resin and hardener) through the casting channel.
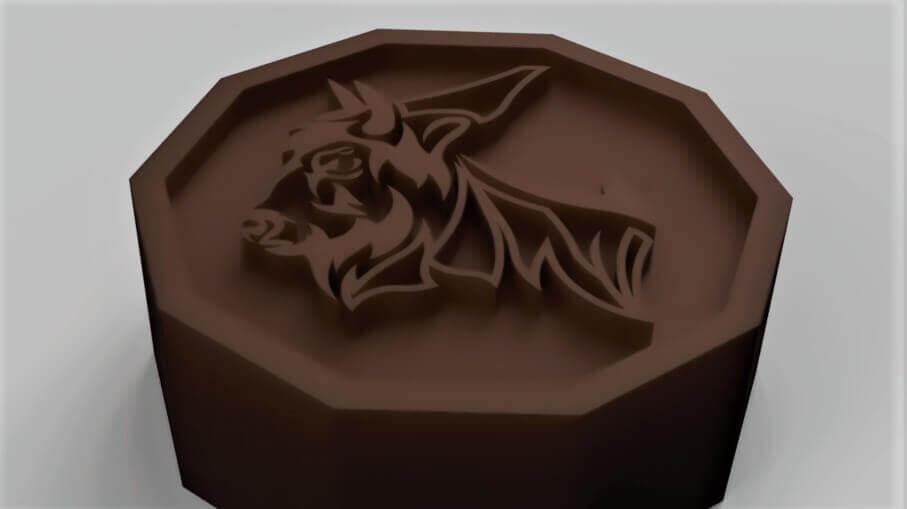
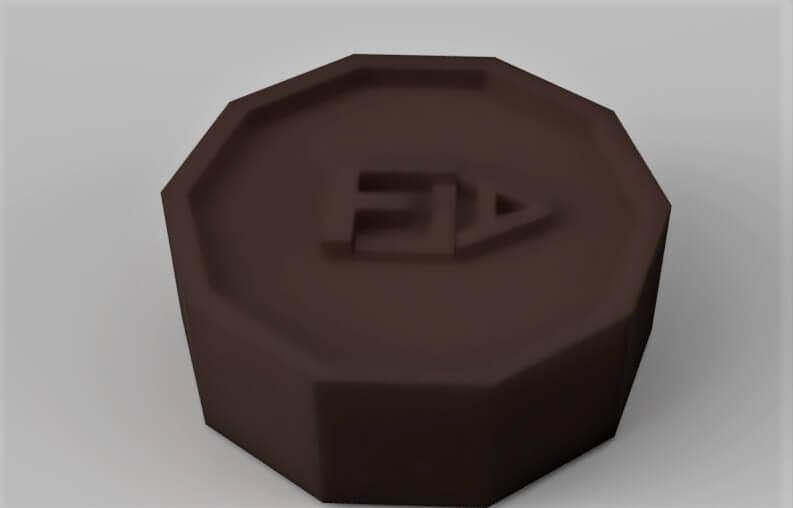
Chocolate Mould
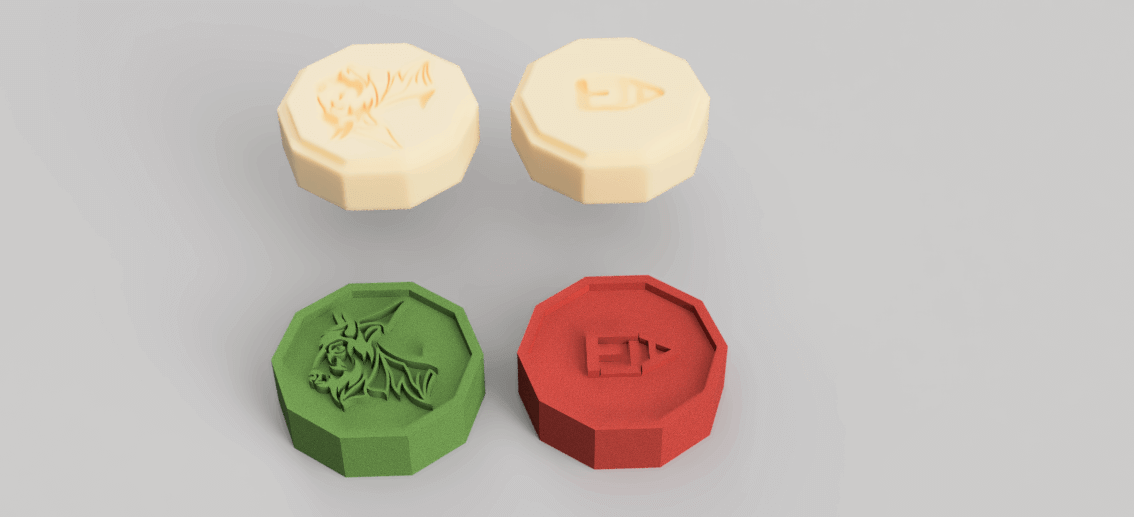
After 20 minutes, to be sure half an hour, I extracted the final product and removed the excess (cylinder). Second container: I repeated the operation with the second container in the same way as before until the silicone mould was filled. Instead of the polyurethane resin this time I poured some dark chocolate (the Platinum Silicone as said is non-toxic) obtaining a "nice and good" medallion .
|
|
REALIZATION
First Step
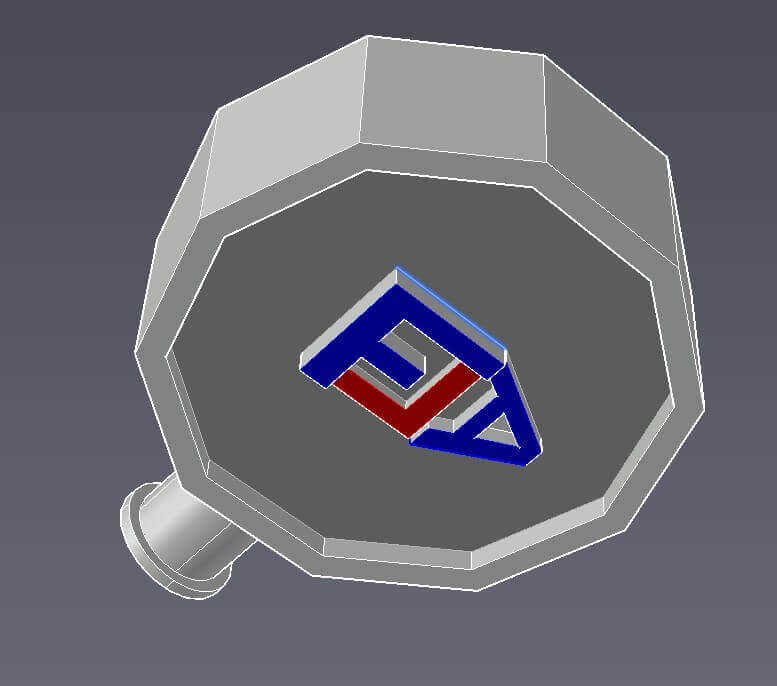
First of all I resized my locket using the "PRESS-PULL" function, then I turned one of the two faces so that it was straight when you turn the locket and then I joined them using the "COMBINE" function.
After that I built a square solid, I found the halves (the point of origin) of both the medallion and my solid and then I used the "COMBINE" function to integrate my medallion with the solid I built.
Once I did this I found the half of my solid and with the medallion inside it and I separated the two faces making them look like a "book".
When I did this I drew two arches from the middle of the medallion upwards so as to create space for the casting.
Second Step
Third Step
WHAT ARE THE REGISTRATION KEYS?
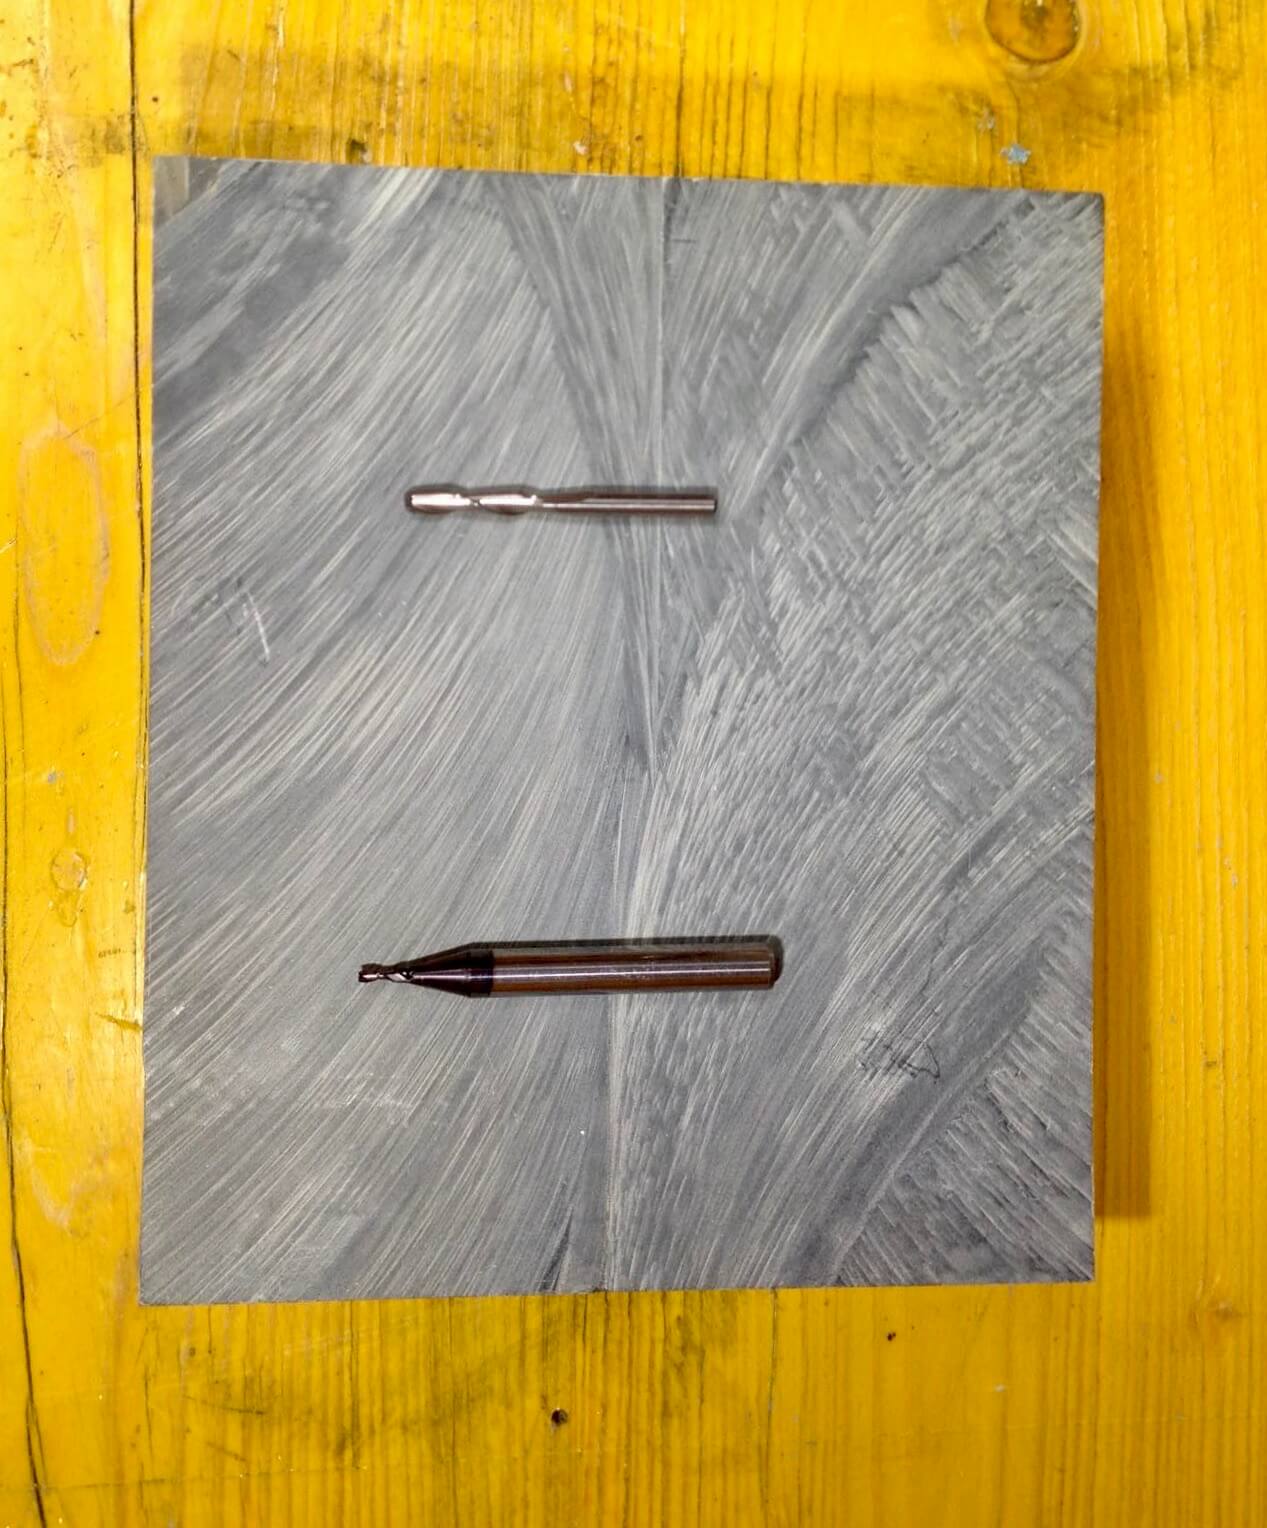
In a "double-sided" project, on one side there is an EXTRUSION and exactly in its opposite point there is a HOLE; in this way when we go to fit the two elements, they will fit perfectly. Once you have designed the registration keys you have to focus on the "faces" and drawings inside the medallion; to do this I insert the dimensions of my tool that I will measure through the gauge so that the software can make a "real visualization" simulation. After entering the various data, I start the simulation so that I can understand what the final result could be like.
Fourth Step
Now only the inner part remains, which is the drawing of the two faces. I will also go there to set all the parameters related to the tools I will have to use. I will do it, as before, measuring them with the gauge and inserting the measurements inside the software so that I can have a simulation as real as possible.
Fifth Step
After having entered all the settings correctly I can and made a "generate" to apply the settings previously entered I can make a PREVIEW of my project so that I can see how it might look like once it is done.
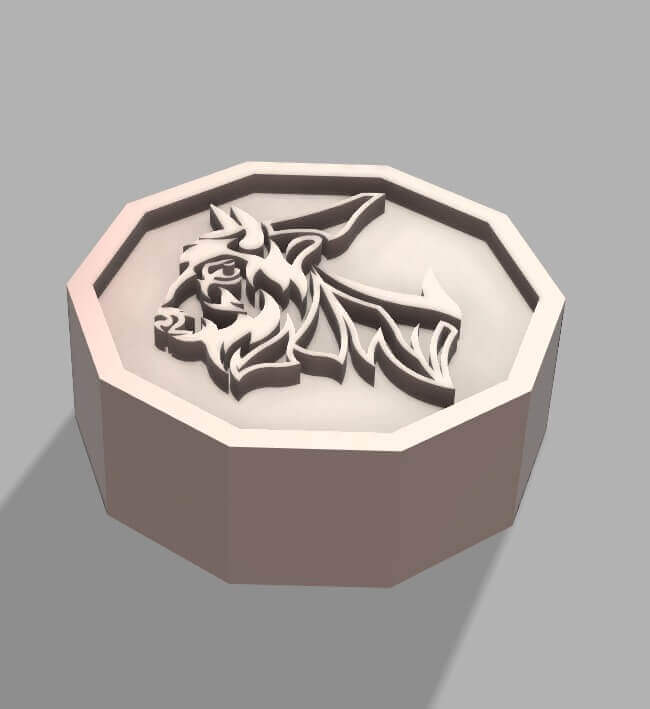
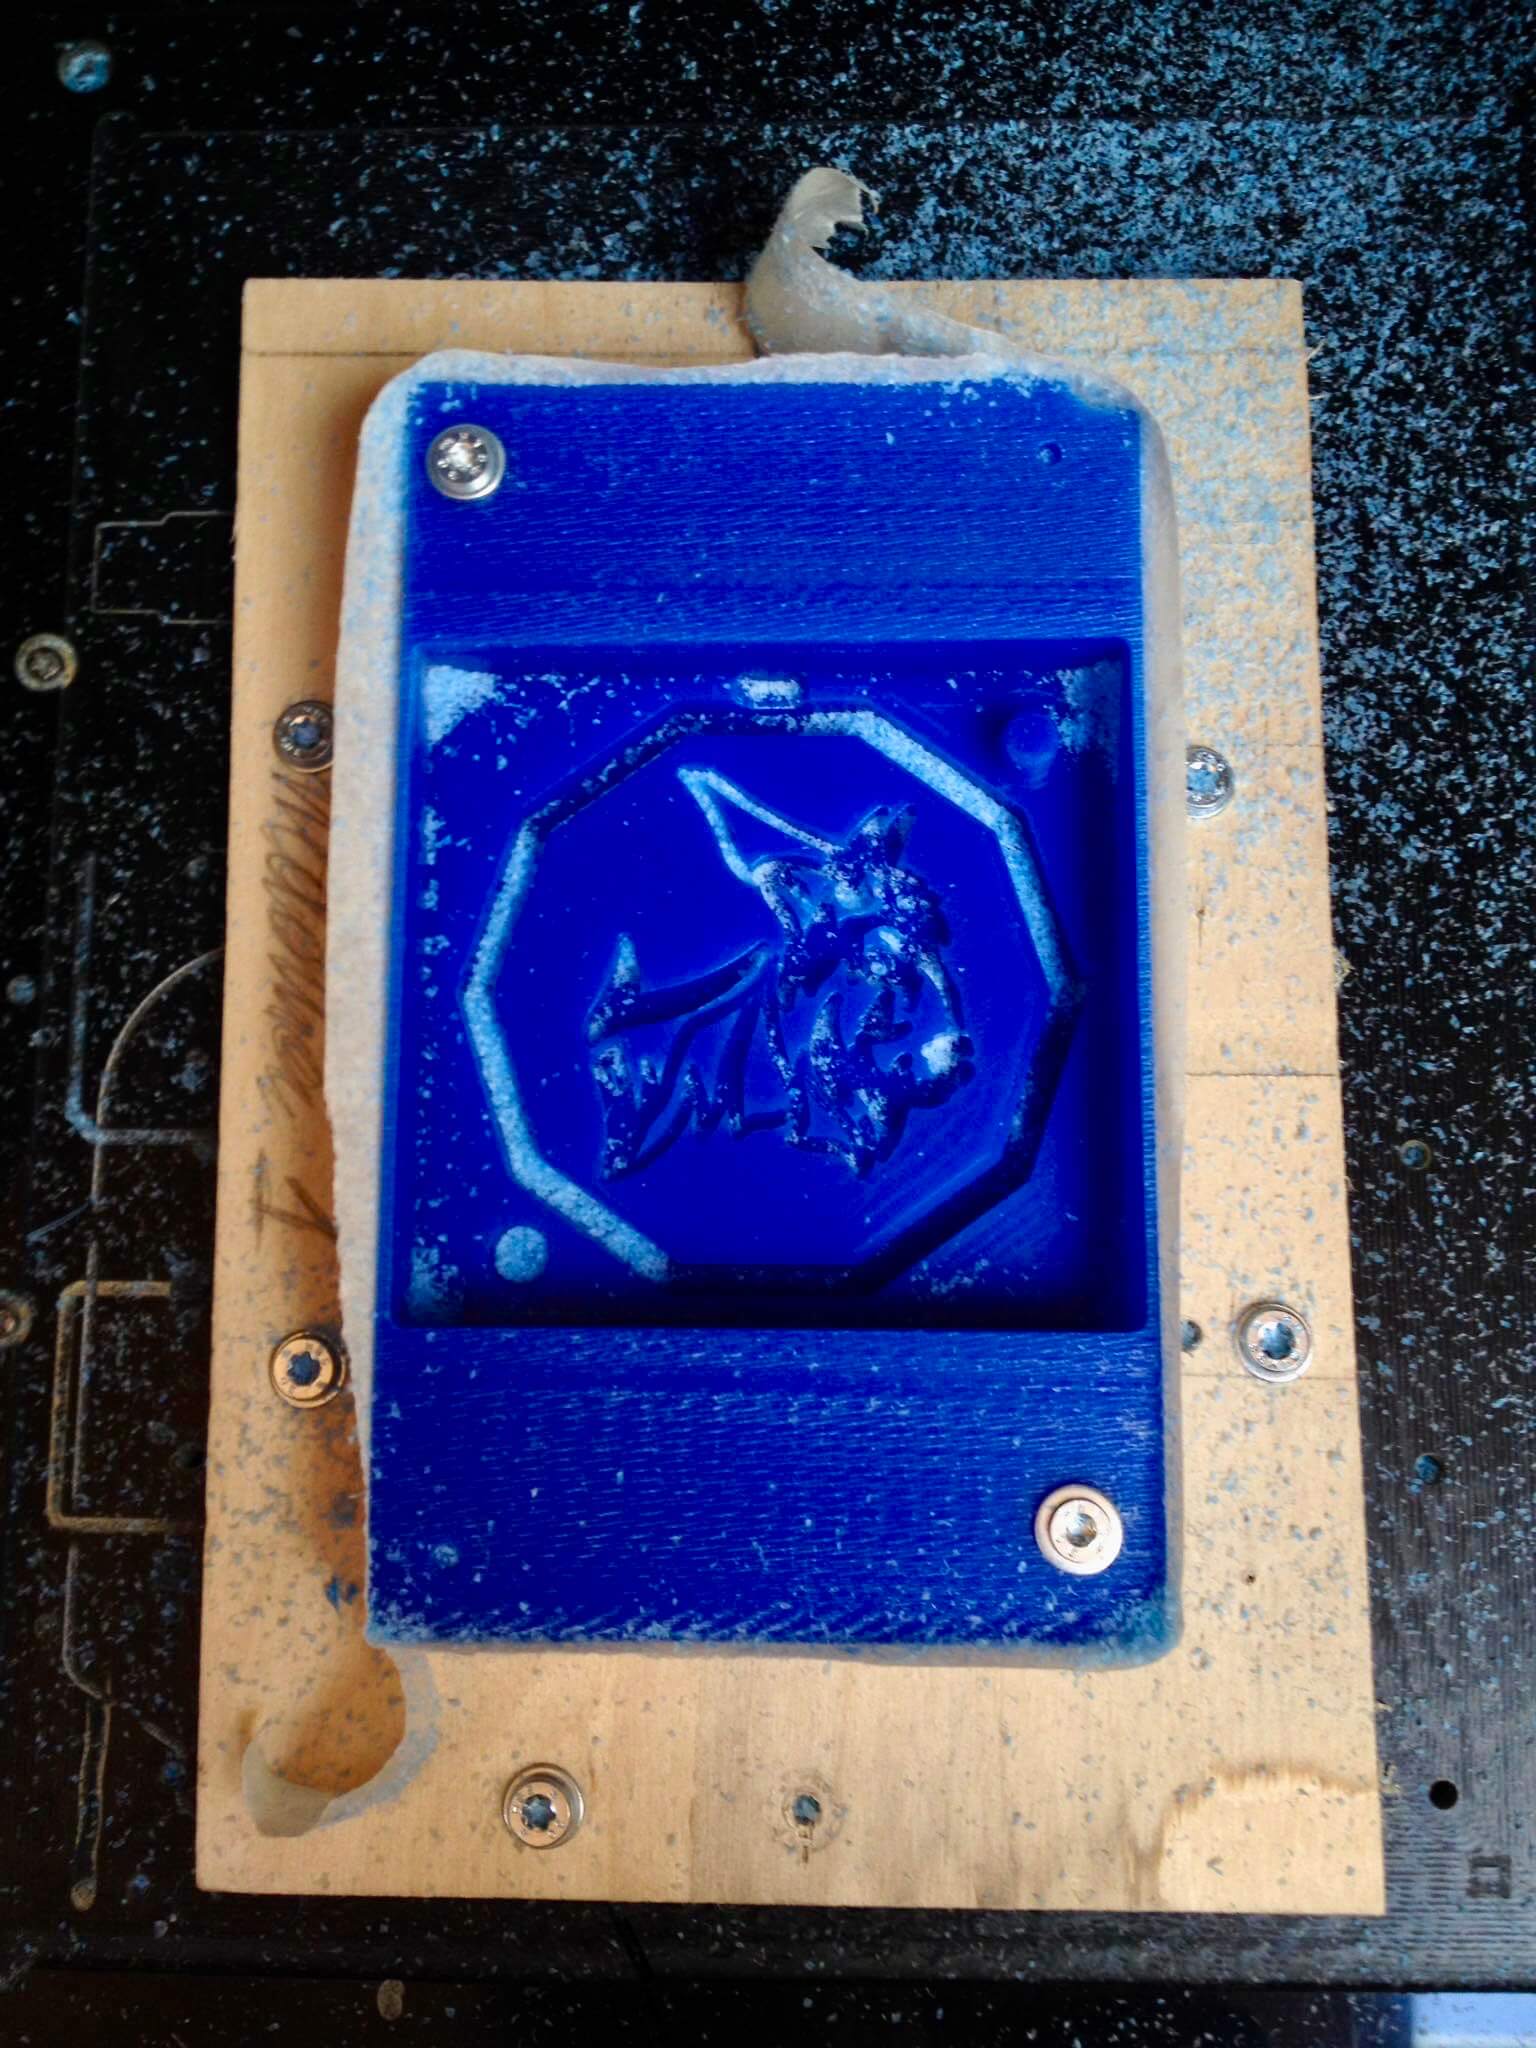
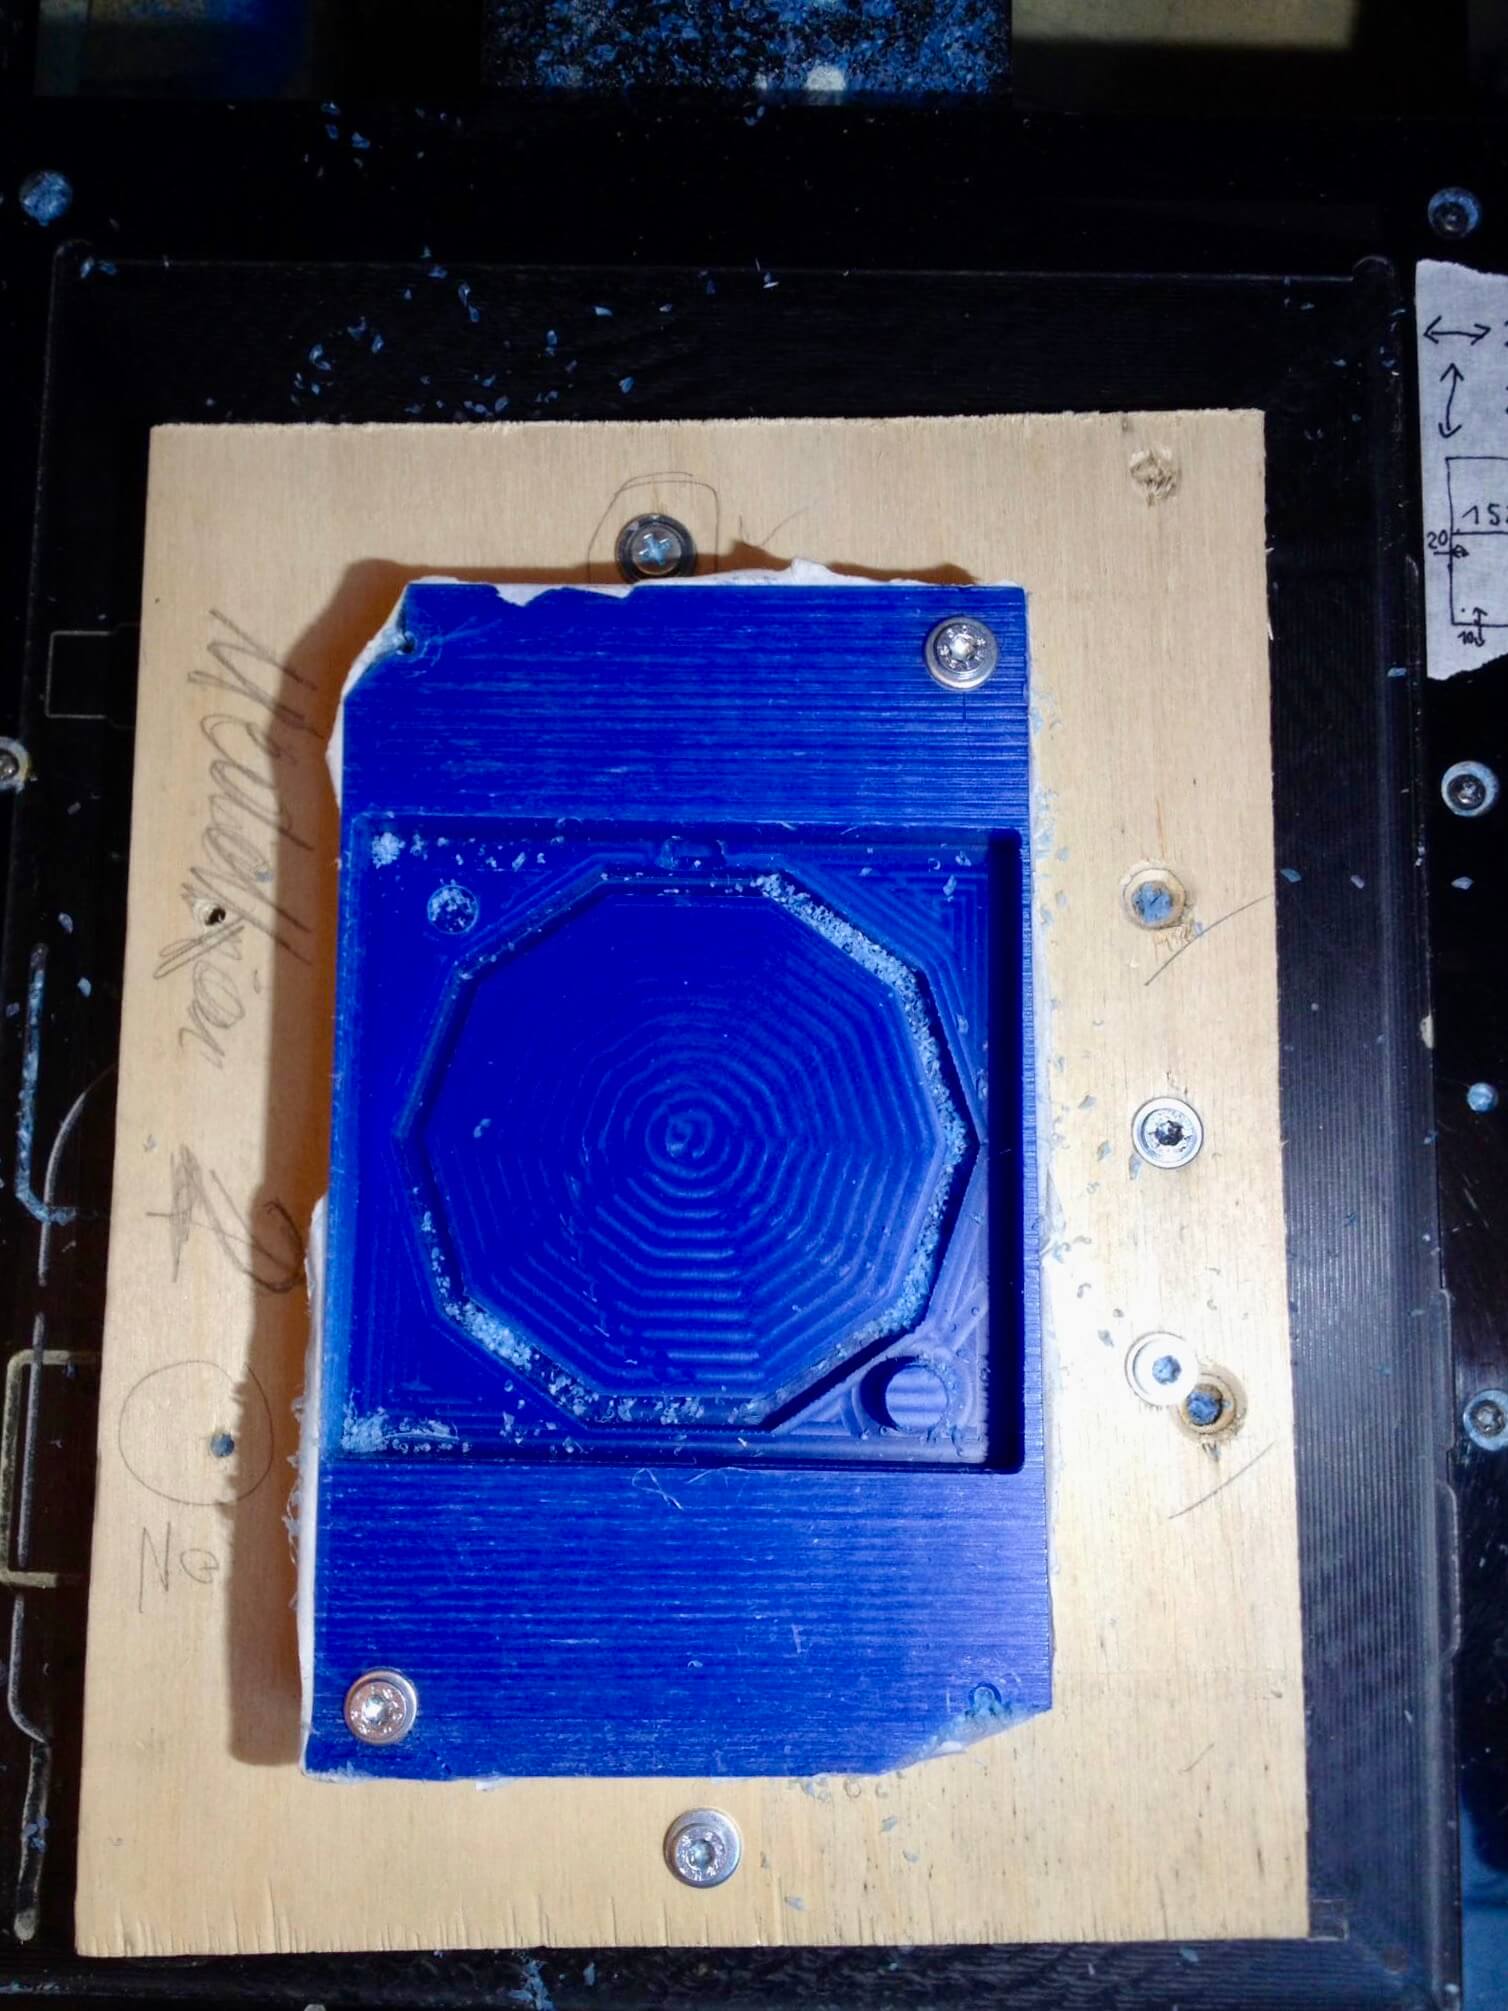
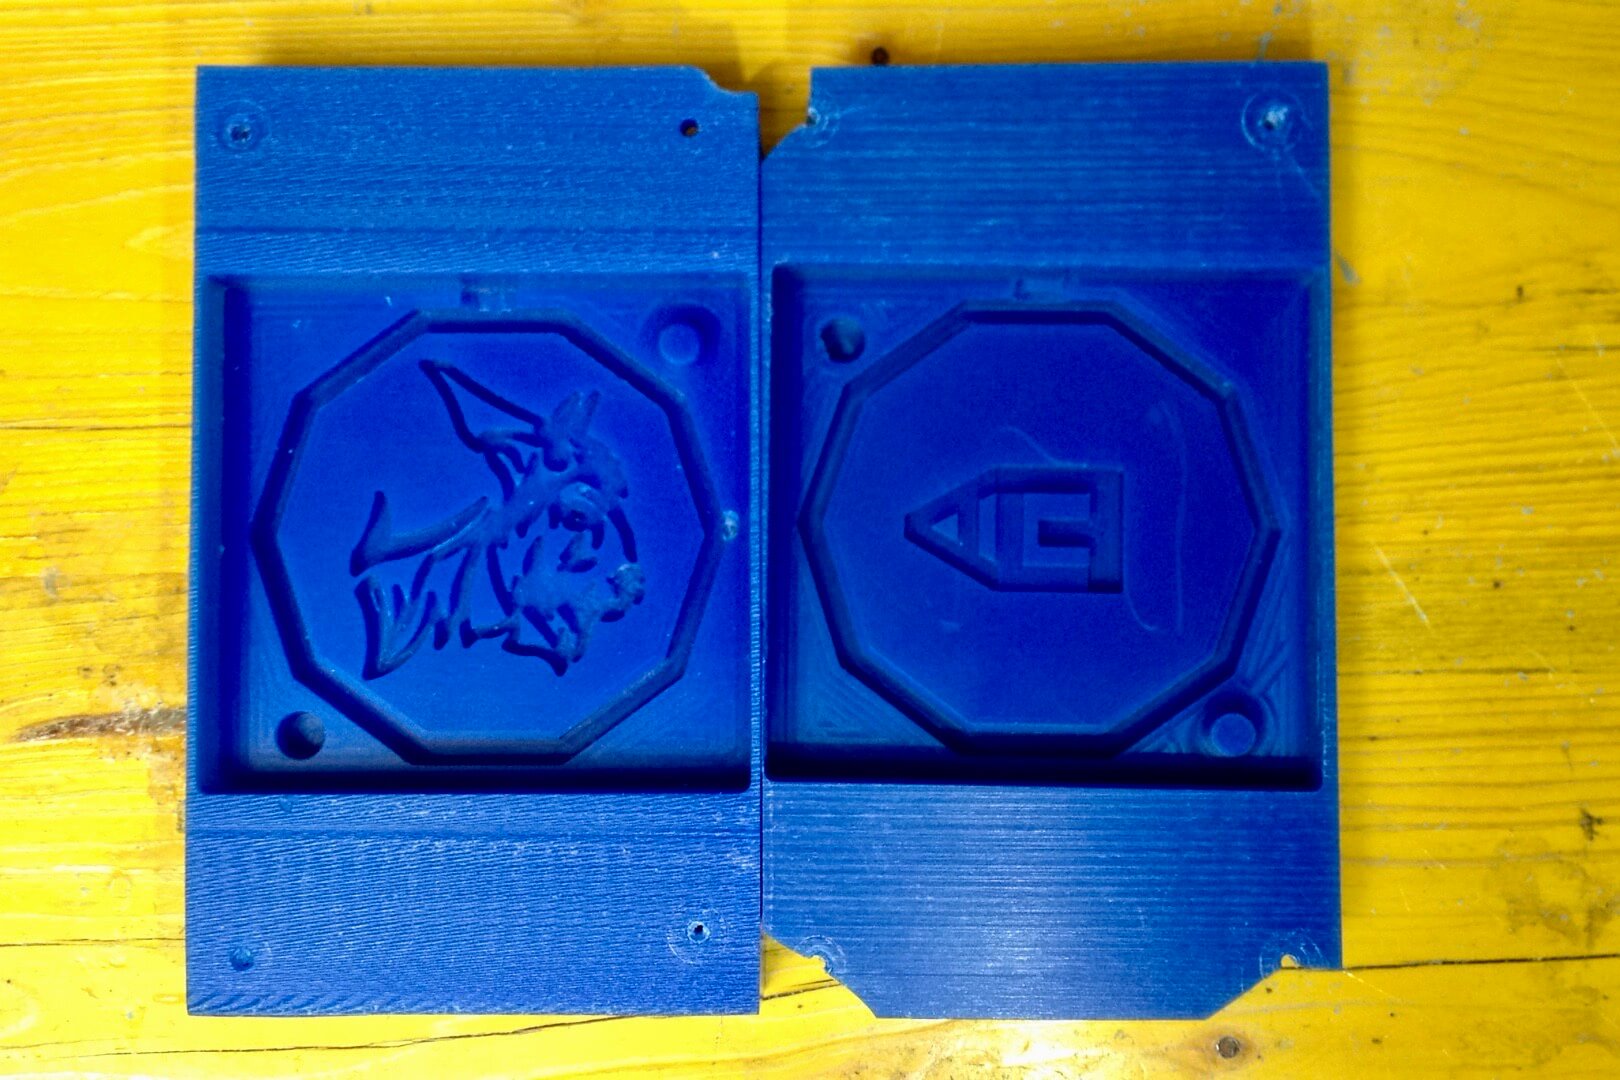
Visualization of the construction process of the medallion moulds with reference to the rounding of areas of the bas-relief: this is both for aesthetic reasons and for the need to strengthen the edges.
Once done "generate" I do a general check-up to see that v and to do so I do a "simulation" for each piece (bison and writing). If everything has been done in the correct way I have to EXPORT the files in nc.-Roland ISO format, format readable by the machine. I don't export the whole file for the part I have to mill but I export the files according to the "tool" I have to use that I have divided in T1 for the coarser parts and T3 for the smallerand more precise parts; so I export for all the files (BISON 1- BISON 2 / WRITE 1-WRITE 2).
|

|
|
|
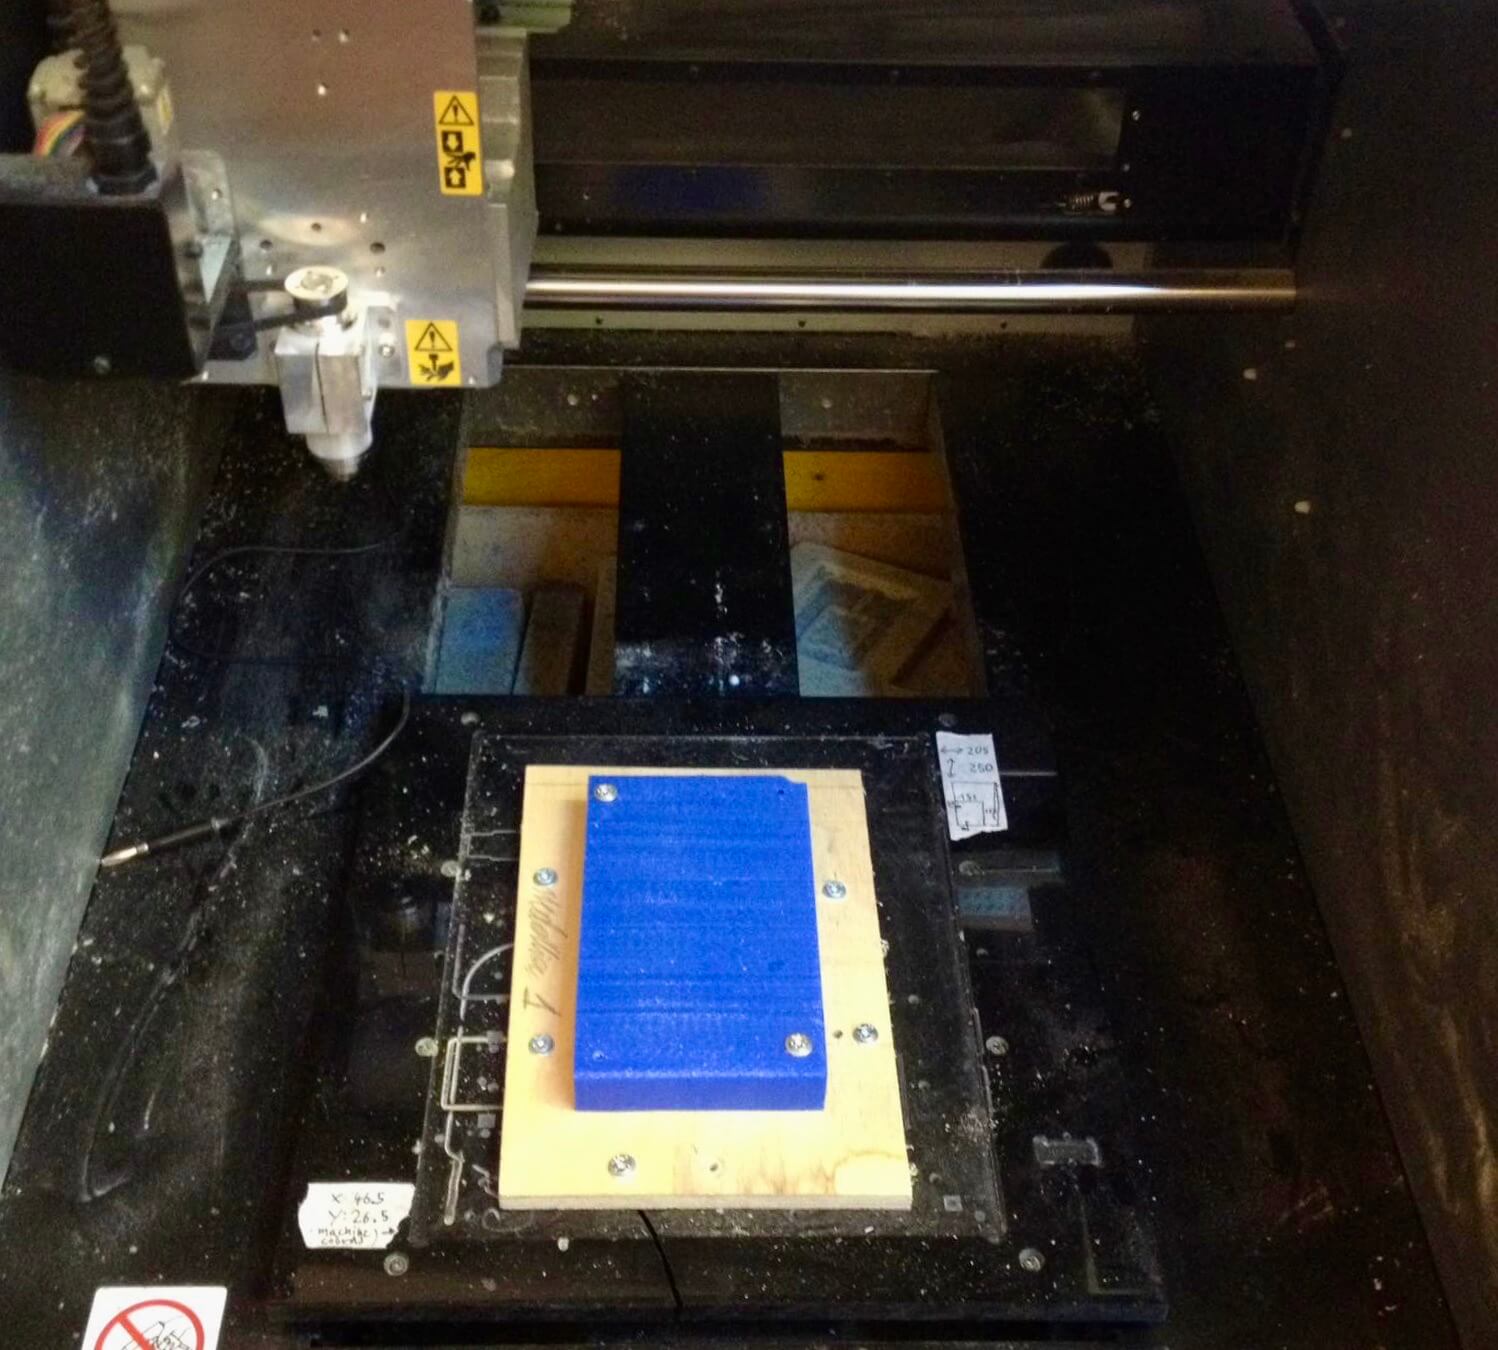

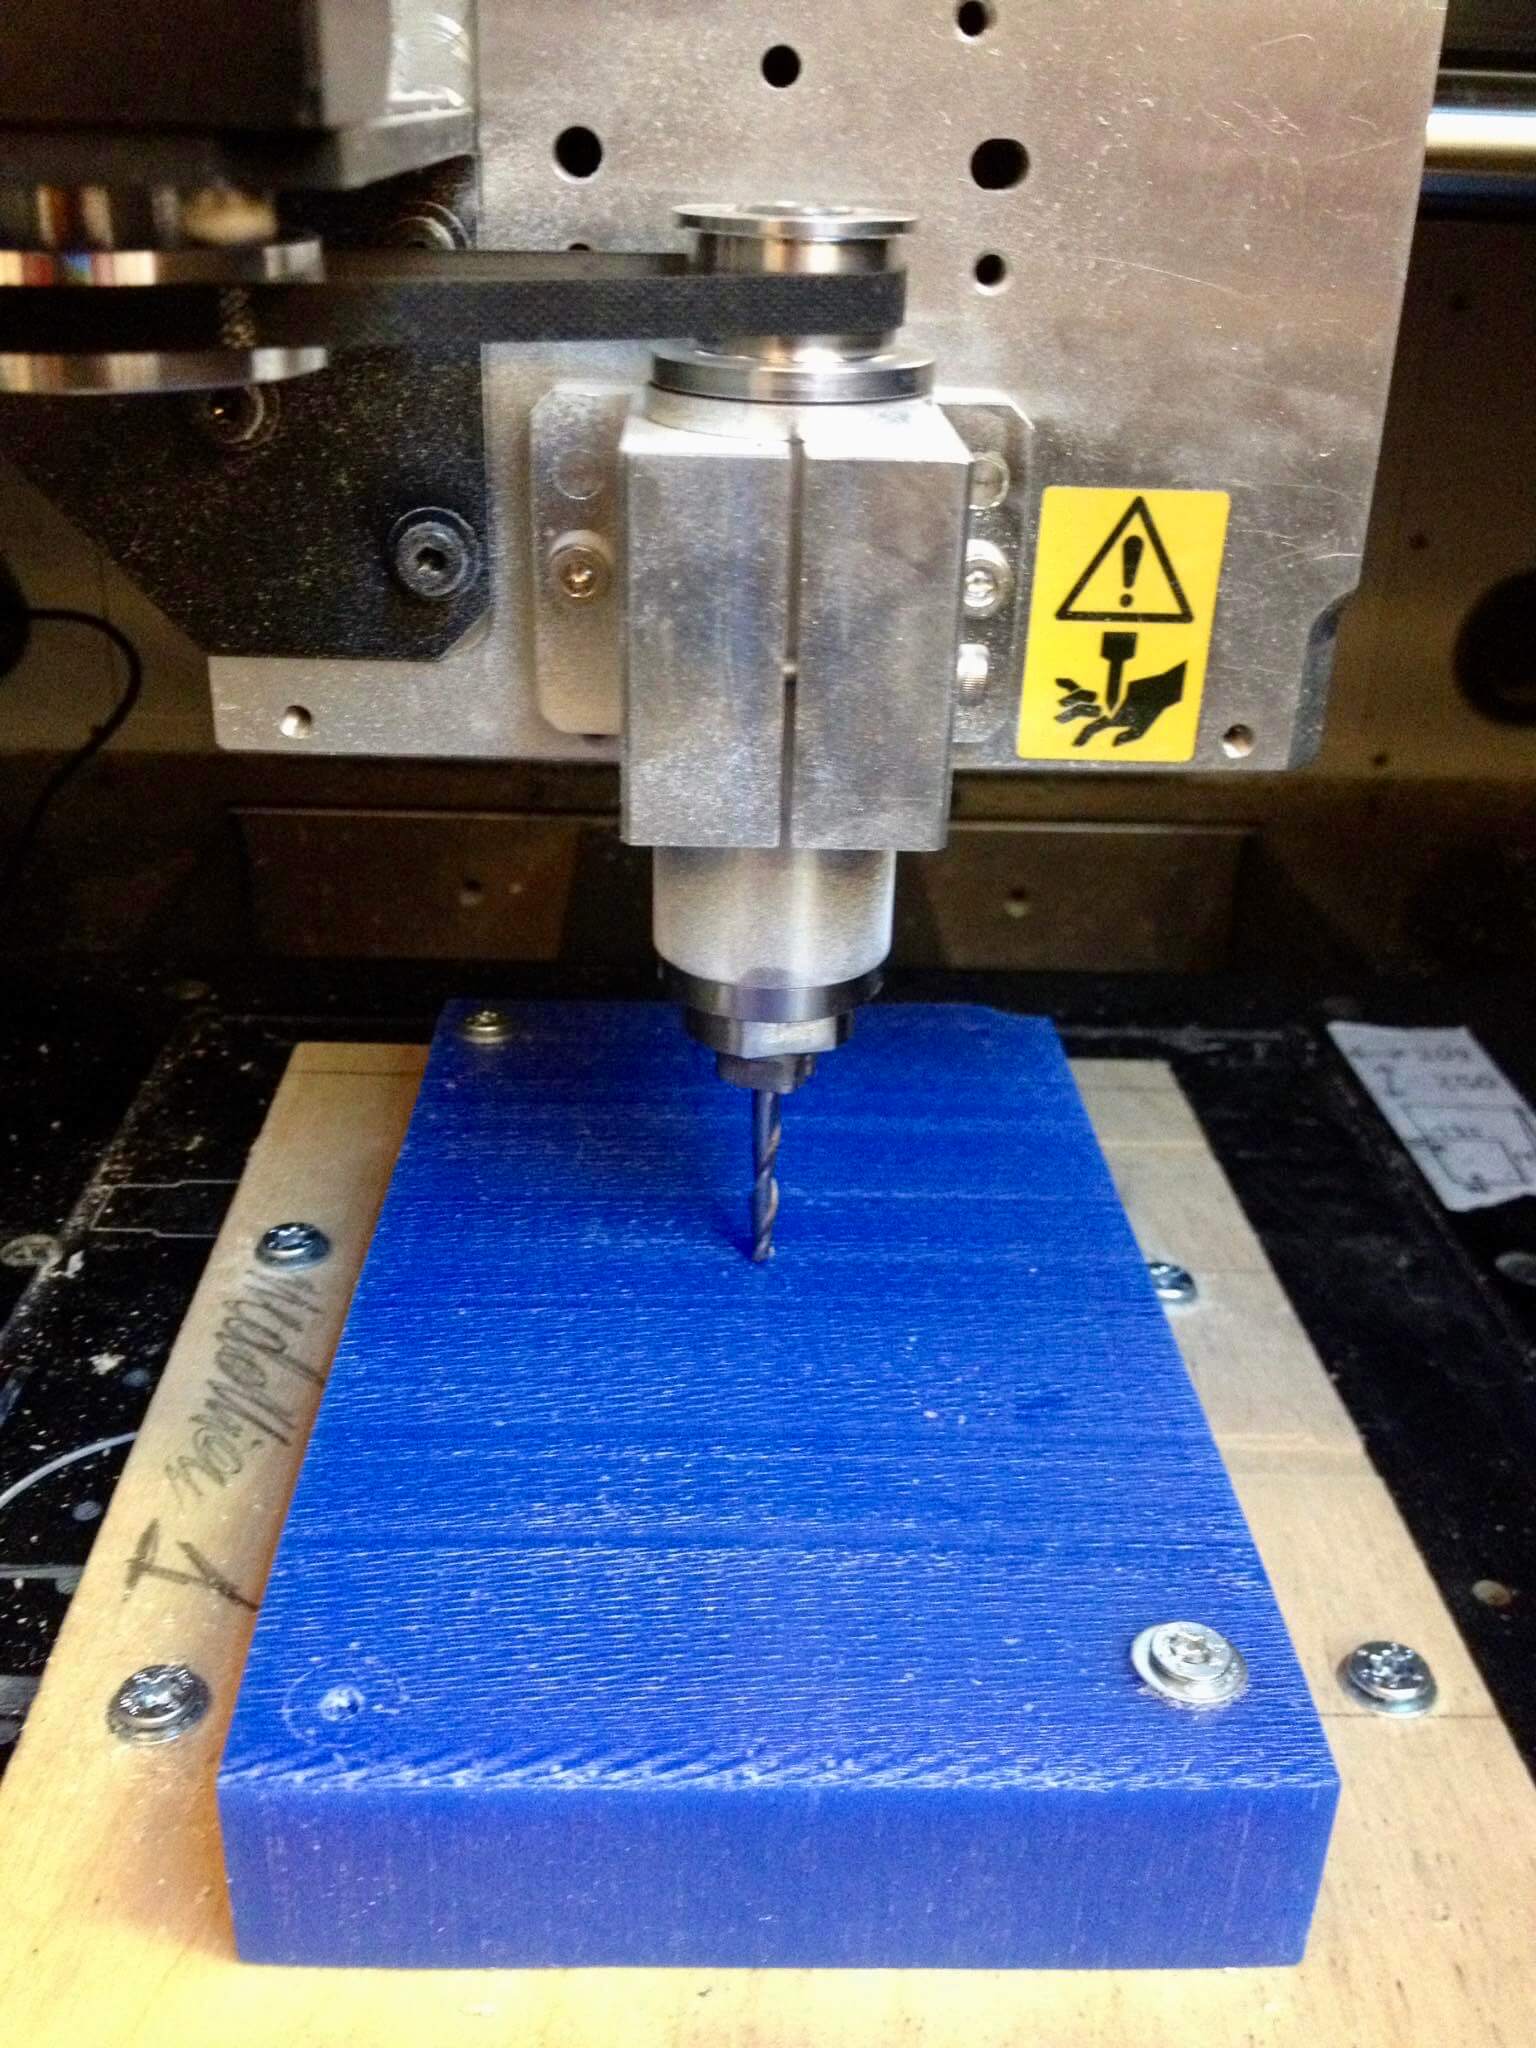

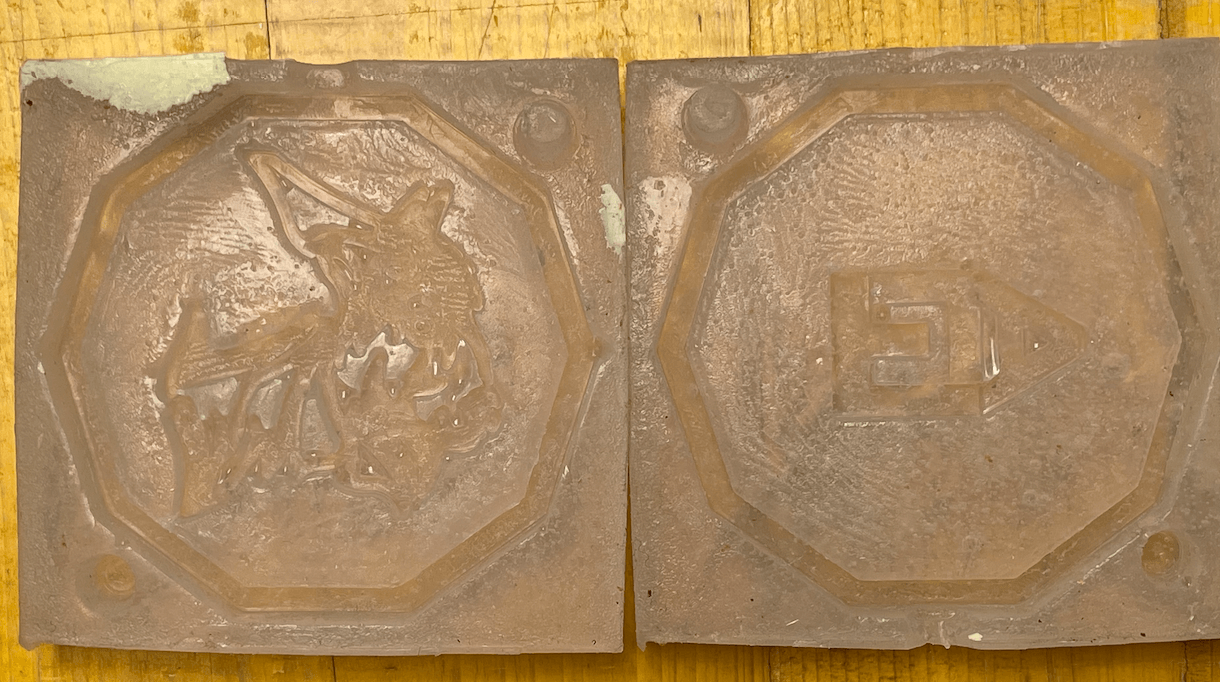
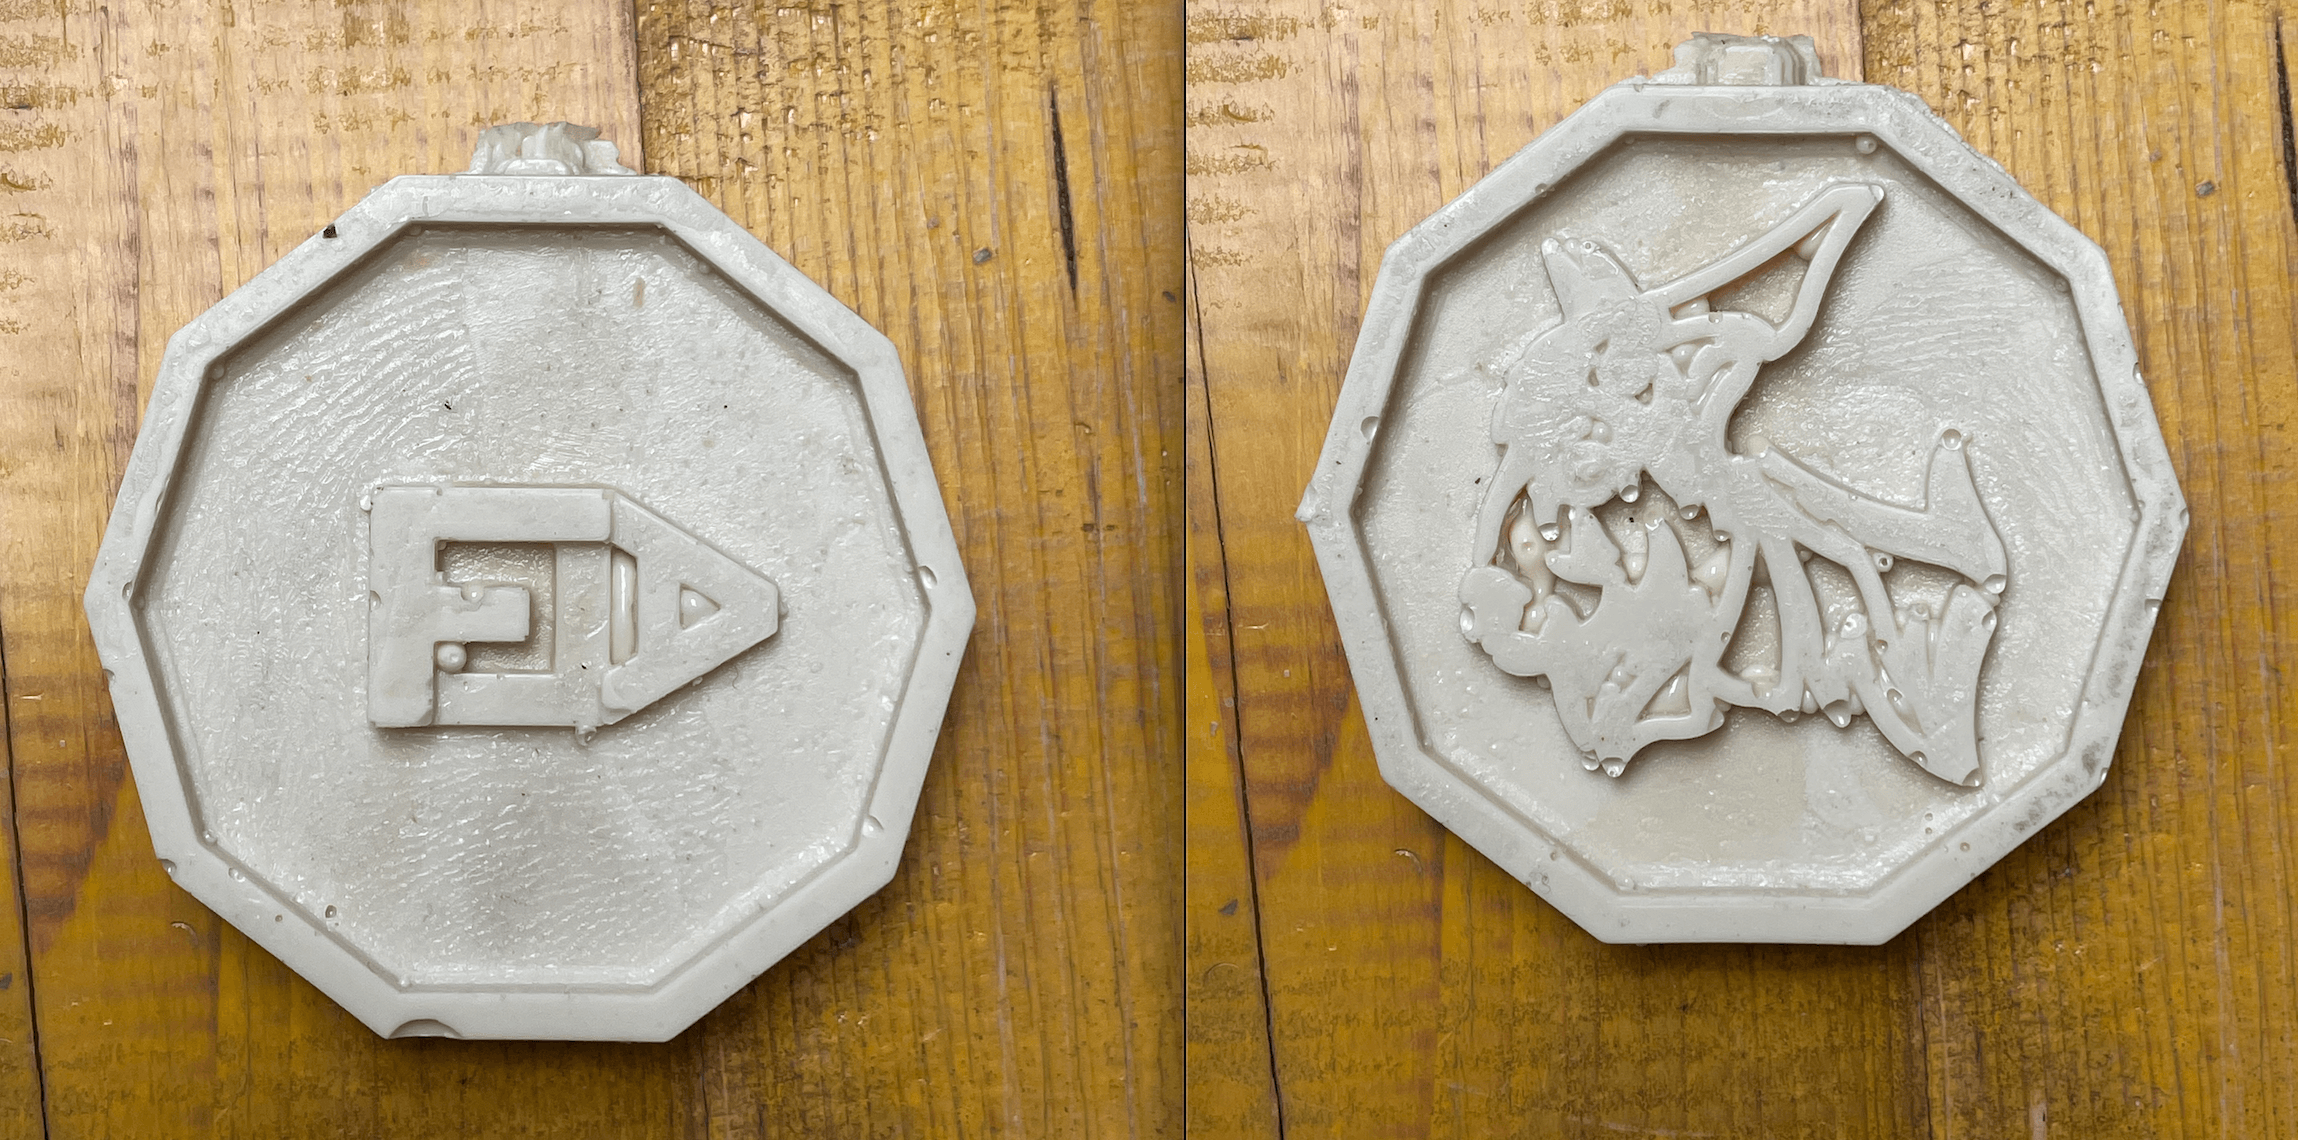
THE RESULT OF THE MACHINE PROCESSING?
Once I have the two perfect moulds, I proceed to pour the silicone rubber. The result will be a "reverse" mould compared to the wax moulds with which I will later make my medallion.
GENERAL INFORMATION ON CASTING
When casting, the most important thing is to AVOID AIR BLOWERS. In order to avoid the formation of bubbles, every time you mix component B with component A, you must mix carefully and slowly, so as to avoid the entry of air into our mix of components (whatever they may be). after stirring carefully for 5-10 minutes, we have to pour our component inside the mould: to do this, we have to pour it in one single point and slowly so that it is distributed all over the mould in a uniform way and avoiding bubbles. This procedure is very important for this type of activity because it ensures that the result is as true and correct as possible.
FINAL RESULT
now there's nothing left to do but to create my medal by making the last casting I need, the one with hardener and catalyst
- MEDALLION_2
- MEDALLION_3
Group Assignment
As a group, this week, we were to confront different materials for casting. The main charateristics that we evaluated were:
- A\B component ratio
- Shore value
- toxicity
- curing time
- pot life
The Shore value indicate the grade of elasticity of a Silicone: the higher the number the most resistant to rupture and cutting.
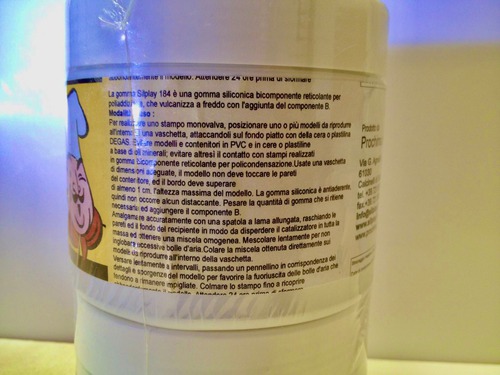
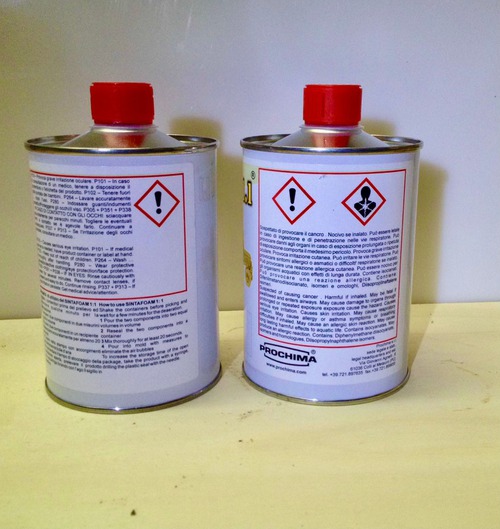
Silplay 184
Silplay 184 by Prochima is a foodsafe siliconic rubber, of translucent white colour.
- A:B = 1:1 (in weight)
- Shore = 184
- not toxic, foodsafe
- curing time: (suggested 10 hours in the fridge to eliminate air bubbles) + 24h
- pot life: 30 minutes after mixing
Cristal EP

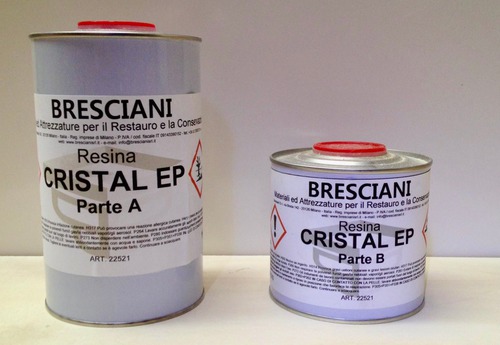
Cristal EP by Bresciani is a two component epoxy resin, transparent in colour.
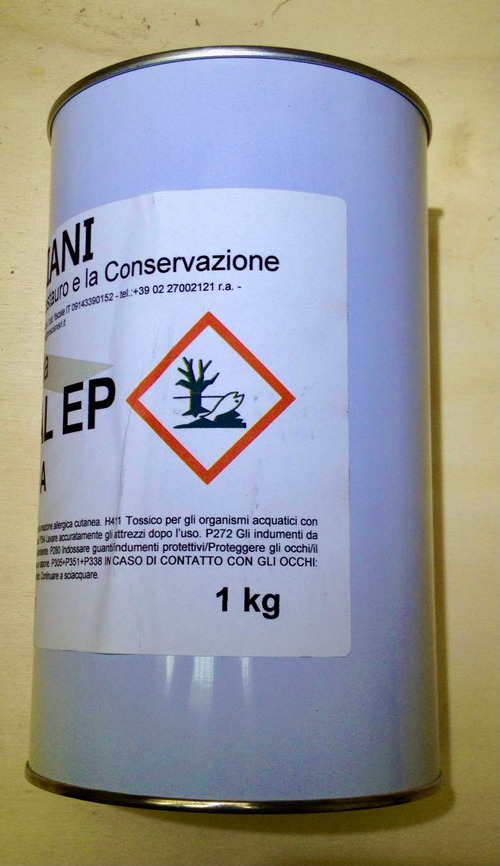

- A:B = 100:40
- highly dense and hard material
- extremely toxic
- curing time: 24h + (suggested 4 hours a 60°)
- pot life: 90 minutes
Liquid Mold
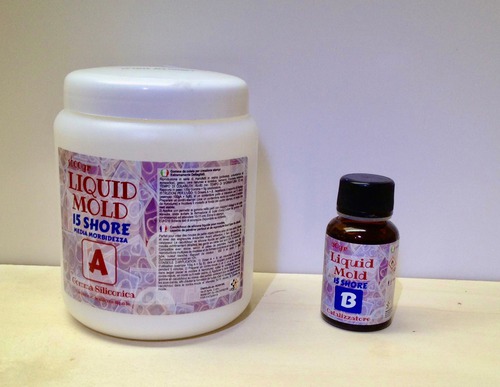
Liquid Mold is a medium hardness sililiconic rubber for detailed models.
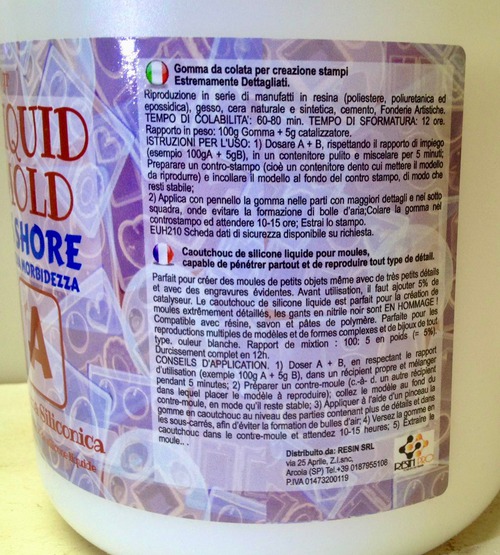
- A:B = 100:5
- Shore = 15
- extremely toxic, fire hazard (B component)
- curing time: 12h
- pot life: 60\80 minutes
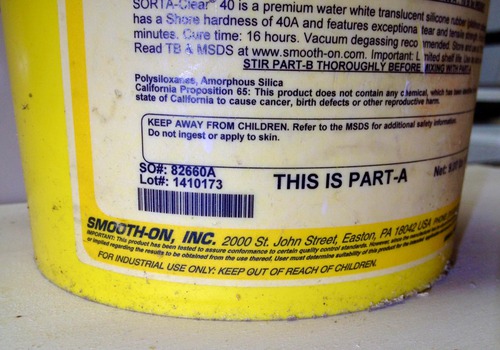
Sortaclear 40
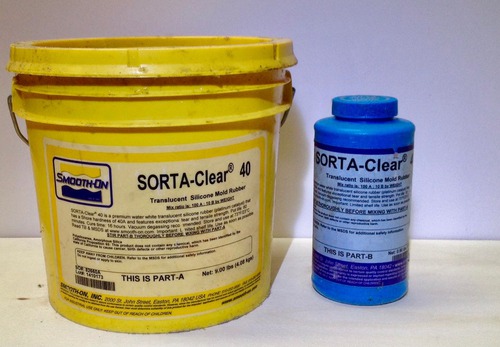
Sortaclear 40 by Smooth-on is a foodsafe siliconic rubber, translucent white\transparent in colour.
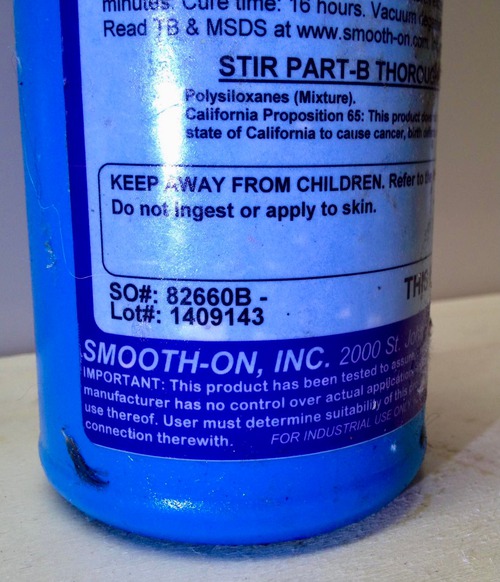
- A:B = 100:10
- Shore = 40
- non toxic, foodsafe
- curing time: 16h
- pot life: 60 minutes
Sintafoam
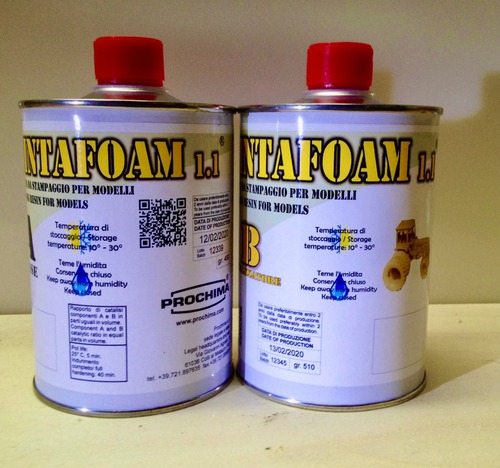
Sintafoam by Prochima is a two component polyurethanic resin, blue in colour
- A:B = 1:1
- high density, hardness
- highly toxic
- curing time: 40 minutes
- pot life: 5 minutes