1. Principles and Practices
This week I worked on defining my final project idea and started to get used to the documentation process.
Creating the Website
I started this week by learning how to create my website. I accessed my GitLab account for the first time and was a little daunted, as my only prior experience was in downloading from GitHub and I had no idea how to start creating my own website. Thankfully, the language (Markdown) is very straightforward and I was able to navigate my way to making my first commit; reading the Fab Charter, signing the Fab Academy Student Agreement form and creating this documentation of it!
IDE
So far, the simplest way to edit seems to be by navigating to my personal page on Gitlab, selecting “IDE” to begin editing, and changing files/locations with the drop down on the left. Most of the editing is in plain text, but adding anything more than plain text requires special strings of text.
Customization (and Pipeline)
To make my website a bit more personalized, I first completed the very important task of selecting a theme. I did this by committing mkdocs-Bootswatch to the requirements.txt and under the mkdocs.yml, “Theme” header, I changed the “name: material” to “name: cosmo.” (cosmo is a sub-theme under Bootswatch This took a couple of tries because I didn’t realize that I had to put the name “cosmo” (the subtheme) on the mkdocs.yml page and “Bootswatch” on the requirements.txt. But while I was investigating I discovered the GitLab “Pipeline”.
If you go to the left side bar on GitLab and click on “CI/CD” (continuous integration and continuous delivery)and go to the subgroup “Pipeline” you can see a history of all the changes you have “committed.” (Figure 1) If I click on the block that says “Failed” next to my last attempted activity, then click on failed jobs (Figure 2) I can see the python code run the changes I made. At the end it says “Error”, telling me where it stopped and writing (at least in this case) in plain English where my problem stemmed from (Figure 3). I am sure this will be useful in the future as I try to make more complicated edits to my site.


I also edited the mkdocs.yml page, editing all the generic categories to reflect my name and information. Then I moved on to editing my About Me page. Check that out to learn about me!
Using External Files
Markdown is a language built on top of HTML, and is definetely much simpler, but still requires special syntax for uploading things like links, photos, etc.
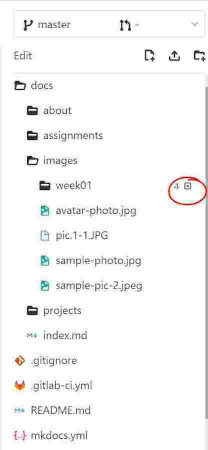
For example: uploading photos requires you to use “ ”, replacing the blank space with the name of your photo. The syntax here navigates back one directory(..) then navigates into the images directory and then the week01 subcategory. “Name.jpg” represents the name of the file you want to upload. The two brackets in the front allow you to enter captions.
To actually put the photos get the files into these folders, I clicked on them in the left hand sidebar on Git IDE and clicked the three dots next to the name (They only appear when scrolled over) and selected the “Upload files” option.
This same markdown format for images described above is used for things like internal/external links, but instead you just use the URL and the words inside the [] will be filled with the name you want to appear on the website. It seems to be the basic layout for embedded/external links to files.
I discovered quickly that seemingly miniscule mistakes are very difficult to pick out in strings like this, which is annoying because small typos will stop the code from doing what it is supposed to. The first time I tried to upload an image I wrote “.jpg” while my file was actually a “.JPG” and it took me quite a few tries to realize my error. I will need to learn to keep a closer eye on things like this so I don’t waste time trying to fix them.
Note: when using GitLab IDE, if you upload your image as a “.JPG”, even if the markdown attachment matches this, the image won’t display correctly. By renaming the file on IDE and changing it to a .jpg, however, it does work.
Managing file sizes
Another thing to watch out for with images is their generally massive file size due to having so many pixels. It’s easy to fill the allotted space with images that are too high quality(lots of pixels). One fix is cropping the image to the bare essentials, but you can also compress the image (remove pixels in the photo) and still get a legible image.I downloaded GIMP (an image editor) and used [this GIMP tutorial]https://docs.gimp.org/en/gimp-tutorial-quickie-scale.html to figure out how to compress my images to smaller sizes.
The software allows you to change lots of different aspects of the photo, and when you are done with it you can save it to your files by going under “File” and selecting “Export as.” After selecting the image location, it brings you to a screen that gives you export settings, in which you can change the image quality. I tried to push most of my images down to about 20%-30% quality because this is a low resolution that is still comfortably viewable.
Selecting “Show preview in Image Window” I can see the quality change in real time so I can decide how low I can push the resolution. Most of my images (for now) are at around 20%-30% resolution. If the quality is too high the file size will be absurdly large, and will fill up the allotted amount of data on these websites.
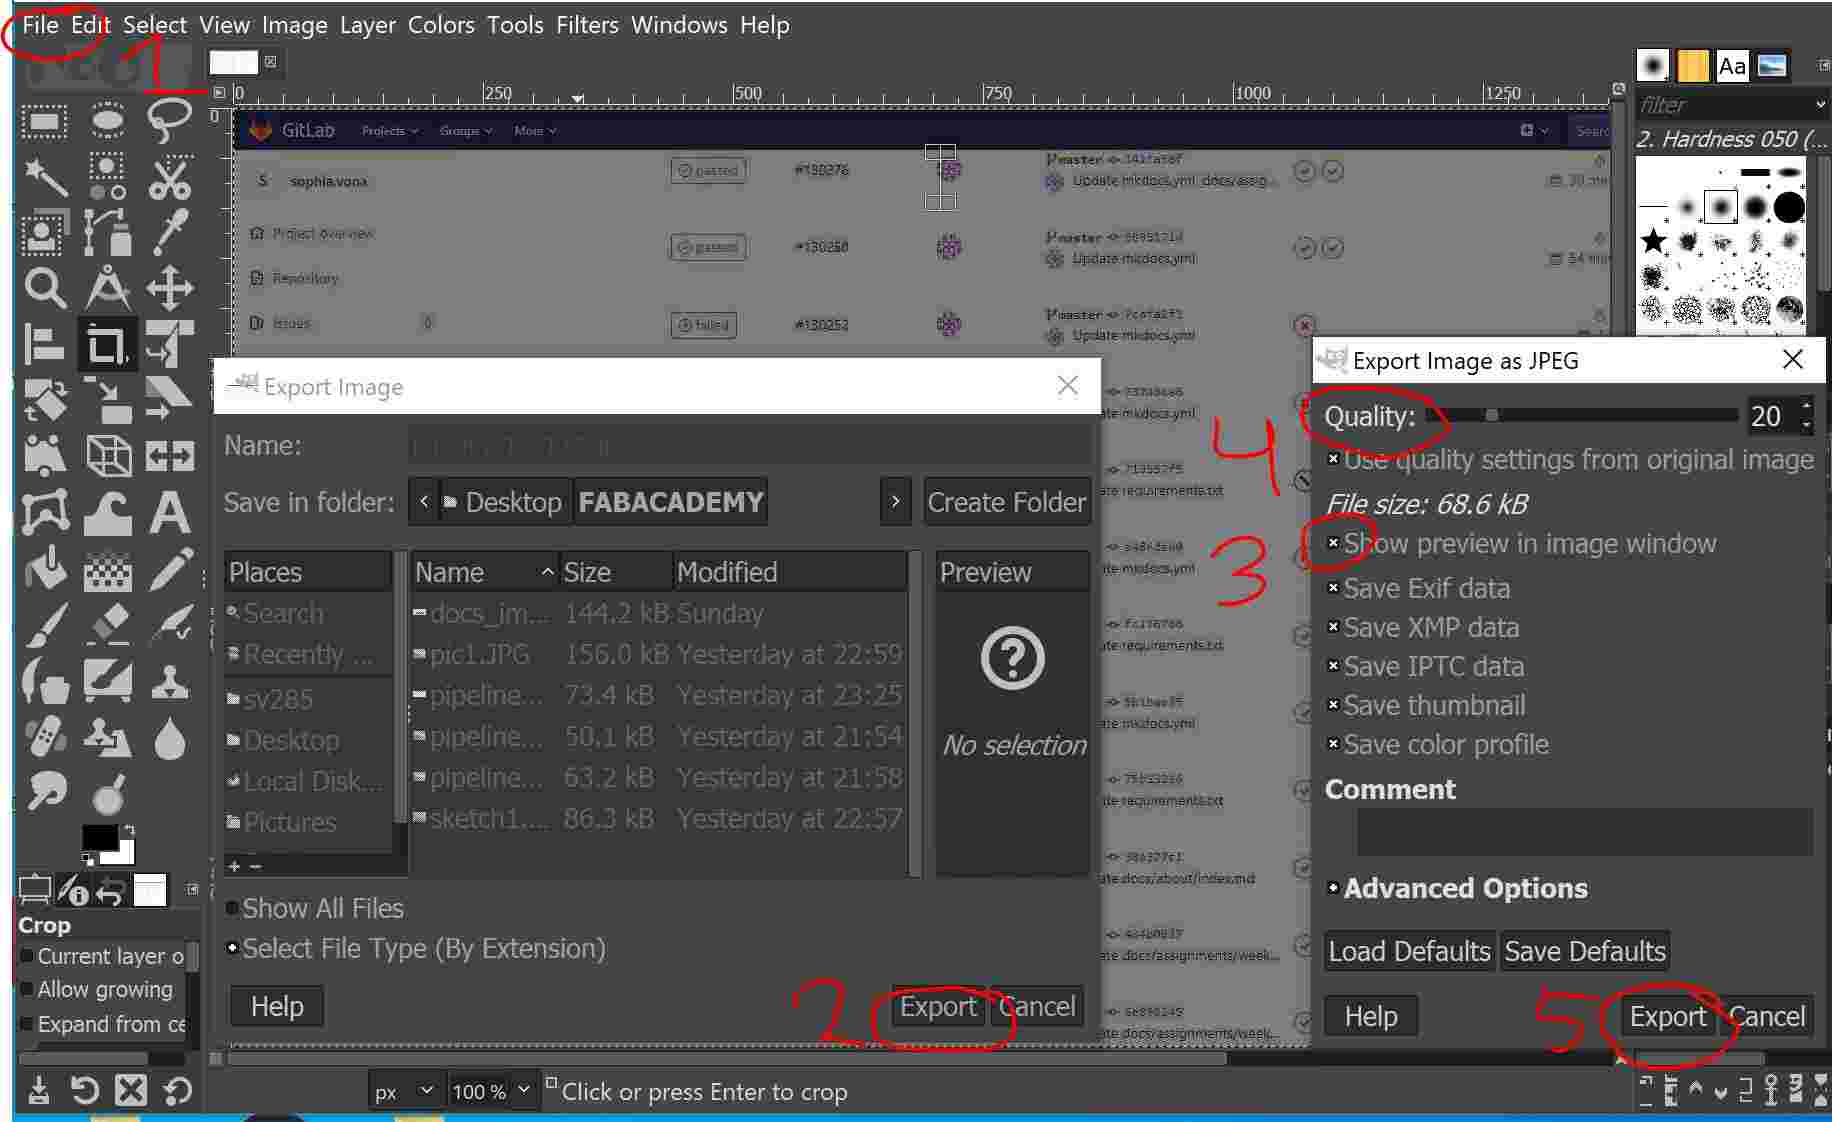
1- “File” button. Scroll down to middle for “Export as” button 2- “Export” button. After selecting desired file location, format (Jpg PNg etc) and naming it, click this. 3- “Show Preview in Image Window.” Make sure this is selected so you can see the changes in quality 4- “Quality. ”scroll up and down the bar or enter a value on the right to choose the image quality 5- “Export” button. Final export to your files.
Tutorials
I found a helpful page about the basics of MkDocs that was very helpful. I figured out some basic Markdown by looking at the content (images, links, videos, etc) already on this page. Most of my questions(so far) can be answered with a quick google search However I also stumbled across a very detailed Markdown CheatSheet that I partially skimmed through and found helpful.
Finally, I read through the GIT tutorial on the fab academy page. So far I like the IDE method best for starting out, but by learning this now I will be able to switch my method later if need be.
Fab Charter:
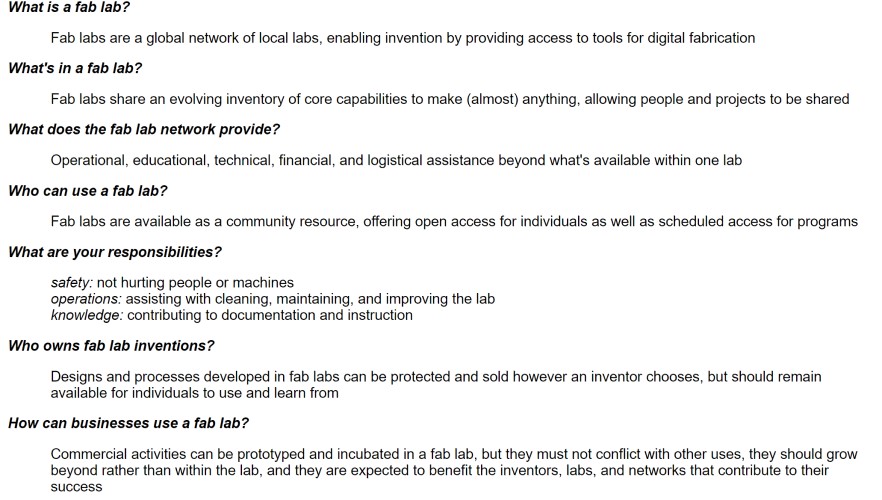
I also read through the Fab Charter, which provides some general information on Fablabs, their use, and my resposibility to the Fablab.
Final Project Planning:
This week I also sketched out a potential final project. It occured during the same week, but the information it on this page here.