15. Molding and casting
Group Assignment
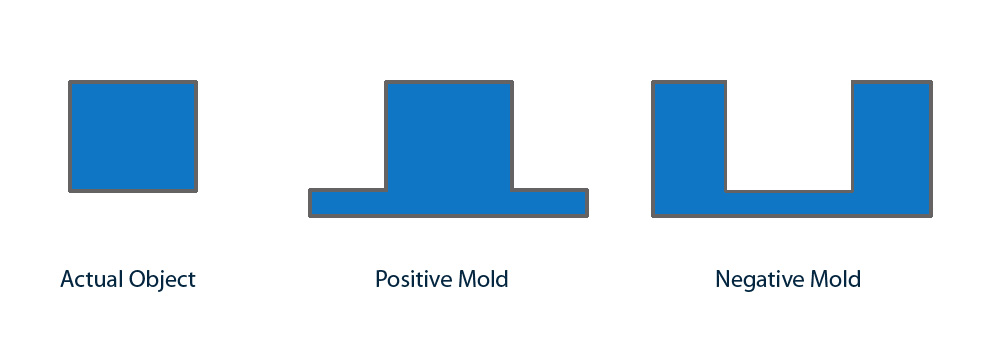
Before you start this three importing thing that you need to understand. First you design the actual object the then you edit it to git the positive mold my milling it on wax last thing you use it to make the negative mold .
to make mold you should do these steps :
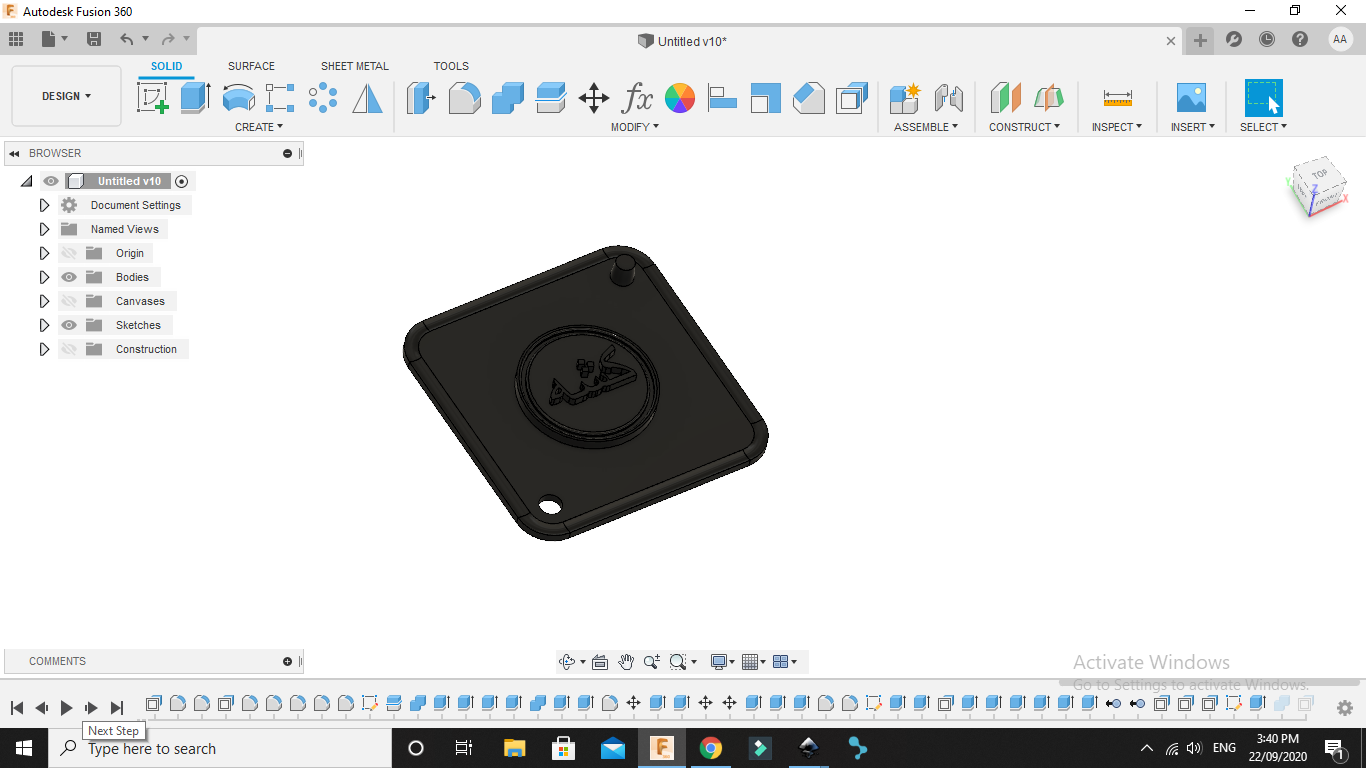
1.Design the object.
I decided to make a chocolate coin. I start by making the design :
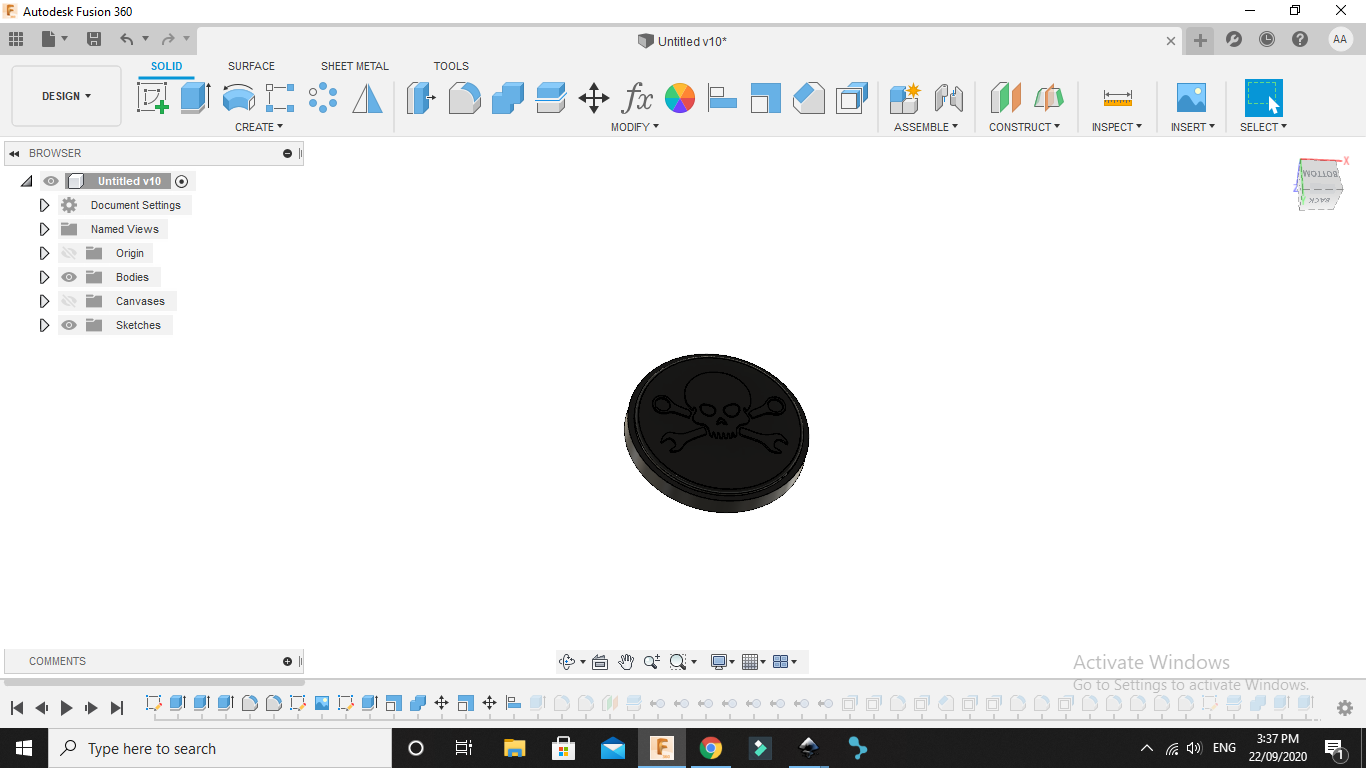
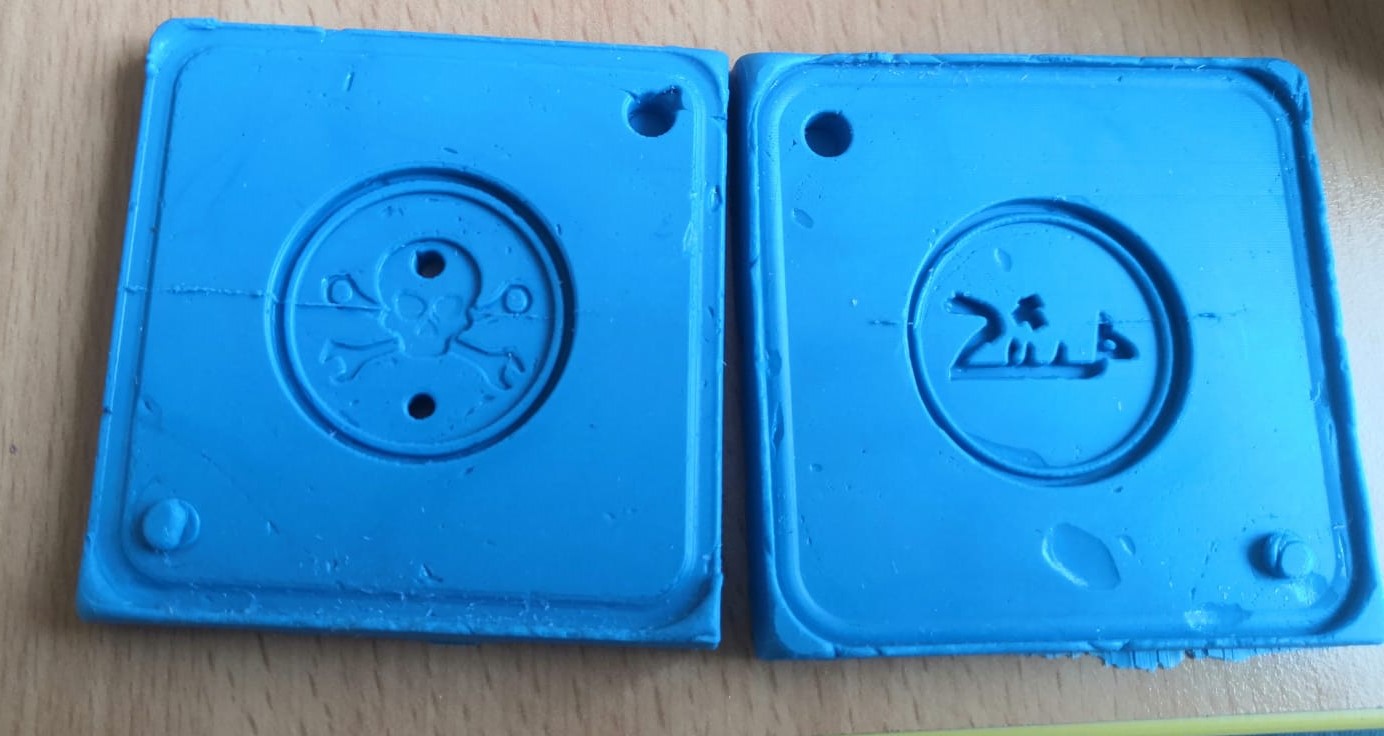
2.design mold (positive mold).
then I need two cut my design too half because each side have design on it .
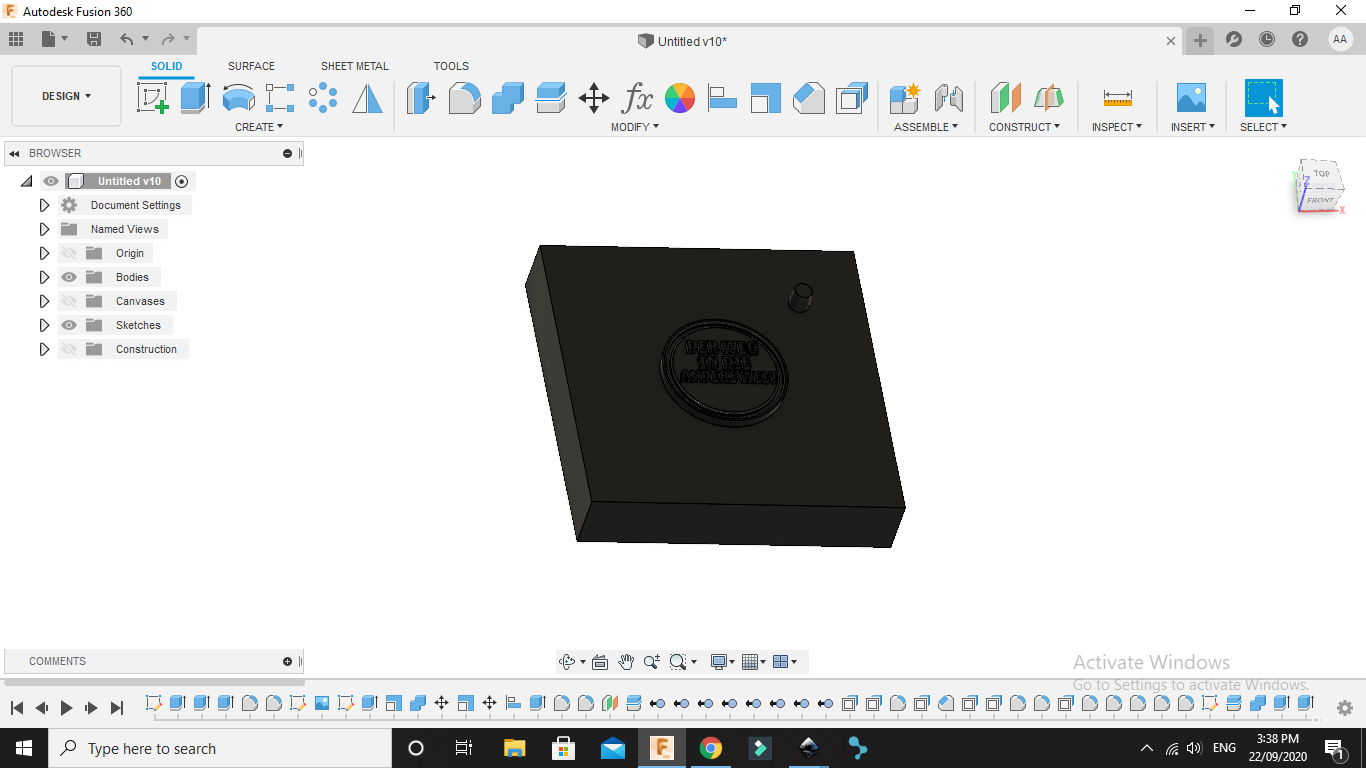
after I cut it in to two half the I added pin at one of they corner and the opposite hole
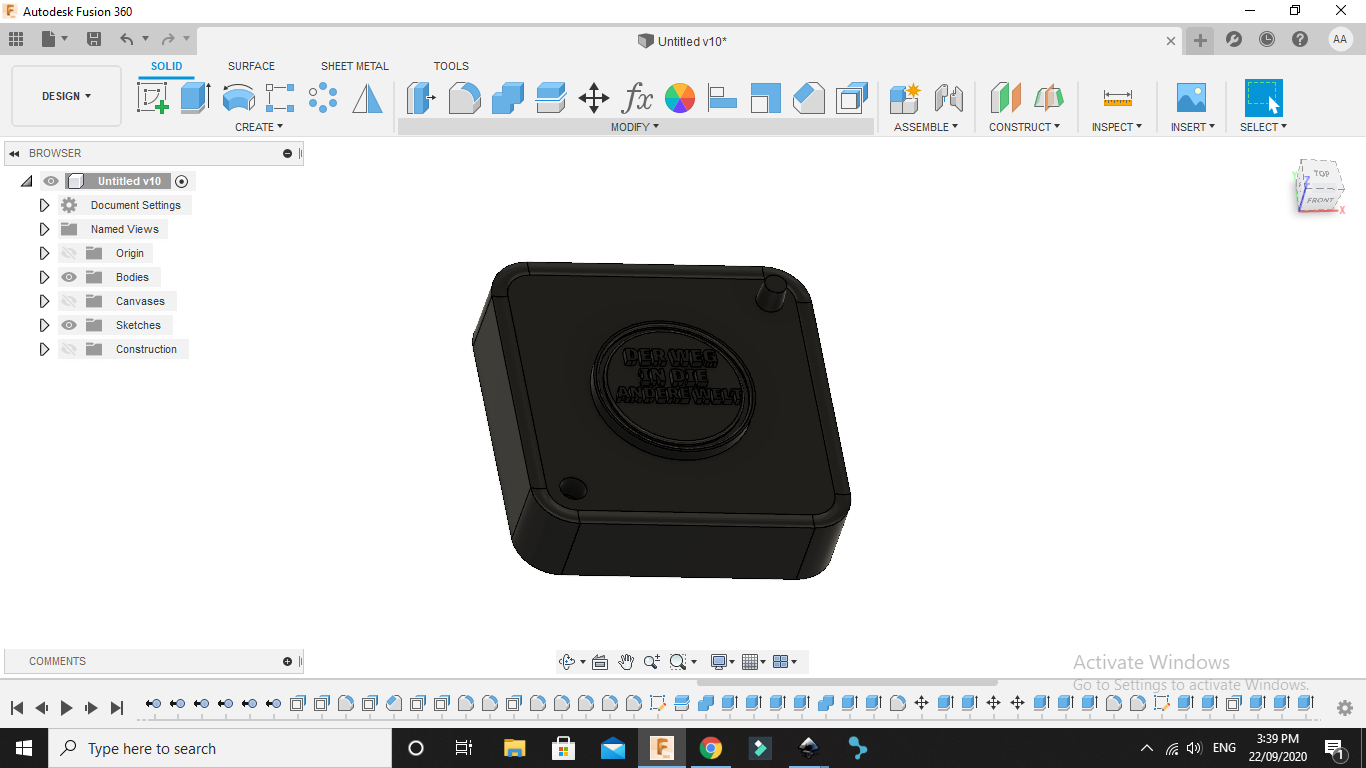 then I make channel around it so when I put it them on top of each other they dose not move
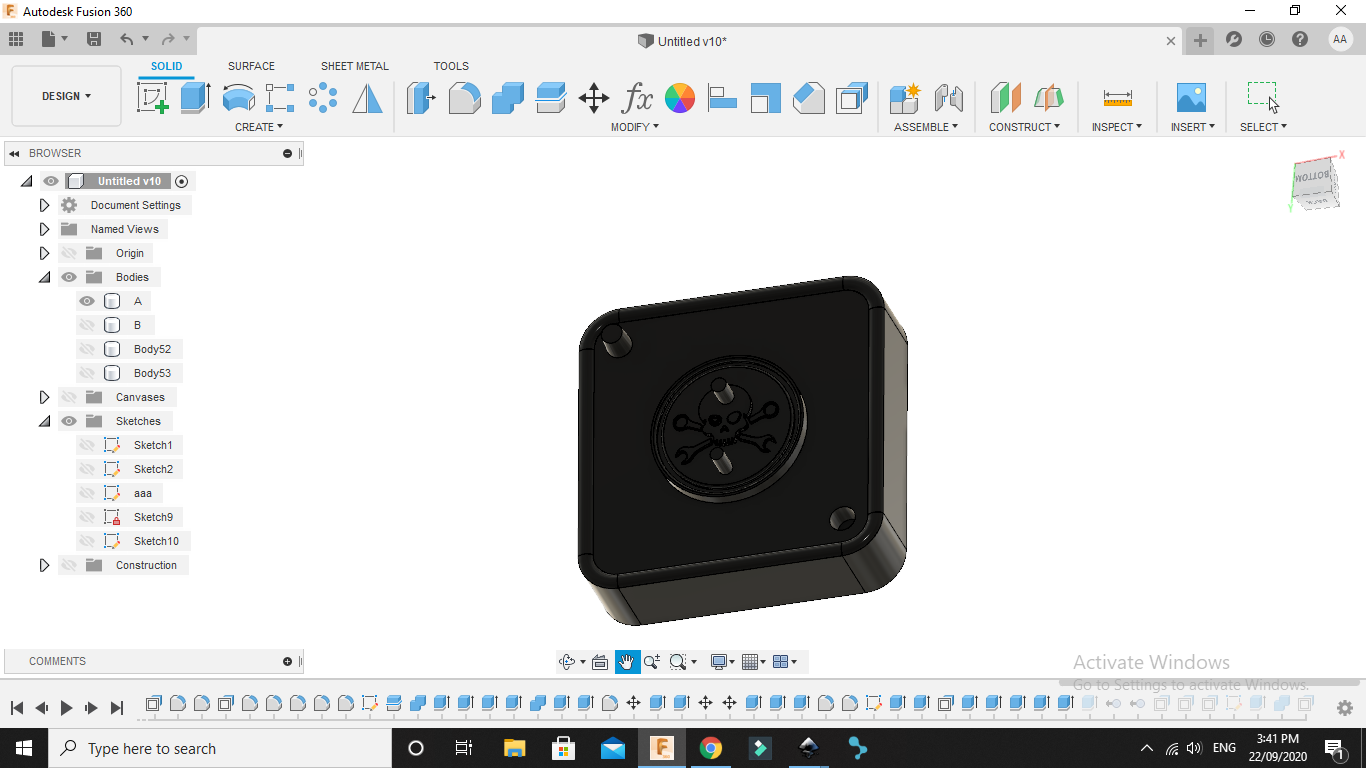 for the other part I add two pins that will help me to pure the cast, and opposite channel and pins.
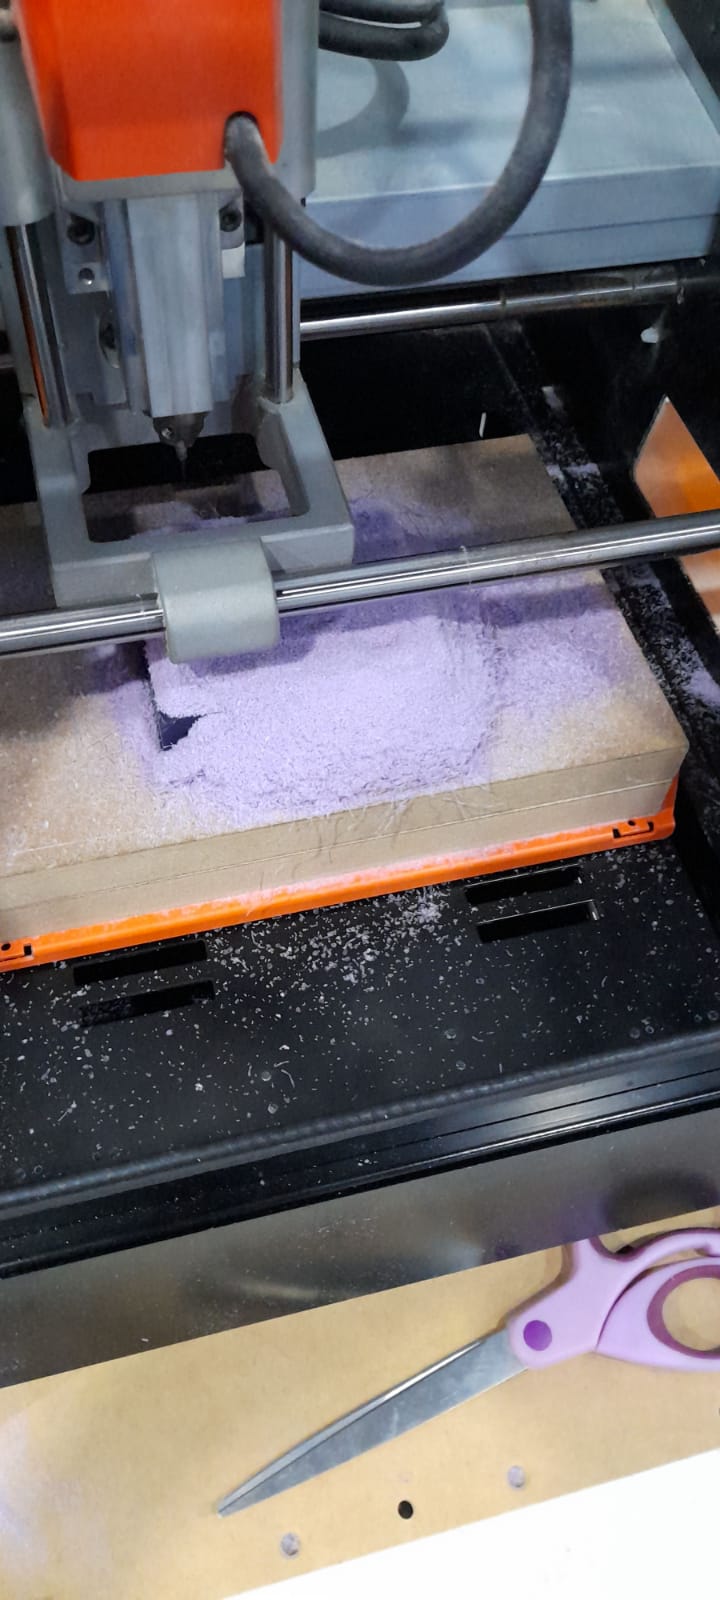
3. mill the design in wax it will be mold (positive mold).
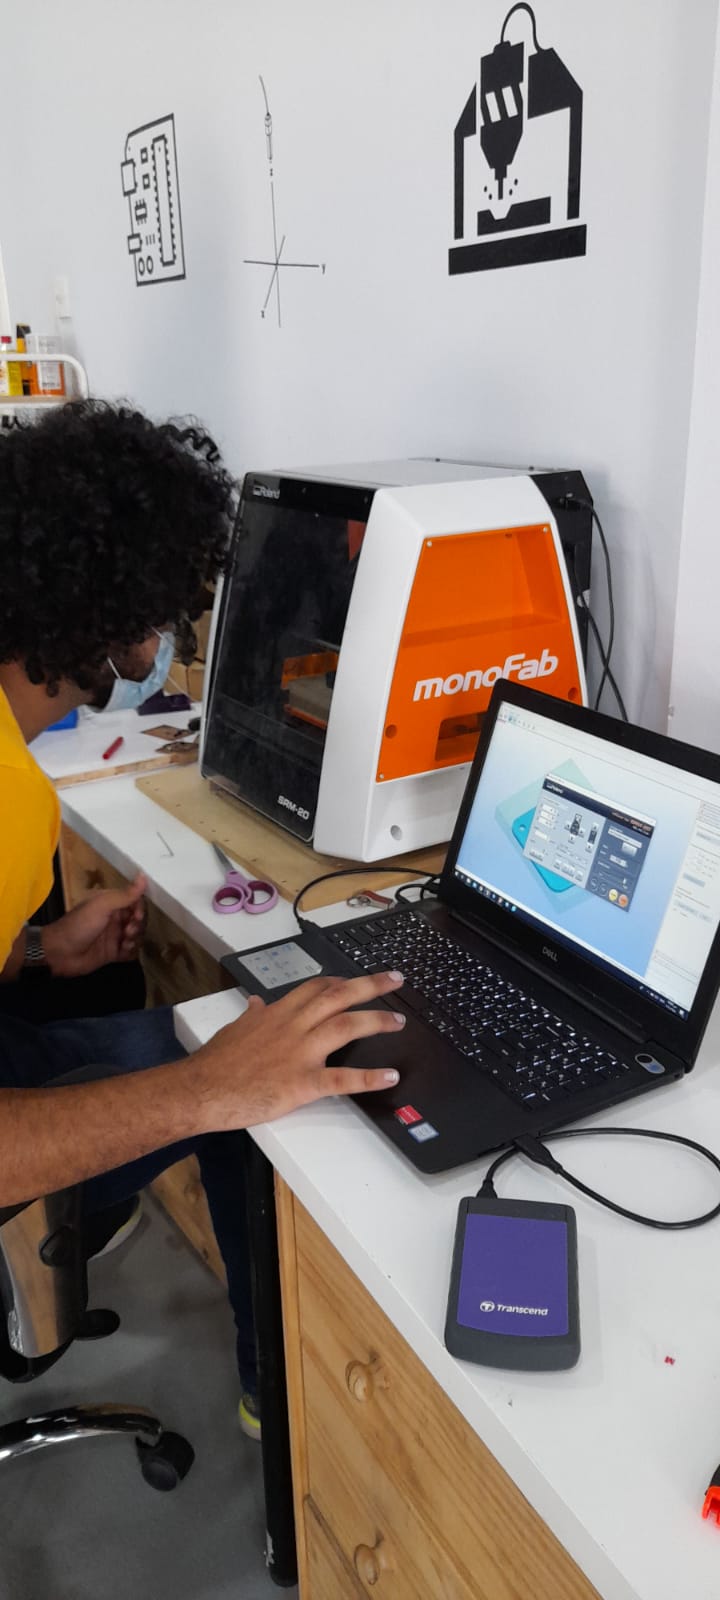
first you put our design in program called “SRP player “
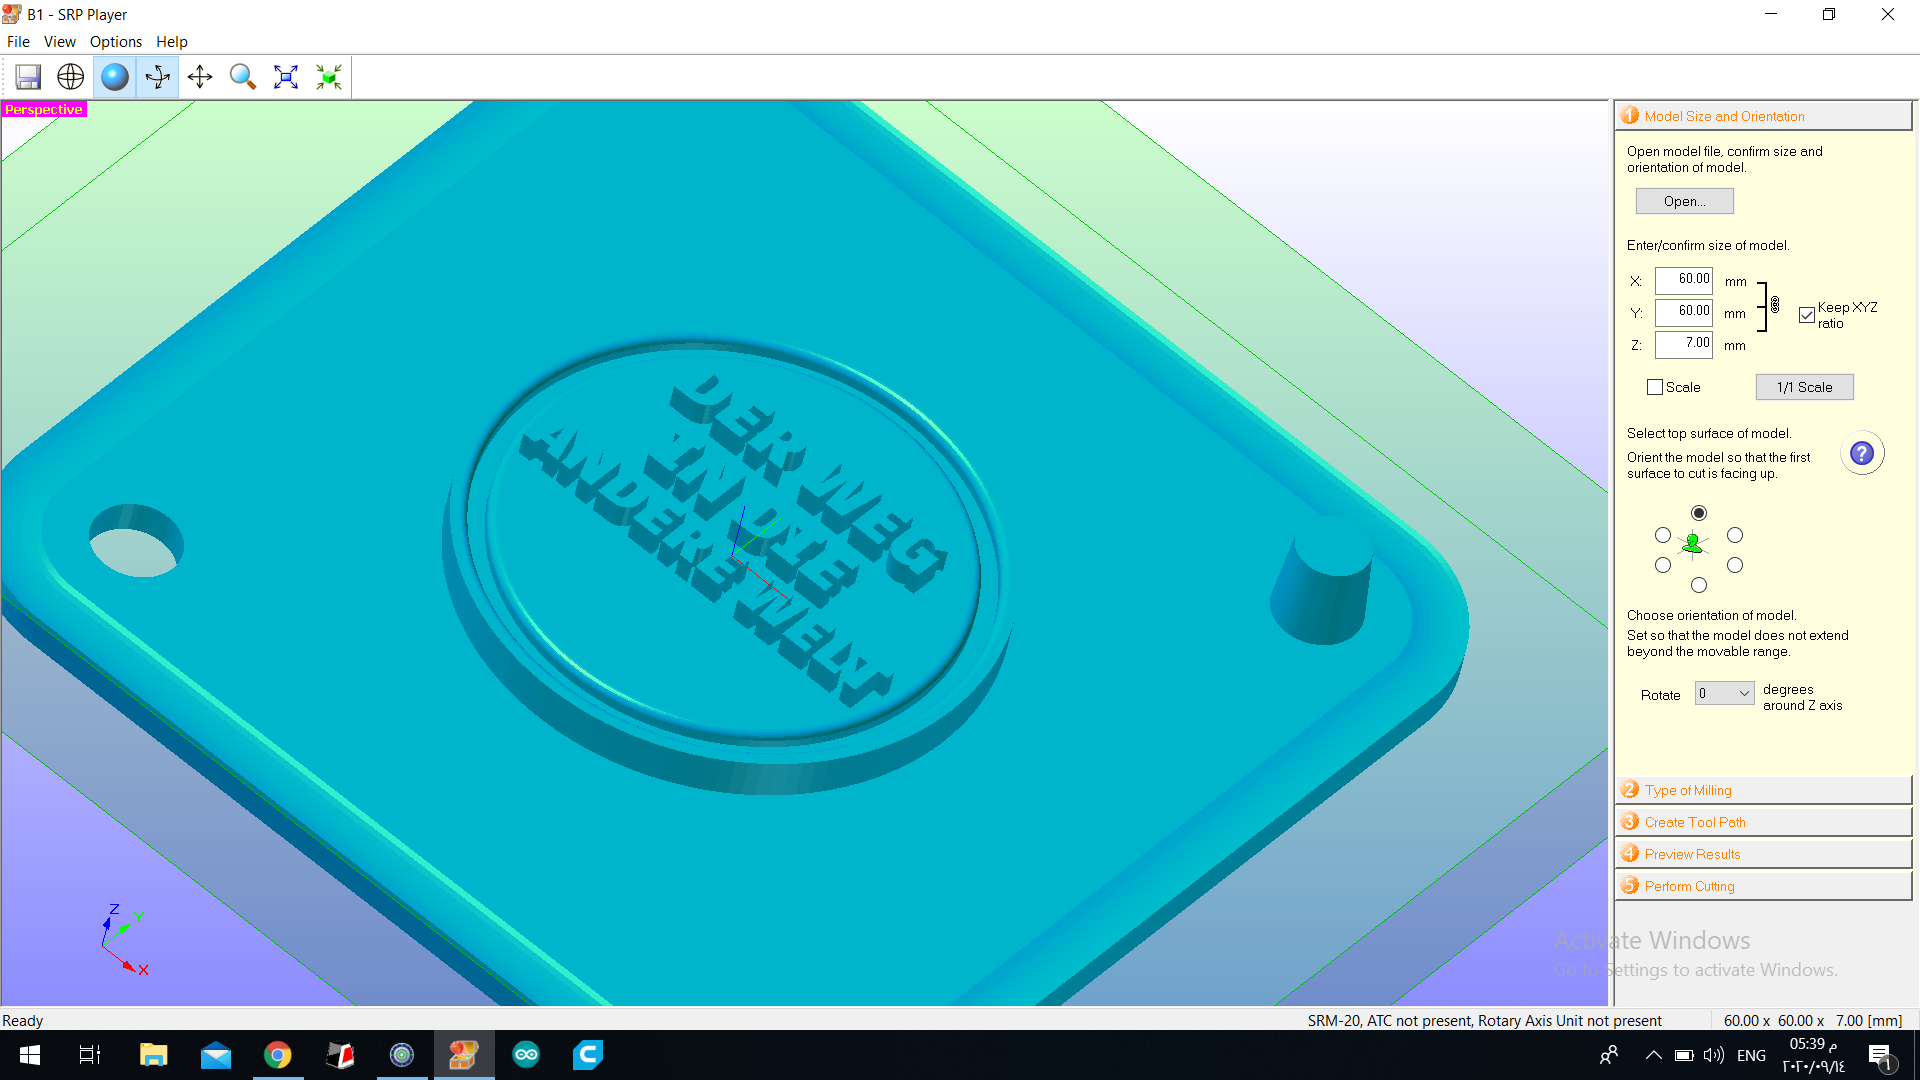
model Size and Orientation
make sure that the size of the design is correct then you select the surface and make sure it face up.
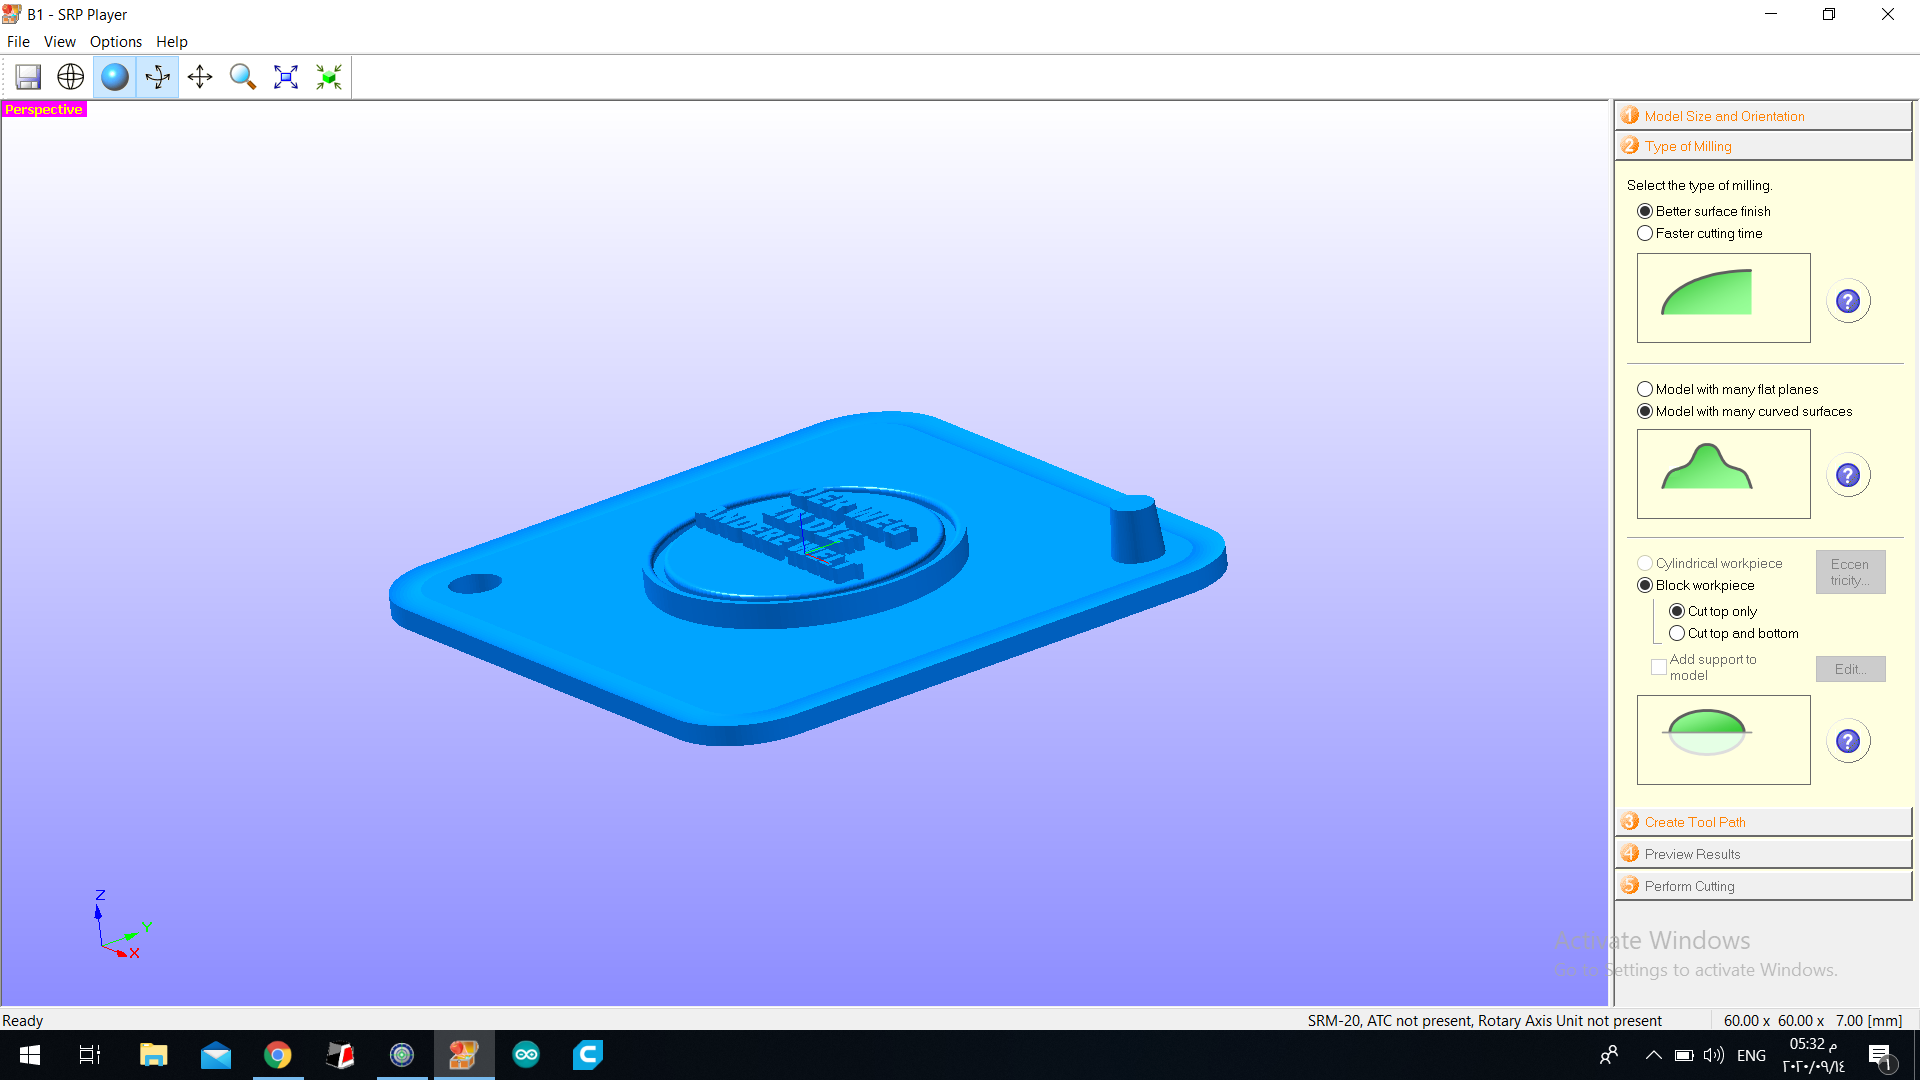
Type of Milling
select batter surface finish ,model with many curved surface and cut top only. This will make your fine surface finish.
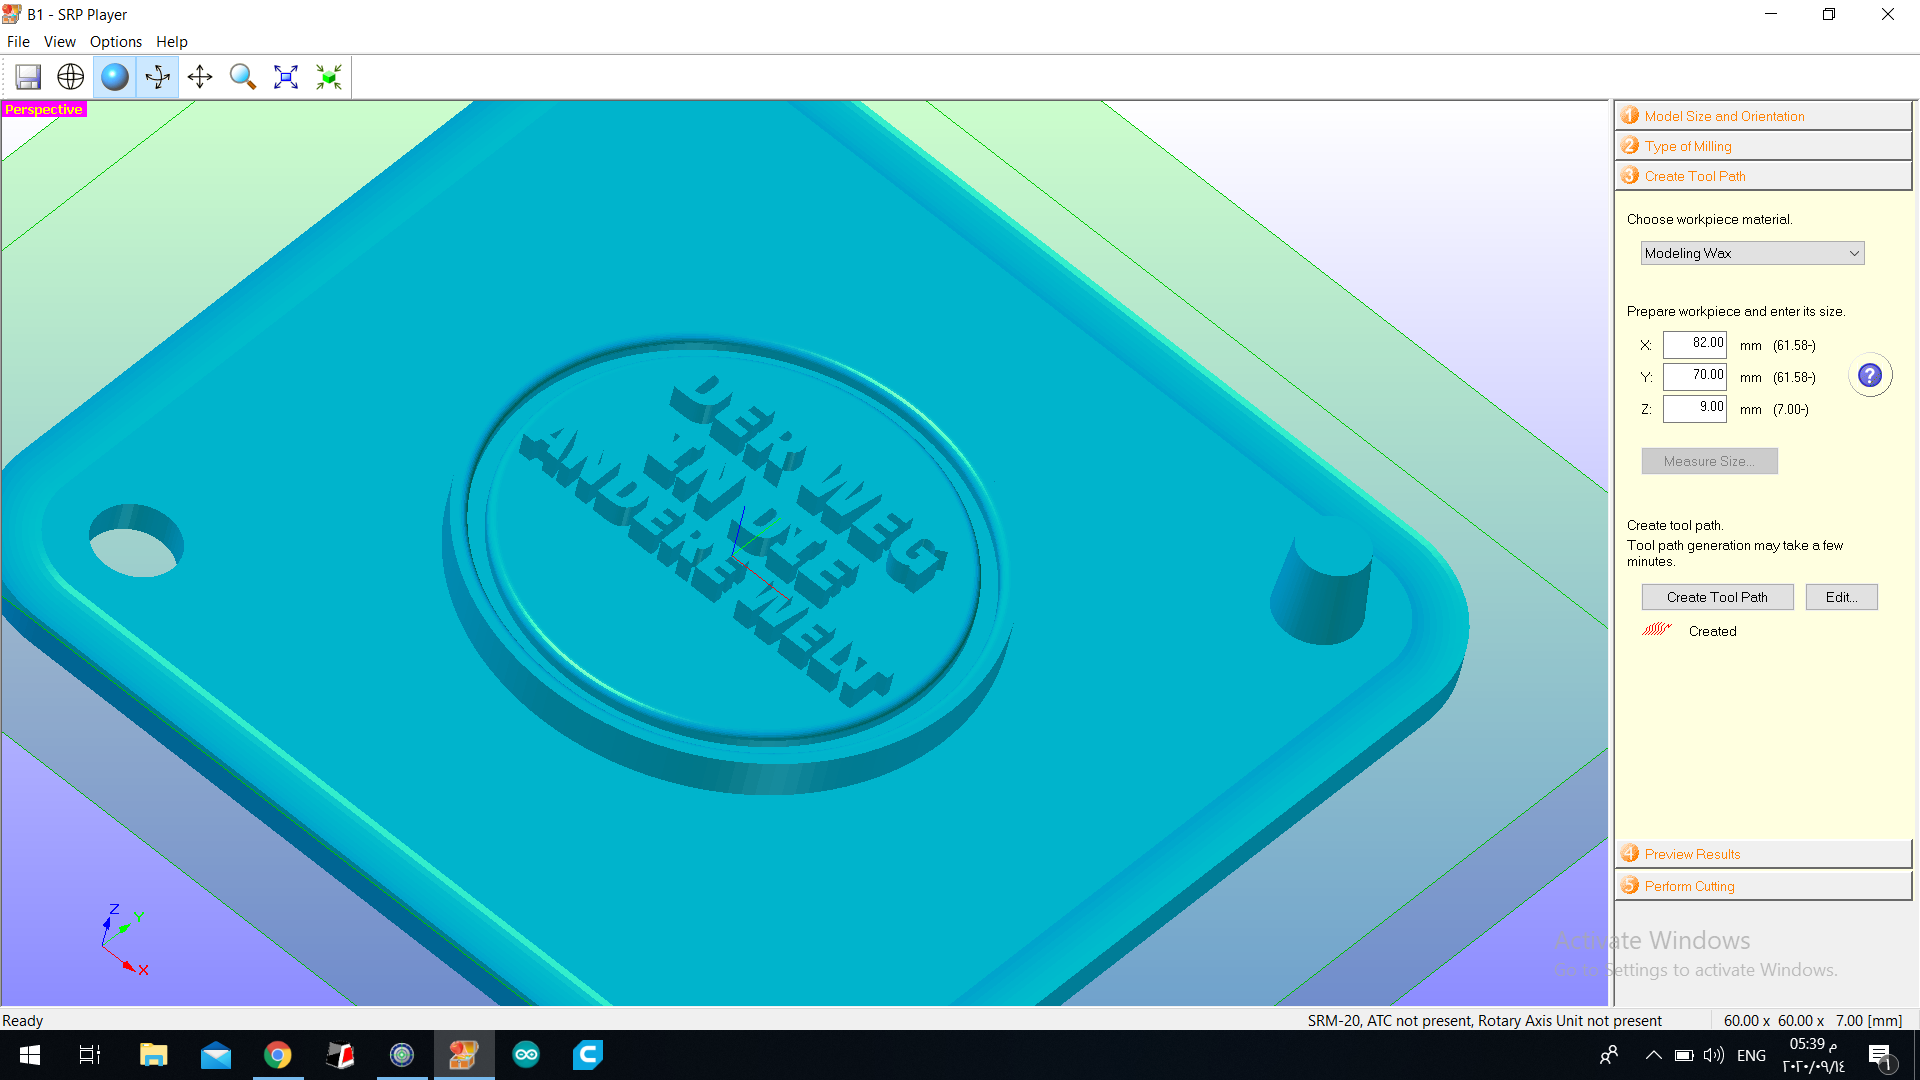
Create Tool Path
chose workpiece material :modelling wax then you put the size of the workpiece “wax” that you will mill on it and batter you put it smaller.
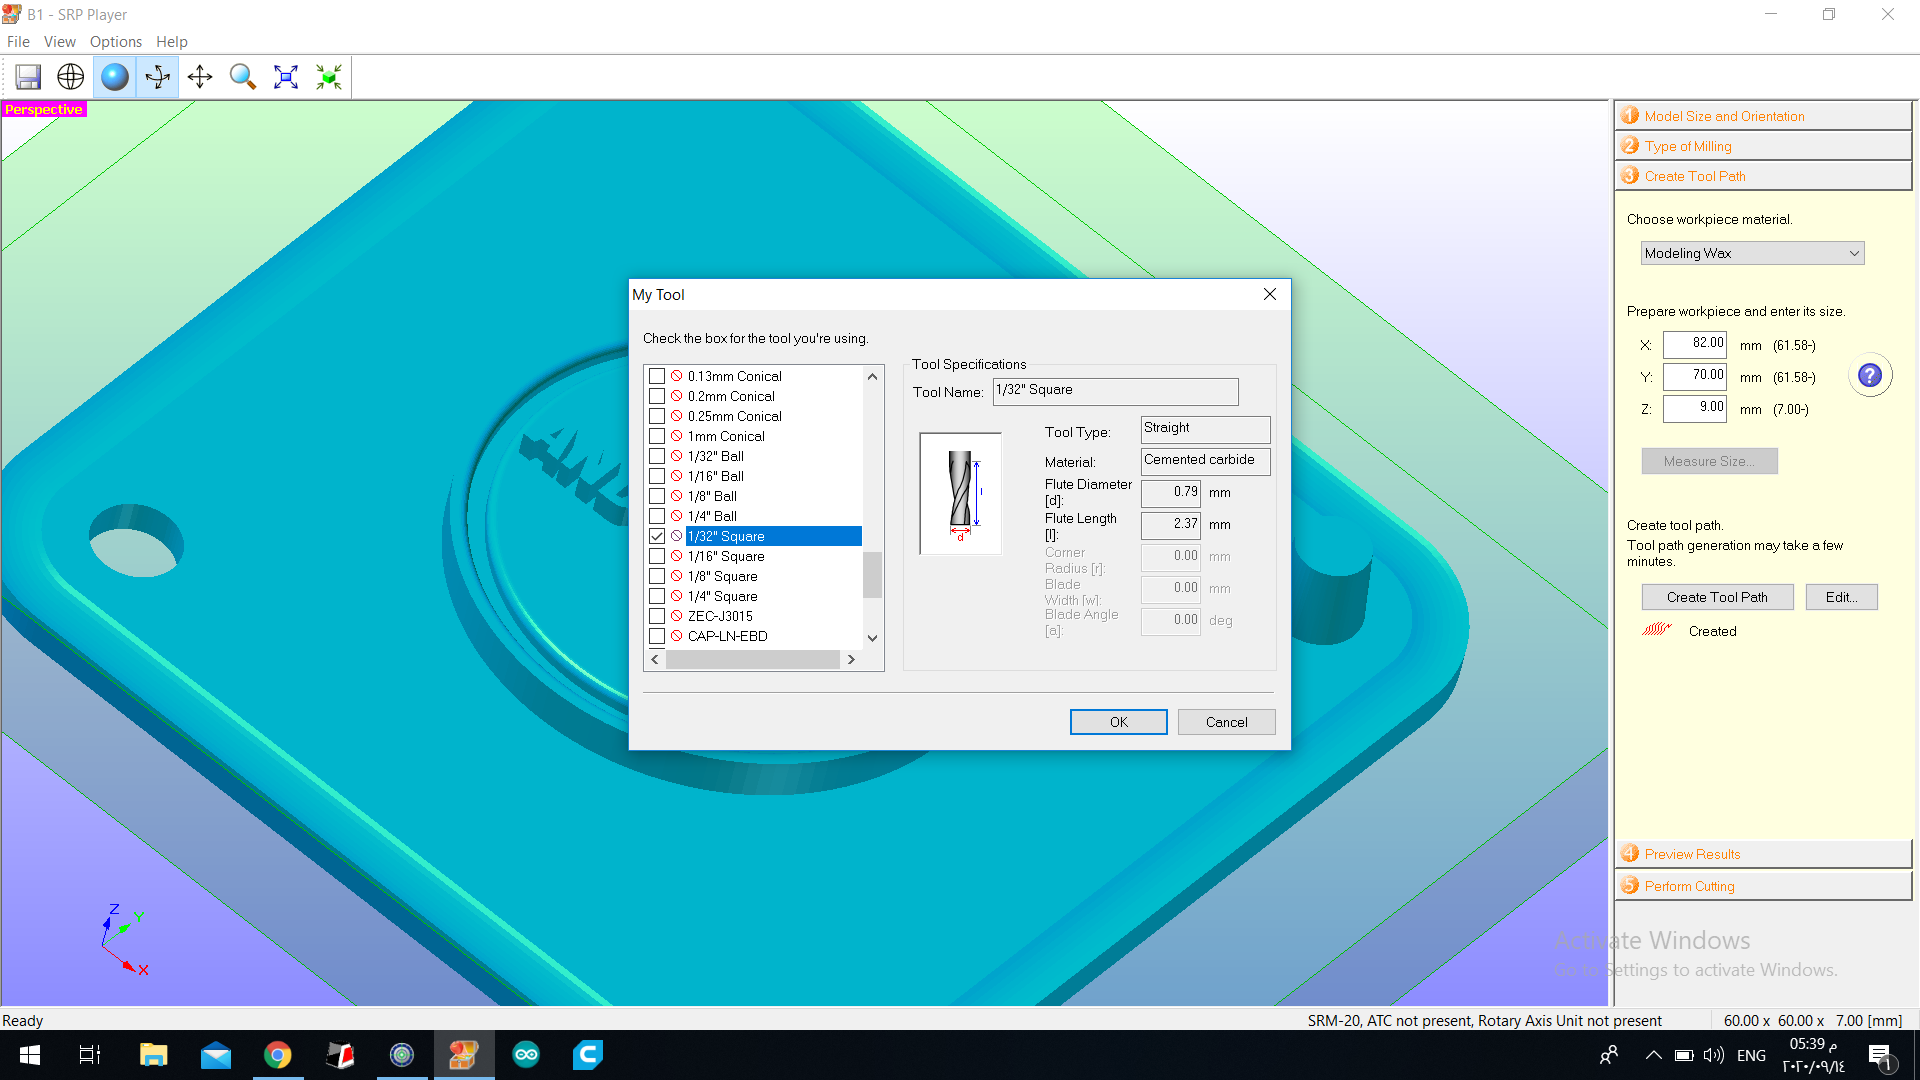
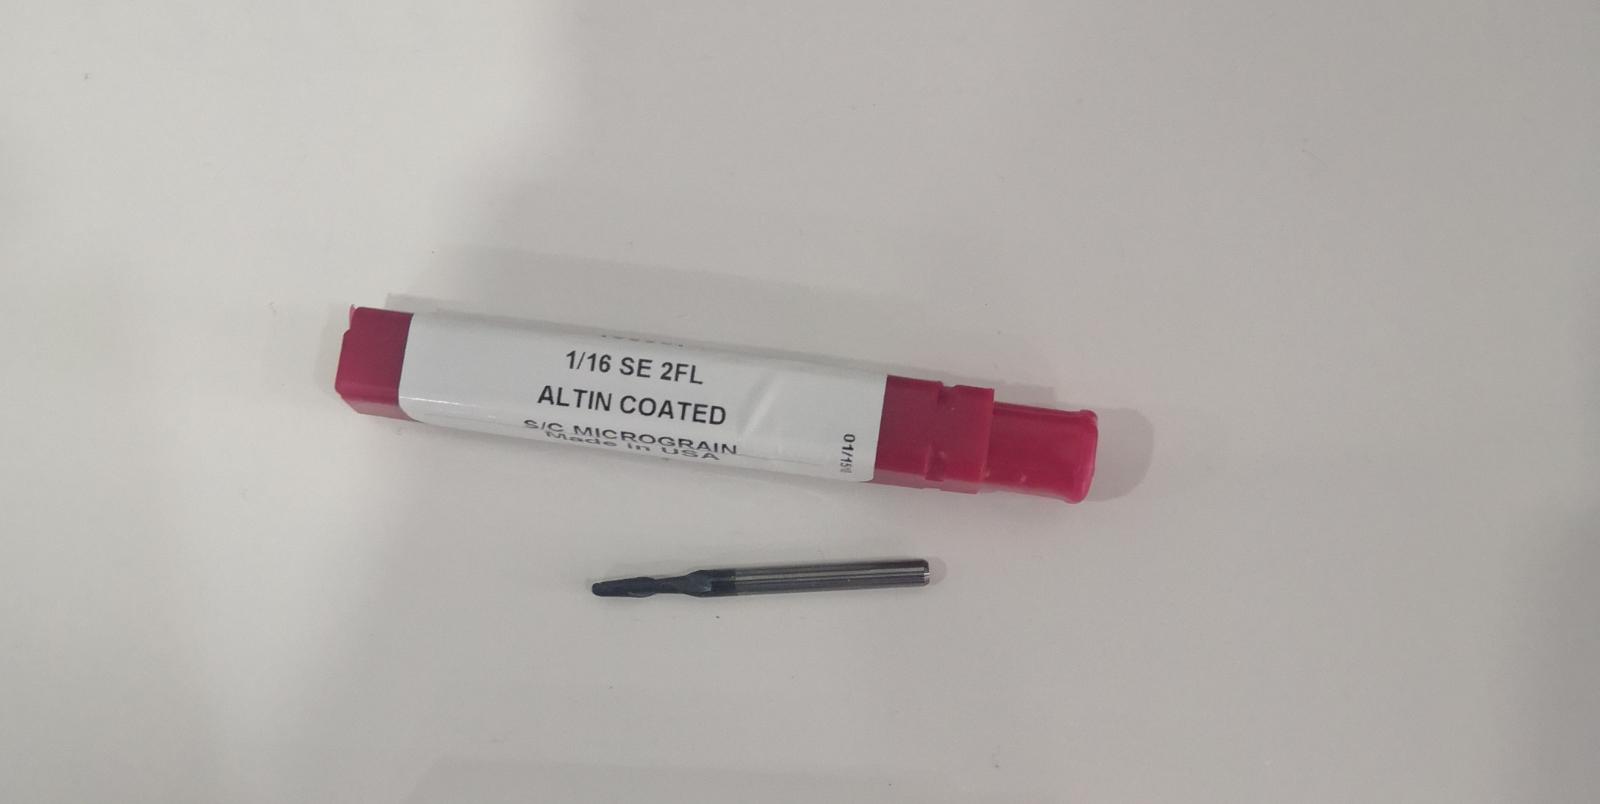
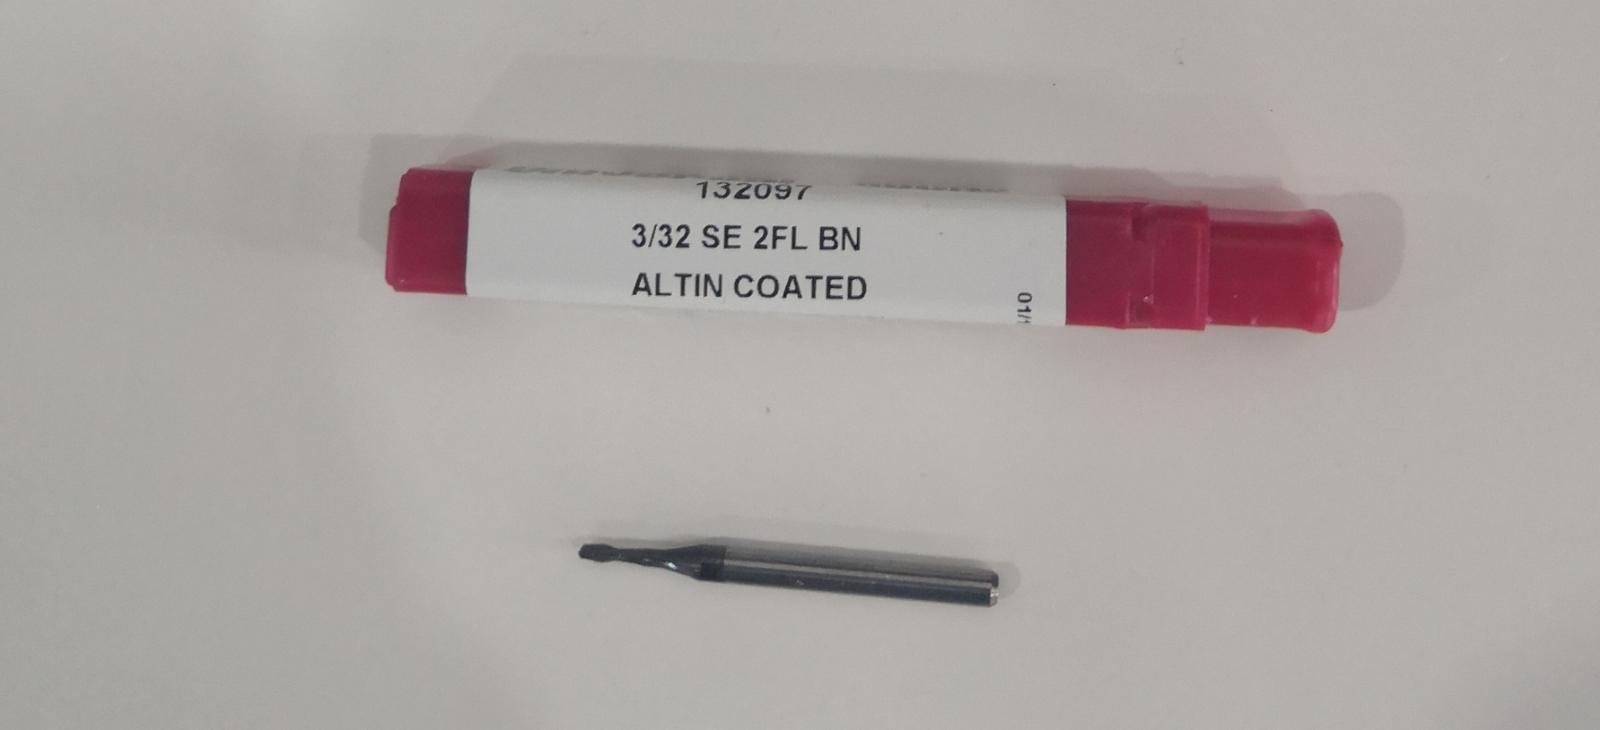
Next you select the tool that you will mill with it tool name : 1/16 square.
when I finish choosing the material and the tool the problem is automatically do the speed and the feed as required.
 the Finish tool
 the Rough tool
finish cut Vs rough cut it depend on the material removing and how the surface will be. Rough is used to remove as much as possible and don’t care about the surface or the details and Roughing passes (1.19mm)., on the other hand Finish used to give smooth surface and every detail and Finishing passes (0.3mm).
there is other things you should care about. the Feed Rate it is how fast the tool move, Spindle is the speed of the tool is spinning, Cutting-in-Amount is the tool’s depth of cut and Path Interval: the distance between tool passes.
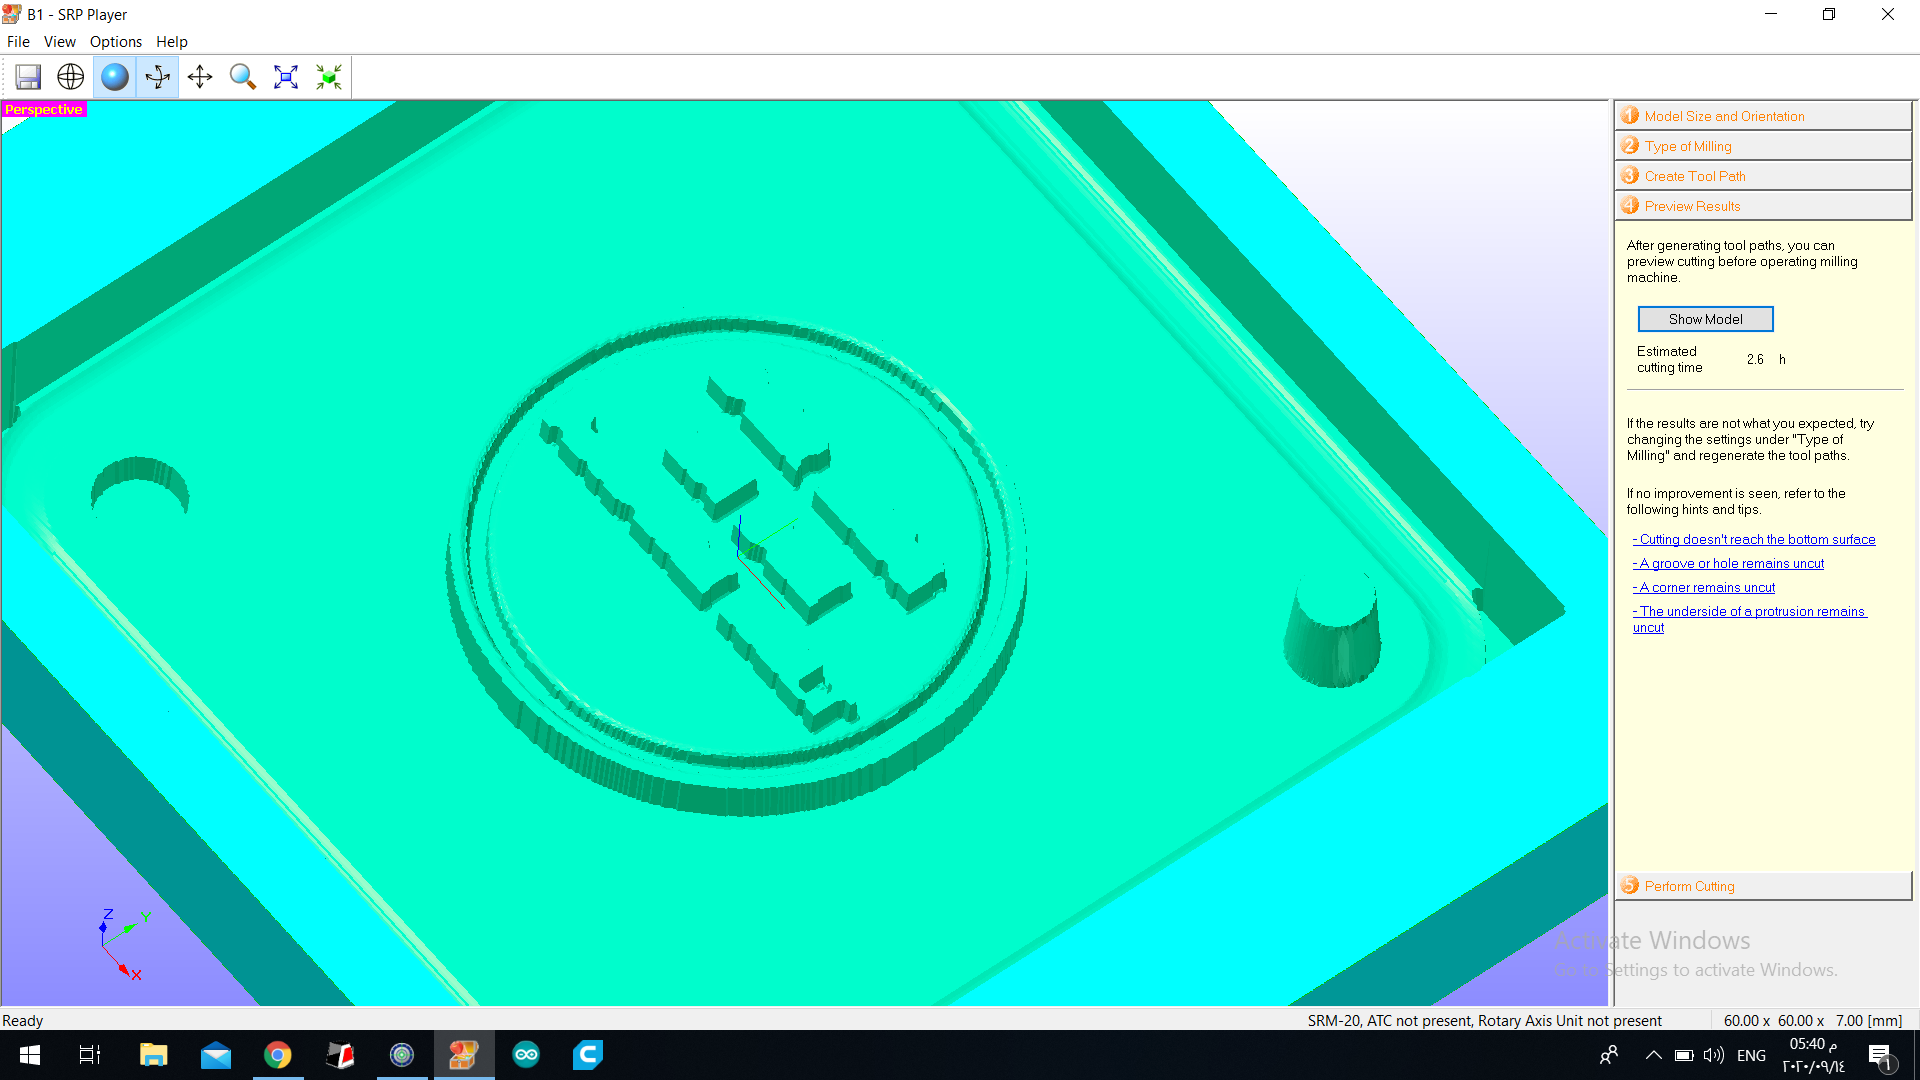
Preview Results
In this step you make sure that every thing look as you want. Here I face one problem and it was that the text on the coin not clear because the text was to small and the drill bit cant go between the letters. So I change the text too one word.
 the wax that we have is smaller than my mold design, So I joint two piece of wax using small torch

I melt little bit of one side of each wax than I joint them together and press on the to hard so they become one piece and don’t break
As I used to fix the PCB in the bed of the milling machine by putting double sided tape I did for the wax then I mast set the x and y axis in the meddle of the workpiece. and
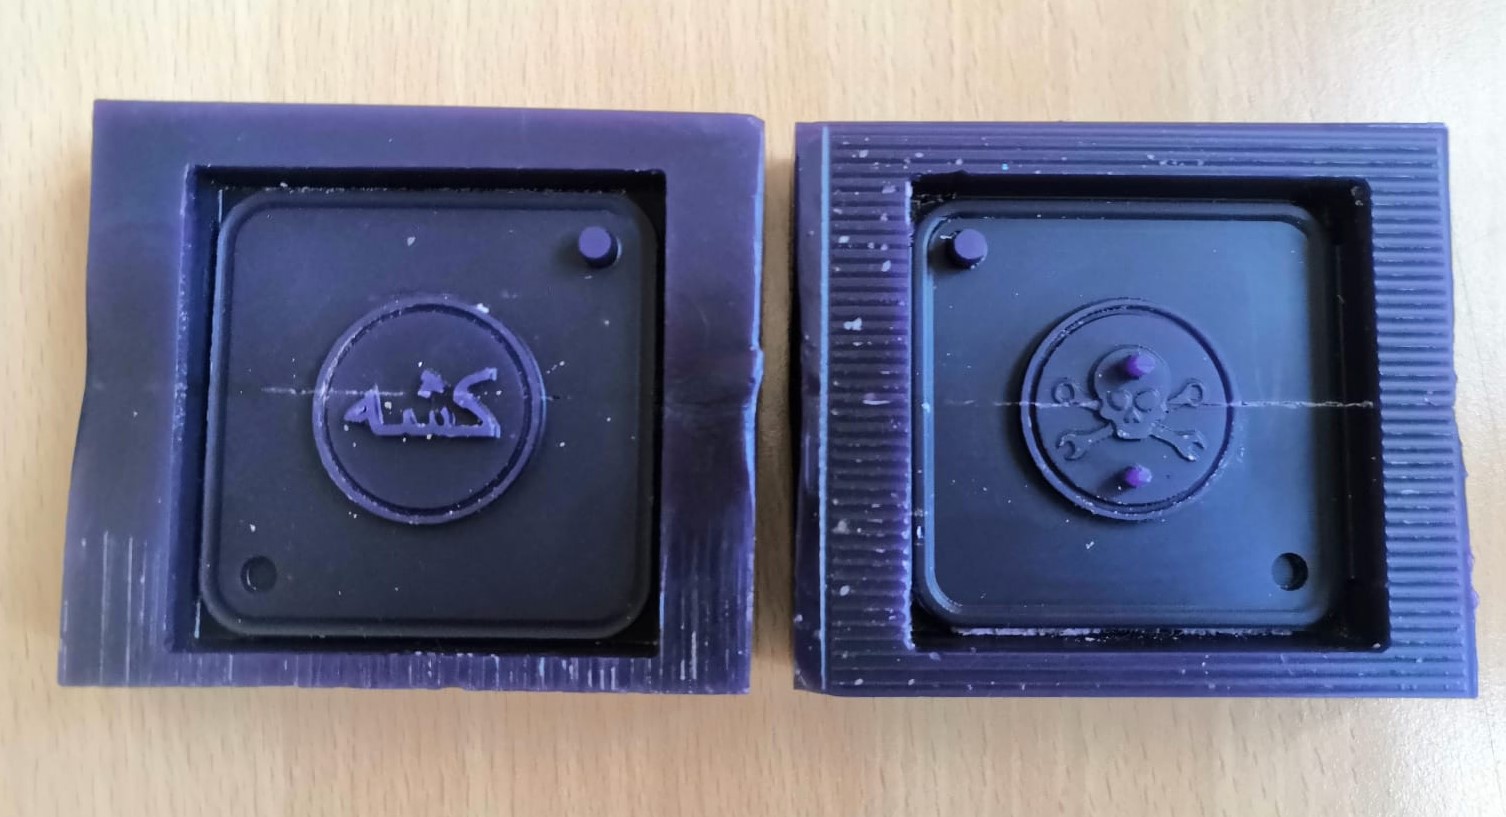 I did finishing for both them. as you see lines in the right mold because I made facing for doe to jointing to wax my melting then .
4. put the material the you want to your mold (negative mold) in the wax mold (positive mold).
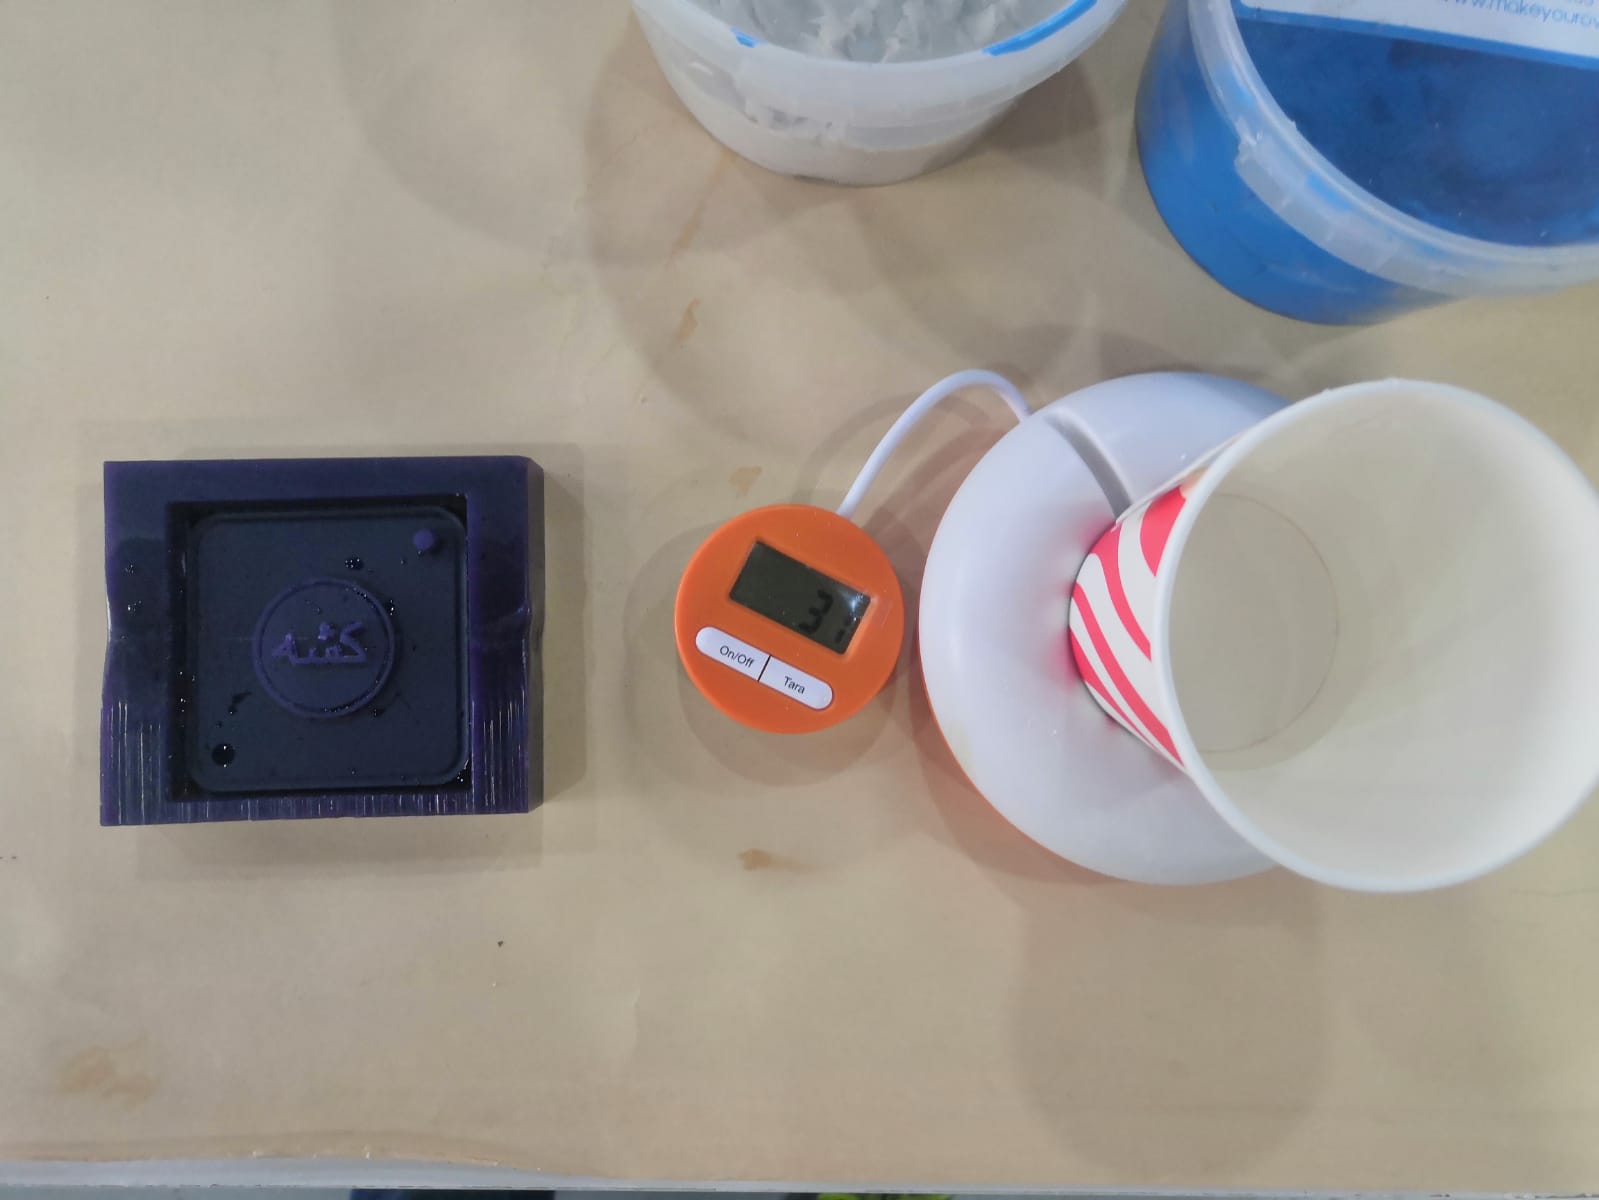 first I take wax mold and pour in at water the I pour the water that in side he wax and cup so I know how much it need from the other material and it need 30g
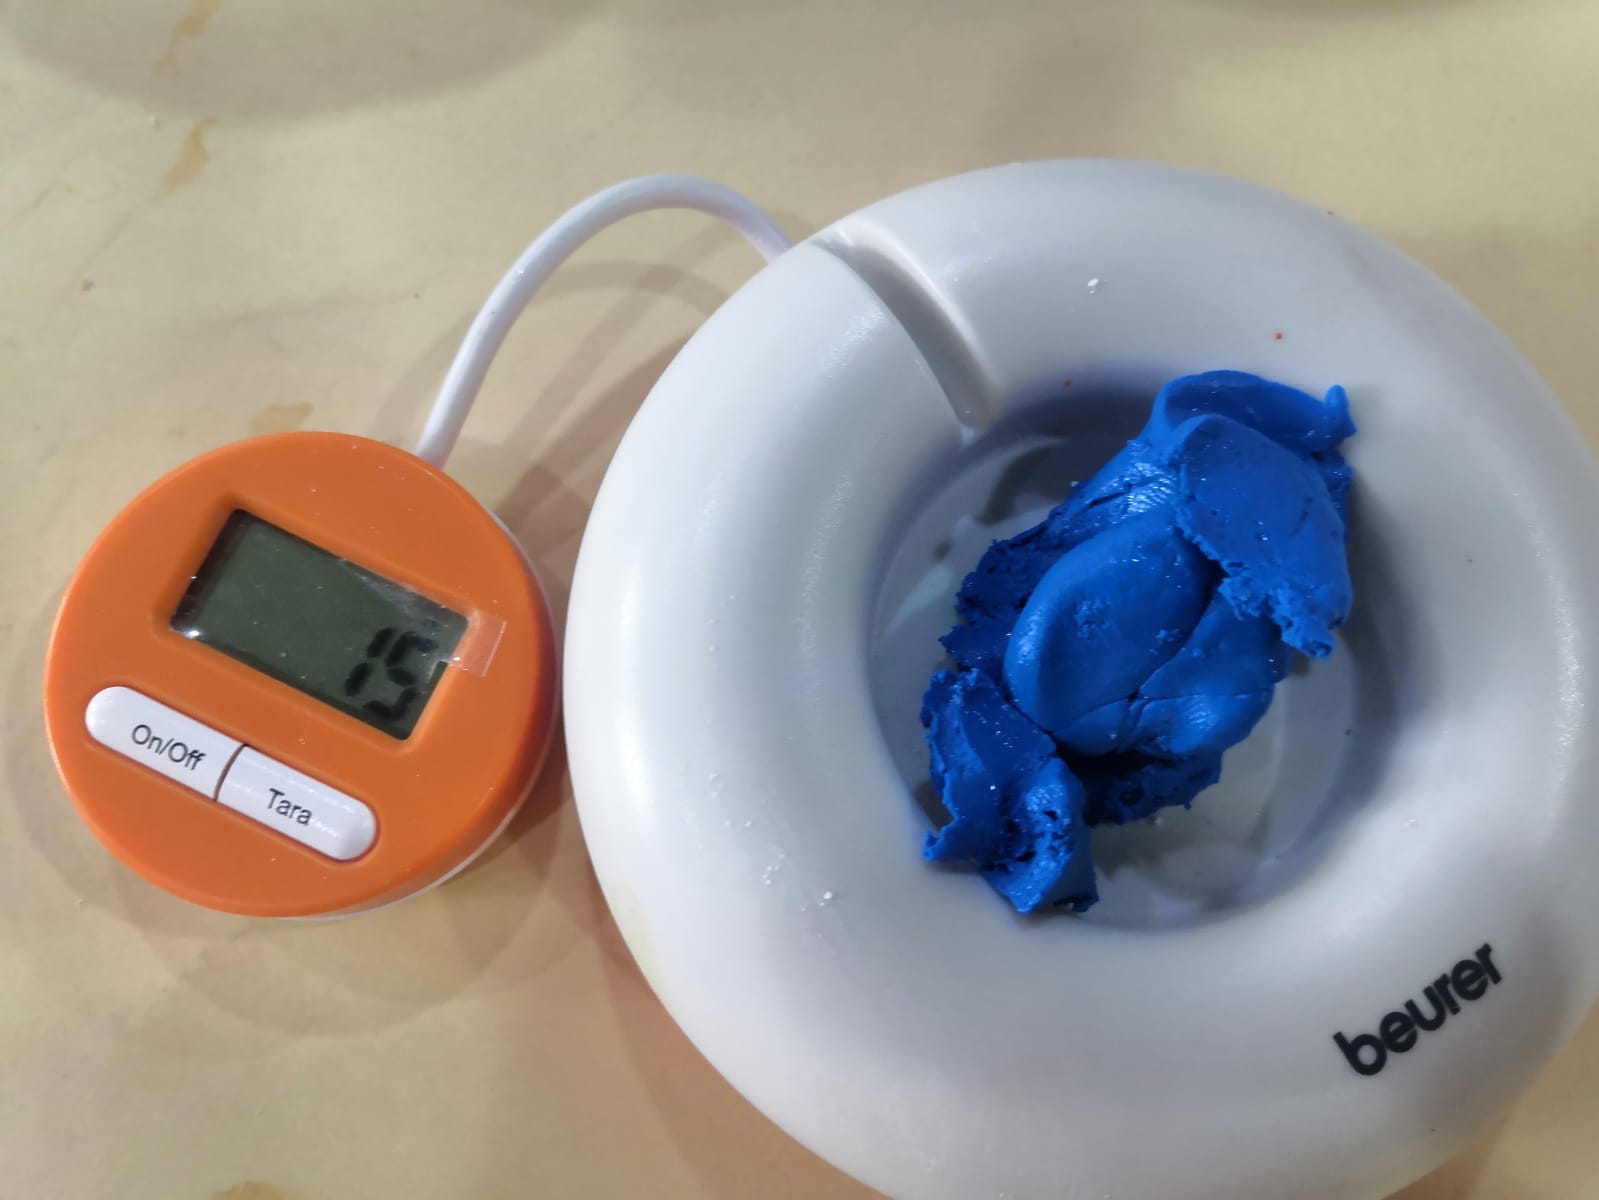
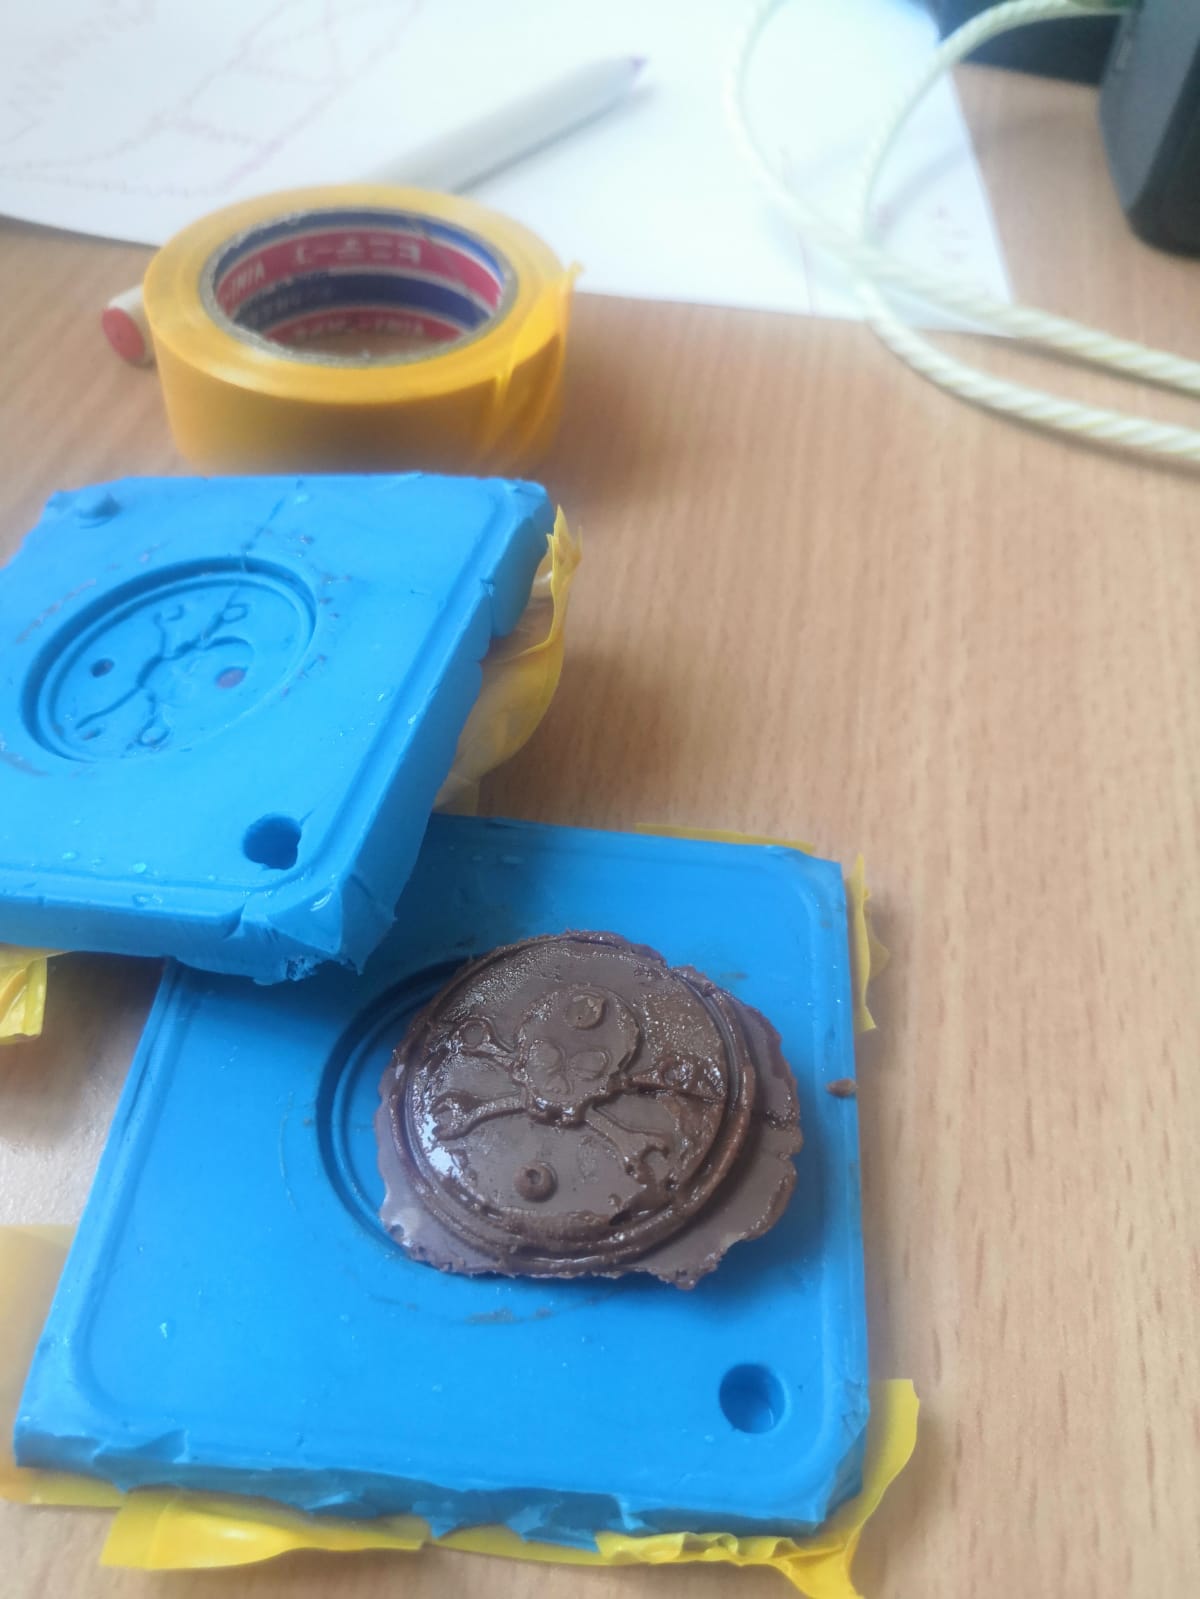
for the negative mold I used this material it called “Silicone Plastique ” and it is food safe material it consistency of clay and it contain of two parts: part_A (White) and part_B (Bleu).
it must be 1:1 So I take 15g of each part then I mix them together until it git color between the two parts.

Next take small part of it and put it in the wax mold and press on it hard
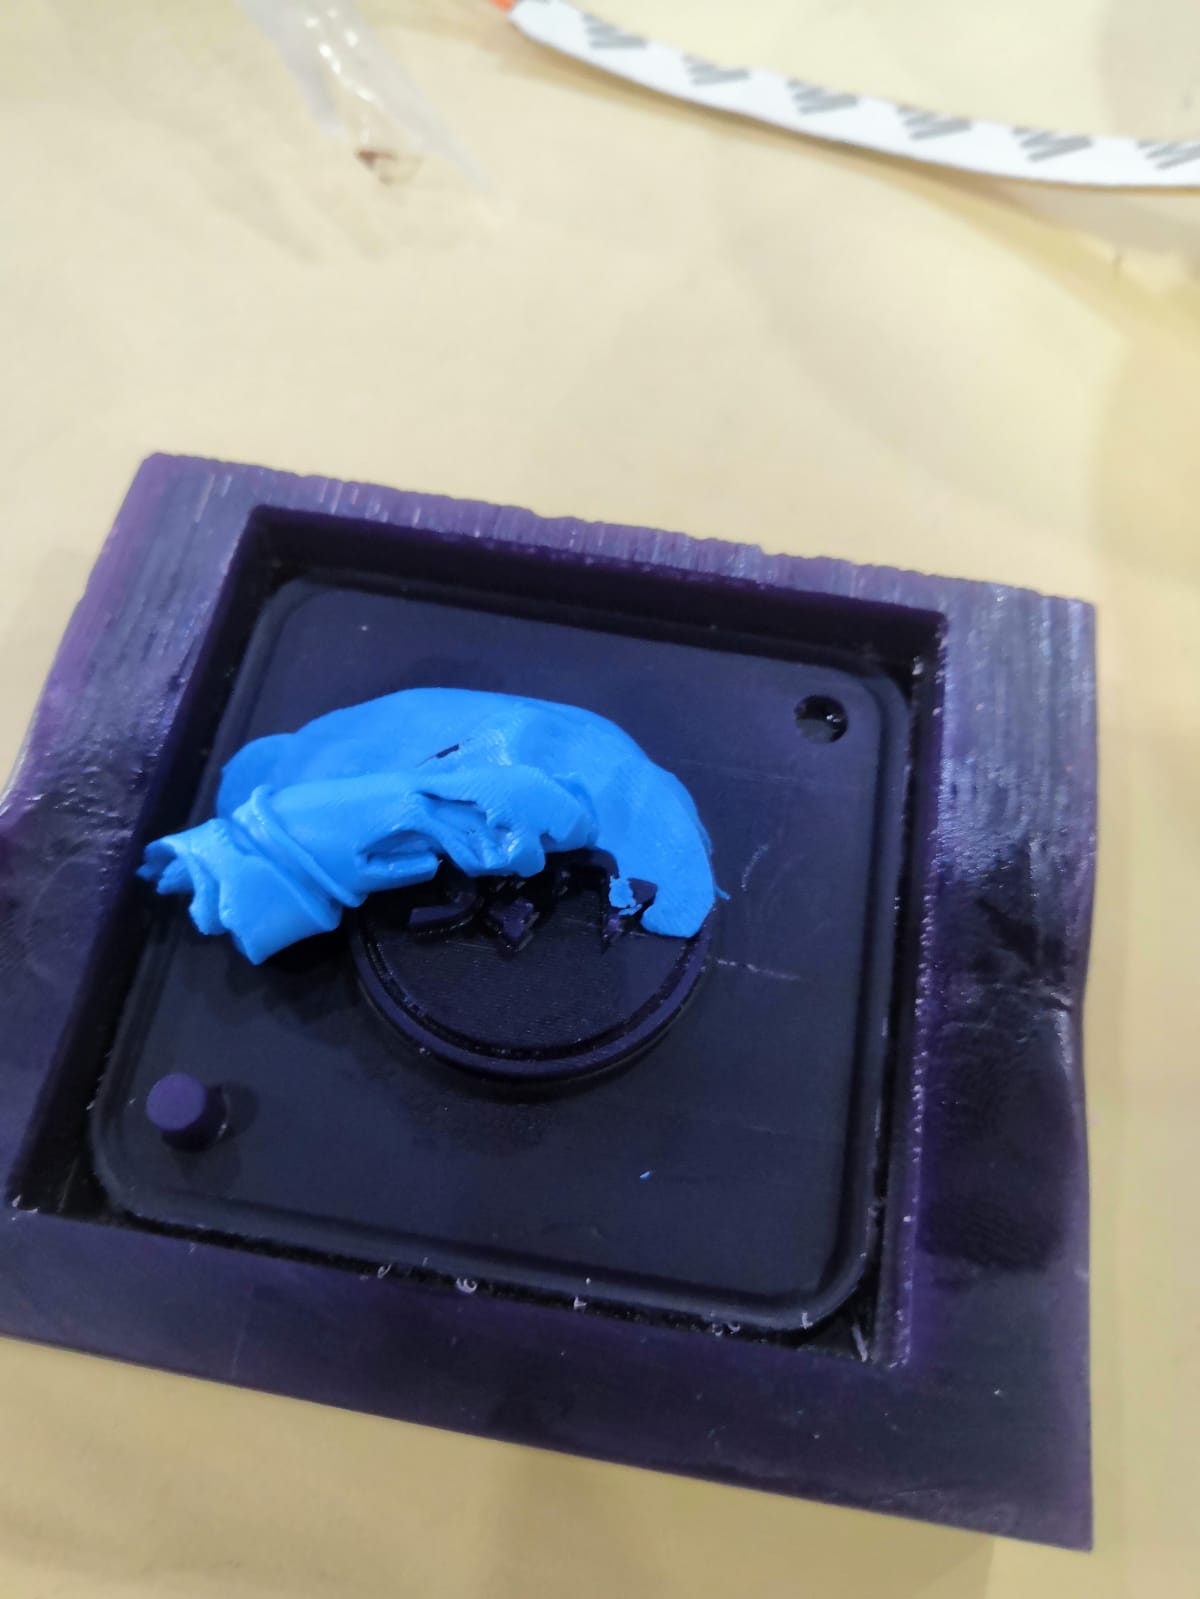 then add more of it.
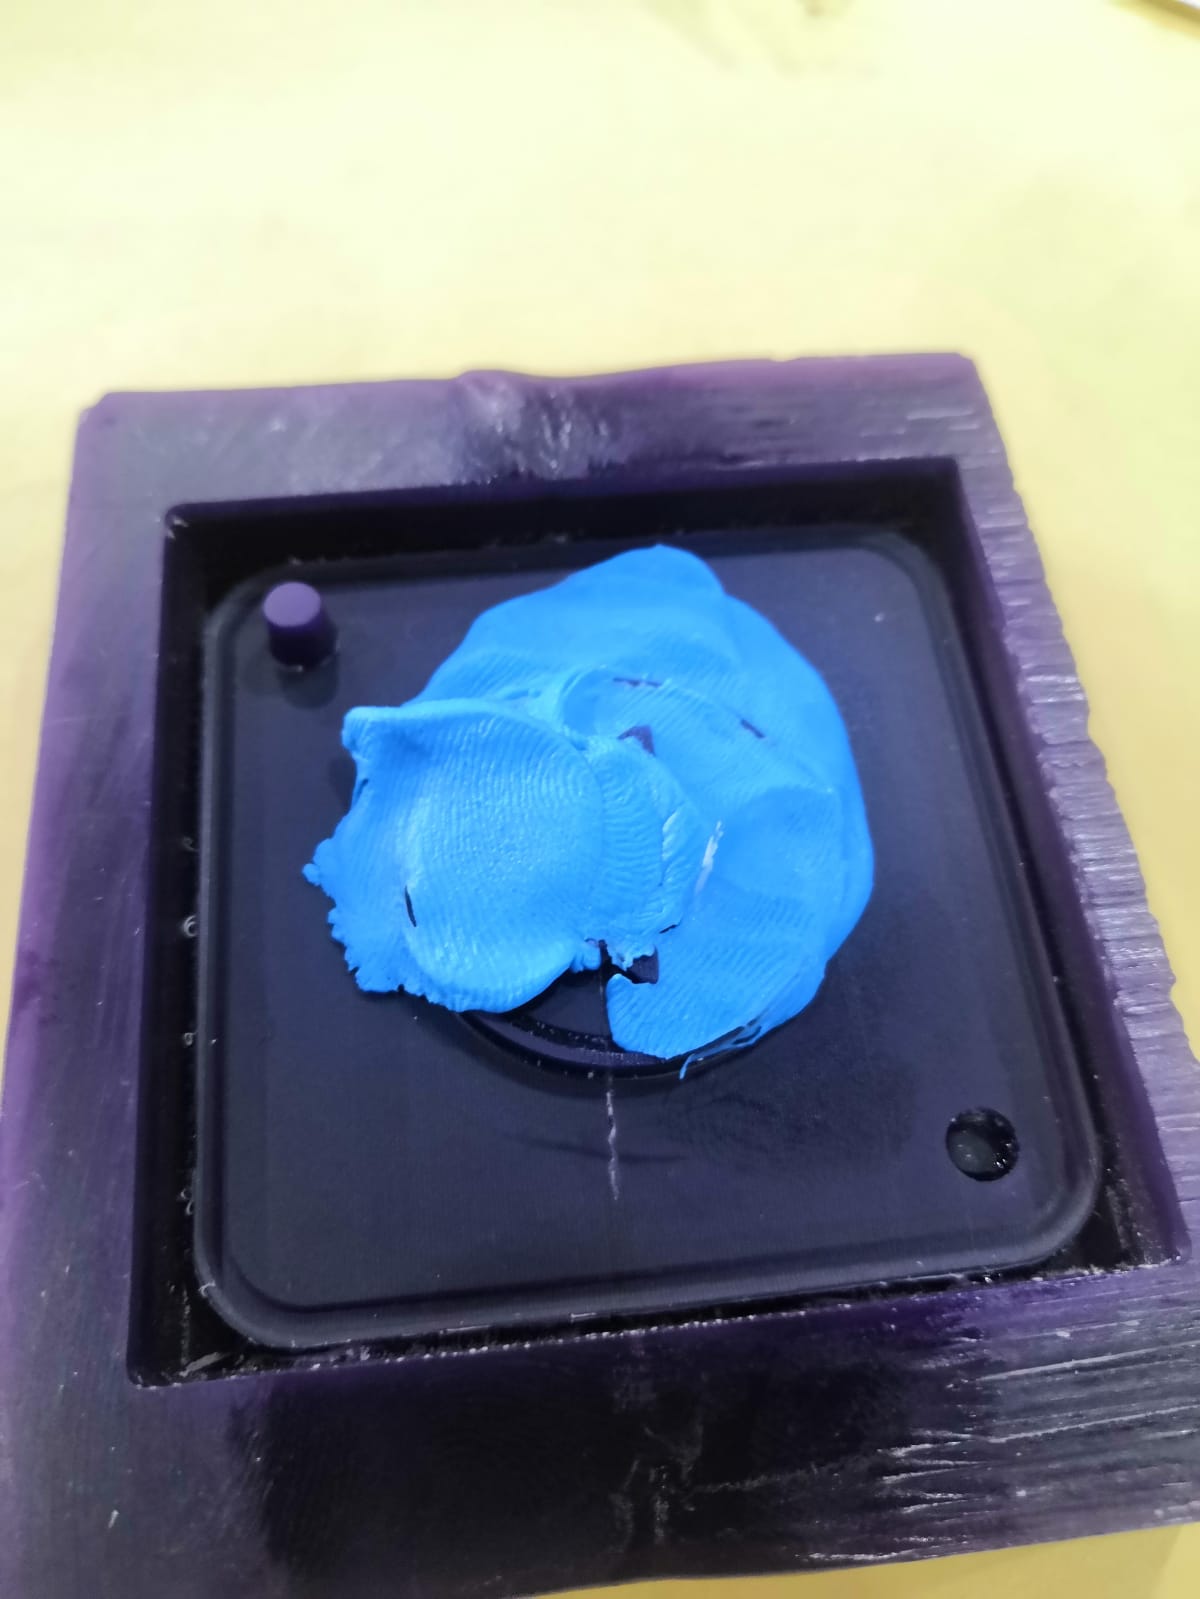 until you cover all the wax with it. White two hour to git hard and stick together
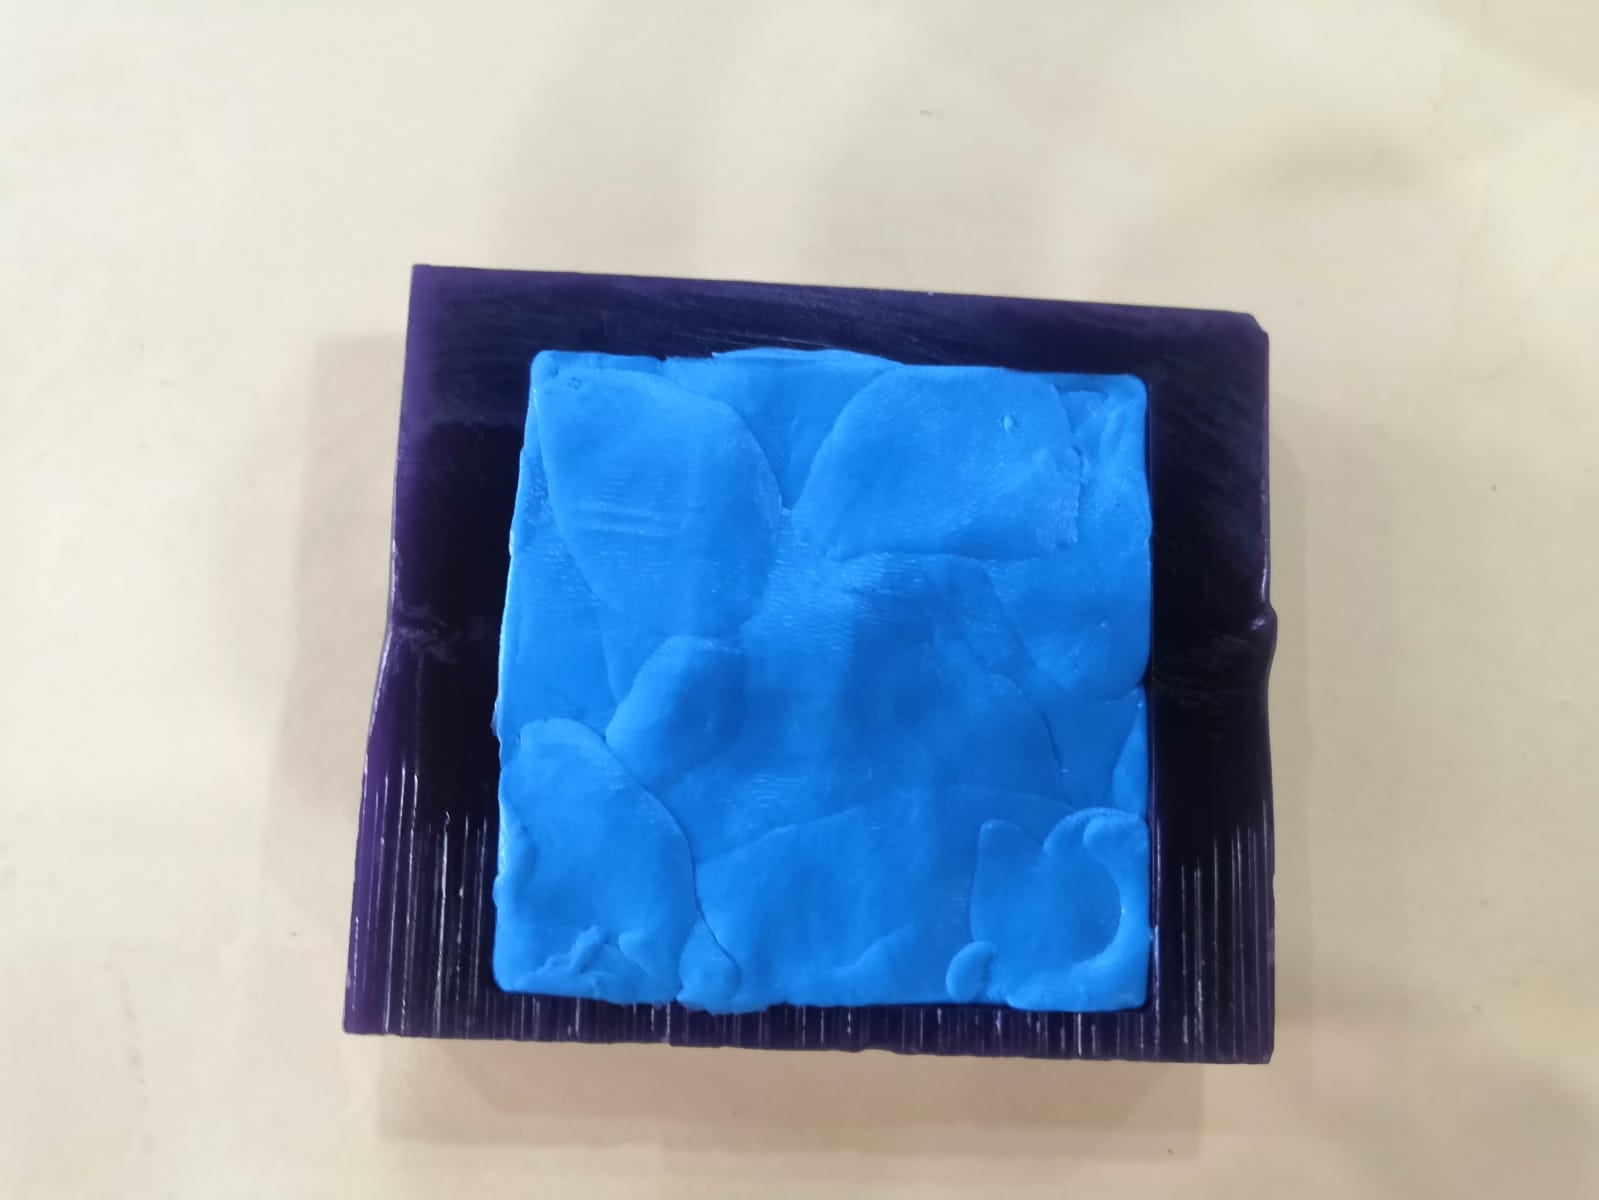 after that remove it from the wax. this is the final mold
before casting I must clean the mold because it food safe and it must be clean and cure well before it use for food, one of the ways to clean it is to put it in boiling water then dry it properly.
5.Casting
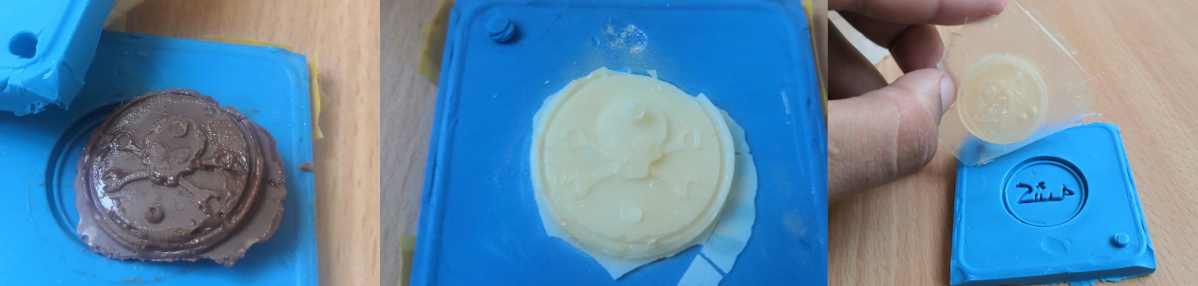
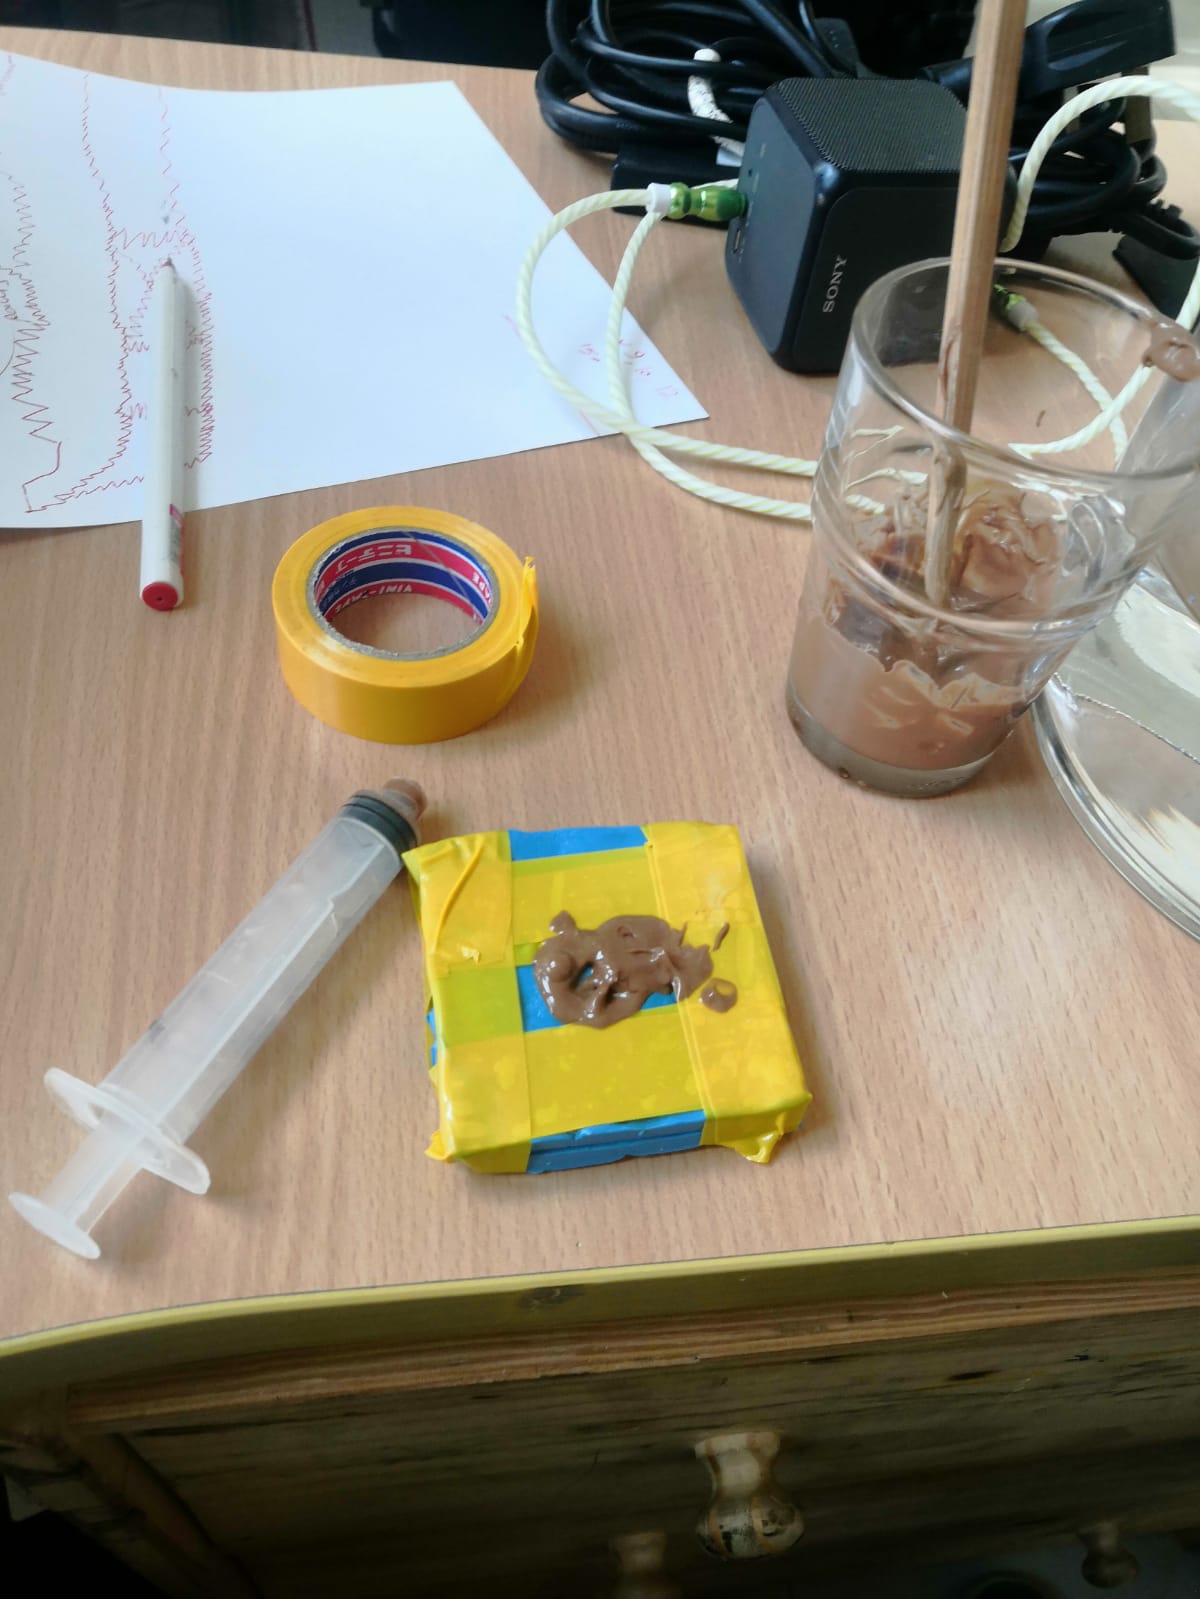
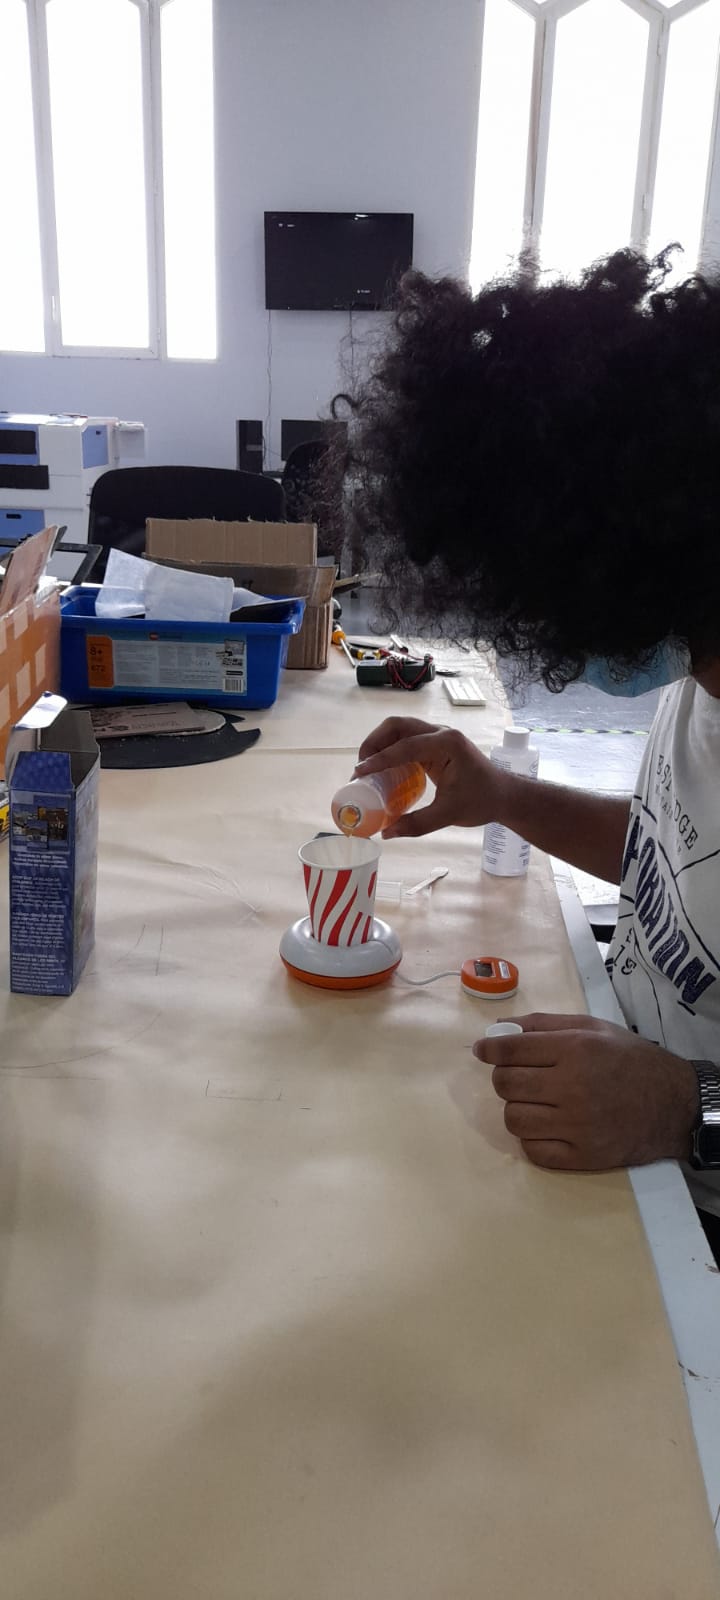
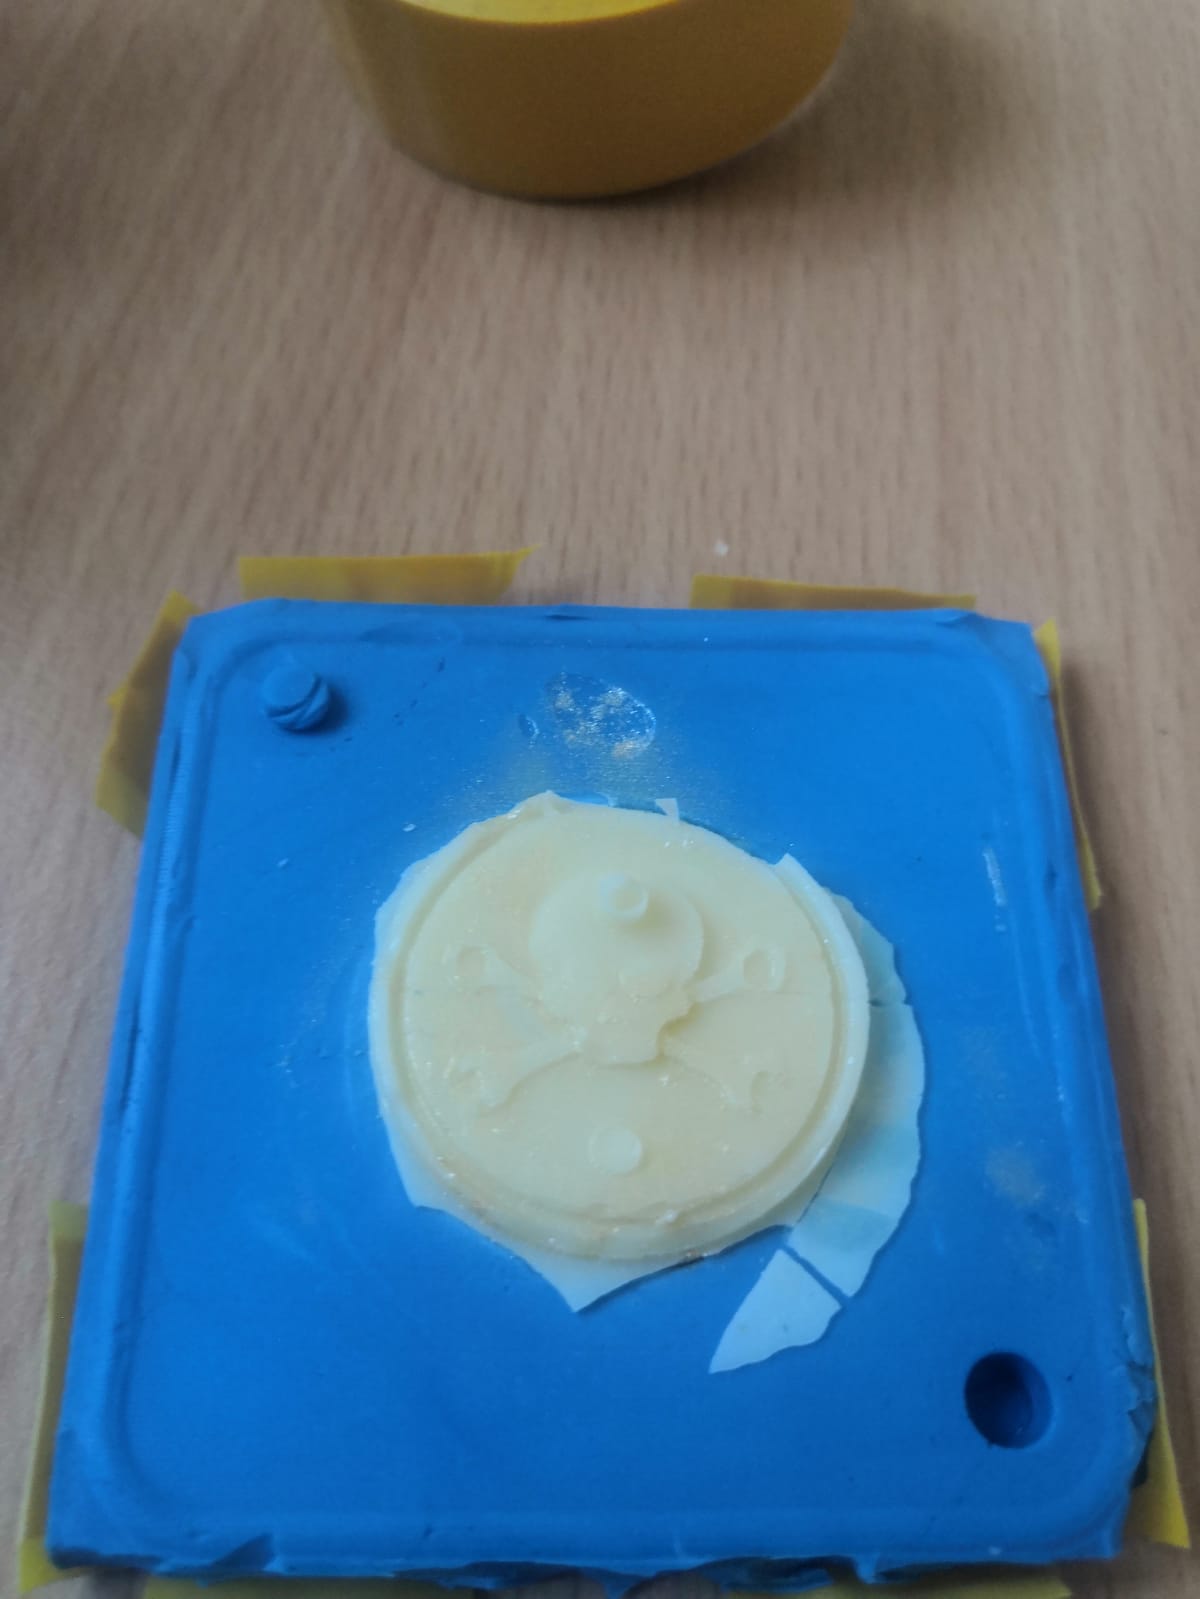
sense the mold is food safe I will try first cast chocolate then white chocolate the last cast will be epoxy after I put the epoxy the mold become not safe for food. So I take chocolate chips and put in hot bathe in side the glass chocolate and I put it in side hot water So it melt.

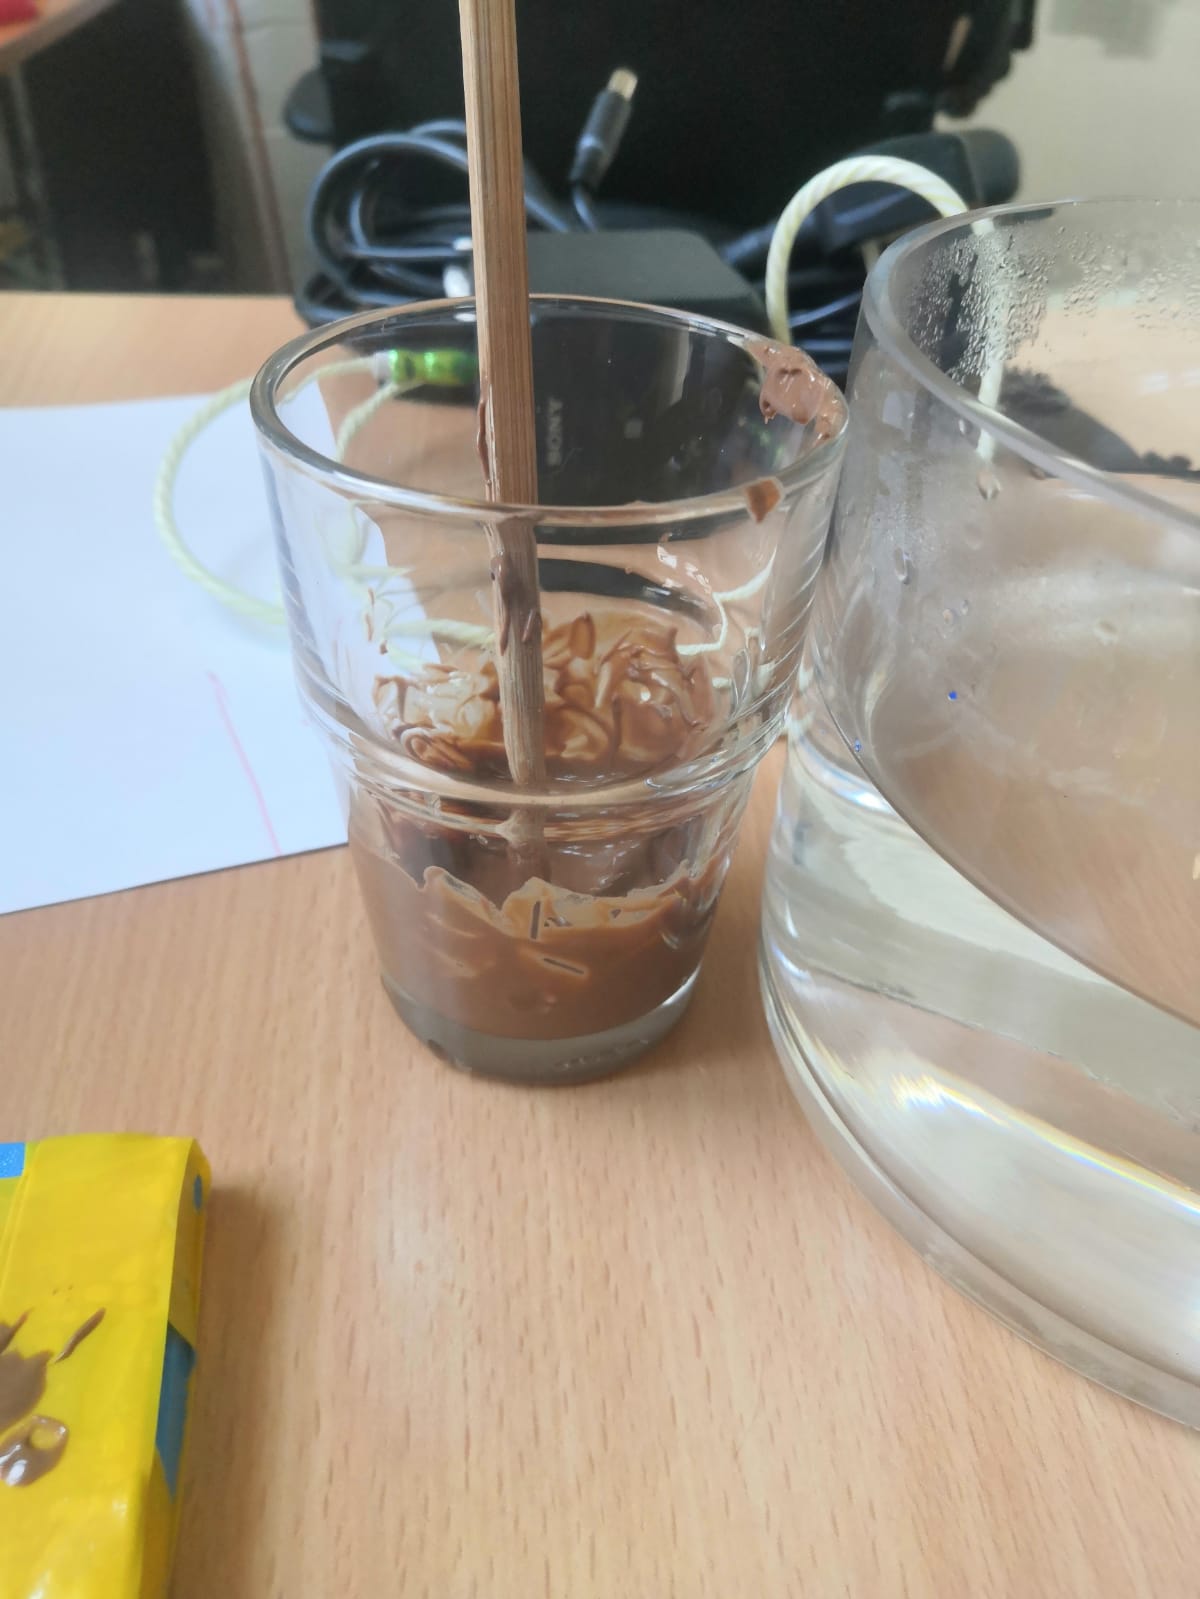 and I mix it till all of the chocolate melt
than I used needle to put the chocolate inside the mold
 and put the mold in fridge so it git hard faster.
I did the same thing for the white
 I had problem with white chocolate because I didn’t put it hot bath for long time and it git stock in the hole so the in second time I put it longer time .
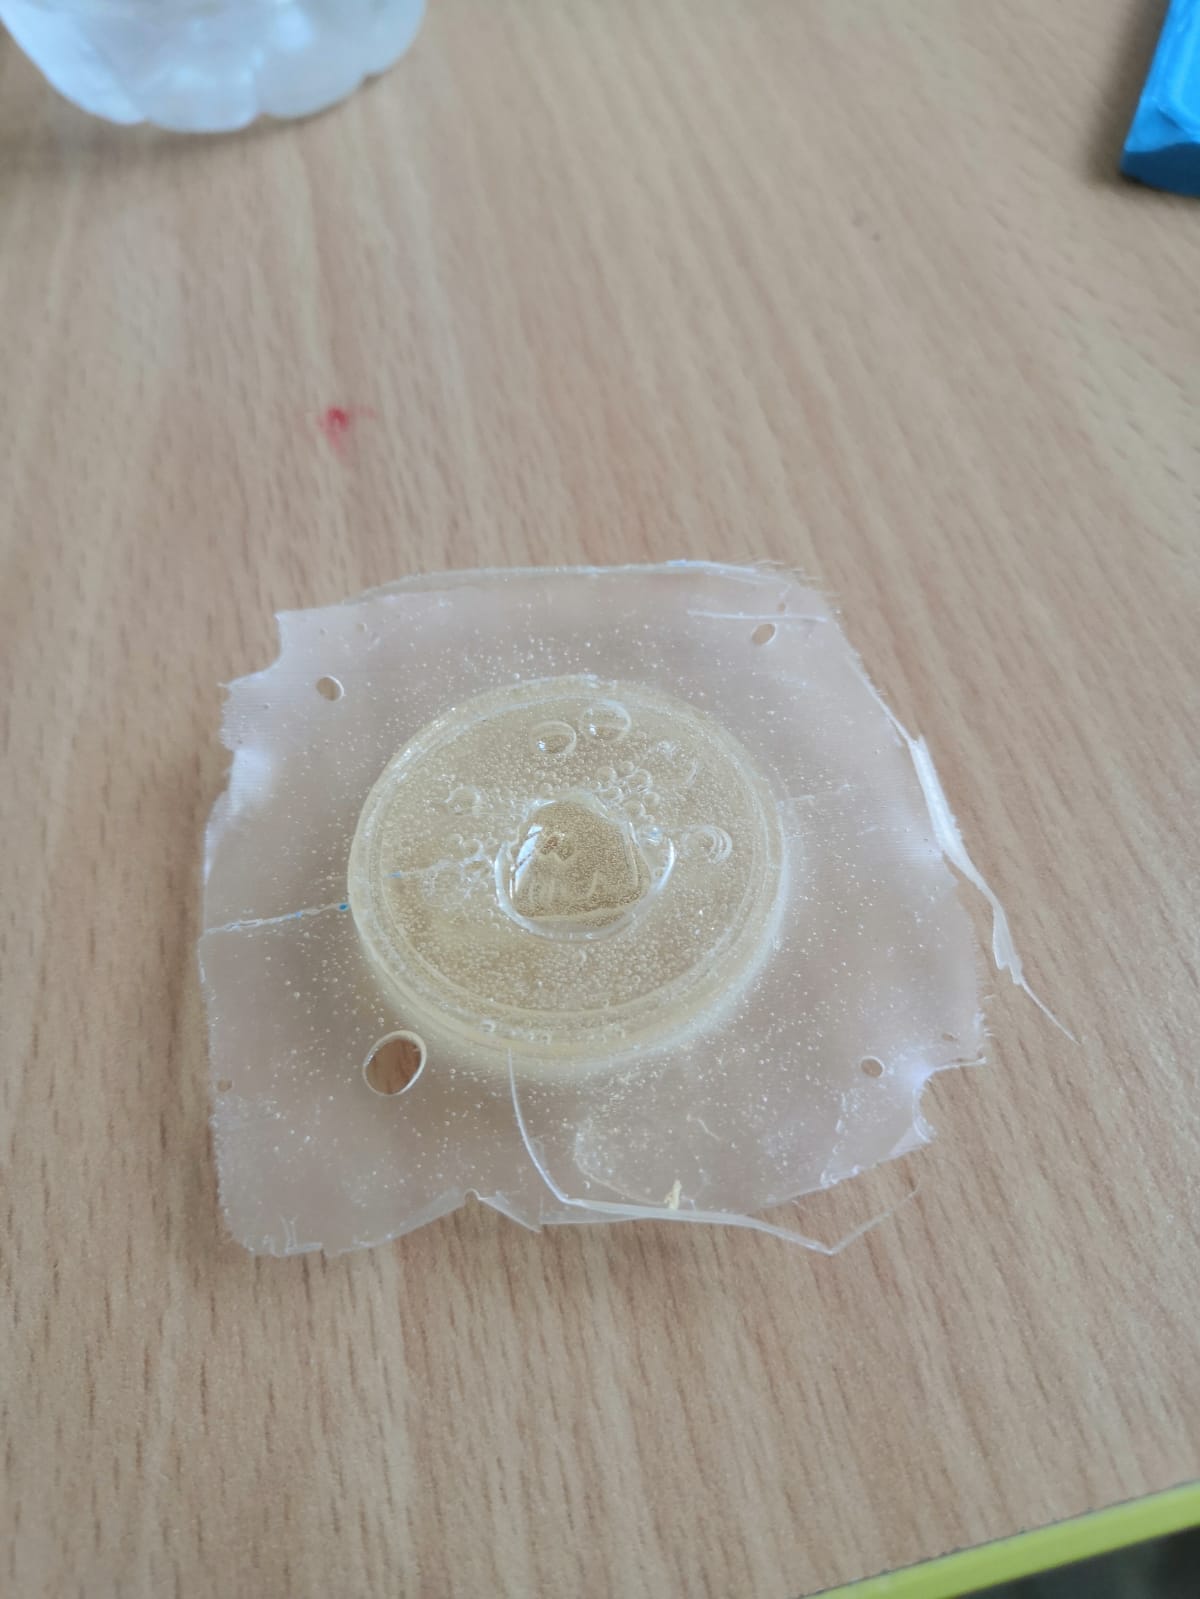
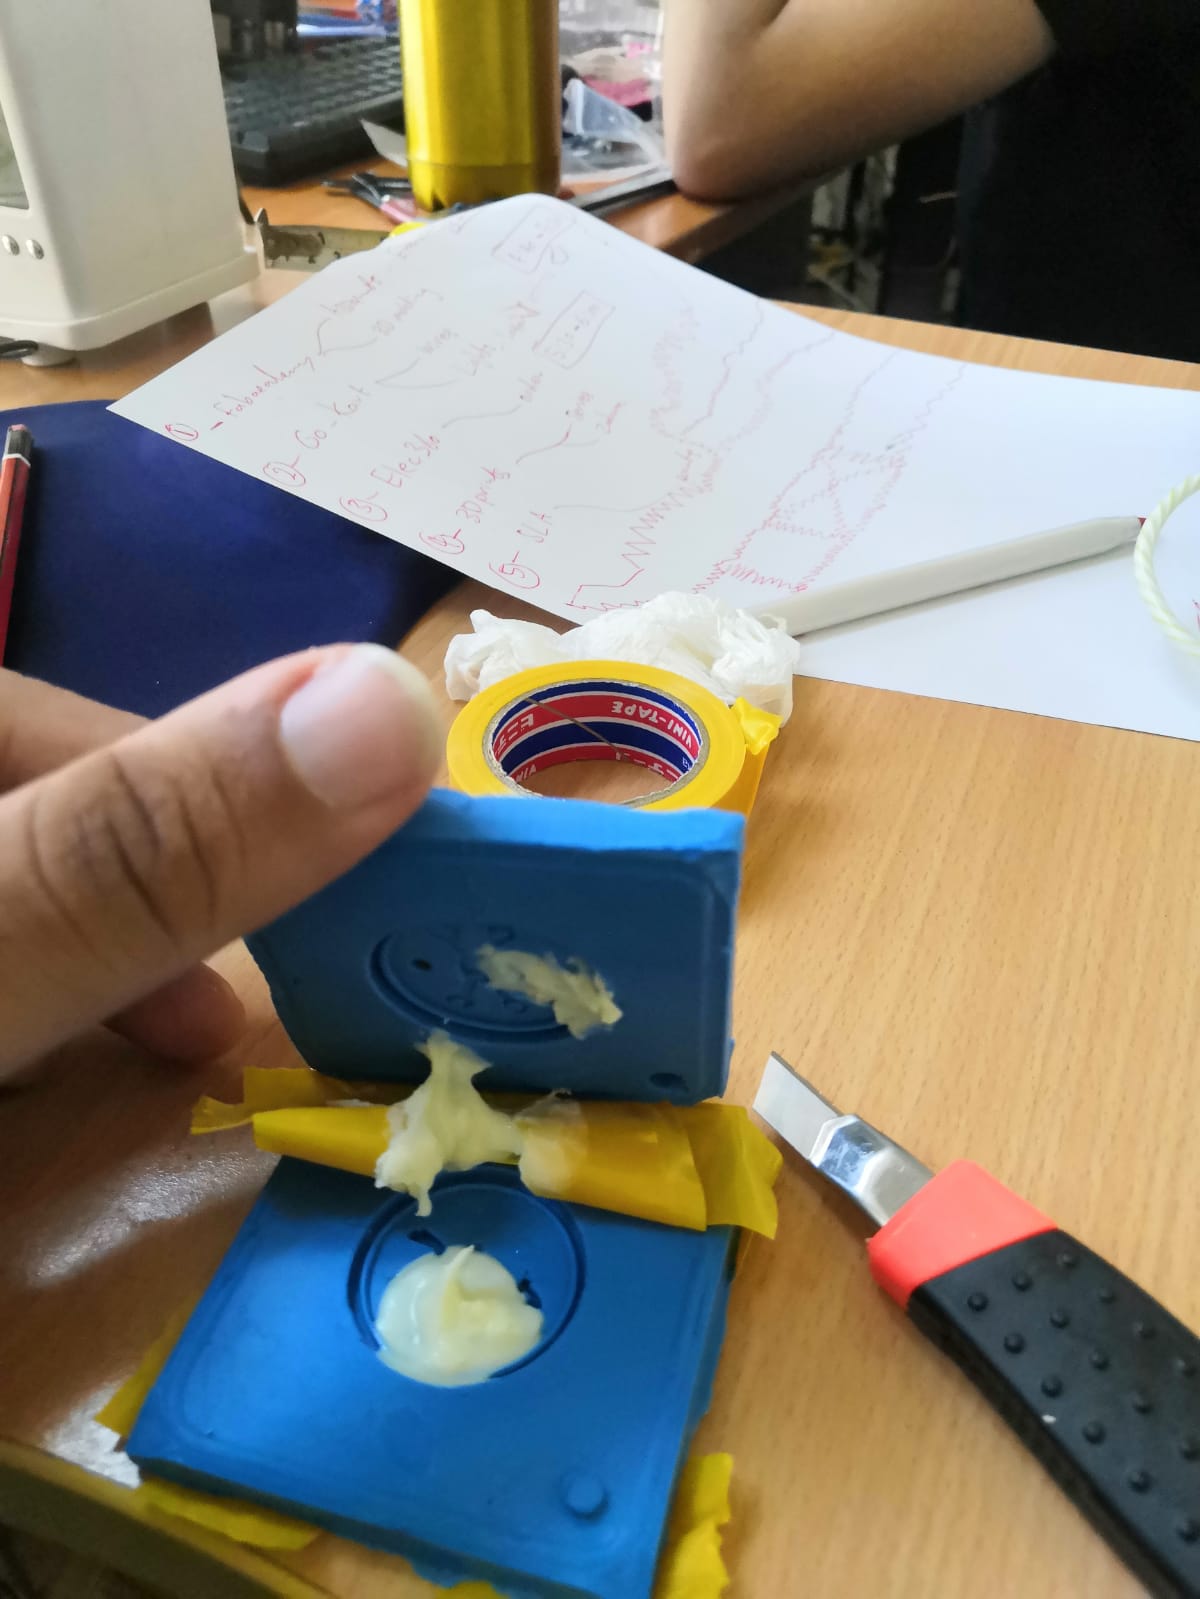
the last material that I used is epoxy
 I mixed the two compose in paper cup and too make sure that it is 1 to 1 so I use small weight scales. After mix it for at less 3 min.
 it is mix 1:1 of component A and B
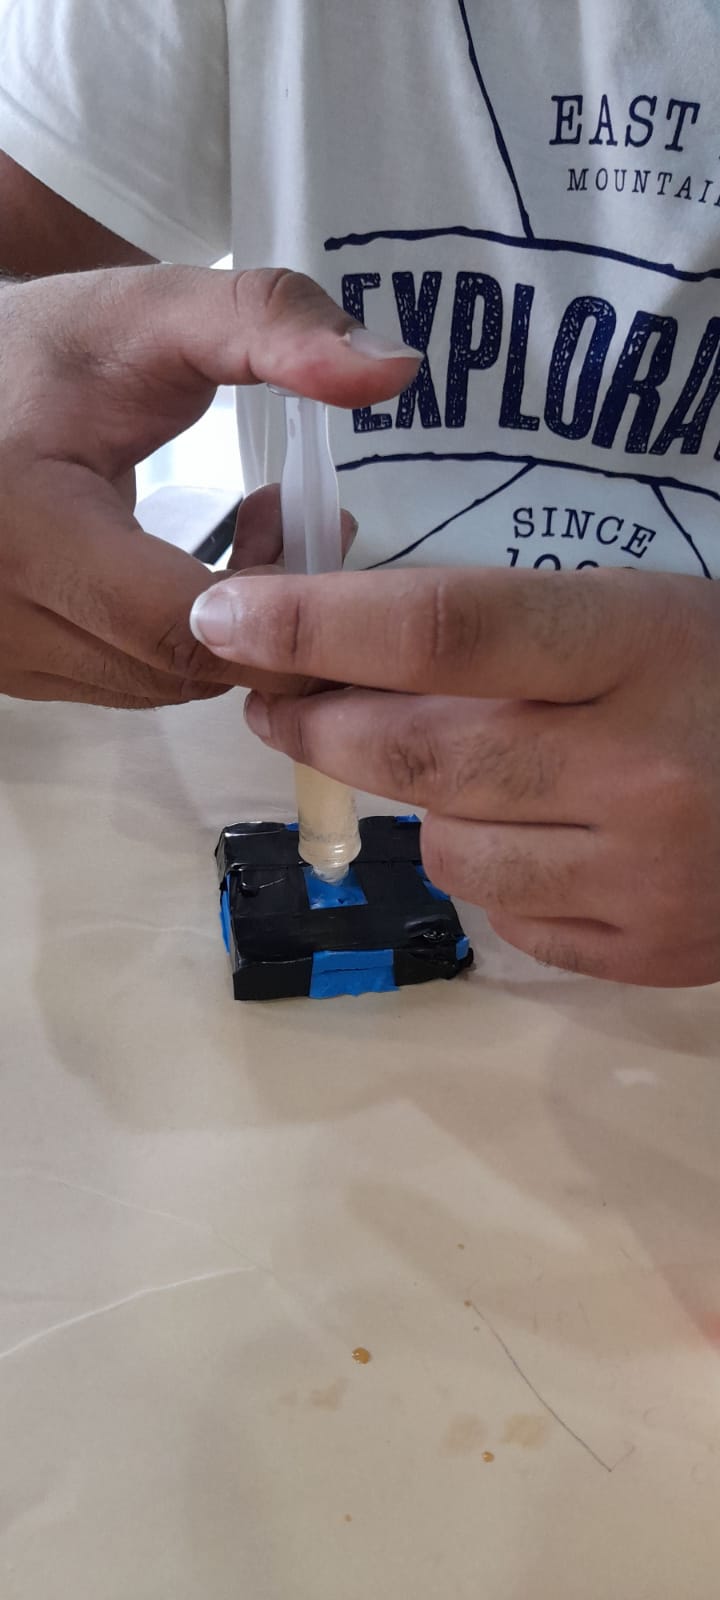 then I used needle too remove it from the cup and putting it in the mold .
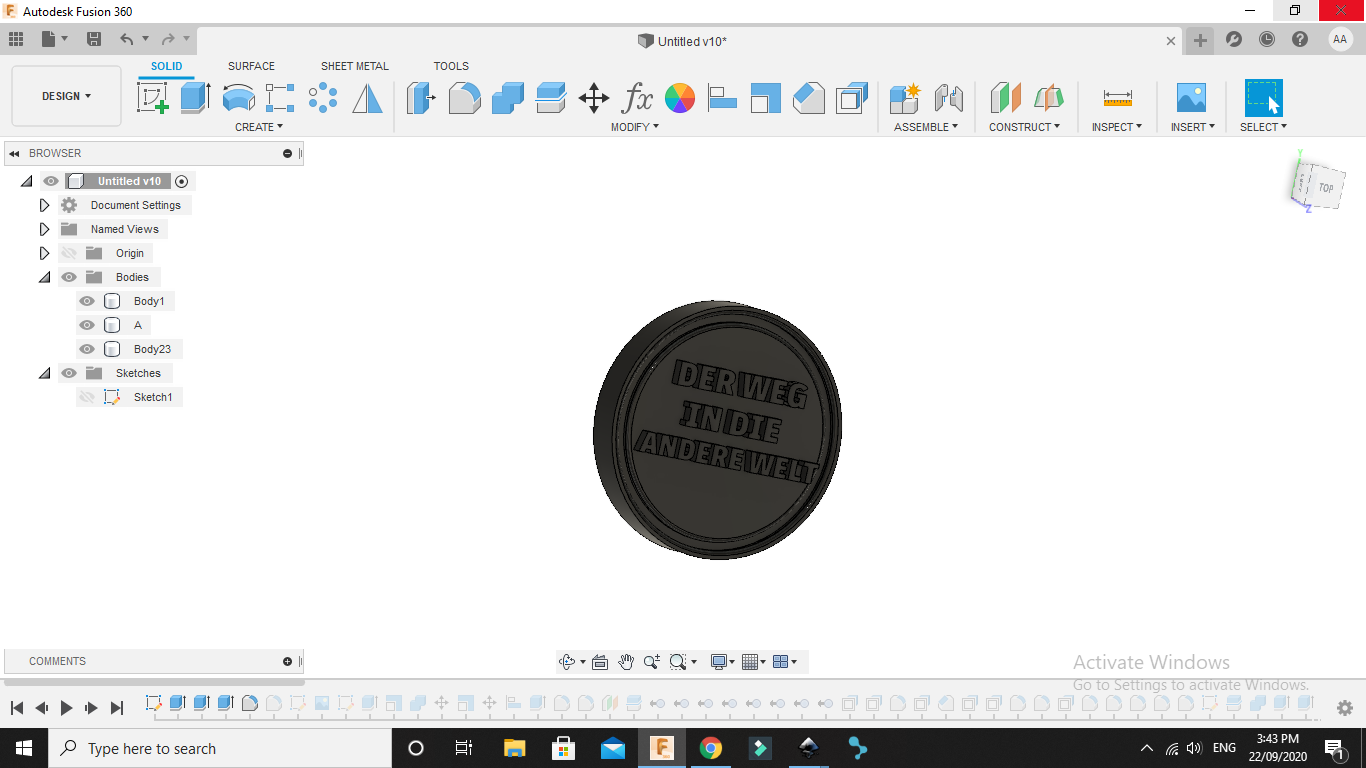
6.Result
chocolate
white chocolate
epoxy
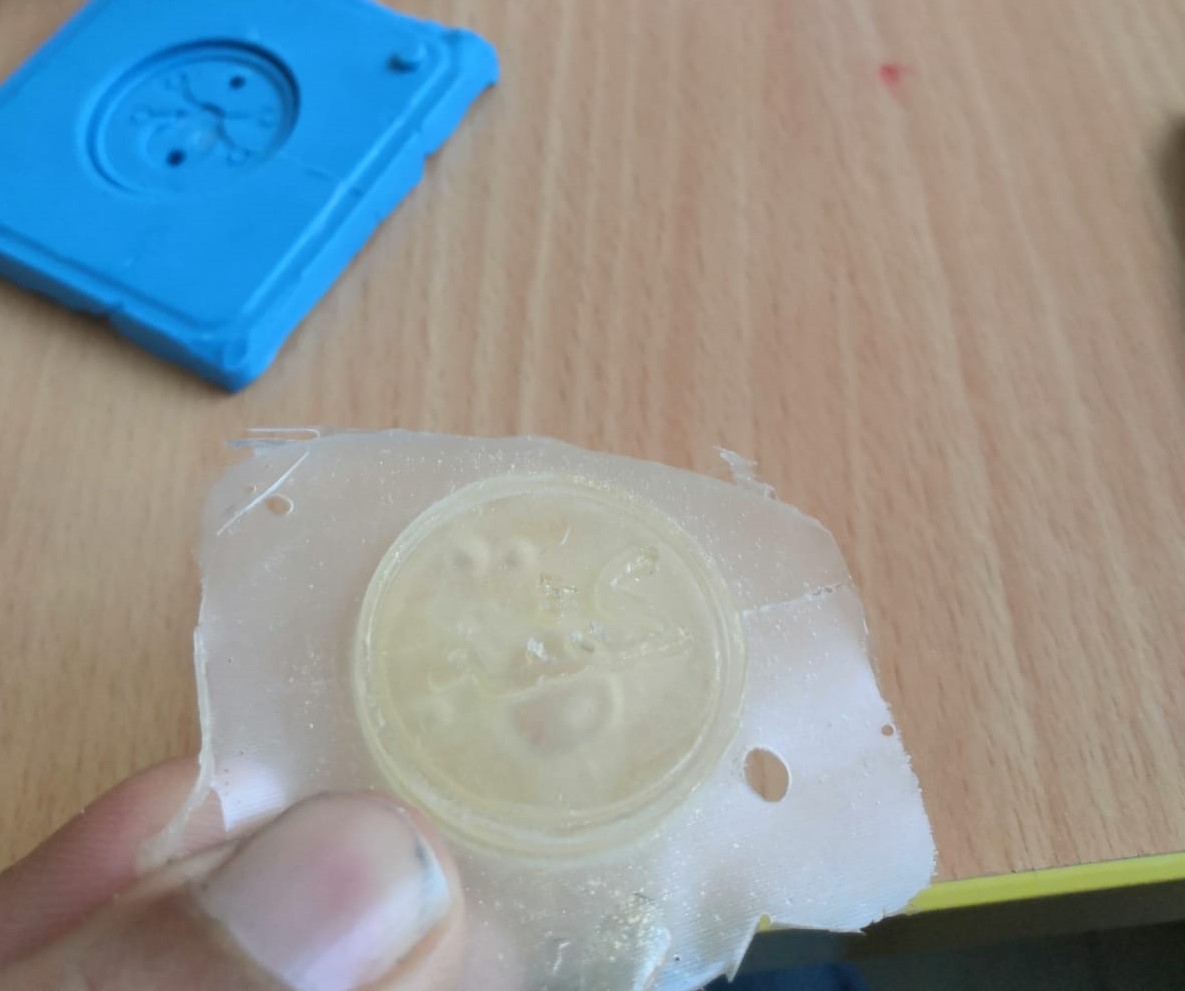
The problem that happened in epoxy coin was that the coin seems to be like I didn’t fill the mold with epoxy but I fillet until it come off other hole the think that I didn’t think about it was that the epoxy have air bobbles in side I mast let the air to come out after I fill the mold with epoxy and after little digging I fond that if I heat the epoxy the air will come out faster.