
Build you're Own Website
Our first assignment is to build our own blog. I could have used the MKDocs or Jekyll to build my website, but I chose to go with a Bootstrap 4 template from Creative
Tim.
The PaperKit template looked right to me and I wanted it to be simple yet elegant. I chose VS code for my editing (which is based on Atom ), mainly because it has wonderful integration with Git Bash . For experimental purposes I also tried out GitKraken, which has a nice
GUI and I used this to generate my SSH key, but more on that later.
The structure of my Fabacademy site
The file structure of my site, is actually pretty much the structure of the Paperkit template and it is nicely organised in subfolders.
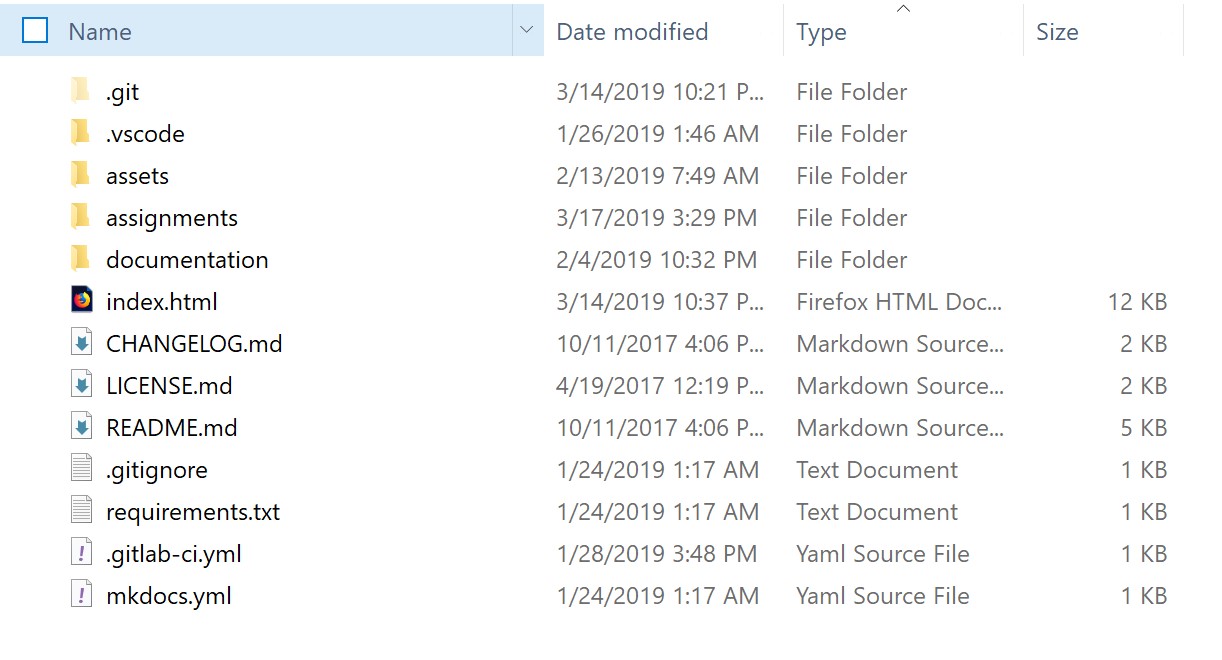
The Root folder of the template
Do not mind the "documentation" folder, this is just for the Paperkit template. The most important ones are the assignments and assets folder
All the HTML pages are stored in the assignments folder and all CSS, JS, SASS and media are stored in the assets folder. In the assets folder, I created subfolders per week, giving me a better overview of my media.
HTML code snippet, used in this web page
<div class="class-content-center">
                <div class="class-wrapper">
                <div class="section-white">
                <div class="container">
                <div class="row">
                <div class="col-md-10 mal-auto mr-auto text-center title">
                <h2>How I built the Site</h2>
Explaining the code
This little sample of code is written in HTML, using the CSS layout of the Bootstrap 4 front-end toolkit. I have used this snippet as the starting point of this web page.
HTML elements usually consits of a start tag and end tag, with the content inserted in between. For example the whole div and /div is an element
HTML attributes provide additional information about an element and are always spceified in the start tag.
The div tag defines a division or a section in an HTML document and is often uset together with the Cascading Style Sheet, to layout a web page.
The class attribute is used to define equal styles for elements with the same class name.
So, all HTML elements with the same class attribute will have the same format and style.
HTML headings are defined with the h4 or h6 tags and are most often used for headings in the web page. I used the h6 for this sections heading.
GIT, VSCODE GitKraken Install:
In order to integrate Git into VSCode, the best way is to first install VSCODE from here. After the installation of VSCode you can install GIT for Windows. Here you will have the option to select VSCode as you’re default editor.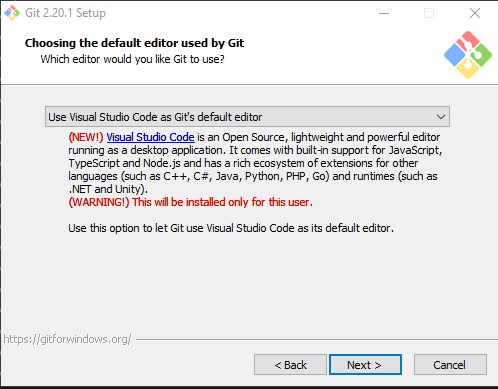
Choosing VSCode as Git's default Editor


