6. 3D Scanning and printing
First Idea
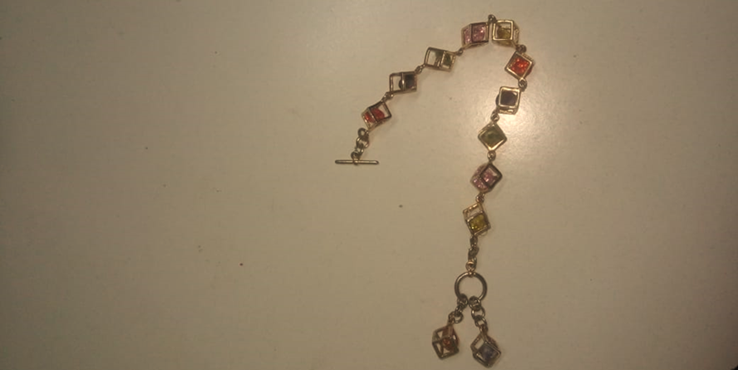
This is my first idea that I want to make this week. I have a Bracelets that I love its design… So I decided to test in 3d printing.
Second Idea
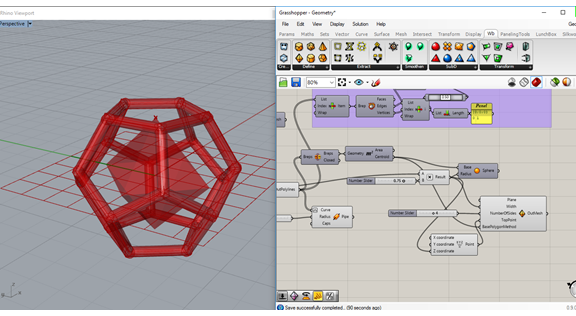
So I Started to design it. From last week I decided to continue with Grasshopper till the end of this diploma.
When I started to design it with Grasshopper I noticed that it’s very easy to design this part! I didn’t feel with challenge!
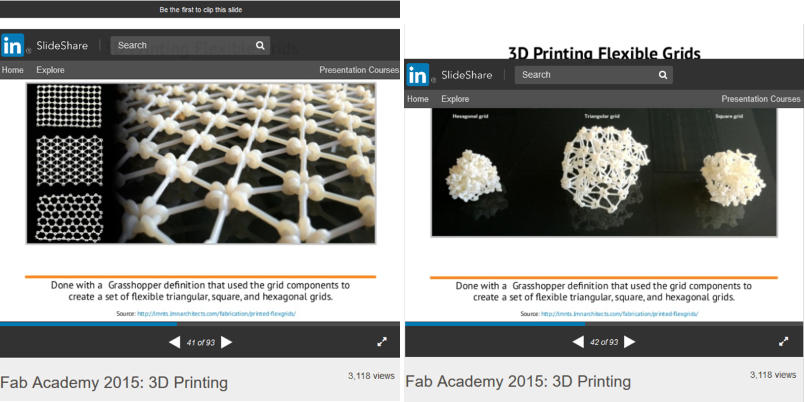
3D Scanning and printing Tutorials
Then I have a passion to search in Tutorials that Hagag recommended it. So I back to the Lectures and Loved it. Then I inspired with this pattern and have the passion to test it by myself.
Slide share of 3d printing lecture
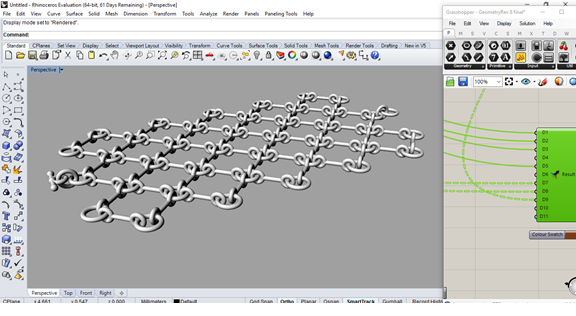
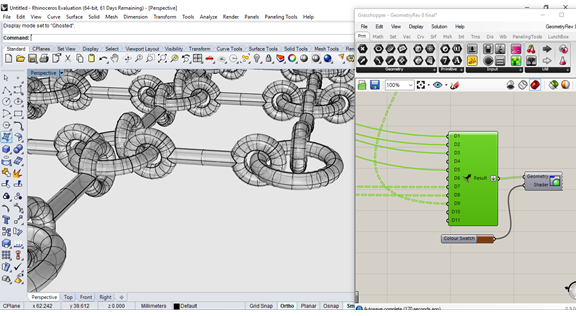
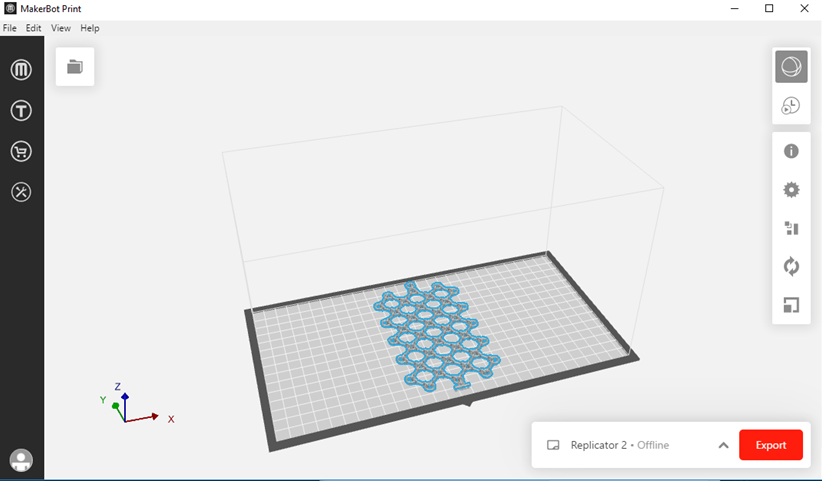
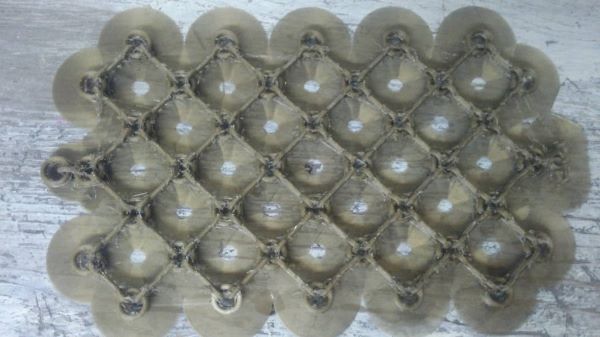
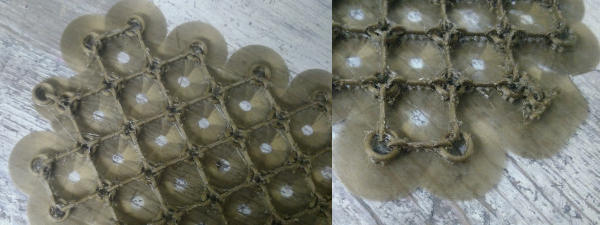
First Idea ‘Bracelets’
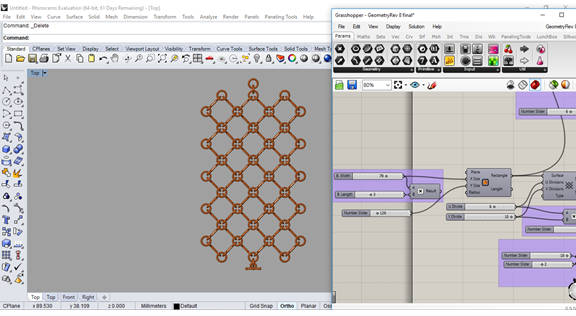
Design Process
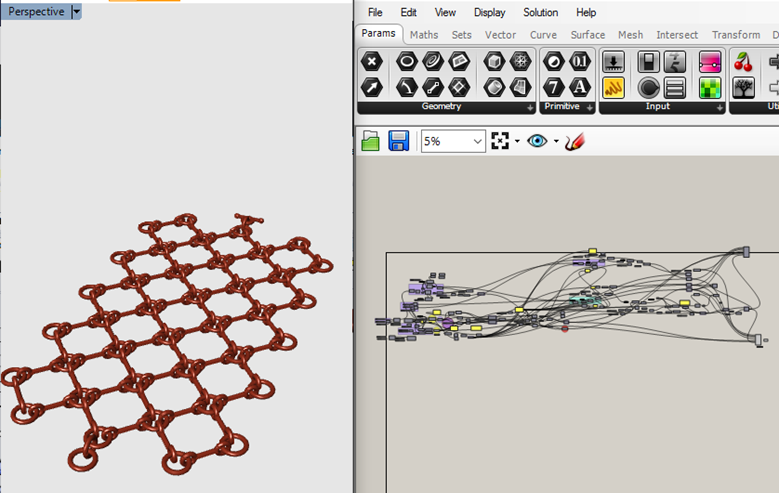
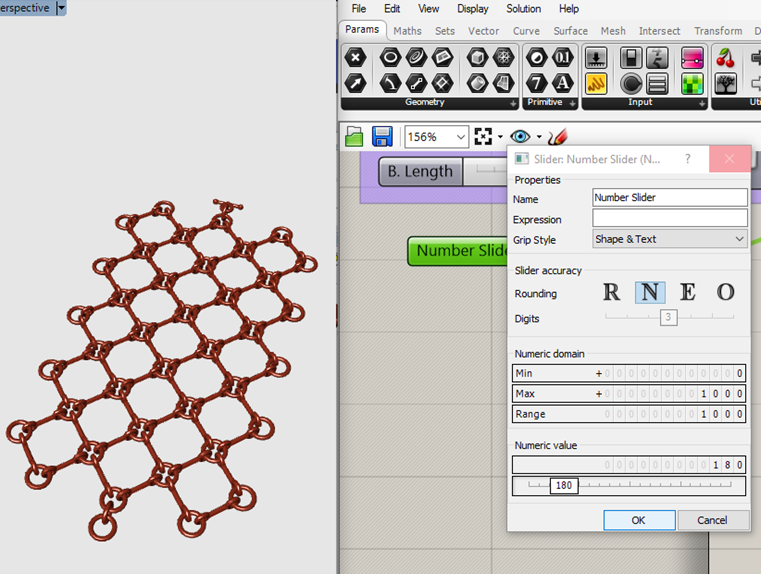
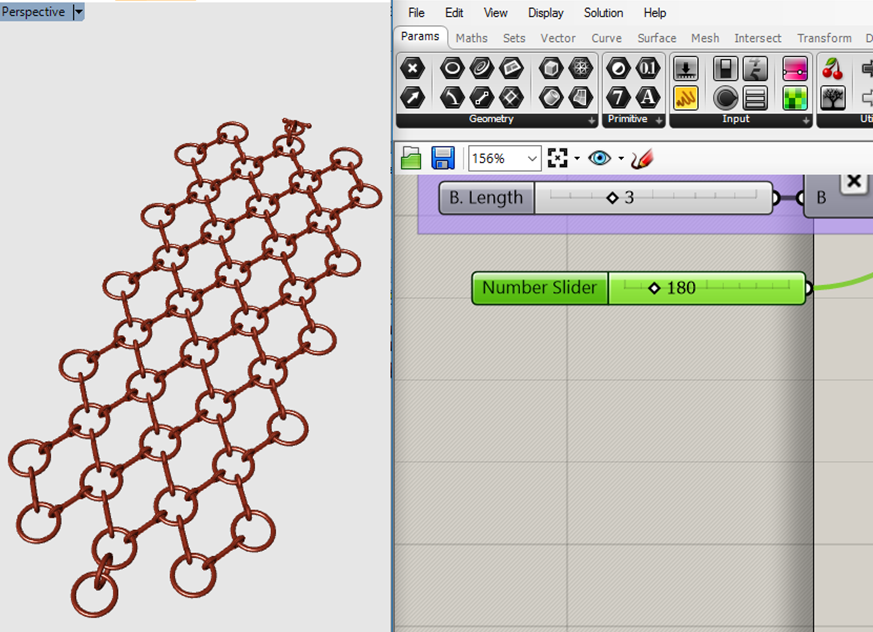
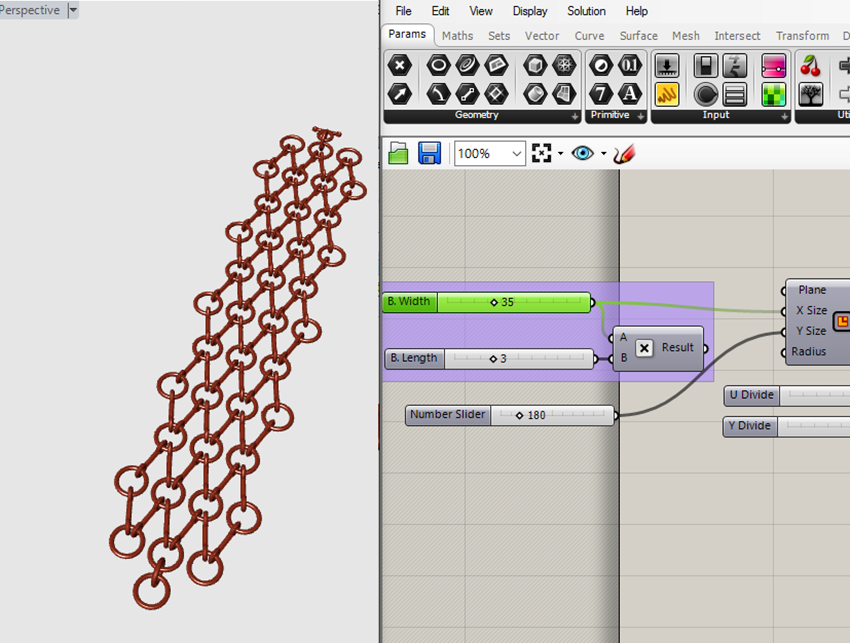
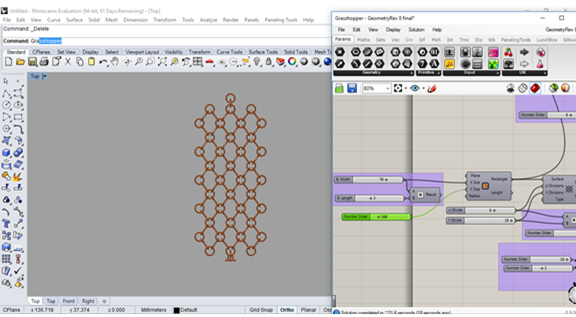
So Lets start with grasshopper! There is many ways and different technic to make this pattern parametric… this technic I have chose is one of them, it’s not standard but it could be good reference for you. I made all my efforts to make it totally parametric, there are a lot of revision and a lot of scenarios to reach to this result!
Feel free to download the files
Sketchfab
The pictures will show how the part is parametric when change in different parameters
MakerBot issue
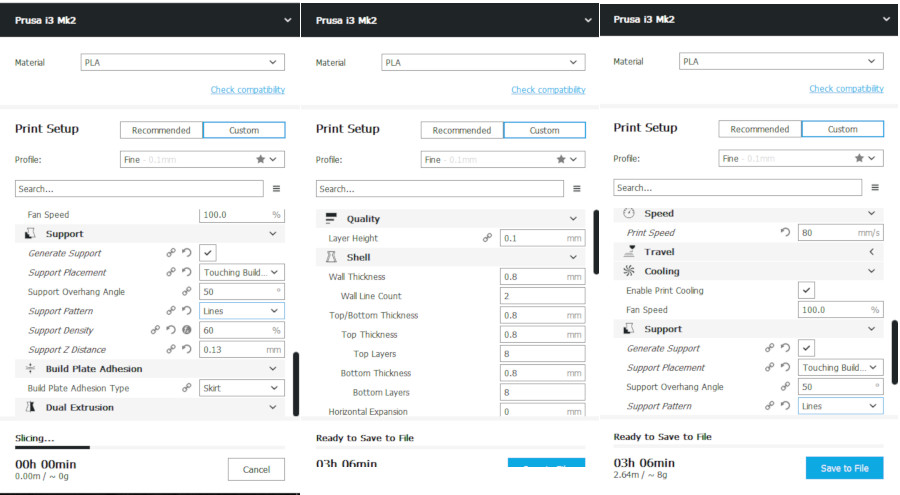
We have three types of 3d printing machine in our lab. Prusa MK2, Prusa MK3 and MakerBot. First, I have been started with MakerBot because of I installed MakerBot software in my PC before and don’t have Cura software.
For this step
- We need to export this part with stl format.
- Open the stl file in the software we will use, for my case, is MakerBot.
- Edit all setting from orientation, make sure from dimensions, layer height, infill… else.
- Finally all parameters of the machine, heat, speed, cooling … else.
- Then, estimate ....
Estimate the grames and the time… but I noticed that MakerBot doesn’t see the members in my part and doesn’t estimate the whole shape. So Haggag recommended to export my design to MeshMixer then export it to MakerBot. But I got the same result!
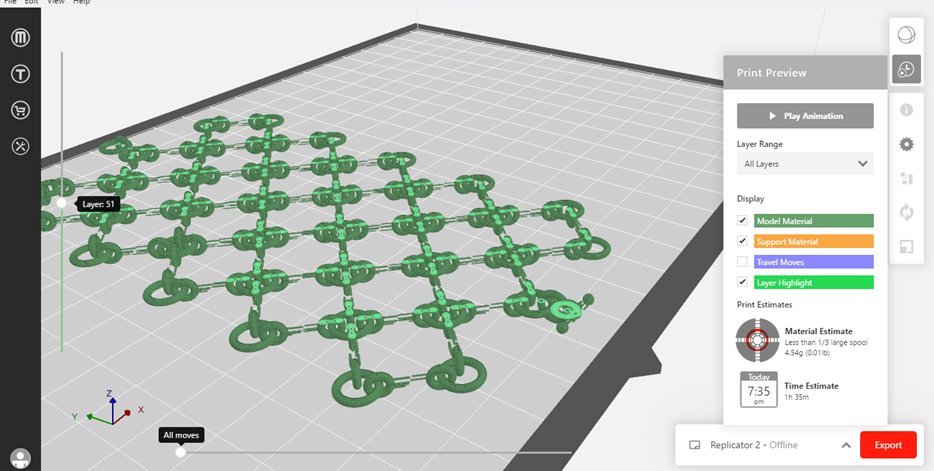
I think about if I rotate my part what will happen!
The MakerBot estimate the members when I rotate it vertically, and It’s very weird for me! I don’t print my part in this orientation.
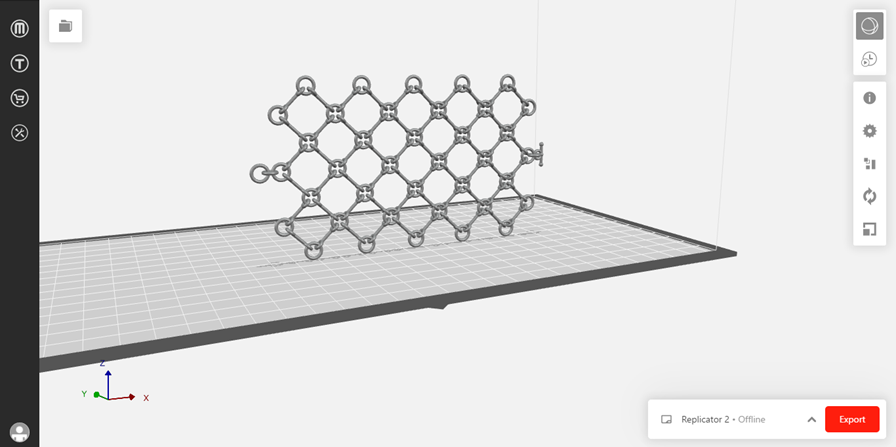
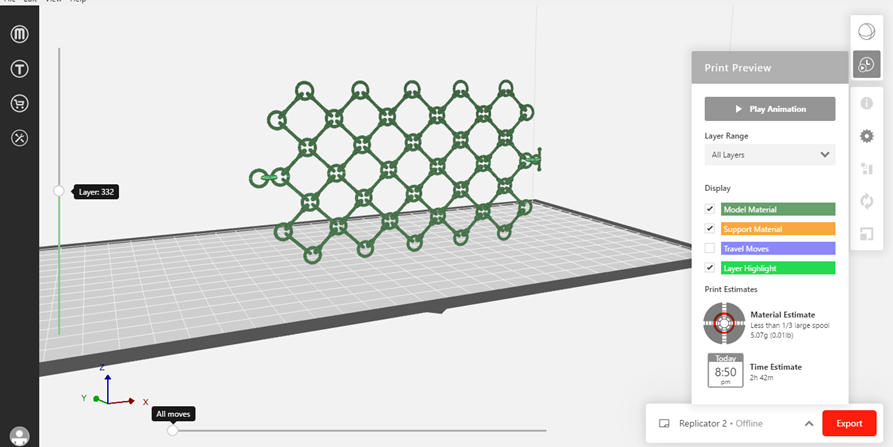
Cura Result
So I decided to test my design with Cura. And It works!!
Finally, I made sure of my design is totally perfect, and the machine can print this small scale.
So lets start to test a small parts with a different setting and parameters.
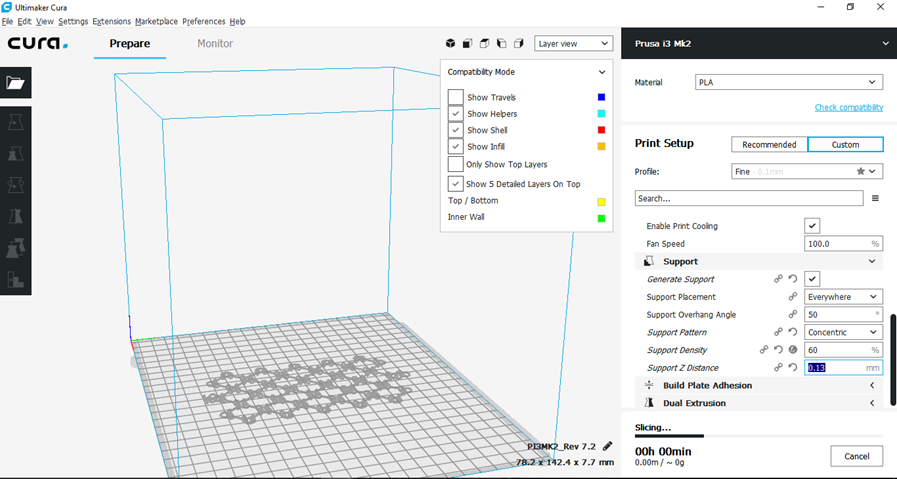
Characterize Different machines
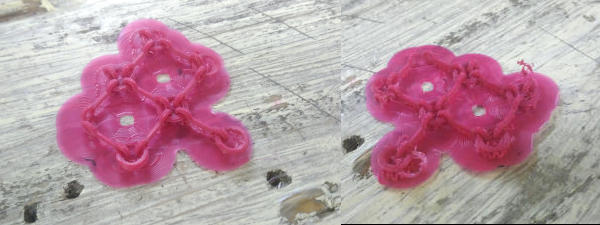
I started with 3d printers, two of them Prusa MK3 and Prusa MK2. Used just one Gram of my part with about 8 members and 6 rings, to test the best setting for this part.
Characterize different material PLA and ABS, and different colors with different parameters ‘temperature, cooling, speed, infill, with and without supports, layer height ..... else. Also I tried different scale of my part.
Download the Excel Sheet
For different tests of printing form Here

So, after all these tries and errors, I discovered that
- The ABS material is very easy to be broken. PLA is more stronger.
- I reached to the default speed and temperature with my part and machine with the Specially material I used.
- With trying different scale of my part, I preferred the small scale.
Different Scale
With and without supports
PLA and ABS material
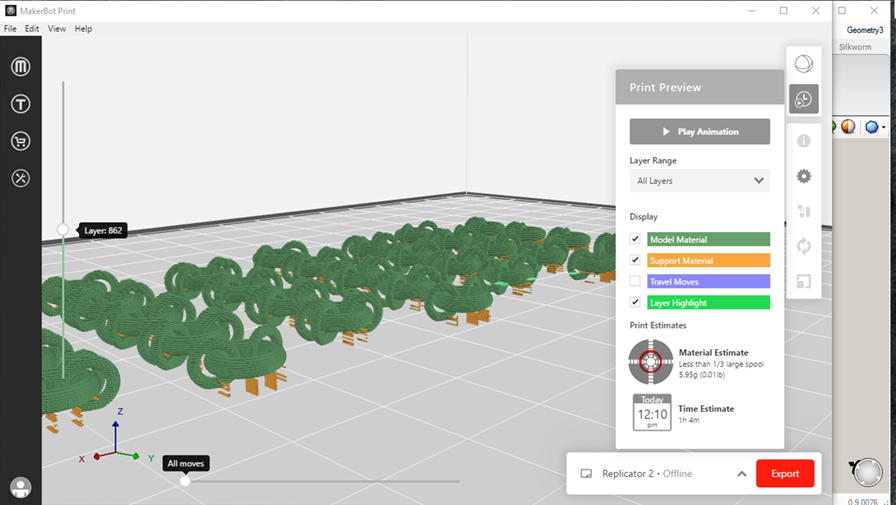
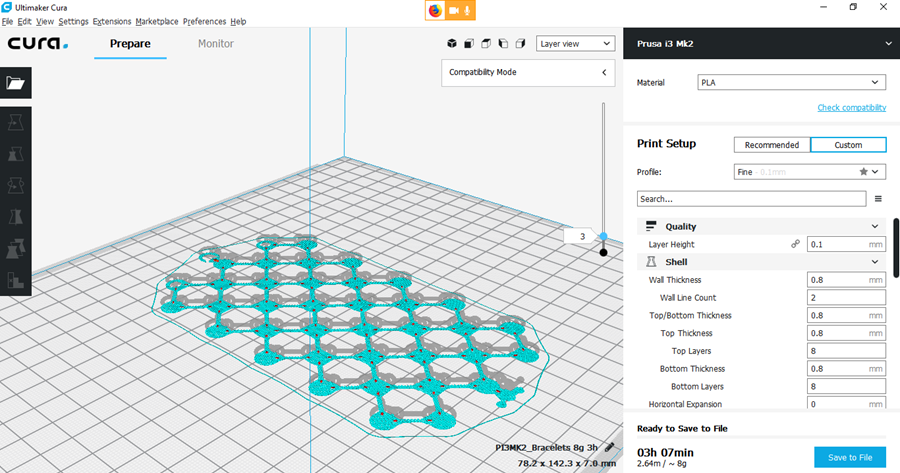
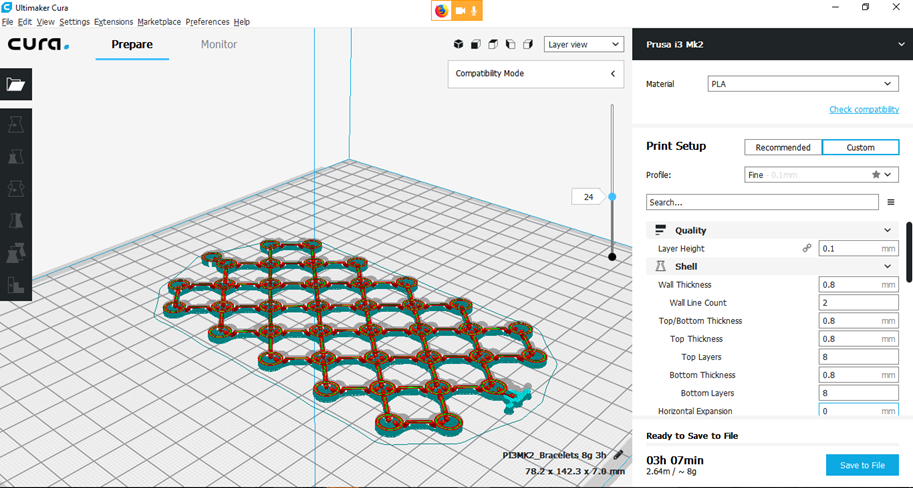
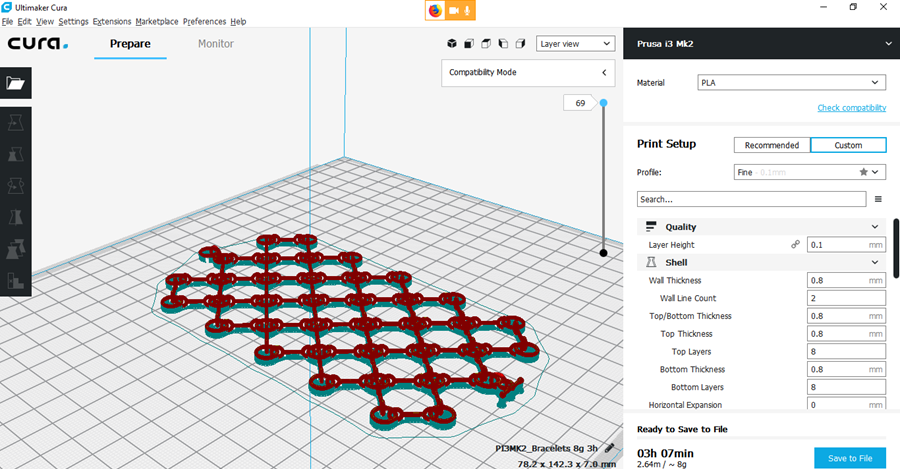
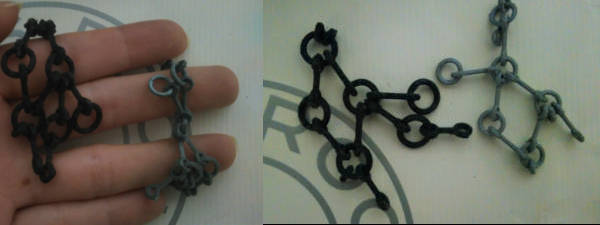
Printing The Whole Part
So, Now I can start with my whole part to be printed!!
It takes 8g/3h.41min.
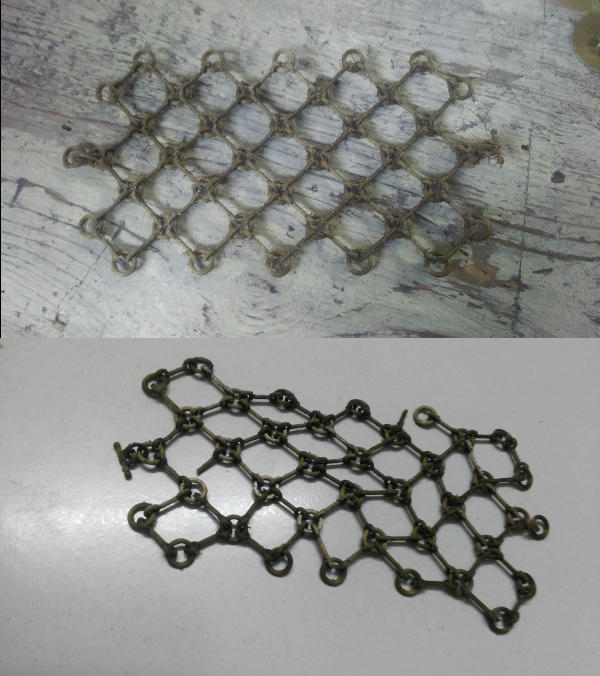
I broken two members by fault when I clean my part from restriction.
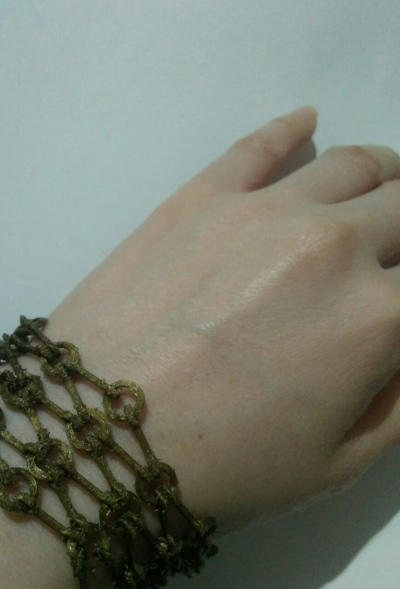
Comments After Printing
I noticed that
- The lock of my bracelets needs some edits … the ring needs to scale up a little.
- The length of the bracelets for the small size only, So it’s perfect with my hand but doesn’t fit with most of girls’ especially boys! everyone see this part he excited to try it! that makes me happy’ … So, I decided to resize the bracelets to be fitted with the most. Fortunately it’s parametric!
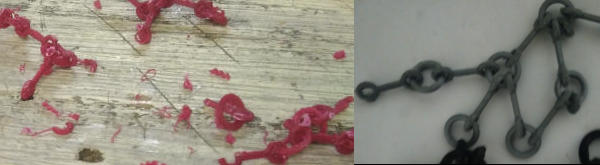
- ABS material is very wonderful than PLA during printing process only… it able to printed without any supports with the best result… But after the printing it’s very easy to break.
- It’s very flexible part … and 3d printing can make an amazing things but we need to understand the variables and make it up!
Redesign
I made some edits in my bracelets to be nice to share with anyone!
Feel free to download the last version
Friend Gift
The most wonderful gift for designer, that someone like to try his design!
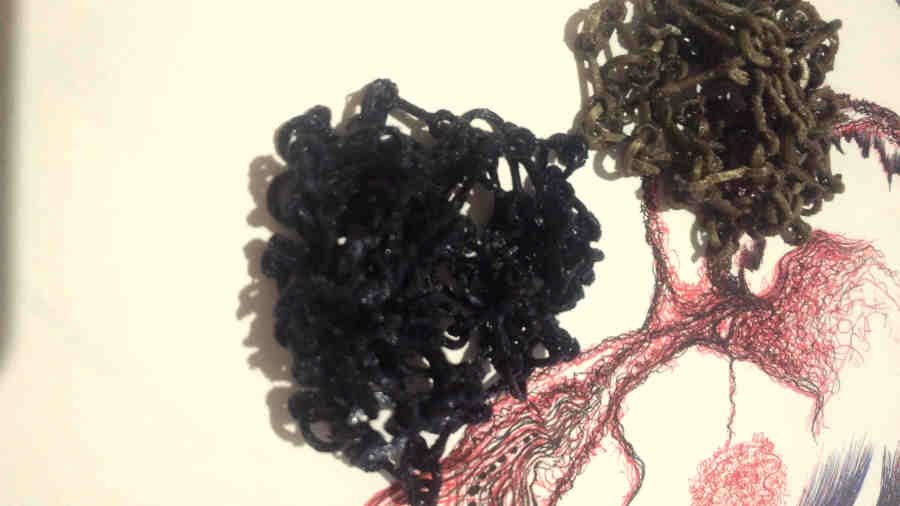
Michael is my classmate in Advanced Maker Diploma October,2018. He know that I wanted to try my bracelets with PVA material “used in supports and just cleaned by water!”. The chance for me to make that, in American Center Cairo by Ultimaker 3 Extended that has two nozzles and can print with two filament in the same time. But during this time the machine has some issues … So Michel fixed it … then he wanted to try my design in the machine.
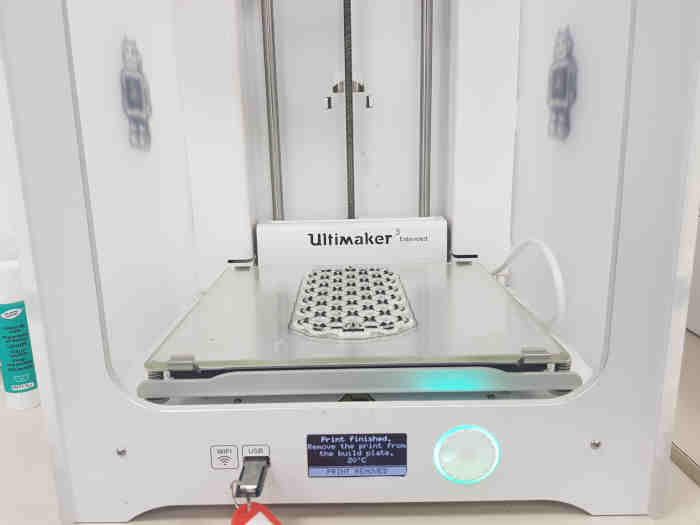
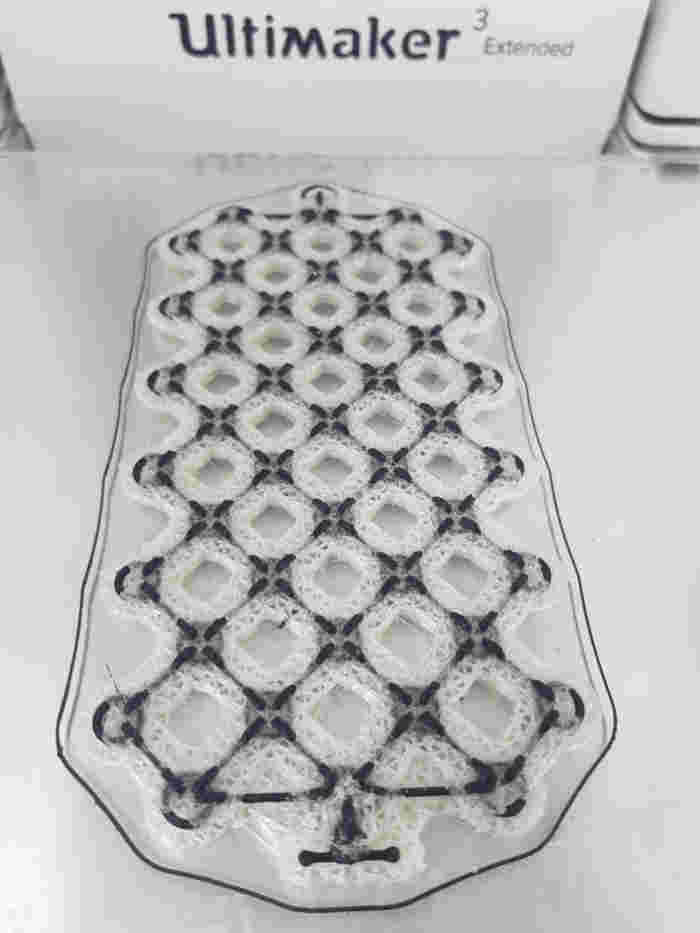
So, I’m very excited to see the effect of water in PVA.
Enjoy watching!
PVA - PLA Material with 3d printing from Nada Gamal on Vimeo.
The Lock is fitted Now!
Bracelets with 3D printing from Nada Gamal on Vimeo.
3D Scanning
I have a previous experience with Recap software… I made a project with it before. it’s very easy and made a perfect result… So I downloaded the software again to use it. But I received an amazing error
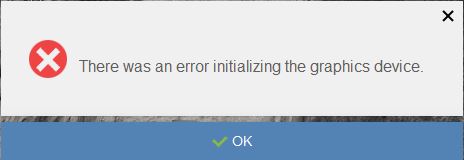
Although, I changed my windows version, I tried to install it again but received the same error
Then Haggag recommended this mobile application Qlone
What is Qlone?
It’s very easy to use, So Let’s try it!

I’m So happy!
So I tried to use my mom’s phone … but the same!
Fortunately Lamia install Qlone in her phone and it works! So I scanned my parts with Lamia’s phone
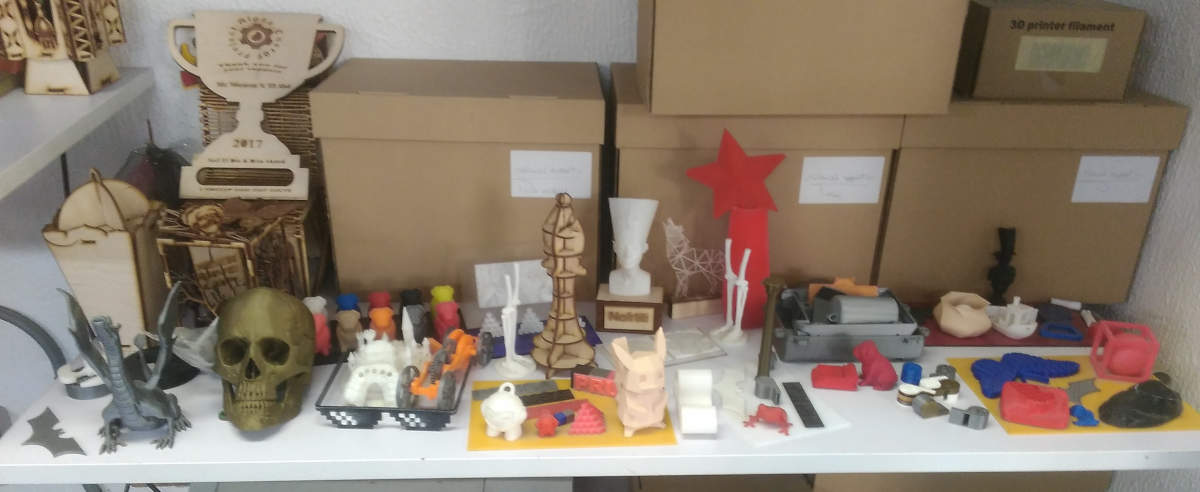
One of the most exciting zone in Our Lab … Each time they print new challenging part to test the machine
So I decided to make my first part
The Great Nefertiti
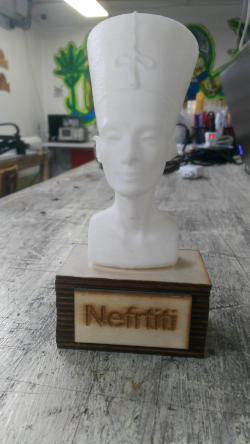
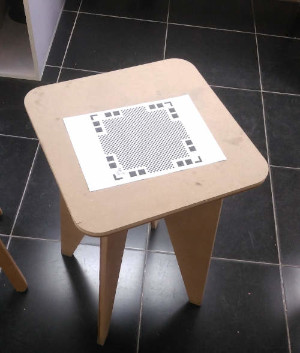
To use Qlone, it draws a dome around, and takes the mat pixels as a reference. By moving it scans part by part to scan the whole part ....
Unfortunately Nefertiti is bigger than the dome, I don’t know if we could print the mat with large scale and it could be work or It can’t be scan with Qlone
So I thought to scan my little marvin that I printed while advanced maker diploma
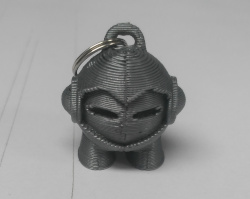
My little Marvin
Scanning process
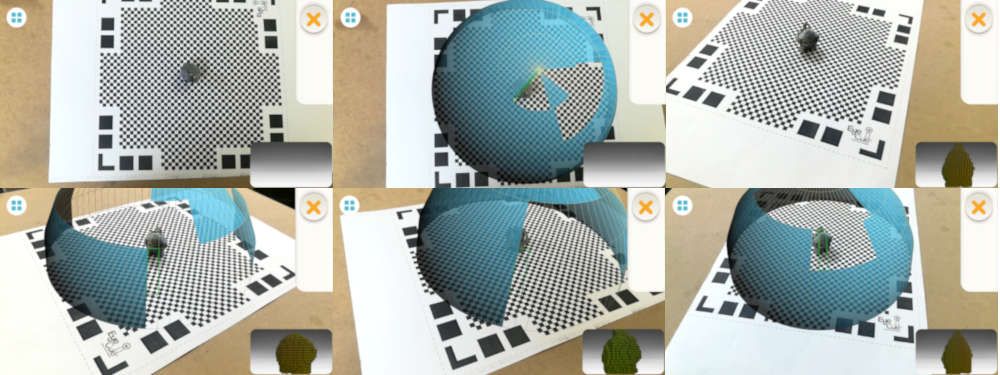
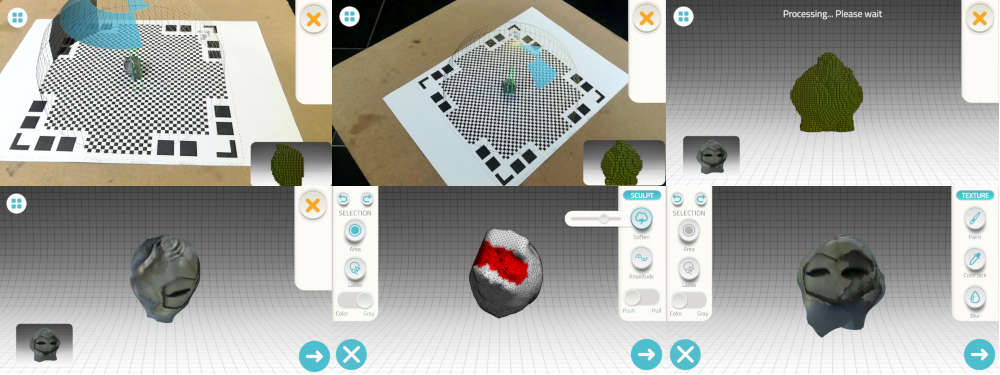
I will be fit in Halloween! XD
I didn’t expect this result … Recap it more better than that but I excited to try a new part.
Castle with New Qlone Scanner
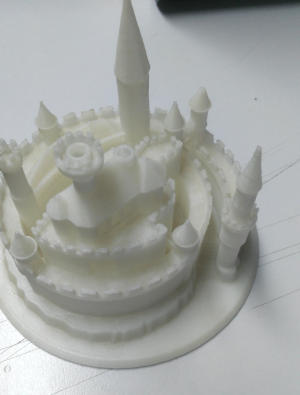
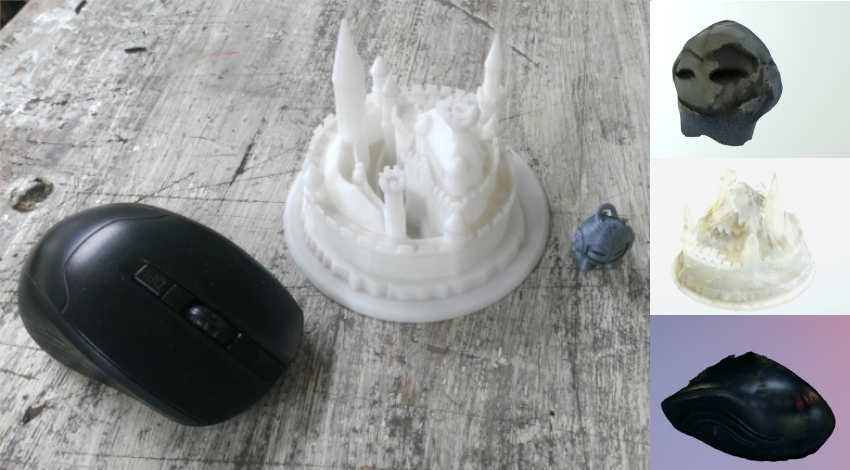
I love this part so much with all small details… Also I want to try the white color will be scanned or not… So let’s try…
Unfortunately, Qlone can’t see the small details.
Let’s try black color with no details in some part
Computer Mouse
Thanks Mrehan for using Your Chair, it helps me to make my scanning parts!
Final Scanned parts
See You!