2. Project management
Our assignment this week
work through a git tutorial build a personal site in the class archive describing you and your final project
Actually, I have done this wonderful assignment four times through this diploma! =)
I changed my windows three times in 6 months for my first time in my life!
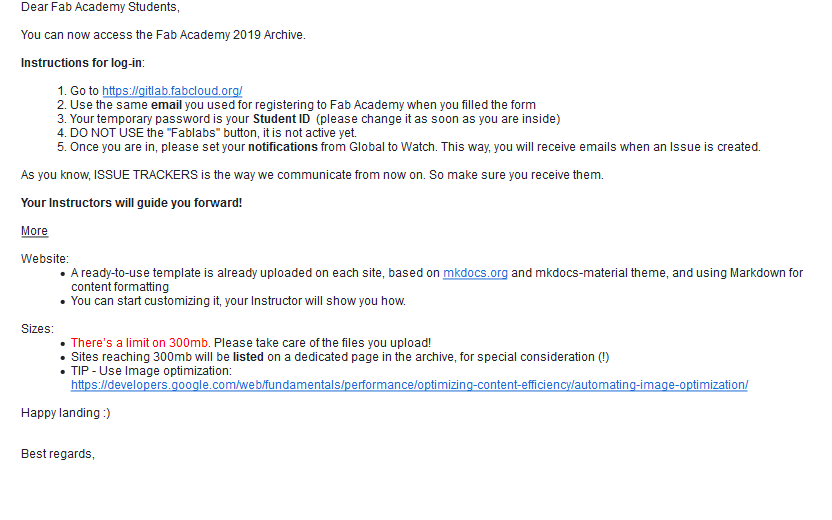
Access to Gitlab Email
We started with that email
References
- So I followed the Mkdocs Link
Mkdocs includes all the information that we need… I followed the installation tutorials step by step… and ended with a new website out of my website that we need!
-
This link is very useful to read more about markdown
-
Fab Academy Tutorials- Week 01, I recommend checking these tutorials. It’s very helpful and explained every step.
I spent a lot of time in the previous step that I made… So for this step, I asked my friend Fatma Fadel Waly for help … We joined the same program in advanced maker diploma and we made almost the same steps to make our websites … but we used Jekyll instead of Mkdocs.
Her documentation helps us to understand each other simply.
Why we take these steps
From the first step with sign in with our emails and password in Gitlab … We have the access to edit directly on our websites

But we need to edit locally in our PC to make it easy and edit as we want … Then we push the edits public when we make sure of it.
Some Steps We Need To Do
-
Install Git is a distributed version control system, it could be used as a server out of the box. Dedicated Git server software helps, amongst other features, to add access control, display the contents of a Git repository via the web, and help to manage multiple repositories.
-
Then we need to install a software text editor, there are many text editor… but I used Atom before, and like its interface, So I decided to use it again.
-
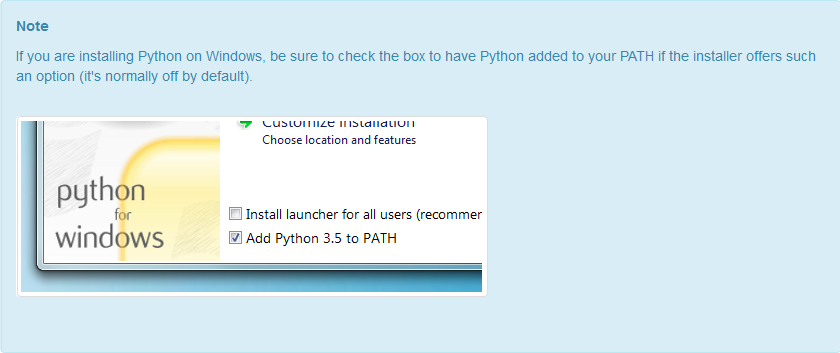
After my reading in Mkdocs, it needs to install Python, choose the version that matches for your device…
Also for python issue, this note is very important … it makes me uninstall and reinstall python again
I followed all the steps in each installation … the websites include everything…
Now, We are ready to clone the repository in our PC.
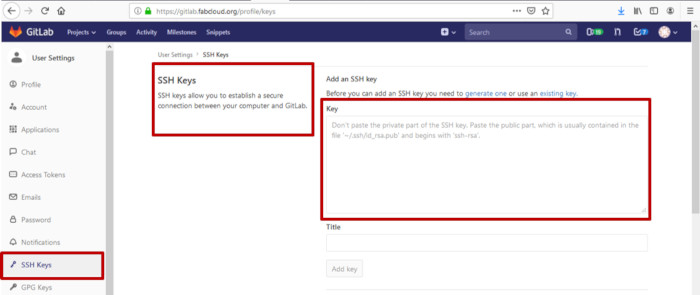
SSH.Key
SSH keys allow you to establish a secure connection between your computer and GitLab.
- First, we need to open our account in gitlab … then from the user account choose setting
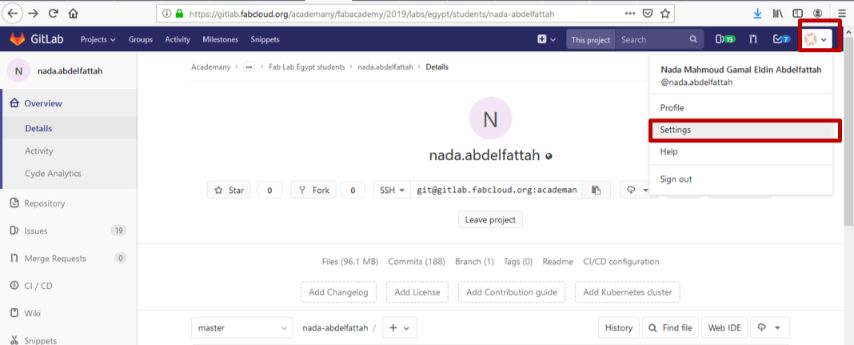
- Then we pick on SSH Key
Now we need the ssh.key to copy and past in this rectangle
- Open command prompt, then write ssh-keygen
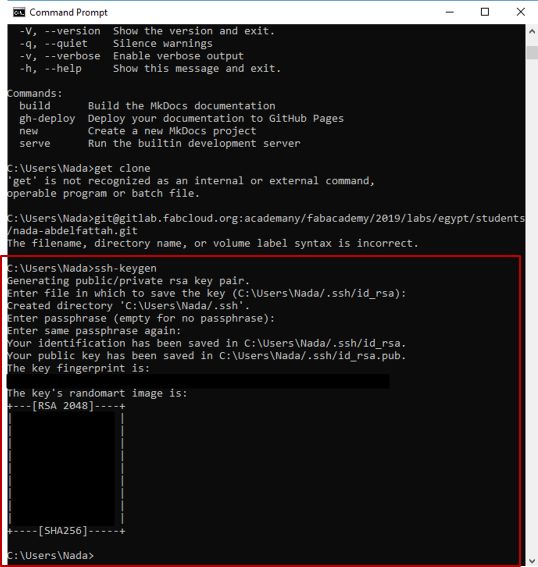
- Now you have the ssh key … open C:\users\username.ssh
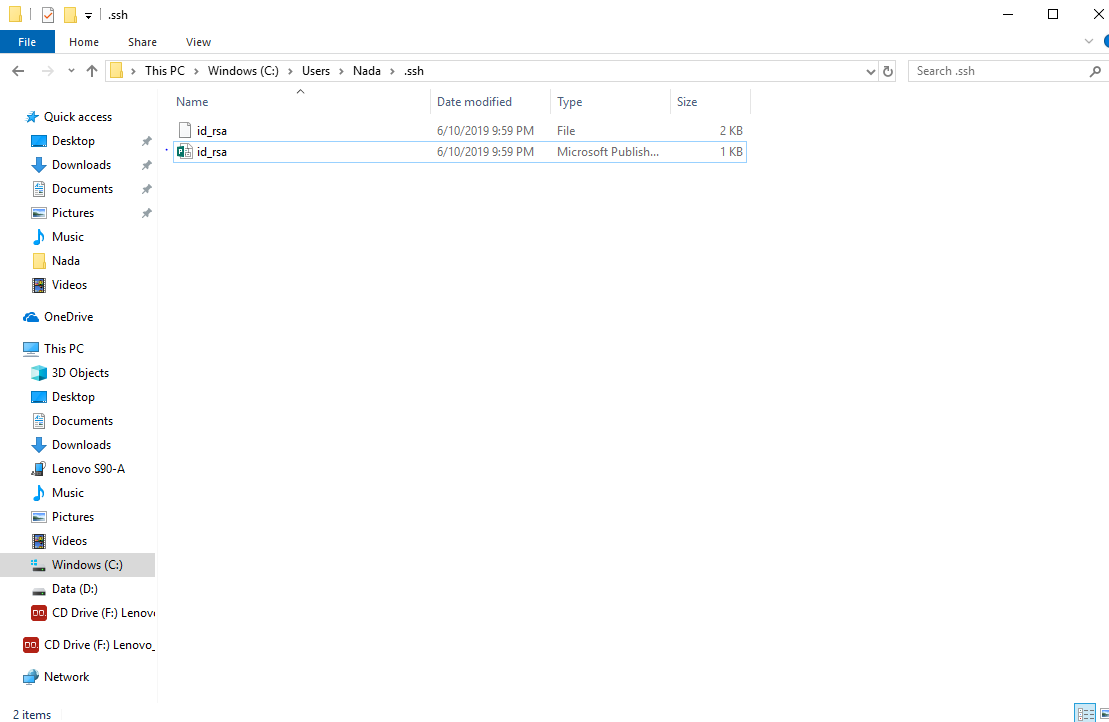
open this file with any text editor, then copy and paste in the ssh key in GitLab
Git Clone
- For this step, we need to make a clone for the website folders from GitLab to our PC
open your website in GitLab … copy the URL clone

- Then,
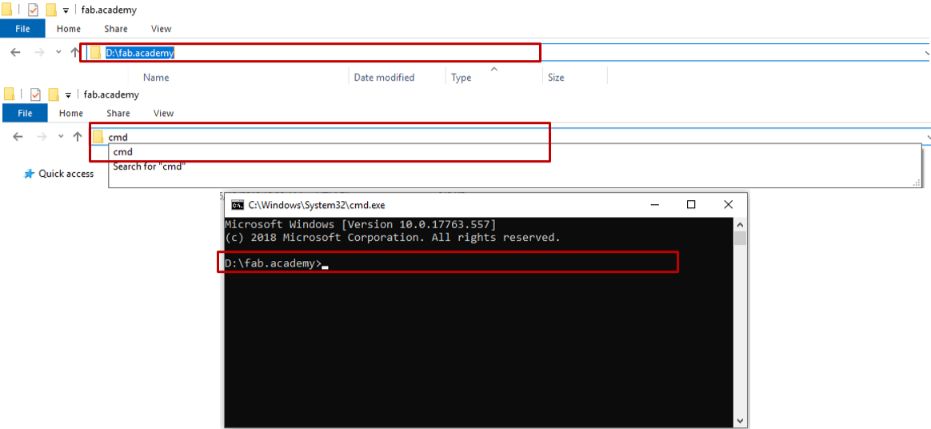
open the command prompt in the directory
You want to make a clone in your PC. There is an easy way to make that … just open the wanted directory then select the directory … write cmd … Enter
There are a lot of different ways, but I prefer this way
- Then write git clone and paste the link we have copied from GitLab… Enter … yes …
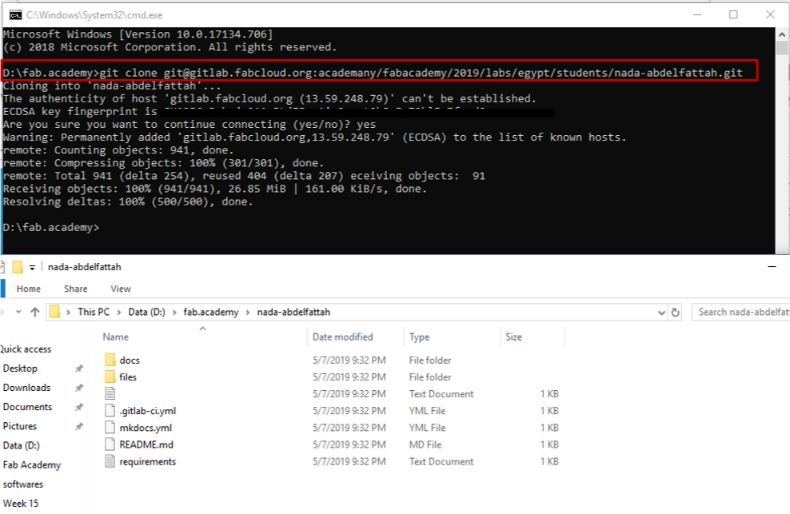
It’s done!!
Now we have the folders in our PC ..
Configure The Server
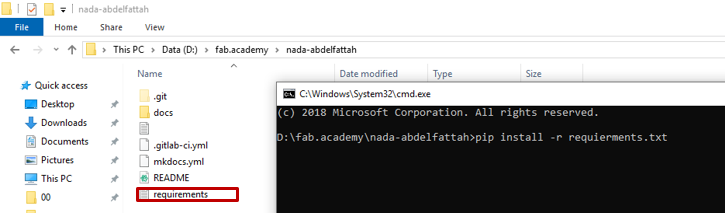
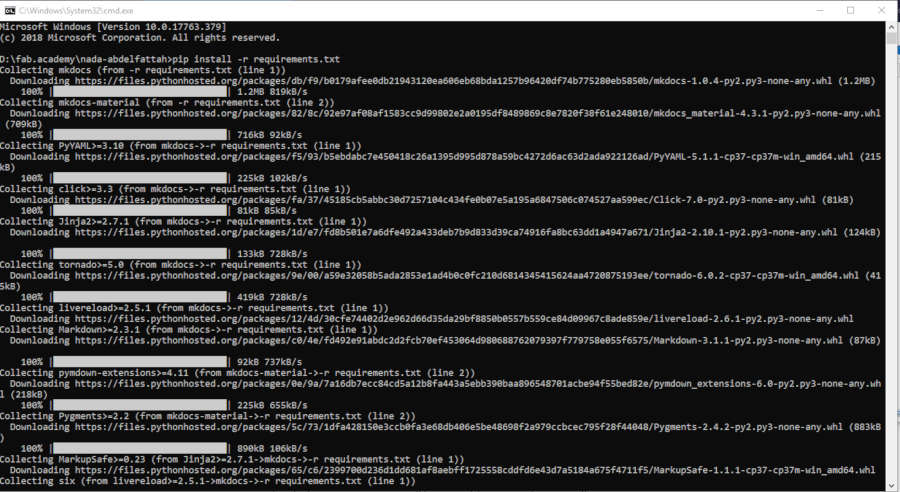
Before we make this step … we need to install the materials file..
So, Open the folder directory in the command prompt … then write pip install -r requierments.txt
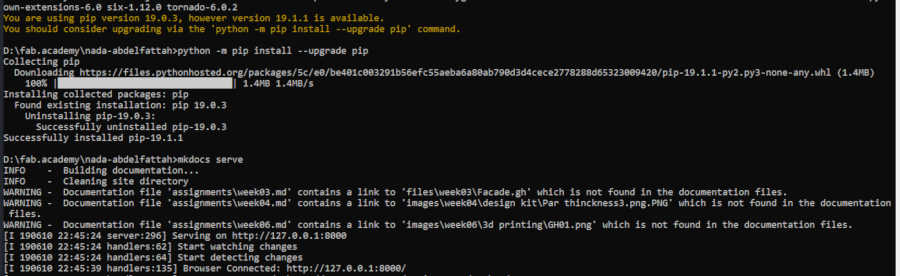
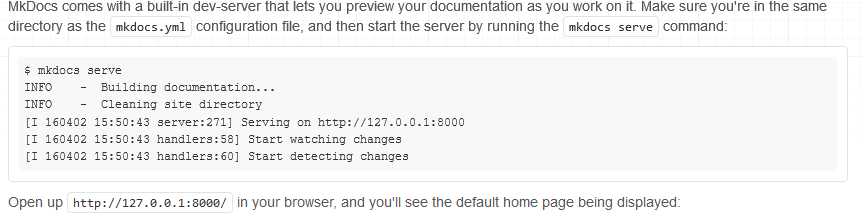
- Finally, write mkdocs serve to open you server, each time you want to edit in your files!
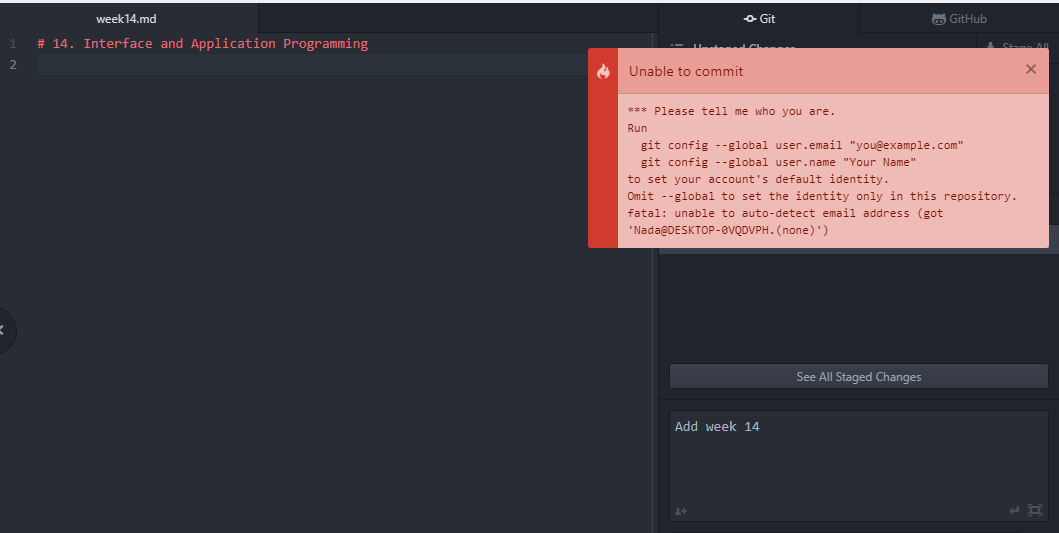
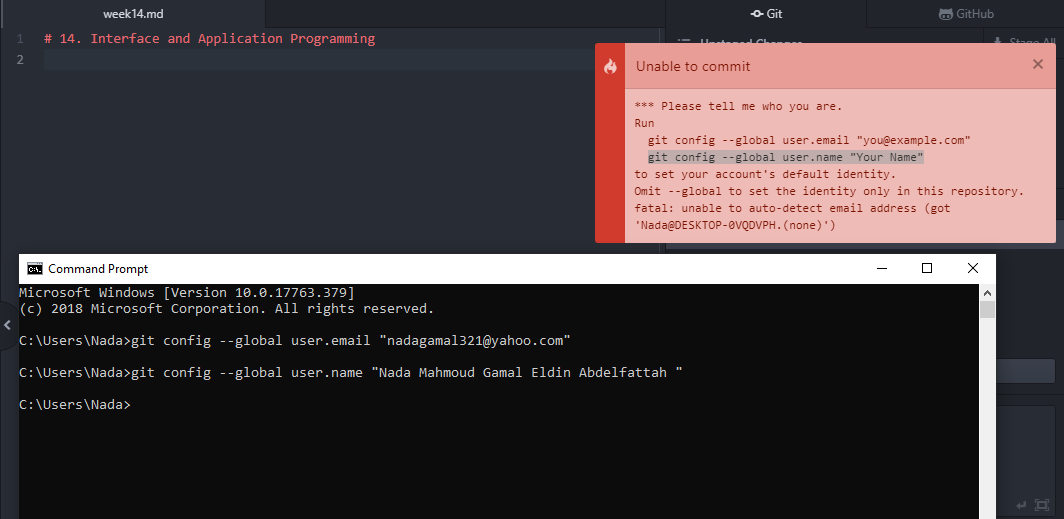
Atom
I preferred to use Atom as a text editor. So this is the first message you will receive when you open your website folder. Please tell me who you are.
So, I followed the steps, Opened the CMD and took these lines copy and paste with writing my email and my user name on the website. Shown as the pictures below.
Now we can Edit and push all edits from our PC!
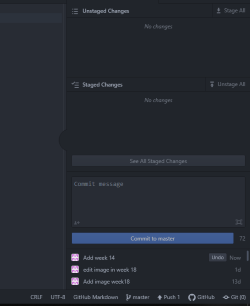
When we edit in our file, then save the edits. We noticed that the file appears in the right panel as below
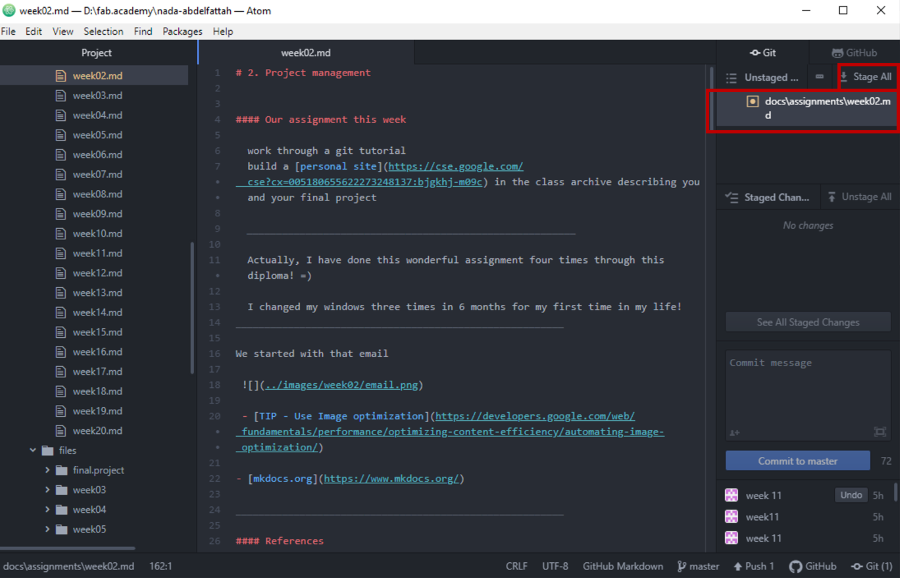
Then we press on ‘Stage All’, the files move down… if we want to move the changes up again, we press on ‘Unstage All’
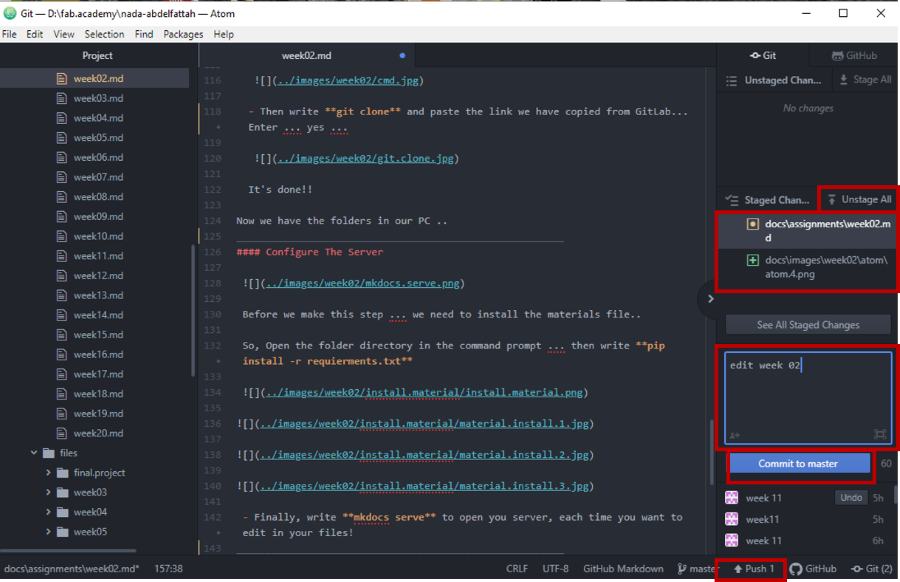
Then we write a comment that will be the title of the issue in gitlab. Then ‘ Commit to master’.
Finally, We press ‘Push’ to clone the changes from local to the master!
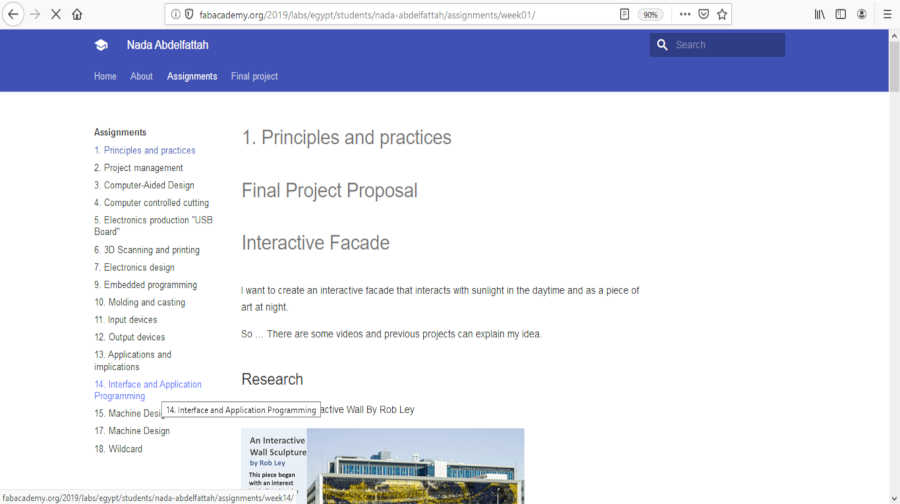
Now, I have my first assignment … Final Project Proposal page!
Instruct Session
I recommended this link Instruct Session that Haggag present to us about this assignment and have a lot of valuable information.
Manage the size of my website
As I mentioned in the access to gitlab email
- There’s a limit on 300mb. Please take care of the files you upload!
- Sites reaching 300mb will be listed on a dedicated page in the archive, for special consideration!
- TIP - Use Image optimization: https://developers.google.com/web/fundamentals/performance/optimizing-content-efficiency/automating-image-optimization/
We have a limit size to our websites, So we need to save this size as possible as we can.
I checked the recommended link in this email. It’s very useful and collect all the data we need to know a bout the images.
I tried a lot of ways to resize the pictures:
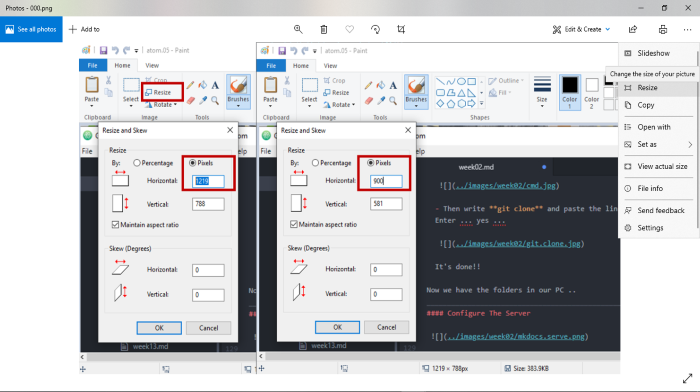
1. Paint
- Open the image in Paint
- Select resize
- Chose pixels to select the right dimensions of the image
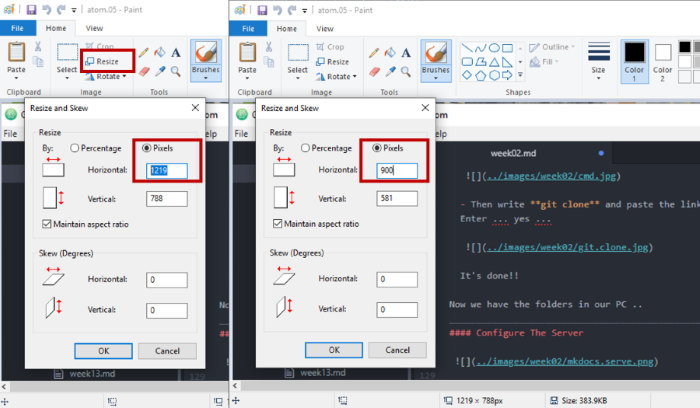
We noticed that the image is resized from 383KB to 272KB

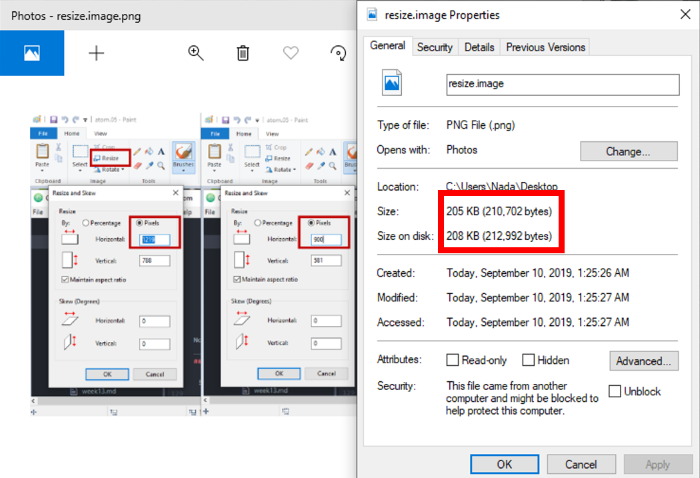
2. Resize image properties
I used the previous images to try the resize with different way. I just open the image and select resize as shown
By reduce the width pixels , the image is resized
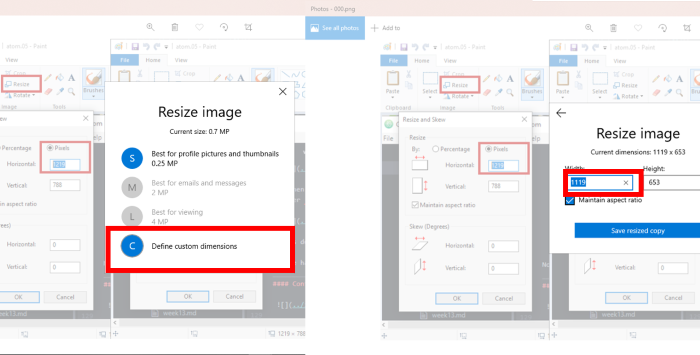
The image is resized to 205KB
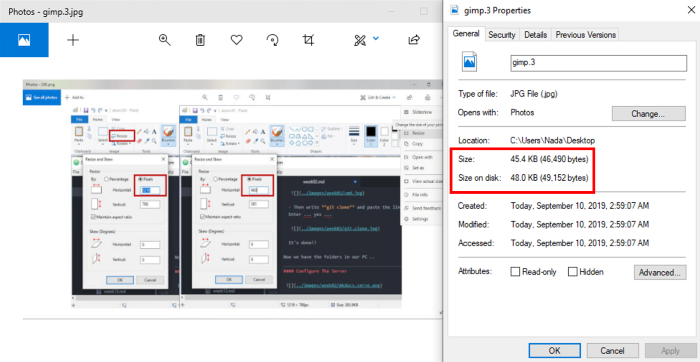
3. GIMP or Photoshop
- Open image with GIMP
- Select ‘Scale image’ from ‘Image’ tab
- Change the width size

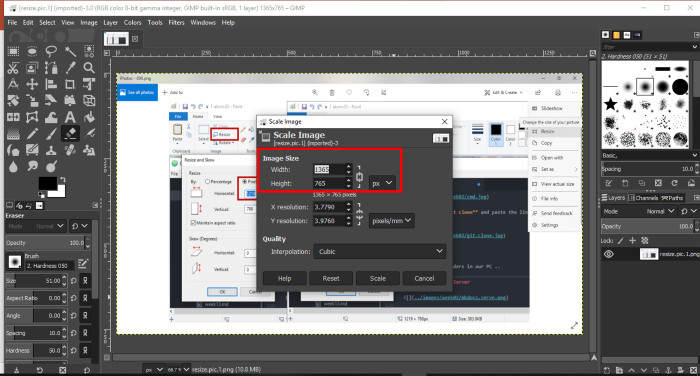
- File >> Export as
- Rename the image and change format to JPG
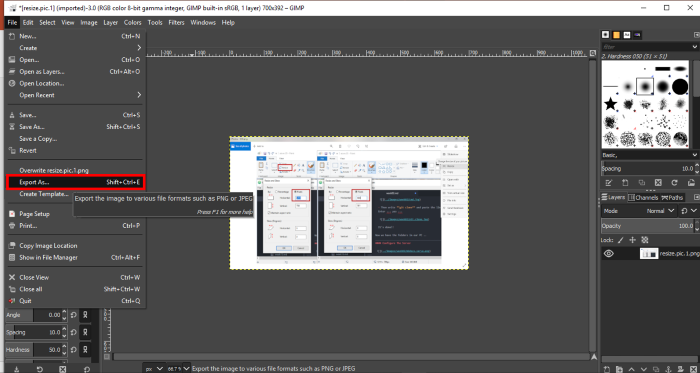
- Then reduce the quality of the image
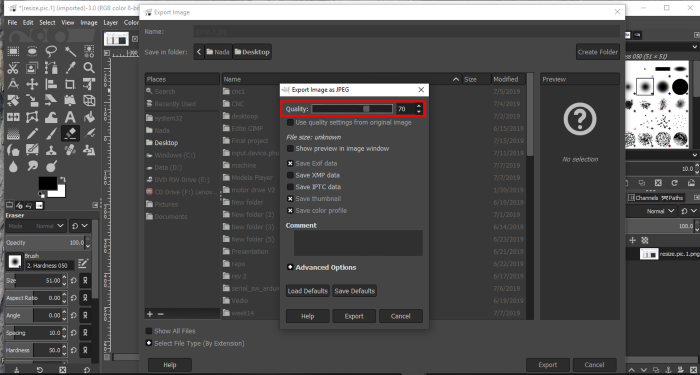
- Finally, the image is resized to 45KB!
4. Bulk Resize Photos
All these tries, I decided to use GIMP to resize and edit my images…
It takes a lot of time to edit the images one by one … So after a lot of waste time in the routine process, I asked my classmates in the regional review group, if there is an easy way to resize multi pictures in one step!
So Samiul Hoque, from CIPT, recommended this amazing website bulkresizephotos.com to resize 150 images in 60 seconds!
So I used this website at the end of my documentation… I recommend it to anyone will start …
Also, Santiago Fuentemilla our global evaluator recommended this software Image magic, This is my first time to listen about it. But I watched online tutorials and it’s interesting to learn more about it…