10. Molding and casting
This week is very interesting for me. I started thinking in the assignment design during the Neil’s lecture! I’m so excited to try a lot of designs, 3d models and compare between all of them also discover different materials!
Overthinking
So after Neil’s lecture we started our local instruct session with Haggag, Lamia and Michael. During the session I searched about more exciting designs I really want to try. I started thinking about accessories, it’s really exciting field that I love. Then I thought in the final project and I could discover different materials to make my panels with a nice design. I will need the same panel with multiple numbers, so it will be a nice idea to test my design that I made in week 3 then I back to the accessories!…
It’s very confusing that you have just one week and want to discover everything!
So During the local instruct session, I can’t stop myself looking for accessories… Actually I found a lot exciting ideas.
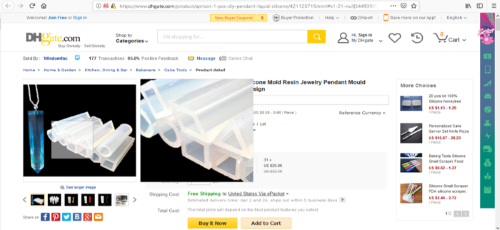
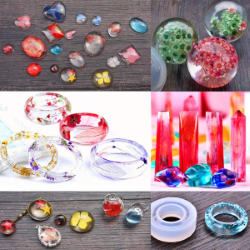
I started with DH gate website, I found this product, Handmade Jewelry Making Moulds Diamond with US $16.1 - 21.63 … This is my first time see like these products… I loved the idea

Then I found this part,Handmade Decoration Tools Crystal Design with US $20.86 - 23.72, It’s very simple design but the result is amazing… We can use different colors and materials to make like this part… also with different simple shapes.
Specially,Unique Jewelry By Using Its Natural Shape
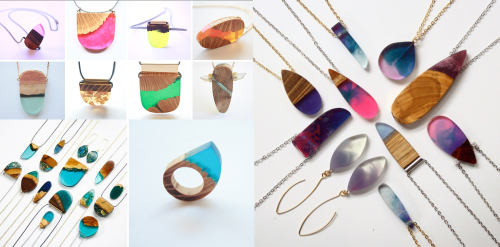
I loved this idea so much that you can use different materials in the same part… I’m sure you will inspire with their website, check it out!
They used in one of these, the beach sand, ultramarine blue resin and metal pigments with a high-gloss polished finish… Also every piece has a unique material related to natural.
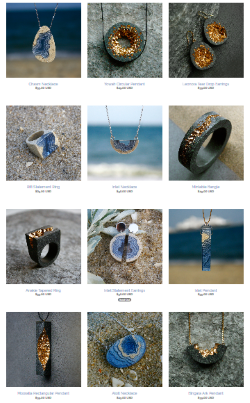
Finally, This one … They used Natural Flowers with colorful resin to make this art!
Now I have a lot of ideas and very excited to discover all of these designs! But I still have no idea how the machine works and could these designs made by Roland MDX-20 machine or there are a lot of variables will limit my designs!
Also I have an issue with the molding and casting process,
that you design the positive part ‘from wax or wood’ to be a negative part for silicon, that the resin or the casting material is poured … Then it becomes the positive part that you want!
Haggag, Lamia and Michael made an open discussion and we took a lot of time to imagine this long process and there is no other solution for this process and asked me in different designs to make sure it’s very clear to me.
After the two sessions, I almost know how the machine works, and the different between endmills we will use. I recommend to watch the Neil’s lecture.
Also Ohad Meyuhas ‘Our Guru’ inspires us as usual in the home work review session and encourage us to think in different designs without use just extrusion. Our design should be sloped from the edges to be easy split.
Thank you for reading all of that!
It’s not Overthinking but it called mood board! The first step to start of any project. And this is my first time to made molding and casting! So reach for the stars!
Design process
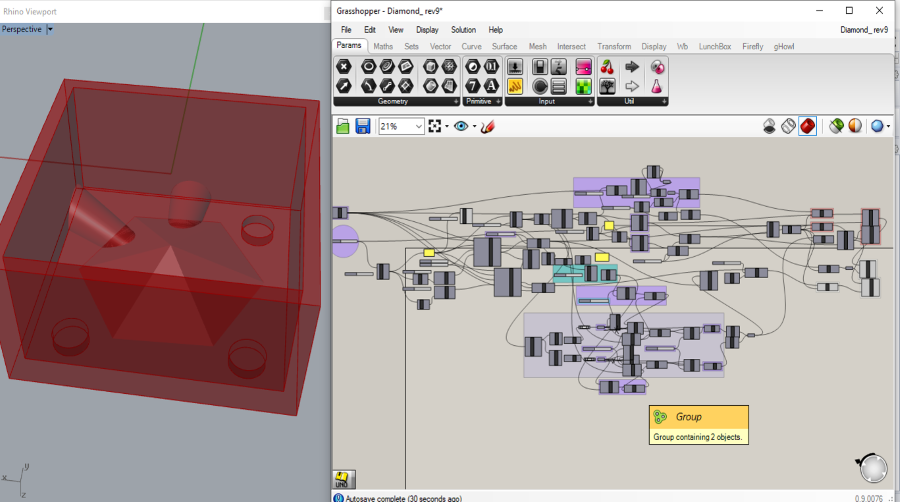
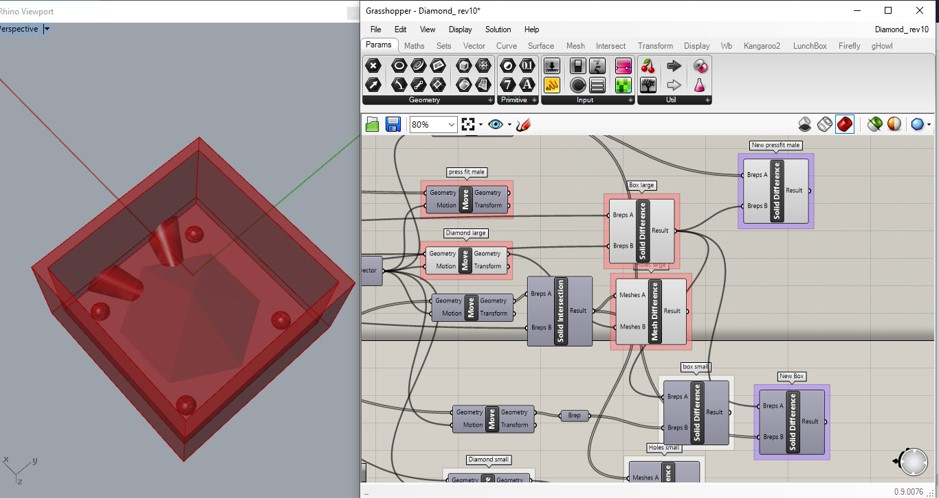
So after all that I decided to make a Pendant, So started with free hand sketch to imagine which part is positive and negative.

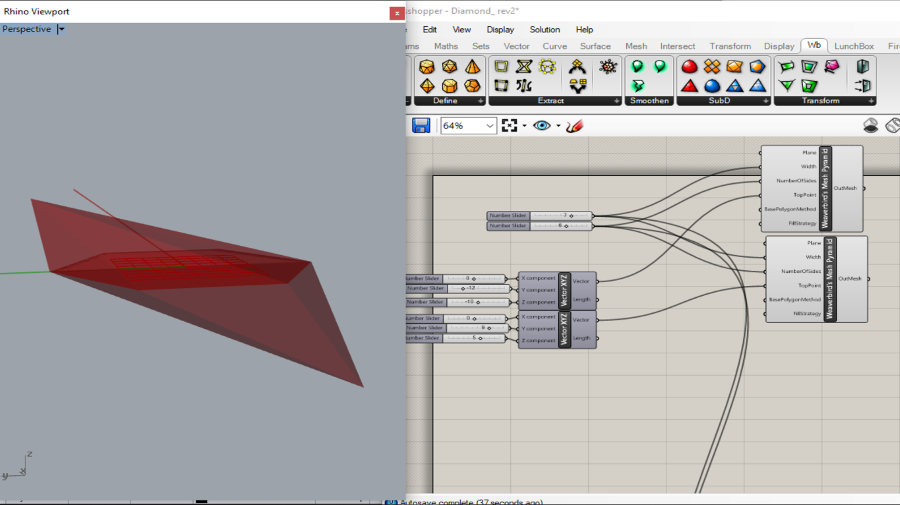
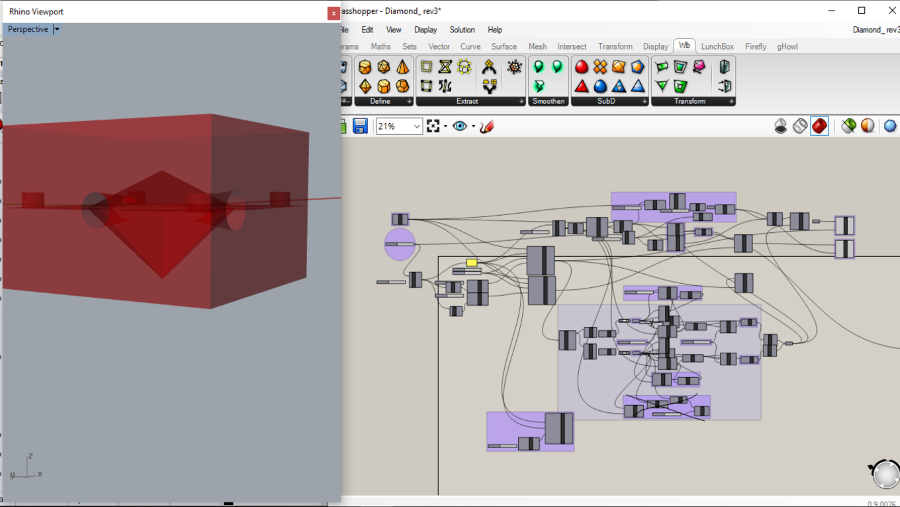
Then I started with Grasshopper. There is a smart easy plug-in in grasshopper called Weaver Bird, This plugin has an easy tools to make meshes with different patterns that you want. You just chose the version that match with your software and install it.
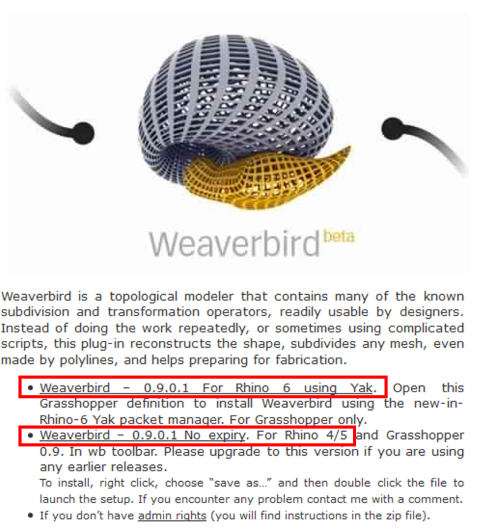
So I just picked the ‘the Weaverbird’s Mesh Dpyramid’ (one pyramid) then I noticed that there is ‘the Weaverbird’s Mesh pyramid’ (two pyramids). The difference between them shown in the image.
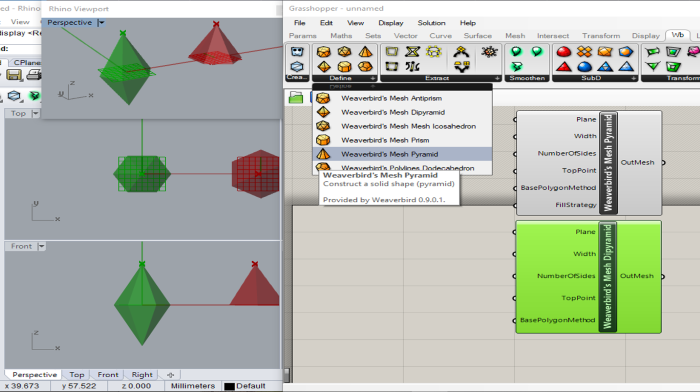
I will make two split parts, it makes me chose Weaverbird’s Mesh pyramid.
You just chose the coordinate point and the size of diamond ‘Hight, Number of sides and width’.
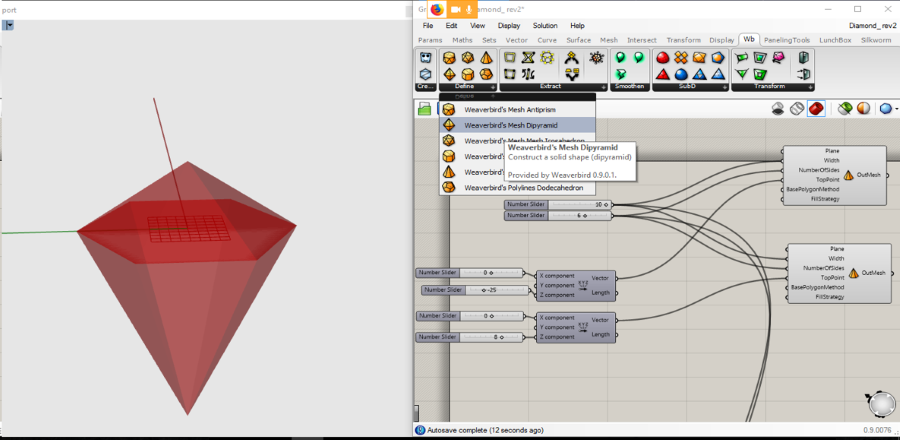
It’s totally parametric part, You can change any parameter you want.

Then I reback again to Overthinking stage!!
I still interested in watching how these products can be made.
So I searched in Youtube about molding with resin material, and how can we use different materials, colors … else.
Every video I have seen I learned tips and tricks from it. Some of them made by different machines or different process but I’m interested in resin material in all different cases. So I will linked them if I want to reback in the future.
-
Products from epoxy resin and wood, That is what I want …. Use the milling part in my casting … Reduce the waste to use the same positive “ wood milling” Stoke … in the casting in resin. Also, We can engrave the wood to draw something
-
I learned from this video, If we have a bubble in our part… how can we remove it. Also I loved the geometry.
This photo inspired me..
I saw this project several times … It makes by 3d printing … Takes a lot of time and more expensive … So I want to try it with molding and casting … first we can mill the external shape … then make the silicone part from it … then mill the same external shape with offset … then make the second silicon internal part from it … Now we have the external and inner shape … Finally we can casting it with our material!
Technical Process
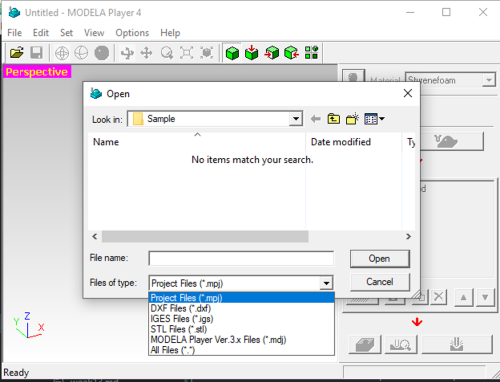
- First we need to prepare our design and export it with DXF or STL extension.
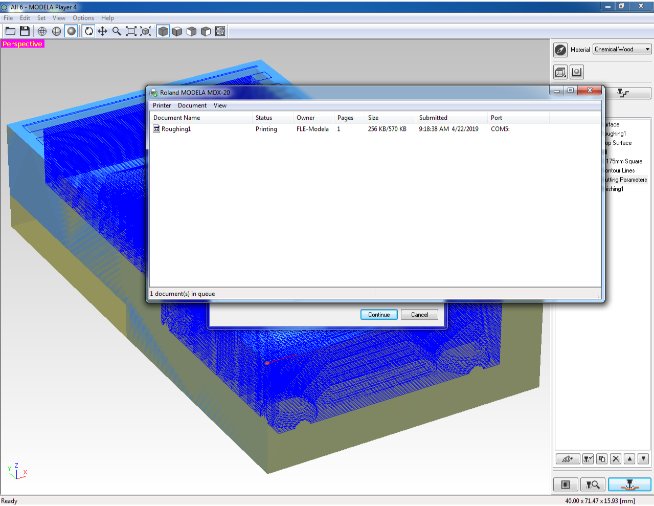
- Using Modela Player 4 Software that match with your machine. This software that simulate your process and generate your 3d model to G-code that send to your machine to mill your part… The machine may takes from 4 to 12 hours… maybe more or less depends on your design, the setting that you used and the endmills… So be patient with this stage.
- Make sure your part is very smooth as you need and matching your design.
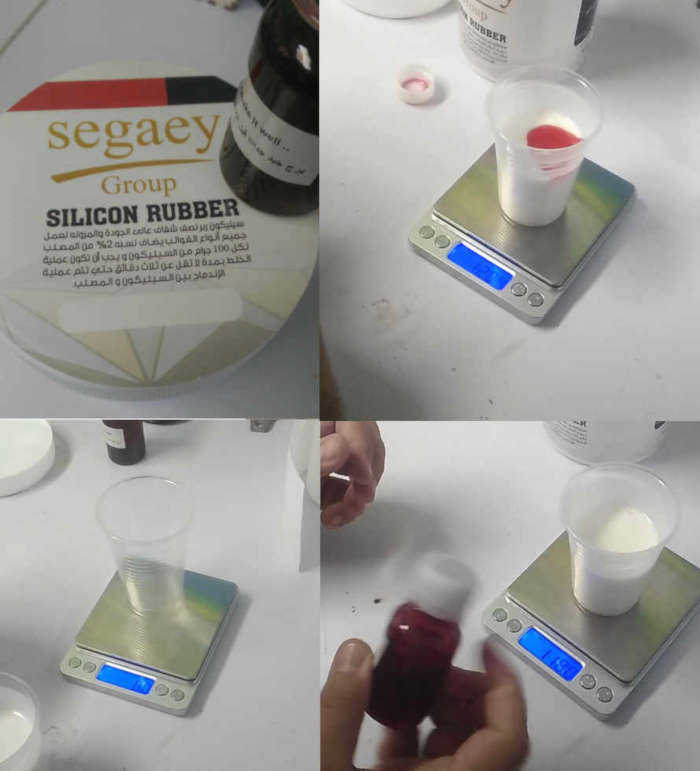
- prepare your molding material… I chose the silicone for my part… It needs to put a harder to silicone. I liked this documentation Check it out.
- Then mold it in your positive part… Wait a couple of hours to be ready.
- Prepare your casting material … I chose Epoxy resin.
- Finally put it in your molding material… Then it be ready!
So Kamel used his previous part in his round fab academy 2016, to test the machine and the milling process.
- First Kamel downloaded the file that attached in his page, then we followed the same steps that he documented in his website
But we made scale down to the part to mill faster… we just need to make the whole process to test the machine… So this is the result.
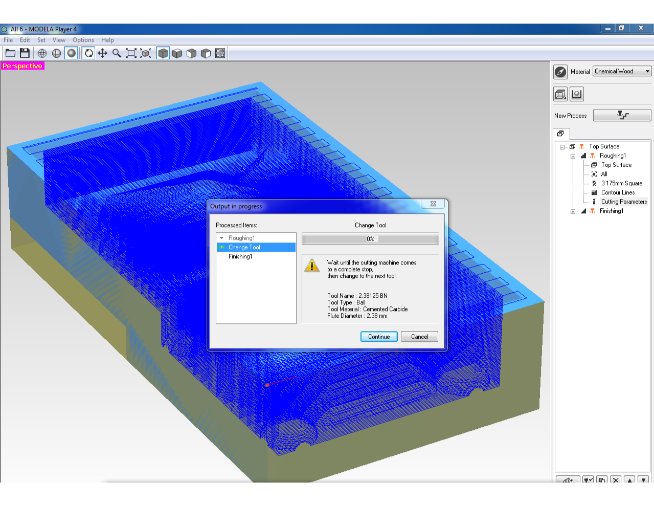
Actually, I love so much to watch the machine works, and the path that it takes to make the process. So I noticed that, almost 25% of the time, the machine just stops to calculate the next path it will take! I think this refers to the g-code that Modela player 4 that generate.
After I learned the whole process from the design to the milling, I’m sure of that I need to redesign my part based on milling.
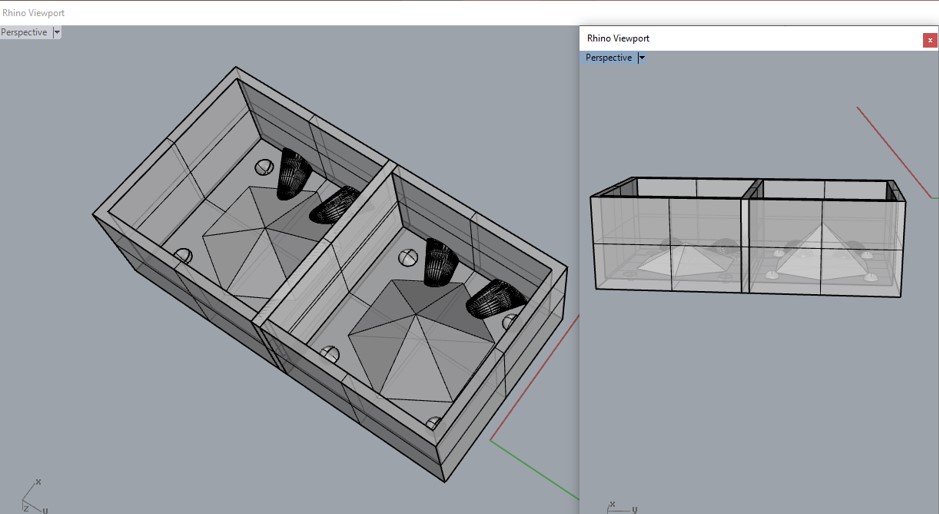
Complete the design
I need to design
- A box for each part.
- Two holes… one of them to mold the material and the second as exhaust.
- joints in the two parts to make the two parts fit in the same place… so one of them with negative and the another with positive.
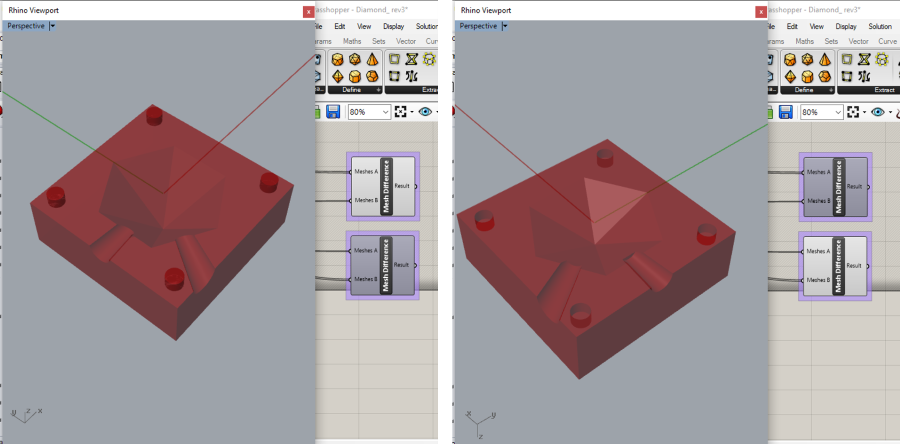
Now, I finished my design and it’s ready now to export it to the machine. The whole part is totally parametric… you can change the width, height, no. of sides of the polygon … the size of the holes, or the size of the joints… and any change in the base part the box will fit with this change also the joints or the holes.
Feel Free to download the file
I’m ready to mill my parts and the machine is available also the maker space just opened now, so I can take all the videos that I want … and happy to share my design with Kamel and Lamia .... Then the nice is ....
Kamel and Lamia said to me you designed the negative part that we don’t need!!!
You need the positive one…
We made a PhD in this point then I fault! … But It’s okay … we just need to edit some parameters....
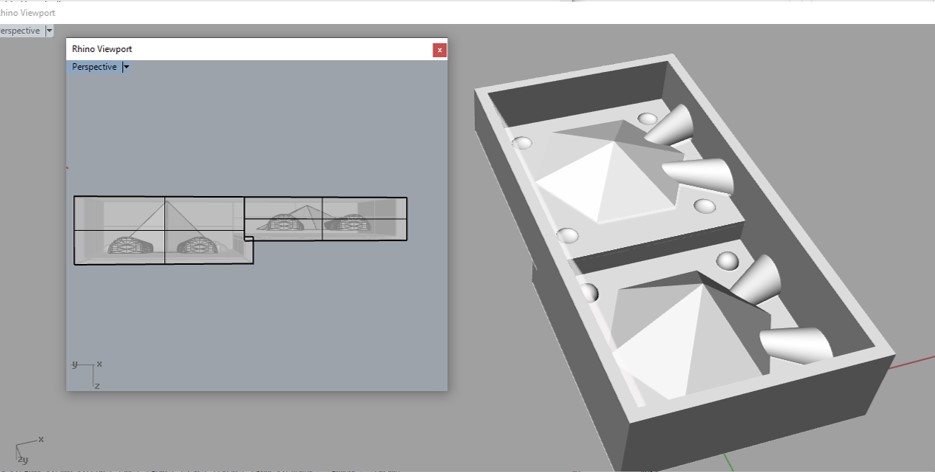
Redesign The Model
For this step, I though of my design again, I made two parts and the both have is fit with the same width no. of sides also the holes… the different are the height and the joints …
So what if we mill the first part with the positive joints and the bigger height, then finish the molding process. After that we re-mill the second part with the negative joints and lower height… I thought that, this process will save the time ‘about 6 hours or more!’ and reduce the rest of the stock.
Based on that I redesign my parts to fit this Process. So we can call…
- Big part … with the longer height and positive joints … and this part for stage 1.
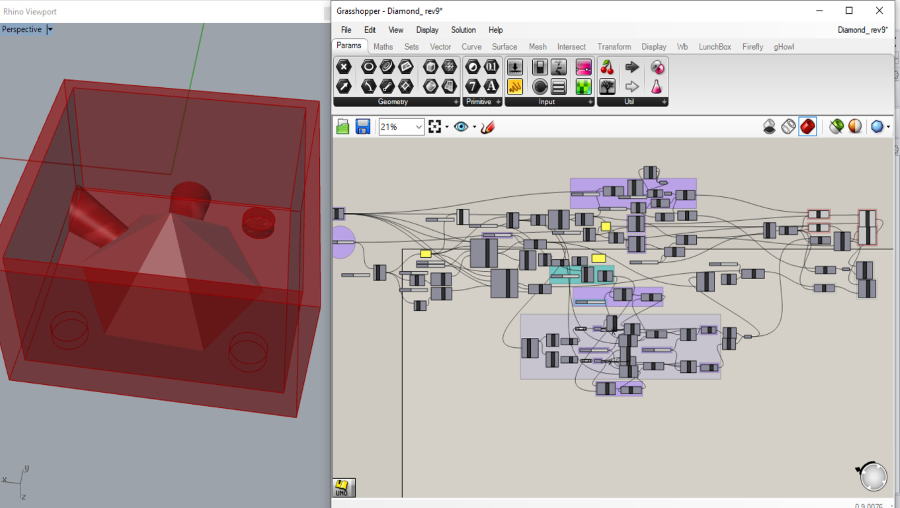
- Small part … with the small height and negative joints … and this part for stage 2.
Now I can say my two parts is ready to mill.
Feel Free to download File
You can follow the same previous steps to export the second part from Grasshopper to dxf or stl format.
- I just select the compound that I need.
- Then make Bake, Now our part baked in Rhino.
- So from Rhino we can select the part and chose from file >> Export Selected.
The nice thing in Rhino is have a lot of formats you can export or import in. So you have the three options to export …
-
dxf
-
stl
-
igs
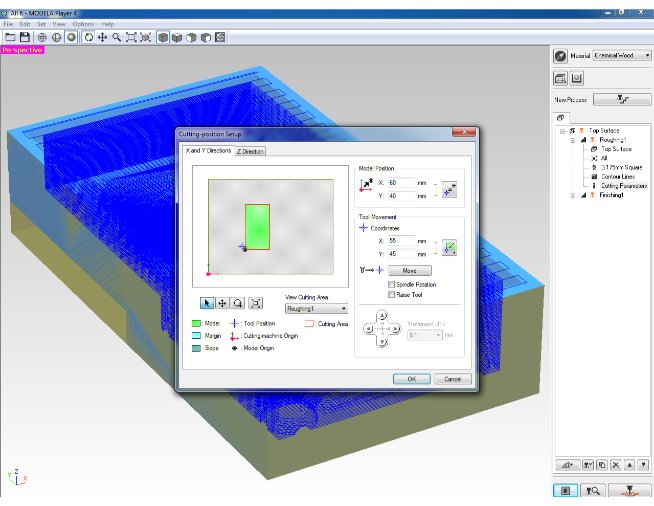
First I checked the files format that Modela Player 4 is opened, as shown. Then I export my parts.
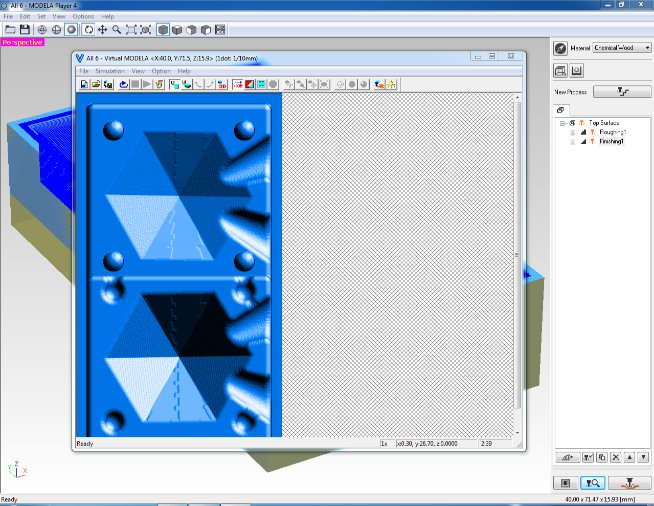
Modela Player 4
As I explained before what I want to do in the previous step, that milling part 1 first, then made the molding process for this part, Then milling the second part in the same stock with the same place … to reduce the time of the machine and the stock…
So I started with the first part…
You can follow these steps … Modela player is very easy and friendly to use … its interface seems to me from the eighties! but it’s nice!
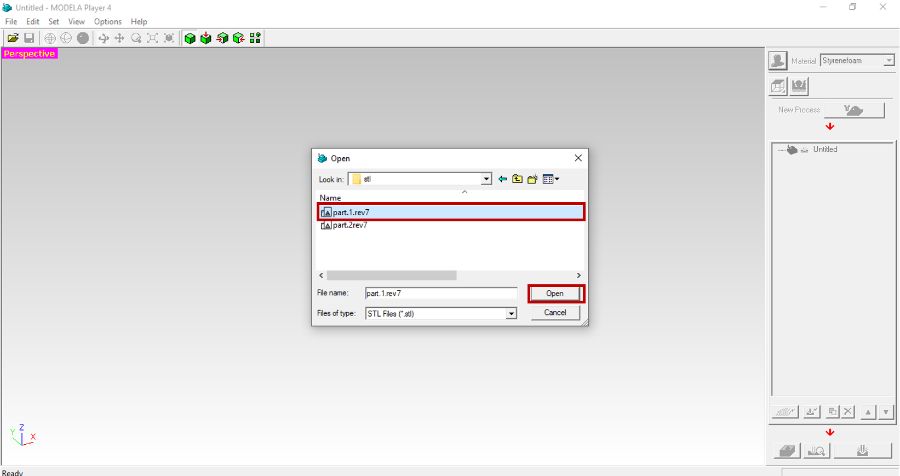
- File >> Open
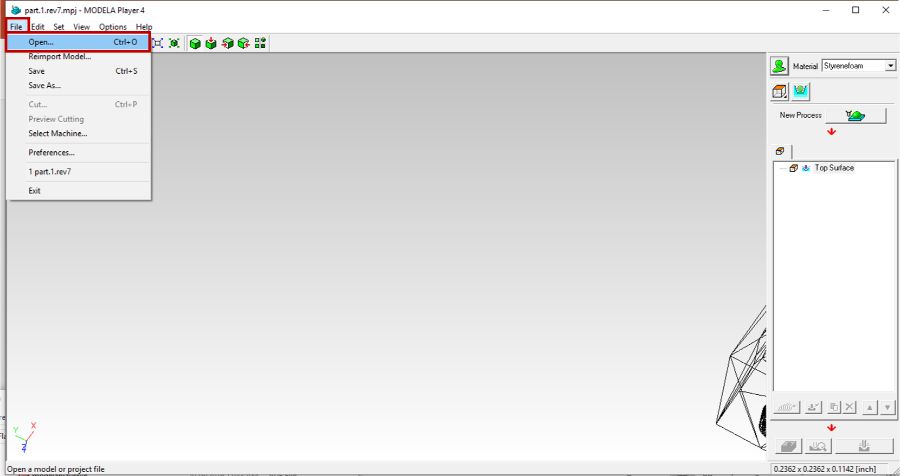
- Select all file formats >> Select your file
- Press Model in the right tab >> to edit the size and scale.
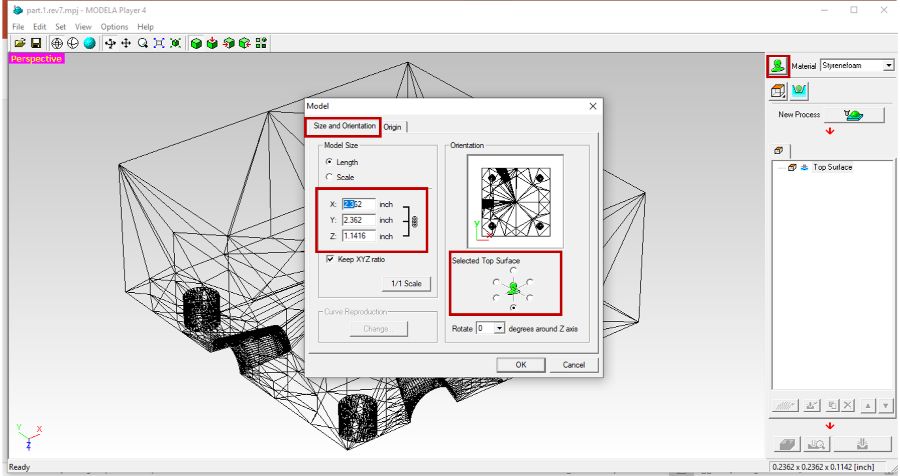
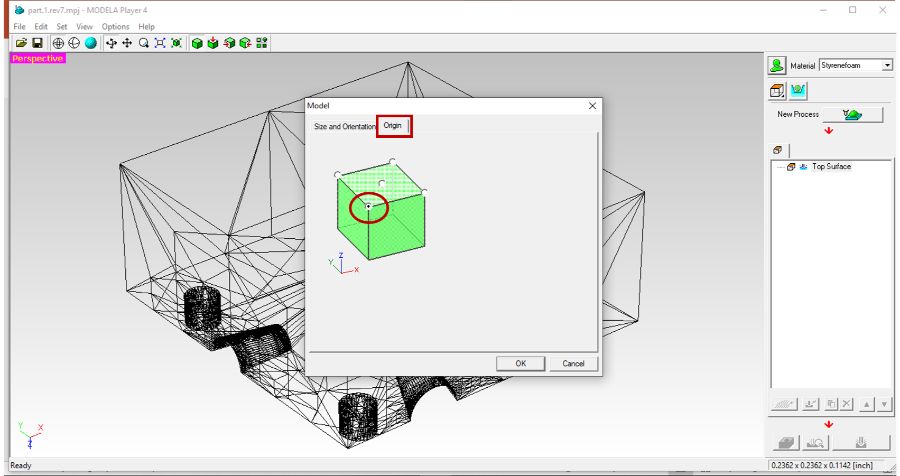
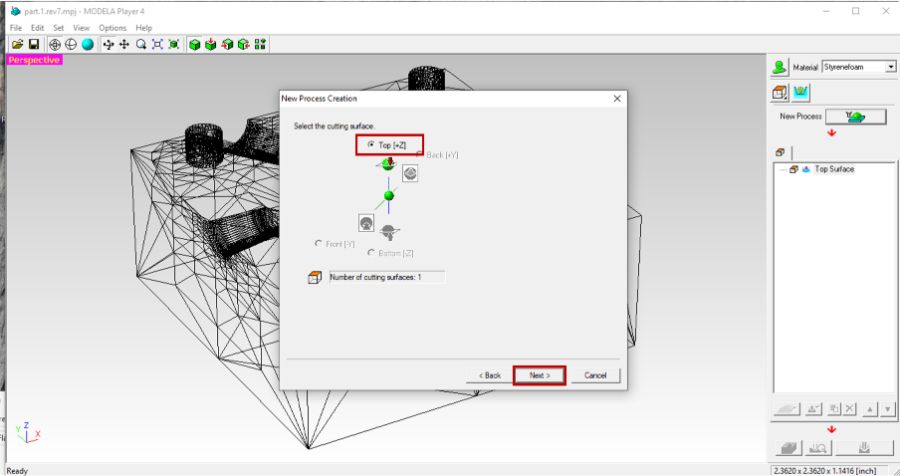
- Also the origin.
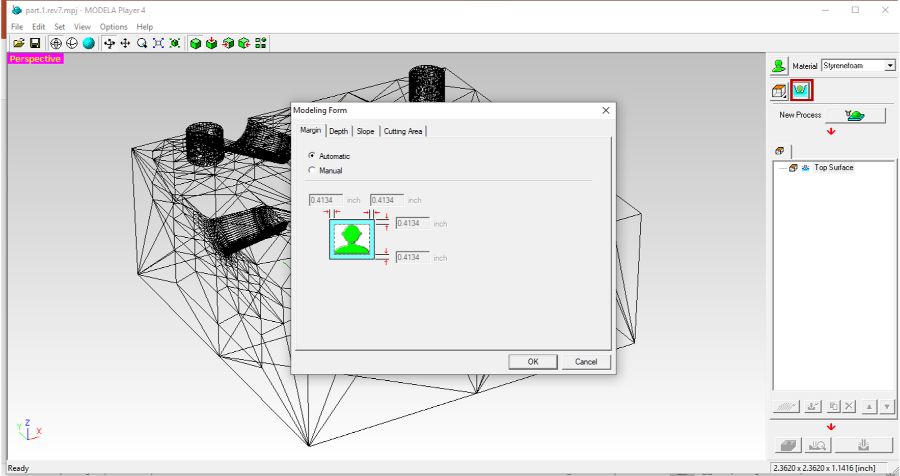
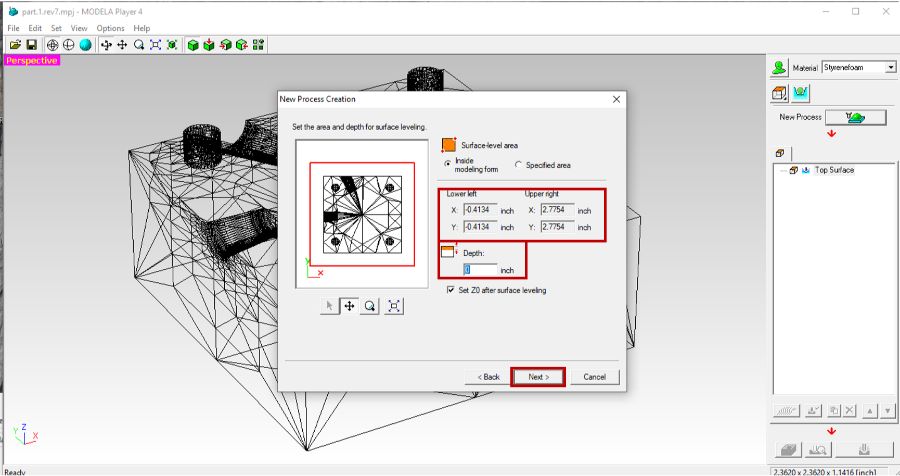
- Press Modeling Form >> Margin … if you export your part without box … Margin will made box for your part… In my case, I have been designed my box, so I don’t need this step
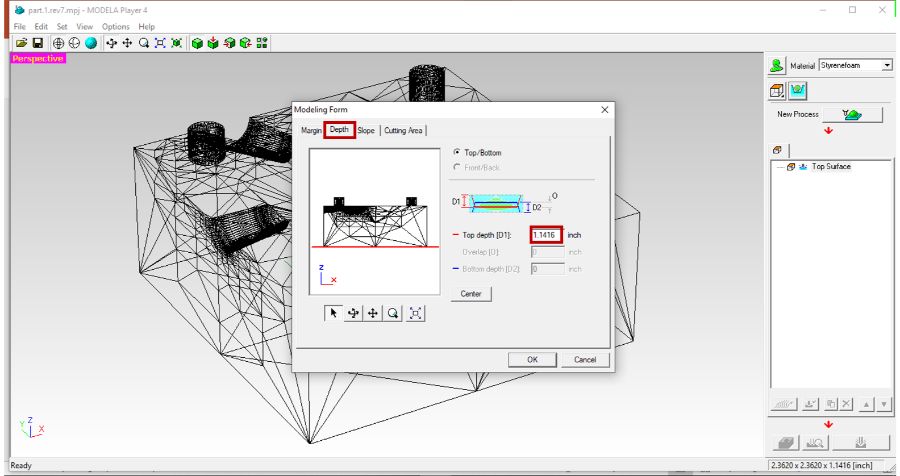
- Depth >> that show the depth will mill in your part.
- Slop >> is an amazing option in Modela Player … exactly like Margin, actually Complete margin process, it makes slop to your box, to be easier when you split your molding stock from the box

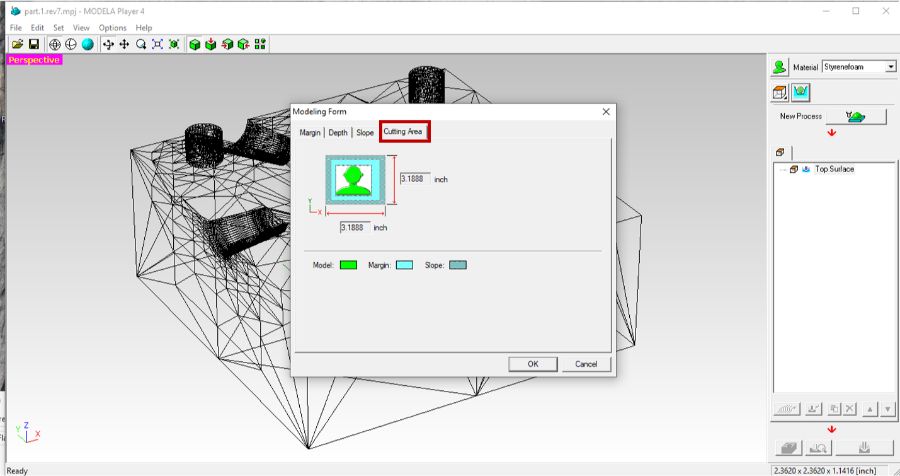
- Cutting Area >> to make sure from your part dimensions.
Now we can to move the next step…
-
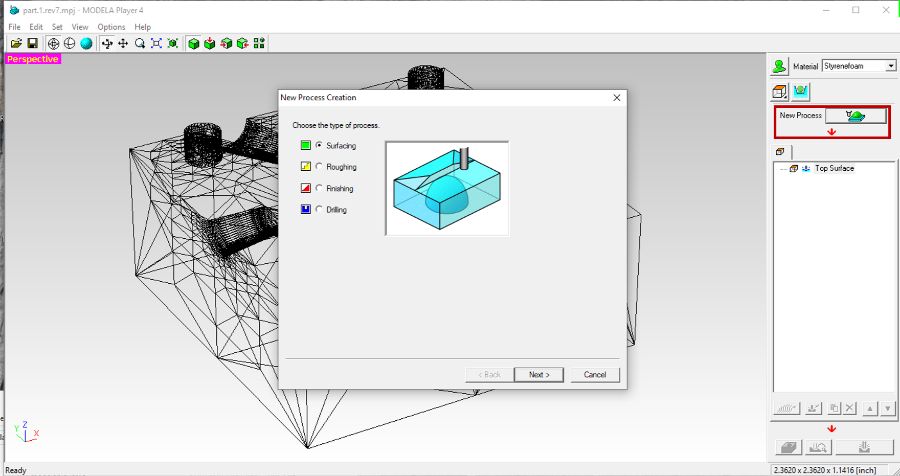
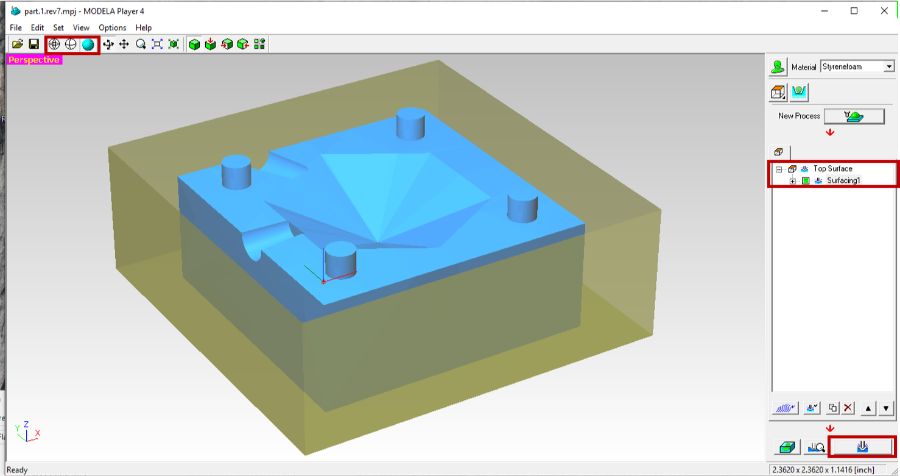
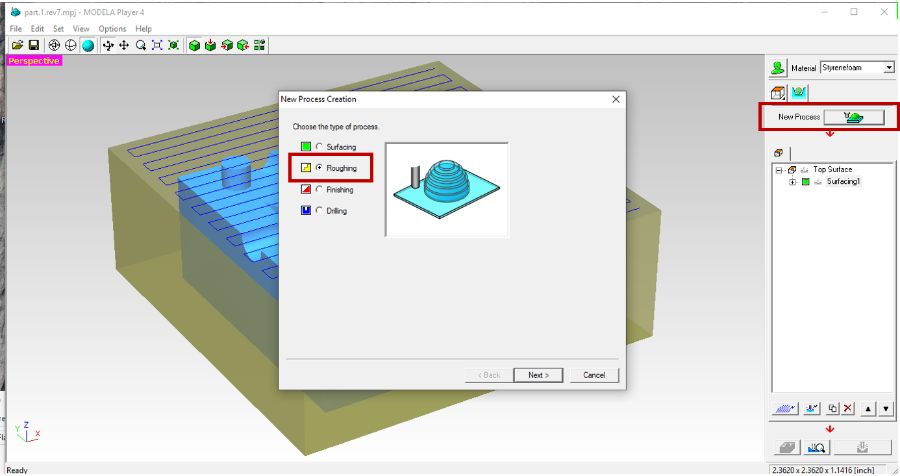
Press New Process… we have four process
- Surface … to make your part is totally flat, But Aser Nabil convinced me, we don’t need this process… we will end to use the roughing process, So the machine will make this process by default.
- Roughing … for this step we need to use endmill with big dimeter like 6 mm to make this process quickly.
- Finishing … to make our part very smooth and show all small details. We used in this process endmill with small dimeter and slow speed. For better result we used endmill ball nose.
- Drilling … actually I didn’t use this process… it’s amazing tools to make the four corner press fit … but I don’t know does it need to import the press fit parts only with the box?!
-
I started with surface process to show you the steps … but I didn’t make surface process with my part.
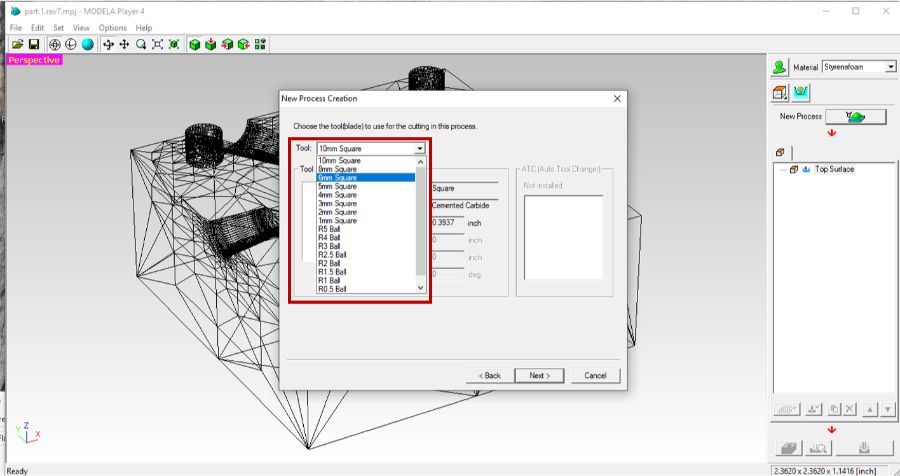
- Select your endmill you will use … for this process 6 mm square will be fine.
- These dimensions show the dimensions that the tool path will calculate in.
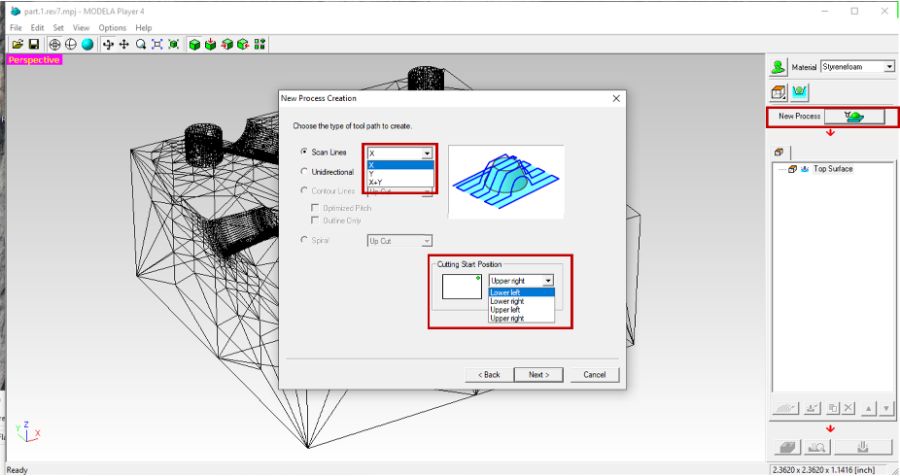
- Scan Line … This function is need more than trying and we will back to this step more than once… each one will reflect in time and finishing according to your design.
So, what we made… change this value to x and finish this process … then make simulation … check the time and the finishing.
Then back again, chose Y … check time and finishing.
Try x,y … check time and finishing
then compare between them, to chose the best choice.
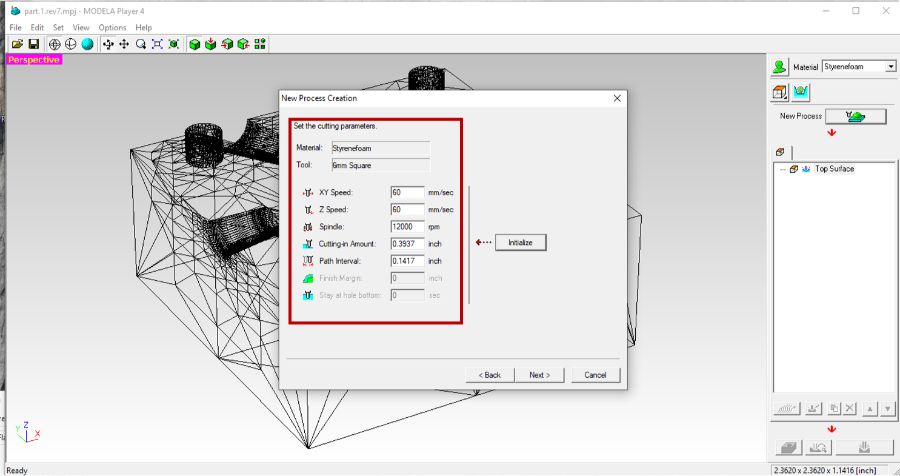
- Then all of this parameters setup by default according to the material and the endmill.
So I didn’t change any parameter.
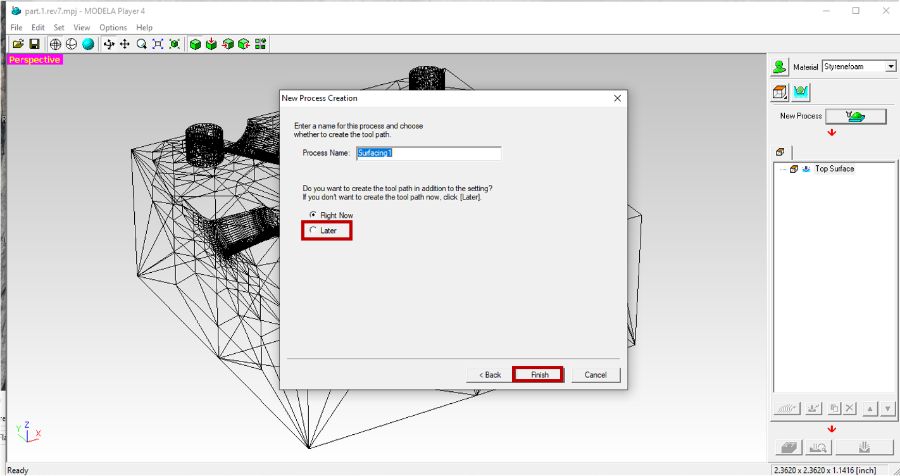
- Remember to chose later… we don’t need to make one process by another… So we can make all process and check all parameters … then start all process.
Finish…
- We can change the preview to rendering
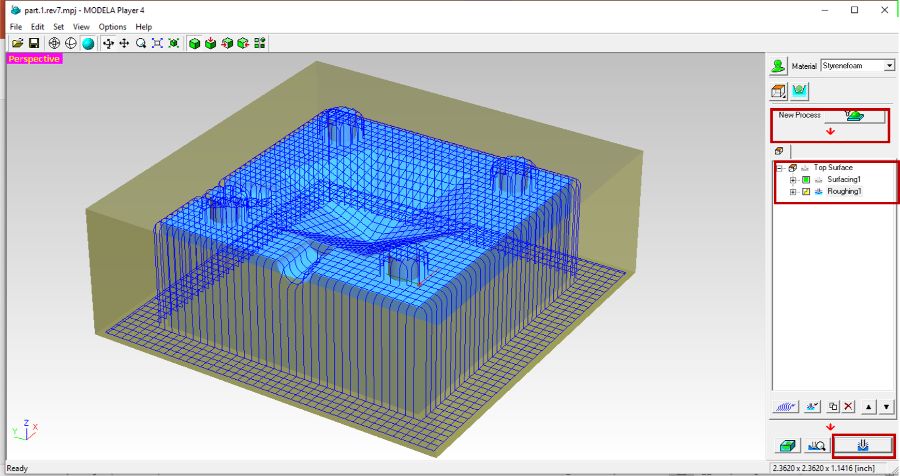
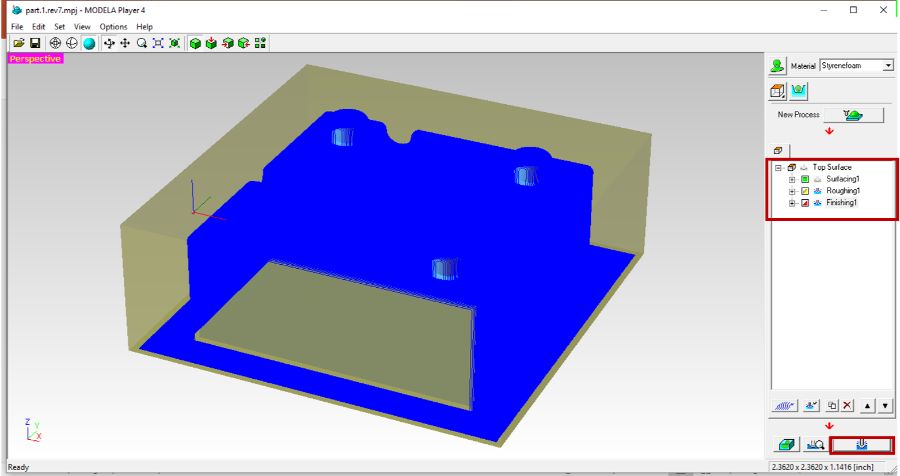
- Our first process has been done … Below in the right tab … we can ‘Preview Cutting’ … it makes simulation for all process and estimate the time … Also ‘Cut’ tool, will draw the tool path that the machine will take.
- We can add new process, we just will follow the same steps.
- The tool path for second Process
- The tool path for final Process
Service Guide Book, Modela Player 4
Finally, this guide is very useful, Kamel is recommended for us.
When I ended with all processes I found that the one part will take about 12 hours!!
Best Time and Finishing!
From this step, Mahmoud Kotb‘the technical operations manager’ in Fablab Egypt, give me from his time to finish my assignment…
First we try to choose the best setting to reduce the time as possible as we can and get the best finishing for my part as I designed!
First question .. Do you really need this dimensions for your part?! …
I back to my design … my diamond height is 3 cm and the outer dimeter 4.65 cm … To get the point for my design to be a piece of jewelry , my design should be smaller than that…
The first question is the most important one … that will get me back to the design process!
Then I preferred to close the redesign process … So I asked him about what I want to do… In the machine process… then he shown me a simulation for the tool path that the machine will take… by this simulation, in all cases the machine will calculate the first Z direction with the whole height of the stock, even if will mill a part of it … So it will take the same time.
The only different point if we make the two parts beside each other … we don’t need to change the endmill in the half time....
So this is the second point that will make different with my design.
The third point, the box size … if we minimize the box size will reduce the machine time.
Also We
Redesign
Fortunately, my part is parametric … It’s easy to edit
I made some edits ..
-
Resize the diamond height to be 1.88 cm, and the outer dimeter is 2.9 cm.
-
The box dimensions becomes 4 * 4 * 2.16 cm.
-
I edit the press fit shape… The cylinder shape takes bigger area than half sphere … So if the cylinder is close to the box corner with the endmill 6mm … the modela player can’t simulate this part … So I preferred the half sphere shape
Sure the cylinder is better press fit than sphere … but with minimize the process … the sphere is better!
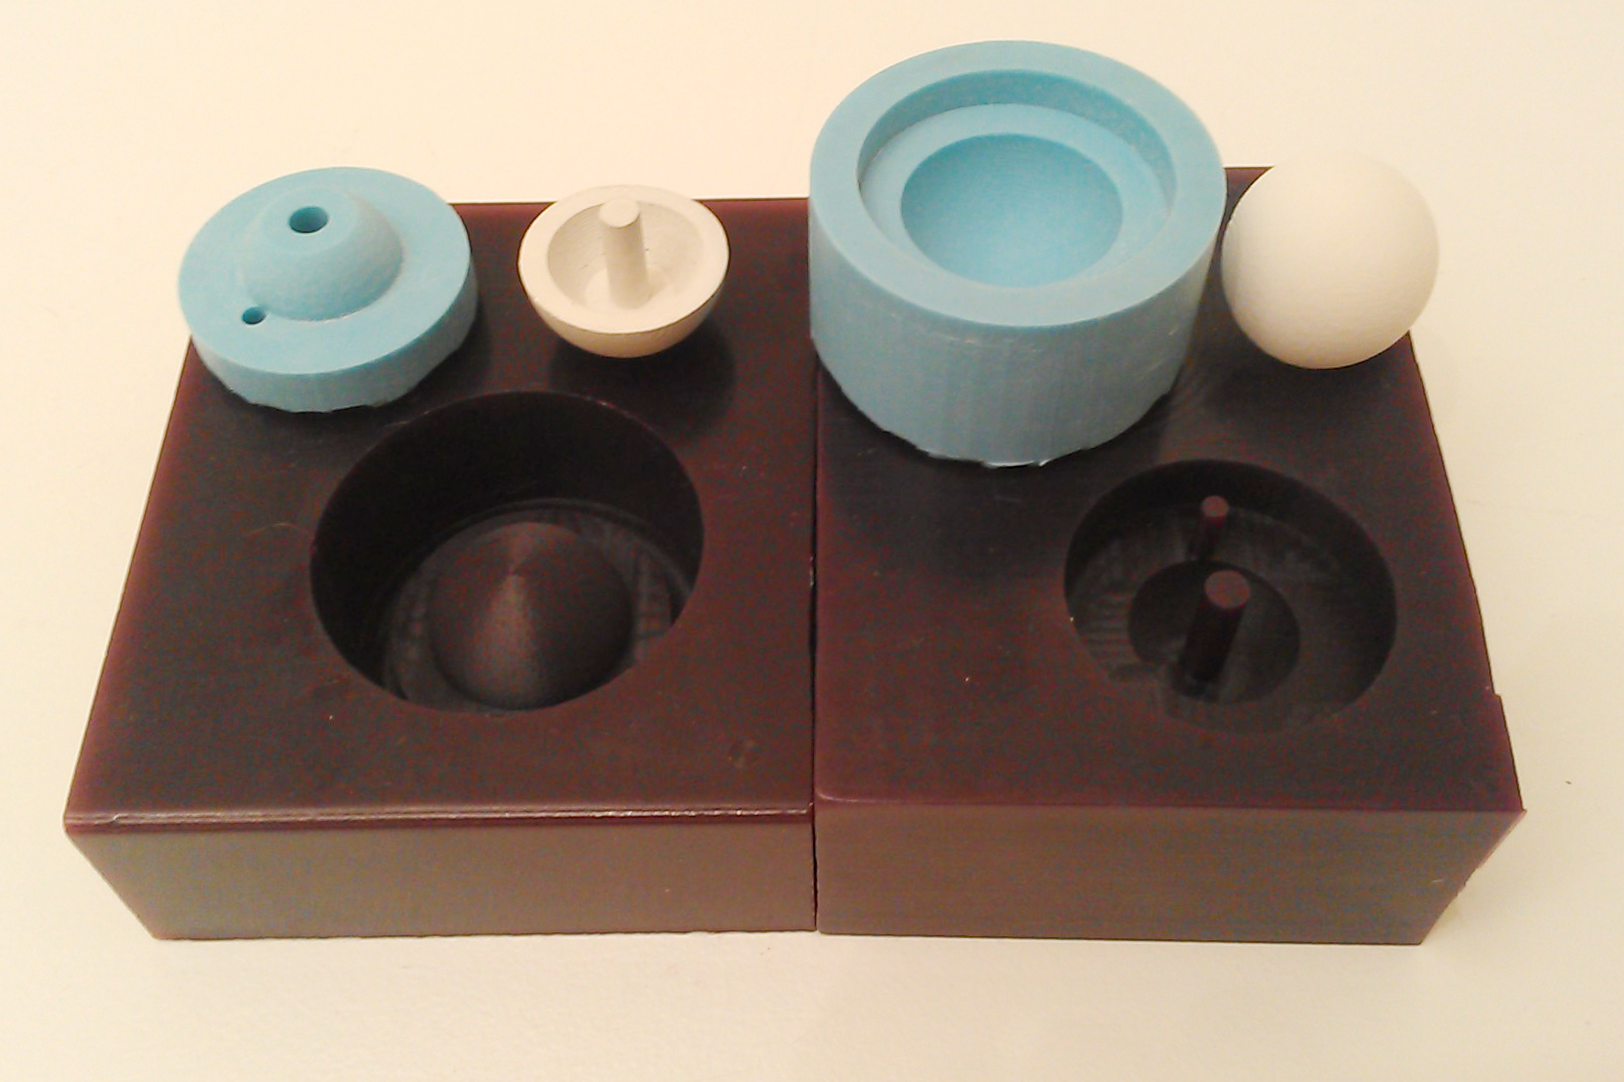
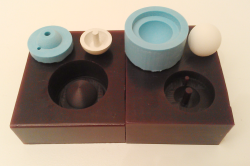
Part 1

Part 2
The two parts collected in one sheet.
Feel Free to download the file
Now I finished…
But, Mahmoud asked me … why we split the two parts with a wall? …
That will take more time … because the tool path will moves down to part 1 then moves up to this wall … then down again to part 2 … So we can help the machine and remove this wall…
Also, for the height of the box …
- Part 1 height is 1.25 cm
- Part 2 height is 0.63 cm
- The box height is 2.16 cm
So we don’t need all this height. Also the height of the two boxes will be different.
My final dimensions is 7.5 * 4 cm with high depth 1.37 cm and the lower is 0.9 cm
Feel Free to download the final design
We can start with Modela Player 4!
We made a long valuable discussion about the different between endmills and how it effects in time and finishing in each process…
First we decided that we don’t need the surface process.
I thought that I should using endmill ball nose 1/8” in roughing process to get the best finishing … Then finishing also the same endmill..
We test these processes, it will take a long time … then we open the speed of all processes
Fabrication Process

Milling Process Video

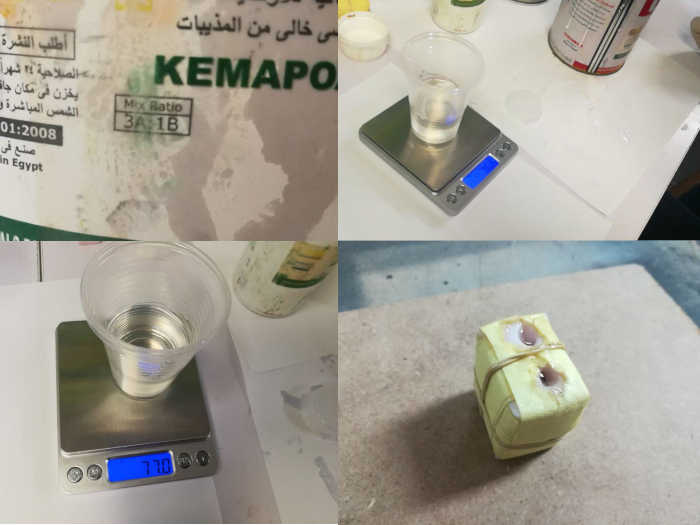
Materials, Datasheet & Safety
CMB products and chemical solutions. CMB the company that we buy the molding and casting materials in Egypt
So Haggag recommended this link for the different material and the datasheet for epoxy resin.
So the specific epoxy that we used is Kemapoxy 150, its datasheet
It’s very important to wear gloves when you make this process, it’s a chemical materials. So be carful. Also check Neil’s lecture for the safety.
Molding Process
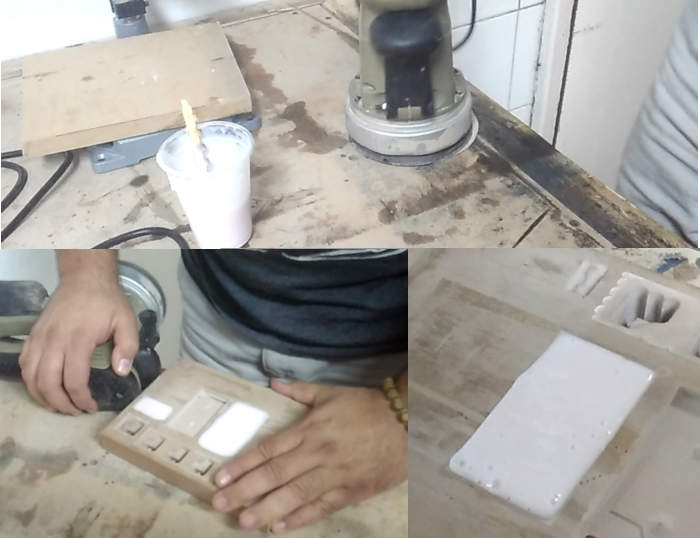
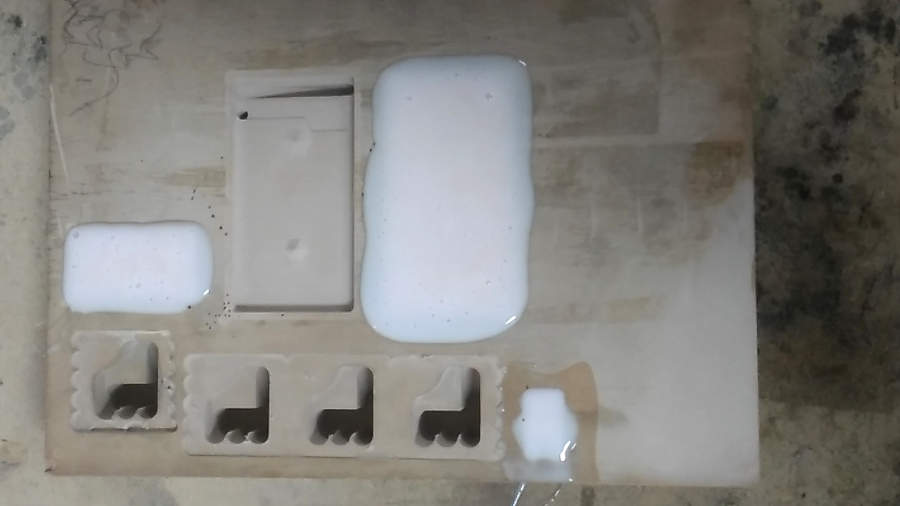
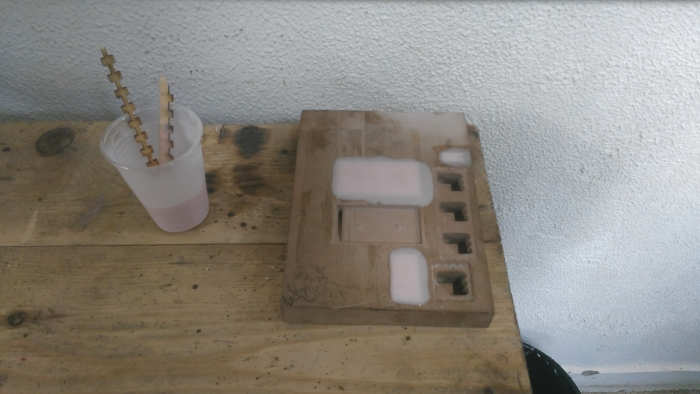
Casting Process
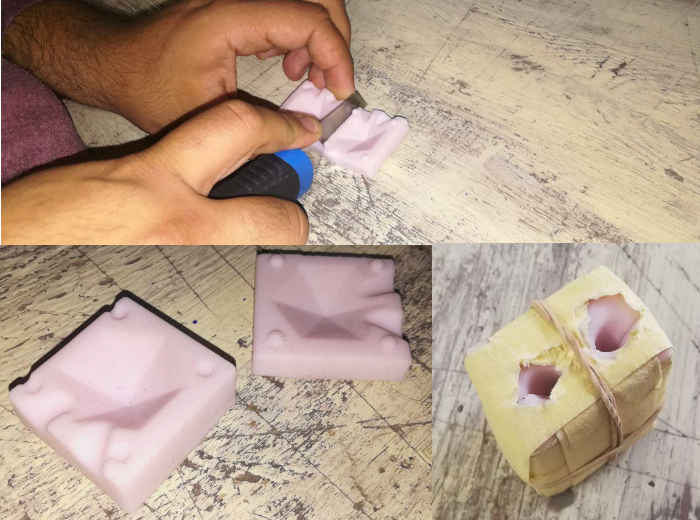
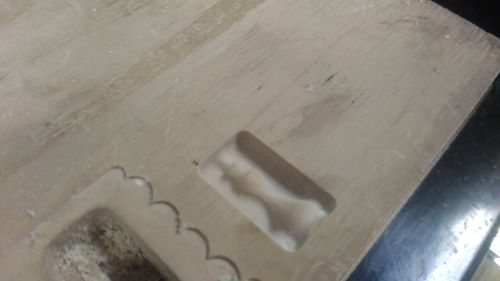
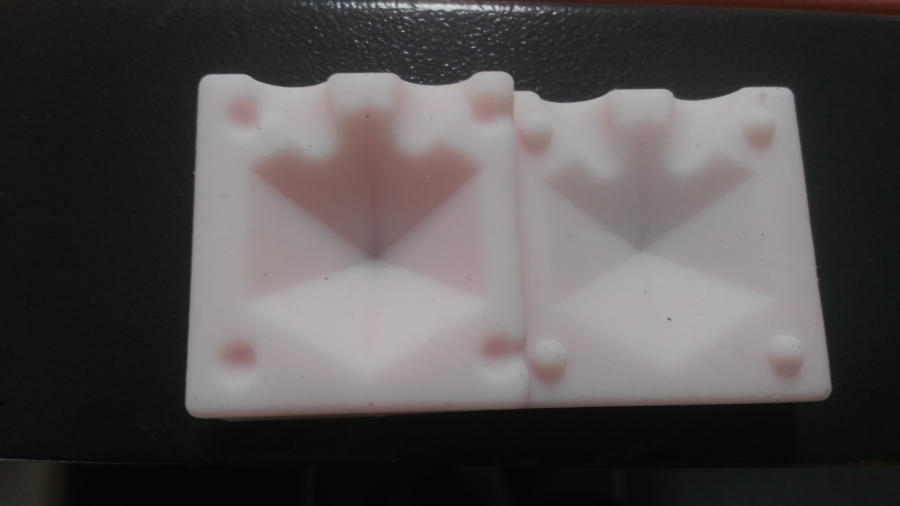
Spilt Epoxy From Silicon Part
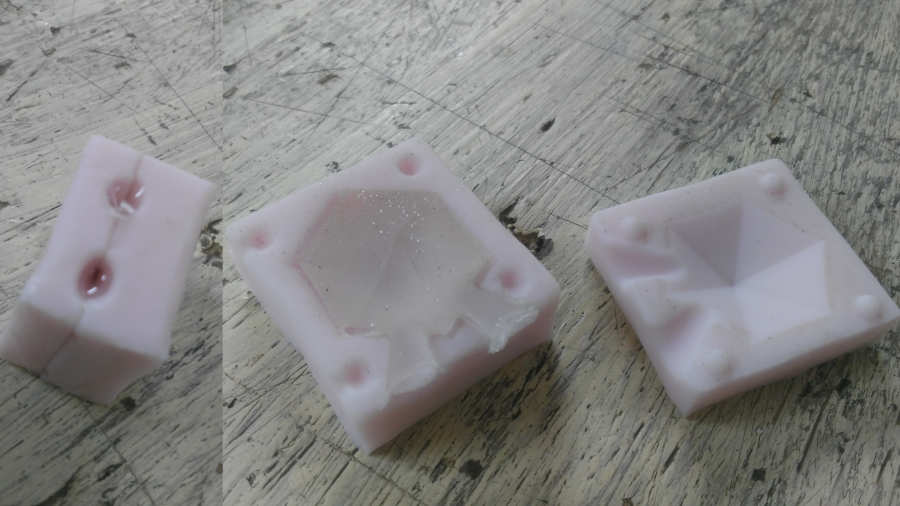
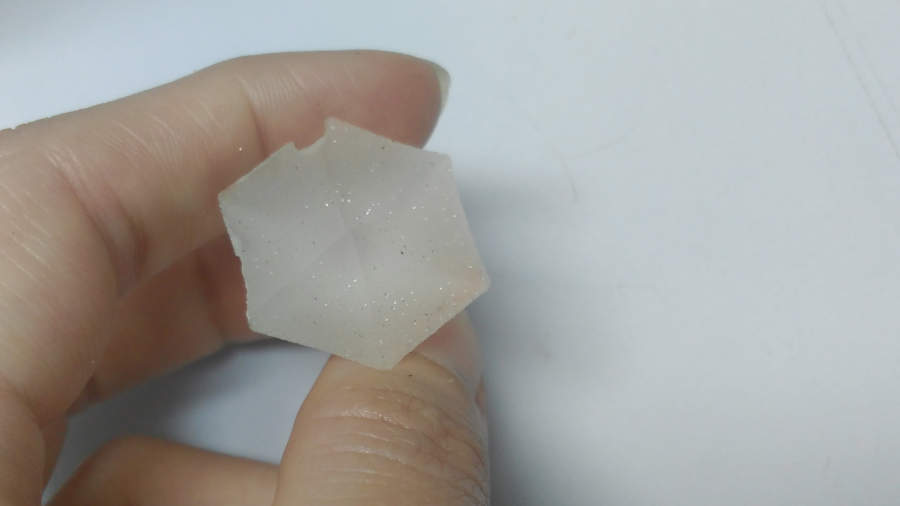
Final Part