An additive technology
The 3d printer is almost the only technology which is capable of creating a form in additionning material. Like any other machines, they all have their little personality and manners. You have to experiment on each to know them better. Like molding and casting, your geometry needs to follow some design rules that are linked at the capability of the 3D printer you work with.
The machine
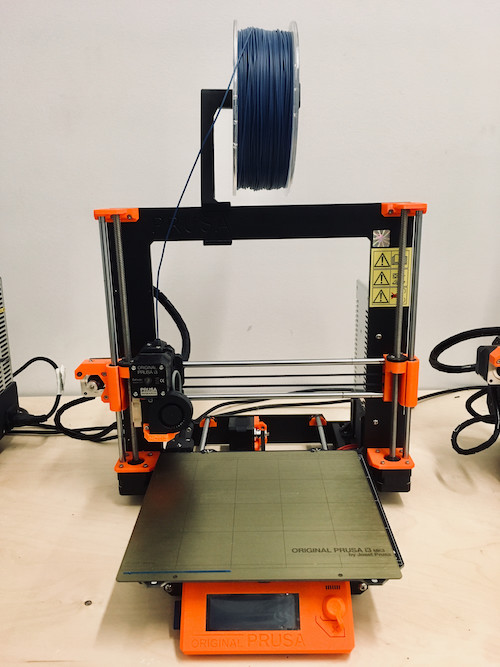
I will use at échoFab some Prussa iMK3 to create, test and pratice. This type of printer use the filament technology. The Prussa iMK3 uses a filament of a diameter of 1,75mm. The roll is installed at the top of the printer and is pulling down by the head of the printer. That means that it is the motor that the pushes the filament in the heated head closed to it. The adventage is that it's easier printing flexible material like TPU for exemple, but the wait of head have a bigger momentum so it's harder on the motor. It also have an heating bed which is great for adherance of the piece that you print. If the bed is heated, the plastic will have a slower retraction and let the piece stick to the surface without glue or anypray. Sometimes, when you do very thin or small pieces, you can add spray for a extra help. The bed is also removable and can band a little bit and this is very usefull to take off a piece small or big without damaging it. For the long runs, it's also very usefull to apply spray on the outside of the printer so the little particules in the air don't stick to the mecanism of the printer. These printers are like Ikea furnitures, you have to assemble them. The benefice of that is everything is visible so you can understand how it moves and how it works. The life time of that kind of printer is longer that other ones like the Ultimaker 3 because you can transform it like changing pieces, updating the firmware, etc. The community around it and the informations available on that machine is very user friendly and aboundant. Most of the thing I will print will be in PLA, a bioplastic from corn starch. I will also use a filament with hemp in it. You can print piece smaller than 30cm X 30cm X 30cm. I am new to this world of machine, but the design seem smarter than the other one. The bed is where you will apply weight and play the most with. On the long run, the adjustement, the calibration and the care that you will give to that machine seem reduced by the fact that the bed is not moving in height. At the échoFab, they have also 2 ditto printer and what happens often is that that same bed is supported only by screew rods on one edge of the plate. The cantilevered creating by that design affect regularly the calibration of the printer...and you really want that machine calibrated.
Every technology have their own advantage and restraint. I will talk about the material jetting because this is what I will use and test. I read some articles on internet and to resume them all, you have some principal design rules to obtain a nice smooth 3D printing object. At the end, you can print everything, you can add support, but first, it produces a lot of waste and second, the finish under it is terrible. This is why you have to minimize the add of support material. Here are some design strategies to overcome these support from usefull sites:
Principal design rules for 3d printing
The overhang
Try to keep overhang at a maximum of 45 degres. Above this number, your printer will have difficulties. If you do 90 degres, your filament will have the tendency to fall because of the leak of the support but for small spaces (arround 5mm) you can process without damage.
The wall thickness
To have something solid, don’t go under 1mm thickness.
Anchor your object
Try to place your object that nothing will float in the air. For example, if you do a human body, make the arm cross or make sure the hands are posed on something and not floating in the air.
Embases
If you do some details like letters or shapes in subtraction, think about the size of it and the orientation so it will look better vertically.
Moving part
Don’t forget to leave a little spaces to make part move. Some sites suggests to add 0.2mm of tolerance.
Small collum
If you do a small column, don’t go under 1mm
Fillet
Add some fillet to your sharp corner to help the printer to do a smooth line.
The scanning
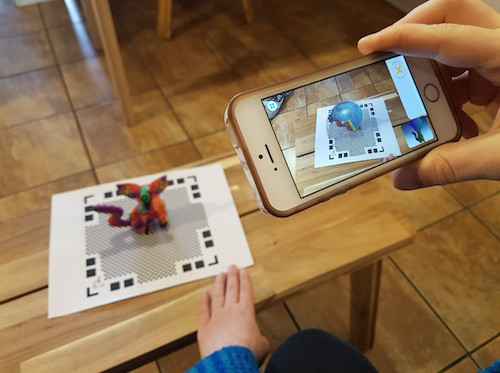
Scanning is one of the 3 ways to have a 3D form. I tried the QClone application on my cellphone. It's working with your cellphone camera and a background that you have to print. It's very user friendly, you put your object (small one if you use the 8.5in X 11in) on the background that you printed and than the app create a half sphere around your object and you turn around until all the half sphere is completely transparent. You can export your file in sketfab at the end. It seems fun, accessible and practicle. It seems that all the reflection is a problem, so a natural diffused light is better to have. Also, the exportation of the file is a problem. They don't have a lot of choices and a lot of these choices are blocked until you pay.
How to
1-Print a test model
Now let’s get to reality and print those test objects to see if all these rules are right.
I begin by downloading this tester which have a lot of overhang, bridges, writing and details to test the capability of the machine.
- Download Cura
- Set your parameter
- Layer height: 0.2mm (this influence the resolution of the piece. If the tickness is smaller, the printer have a better controle on the shape his doing but have more friction so smaller pieces like columes can be difficule.)
- Printing temperature: 200 celcius. (the PLA plastic can be around 200-220 without problem any problem. If we need a more liquid texture I will heat more around 215 or 220. For this testing I use 200 for the purpuse of test.
- Temperature plate: 40 celcius ( the bead of that printer can be heat for a better adherance. For small pieces I can use a maximum of 70 deg but the buttom plate here is realy larg so I figure that 40 should be enough.
- Print speed (40mm/s) and travel speed (120mm/s) That is a ratio that I didn't touch. You can play with it if you want to print faster, but in my case, we use this ration for pla on the prussa because we think it work well with them.
- Export your Gcode on a SD card
- Open the printer, preheat the nozzel and put the filament you want.
- Start the print
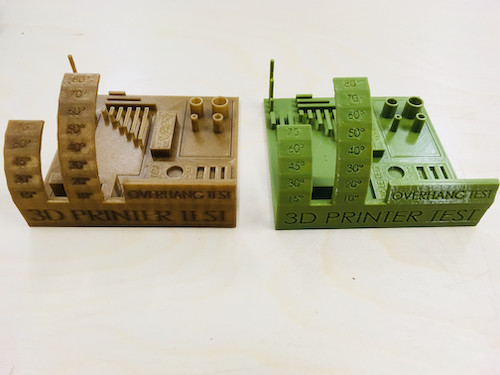
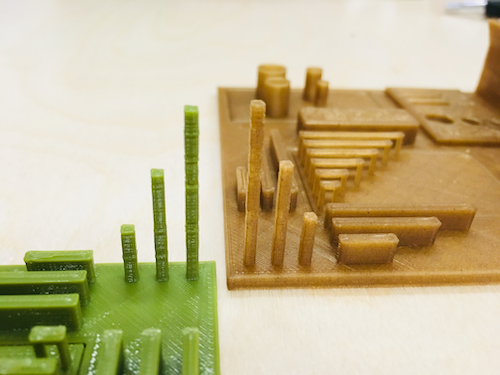
I proceed with the same printer and the same gcode to print with PLA (the green) and with a hemp filament (the brown) to see the difference between these 2 filaments. I also try with copper wire, but it was too old and dry, it stucks in the machine. The result is very similar.
Tips:
Cura parameter
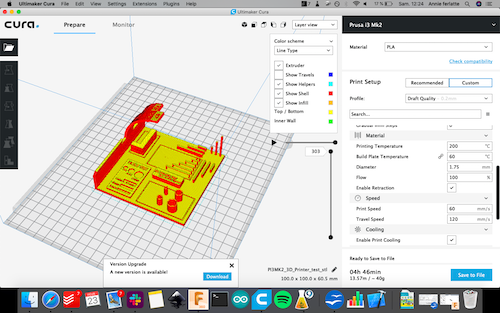
I send it without support even if the software tells me to. Here is where Cura put the support

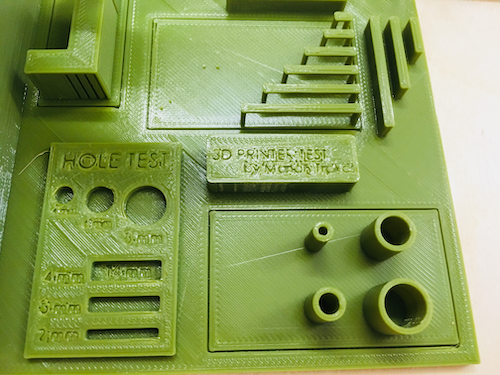
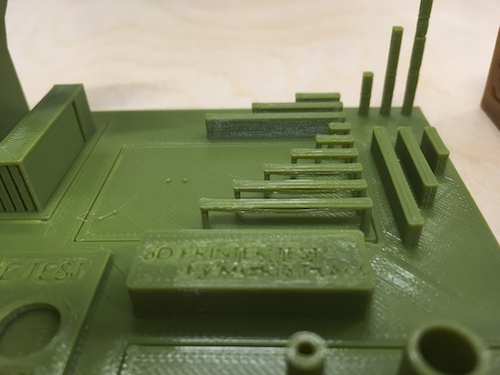
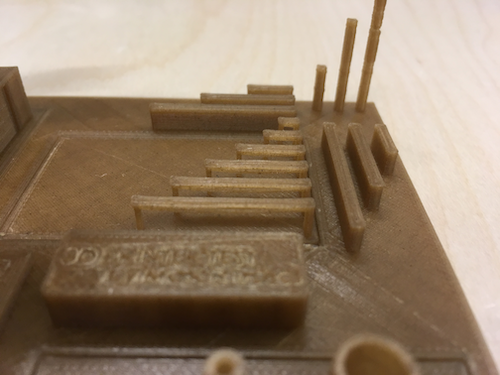
Model complete in PLA and PLA+Hemp
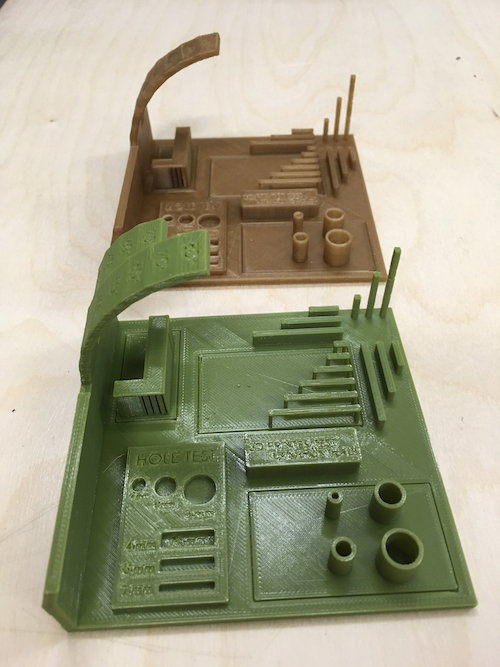
Hemp filament was a little bit better with the column
The text was a little bit better on the PLA on this orientation. They are a glitch in the "o" of hOle test

The bridge is better in the hemp filament but it's able to them both
2-Tolerance model no1
I try to make a tool to see what are the tolerances and the thickness possibles to create a no assembly mecanisme.
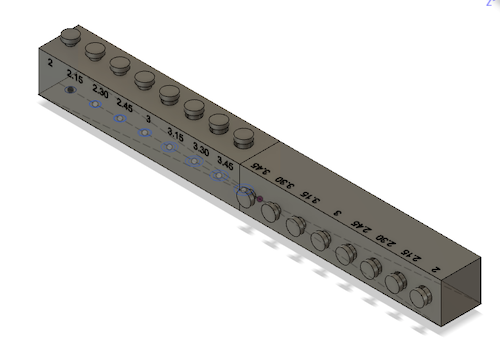
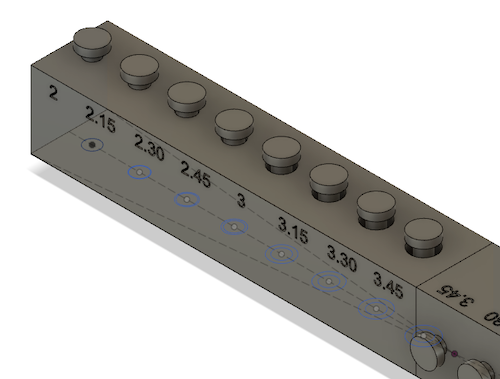
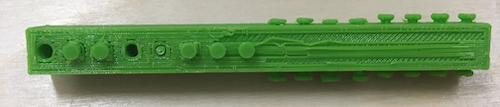
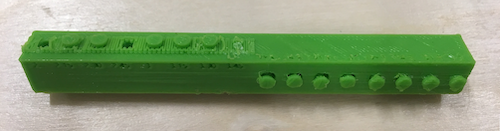
On Fusion 360, I draw some pin with the same diameter (2mm) and I changed the size of the hole to see what is the smallest tolerance possible to make the pin moving. You can see in the picture the circle used to create the pin in the center of the hole. I link all of the holes on a sketch line so that they will be all align. For the purpuse of the exercice, I didn't constraint them because it was a quick test. I also added some writting to remember which hole was supposed to be at which diameter. It's very easy, you create some text on a sketch and extrude it like it was a normal shape.
I copy the first volume and make it a 90 degre turn. When it will print, I can test the same tolerance but with 2 printing directions.
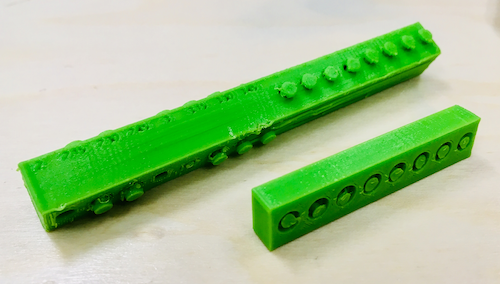
Because of the head of the pin, I needed some support. Sadly for me, the support was too good and for the vertical pin it was impossible to remove. For the horizontal pin, I could remove it, but when the hole was big enough, the printer create a support on top of the pin and than the pin is more ovale than round. In summary...not a success at all.
Fusion model
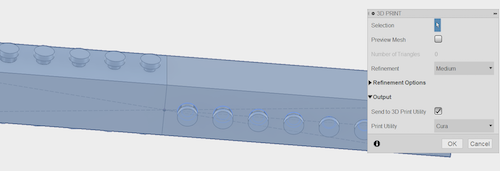
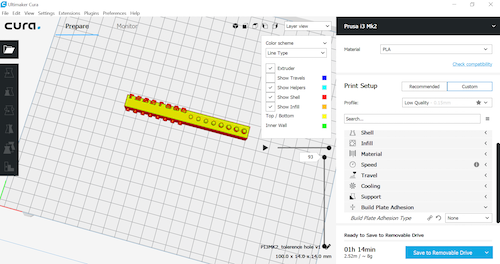
Export the model into Cura with the same parameter has the testing board I made previously
Final result
3-Tolerance model no2
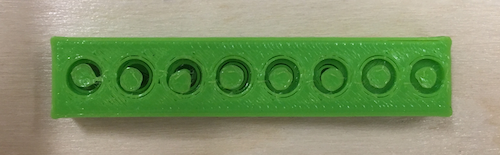
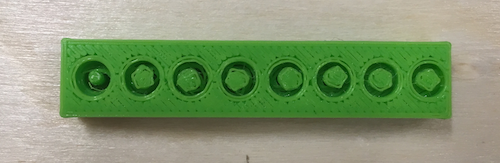
I try it again making the head of the pin going flush to the surface and not generating support, but the geometry is now fragile. The pin is too small and the contact between the cap and the pin is to small too. In the hole, the first pin was stable because of the poor tolerance, and the quality of the inside hole is much better than the latest hole. My theory is that the pin was moving and was messing around the fragile filament of the inside hole.
Fusion model
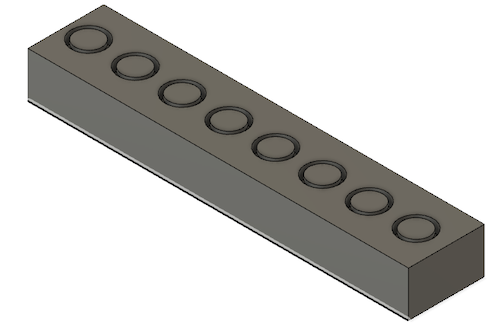

Bottom and top photo. Observe the finish of the hole and the top of the head
2 tests complete
The scan
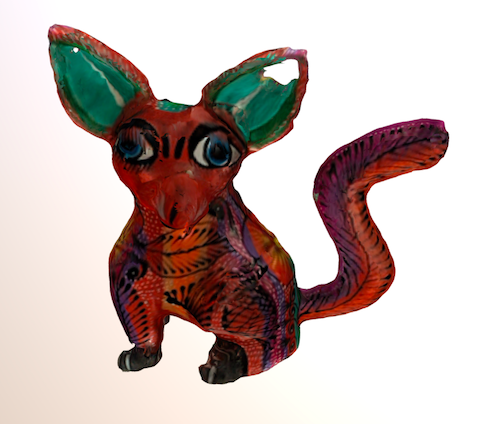
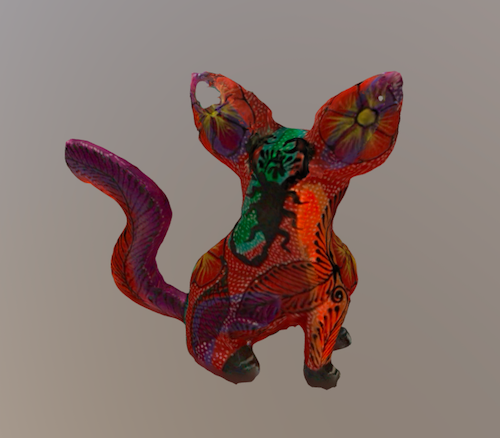
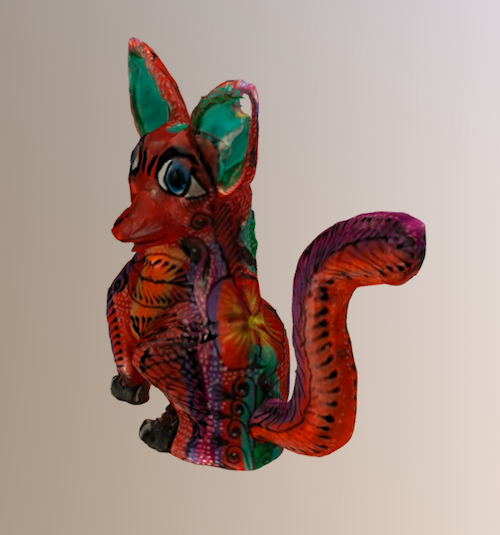
I use a little Alebrije that I have to try the scan. It's a mat but colorful object.
- Download QClone on your phone
- Print the background (chose the size of your background in relation of the size of the object to scan.)
- Place your object on your background, open the application and start scanning.
- When you are done, you can scan again your object in a different position to create a better details shape (it will merge manualy or automatically both shape after all) Sadely, this fonction was not concluent, i
3-Scanning
I try it again making the head of the pin going flush to the surface and not generating support, but the geometry is now fragile. The pin is too small and the contact between the cap and the pin is to small too. In the hole, the first too pin was stable because of the poor tolerance, and the quality of the inside hole is much better than the latest hole. My theory is that the pin was moving and was messing around the the fragile filament of the inside hole.
Set up of scanning
The result
The moral of this story
They are 3 ways to produce a 3D model, by downloading, drawing or scanning. As you see here, the drawing is much more accurate than scanning, but it's longer. Knowing better how it works and design with the machine, not against it. Files
Contact
Annie Ferlatte
ferlatte.annie@gmail.com
Montreal, QC, Canada