Input Devices
The assigment page
The goal of this week was to design a board with an input device and program it.
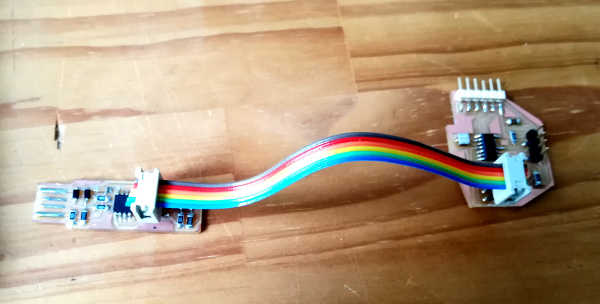
⇝ Designing the board ⇝ Milling the board ⇝ Program the board
I plug my board to my programmer in the right way and in terminal:
avrdude -c usbtiny -p t84
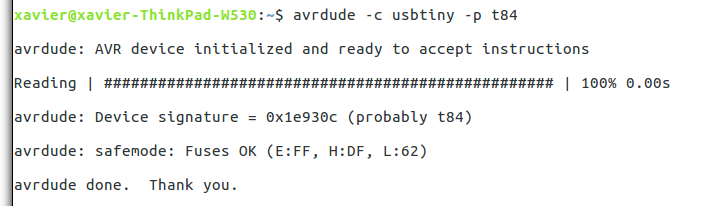
It's working let's go in Arduino to burn the bootloader:
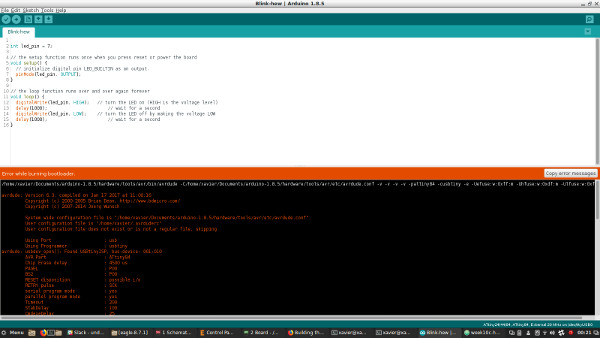
ERROR WHILE BURNING BOOTLOADER oh.
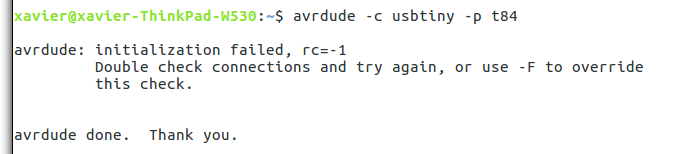
And now avrdude, what does it says?

First Conclusion
I'm very frustrating. But it reveals something with my relationship with electronics.
I'm a reckless guy who loves to experiment. It was my big skill in art school.
And when I program, I make a lot of tries and errors, I learn this way. Sometimes it works, sometimes no.
Electronic design is the farthest thing from my initial education.
With electronic design you have to be very aware of what are you doing and it doesn't exactly suit me.
So I don't know really why it didn't work this time but for the future I have to be more
cautious.
And btw, I really enjoy electronics!
YOLO, I'm using the sensor with an Arduino.
Last Thursday, Henk gimme a Flora sensor, a gyroscope and accelerometer. All info about it are here.
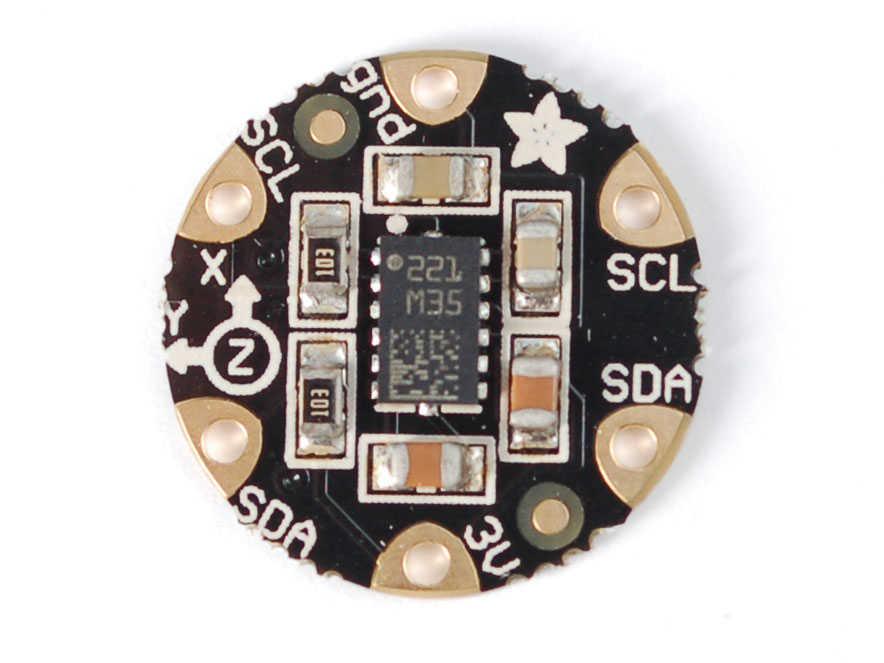
It has 6 pins:
-GND
-3V
-2xSDA
-2xSCL
In order to be program, I have to install 2 libraries: Adafruit_sensors and LSM303 for this sensor.
Now I have to wire all this stuff.
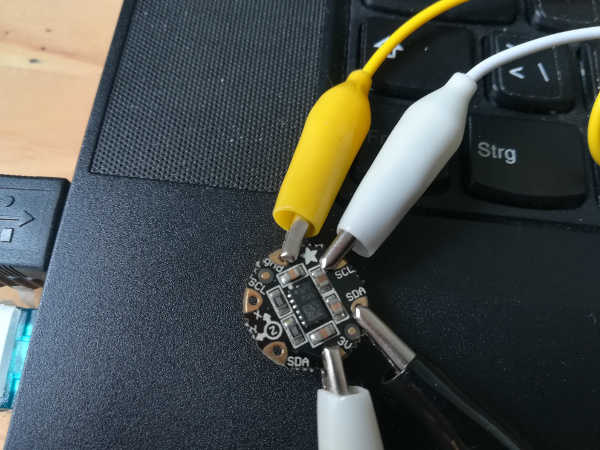
So GND and 3v, there's equivalent in the Arduino, but SDA and SCL...
I managed to find the answer quickly: In the Uno with Wire library, SDA -> A4 pin, SCL -> A5 pin.
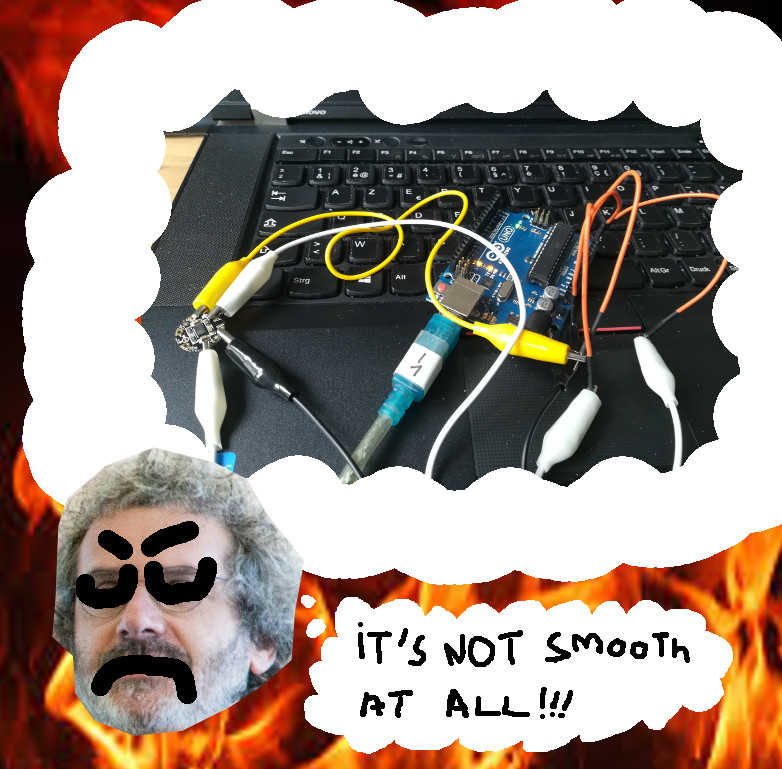
Here the result, a Neil Gershenfeld nightmare:
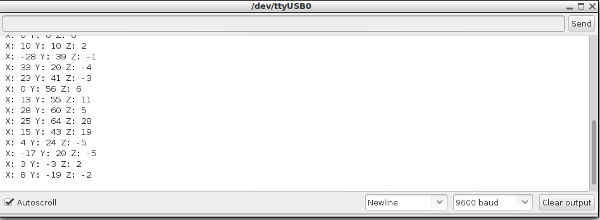
In Arduino Uno, I run the Test exemple of the LSM303 library, clean it a bit in order to have only the gyro. I run the sketch and the serial monitor and manage to read data.
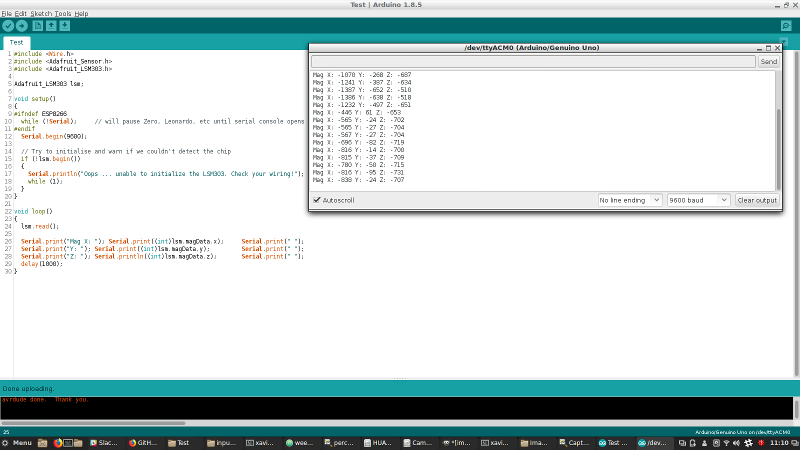
Hum, in fact, the board is working.
I managed to find what's the problem were: one of two pins of the resonator desoldered between first Avrdude test and when I try to burn the bootloader.
I saw it simply looking to the board and I tested the connection with the multimeter. I resoldered it and manage to burn the bootloader! Now it's ready to be programmed.
Programming the board and using the gyro.
I had to make an other board for the output devices week so I mix input and output in the same board:
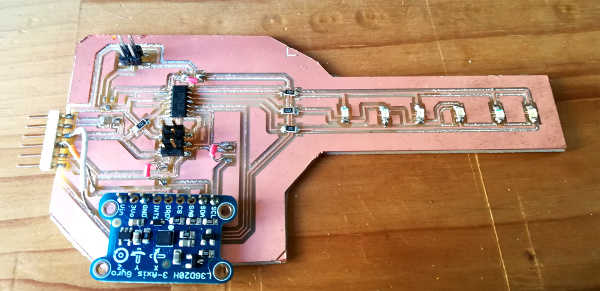
All the stuff about this board can be found on the dedicated page.
Tips I learn this week: The Rx and Tx pins on the schematics are for the computer, so you have to reverse it in the code.
For this board Rx -> Pin 3 Tx -> 5.
I put those lines to allows serial com:
#include
#define rxPin 3
#define txPin 5
SoftwareSerial serial(rxPin, txPin);
Error compiling for board ATtiny24/44/84.
So it's not possible to use with an Attiny ? I did some research and find a guy, on a forum, who's transform the Wire library (it's the library who allows to communicate using I2C) in order to use it with an Attiny.
You can find his post here and you can download the library here.
Second attempt, second problem:
#error Clock frequency non supported
I burn the bootloader with an external 20 Mhz clock. I reburn it with an internal 8 Mhz. But now I have a new problem...
Third attempt:
When I run the sketch, I had this problem:
It didn't find gyro.L3DS20_RANGE_250DPS. We checked with Emma, nothing in the library, it's weird. Finally, I download the old library and it's worked!
Final code:
#include
#include
Adafruit_L3GD20 gyro; //Naming sensor
#include
#define rxPin 3
#define txPin 5
SoftwareSerial serial(rxPin, txPin);
void setup()
{
serial.begin(9600);
// Try to initialise and warn if we couldn't detect the chip
if (!gyro.begin(gyro.L3DS20_RANGE_250DPS)) //You can choose your range here by comment/uncomment
//if (!gyro.begin(gyro.L3DS20_RANGE_500DPS))
//if (!gyro.begin(gyro.L3DS20_RANGE_2000DPS))
{
serial.println("Oops ... unable to initialize the L3GD20. Check your wiring!");
while (1);
}
}
void loop()
{
gyro.read();
serial.print("X: "); serial.print((int)gyro.data.x); serial.print(" "); //Data's serial prints
serial.print("Y: "); serial.print((int)gyro.data.y); serial.print(" ");
serial.print("Z: "); serial.println((int)gyro.data.z); serial.print(" ");
delay(100);
}