
Week 7: Computer-Controlled Machining
This week's assignment was to use the ShopBot to make something big. Unfortunately there is no Shopbot CNC machine on location because FabLab Richmond is still being constructed. So once again I had to head out to TechShop in San Francisco to gain access. As with previous machines, I had to take a 4 hour Safety and Basic Use Course (SBU)
The instructor walked the class through the two programs needed to use the ShopBot, VCarvePro, and Cut3D. VcarvePro is used to design any pockets or drilling toolpaths that need to be created for a 2D cut. Cut3D is used for creating rough, finishing, and cutting toolpaths for 3D models.
Because of the structure of the class I was not able to grab any screenshots of how to create toolpaths in VCarve Pro, or the files I used however you can view my rough class notes here. I also came across this short tutorial video on youtube that walks you through how to create the various toolpaths:
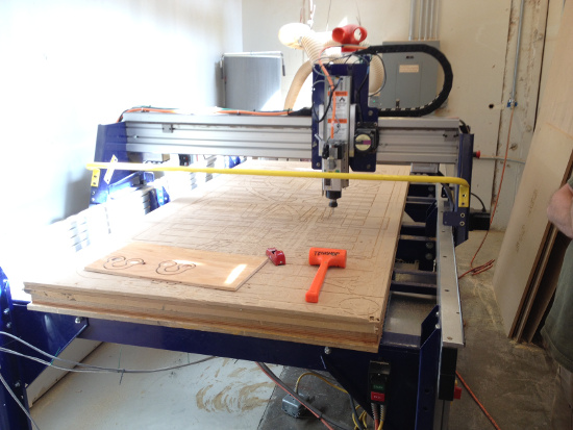
Once the file and the toolpaths have been created here is how to operate shopbot:
- Select the appropriate collet for the drill bit being used, and push it into the the collet holder until it clicks.
- Begin threading the collet holder onto the spindle by hand. Insert the tool bit into the hole until the flutes are almost touching the collet.
- Take a collet wrench for the collet holder and a regular wrench for the flatside of the spindle, and using both wrenches tighten the holder to the spindle
- Turn on the big red switch on the side of the ShopBot
- Press the blue reset button on the control box
- Attach material to bed using plastic nails, screws, or double sided tape
- Open the shopbot program
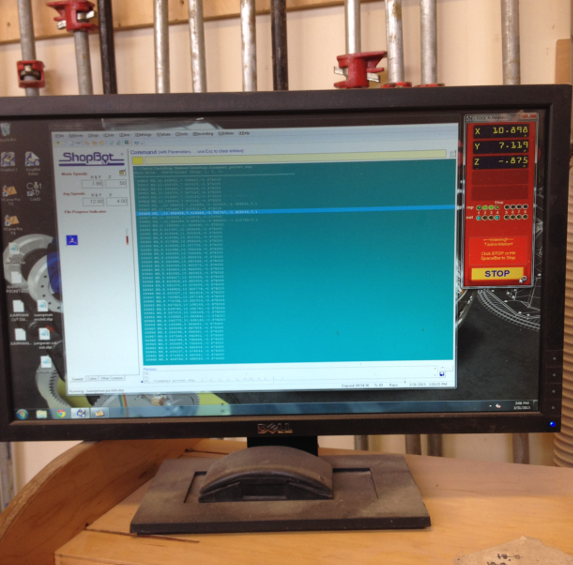
- On the red Shopbot Position Window, find the yellow “Show Keypad” button and click it. This allows you to now jog manually using the keyboard. The arrow keys control X and Y, Pg Up and Pg Dn move Z
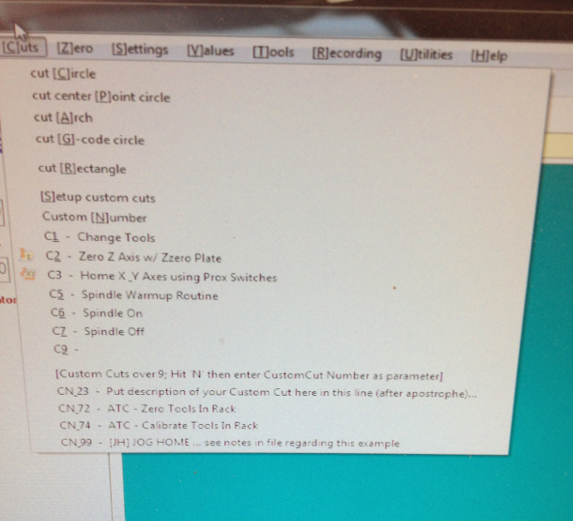
- In the shopbot console go to the "cuts" menu and run command C3 - Home X Y axis using Proxy Switches. Click Ok. The machine will run to the X and Y boundaries and checks the limits.
- Next jog the spindle till its over the material. Using the zeroing plate, place the plate on top of your material directly underneath the spindle. Go back into the "Cuts" menu and run command C2 - Zero Z axis w/ ZZero Plate. Click OK and the machine will begin to automatically zero the Z axis by lowering the tool till it touches the plate a few times. After its done, click OK.
- Load the part file and click start in the bottom right corner.
- A message will pop up to remind you to start the router/spindle, press the start button on the handheld control box and the machine will begin to spin up. Now click OK, and the machine will begin the cut.
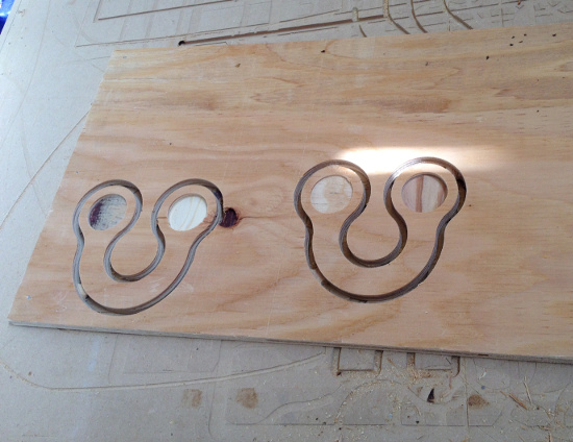
I was able to create the two candle holders pictured above as part of passing the SBU course on the ShopBot. I look forward to having more time with the ShopBot once FabLab Richmond is built.
Also see Week 11 - Composites for more notes on VCarve Pro and the ShopBot
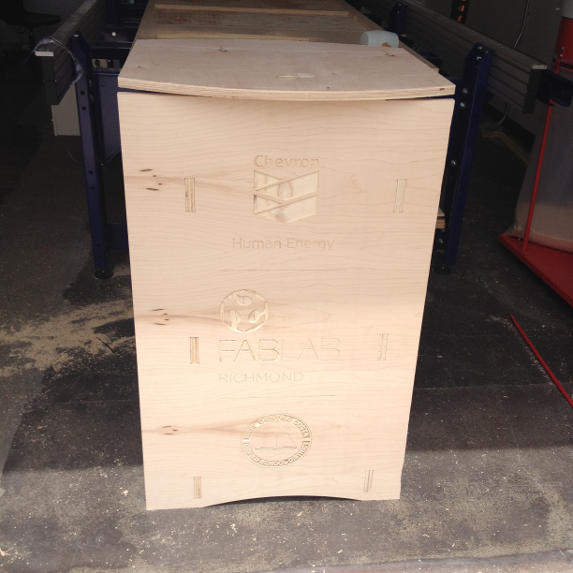
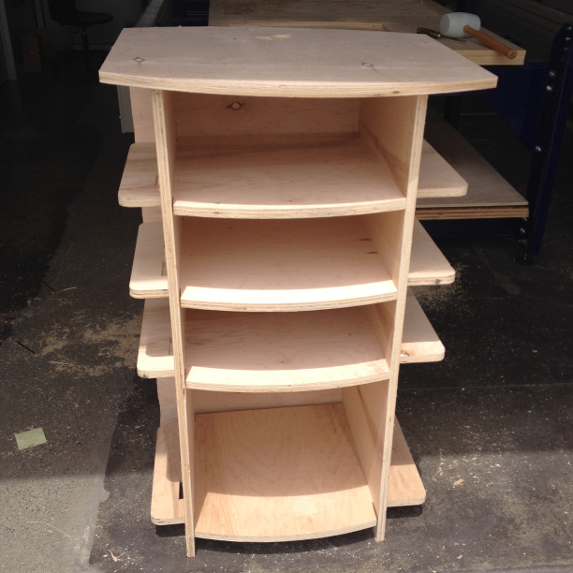
UPDATE:
I was able to get some additional time on the ShopBot and created a podium that will house the computer controlling the machine once FabLab Richmond is up and running. Here are some pictures and the files below:
VCarve Pro Files:
I don't have the actual .sbp files because the software I am running off my personal labtop is the trial version and does not allow me to save the toolpaths, so after opening the VCarve files, go to each of the various toolpaths and re-save the .sbp toolpath files and then you can open them in the ShopBot program and make your cut