11 Composites
This week, we used two different types of material to produce a more durable composite cast. A popular application for composites is boat-making, because they allow tensions and stresses to be distributed along multiple axes.
To begn this experimental week (this is the first time composites get a whole week of the course), we started on Thurs by using a readymade object as a mold. I used a giant Ikea bowl, which fits perfectly over an overhead light at my apartment - it would make a great lampshade.
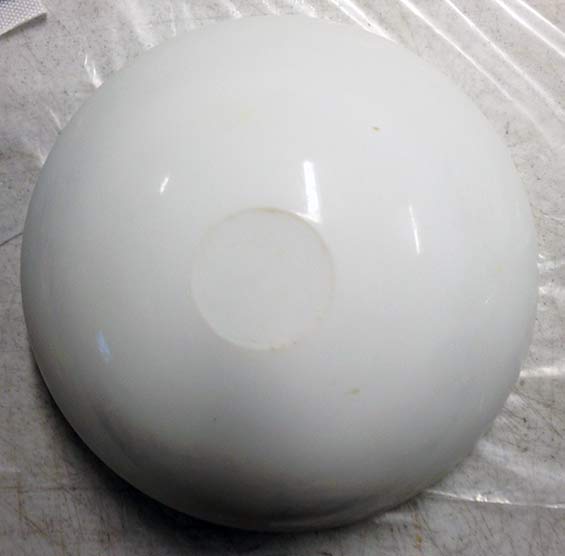
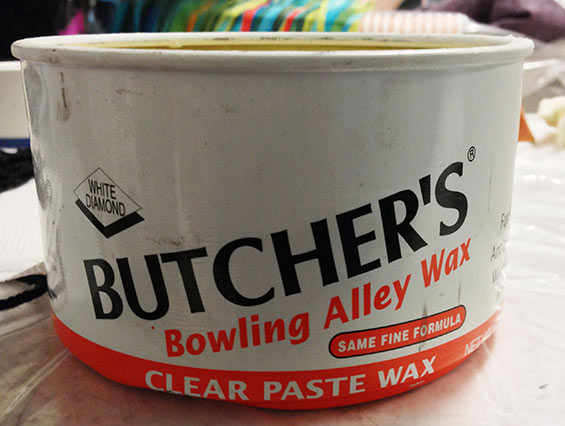
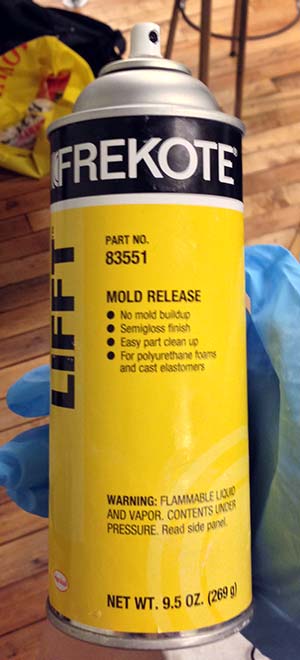
The bowl was smooth and round, except for a flattened bottom. Piece of cake, I thought. To ease removal of the cast, we used wax and then a spray mold release on our objects.
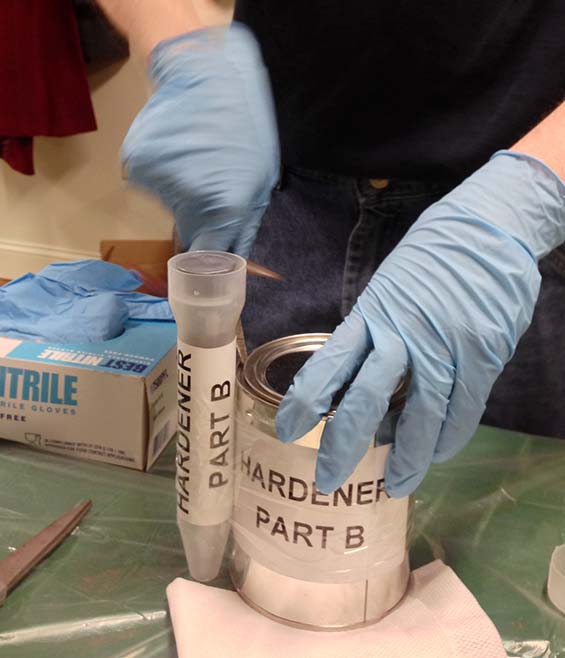
Then, we mixed up the resin and hardener in a 2:1 ratio. We mixed them in paper cups, and used giant plastic syringes for each one. The starting volume was 30:15mL, but this proved to be far too little for my giant bowl, so I had to mix more several times. Once mixed, the plastics have a 20 minute shelf life before they start hardening - meaning we have 20 mins to brush them onto the fabric and onto the mold.
Once mixed, the brushing began. My bowl in progress: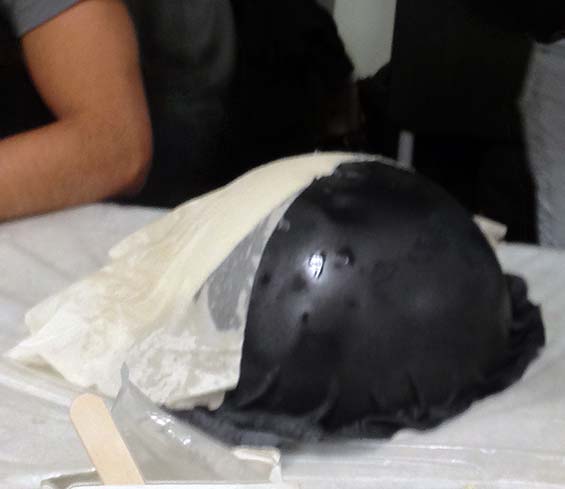
The resin is really viscous, and was sticking to the popsicle sticks. I was using big pieces of fabric, which kept pulling off the bowl, or lifting up in sections while sticking in others. Also, I didn't cut the bottom of the fabric neatly. Once I started layering on the resin, it became quite messy to cut the goopy fabric. Given my large bowl and the large sheets of unevenly cut fabric, this process took a long time. I had missed the instruction to layer the fabric too, so had only prepared one layer. At the end, I was able to add a second layer across the seam above, along the middle of the bowl.
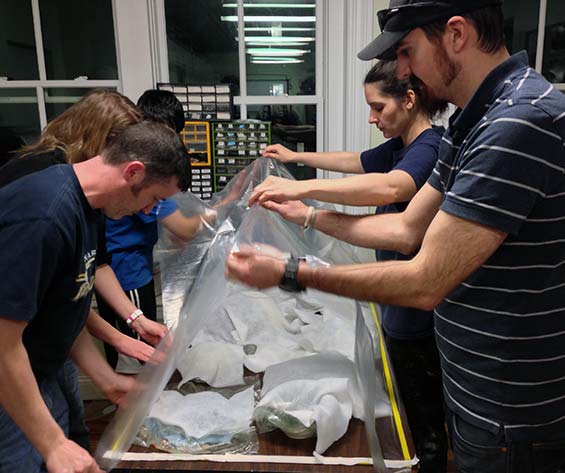
As soon as everyone was ready, we brought our pieces to one table, and applied breather fabric to each. We were going to use the air compressor to suck out air and get a nice, firm bond between our fabric and the resin - the breather fabric takes away undecessary resin that might otherwise glom too strongly onto the mold. Once the breathers were on, we taped down a large sheet of vacuum foil to cover all the pieces. The yellow tape in the picture below is incredibly sticky to ensure an airtight connection. Even still, we spent a good amount of time finding and eliminating air pockets, and used two air compressors for this big batch.
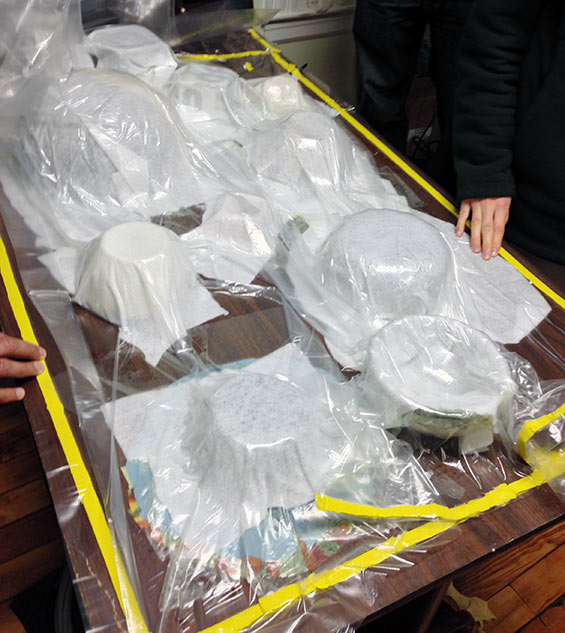
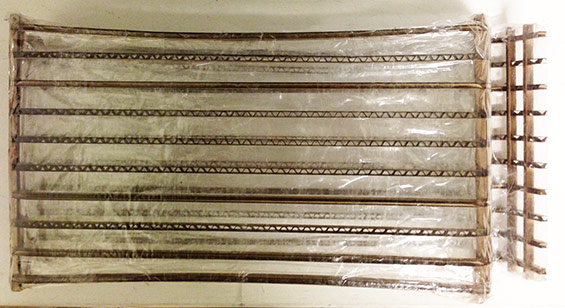
And it worked! The suction was airtight, to the point that some of the cardboard or plastic molds were destroyed in the process under too much pressure (the results were cool though!). Here are all the vacuum sealed pieces:
And my big bowl, with a suction hose hugging it.
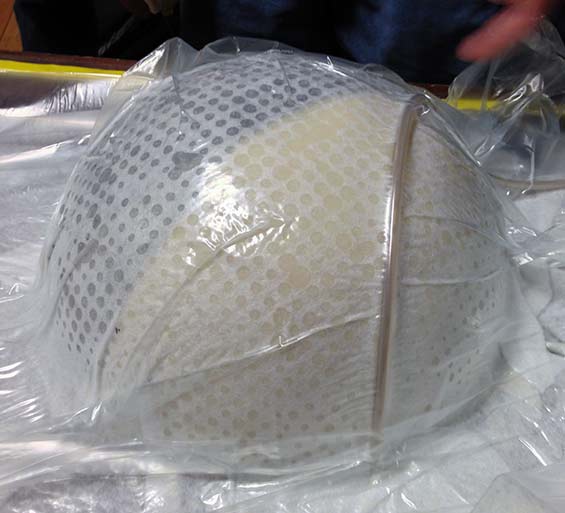
In the end, the super suction and my sing-layer walls made the cast stick to the mold, and we have yet to pull them apart. I'll post a pic once I get them separated. The other problem was that some of the (too long) fabric curled under the bowl, making it all the more difficult to get the bowl out. We've been able to cut most of that off however, so now it's a matter of popping it off, hopefully without ripping the cast or breaking the bowl.
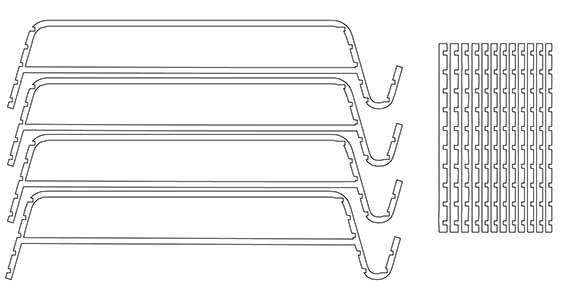
So, the second attempt was supposed to be informed by lessons from the first, and use a 3d design that we produced. I had been thinking of a basic laptop stand, and made a simple pressfit model using Rhino and 123Make. Files here. I'm learning Rhino, so in the screenshot of the design, I included my process - from a polyline (it took me a while to find the curved edge function!), to a lofted surface, to an extruded solid. The logic of Rhino is pretty great, and there are probably many ways to go about designing something like this. Since it's probably obvious to more advanced Rhino users, I thought I'd share in case it's helpful to someone - or in case you have tips for how to think through this workflow better!

123D Make is amazing - it'll take your stl file and break it up into a pressfit. It even allows you to define notch size and account for kerf. There were a few sheets of this:
My notches were a bit too loose, and the thickness of platforms (as reflected in the height of the individual pieces) was a little too shallow, which made assembly wobbly and tricky. The next step was to tape this pressfit structure up, to prevent the resin from wetting the cardboard, which would make it collapse (as learned in the class activity below).
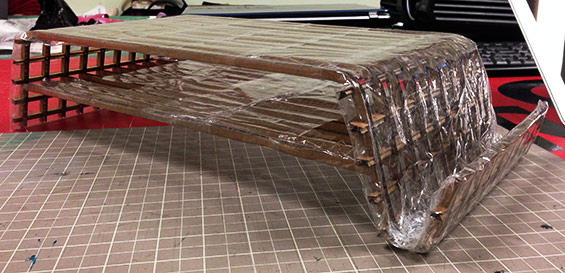
I also didn't account for any beams across the long surface, so the taping caused the flat platforms of the structure to bow in.
The taping took a long time - next time I might use plexi so that the structure is both more sturdy and to avoid the taping. Next came the fabric prep and the resin layering. I didn't heed the lesson from the bowl, and again didn't cut the fabric carefully while it was still dry. Instead, I cut loose, swatches, thinking the resin's stickiness would easily tack the fabric onto the structure and let me quickly tuck it where I wanted it. Wrong! This fabric was too heavy to be held up by the resin, so it bubbled out in the edges and didn't stick well to the walls. Also, I think something about the chemical reaction with the plastic tape caused the resin to form small droplets across the surface. It tried, but it was still flexible and slightly tacky in places, not as rigid as it's supposed to be. Again, because of the difficulty with the fabric, I was only able to put on one layer. Now that it's hardened, I plan to cut the bubbled fabric off (can't see it in the picture below, it's behind and underneath that front part) and try another layer.
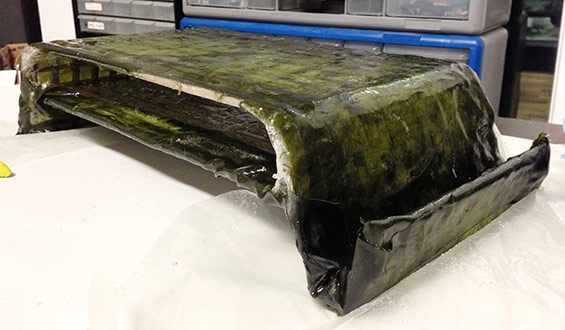
Overall, this seems like a poweful technique but more experimentation is necessary to determine what optimal fabrics to use (was this one too thick? too densely woven? do the dyes in the fabric matter?).

